> ## Documentation Index
> Fetch the complete documentation index at: https://notes.kodekloud.com/llms.txt
> Use this file to discover all available pages before exploring further.
# Face Detection Using Azure AI Vision
> Guide to using Azure AI Vision Face API to detect faces, return bounding boxes, landmarks, and optional attributes, with SDK examples, parameters, and deployment steps.
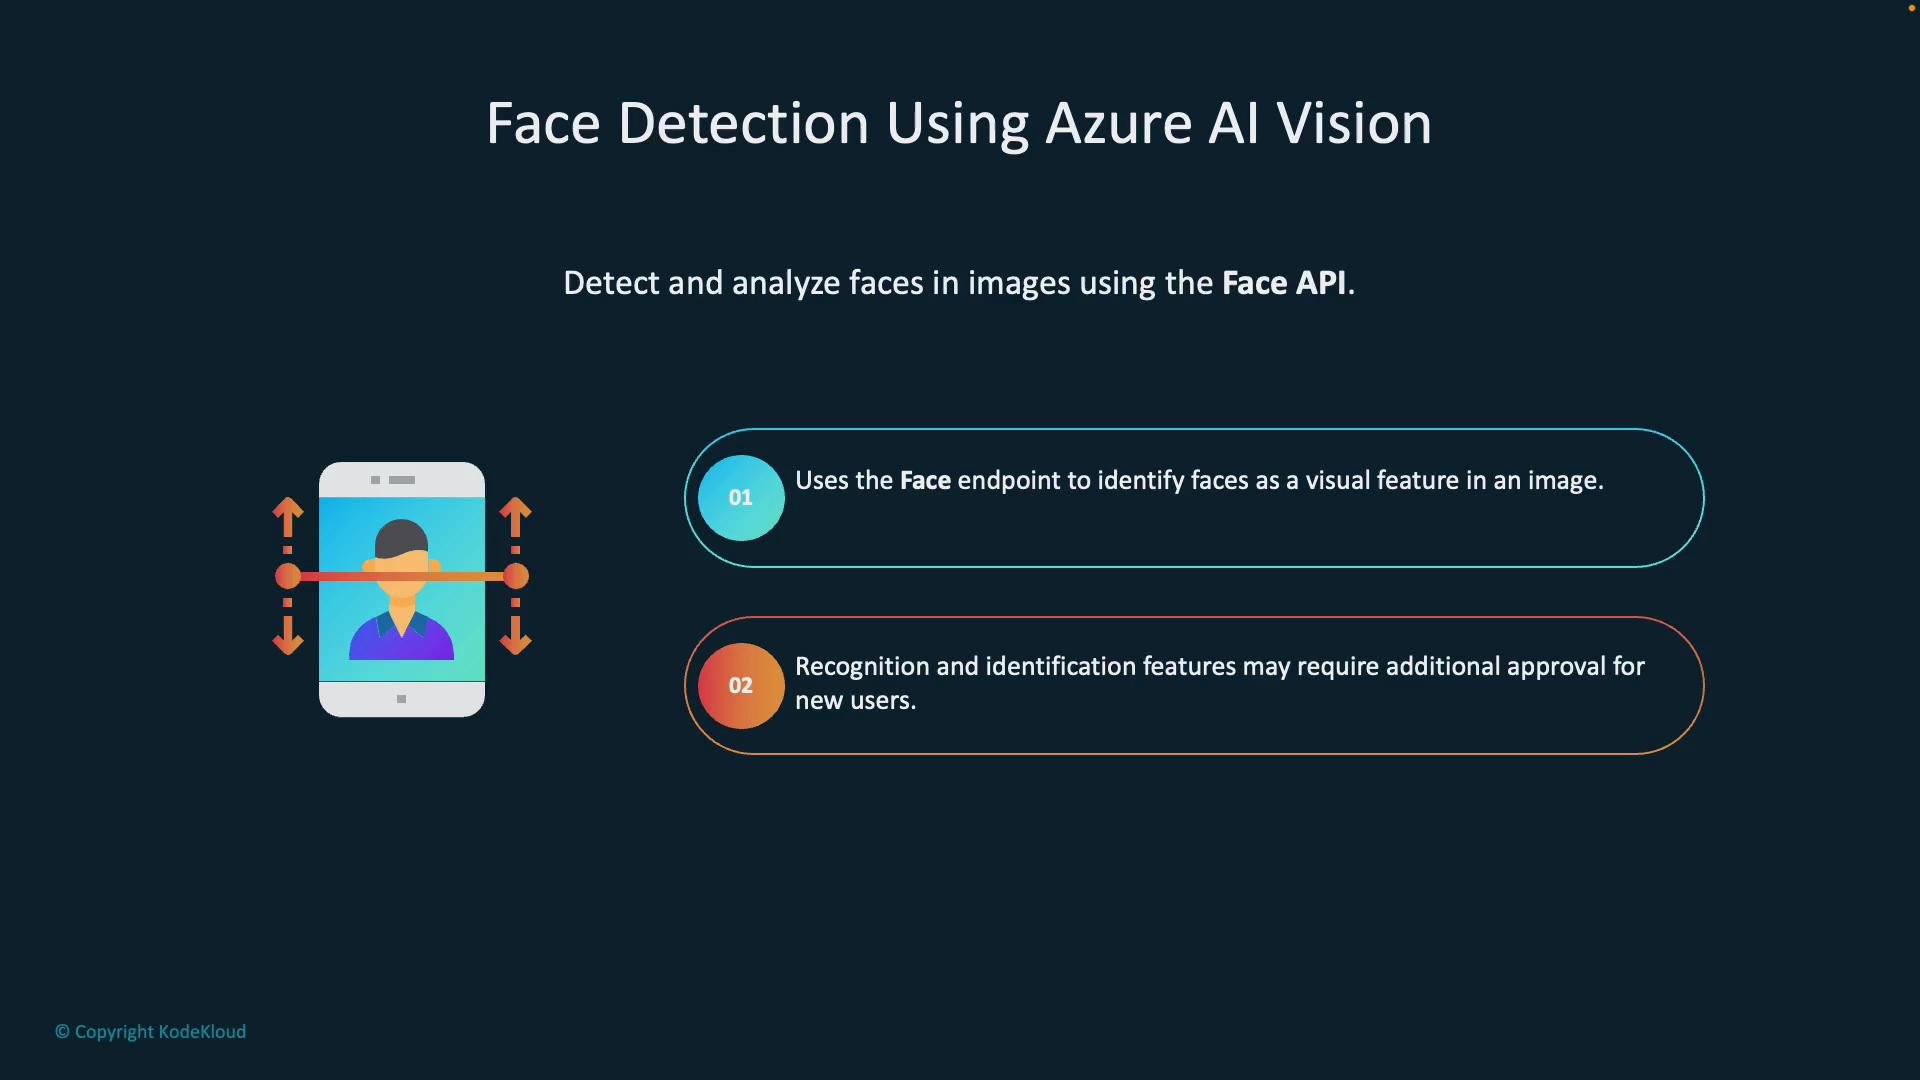
Face detection with Azure AI Vision (Face API) lets you detect and analyze faces in images. The API locates faces, returns bounding boxes and landmarks (eye centers, nose tip, lip corners), and can optionally return attributes such as head pose, glasses, and more. Note that certain capabilities—like identity matching and some sensitive attributes (age, gender, emotion)—require explicit approval for your Azure subscription.
Some attributes (for example: age, gender, emotions, and identity matching/Face ID) require extra approval from Microsoft before they can be used. You can still retrieve landmarks and basic location data without that approval.
 What the Face API can return
* Bounding boxes for each detected face.
* Detailed facial landmarks (eyes, nose, mouth, pupils, etc.).
* Optional face attributes (head pose, glasses, and other attributes where allowed).
* Optional unique face identifiers for cross-image matching (subject to approval).
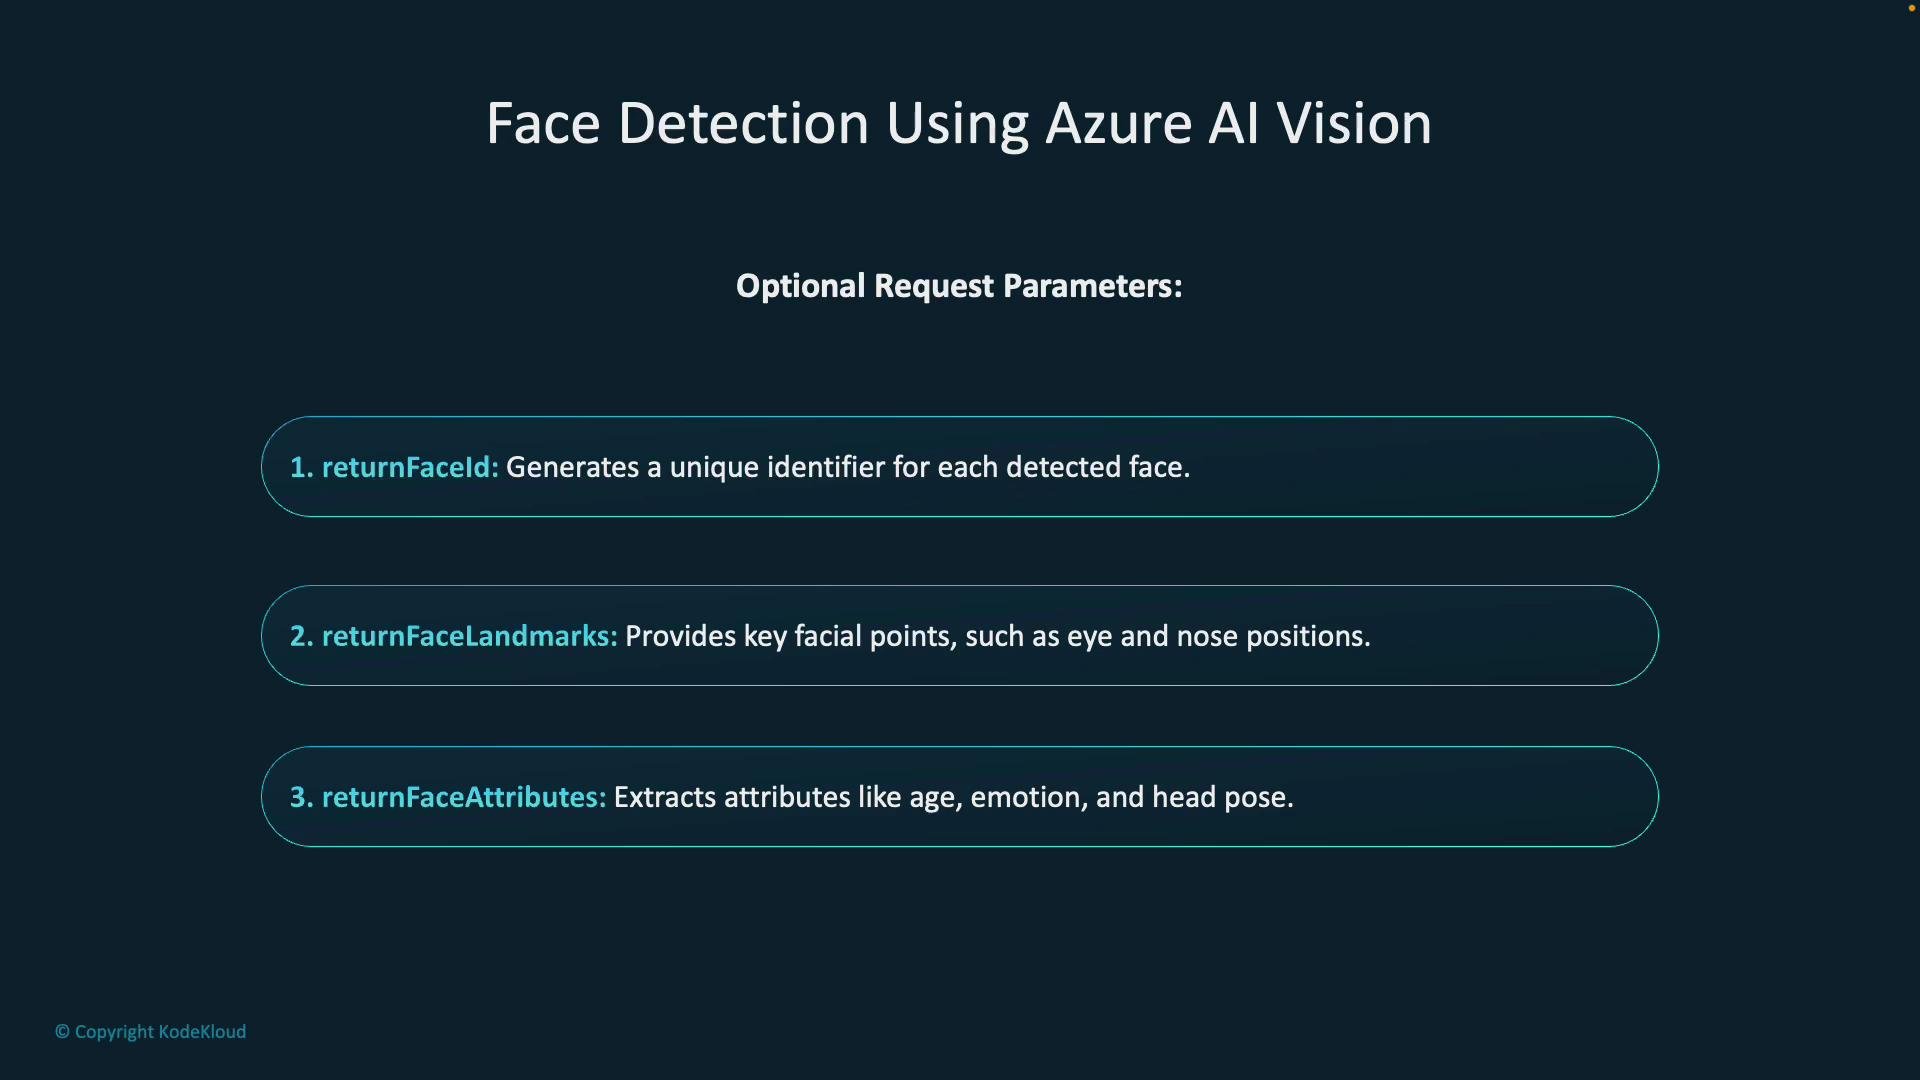
Optional request parameters (quick overview)
| Parameter | Purpose | Notes |
| -------------------- | ---------------------------------------------------------------- | ------------------------------------------------------------- |
| returnFaceId | Return a unique faceId for each detected face | Enables cross-image matching; may require additional approval |
| returnFaceLandmarks | Return detailed facial keypoints (pupils, nose tip, lip corners) | Useful for overlaying or measuring facial geometry |
| returnFaceAttributes | Request attributes such as age, emotion, headPose, glasses, etc. | Some attributes require Microsoft approval |
What the Face API can return
* Bounding boxes for each detected face.
* Detailed facial landmarks (eyes, nose, mouth, pupils, etc.).
* Optional face attributes (head pose, glasses, and other attributes where allowed).
* Optional unique face identifiers for cross-image matching (subject to approval).
Optional request parameters (quick overview)
| Parameter | Purpose | Notes |
| -------------------- | ---------------------------------------------------------------- | ------------------------------------------------------------- |
| returnFaceId | Return a unique faceId for each detected face | Enables cross-image matching; may require additional approval |
| returnFaceLandmarks | Return detailed facial keypoints (pupils, nose tip, lip corners) | Useful for overlaying or measuring facial geometry |
| returnFaceAttributes | Request attributes such as age, emotion, headPose, glasses, etc. | Some attributes require Microsoft approval |
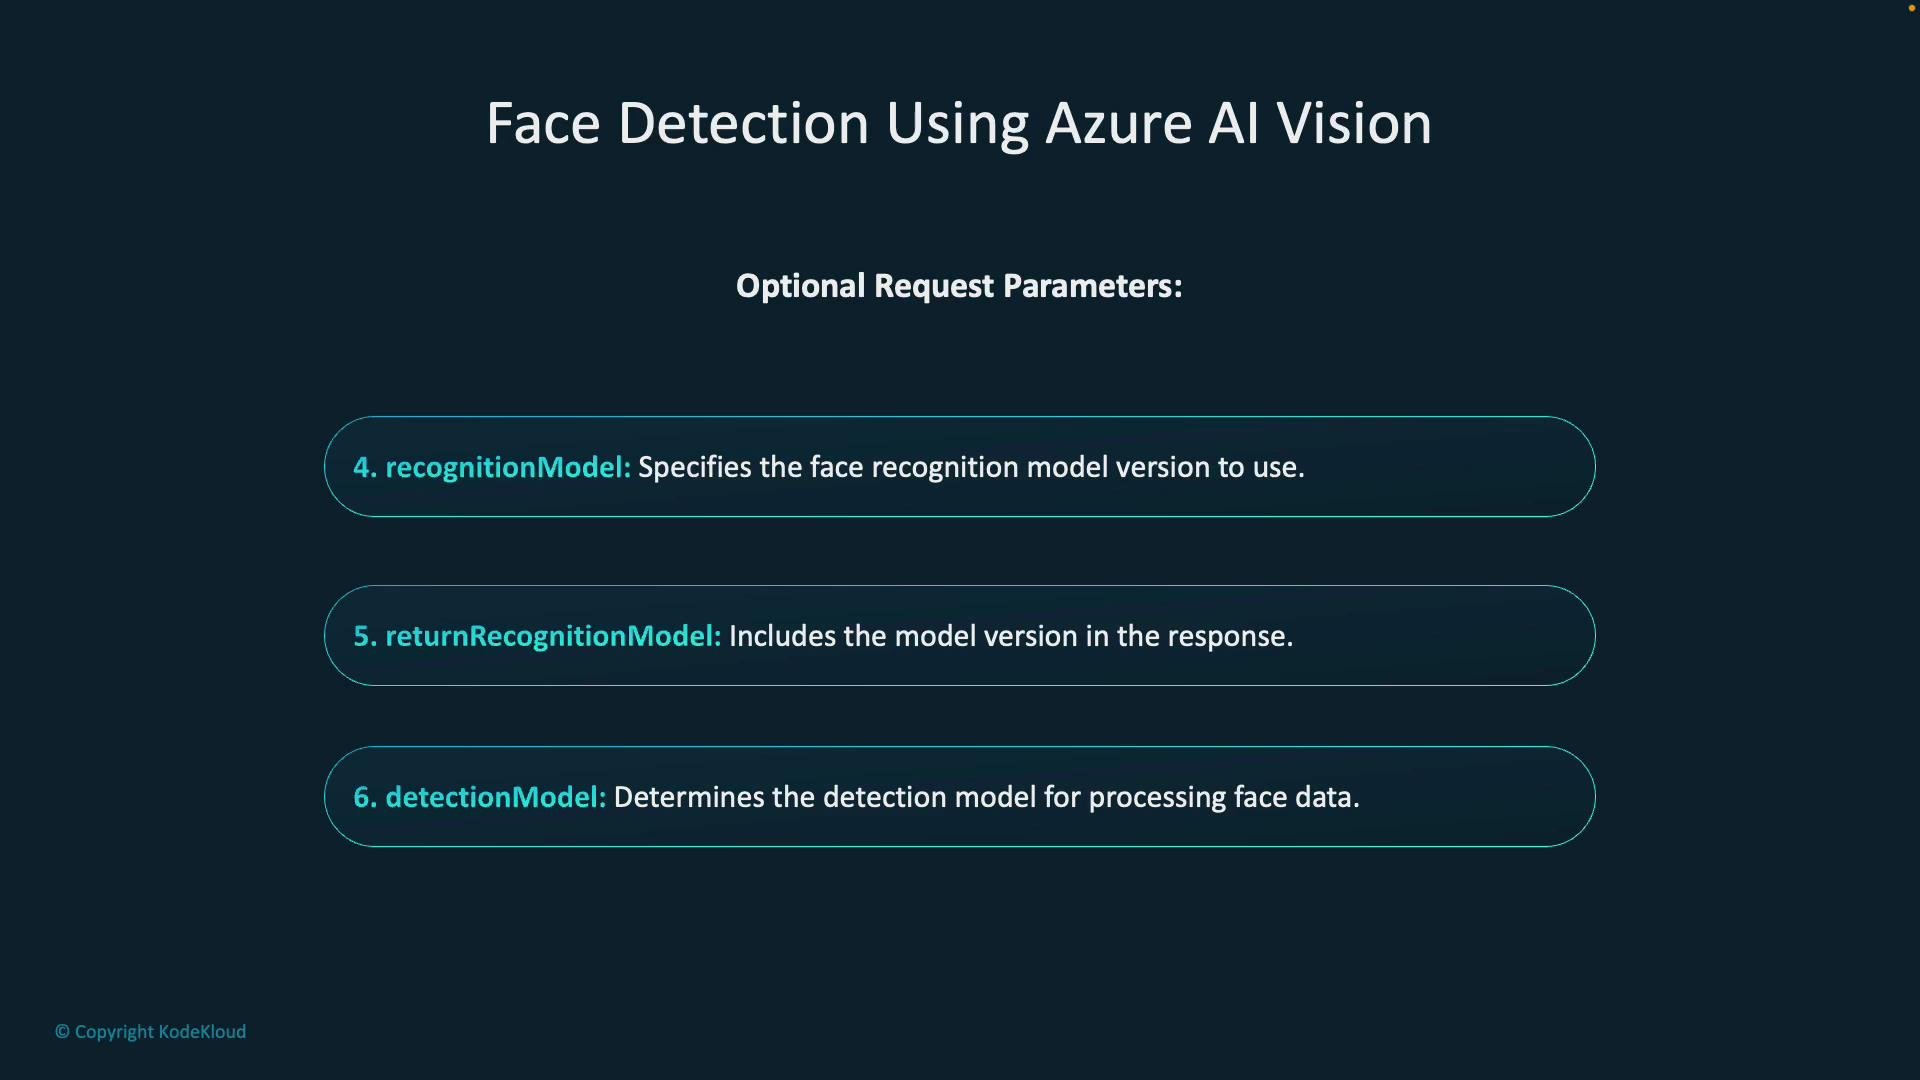
 Additional optional parameters
| Parameter | Purpose | When to use |
| ---------------------- | ------------------------------------------------------------------------- | ----------------------------------------------------------------------- |
| recognitionModel | Specify which recognition model version to use | Use when identity matching is allowed and multiple models are available |
| returnRecognitionModel | Return the recognition model version used in the response | Helpful for auditing and reproducibility |
| detectionModel | Choose the face detection model to control scanning/localization behavior | Useful to balance performance vs. accuracy |
Additional optional parameters
| Parameter | Purpose | When to use |
| ---------------------- | ------------------------------------------------------------------------- | ----------------------------------------------------------------------- |
| recognitionModel | Specify which recognition model version to use | Use when identity matching is allowed and multiple models are available |
| returnRecognitionModel | Return the recognition model version used in the response | Helpful for auditing and reproducibility |
| detectionModel | Choose the face detection model to control scanning/localization behavior | Useful to balance performance vs. accuracy |
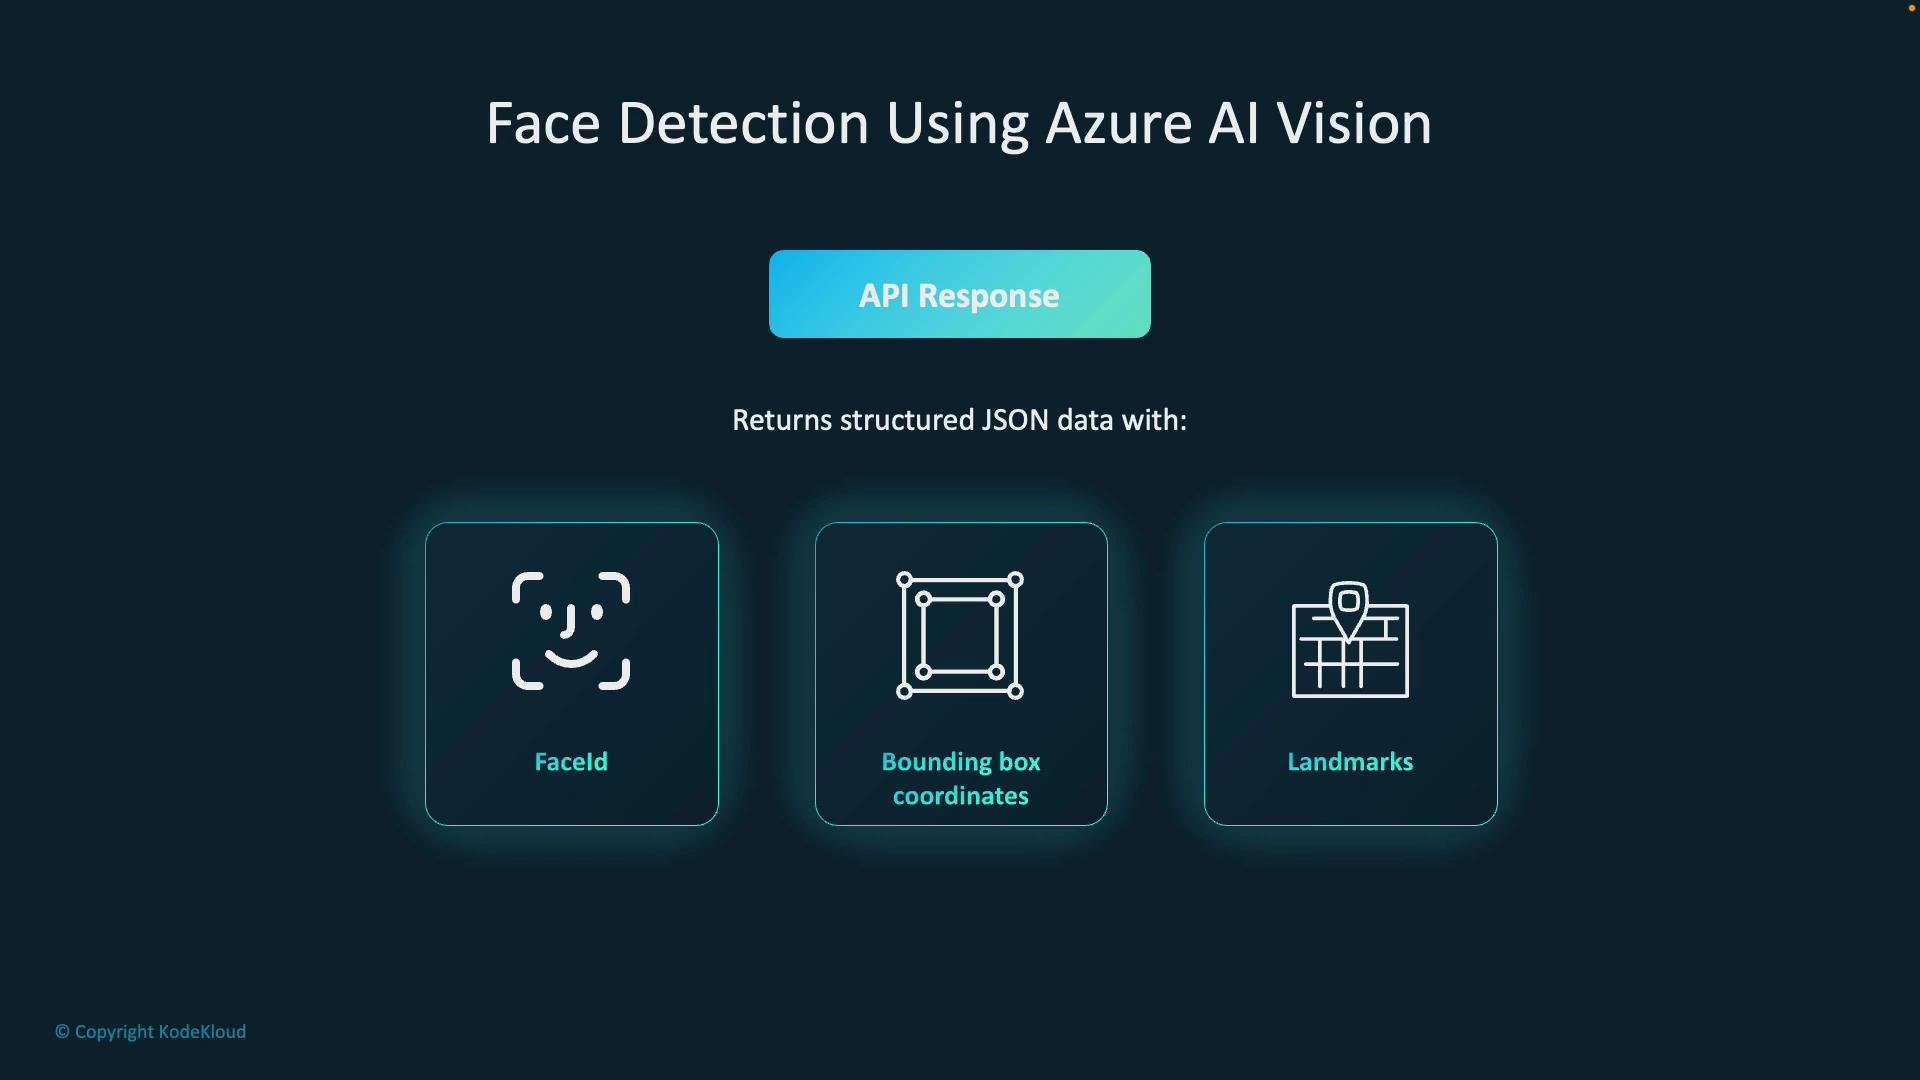
 API response structure
When faces are detected, the Face API returns a JSON array where each element corresponds to one detected face. Key fields include:
| Field | Type | Description |
| ---------------- | ------ | ----------------------------------------------------------------------- |
| faceId | string | Unique ID for the detected face (if requested and permitted) |
| recognitionModel | string | Recognition model name/version used for processing |
| faceRectangle | object | Bounding box with left, top, width, height |
| faceLandmarks | object | Coordinates for facial keypoints (pupilLeft, noseTip, mouthLeft, etc.) |
| faceAttributes | object | Requested attributes such as headPose, glasses, emotions (if available) |
API response structure
When faces are detected, the Face API returns a JSON array where each element corresponds to one detected face. Key fields include:
| Field | Type | Description |
| ---------------- | ------ | ----------------------------------------------------------------------- |
| faceId | string | Unique ID for the detected face (if requested and permitted) |
| recognitionModel | string | Recognition model name/version used for processing |
| faceRectangle | object | Bounding box with left, top, width, height |
| faceLandmarks | object | Coordinates for facial keypoints (pupilLeft, noseTip, mouthLeft, etc.) |
| faceAttributes | object | Requested attributes such as headPose, glasses, emotions (if available) |
 Example: simplified REST detect request and a trimmed JSON response
```http theme={null}
Request: https://{endpoint}/face/v1.0/detect[?returnFaceId=true|false&returnFaceLandmarks=true|false&returnFaceAttributes=...]
Body: {"url": "http://path-to-image"}
Response:
[
{
"faceId": "c5c24a82-6845-4031-9d5d-978df9175426",
"recognitionModel": "recognition_03",
"faceRectangle": {
"width": 78,
"height": 78,
"left": 394,
"top": 54
},
"faceLandmarks": {
"pupilLeft": { "x": 412.7, "y": 78.4 },
"pupilRight": { "x": 446.8, "y": 74.2 }
},
"faceAttributes": {
"headPose": { "roll": 0.5, "yaw": 10.0, "pitch": -2.1 }
}
}
]
```
Create and configure the Face resource in Azure Portal
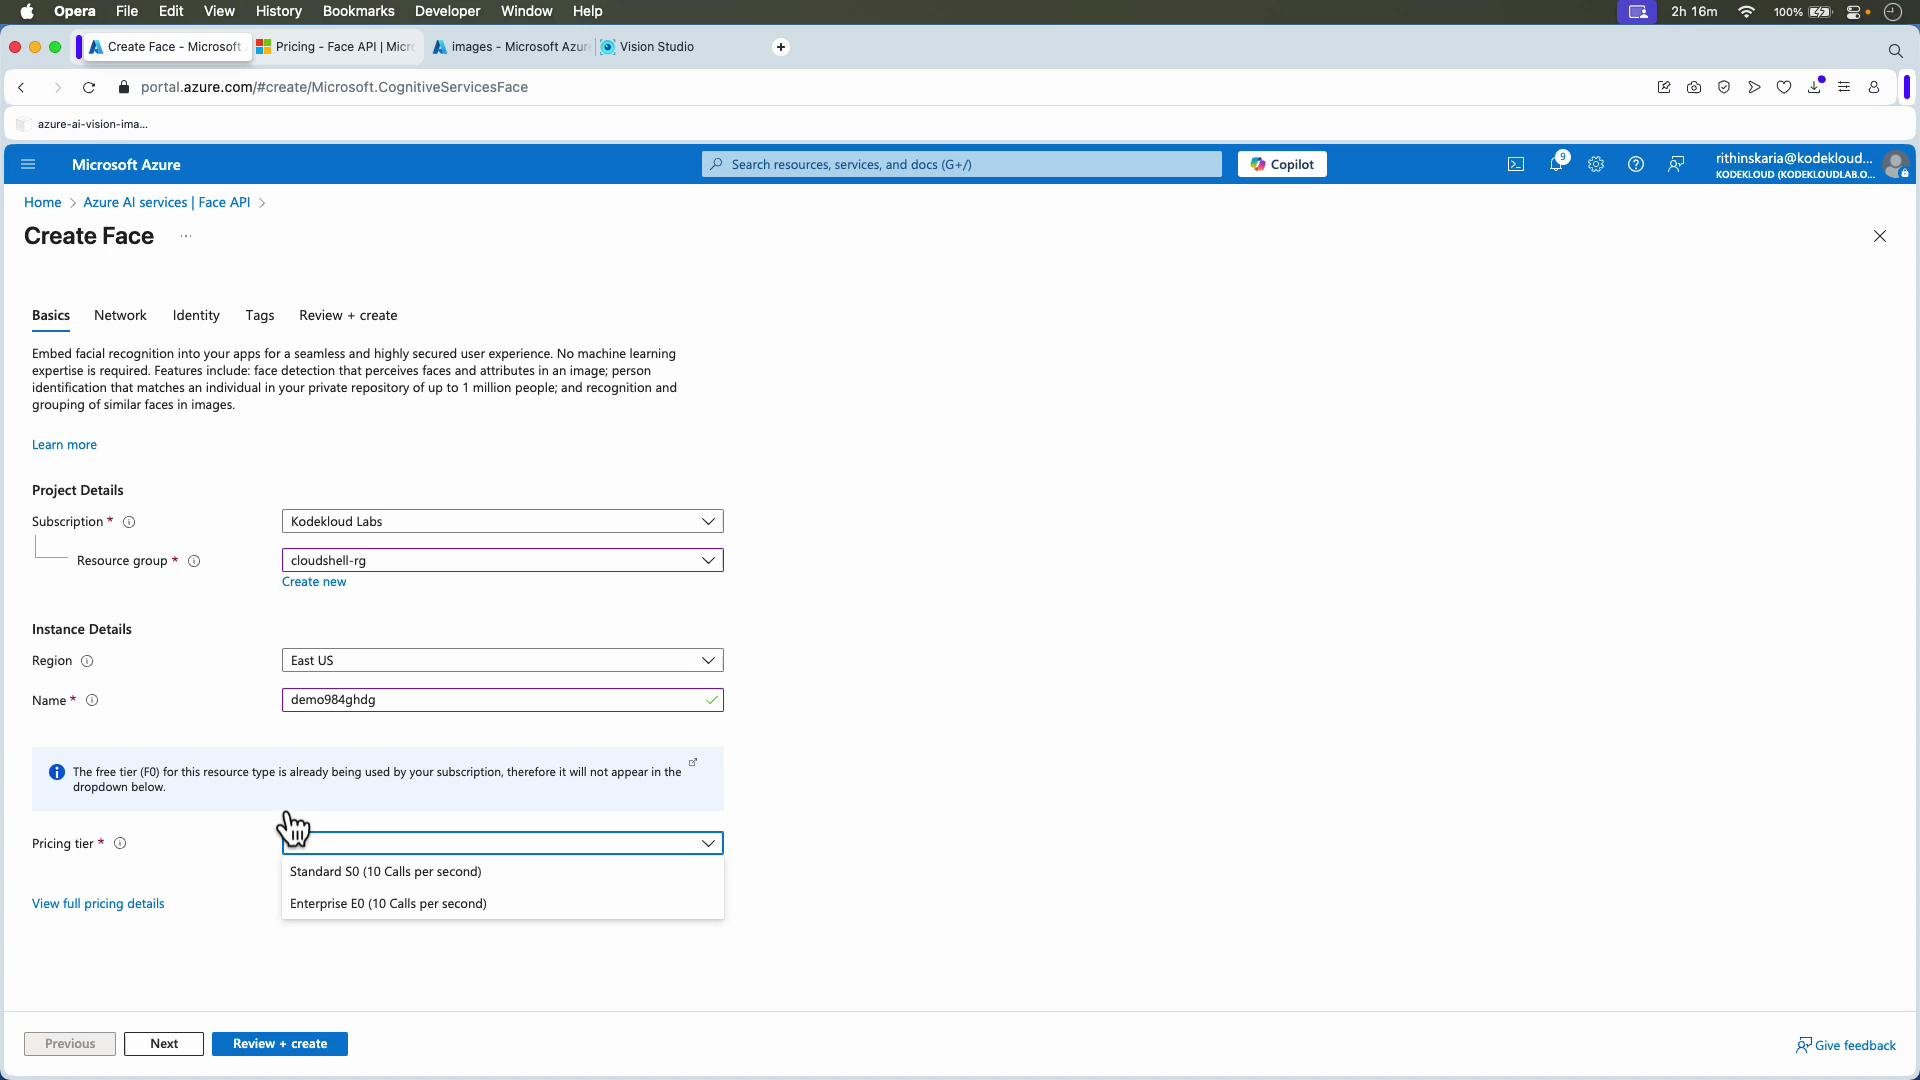
1. In the Azure Portal, create an Azure AI (Face) resource. Provide subscription, resource group, region, name, and pricing tier. Note: the free tier is limited to one per subscription and may not always be available.
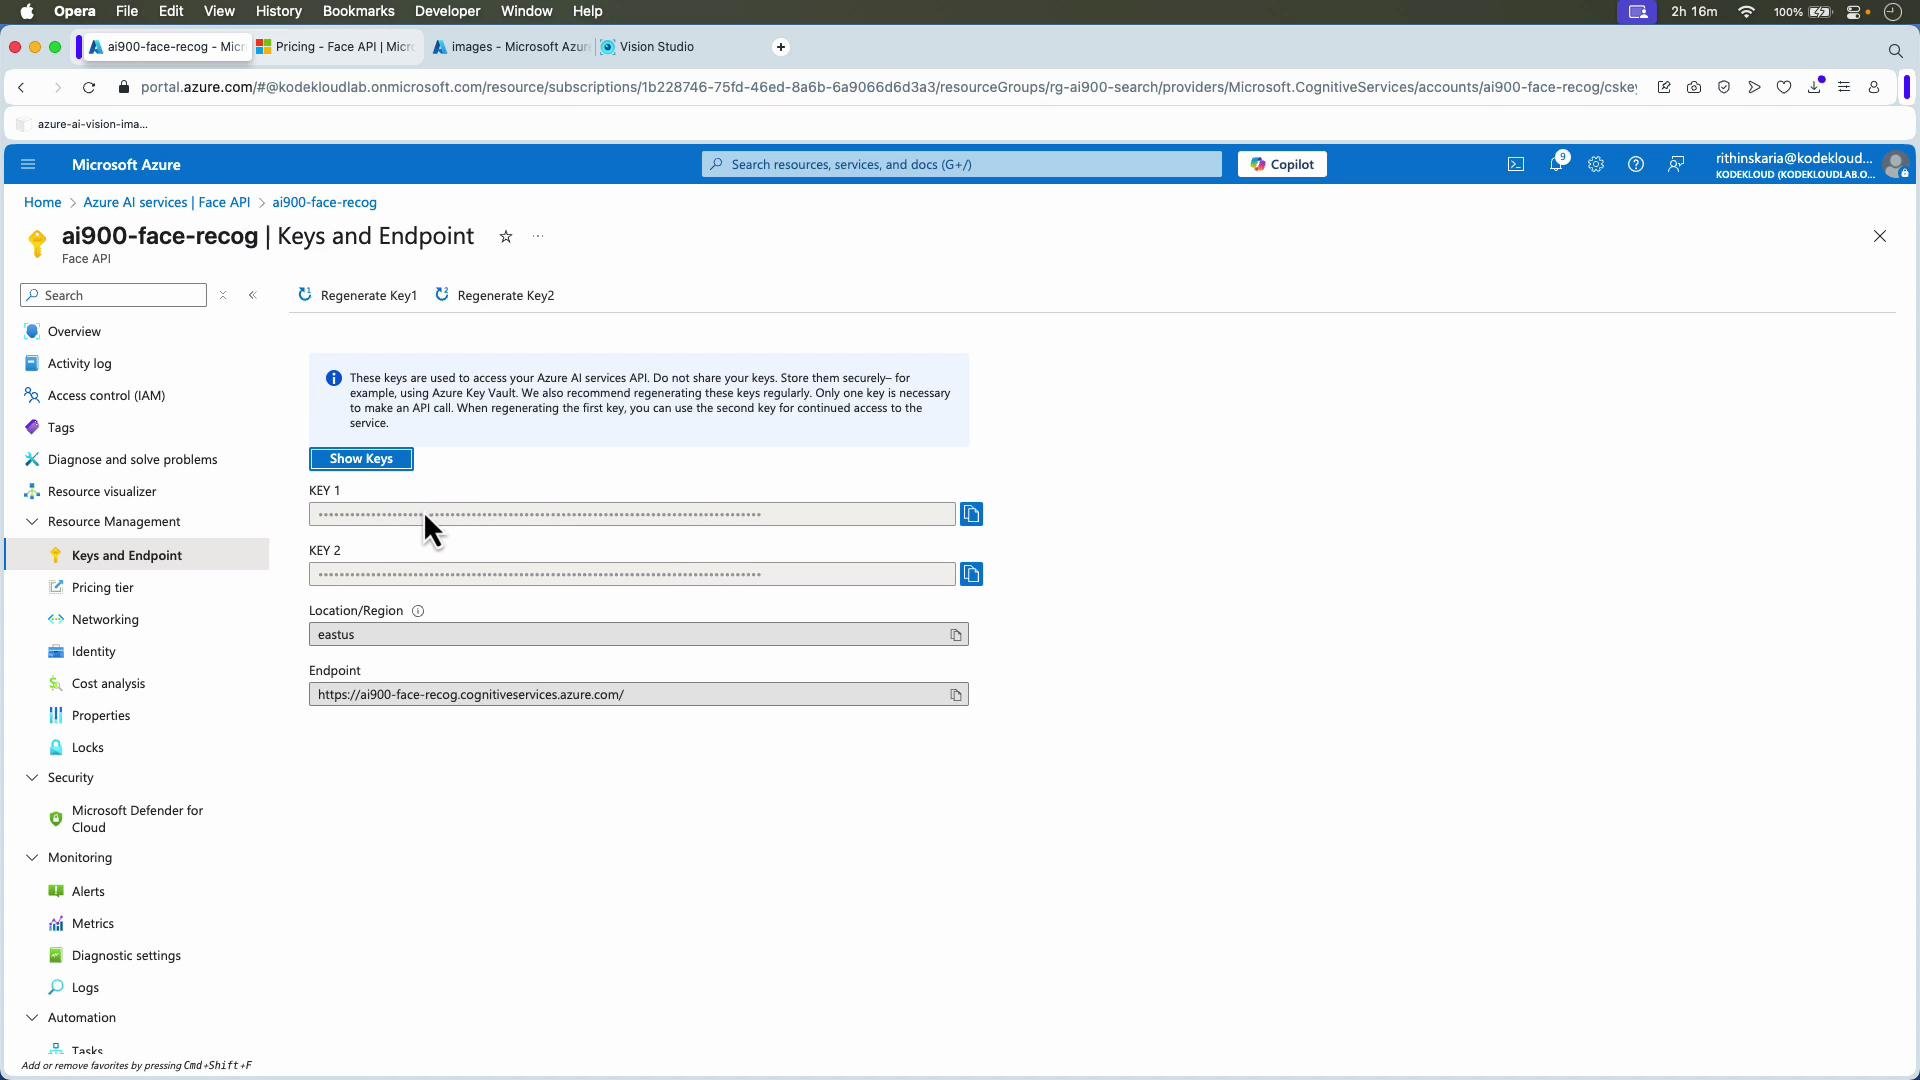
2. After creation, open the resource and copy the service endpoint and subscription keys from the "Keys and Endpoint" blade. You'll use these values in SDKs and REST calls.
Example: simplified REST detect request and a trimmed JSON response
```http theme={null}
Request: https://{endpoint}/face/v1.0/detect[?returnFaceId=true|false&returnFaceLandmarks=true|false&returnFaceAttributes=...]
Body: {"url": "http://path-to-image"}
Response:
[
{
"faceId": "c5c24a82-6845-4031-9d5d-978df9175426",
"recognitionModel": "recognition_03",
"faceRectangle": {
"width": 78,
"height": 78,
"left": 394,
"top": 54
},
"faceLandmarks": {
"pupilLeft": { "x": 412.7, "y": 78.4 },
"pupilRight": { "x": 446.8, "y": 74.2 }
},
"faceAttributes": {
"headPose": { "roll": 0.5, "yaw": 10.0, "pitch": -2.1 }
}
}
]
```
Create and configure the Face resource in Azure Portal
1. In the Azure Portal, create an Azure AI (Face) resource. Provide subscription, resource group, region, name, and pricing tier. Note: the free tier is limited to one per subscription and may not always be available.
2. After creation, open the resource and copy the service endpoint and subscription keys from the "Keys and Endpoint" blade. You'll use these values in SDKs and REST calls.
 Python examples (Azure Face SDK)
Below are concise Python examples using the Azure Cognitive Services Face SDK. Replace the endpoint and key placeholders with values from your Azure resource.
Single-image example (detect faces and landmarks, without returning Face ID)
```python theme={null}
# Ref: https://learn.microsoft.com/en-us/python/api/overview/azure/ai-vision-face-readme?view=azure-python-preview
from azure.cognitiveservices.vision.face import FaceClient
from azure.cognitiveservices.vision.face.models import FaceAttributeType
from msrest.authentication import CognitiveServicesCredentials
import json
# Replace with your correct endpoint and key
ENDPOINT = "https://.cognitiveservices.azure.com/"
KEY = ""
# Public image URL (single person)
image_url = "https://azai102imagestore.blob.core.windows.net/images/happy.jpg"
face_client = FaceClient(ENDPOINT, CognitiveServicesCredentials(KEY))
# Define the face attributes you want to extract
face_attributes = [FaceAttributeType.head_pose]
# Detect faces and attributes
detected_faces = face_client.face.detect_with_url(
url=image_url,
return_face_id=False,
return_face_landmarks=True,
return_face_attributes=face_attributes
)
print(f"Detected {len(detected_faces)} face(s) in the image.\n")
if not detected_faces:
print("No face detected.")
else:
for i, face in enumerate(detected_faces, start=1):
print(f"Face #{i}")
# face.face_id may be None when return_face_id=False
print(f"Face ID: {getattr(face, 'face_id', None)}")
# Some attributes like glasses or headPose are available when requested
if face.face_attributes:
print(f"Head pose: {face.face_attributes.head_pose}")
# Landmarks (example)
if face.face_landmarks:
pl = face.face_landmarks.pupil_left
nt = face.face_landmarks.nose_tip
ml = face.face_landmarks.mouth_left
mr = face.face_landmarks.mouth_right
print("Landmarks:")
print(f" - Pupil Left: {pl.x}, {pl.y}")
print(f" - Nose Tip: {nt.x}, {nt.y}")
print(f" - Mouth Left: {ml.x}, {ml.y}")
print(f" - Mouth Right: {mr.x}, {mr.y}")
# Optionally, print the full JSON response for inspection
# NOTE: the SDK objects can be serialized; here we convert to dict via repr/json where useful
print("\nFull JSON-like response for all faces:")
print(json.dumps([face.as_dict() for face in detected_faces], indent=2))
```
Typical cleaned console output (example):
```text theme={null}
Detected 1 face(s) in the image.
Face #1
Face ID: None
Head pose: {'roll': 1.0, 'yaw': 24.3, 'pitch': -4.5}
Landmarks:
- Pupil Left: 253.9, 145.6
- Nose Tip: 295.6, 202.2
- Mouth Left: 258.9, 231.1
- Mouth Right: 337.8, 230.2
Full JSON-like response for all faces:
[
{
"faceRectangle": {
"width": 189,
"height": 189,
"left": 203,
"top": 95
},
"faceLandmarks": {
"pupilLeft": { "x": 253.9, "y": 145.6 },
"pupilRight": { "x": 340.6, "y": 145.9 },
"noseTip": { "x": 295.6, "y": 202.2 },
...
},
"faceAttributes": {
"headPose": { "roll": 1.0, "yaw": 24.3, "pitch": -4.5 }
}
}
]
```
Group image (multiple faces)
To analyze group images, provide a group image URL. The API response will return one object per detected face in the array.
```python theme={null}
# Public group image URL (multiple people)
image_url = "https://azai102imagestore.blob.core.windows.net/images/group.jpg"
detected_faces = face_client.face.detect_with_url(
url=image_url,
return_face_id=False,
return_face_landmarks=True,
return_face_attributes=face_attributes
)
print(f"Detected {len(detected_faces)} face(s) in the group image.\n")
for i, face in enumerate(detected_faces, start=1):
print(f"Face #{i}")
if face.face_landmarks:
pl = face.face_landmarks.pupil_left
nt = face.face_landmarks.nose_tip
print(f" - Pupil Left: {pl.x}, {pl.y}")
print(f" - Nose Tip: {nt.x}, {nt.y}")
print()
```
Tips, notes, and troubleshooting
* If you request face IDs or certain attributes and your subscription lacks approval, the service may return an error—disable those parameters or request access via Azure support.
* Use returnRecognitionModel for traceability when running experiments across SDK versions.
* Verify pricing tier and quotas (especially in production) to avoid throttling.
* For persistent matching across images, you need faceId functionality and the appropriate approval.
* If you get permissions errors for sensitive attributes, file an Azure support request to request feature access.
* When debugging, log the recognitionModel and detectionModel returned so you can reproduce results later.
Resources and references
| Resource | Description |
| --------------------------------------- | -------------------------------------------------------------------------------------------------------------------------------------------------------------------------------------------------------------------------- |
| Face API docs | [https://learn.microsoft.com/azure/cognitive-services/face/](https://learn.microsoft.com/azure/cognitive-services/face/) |
| Azure Cognitive Services Python samples | [https://learn.microsoft.com/en-us/python/api/overview/azure/ai-vision-face-readme?view=azure-python-preview](https://learn.microsoft.com/en-us/python/api/overview/azure/ai-vision-face-readme?view=azure-python-preview) |
| Azure Portal | [https://portal.azure.com/](https://portal.azure.com/) |
With these steps and examples you can detect faces, extract landmarks, and request face attributes where allowed. Explore the broader Azure Vision documentation for additional capabilities like OCR, object detection, and custom vision scenarios.
Python examples (Azure Face SDK)
Below are concise Python examples using the Azure Cognitive Services Face SDK. Replace the endpoint and key placeholders with values from your Azure resource.
Single-image example (detect faces and landmarks, without returning Face ID)
```python theme={null}
# Ref: https://learn.microsoft.com/en-us/python/api/overview/azure/ai-vision-face-readme?view=azure-python-preview
from azure.cognitiveservices.vision.face import FaceClient
from azure.cognitiveservices.vision.face.models import FaceAttributeType
from msrest.authentication import CognitiveServicesCredentials
import json
# Replace with your correct endpoint and key
ENDPOINT = "https://.cognitiveservices.azure.com/"
KEY = ""
# Public image URL (single person)
image_url = "https://azai102imagestore.blob.core.windows.net/images/happy.jpg"
face_client = FaceClient(ENDPOINT, CognitiveServicesCredentials(KEY))
# Define the face attributes you want to extract
face_attributes = [FaceAttributeType.head_pose]
# Detect faces and attributes
detected_faces = face_client.face.detect_with_url(
url=image_url,
return_face_id=False,
return_face_landmarks=True,
return_face_attributes=face_attributes
)
print(f"Detected {len(detected_faces)} face(s) in the image.\n")
if not detected_faces:
print("No face detected.")
else:
for i, face in enumerate(detected_faces, start=1):
print(f"Face #{i}")
# face.face_id may be None when return_face_id=False
print(f"Face ID: {getattr(face, 'face_id', None)}")
# Some attributes like glasses or headPose are available when requested
if face.face_attributes:
print(f"Head pose: {face.face_attributes.head_pose}")
# Landmarks (example)
if face.face_landmarks:
pl = face.face_landmarks.pupil_left
nt = face.face_landmarks.nose_tip
ml = face.face_landmarks.mouth_left
mr = face.face_landmarks.mouth_right
print("Landmarks:")
print(f" - Pupil Left: {pl.x}, {pl.y}")
print(f" - Nose Tip: {nt.x}, {nt.y}")
print(f" - Mouth Left: {ml.x}, {ml.y}")
print(f" - Mouth Right: {mr.x}, {mr.y}")
# Optionally, print the full JSON response for inspection
# NOTE: the SDK objects can be serialized; here we convert to dict via repr/json where useful
print("\nFull JSON-like response for all faces:")
print(json.dumps([face.as_dict() for face in detected_faces], indent=2))
```
Typical cleaned console output (example):
```text theme={null}
Detected 1 face(s) in the image.
Face #1
Face ID: None
Head pose: {'roll': 1.0, 'yaw': 24.3, 'pitch': -4.5}
Landmarks:
- Pupil Left: 253.9, 145.6
- Nose Tip: 295.6, 202.2
- Mouth Left: 258.9, 231.1
- Mouth Right: 337.8, 230.2
Full JSON-like response for all faces:
[
{
"faceRectangle": {
"width": 189,
"height": 189,
"left": 203,
"top": 95
},
"faceLandmarks": {
"pupilLeft": { "x": 253.9, "y": 145.6 },
"pupilRight": { "x": 340.6, "y": 145.9 },
"noseTip": { "x": 295.6, "y": 202.2 },
...
},
"faceAttributes": {
"headPose": { "roll": 1.0, "yaw": 24.3, "pitch": -4.5 }
}
}
]
```
Group image (multiple faces)
To analyze group images, provide a group image URL. The API response will return one object per detected face in the array.
```python theme={null}
# Public group image URL (multiple people)
image_url = "https://azai102imagestore.blob.core.windows.net/images/group.jpg"
detected_faces = face_client.face.detect_with_url(
url=image_url,
return_face_id=False,
return_face_landmarks=True,
return_face_attributes=face_attributes
)
print(f"Detected {len(detected_faces)} face(s) in the group image.\n")
for i, face in enumerate(detected_faces, start=1):
print(f"Face #{i}")
if face.face_landmarks:
pl = face.face_landmarks.pupil_left
nt = face.face_landmarks.nose_tip
print(f" - Pupil Left: {pl.x}, {pl.y}")
print(f" - Nose Tip: {nt.x}, {nt.y}")
print()
```
Tips, notes, and troubleshooting
* If you request face IDs or certain attributes and your subscription lacks approval, the service may return an error—disable those parameters or request access via Azure support.
* Use returnRecognitionModel for traceability when running experiments across SDK versions.
* Verify pricing tier and quotas (especially in production) to avoid throttling.
* For persistent matching across images, you need faceId functionality and the appropriate approval.
* If you get permissions errors for sensitive attributes, file an Azure support request to request feature access.
* When debugging, log the recognitionModel and detectionModel returned so you can reproduce results later.
Resources and references
| Resource | Description |
| --------------------------------------- | -------------------------------------------------------------------------------------------------------------------------------------------------------------------------------------------------------------------------- |
| Face API docs | [https://learn.microsoft.com/azure/cognitive-services/face/](https://learn.microsoft.com/azure/cognitive-services/face/) |
| Azure Cognitive Services Python samples | [https://learn.microsoft.com/en-us/python/api/overview/azure/ai-vision-face-readme?view=azure-python-preview](https://learn.microsoft.com/en-us/python/api/overview/azure/ai-vision-face-readme?view=azure-python-preview) |
| Azure Portal | [https://portal.azure.com/](https://portal.azure.com/) |
With these steps and examples you can detect faces, extract landmarks, and request face attributes where allowed. Explore the broader Azure Vision documentation for additional capabilities like OCR, object detection, and custom vision scenarios.