Face Detection Features
The Face Service analyzes images to ensure high-quality face detection by evaluating several key factors:Blur Detection
Blur detection measures the clarity of an image. If an image is blurry, it may affect detection accuracy. This feature alerts users when the image quality could compromise the results.Exposure Analysis
Exposure analysis determines if an image is underexposed or overexposed. Proper lighting is essential for distinguishing facial features accurately. This assessment helps maintain optimal conditions for face detection.Glasses Detection
The service can detect if a person is wearing glasses. This information is useful for applications such as authentication systems and demographic analysis, where glasses might impact the precision of face recognition.Head Pose Detection
This functionality measures head pose by tracking pitch, yaw, and roll angles. Understanding the orientation of a face is crucial in settings like retail, where it may be important to know if someone is looking at a display.Noise Detection
Noise detection identifies random specks or distortions in the image. Excessive noise can detract from the clarity necessary for accurate detection. The service flags noisy images to ensure that only clear images are processed.Occlusion Detection
Occlusion detection recognizes when a face is partially covered by objects such as masks, hands, or hats. Since occlusions can hide important facial features, the system flags such instances to either process only fully visible faces or inform users about potential issues.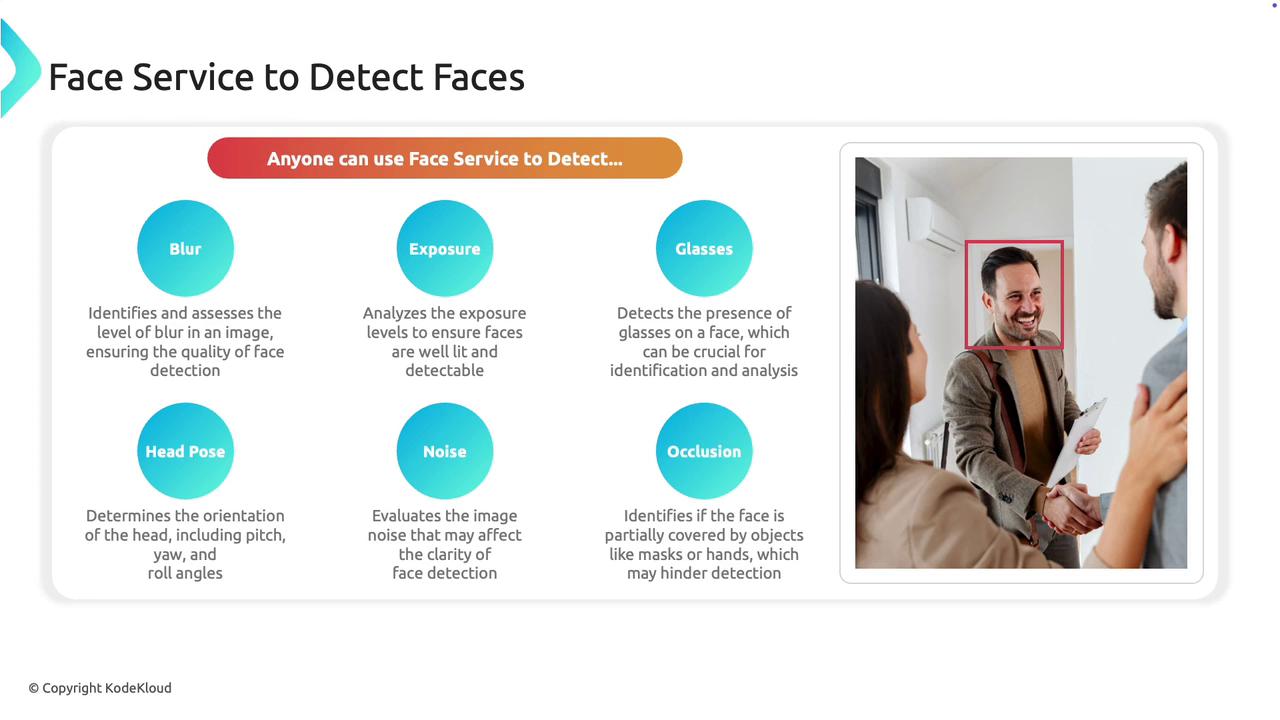
Advanced Face Recognition Features
For managed Microsoft customers, the Face Service offers enhanced recognition capabilities:Similarity Matching
This feature compares faces to determine if they belong to the same person, which is instrumental in deduplication tasks and security applications where recognizing similar features is critical.Identity Verification
Building on similarity matching, identity verification confirms a person’s identity by comparing the detected face against a stored, trusted image. This capability is valuable for high-security environments such as secure building access.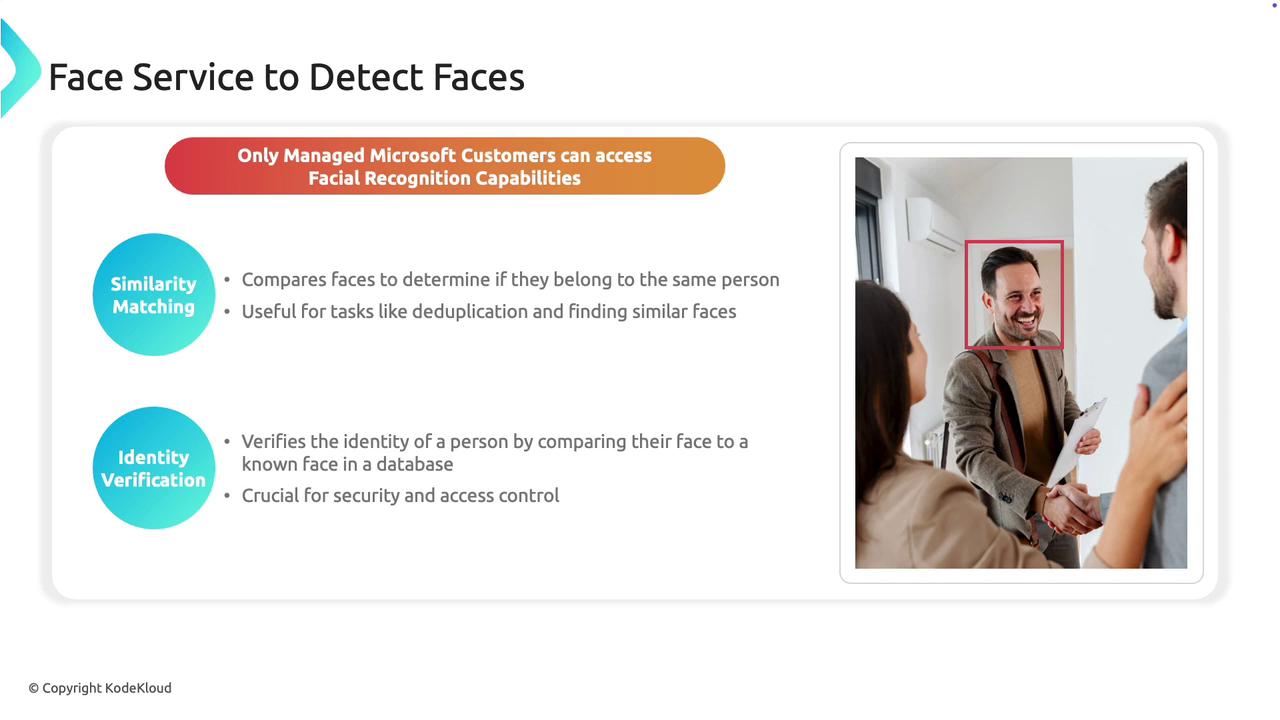
The Face Service in Azure integrates both detection and recognition functionalities. It addresses fundamental image quality issues and provides advanced tools for identity confirmation, making it a versatile solution for a variety of applications including security and customer insights.
Using the Face Service in Azure
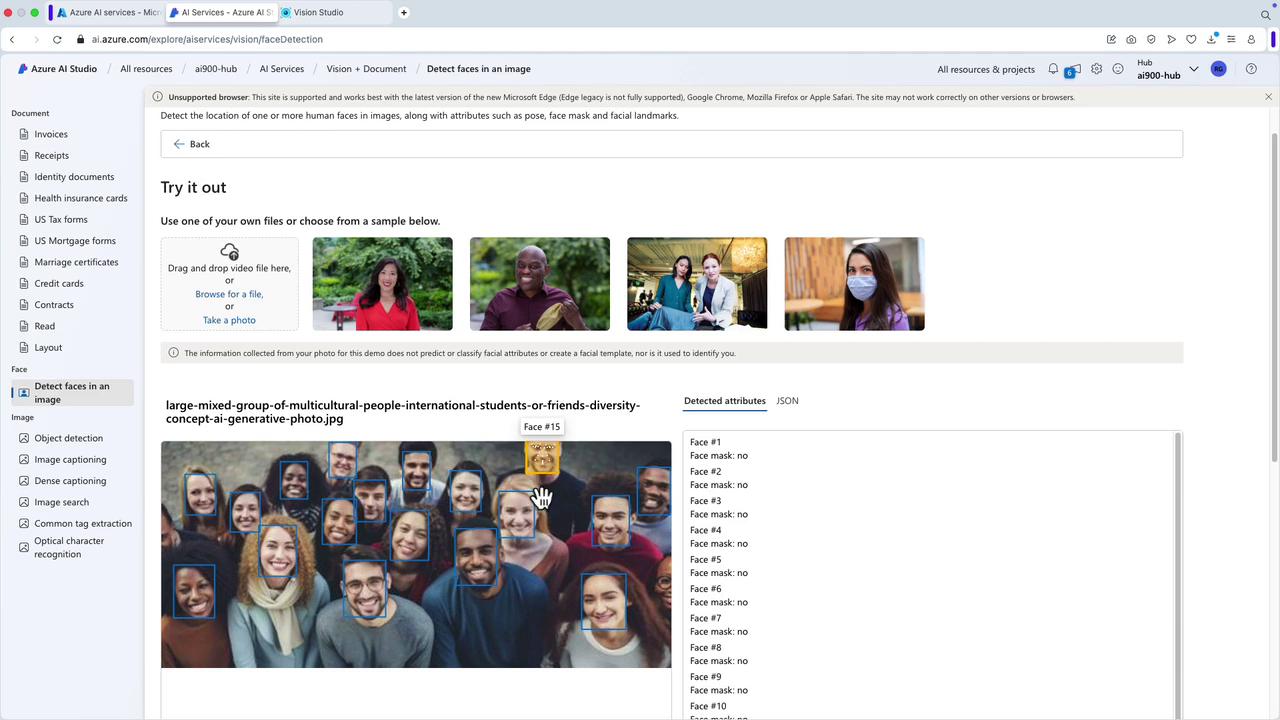
Follow these steps to deploy and use the Face Service in Azure through AI Studio and Vision Studio.1. Accessing AI Studio
Open the Azure portal and navigate to AI Studio. Here’s how to start:- Select the “Face” option.
- Choose an image file from the dataset.
- The system will automatically detect all faces present in the image.
2. Exploring Advanced Features via Vision Studio
For advanced features, switch to Vision Studio:- Sign in to your account.
- If you encounter issues with loading a resource group, return to the Azure portal and deploy the required resource manually.
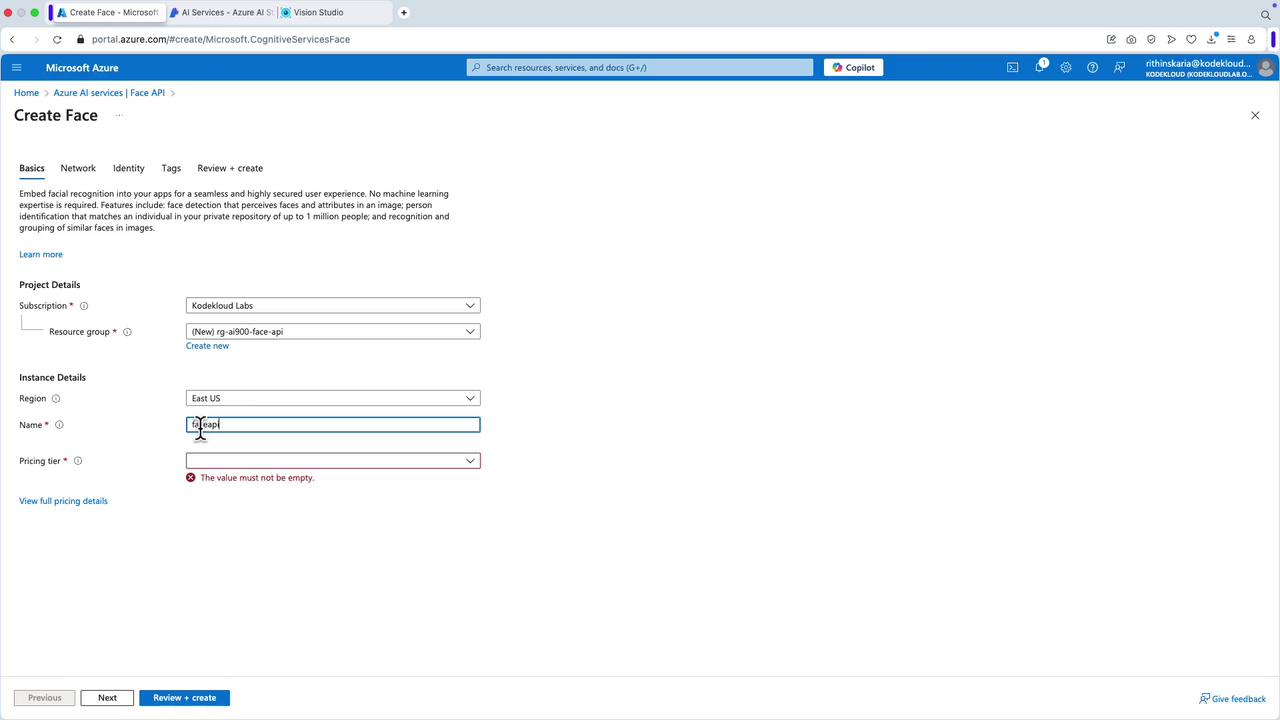
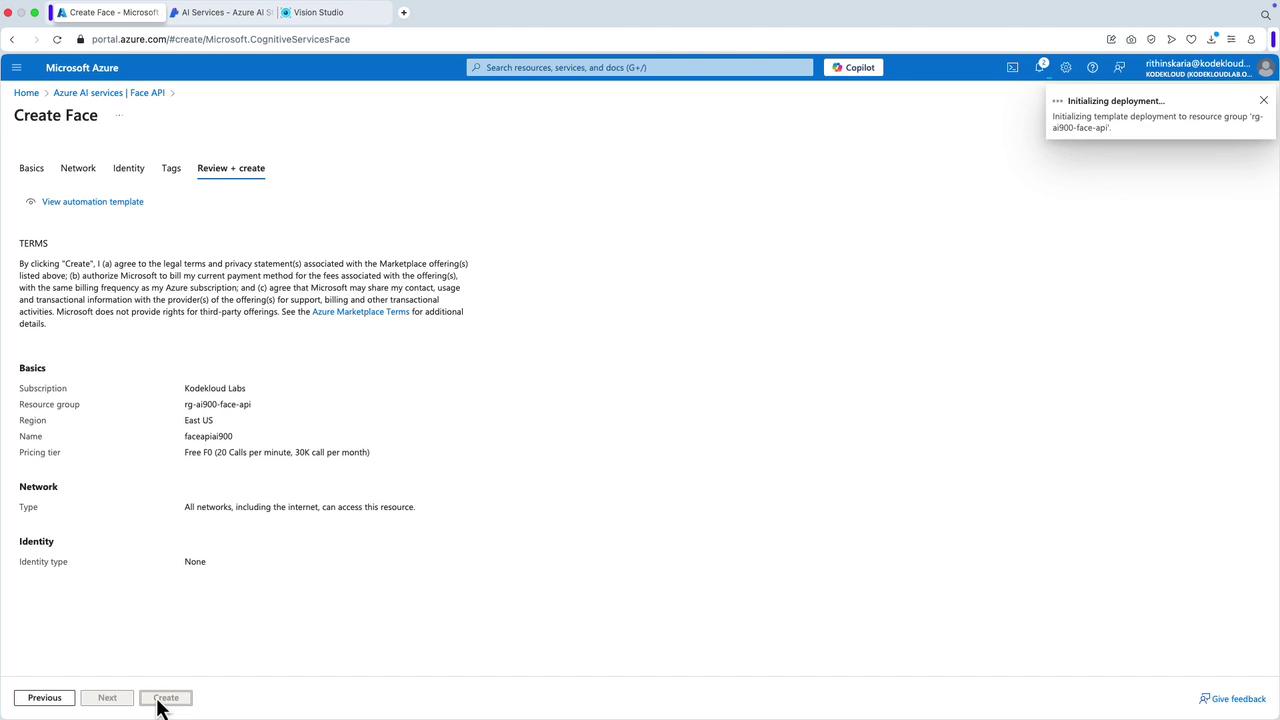
3. Deploying a Face API Resource
Within the Azure portal:- Select the option to create a Face API resource.
- Create a new resource group (e.g., RGAI900FaceAPI) and choose the appropriate region.
- Name your resource (e.g., Face API AI 900) and select the free pricing tier.
- Click “Review and Create” to deploy the resource.
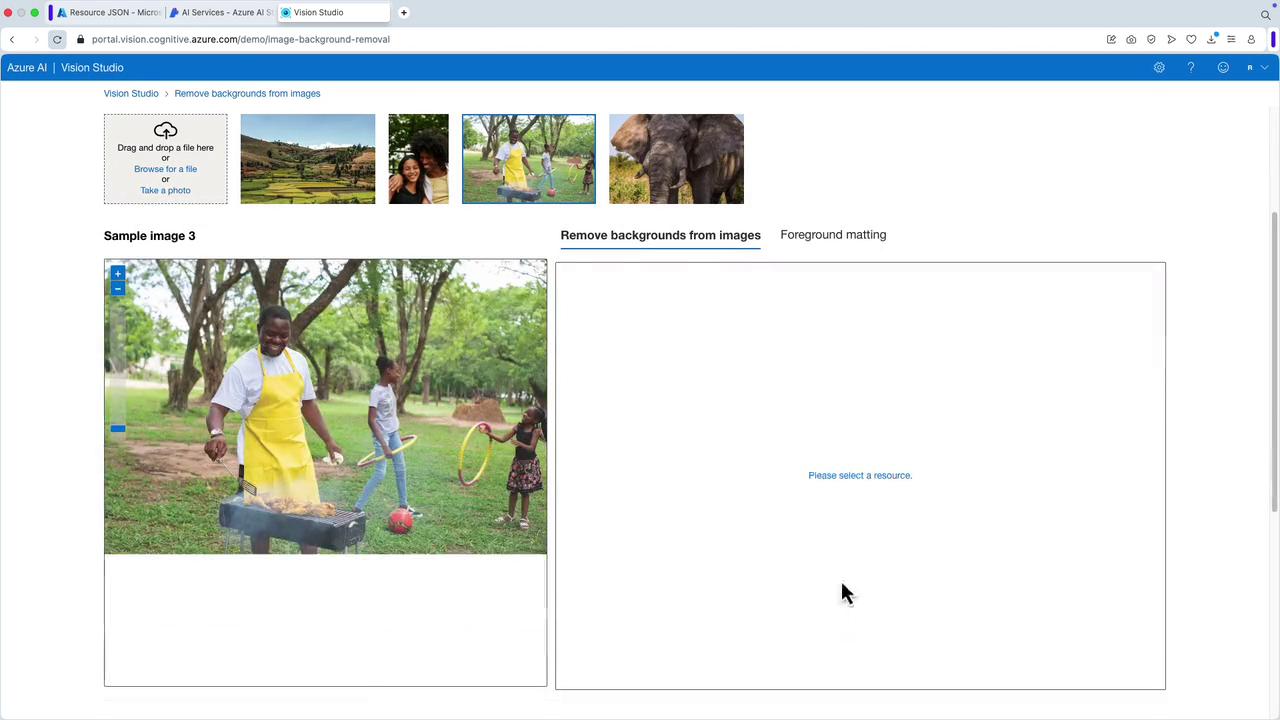
4. Additional Vision Services
For functionalities like Smart Crop or background removal, create a Computer Vision resource. Other capabilities, including liveness detection and portrait processing, are available under the Face API umbrella.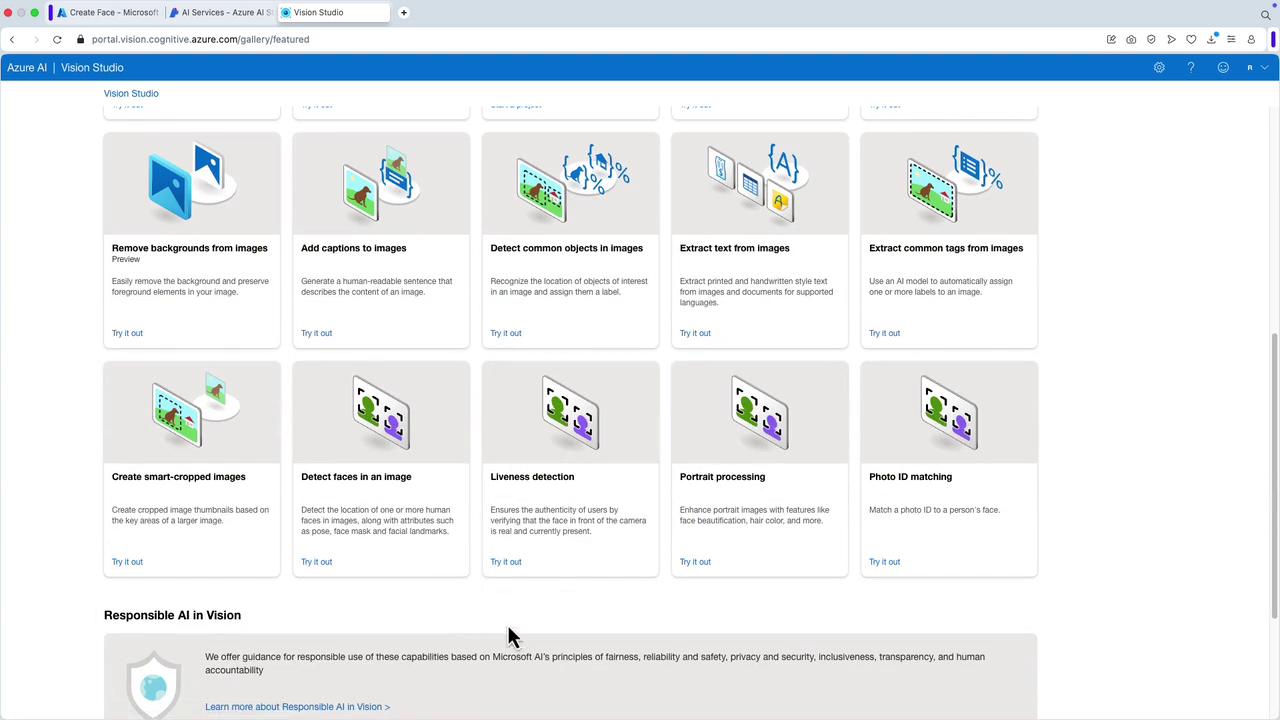
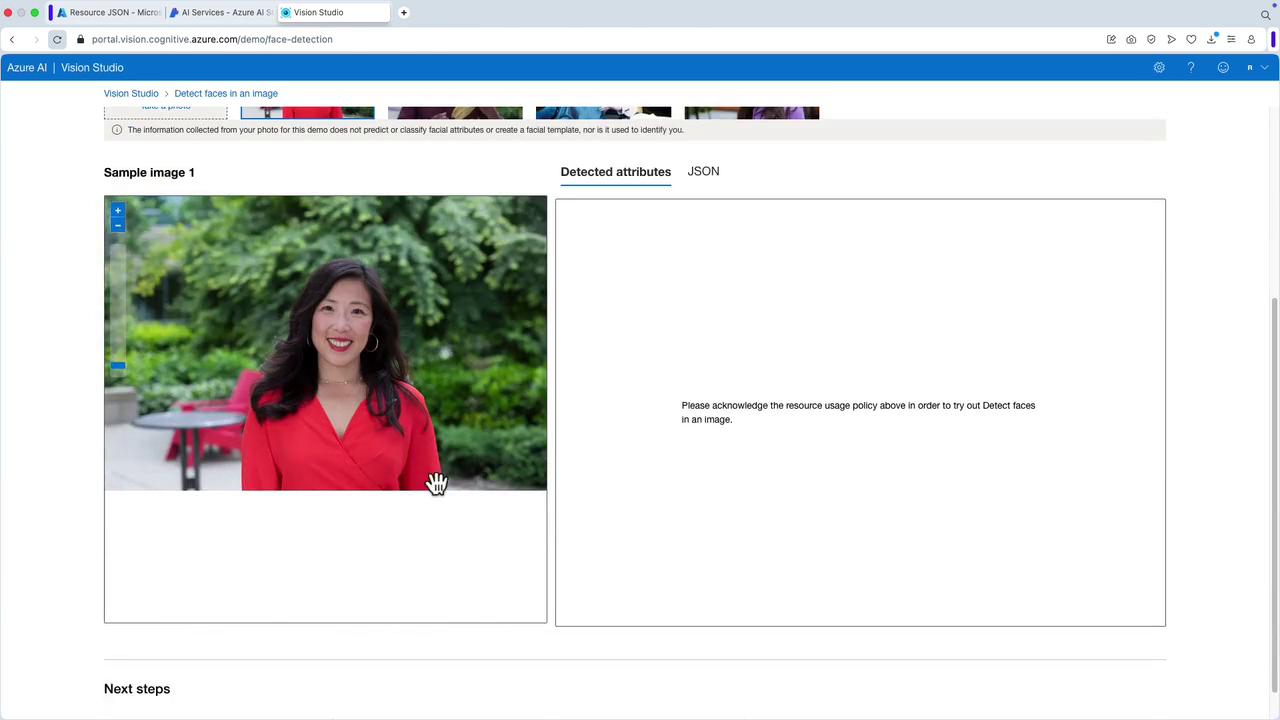
5. Associating the Resource in Vision Studio
Once your Face API resource is deployed:- Navigate back to Vision Studio.
- Select the newly created Face API resource.
- Use the tool to process an image and detect faces.
6. Testing Face Recognition
With the resource assigned:- Select an image in Vision Studio.
- Confirm the resource selection and acknowledge any system prompts.
- The service will then identify and highlight detected faces.
7. Handling Other AI Services
If you intend to use features like portrait processing, liveness detection, or photo ID matching:- Ensure you have a corresponding Computer Vision resource deployed.
- Without it, you will be prompted to choose a resource when selecting an image for these services.
Using both AI Studio and Vision Studio allows you to leverage a comprehensive set of facial detection and recognition tools, ensuring that you can meet a wide range of application requirements.