> ## Documentation Index
> Fetch the complete documentation index at: https://notes.kodekloud.com/llms.txt
> Use this file to discover all available pages before exploring further.
# Practice Labs Your First AI API Call
> Tutorial guiding users through setting up the OpenAI Python client, making chat API calls, extracting responses, and estimating token usage and costs
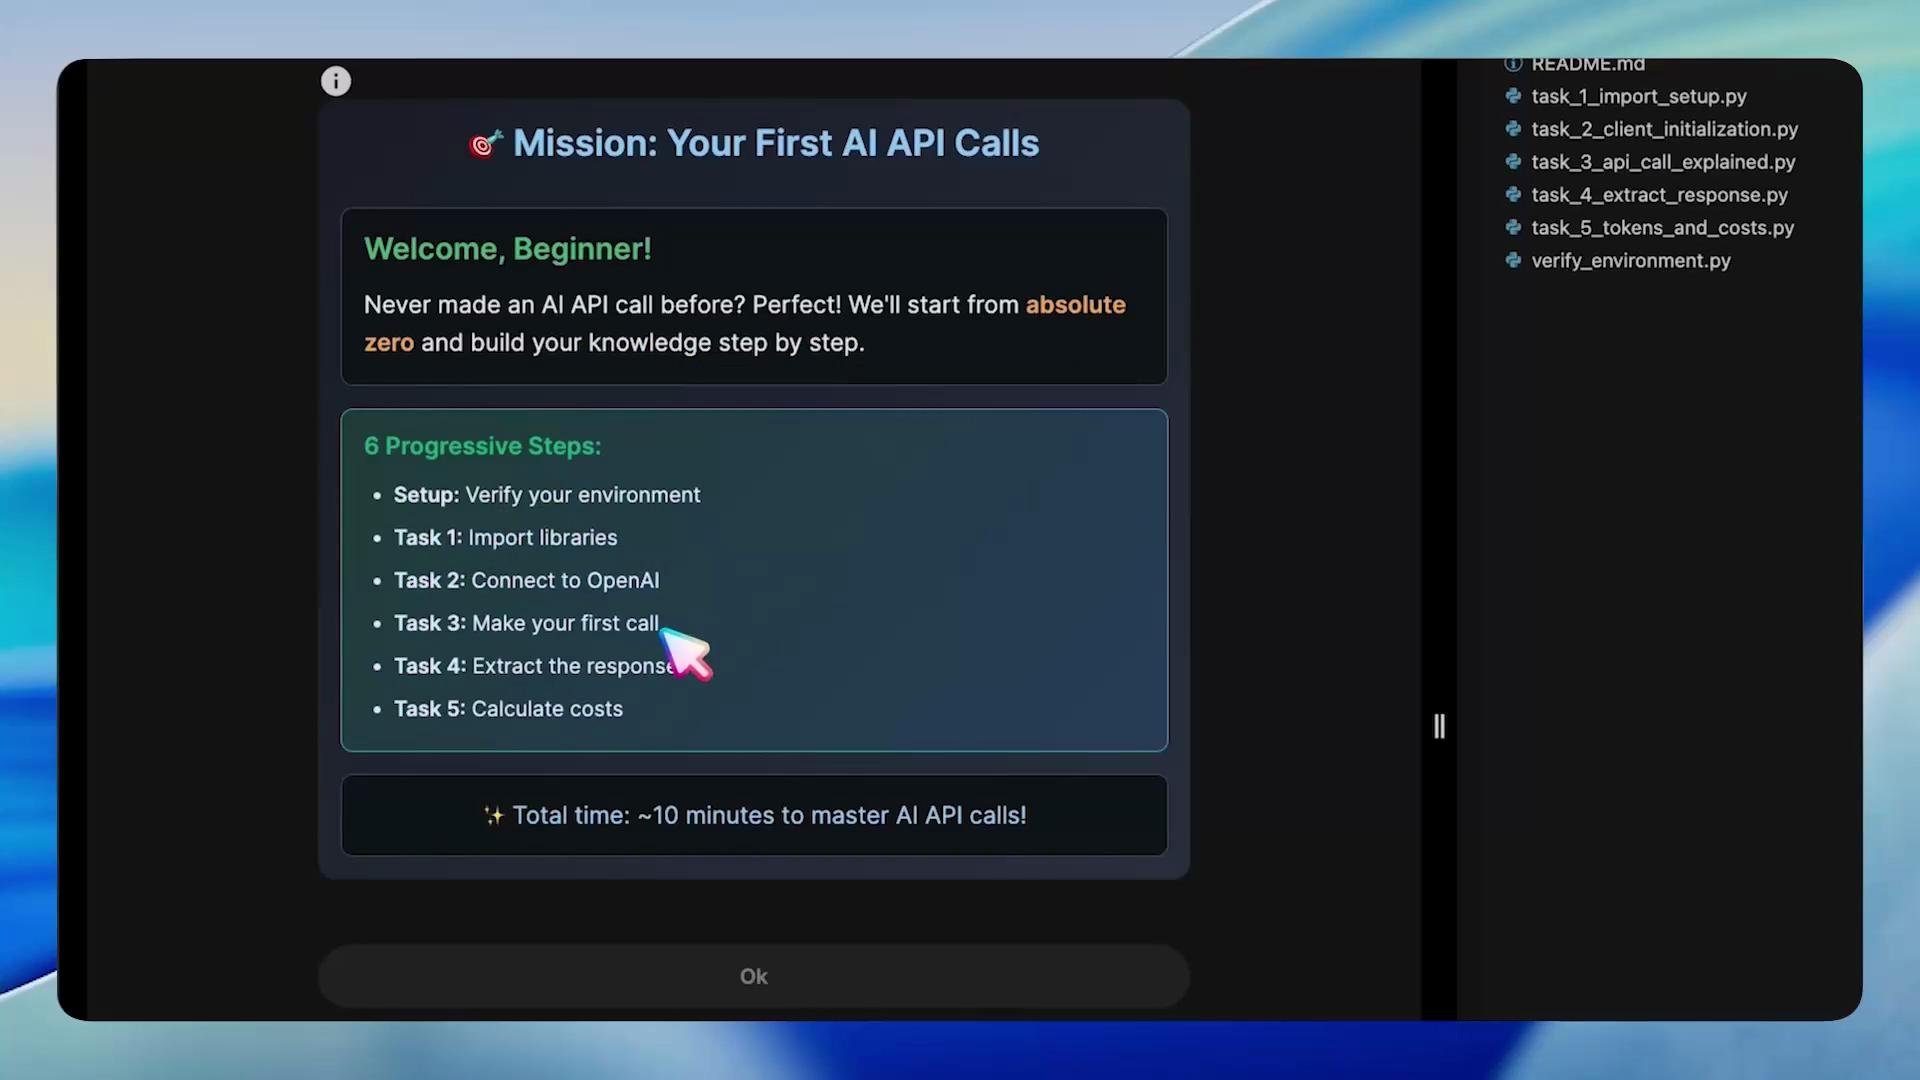
Let's start with the lab files you'll work through:
```text theme={null}
README.md
task_1_import_setup.py
task_2_client_initialization.py
task_3_api_call_explained.py
task_4_extract_response.py
task_5_tokens_and_costs.py
verify_environment.py
root@controlplane ~/code via ⬢ v3.12.3 ❯
```
In this lesson you'll learn how to make your first AI API calls with the OpenAI Python client. The goal is practical: verify your environment, connect to the API, make a chat completion request, extract the assistant's reply, and inspect token usage and cost — all in progressive steps.
 ## 1 — Verify the environment
Before writing code, verify that your runtime is ready: activate the virtual environment, confirm Python is available, ensure the OpenAI package is installed, and verify your API keys are present. Run these commands in the lab VM:
```bash theme={null}
source /root/venv/bin/activate
python3 /root/code/verify_environment.py
```
If verification succeeds, the script prints readiness checks and exits. If something fails, re-check your virtual environment and that packages (like the OpenAI Python package) are installed.
Environment variables commonly used in these examples:
| Environment Variable | Purpose |
| -------------------- | -------------------------------------------------------------- |
| OPENAI\_API\_KEY | Your secret API key (keep it private) |
| OPENAI\_API\_BASE | Optional API base URL (use when pointing to a custom endpoint) |
## What is OpenAI?
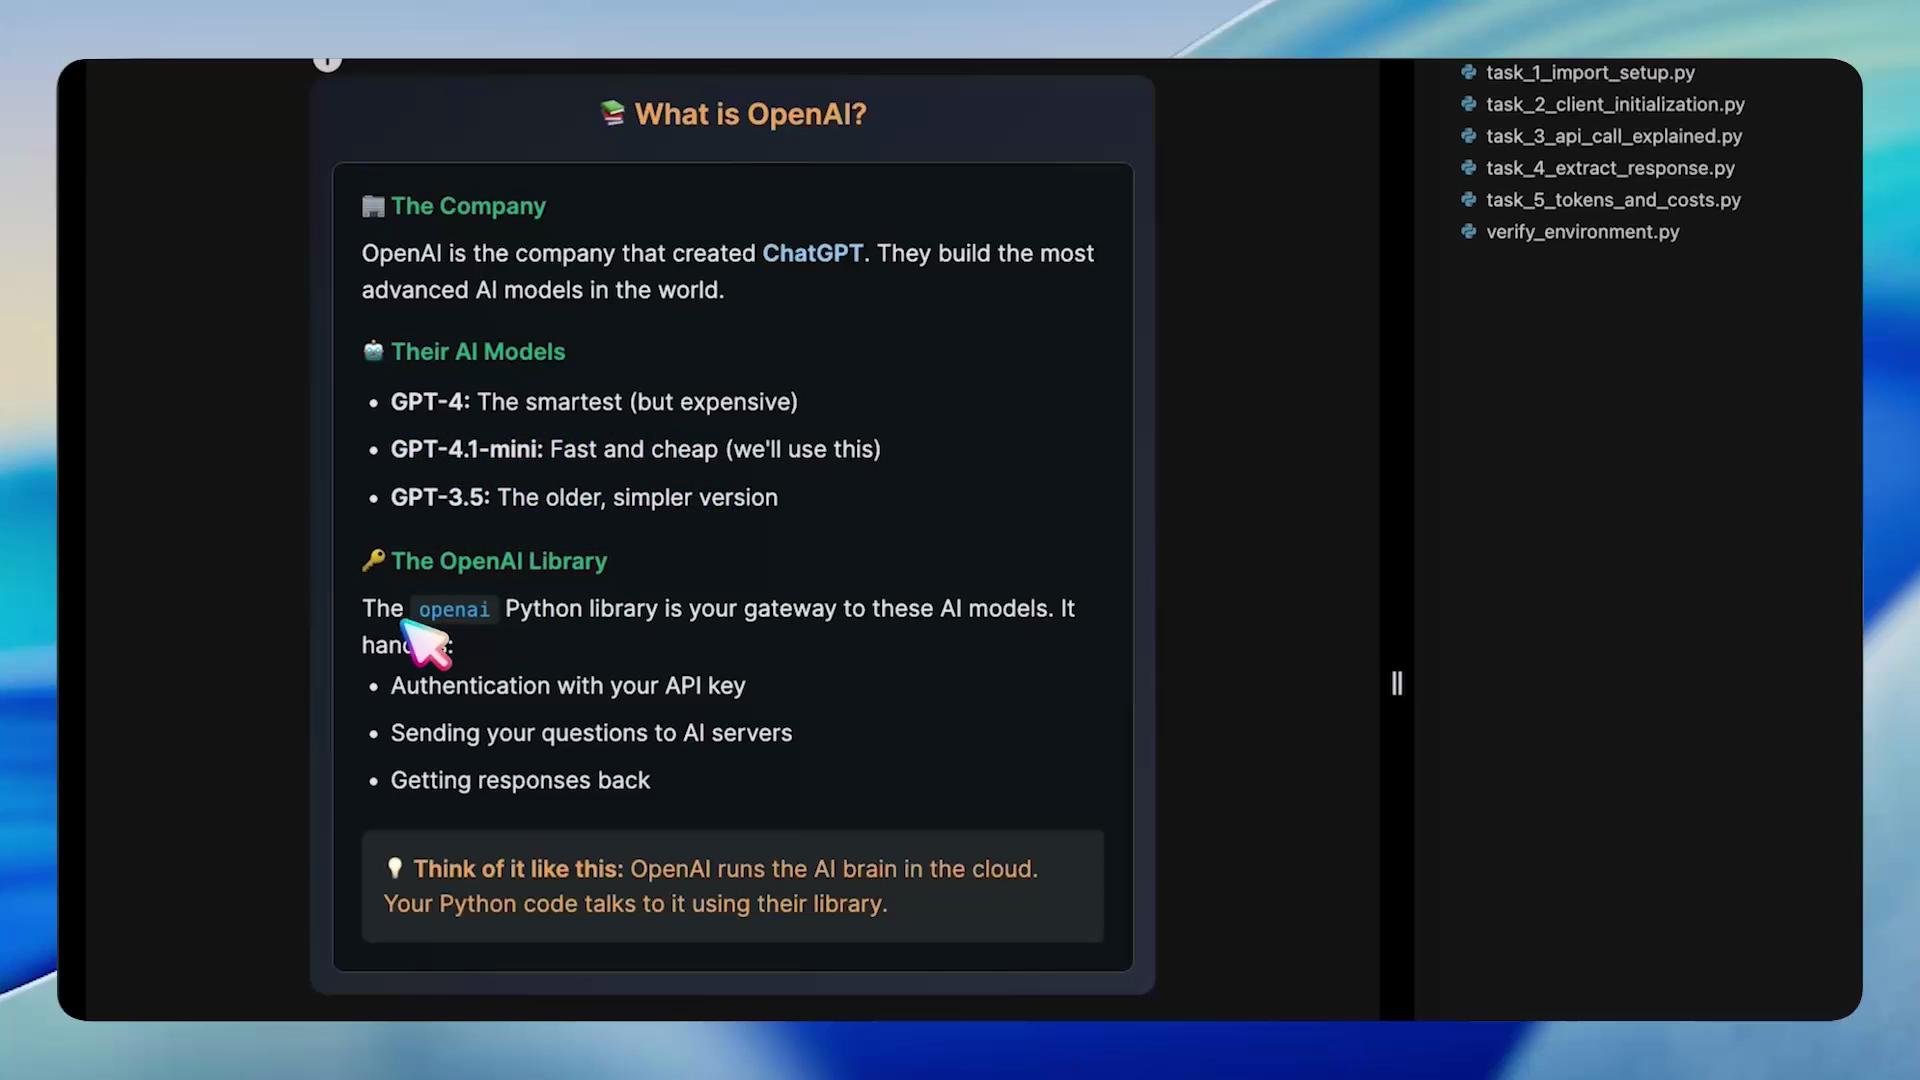
[OpenAI](https://openai.com) builds ChatGPT and families of large language models (e.g., GPT-4, GPT-4.1 Mini, GPT-3.5). The OpenAI Python client is the bridge between your Python code and the API.
## 1 — Verify the environment
Before writing code, verify that your runtime is ready: activate the virtual environment, confirm Python is available, ensure the OpenAI package is installed, and verify your API keys are present. Run these commands in the lab VM:
```bash theme={null}
source /root/venv/bin/activate
python3 /root/code/verify_environment.py
```
If verification succeeds, the script prints readiness checks and exits. If something fails, re-check your virtual environment and that packages (like the OpenAI Python package) are installed.
Environment variables commonly used in these examples:
| Environment Variable | Purpose |
| -------------------- | -------------------------------------------------------------- |
| OPENAI\_API\_KEY | Your secret API key (keep it private) |
| OPENAI\_API\_BASE | Optional API base URL (use when pointing to a custom endpoint) |
## What is OpenAI?
[OpenAI](https://openai.com) builds ChatGPT and families of large language models (e.g., GPT-4, GPT-4.1 Mini, GPT-3.5). The OpenAI Python client is the bridge between your Python code and the API.
 ## Task 1 — Import required libraries
Open `task_1_import_setup.py`. You need to import the OpenAI client library and the `os` module to read environment variables. The following file shows the required imports and writes a completion marker for the lab system.
```python theme={null}
#!/usr/bin/env python3
"""
Task 1: Import Required Libraries
Learn what libraries we need for AI API calls.
"""
# Step 1: Import the OpenAI library
# This library helps us talk to AI models
import openai
# Step 2: Import os for environment variables
# This helps us access API keys safely
import os
print("✅ Step 1 Complete: Libraries imported!")
print("- openai: For making API calls")
print("- os: For accessing environment variables")
# Create marker for the automated lab system
os.makedirs("/root/markers", exist_ok=True)
with open("/root/markers/task1_imports_complete.txt", "w") as f:
f.write("SUCCESS")
```
Run it like this:
```bash theme={null}
root@controlplane ~/code via v3.12.3 (venv) ❯ python3 /root/code/task_1_import_setup.py
✅ Step 1 Complete: Libraries imported!
- openai: For making API calls
- os: For accessing environment variables
```
## Authentication and client setup
To authenticate you need:
* OPENAI\_API\_KEY — your secret API key
* OPENAI\_API\_BASE — (optional) custom API base URL
Keep these values out of source control. Use environment variables, a secrets manager, or CI secrets.
## Task 2 — Initialize the OpenAI client
Open `task_2_client_initialization.py` and initialize the OpenAI client using environment variables. This example creates a client object you can reuse across requests.
```python theme={null}
#!/usr/bin/env python3
"""
Task 2: Initialize the OpenAI client
Set up the client using environment variables.
"""
import openai
import os
client = openai.OpenAI(
api_key=os.getenv("OPENAI_API_KEY"),
api_base=os.getenv("OPENAI_API_BASE")
)
print("✅ Step 2 Complete: Connected to OpenAI!")
api_key_preview = os.getenv('OPENAI_API_KEY')[:10] + "..." if os.getenv('OPENAI_API_KEY') else "(not set)"
print(f"- API Key: {api_key_preview}")
print(f"- Base URL: {os.getenv('OPENAI_API_BASE')}")
```
Example run:
```bash theme={null}
root@controlplane ~/code via v3.12.3 (venv) ❯ python3 /root/code/task_2_client_initialization.py
✅ Step 2 Complete: Connected to OpenAI!
- API Key: Sk-kKA1-86...
- Base URL: https://dev.kk-ai-keys.kodekloud.com/v1
```
If client initialization fails, confirm your environment variables are set and that the model you request is available for your account.
## Chat completions — the basics
Chat completions implement conversational interactions. You send an ordered list of messages (with roles) and the model returns assistant messages.
Minimal Python pattern:
```python theme={null}
client.chat.completions.create(
model="openai/gpt-4.1-mini",
messages=[
{"role": "user", "content": "Your question here"}
]
)
```
Roles:
* system — high-level instructions that define behavior
* user — user input
* assistant — model replies
## Task 3 — Make an API call
Open `task_3_api_call_explained.py`. Configure the model and messages, then make a call where the AI introduces itself.
```python theme={null}
#!/usr/bin/env python3
"""
Task 3: Make your first API call
Send a simple user message and print the full response.
"""
import openai
import os
client = openai.OpenAI(
api_key=os.getenv("OPENAI_API_KEY"),
api_base=os.getenv("OPENAI_API_BASE")
)
response = client.chat.completions.create(
model="openai/gpt-4.1-mini",
messages=[
{"role": "user", "content": "Hello AI, please introduce yourself"}
]
)
print("✅ API Call Successful!")
print()
print("🤖 AI said:")
print(response.choices[0].message.content)
print()
print(f"📊 Total tokens used: {response.usage.total_tokens}")
```
Example output:
```bash theme={null}
root@controlplane ~/code via v3.12.3 (venv) ❯ python3 /root/code/task_3_api_call_explained.py
✅ API Call Successful!
🤖 AI said:
Hello! I'm ChatGPT, your AI assistant here to help with a wide range of tasks—from answering questions and providing explanations to creative writing and problem-solving. How can I assist you today?
📊 Total tokens used: 53
```
If you receive PermissionDenied or "model not supported" errors, switch to a model available on your account or check API permissions.
## Task 4 — Extract the AI's response
Responses contain nested structures. The straightforward path to the assistant's reply is:
```text theme={null}
response.choices[0].message.content
```
Open `task_4_extract_response.py` to extract and print that text.
```python theme={null}
#!/usr/bin/env python3
"""
Task 4: Extract the AI's response
Show how to retrieve the assistant's message from the response object.
"""
import openai
import os
client = openai.OpenAI(
api_key=os.getenv("OPENAI_API_KEY"),
api_base=os.getenv("OPENAI_API_BASE")
)
response = client.chat.completions.create(
model="openai/gpt-4.1-mini",
messages=[
{"role": "user", "content": "What is Python in one sentence?"}
]
)
ai_text = response.choices[0].message.content
print("🍬 Successfully extracted the AI's response!")
print("\n" + "="*60)
print("Question: What is Python in one sentence?")
print("\nAI's Answer:")
print(ai_text)
print("="*60)
# Show the golden path
print("\n🔑 THE GOLDEN PATH - Memorize this:")
print("response.choices[0].message.content")
```
Example output:
```bash theme={null}
root@controlplane ~/code via v3.12.3 (venv) ❯ python3 /root/code/task_4_extract_response.py
🍬 Successfully extracted the AI's response!
============================================================
Question: What is Python in one sentence?
AI's Answer:
Python is a high-level, interpreted programming language known for its readability, simplicity, and versatility across various applications.
============================================================
🔑 THE GOLDEN PATH - Memorize this:
response.choices[0].message.content
✅ Task 4 completed! You now know how to extract AI responses!
```
## Tokens and costs
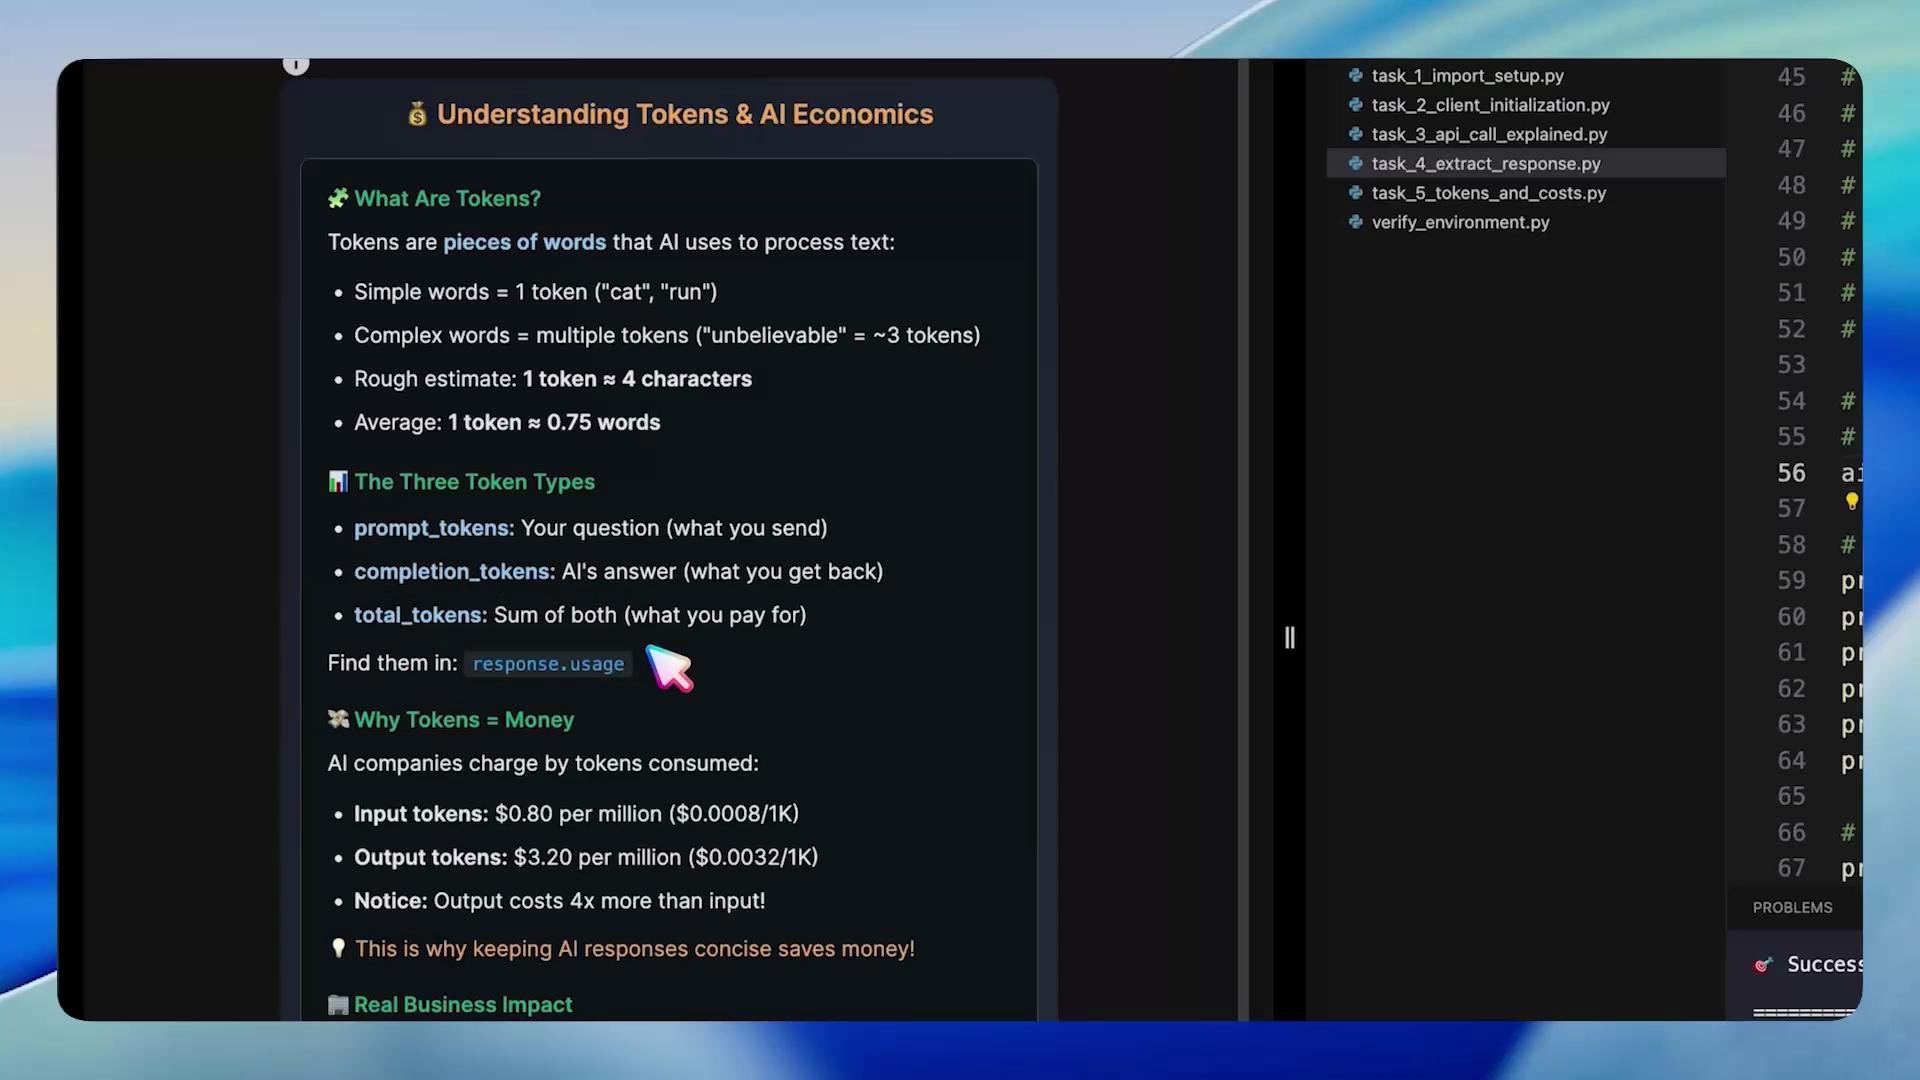
Tokens are the billing and processing unit used by models. Every request consumes tokens from your account:
| Token Type | What it represents | Example |
| ------------------------ | ---------------------------------------- | ---------------------------- |
| prompt/input tokens | Tokens consumed by the input you send | Your question text |
| completion/output tokens | Tokens generated by the model as a reply | The assistant's answer |
| total tokens | Sum of prompt + completion | Billed total for the request |
Output tokens are often priced higher than input tokens, so being concise helps control costs.
Keep your API key secure. Never hard-code it in scripts or check it into version control. Use environment variables or a secrets manager.
## Task 1 — Import required libraries
Open `task_1_import_setup.py`. You need to import the OpenAI client library and the `os` module to read environment variables. The following file shows the required imports and writes a completion marker for the lab system.
```python theme={null}
#!/usr/bin/env python3
"""
Task 1: Import Required Libraries
Learn what libraries we need for AI API calls.
"""
# Step 1: Import the OpenAI library
# This library helps us talk to AI models
import openai
# Step 2: Import os for environment variables
# This helps us access API keys safely
import os
print("✅ Step 1 Complete: Libraries imported!")
print("- openai: For making API calls")
print("- os: For accessing environment variables")
# Create marker for the automated lab system
os.makedirs("/root/markers", exist_ok=True)
with open("/root/markers/task1_imports_complete.txt", "w") as f:
f.write("SUCCESS")
```
Run it like this:
```bash theme={null}
root@controlplane ~/code via v3.12.3 (venv) ❯ python3 /root/code/task_1_import_setup.py
✅ Step 1 Complete: Libraries imported!
- openai: For making API calls
- os: For accessing environment variables
```
## Authentication and client setup
To authenticate you need:
* OPENAI\_API\_KEY — your secret API key
* OPENAI\_API\_BASE — (optional) custom API base URL
Keep these values out of source control. Use environment variables, a secrets manager, or CI secrets.
## Task 2 — Initialize the OpenAI client
Open `task_2_client_initialization.py` and initialize the OpenAI client using environment variables. This example creates a client object you can reuse across requests.
```python theme={null}
#!/usr/bin/env python3
"""
Task 2: Initialize the OpenAI client
Set up the client using environment variables.
"""
import openai
import os
client = openai.OpenAI(
api_key=os.getenv("OPENAI_API_KEY"),
api_base=os.getenv("OPENAI_API_BASE")
)
print("✅ Step 2 Complete: Connected to OpenAI!")
api_key_preview = os.getenv('OPENAI_API_KEY')[:10] + "..." if os.getenv('OPENAI_API_KEY') else "(not set)"
print(f"- API Key: {api_key_preview}")
print(f"- Base URL: {os.getenv('OPENAI_API_BASE')}")
```
Example run:
```bash theme={null}
root@controlplane ~/code via v3.12.3 (venv) ❯ python3 /root/code/task_2_client_initialization.py
✅ Step 2 Complete: Connected to OpenAI!
- API Key: Sk-kKA1-86...
- Base URL: https://dev.kk-ai-keys.kodekloud.com/v1
```
If client initialization fails, confirm your environment variables are set and that the model you request is available for your account.
## Chat completions — the basics
Chat completions implement conversational interactions. You send an ordered list of messages (with roles) and the model returns assistant messages.
Minimal Python pattern:
```python theme={null}
client.chat.completions.create(
model="openai/gpt-4.1-mini",
messages=[
{"role": "user", "content": "Your question here"}
]
)
```
Roles:
* system — high-level instructions that define behavior
* user — user input
* assistant — model replies
## Task 3 — Make an API call
Open `task_3_api_call_explained.py`. Configure the model and messages, then make a call where the AI introduces itself.
```python theme={null}
#!/usr/bin/env python3
"""
Task 3: Make your first API call
Send a simple user message and print the full response.
"""
import openai
import os
client = openai.OpenAI(
api_key=os.getenv("OPENAI_API_KEY"),
api_base=os.getenv("OPENAI_API_BASE")
)
response = client.chat.completions.create(
model="openai/gpt-4.1-mini",
messages=[
{"role": "user", "content": "Hello AI, please introduce yourself"}
]
)
print("✅ API Call Successful!")
print()
print("🤖 AI said:")
print(response.choices[0].message.content)
print()
print(f"📊 Total tokens used: {response.usage.total_tokens}")
```
Example output:
```bash theme={null}
root@controlplane ~/code via v3.12.3 (venv) ❯ python3 /root/code/task_3_api_call_explained.py
✅ API Call Successful!
🤖 AI said:
Hello! I'm ChatGPT, your AI assistant here to help with a wide range of tasks—from answering questions and providing explanations to creative writing and problem-solving. How can I assist you today?
📊 Total tokens used: 53
```
If you receive PermissionDenied or "model not supported" errors, switch to a model available on your account or check API permissions.
## Task 4 — Extract the AI's response
Responses contain nested structures. The straightforward path to the assistant's reply is:
```text theme={null}
response.choices[0].message.content
```
Open `task_4_extract_response.py` to extract and print that text.
```python theme={null}
#!/usr/bin/env python3
"""
Task 4: Extract the AI's response
Show how to retrieve the assistant's message from the response object.
"""
import openai
import os
client = openai.OpenAI(
api_key=os.getenv("OPENAI_API_KEY"),
api_base=os.getenv("OPENAI_API_BASE")
)
response = client.chat.completions.create(
model="openai/gpt-4.1-mini",
messages=[
{"role": "user", "content": "What is Python in one sentence?"}
]
)
ai_text = response.choices[0].message.content
print("🍬 Successfully extracted the AI's response!")
print("\n" + "="*60)
print("Question: What is Python in one sentence?")
print("\nAI's Answer:")
print(ai_text)
print("="*60)
# Show the golden path
print("\n🔑 THE GOLDEN PATH - Memorize this:")
print("response.choices[0].message.content")
```
Example output:
```bash theme={null}
root@controlplane ~/code via v3.12.3 (venv) ❯ python3 /root/code/task_4_extract_response.py
🍬 Successfully extracted the AI's response!
============================================================
Question: What is Python in one sentence?
AI's Answer:
Python is a high-level, interpreted programming language known for its readability, simplicity, and versatility across various applications.
============================================================
🔑 THE GOLDEN PATH - Memorize this:
response.choices[0].message.content
✅ Task 4 completed! You now know how to extract AI responses!
```
## Tokens and costs
Tokens are the billing and processing unit used by models. Every request consumes tokens from your account:
| Token Type | What it represents | Example |
| ------------------------ | ---------------------------------------- | ---------------------------- |
| prompt/input tokens | Tokens consumed by the input you send | Your question text |
| completion/output tokens | Tokens generated by the model as a reply | The assistant's answer |
| total tokens | Sum of prompt + completion | Billed total for the request |
Output tokens are often priced higher than input tokens, so being concise helps control costs.
Keep your API key secure. Never hard-code it in scripts or check it into version control. Use environment variables or a secrets manager.
 ## Task 5 — Extract token usage and compute cost
Open `task_5_tokens_and_costs.py`. The response includes a `usage` object with three fields: `prompt_tokens`, `completion_tokens`, and `total_tokens`. Use these values to compute a simple cost estimate with your per-token pricing.
```python theme={null}
#!/usr/bin/env python3
"""
Task 5: Extract token usage and compute cost
Read usage from the response and print a cost breakdown.
"""
import openai
import os
# Example per-token prices (replace with real prices for accurate cost)
INPUT_TOKEN_PRICE = 0.000000789 # example price per input token in dollars
OUTPUT_TOKEN_PRICE = 0.0000023 # example price per output token in dollars
client = openai.OpenAI(
api_key=os.getenv("OPENAI_API_KEY"),
api_base=os.getenv("OPENAI_API_BASE")
)
response = client.chat.completions.create(
model="openai/gpt-4.1-mini",
messages=[
{"role": "user", "content": "Explain what an API is in two sentences."}
]
)
input_tokens = response.usage.prompt_tokens
output_tokens = response.usage.completion_tokens
total_tokens = response.usage.total_tokens
input_cost = input_tokens * INPUT_TOKEN_PRICE
output_cost = output_tokens * OUTPUT_TOKEN_PRICE
total_cost = input_cost + output_cost
print("📊 Token Usage Report:")
print("="*50)
print(f" Your question used: {input_tokens} tokens")
print(f" AI's response used: {output_tokens} tokens")
print(f" Total tokens billed: {total_tokens} tokens")
print("="*50)
print("\n🧾 Cost Breakdown for This Call:")
print(f"Input cost: ${input_cost:.6f} ({input_tokens} tokens)")
print(f"Output cost: ${output_cost:.6f} ({output_tokens} tokens)")
print(f"TOTAL COST: ${total_cost:.6f}")
```
Sample output (varies per request and model):
```bash theme={null}
root@controlplane ~/code via v3.12.3 (venv) ❯ python3 /root/code/task_5_tokens_and_costs.py
📊 Token Usage Report:
==================================================
Your question used: 19 tokens
AI's response used: 301 tokens
Total tokens billed: 320 tokens
==================================================
🧾 Cost Breakdown for This Call:
Input cost: $0.000015 (19 tokens)
Output cost: $0.000693 (301 tokens)
TOTAL COST: $0.000708
```
Be careful with long model responses or high-frequency calls — costs can add up quickly. Use concise prompts, set max tokens when needed, and monitor usage.
## Task 5 — Extract token usage and compute cost
Open `task_5_tokens_and_costs.py`. The response includes a `usage` object with three fields: `prompt_tokens`, `completion_tokens`, and `total_tokens`. Use these values to compute a simple cost estimate with your per-token pricing.
```python theme={null}
#!/usr/bin/env python3
"""
Task 5: Extract token usage and compute cost
Read usage from the response and print a cost breakdown.
"""
import openai
import os
# Example per-token prices (replace with real prices for accurate cost)
INPUT_TOKEN_PRICE = 0.000000789 # example price per input token in dollars
OUTPUT_TOKEN_PRICE = 0.0000023 # example price per output token in dollars
client = openai.OpenAI(
api_key=os.getenv("OPENAI_API_KEY"),
api_base=os.getenv("OPENAI_API_BASE")
)
response = client.chat.completions.create(
model="openai/gpt-4.1-mini",
messages=[
{"role": "user", "content": "Explain what an API is in two sentences."}
]
)
input_tokens = response.usage.prompt_tokens
output_tokens = response.usage.completion_tokens
total_tokens = response.usage.total_tokens
input_cost = input_tokens * INPUT_TOKEN_PRICE
output_cost = output_tokens * OUTPUT_TOKEN_PRICE
total_cost = input_cost + output_cost
print("📊 Token Usage Report:")
print("="*50)
print(f" Your question used: {input_tokens} tokens")
print(f" AI's response used: {output_tokens} tokens")
print(f" Total tokens billed: {total_tokens} tokens")
print("="*50)
print("\n🧾 Cost Breakdown for This Call:")
print(f"Input cost: ${input_cost:.6f} ({input_tokens} tokens)")
print(f"Output cost: ${output_cost:.6f} ({output_tokens} tokens)")
print(f"TOTAL COST: ${total_cost:.6f}")
```
Sample output (varies per request and model):
```bash theme={null}
root@controlplane ~/code via v3.12.3 (venv) ❯ python3 /root/code/task_5_tokens_and_costs.py
📊 Token Usage Report:
==================================================
Your question used: 19 tokens
AI's response used: 301 tokens
Total tokens billed: 320 tokens
==================================================
🧾 Cost Breakdown for This Call:
Input cost: $0.000015 (19 tokens)
Output cost: $0.000693 (301 tokens)
TOTAL COST: $0.000708
```
Be careful with long model responses or high-frequency calls — costs can add up quickly. Use concise prompts, set max tokens when needed, and monitor usage.
 ## Wrap-up
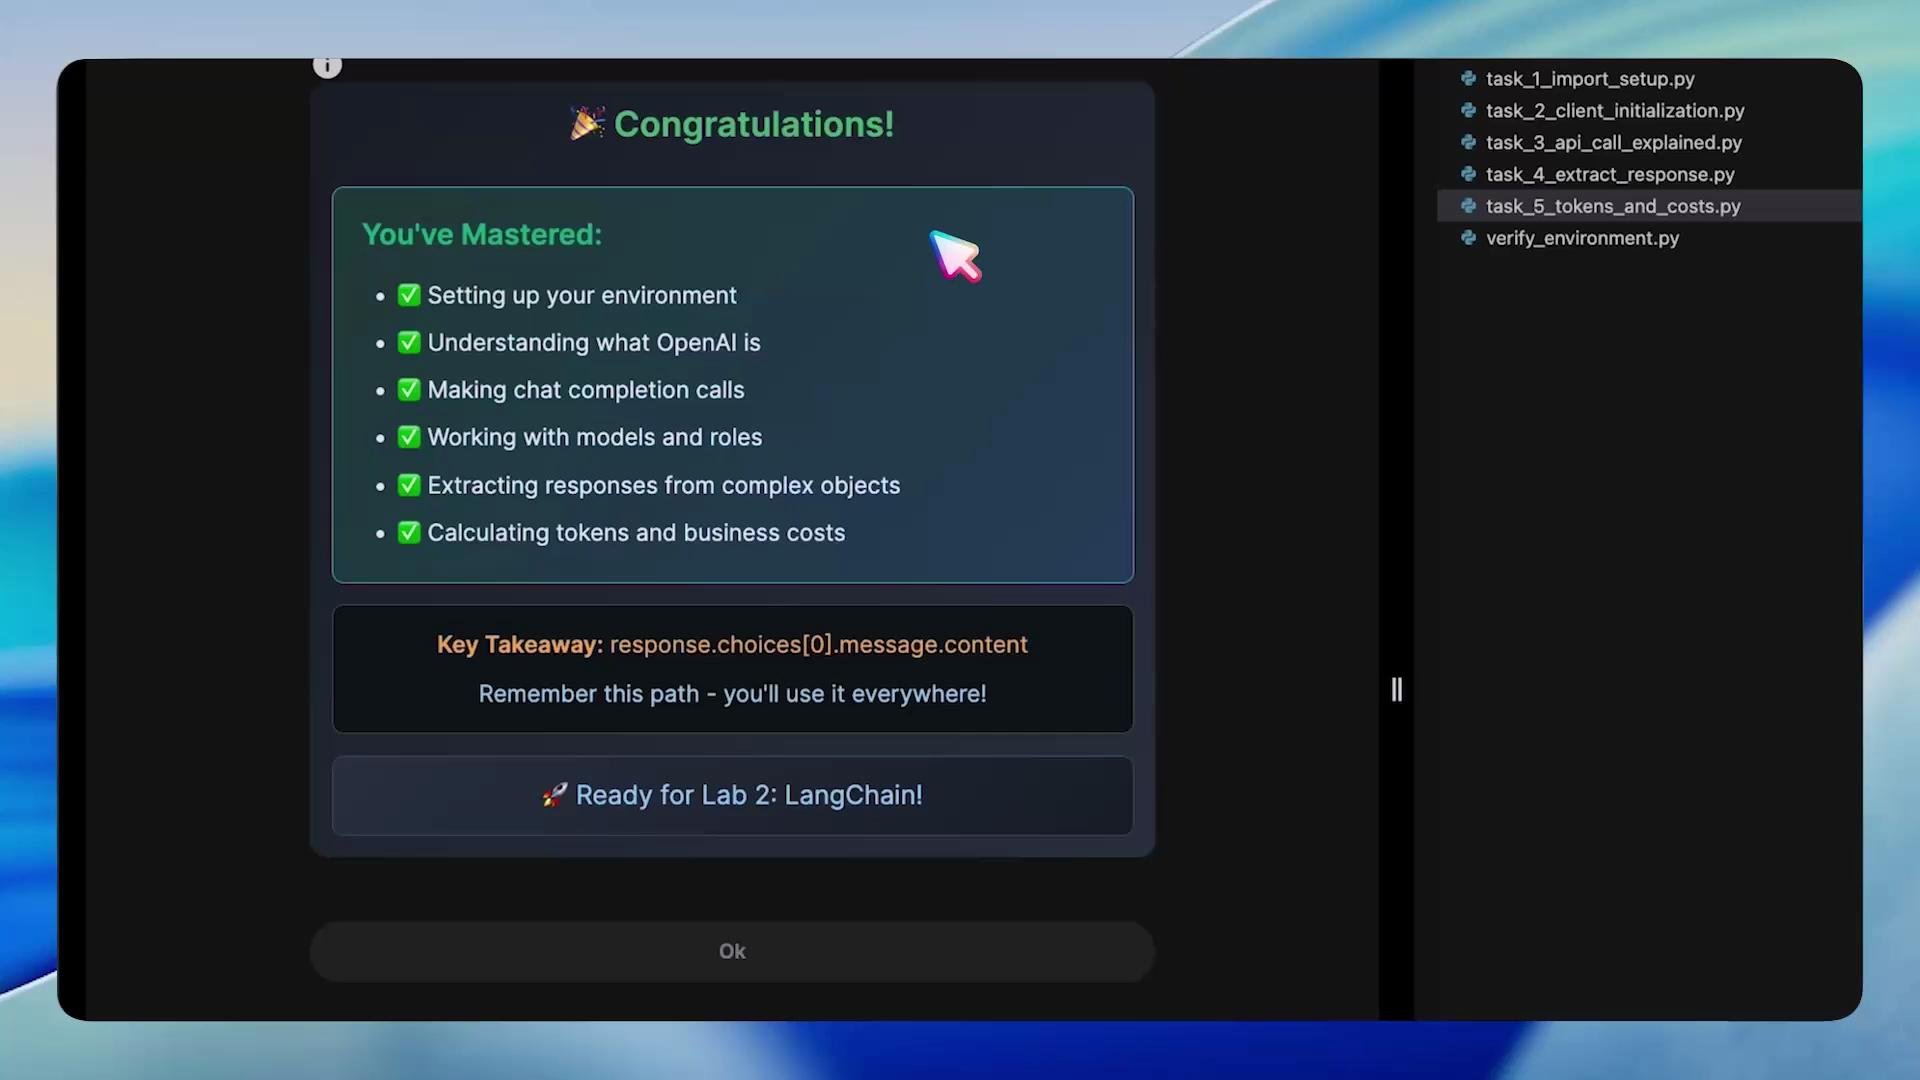
Congrats — by completing this lab you:
* Verified your environment and runtime
* Initialized the OpenAI Python client
* Made chat completion requests
* Extracted assistant replies via response.choices\[0].message.content
* Read token usage and estimated costs
Next steps: experiment with system messages to control behavior, try longer multi-turn conversations, and test different models to compare quality and cost.
## Quick reference and links
* OpenAI API docs: [https://platform.openai.com/docs](https://platform.openai.com/docs)
* OpenAI homepage: [https://openai.com](https://openai.com)
* LangChain (multi-provider tooling): [https://learn.kodekloud.com/user/courses/langchain](https://learn.kodekloud.com/user/courses/langchain)
Relevant local files in this lab:
| File | Purpose |
| ---------------------------------- | --------------------------------------------- |
| verify\_environment.py | Check Python, venv, and environment variables |
| task\_1\_import\_setup.py | Import libraries and mark completion |
| task\_2\_client\_initialization.py | Initialize the OpenAI client |
| task\_3\_api\_call\_explained.py | Send a simple chat completion |
| task\_4\_extract\_response.py | Extract the assistant message |
| task\_5\_tokens\_and\_costs.py | Read token usage and compute estimated cost |
You're ready to build on this foundation and explore richer prompts, system instructions, and multi-turn dialogues. Good luck!
## Wrap-up
Congrats — by completing this lab you:
* Verified your environment and runtime
* Initialized the OpenAI Python client
* Made chat completion requests
* Extracted assistant replies via response.choices\[0].message.content
* Read token usage and estimated costs
Next steps: experiment with system messages to control behavior, try longer multi-turn conversations, and test different models to compare quality and cost.
## Quick reference and links
* OpenAI API docs: [https://platform.openai.com/docs](https://platform.openai.com/docs)
* OpenAI homepage: [https://openai.com](https://openai.com)
* LangChain (multi-provider tooling): [https://learn.kodekloud.com/user/courses/langchain](https://learn.kodekloud.com/user/courses/langchain)
Relevant local files in this lab:
| File | Purpose |
| ---------------------------------- | --------------------------------------------- |
| verify\_environment.py | Check Python, venv, and environment variables |
| task\_1\_import\_setup.py | Import libraries and mark completion |
| task\_2\_client\_initialization.py | Initialize the OpenAI client |
| task\_3\_api\_call\_explained.py | Send a simple chat completion |
| task\_4\_extract\_response.py | Extract the assistant message |
| task\_5\_tokens\_and\_costs.py | Read token usage and compute estimated cost |
You're ready to build on this foundation and explore richer prompts, system instructions, and multi-turn dialogues. Good luck!