> ## Documentation Index
> Fetch the complete documentation index at: https://notes.kodekloud.com/llms.txt
> Use this file to discover all available pages before exploring further.
# Demo Setting Up Development Environment
> Guide to setting up a local Jupyter development environment, securing an OpenAI API key with a .env, and using GitHub for version control and safe commits
Welcome to the first demo lesson.
In this guide you'll set up a local development environment for working with Jupyter Notebook and GitHub, then securely store an OpenAI API key for use in your notebooks. Jupyter Notebook is ideal for step-by-step prototyping, visualization, and interactive documentation — particularly useful for data science, machine learning, and teaching. Pairing Jupyter with GitHub gives you version control, collaboration, and cloud backup so your notebooks remain reproducible and shareable.
This walkthrough covers:
* Installing Anaconda to run Jupyter
* Launching and using Jupyter Notebook (kernels, running cells, common pitfalls)
* Creating a secure `.env` file for your API key and loading it in Python
* Creating a GitHub repository and committing your project safely
***
## 1) Install Anaconda (to run Jupyter)
1. Visit the Anaconda distribution page: [https://www.anaconda.com/products/distribution](https://www.anaconda.com/products/distribution)
2. Download the free distribution for your operating system.
3. You can skip account registration and proceed with the installer.
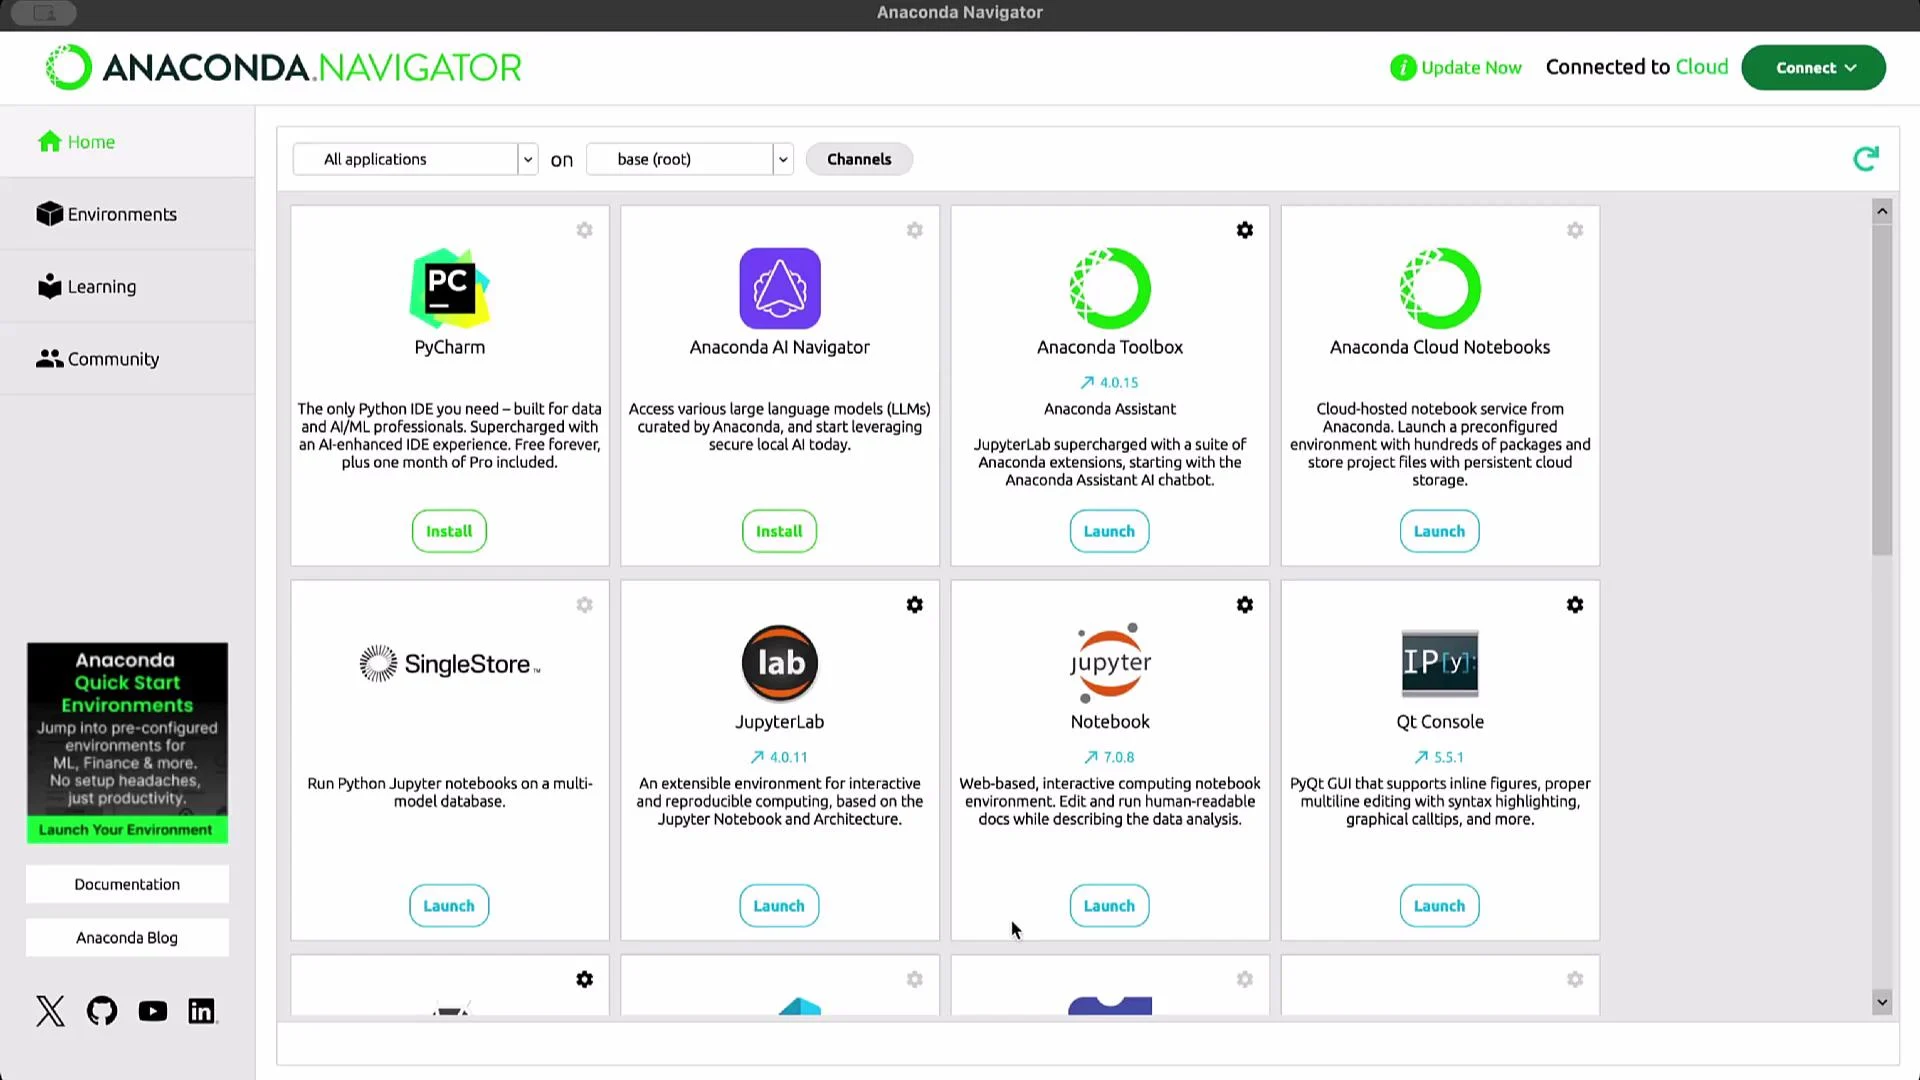
4. After installation, launch Anaconda Navigator to access Jupyter Notebook and other tools.
 ***
## 2) Launching Jupyter Notebook
* Start Jupyter Notebook from Anaconda Navigator (or run `jupyter notebook` from a terminal). It opens in your default browser at a local URL such as `http://localhost:8888/tree`.
* Create a project folder: click New → New Folder, rename it (e.g., `Demo Project`) and open it.
* Create a new notebook inside the folder: New → Python 3 (or an available kernel).
* Rename the notebook by clicking the title (e.g., change "Untitled" to `Demo`).
The menu bar contains File, Edit, View, Run, Kernel, Settings, Help. The toolbar provides quick actions: run cell, move cells, cut/copy/paste, restart kernel, etc.
***
## 2) Launching Jupyter Notebook
* Start Jupyter Notebook from Anaconda Navigator (or run `jupyter notebook` from a terminal). It opens in your default browser at a local URL such as `http://localhost:8888/tree`.
* Create a project folder: click New → New Folder, rename it (e.g., `Demo Project`) and open it.
* Create a new notebook inside the folder: New → Python 3 (or an available kernel).
* Rename the notebook by clicking the title (e.g., change "Untitled" to `Demo`).
The menu bar contains File, Edit, View, Run, Kernel, Settings, Help. The toolbar provides quick actions: run cell, move cells, cut/copy/paste, restart kernel, etc.
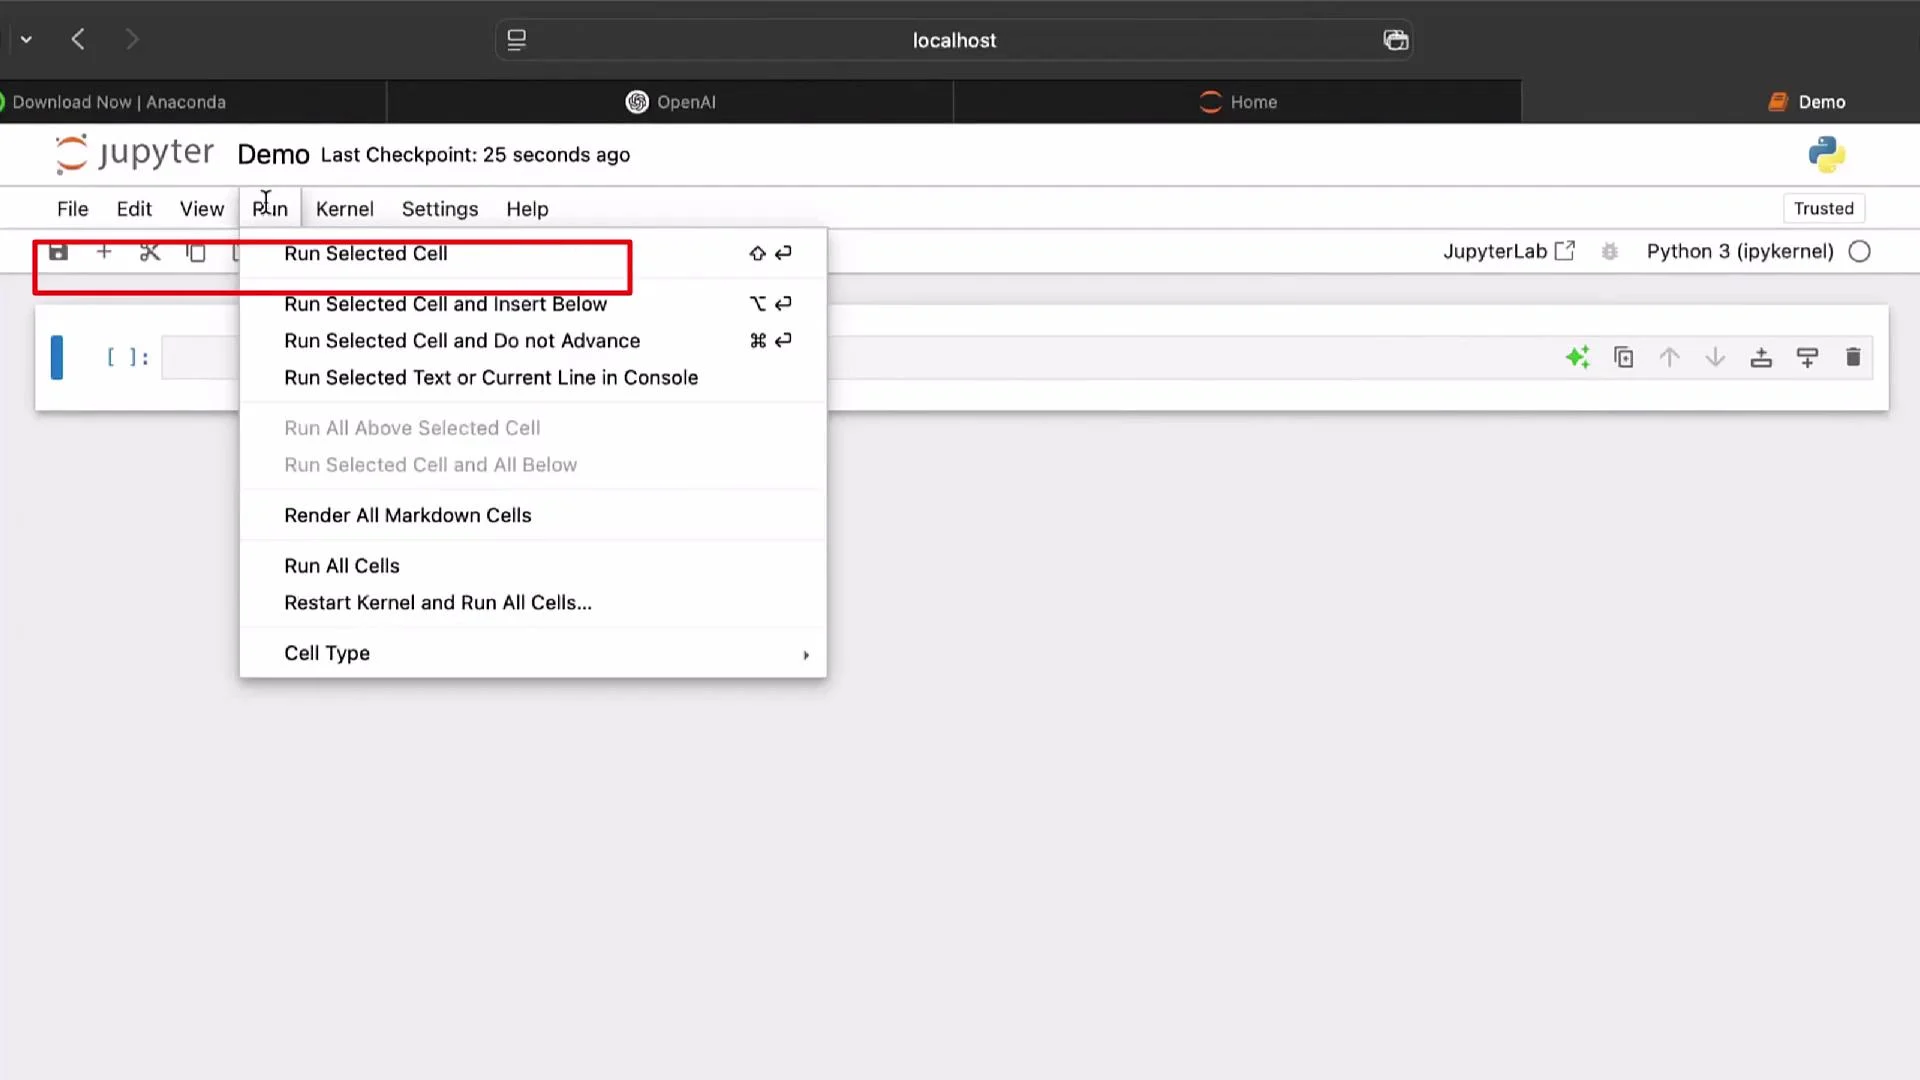 ### Kernel & run controls — quick reference
| Action | What it does |
| ------------ | -------------------------------------------------------------------------------------- |
| Interrupt | Stops currently executing code (useful for infinite loops or long-running operations). |
| Restart | Restarts the kernel and clears in-memory state (variables, imports). |
| Shutdown | Ends the kernel session. |
| Run cell (▶) | Executes the current cell and advances depending on the option chosen. |
Tip: If your notebook behaves unexpectedly (old variables, mismatched outputs), use Kernel → Restart & Clear Output to get a clean runtime and reproduce results deterministically.
***
## 3) Examples — running cells and managing the kernel
Infinite loop example (run with caution):
```python theme={null}
while True:
print("Hi")
```
If you execute this, it will continually print until you interrupt the kernel (Kernel → Interrupt or the stop button).
Common error example (Python is case-sensitive):
```python theme={null}
while true:
print("hi")
```
This raises a `NameError` because `true` (lowercase) is not defined in Python. The correct boolean literal is `True`.
### Cell execution order and kernel state
Cells execute in the kernel's current state. If you modify a later cell but do not re-run it, the kernel will still use the previously executed value.
Example:
```python theme={null}
foo = 1 + 1
print(foo) # outputs: 2
```
If you later change another cell to:
```python theme={null}
foo = 1 + 1 + 1
# (but do not run this cell)
```
and then re-run the `print(foo)` cell without running the updated assignment cell, the output remains `2`. To update the kernel state, run the assignment cell or restart and re-run the notebook in order.
Restarting the kernel (Kernel → Restart & Clear Output) clears state and outputs and is useful to confirm reproducibility.
***
## 4) Store a secure `.env` file for your API key
Keeping secrets outside source control is essential. Create a `.env` file locally and never commit it.
Create `.env` programmatically (replace `YOUR_OPENAI_API_KEY` with your real key after you obtain it):
```python theme={null}
with open(".env", "w") as f:
f.write("OPENAI_API_KEY=YOUR_OPENAI_API_KEY")
```
Add `.env` to `.gitignore` before committing:
```text theme={null}
.env
```
Example `.env` content (do not paste real keys into shared or public files):
```text theme={null}
OPENAI_API_KEY=sk-XXXXXXXXXXXXXXXXXXXXXXXXXXXXXXXX
```
Do not commit `.env` or your API keys to GitHub. Keep secrets out of version control and use environment-specific secret management in production.
***
## 5) Getting your OpenAI API key
1. Go to the OpenAI dashboard: [https://platform.openai.com/account/api-keys](https://platform.openai.com/account/api-keys)
2. Log in or create an account.
3. From the dashboard, open Settings (cogwheel) → API keys.
4. Create a new secret key, give it a descriptive name (e.g., `Demo API Key final`), and copy it immediately — the secret is shown only once.
### Kernel & run controls — quick reference
| Action | What it does |
| ------------ | -------------------------------------------------------------------------------------- |
| Interrupt | Stops currently executing code (useful for infinite loops or long-running operations). |
| Restart | Restarts the kernel and clears in-memory state (variables, imports). |
| Shutdown | Ends the kernel session. |
| Run cell (▶) | Executes the current cell and advances depending on the option chosen. |
Tip: If your notebook behaves unexpectedly (old variables, mismatched outputs), use Kernel → Restart & Clear Output to get a clean runtime and reproduce results deterministically.
***
## 3) Examples — running cells and managing the kernel
Infinite loop example (run with caution):
```python theme={null}
while True:
print("Hi")
```
If you execute this, it will continually print until you interrupt the kernel (Kernel → Interrupt or the stop button).
Common error example (Python is case-sensitive):
```python theme={null}
while true:
print("hi")
```
This raises a `NameError` because `true` (lowercase) is not defined in Python. The correct boolean literal is `True`.
### Cell execution order and kernel state
Cells execute in the kernel's current state. If you modify a later cell but do not re-run it, the kernel will still use the previously executed value.
Example:
```python theme={null}
foo = 1 + 1
print(foo) # outputs: 2
```
If you later change another cell to:
```python theme={null}
foo = 1 + 1 + 1
# (but do not run this cell)
```
and then re-run the `print(foo)` cell without running the updated assignment cell, the output remains `2`. To update the kernel state, run the assignment cell or restart and re-run the notebook in order.
Restarting the kernel (Kernel → Restart & Clear Output) clears state and outputs and is useful to confirm reproducibility.
***
## 4) Store a secure `.env` file for your API key
Keeping secrets outside source control is essential. Create a `.env` file locally and never commit it.
Create `.env` programmatically (replace `YOUR_OPENAI_API_KEY` with your real key after you obtain it):
```python theme={null}
with open(".env", "w") as f:
f.write("OPENAI_API_KEY=YOUR_OPENAI_API_KEY")
```
Add `.env` to `.gitignore` before committing:
```text theme={null}
.env
```
Example `.env` content (do not paste real keys into shared or public files):
```text theme={null}
OPENAI_API_KEY=sk-XXXXXXXXXXXXXXXXXXXXXXXXXXXXXXXX
```
Do not commit `.env` or your API keys to GitHub. Keep secrets out of version control and use environment-specific secret management in production.
***
## 5) Getting your OpenAI API key
1. Go to the OpenAI dashboard: [https://platform.openai.com/account/api-keys](https://platform.openai.com/account/api-keys)
2. Log in or create an account.
3. From the dashboard, open Settings (cogwheel) → API keys.
4. Create a new secret key, give it a descriptive name (e.g., `Demo API Key final`), and copy it immediately — the secret is shown only once.
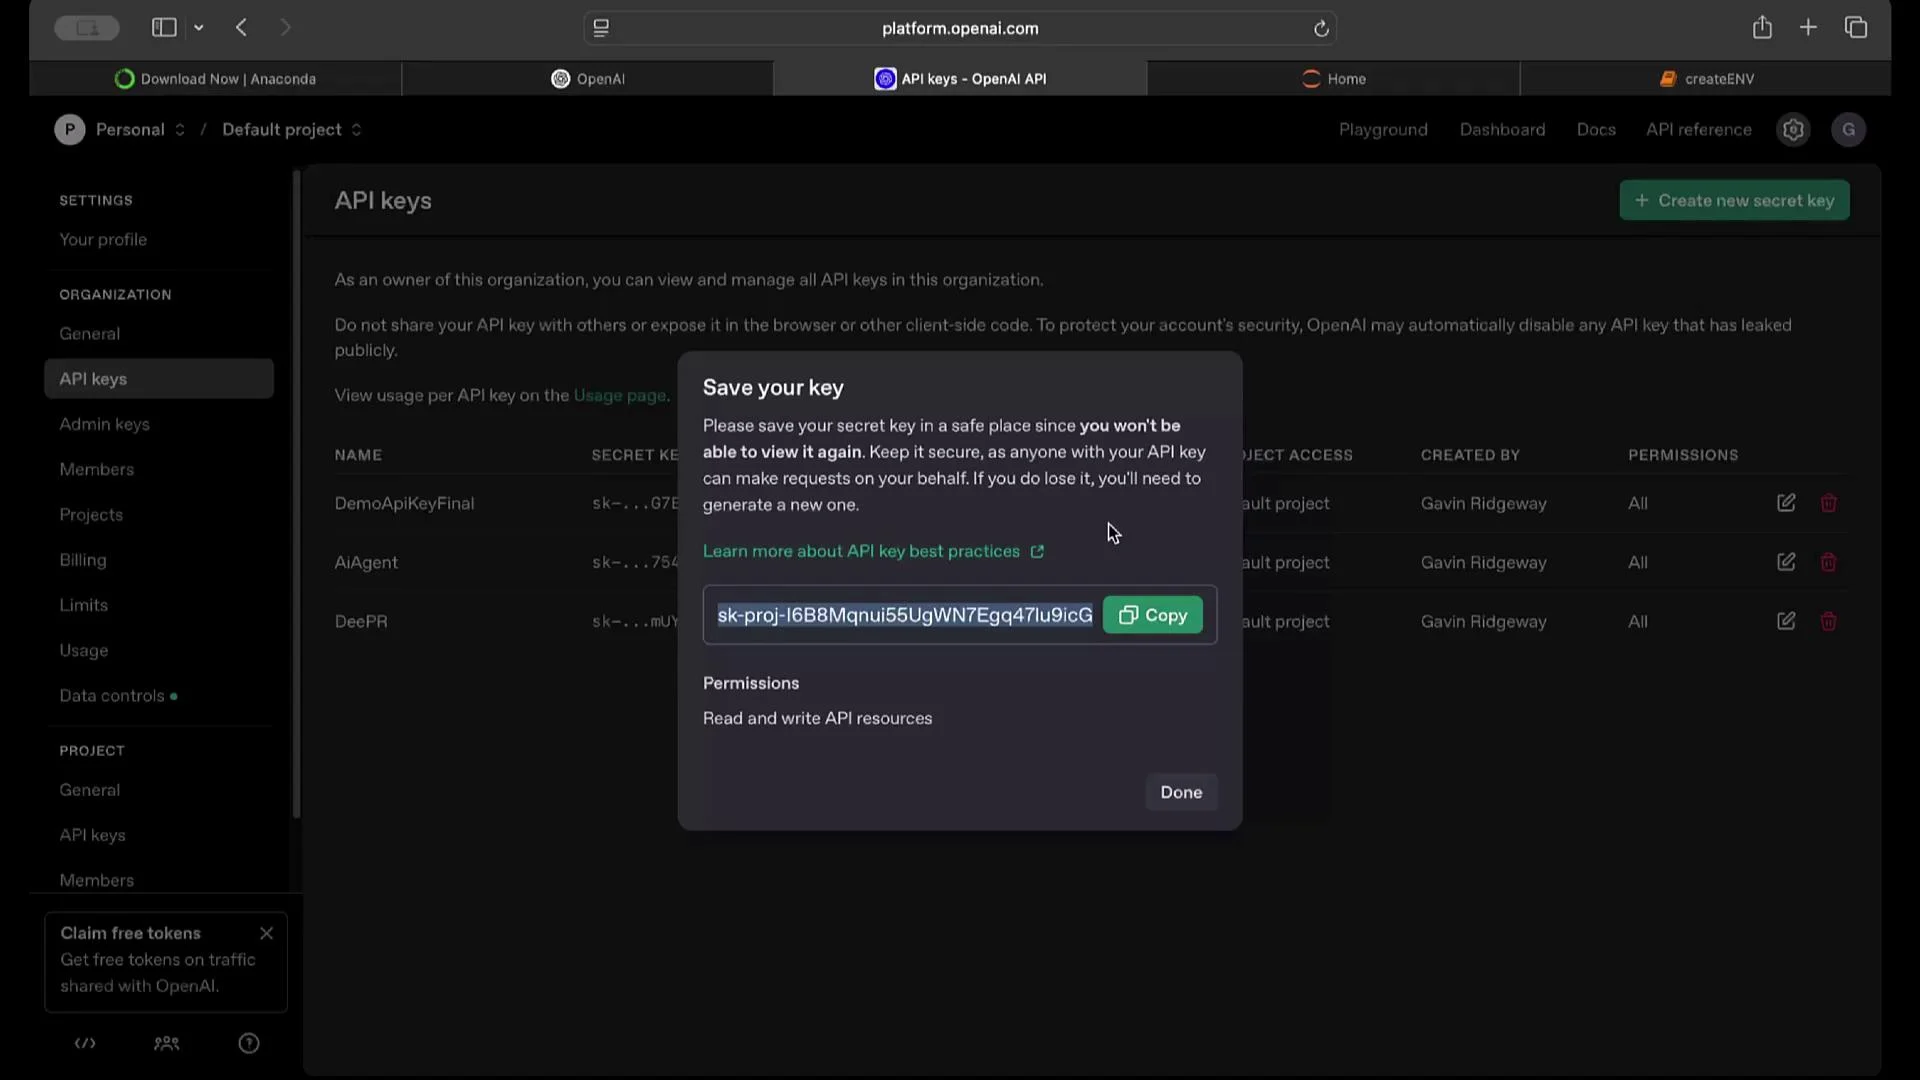 After creating the key, paste it into your `.env` file (or update the file manually).
***
## 6) Loading environment variables in Python
Install python-dotenv if not already installed:
```bash theme={null}
pip install python-dotenv
```
Load the `.env` and verify the key is present:
```python theme={null}
from dotenv import load_dotenv
import os
load_dotenv()
print(os.getenv("OPENAI_API_KEY") is not None) # Should print: True
```
***
## 7) Add a small code test to the notebook
Add a few simple cells to confirm everything runs:
```python theme={null}
print(1)
print("Hello World")
```
***
## 8) Set up a GitHub repository and commit safely
1. Sign in to GitHub: [https://github.com](https://github.com)
2. Create a new repository (e.g., `Demo-API-Setup`). Choose private if you prefer and add a README.
After creating the key, paste it into your `.env` file (or update the file manually).
***
## 6) Loading environment variables in Python
Install python-dotenv if not already installed:
```bash theme={null}
pip install python-dotenv
```
Load the `.env` and verify the key is present:
```python theme={null}
from dotenv import load_dotenv
import os
load_dotenv()
print(os.getenv("OPENAI_API_KEY") is not None) # Should print: True
```
***
## 7) Add a small code test to the notebook
Add a few simple cells to confirm everything runs:
```python theme={null}
print(1)
print("Hello World")
```
***
## 8) Set up a GitHub repository and commit safely
1. Sign in to GitHub: [https://github.com](https://github.com)
2. Create a new repository (e.g., `Demo-API-Setup`). Choose private if you prefer and add a README.
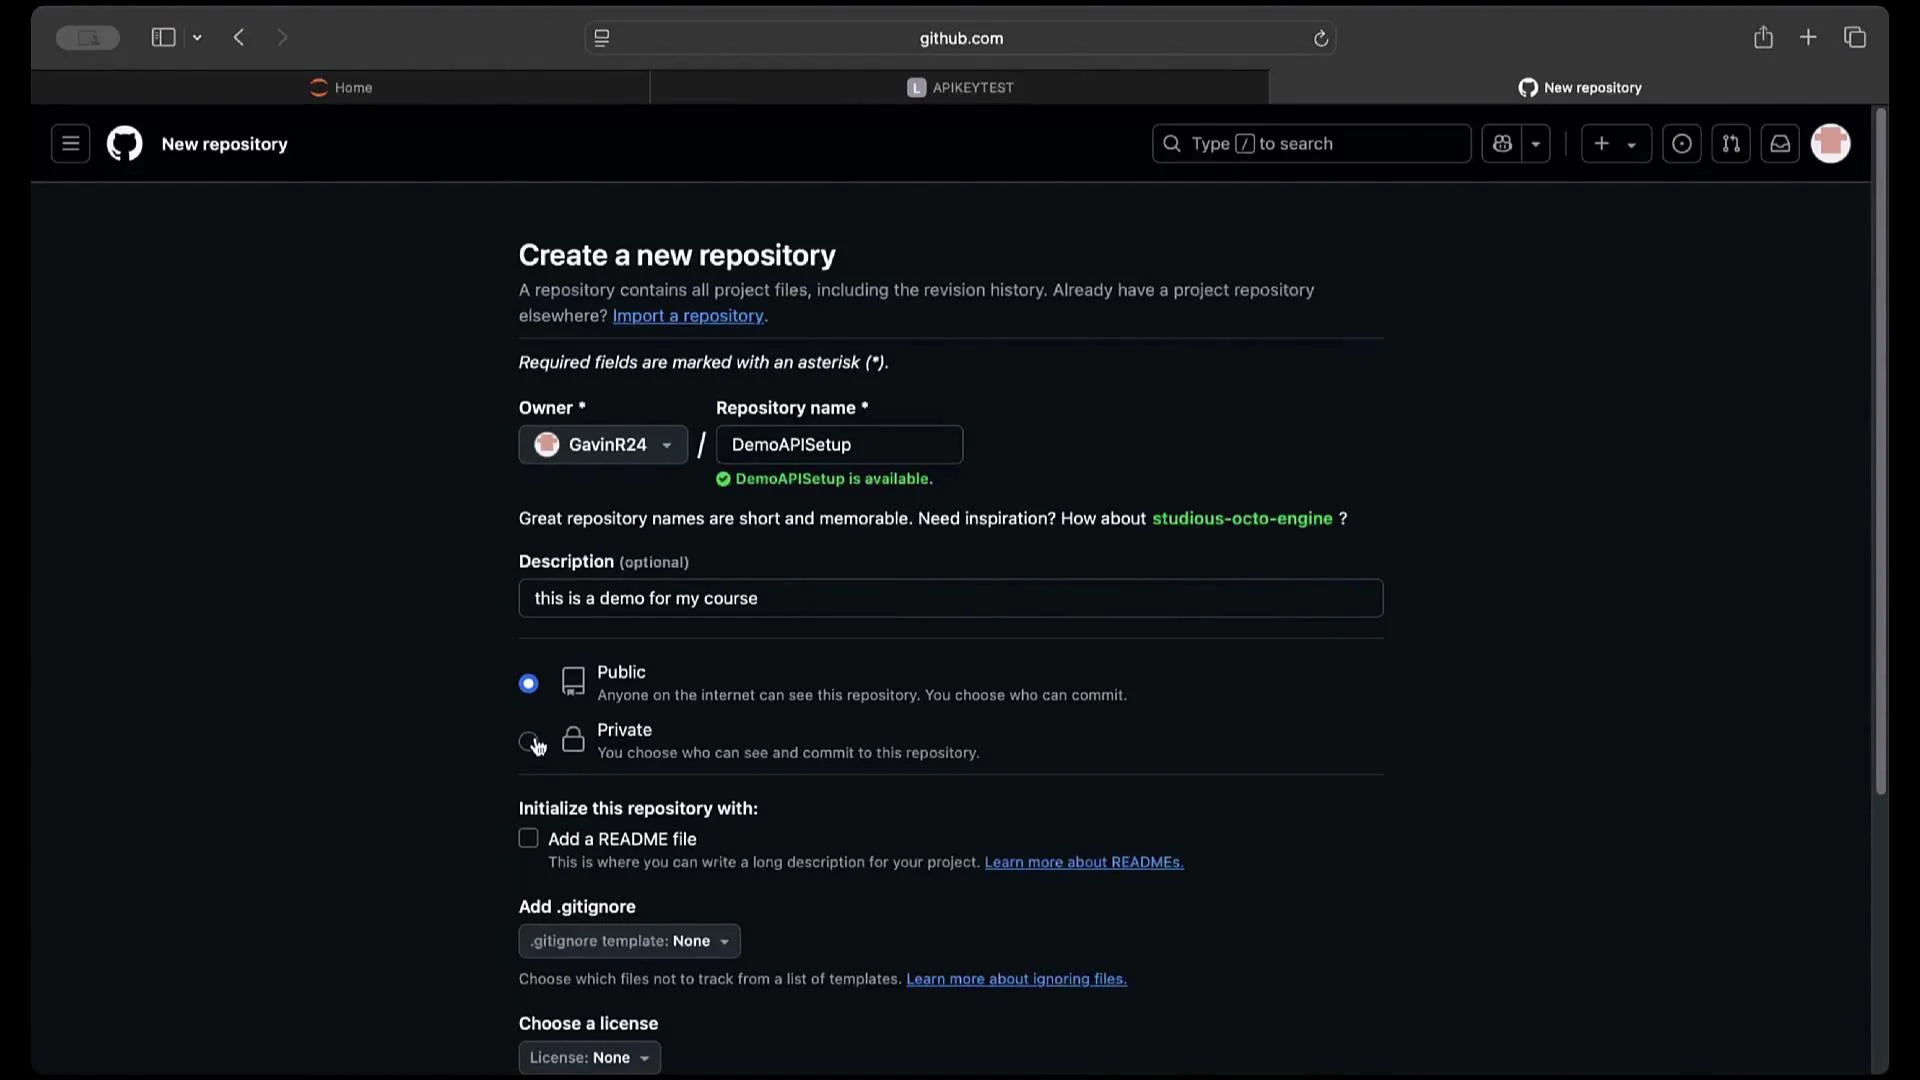 Confirm `.gitignore` includes `.env` before committing.
Quick Git commands (run from your project root):
| Command | Purpose |
| --------------------------------------------------------------------------- | -------------------------------------------------- |
| `git init` | Initialize a new repository |
| `git add .` | Stage all files (ensure `.gitignore` is set first) |
| `git commit -m "Initial commit"` | Create the first commit |
| `git branch -M main` | Rename the default branch to `main` |
| `git remote add origin https://github.com/your-username/Demo-API-Setup.git` | Add your remote (replace with your URL) |
| `git push -u origin main` | Push commits to GitHub and set upstream |
Replace the remote URL with your repository's HTTPS or SSH URL.
***
## Wrap-up
You have completed the essential setup:
* Installed Anaconda and launched Jupyter Notebook.
* Learned to manage kernels and run cells reliably.
* Created and loaded a secure `.env` file for your OpenAI API key using `python-dotenv`.
* Created a GitHub repository and prepared your project to avoid committing secrets.
Use this workflow for future projects to keep secrets safe, ensure reproducibility, and maintain clear version control for notebooks.
***
## Links and references
* Jupyter: [https://jupyter.org](https://jupyter.org)
* Anaconda distribution: [https://www.anaconda.com/products/distribution](https://www.anaconda.com/products/distribution)
* OpenAI API keys: [https://platform.openai.com/account/api-keys](https://platform.openai.com/account/api-keys)
* python-dotenv: [https://pypi.org/project/python-dotenv/](https://pypi.org/project/python-dotenv/)
* GitHub: [https://github.com](https://github.com)
Confirm `.gitignore` includes `.env` before committing.
Quick Git commands (run from your project root):
| Command | Purpose |
| --------------------------------------------------------------------------- | -------------------------------------------------- |
| `git init` | Initialize a new repository |
| `git add .` | Stage all files (ensure `.gitignore` is set first) |
| `git commit -m "Initial commit"` | Create the first commit |
| `git branch -M main` | Rename the default branch to `main` |
| `git remote add origin https://github.com/your-username/Demo-API-Setup.git` | Add your remote (replace with your URL) |
| `git push -u origin main` | Push commits to GitHub and set upstream |
Replace the remote URL with your repository's HTTPS or SSH URL.
***
## Wrap-up
You have completed the essential setup:
* Installed Anaconda and launched Jupyter Notebook.
* Learned to manage kernels and run cells reliably.
* Created and loaded a secure `.env` file for your OpenAI API key using `python-dotenv`.
* Created a GitHub repository and prepared your project to avoid committing secrets.
Use this workflow for future projects to keep secrets safe, ensure reproducibility, and maintain clear version control for notebooks.
***
## Links and references
* Jupyter: [https://jupyter.org](https://jupyter.org)
* Anaconda distribution: [https://www.anaconda.com/products/distribution](https://www.anaconda.com/products/distribution)
* OpenAI API keys: [https://platform.openai.com/account/api-keys](https://platform.openai.com/account/api-keys)
* python-dotenv: [https://pypi.org/project/python-dotenv/](https://pypi.org/project/python-dotenv/)
* GitHub: [https://github.com](https://github.com)