> ## Documentation Index
> Fetch the complete documentation index at: https://notes.kodekloud.com/llms.txt
> Use this file to discover all available pages before exploring further.
# A Quick Look Cursor
> This article explores Cursor, a standalone application for immersive coding and chat integration, highlighting its features and Python application setup.
In this article, we explore Cursor—a standalone application built as a fork of [Visual Studio Code](https://code.visualstudio.com). Unlike extensions for Visual Studio Code or [JetBrains products](https://www.jetbrains.com), Cursor offers an immersive environment where both chat and code reside within a single window.
When you launch Cursor and press Ctrl+I, you'll see options such as Add Files, Edit Refactor, and Add Code. The tool also allows you to switch between models like Cloud 3.5 Sonnet, GPT-4, 40 Mini, 01 Mini, 01 Preview, and Cursor Small. For illustration, we scaffold a typical Python application, with Cursor automatically generating the necessary files—much like what [GitHub Copilot](https://github.com/features/copilot) might do.
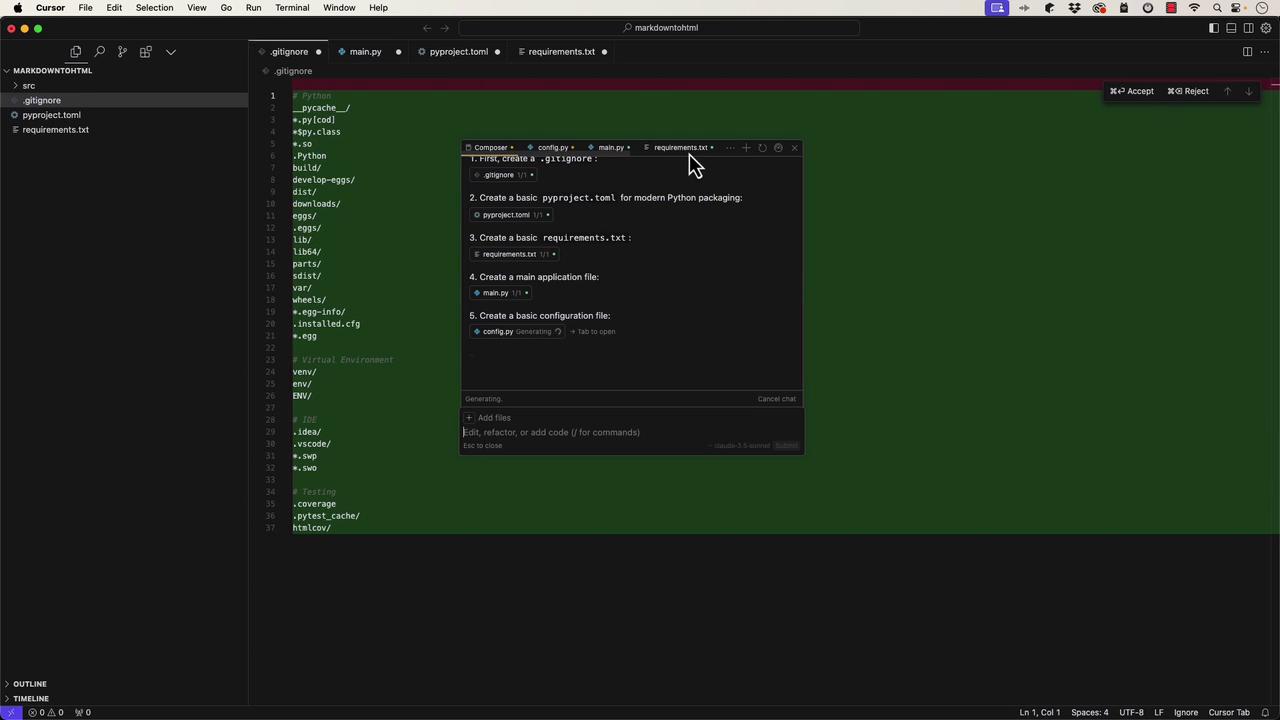
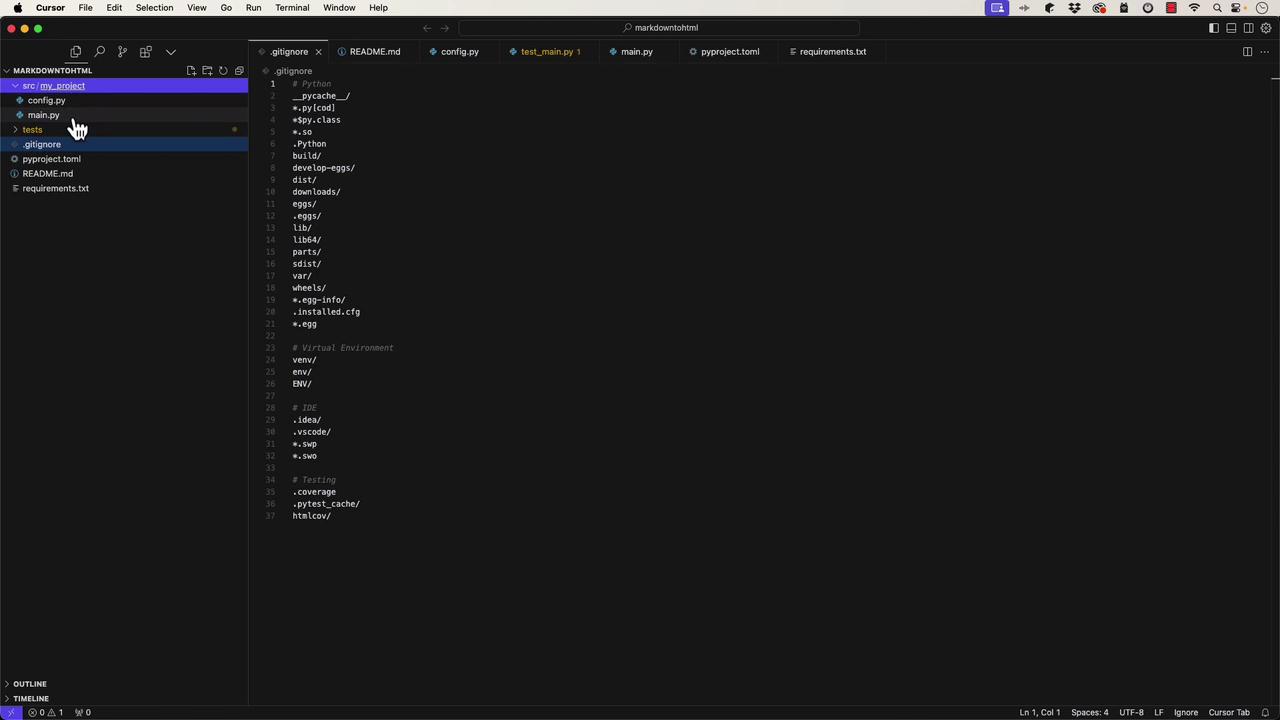
After accepting the generated files, you can inspect the project structure. The folder includes a source directory (src) with your project files, such as `main.py`.
## The Generated Python Application
The generated `main.py` file contains a standard Python entry point, featuring a `def main` function along with an `if __name__ == '__main__':` check. It also sets up logging automatically:
```python theme={null}
import logging
# Main application module.
logging.basicConfig(
level=logging.INFO,
format='%(asctime)s - %(name)s - %(message)s'
)
logger = logging.getLogger(__name__)
def main():
"""Main application entry point."""
logger.info('Application starting...')
# Your application logic here
logger.info('Application finished.')
if __name__ == '__main__':
main()
```
A configuration file, `config.py`, is also generated. It uses a dataclass to manage configuration variables such as the API key and debug mode:
```python theme={null}
import os
from dataclasses import dataclass
from typing import Optional
@dataclass
class Config:
"""Application configuration."""
app_name: str = "my_project"
debug: bool = False
api_key: Optional[str] = os.getenv("API_KEY")
@classmethod
def load(cls) -> "Config":
"""Load configuration from environment."""
return cls(
debug=os.getenv("DEBUG", "false").lower() == "true",
api_key=os.getenv("API_KEY")
)
config = Config.load()
```
A simple test file is generated to serve as a placeholder for your test cases:
```python theme={null}
import pytest
from my_project.main import main
def test_main():
"""Test main function execution."""
# Add your test cases here
assert True
```
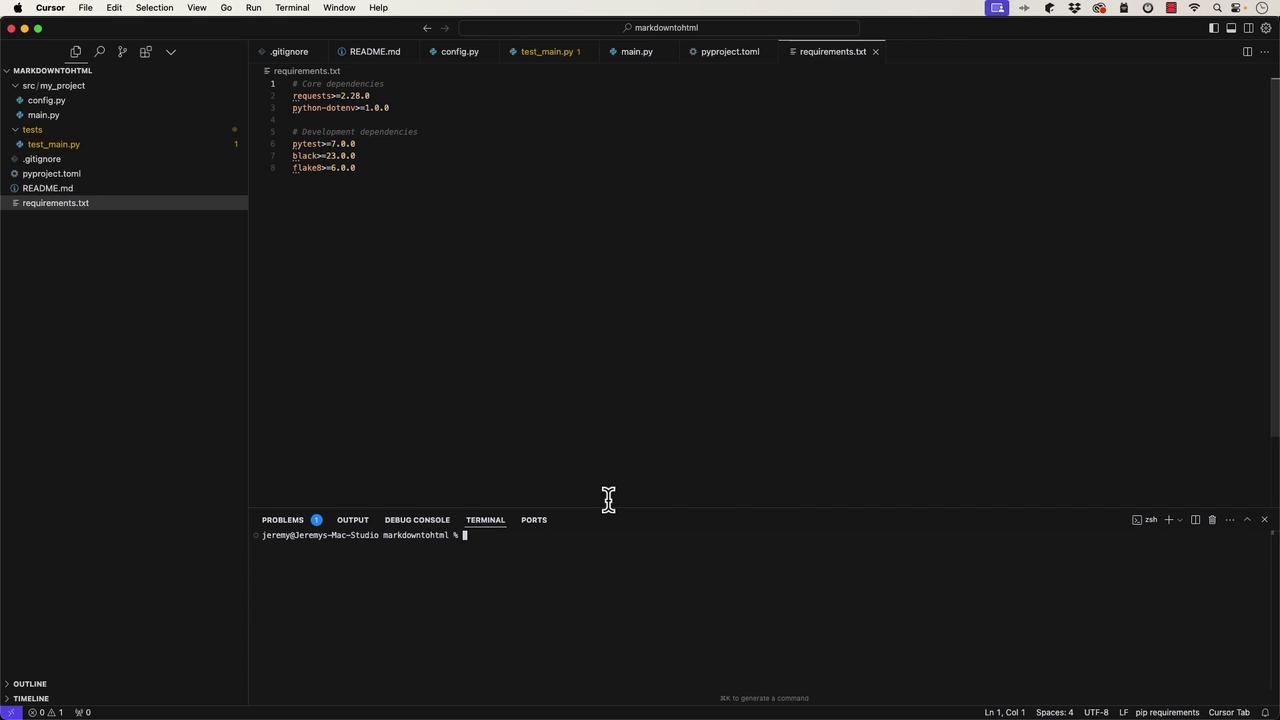
Additionally, the project includes a `.gitignore` file for ignoring file patterns (like virtual environments), a `pyproject.toml` with metadata and dependency details, and a basic `requirements.txt` listing both core and development dependencies.
The `pyproject.toml` file looks like this:
```toml theme={null}
[build-system]
requires = ["hatchling"]
build-backend = "hatchling.build"
[project]
name = "my_project"
authors = [
{ name = "Your Name", email = "your.email@example.com" }
]
description = "A short description of your project"
readme = "README.md"
requires-python = ">=3.8"
dependencies = []
[project.optional-dependencies]
dev = [
"pytest>=7.0",
"pytest-cov>=4.0",
"black>=23.0",
"isort>=5.0",
"flake8>=6.0",
]
[tool.pytest.ini_options]
testpaths = ["tests"]
python_files = ["test_*.py"]
```
## Setting Up and Running the Application
To set up your Python environment, open the terminal and create a virtual environment:
```bash theme={null}
python -m venv venv
# If "python" is not recognized, try:
python3 -m venv venv
source venv/bin/activate
```
Once the virtual environment is activated, install the dependencies:
```bash theme={null}
pip install -r requirements.txt
```
You can then run your application:
```bash theme={null}
python src/main.py
```
If you encounter an error like "can't open file 'src/main.py'", verify your directory structure. For instance, if your main file resides at `src/my_project/main.py`, run:
```bash theme={null}
python src/my_project/main.py
```
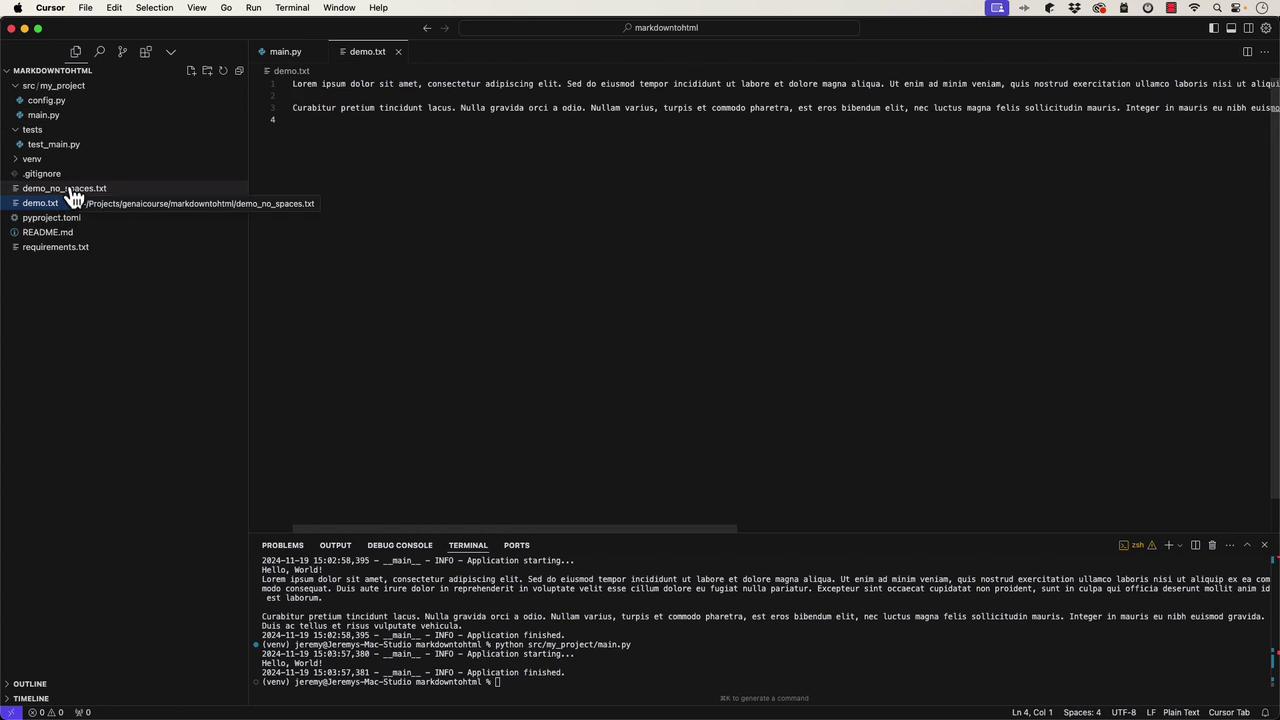
Upon execution, you should see log output indicating the application has started and finished, similar to:
```bash theme={null}
2022-11-19 14:59:16,537 __main__ INFO - Application starting...
Hello, World!
2022-11-19 14:59:16,537 __main__ INFO - Application finished.
```
## Modifying the Application
Cursor supports interactive code generation. For example, you can modify your code so that it reads from a text file (`demo.txt`) and prints its contents line by line. An updated version of `main.py` might look like this:
```python theme={null}
import logging
logging.basicConfig(
level=logging.INFO,
format='%(asctime)s - %(name)s - %(levelname)s - %(message)s'
)
logger = logging.getLogger(__name__)
def main():
"""Main application entry point."""
logger.info('Application starting...')
print("Hello, World!")
try:
with open("demo.txt") as file:
for line in file:
print(line.rstrip())
except FileNotFoundError:
logger.error("demo.txt file not found")
except Exception as e:
logger.error(f"Error reading demo.txt: {e}")
logger.info('Application finished.')
if __name__ == "__main__":
main()
```
Later, you might further modify the code to process the file by removing all spaces and writing the cleaned output to `demo_no_spaces.txt`:
```python theme={null}
import logging
logging.basicConfig(
level=logging.INFO,
format='%(asctime)s - %(name)s - %(levelname)s - %(message)s'
)
logger = logging.getLogger(__name__)
def main():
"""Main application entry point."""
logger.info("Application starting...")
print("Hello, World!")
# Your application logic here
try:
with open('demo.txt') as file:
for line in file:
with open('demo_no_spaces.txt', 'w') as outfile:
outfile.write(line.rstrip().replace(" ", ""))
except FileNotFoundError:
logger.error('demo.txt file not found')
except IOError as e:
logger.error('Error reading demo.txt: {0}'.format(e))
logger.info("Application finished.")
if __name__ == "__main__":
main()
```
After running the application, confirm that `demo.txt` has been processed and that `demo_no_spaces.txt` is created as expected.
## Refactoring into Functions and Writing Tests
For better code organization, it's a good practice to refactor logic into separate functions. In this case, the file processing logic is moved into its own function:
```python theme={null}
def process_file():
"""Process demo.txt file and write output without spaces."""
try:
with open("demo.txt", "r") as infile, open("demo_no_spaces.txt", "w") as outfile:
for line in infile:
outfile.write(line.rstrip().replace(" ", "") + "\n")
except FileNotFoundError:
logger.error('demo.txt file not found')
except IOError as e:
logger.error(f"Error reading demo.txt: {e}")
logger.info("Application finished")
def main():
"""Main application entry point."""
logger.info("Application starting...")
print("Hello, World!")
# Your application logic here
process_file()
if __name__ == "__main__":
main()
```
Next, it's important to write tests for your functions. In the file `tests/test_main.py`, you might add tests as follows:
```python theme={null}
import os
import pytest
from my_project.main import main, process_file
def test_main():
"""Test main function execution."""
# Add your test cases here.
assert True
def test_process_file(tmp_path):
"""Test process_file function with sample input."""
# Prepare test input.
test_input = "sample text\nwith multiple\nlines"
demo_file = tmp_path / "demo.txt"
demo_file.write_text(test_input)
# Change the working directory to the temporary path.
original_cwd = os.getcwd()
os.chdir(tmp_path)
# Call process_file which will read demo.txt and write demo_no_spaces.txt.
process_file()
# Read the output from demo_no_spaces.txt.
output_file = tmp_path / "demo_no_spaces.txt"
result = output_file.read_text().splitlines()
# Expected output: each line with spaces removed.
expected_output = [line.replace(" ", "") for line in test_input.splitlines()]
# Restore the original working directory.
os.chdir(original_cwd)
# Assert the results.
assert result == expected_output
assert len(result) == 3
assert isinstance(result, list)
```
If you encounter issues running tests, ensure your project is structured as a proper Python package (e.g., add empty `__init__.py` files) and adjust import statements accordingly. For example:
```bash theme={null}
touch my_project/__init__.py
touch tests/__init__.py
```
When running tests with pytest, common troubleshooting steps include verifying module import paths and installing your package in development mode with:
```bash theme={null}
pip install -e .
```
## Final Thoughts
Cursor significantly speeds up code generation and prototyping. However, as demonstrated through iterative testing and debugging, a solid foundation in Python and best development practices remains essential. In our next article, we will explore building a larger application combining multiple AI-assisted development tools like [ChatGPT](https://chat.openai.com), [Tabnine](https://www.tabnine.com), [BlackboxAI](https://www.blackbox.ai), [GitHub Copilot](https://github.com/features/copilot), and Cursor.
Stay tuned for our next lesson as we delve deeper into advanced application development methodologies.