This article demonstrates building a simple AWS Step Functions workflow for threat detection using Lambda functions and branching logic.
In this lesson, we demonstrate how to work with AWS Step Functions by building a simple workflow that simulates threat detection from a camera event.Begin by searching for “Step Functions” in the AWS Console. This search leads you to the page where you can create your first state machine—a central component where you design your workflow logic by combining the necessary steps and actions to process events.
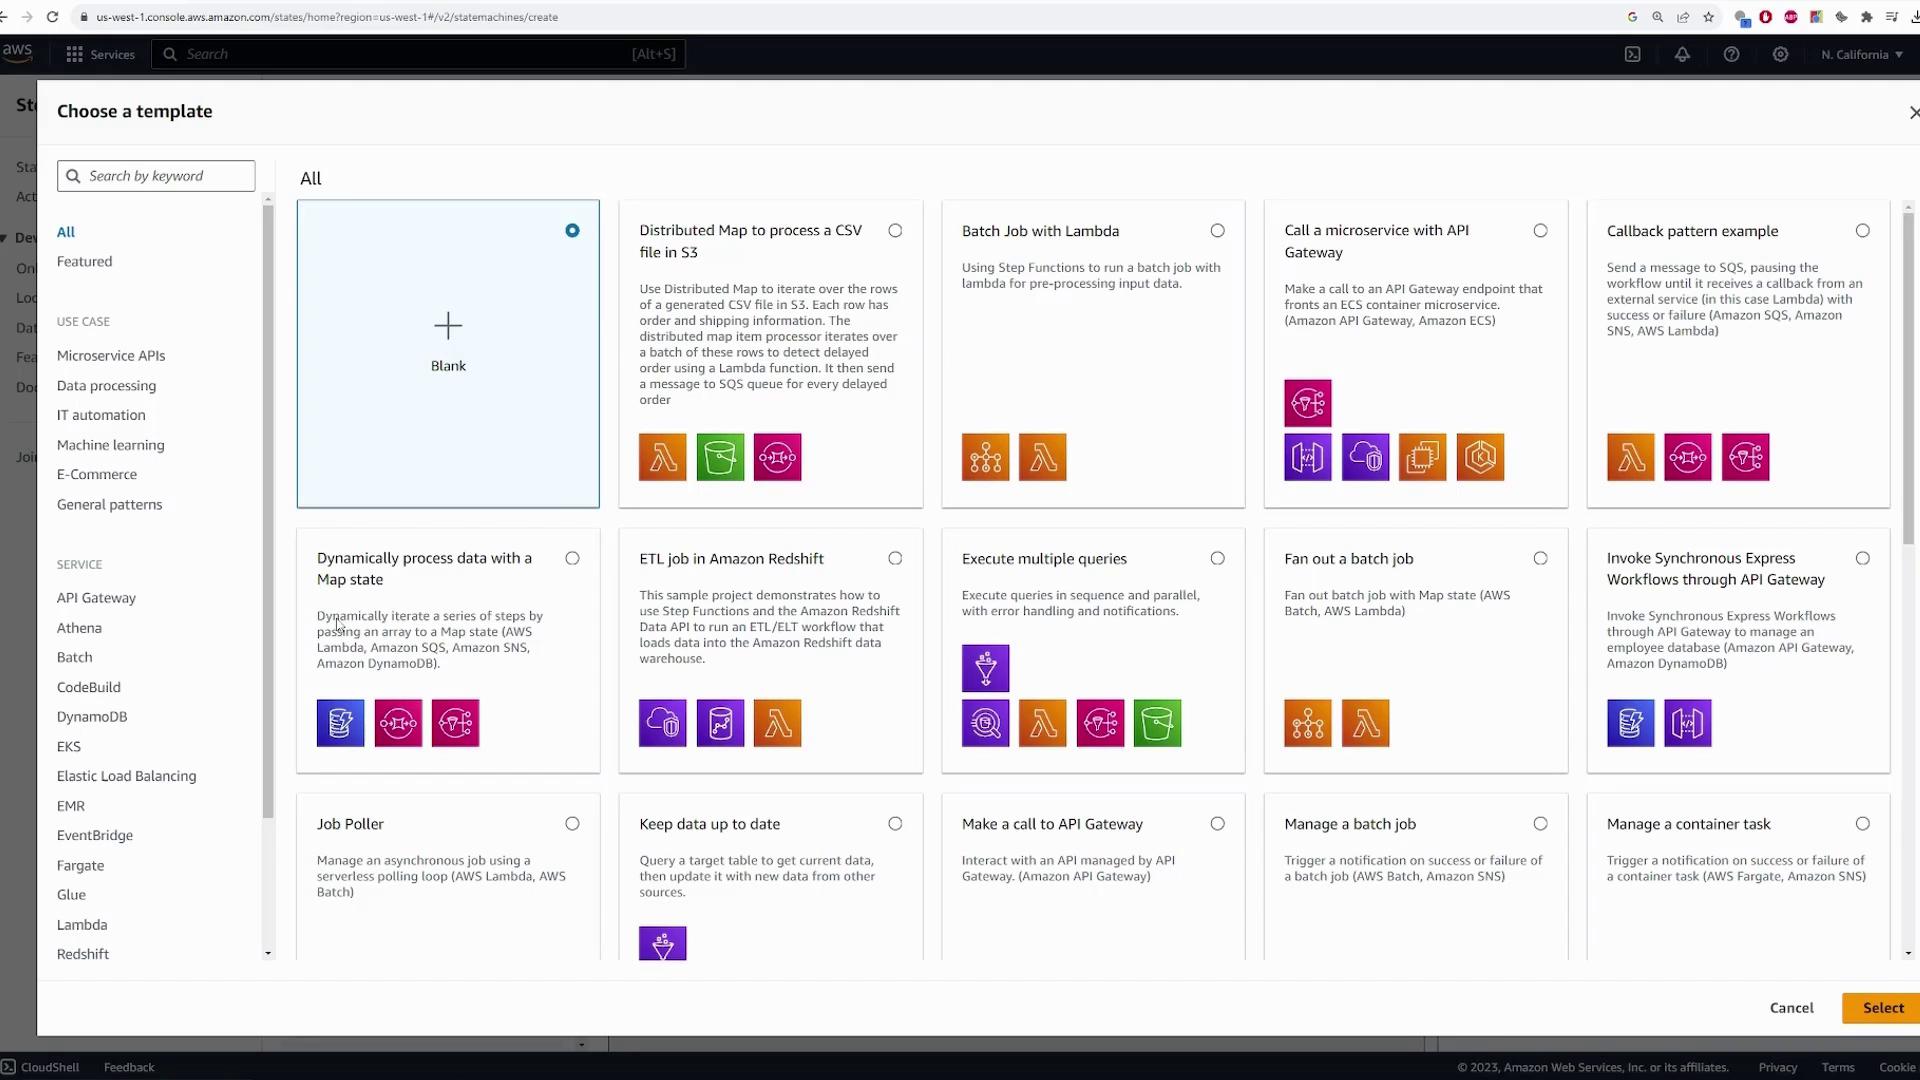
Select “Create state machine” to start. AWS offers several templates to help you begin quickly without building the entire workflow from scratch. Although you can explore these templates, this demonstration uses a blank template so you can build the workflow step by step.
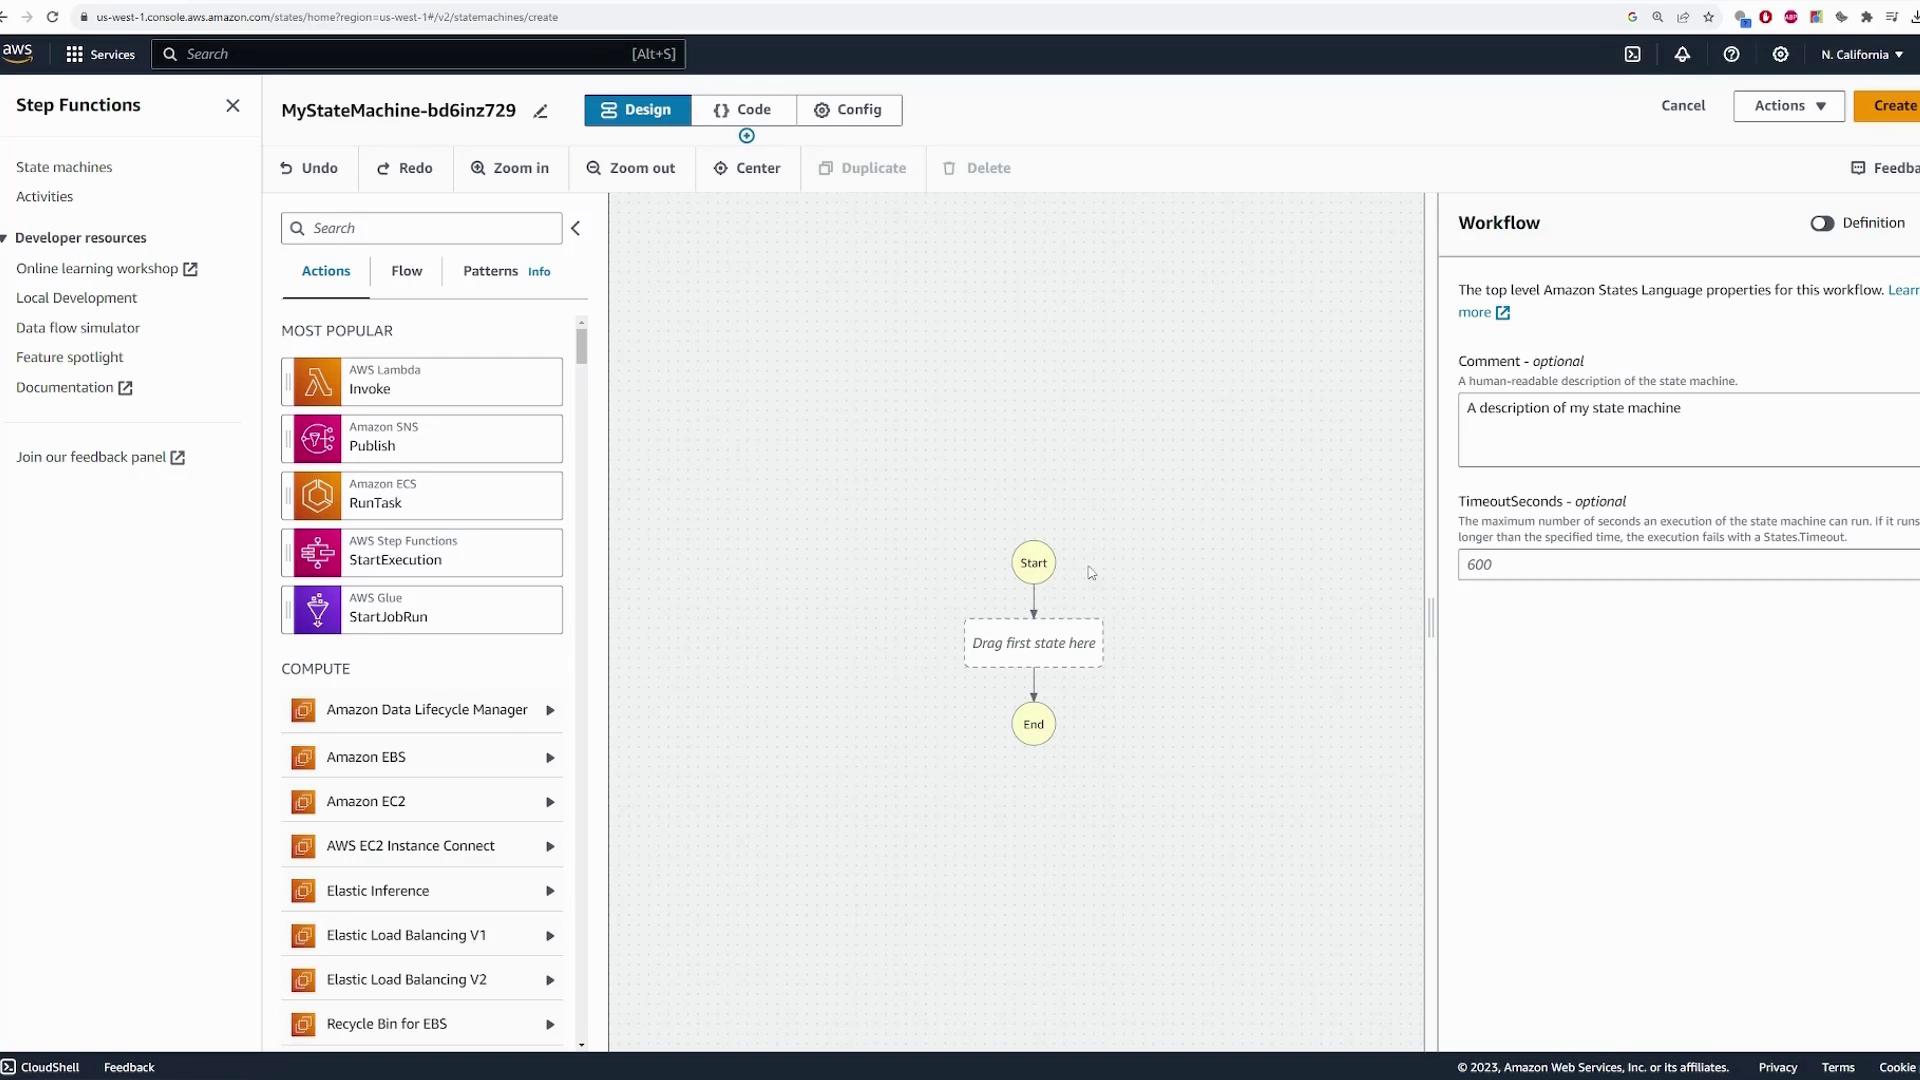
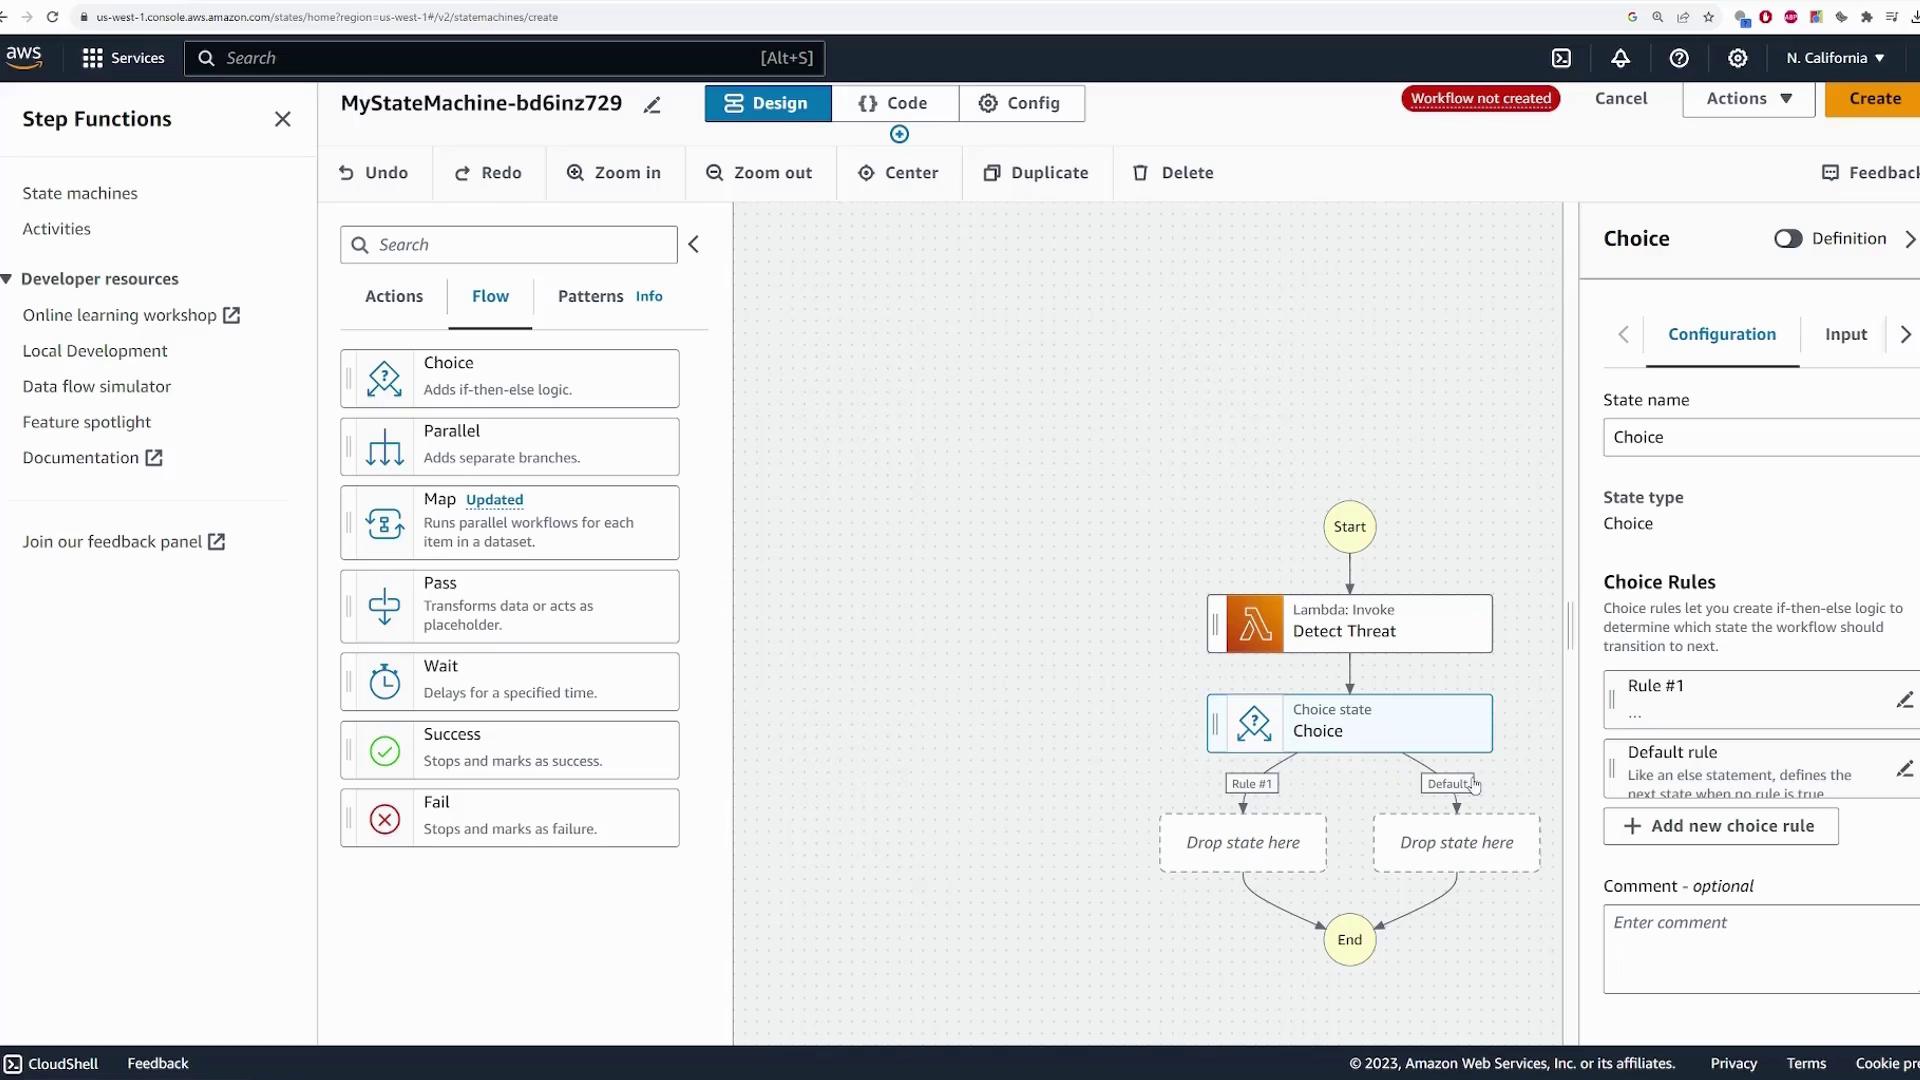
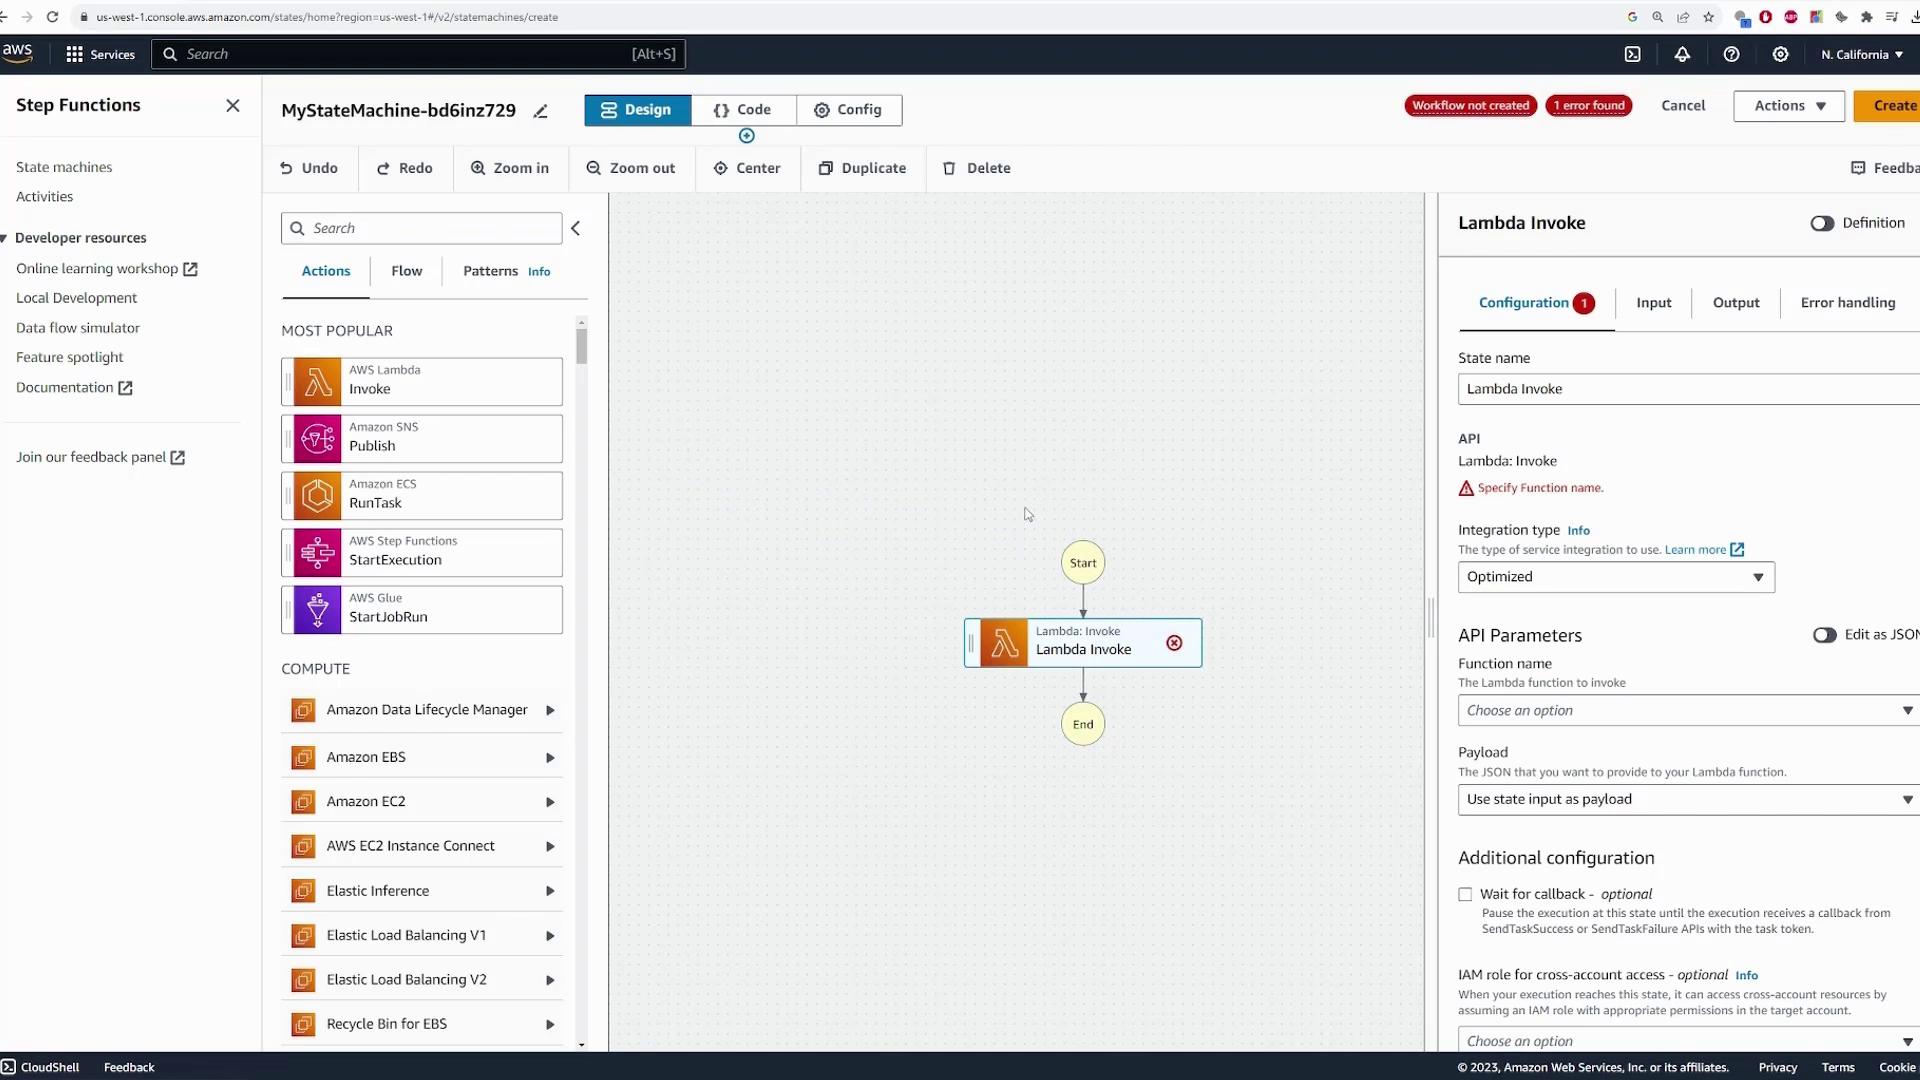
After selecting the blank template, the authoring window will appear. At the center is your workflow canvas with a “Start” point at the top and an “End” state at the bottom. You will drag and drop various actions between these endpoints to build your logic.
On the left sidebar, you find a list of actions and integrations with many AWS services. Under the “Most Popular” section, common actions such as invoking a Lambda function, publishing to SNS, or running an ECS task are readily available. Scrolling down reveals even more integrations, giving you the versatility to build varied workflows.In the “Flow” section, you can add logic—such as if-then-else (Choice state) or parallel execution—to handle different branches. The right-hand panel offers configuration settings for each state; for example, when you add a Lambda function, you will need to specify which function to invoke and configure its options.
For this demo application, imagine a smart doorbell that records activity. When motion is detected, an event is sent to the state machine. The workflow then determines whether the motion represents a threat and takes appropriate actions.
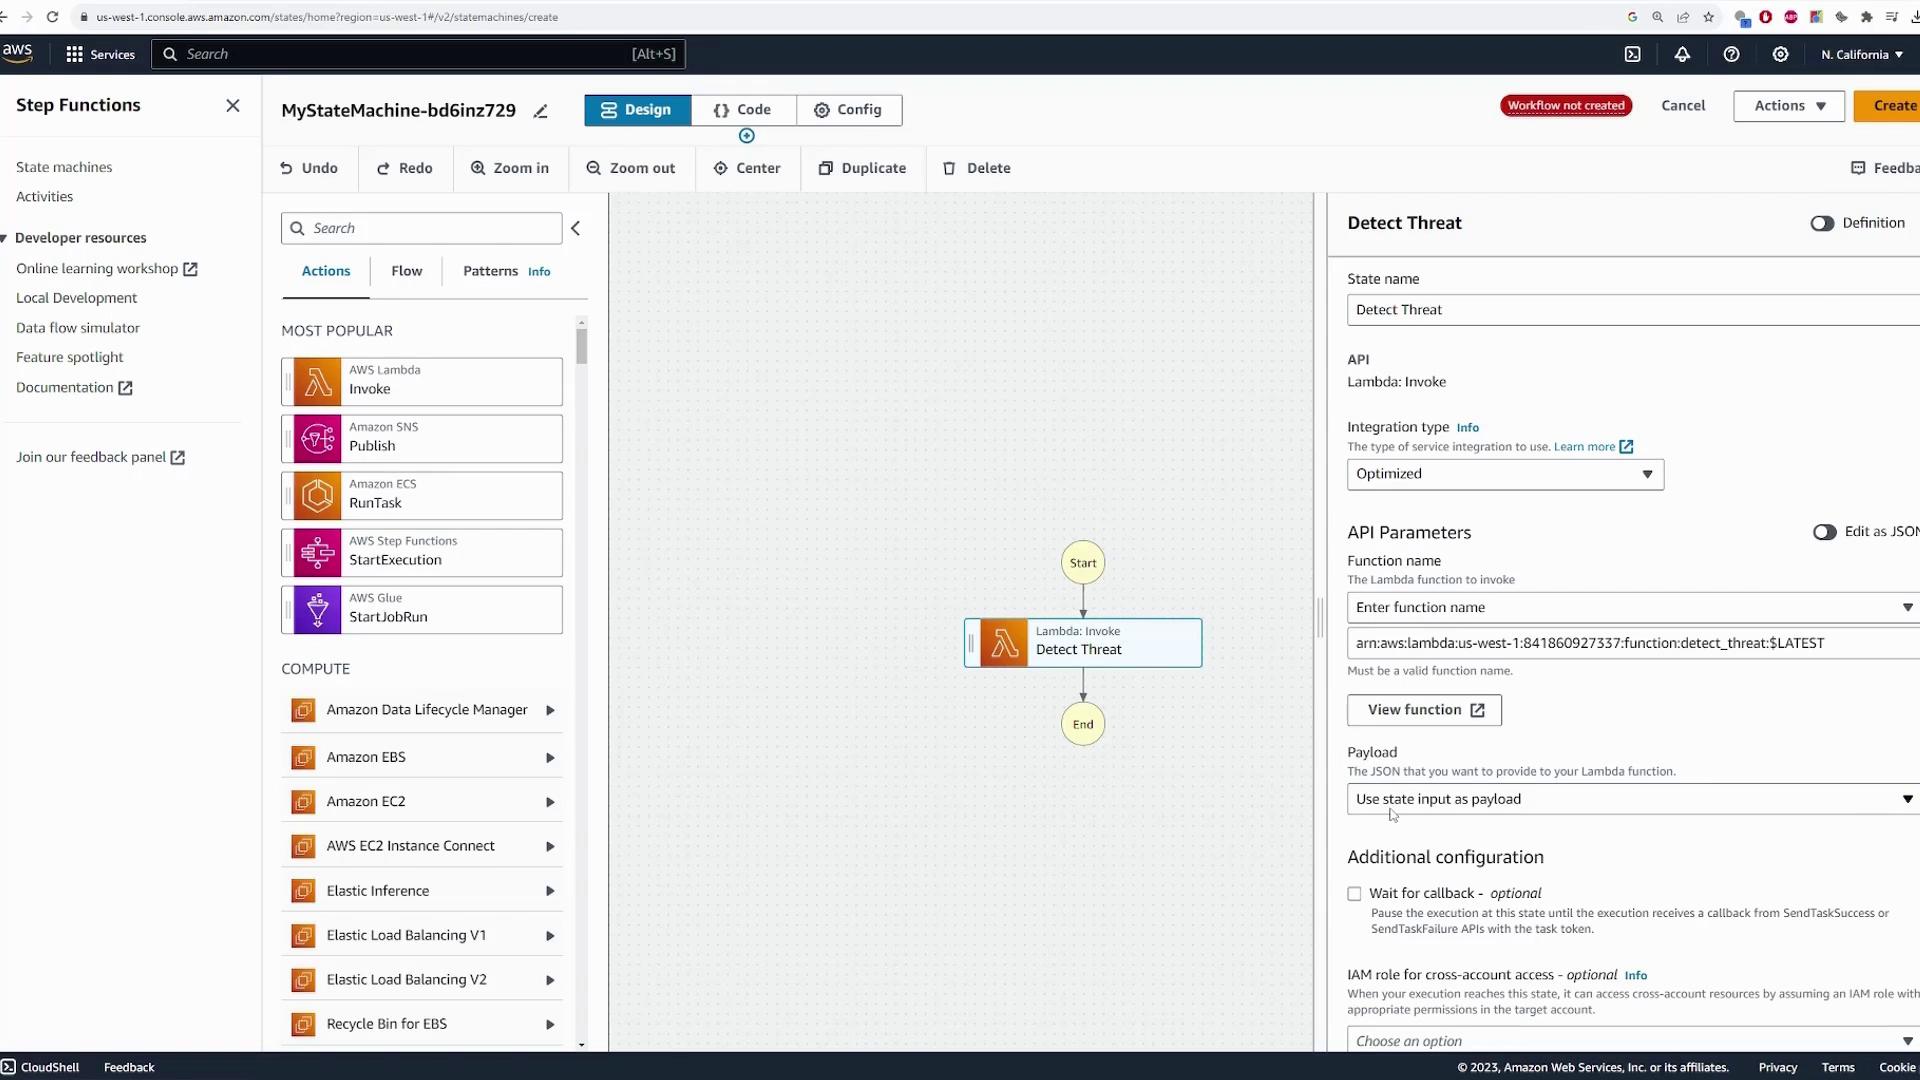
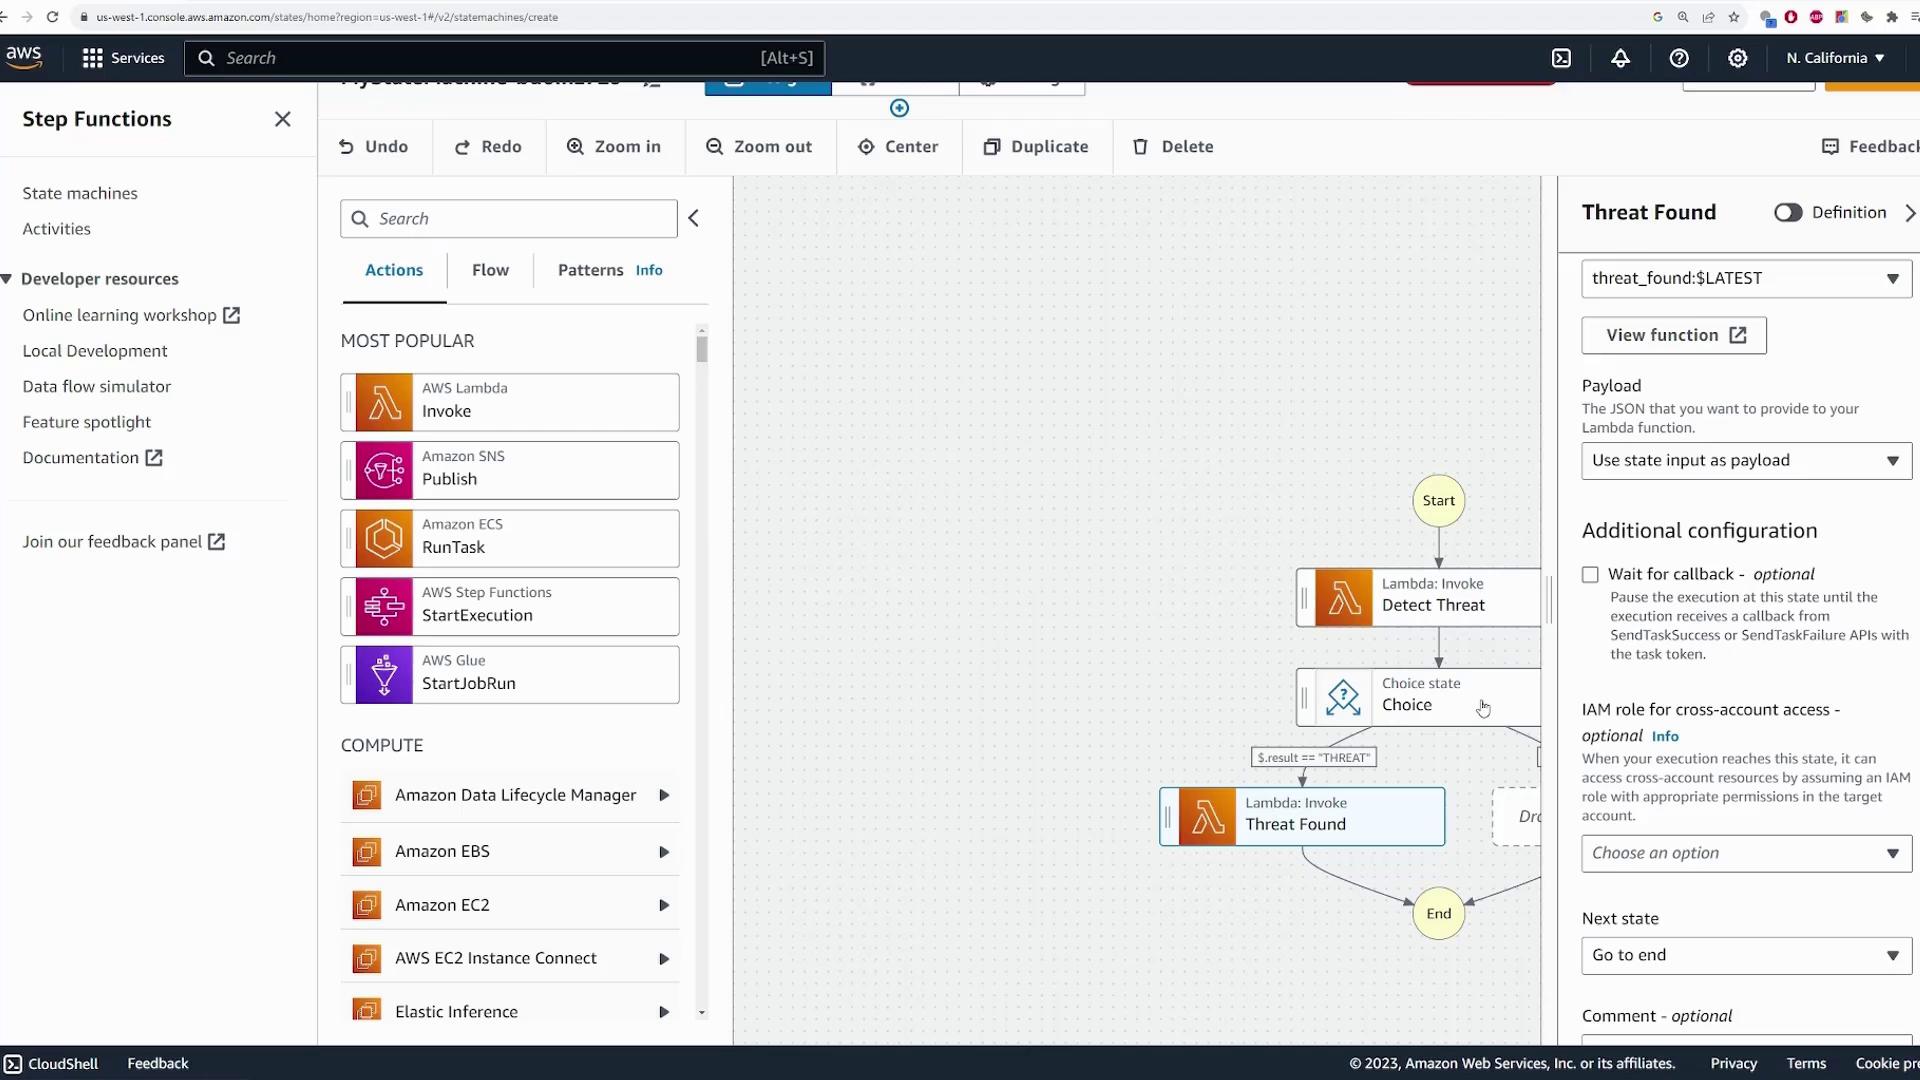
Begin by switching to the AWS Lambda console to locate your Lambda functions. In this example, the function named “detect_threat” analyzes the event data and randomly returns either a threat or no threat, simulating a 50/50 chance.Drag this Lambda function onto your state machine canvas. Although an “X” may appear initially, this indicates that the configuration is incomplete. To complete it:
Rename the state to “detect threat” for clarity.
Select the AWS SDK optimized integration.
From the dropdown, choose the “detect_threat” Lambda function.
Configure the state payload to pass the state input (e.g., video clip or event metadata) to the Lambda function.
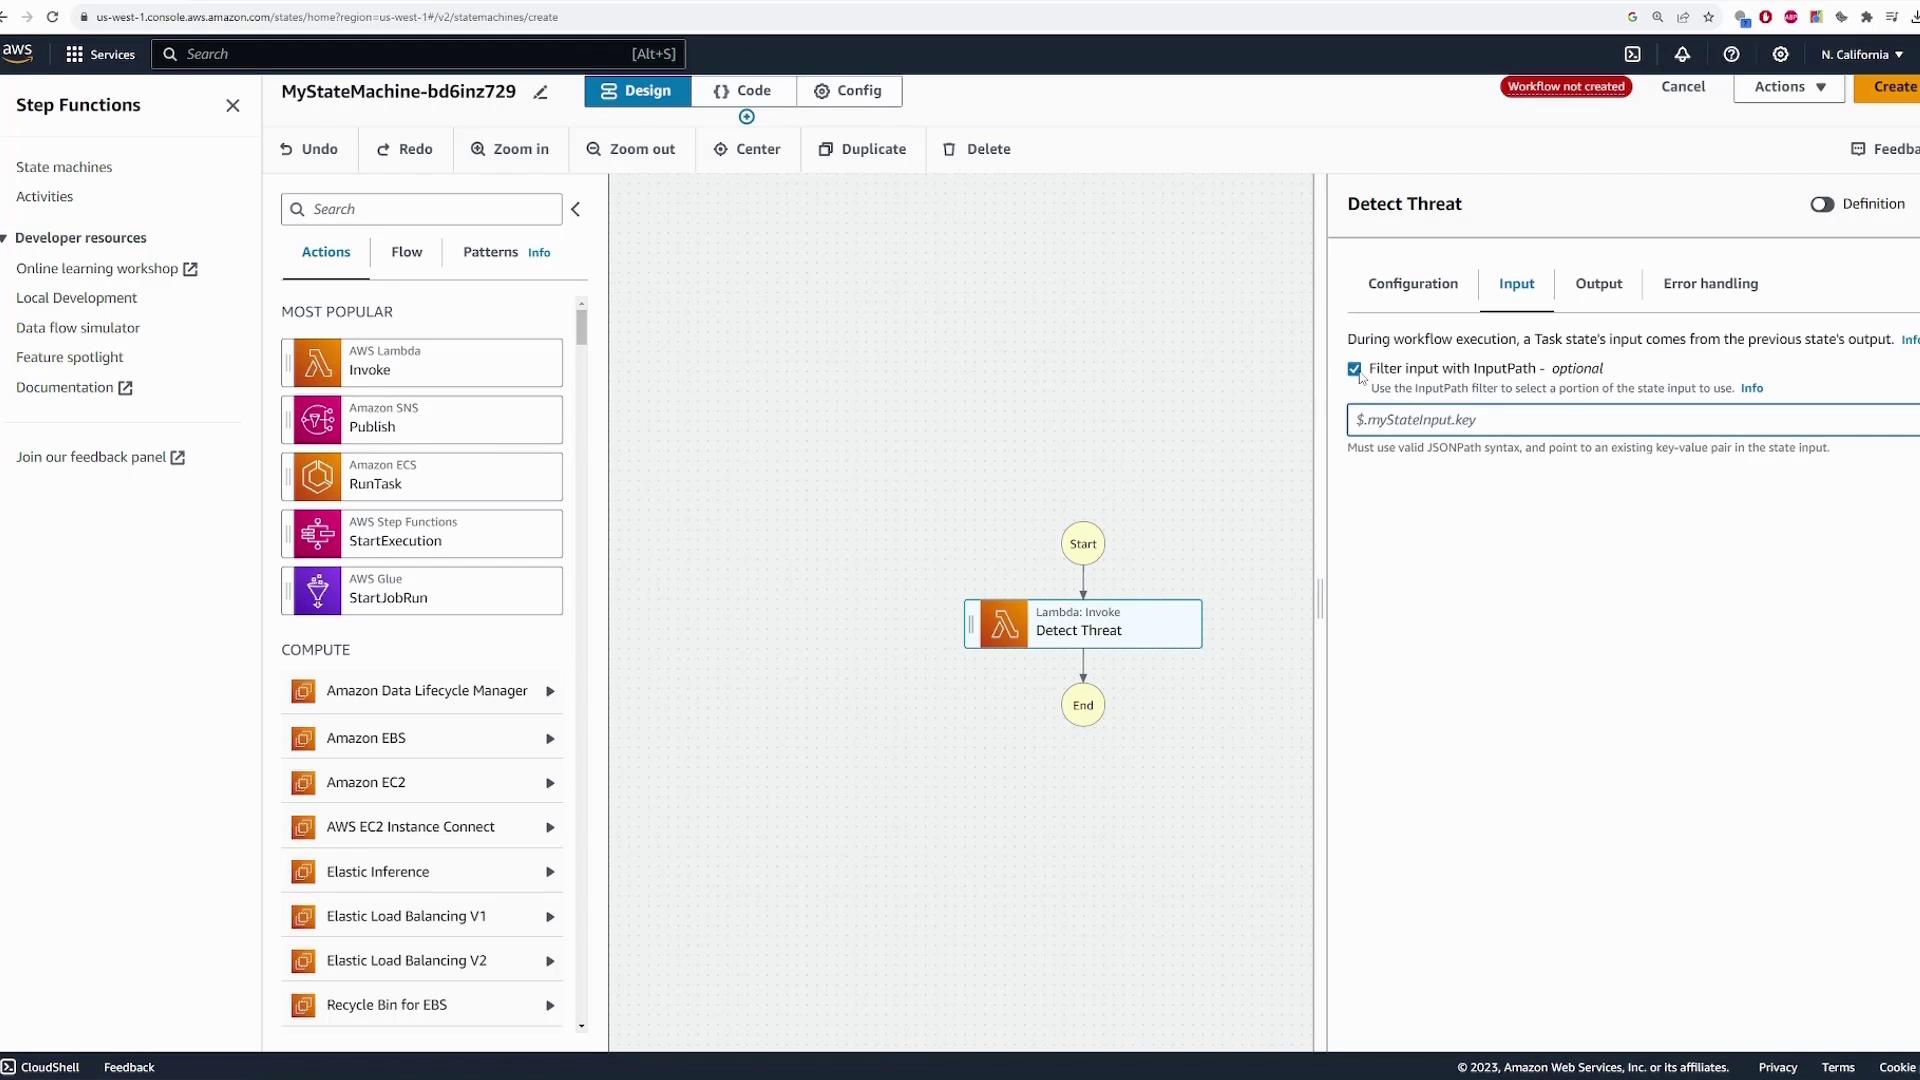
By default, the entire input object is passed. In advanced use cases, you may filter the input to include only the necessary fields.Below is a sample snippet of the Lambda function:
Copy
export const handler = async (event) => { // Determine if a threat is present const result = Math.random() < 0.5 ? "THREAT" : "NO_THREAT"; return { result };};
This Lambda function simply returns an object with a “result” property, with a value of either “THREAT” or “NO_THREAT.”
Under the state configuration, you can enable wait-for-callback functionality for human intervention when necessary (such as order approval scenarios). For this demo, we keep it disabled. Finally, set the state to transition to the “End” state (or later, branch into a Choice state).
The configuration also supports error handling with retry policies and catch statements. For instance, if the Lambda function encounters an error, you can configure retries. In our demo, basic error handling is enabled by default.
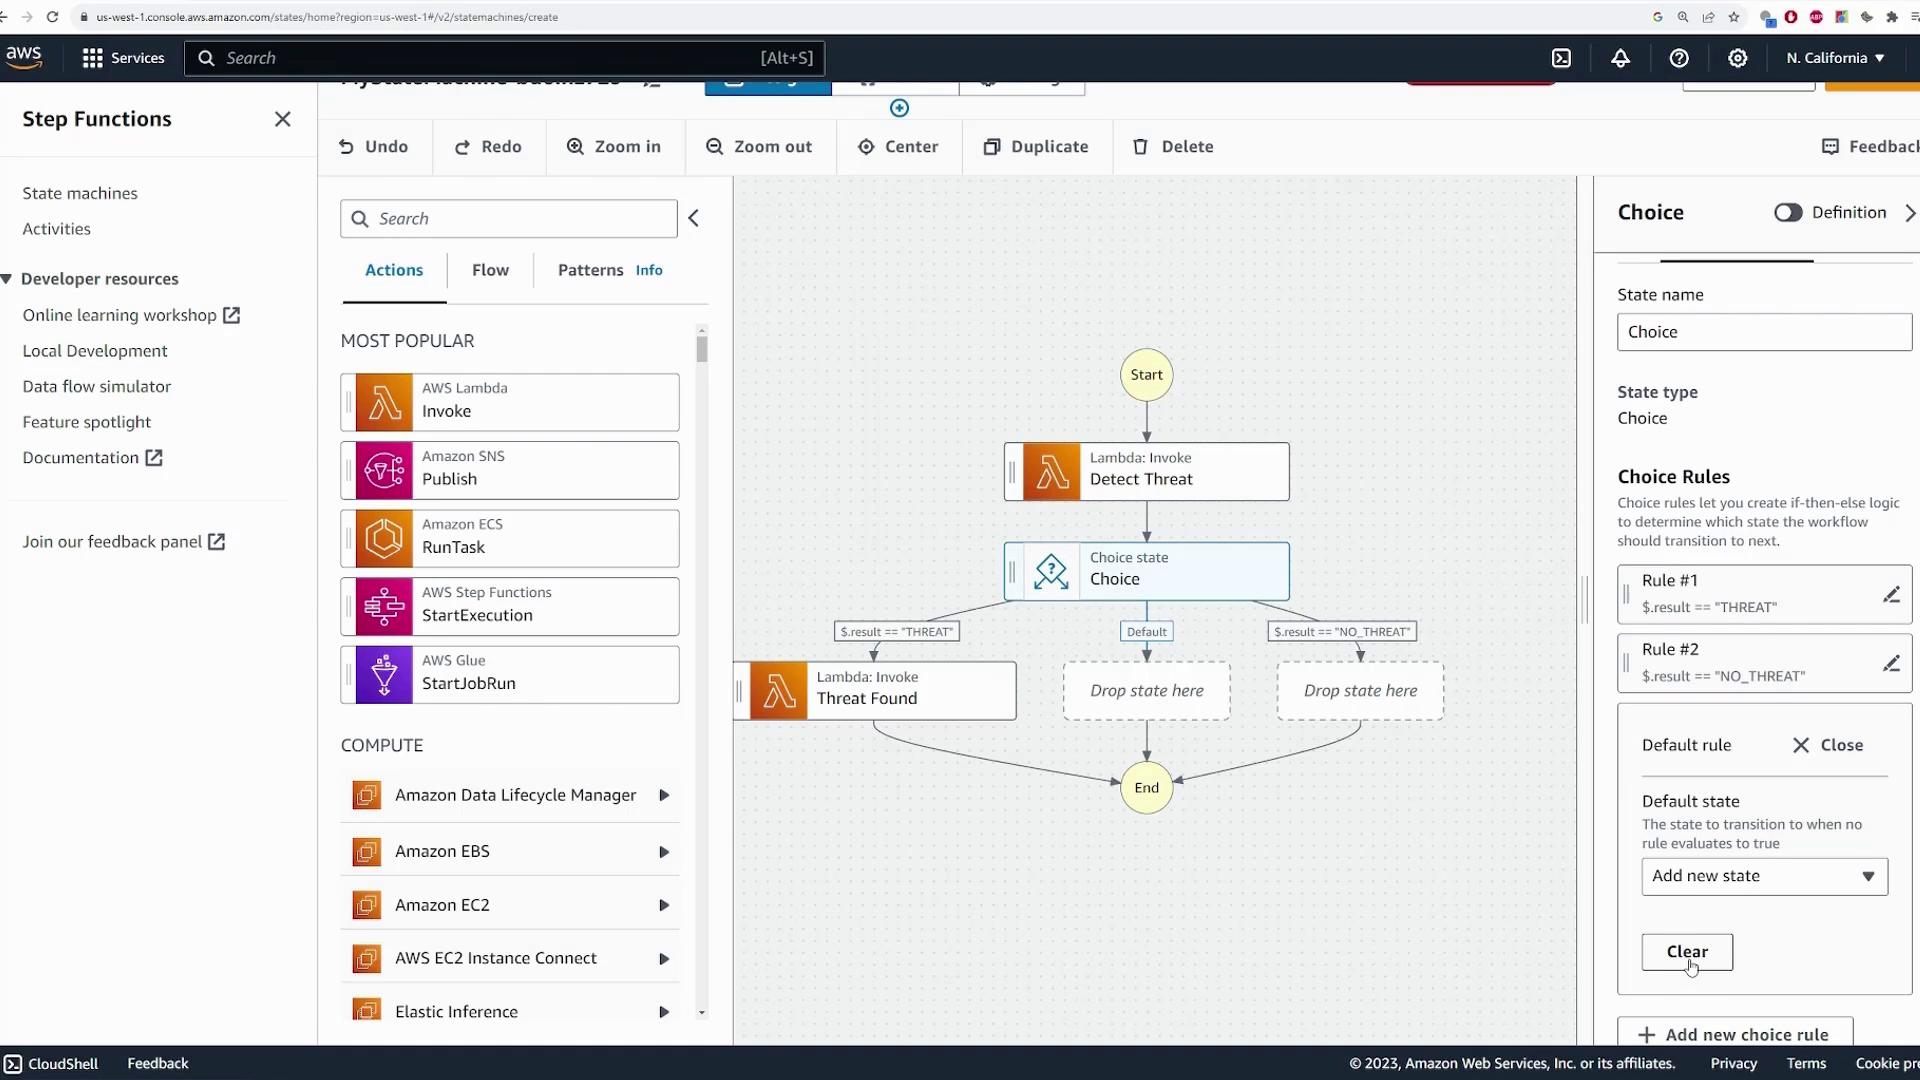
After threat detection, the workflow must branch based on the output. To implement this if-then-else logic, add a Choice state to the canvas. This state evaluates the output of the “detect threat” function and directs the workflow accordingly.Configure the first rule with the following condition:
Variable: $.result
Comparator: Equals
Value: “THREAT”
If this condition is met, drag a new Lambda function state for the “threat found” action onto the canvas. In its configuration, select the associated Lambda function named “threat_found” and set its next state to “End.”Next, add a second rule to handle the alternative outcome:
Variable: $.result
Comparator: Equals
Value: “NO_THREAT”
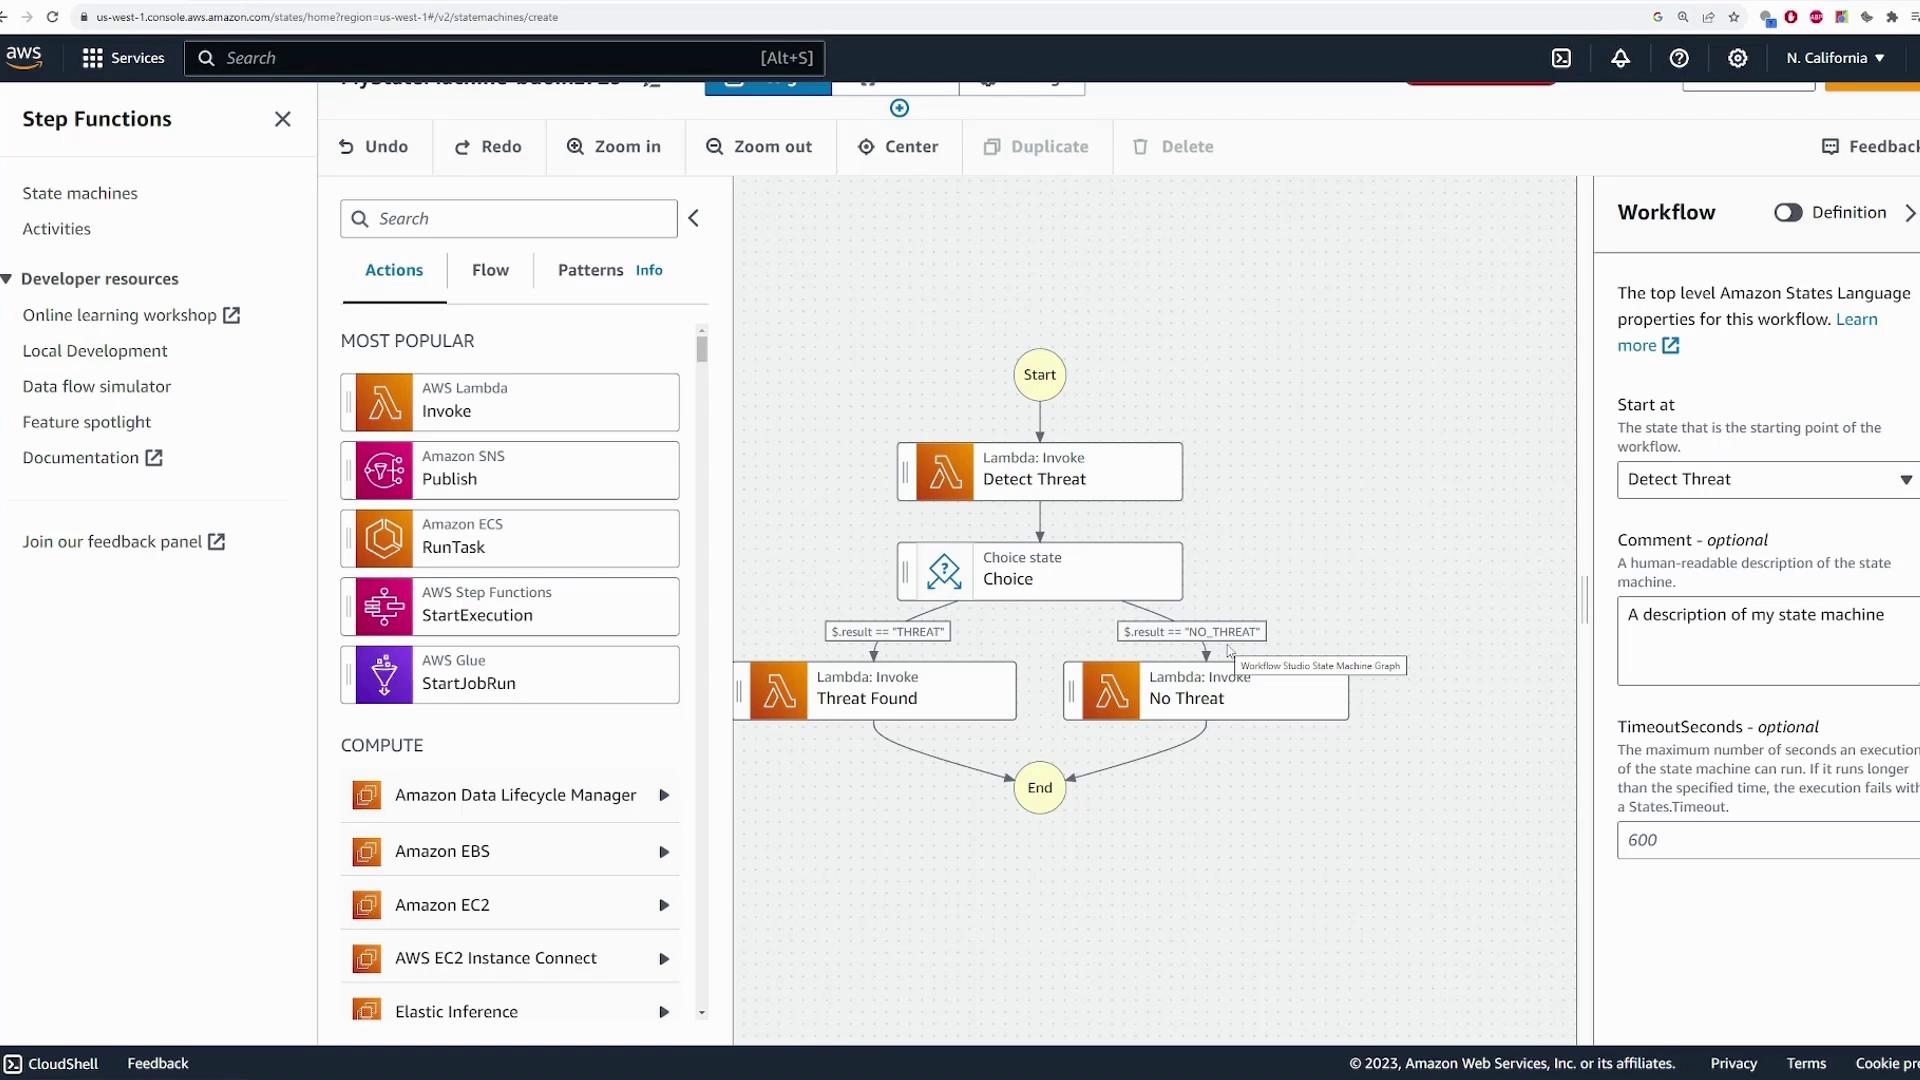
For this condition, drag another Lambda state onto the canvas, name it “no threat”, and assign the Lambda function “false_positive.” Again, set the next state to “End.” Ensure that any default rules are removed so the workflow strictly follows your conditions.
Finally, connect the outputs from the Choice state to their respective Lambda function states. The “threat found” branch will handle confirmed threats (such as triggering alerts or sending notifications), while the “no threat” branch logs the event for false positives.
Additional integrations—like integrating with SES for email or SMS notifications—can be added. For this demonstration, we conclude the workflow after linking the branches.
With the workflow configured, click “Create” to build your state machine. AWS automatically creates and assigns an IAM role, allowing the state machine to invoke the specified Lambda functions and, if enabled, AWS X-Ray for tracing.
Ensure all configurations are set correctly—especially error handling settings—before creating the state machine.
Once created, initiate an execution by clicking “Start Execution.” You will be prompted to provide input data representing the event. For instance, a typical input for a camera event might resemble:
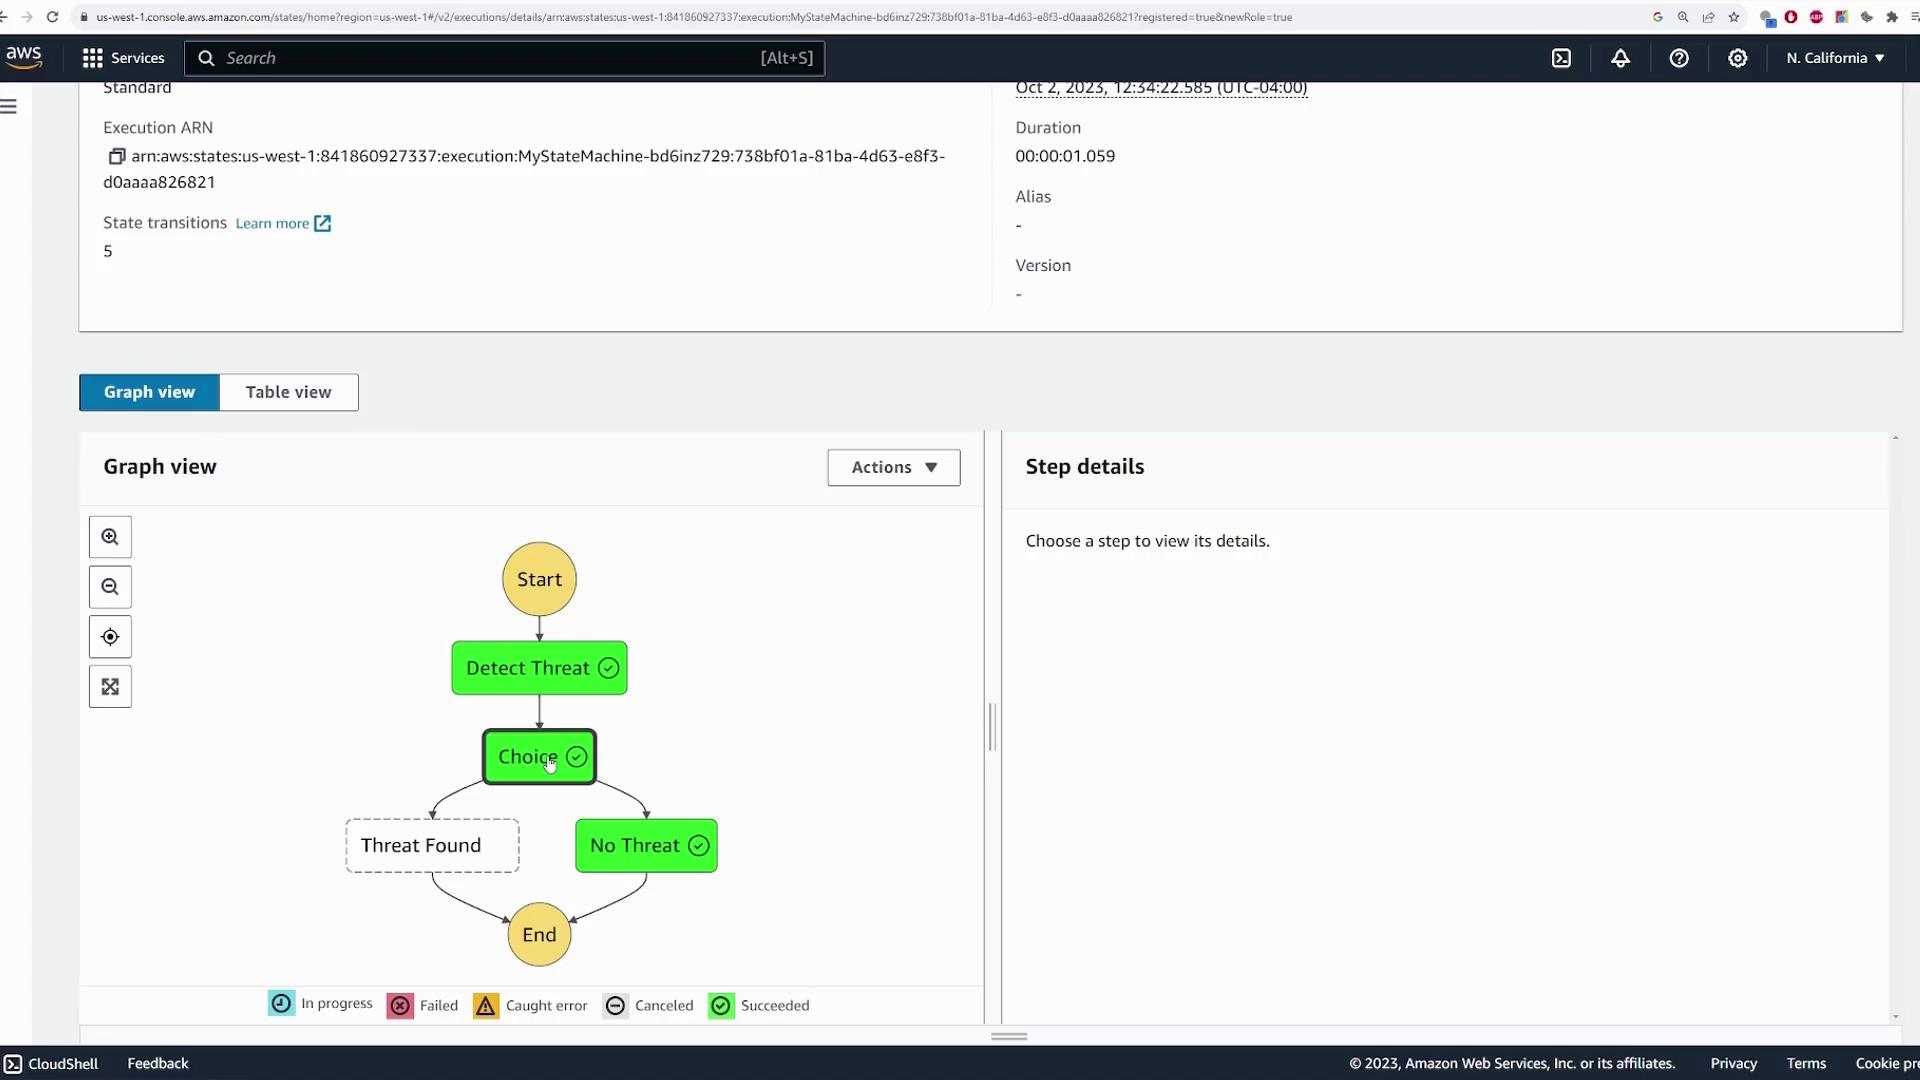
After starting the execution, AWS Step Functions displays the progress in a graphical view. The workflow begins at “detect threat,” passes through the Choice state, and follows the corresponding branch based on the result (“Threat Found” or “No Threat”).
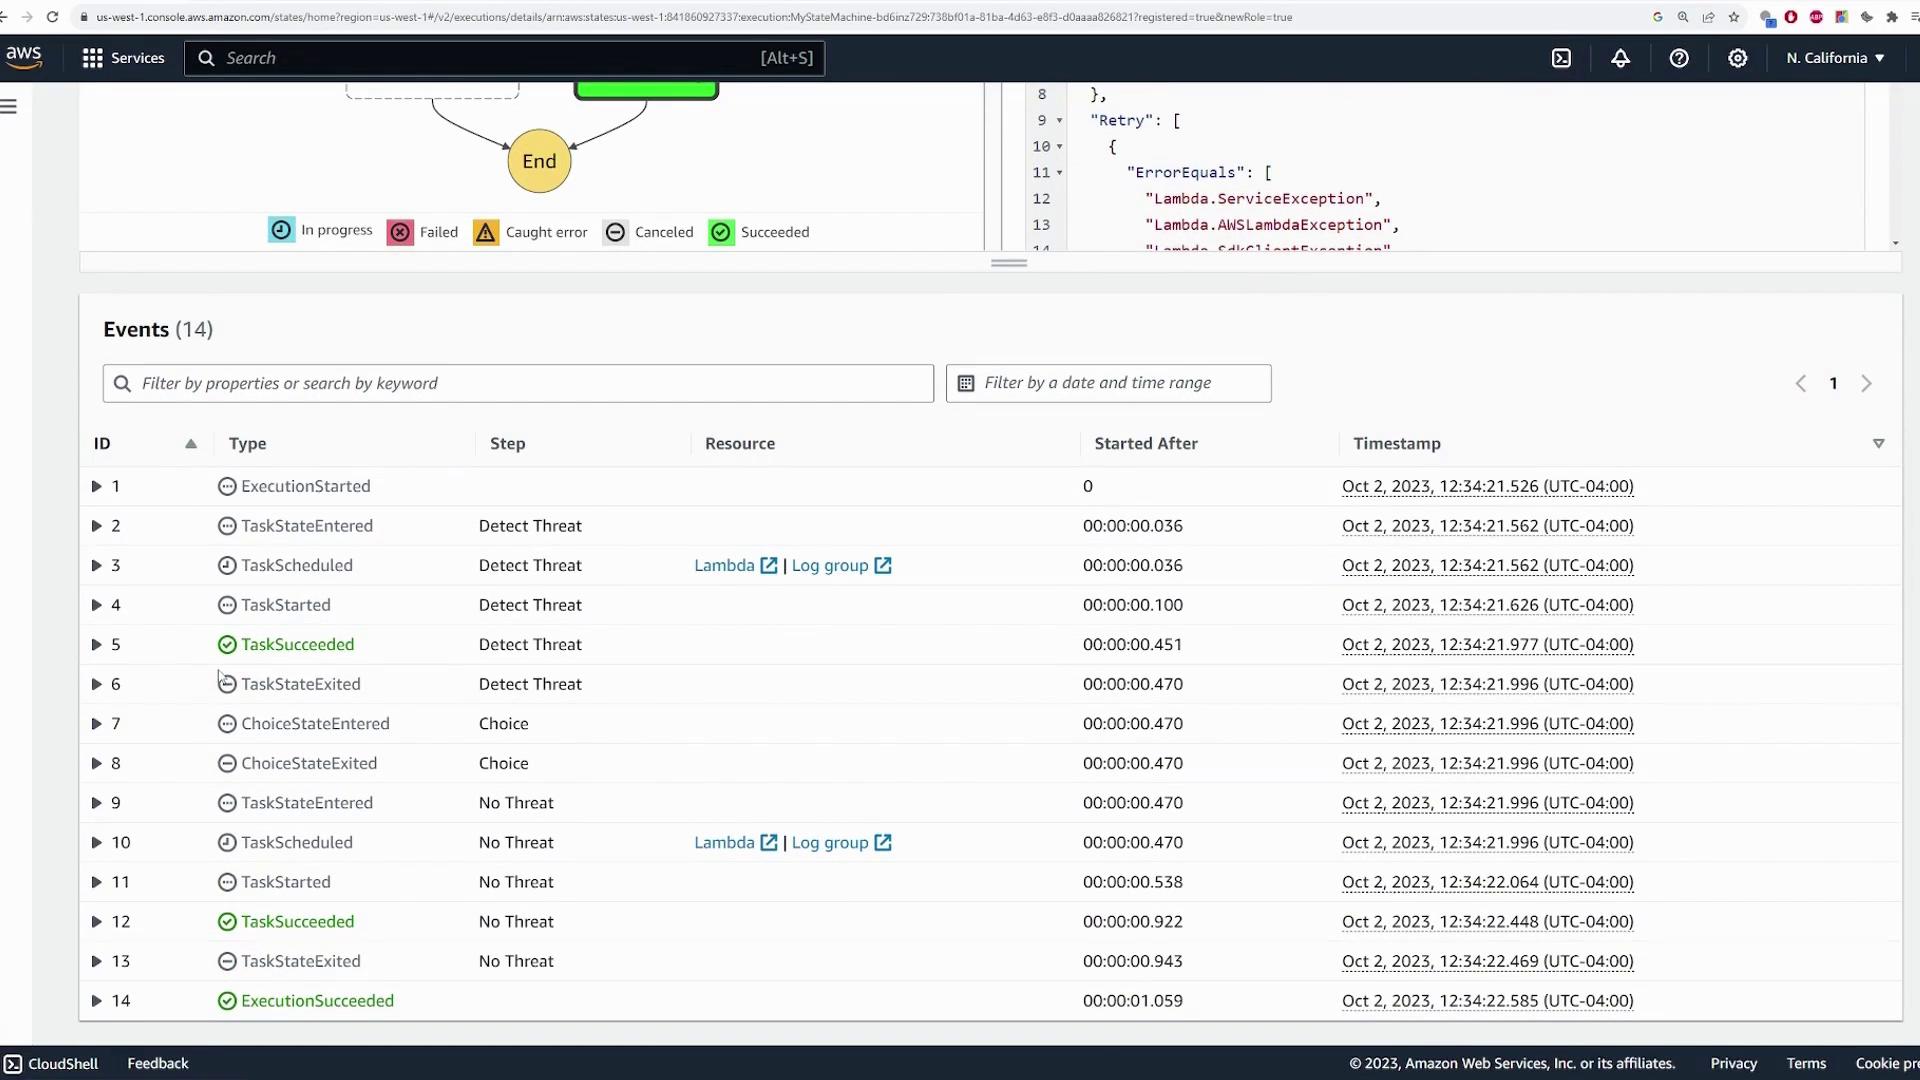
You can click on individual steps to review input and output details, which provide insights into:
The event data received (e.g., camera ID, object ID)
The result from the “detect threat” function
The decisions evaluated at the Choice state and the subsequent actions taken
Running multiple executions may result in varied branches being taken, confirming that the Choice state functions as expected.Finally, return to the main state machine overview to review execution statistics—such as total runs, successes, and failures. The interface allows you to switch between graphical and table views to analyze execution history in detail.
In this lesson, we built a simple state machine for threat detection by integrating AWS Step Functions with Lambda functions. The workflow simulates a real-world scenario where a camera event triggers analysis, leading to different actions based on the threat detection outcome.We covered:
Creating a new state machine using a blank template
Configuring a Lambda function to simulate threat detection
Incorporating a Choice state to branch the workflow based on the threat detection result
Testing the state machine with sample input and reviewing execution details
This demonstration highlights AWS Step Functions’ flexibility in orchestrating complex workflows with integrated error handling and branch logic.Happy building, and see you in the next lesson!