AWS Certified Developer - Associate
Databases
DynamoDB Dax Demo
In this demonstration, we walk through the process of setting up a DAX cluster for DynamoDB using the AWS Management Console. Follow the steps below to create, configure, monitor, and delete your DAX cluster.
Step 1: Creating the DAX Cluster
Begin by navigating to the DynamoDB page in the AWS console. Under the "Clusters" section, click on "Create Cluster" to launch the creation wizard.
Provide a meaningful cluster name (e.g., "Cluster 1") and select the node type for your cluster. AWS offers two node families:
- R type family: Provides fixed resources with guaranteed capacity.
- T type family: Offers a baseline level of CPU performance with the capability to burst above baseline levels.
For workloads demanding consistent capacity, AWS recommends R type nodes. In contrast, T type nodes are more suited for lower throughput scenarios with occasional bursts. For this demo, opt for the cost-effective T2 small instance, which includes one vCPU.

Step 2: Configuring Cluster Nodes and Subnet Group
While a production environment should have at least three nodes for high availability, this demo uses a single node.
Warning
For production deployments, always configure a minimum of three nodes to ensure high availability and fault tolerance.
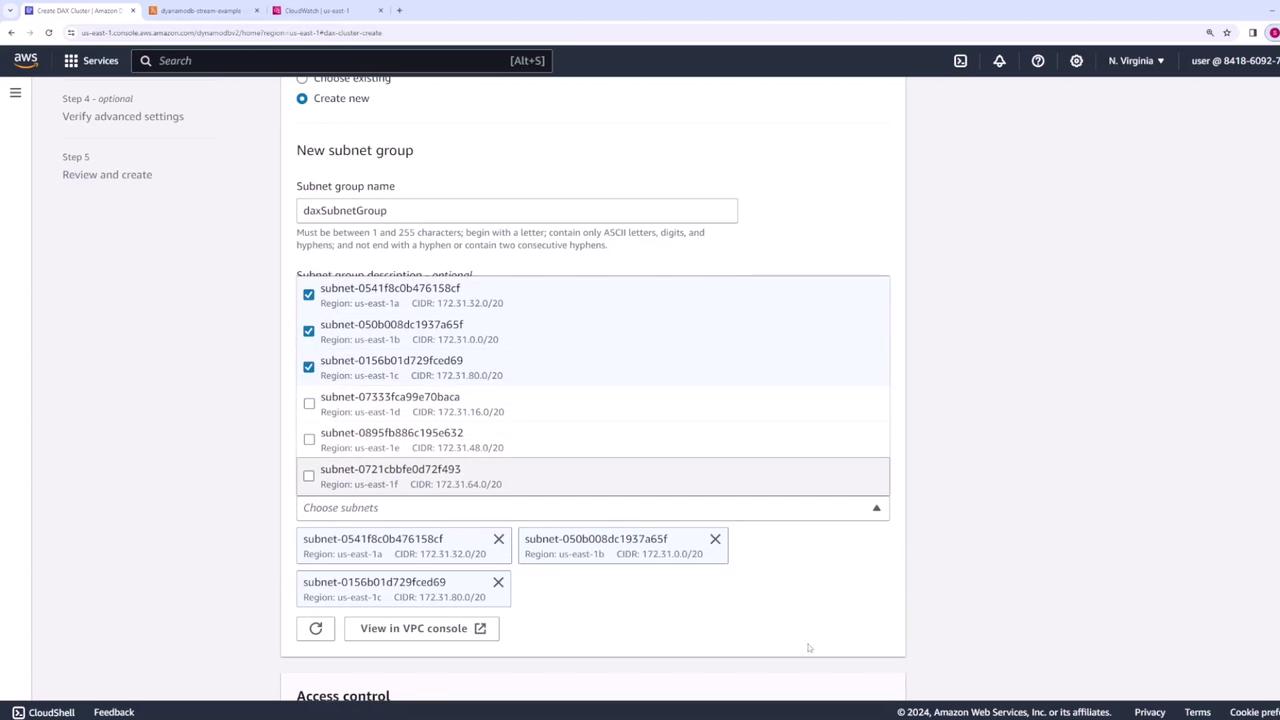
Next, create a subnet group by following these steps:
- Name the subnet group (e.g., "DAX Subnet Group").
- Select the appropriate VPC where the cluster will reside.
- Change the subnet selection to use the default subnet and choose three subnets for inclusion.
Step 3: Security and IAM Role Setup
Proceed by selecting a security group that meets the following requirements:
- Allow inbound access on port 811.
- If encryption in transit is enabled, ensure port 911 is also accessible.
For node distribution, you can let AWS automatically distribute nodes across available availability zones or manually specify the zones. For ease, choose the automatic distribution option.
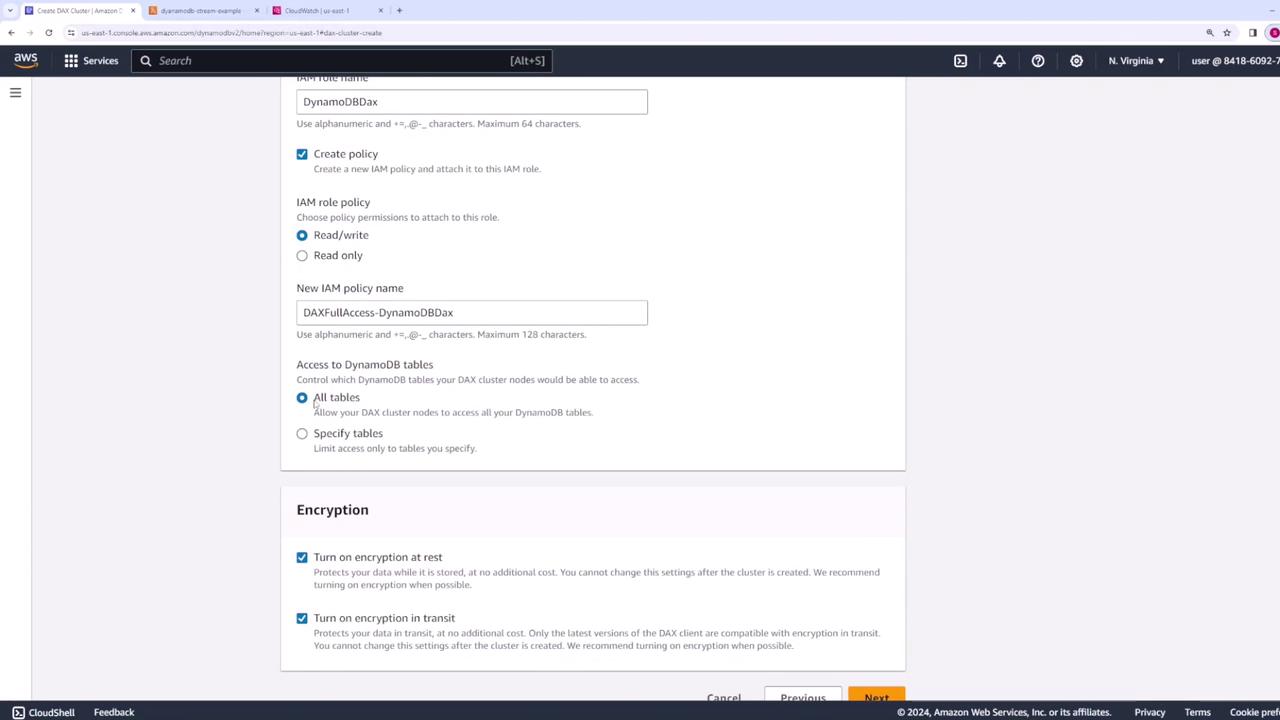
Now, create a new IAM service role by:
- Assigning a relevant name (e.g., "DynamoDB DAX").
- Clicking "Create Policy" to attach a new IAM policy.
- Selecting the data access role; for this demo, choose "read write access". Although you can restrict access to specific DynamoDB tables, this demo keeps the settings open.
Step 4: Enabling Encryption and Configuring the Parameter Group
Secure your cluster by enabling both encryption at rest and encryption in transit. After securing the cluster, select a parameter group:
- AWS provides a default parameter group named "default DAX" that includes settings such as the TTL (time-to-live) for cached queries (defaulted to five minutes).
- You may opt to create a custom parameter group if you need specific configuration adjustments.
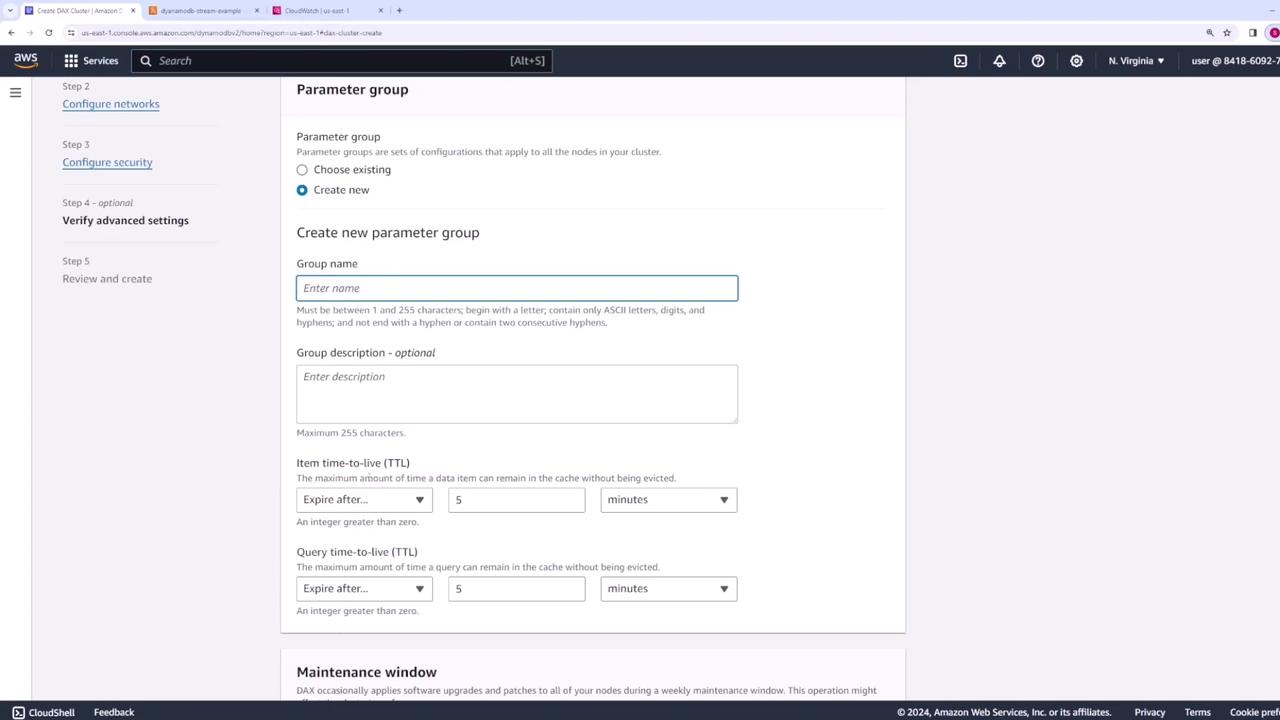
Additionally, specify the maintenance window for applying patches and upgrades—either leave the settings at their default or define a specific time window. Once you have reviewed and confirmed all configurations, click "Create Cluster" to initiate the deployment.
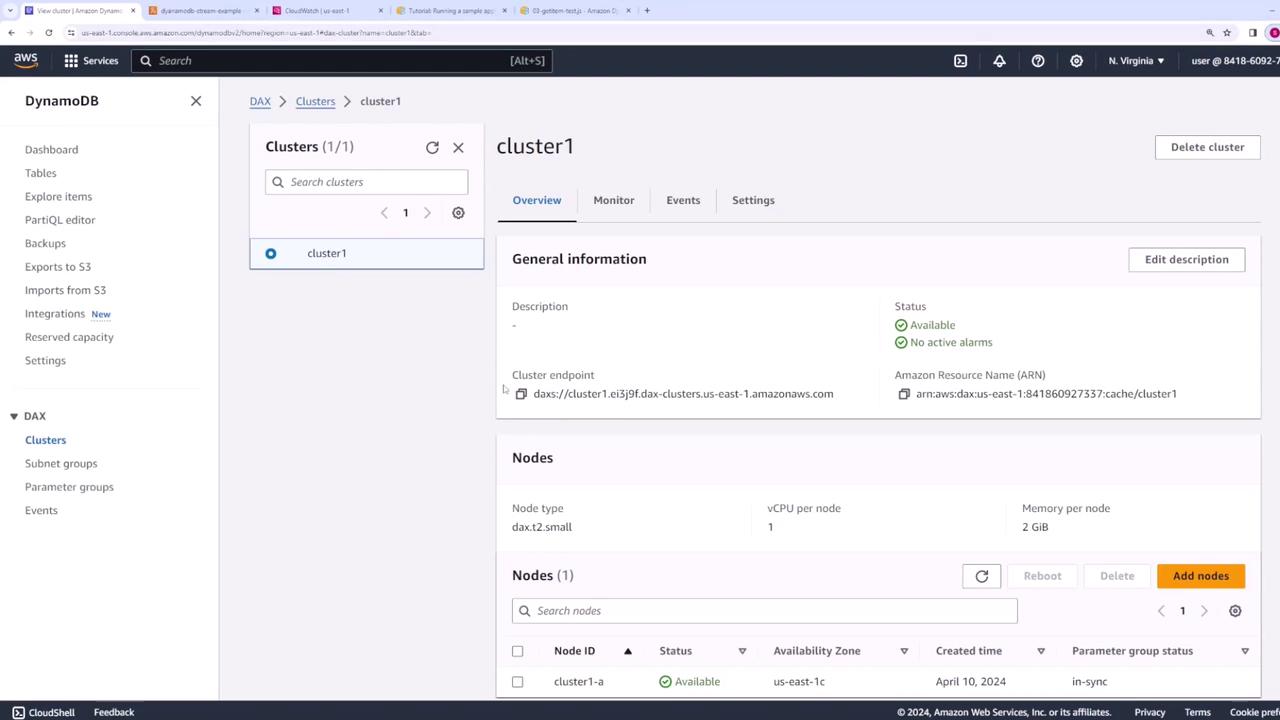
Step 5: Reviewing the Cluster Details
After the cluster is successfully created, review the cluster details. The most critical piece of information is the endpoint, which you will use when configuring the DynamoDB SDK. This endpoint ensures that your application interacts with the DAX cache rather than directly accessing the DynamoDB table.
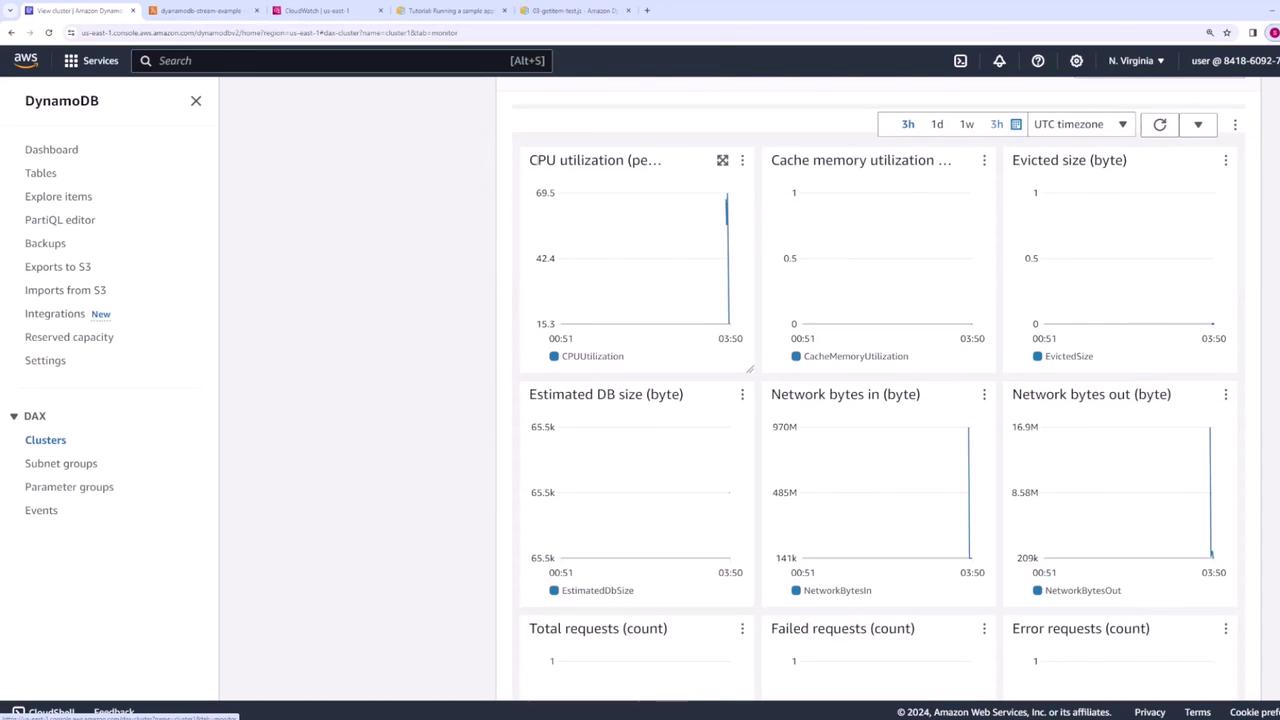
Step 6: Monitoring the Cluster
AWS provides a comprehensive Monitoring section where you can track various metrics to ensure optimal performance. Key metrics include:
- CPU utilization of nodes
- Cache memory utilization
- Total number of requests
- Failed requests
- Throttled requests
- Cache hits and misses
These metrics help you quickly diagnose performance issues and ensure your DAX cluster is operating efficiently.
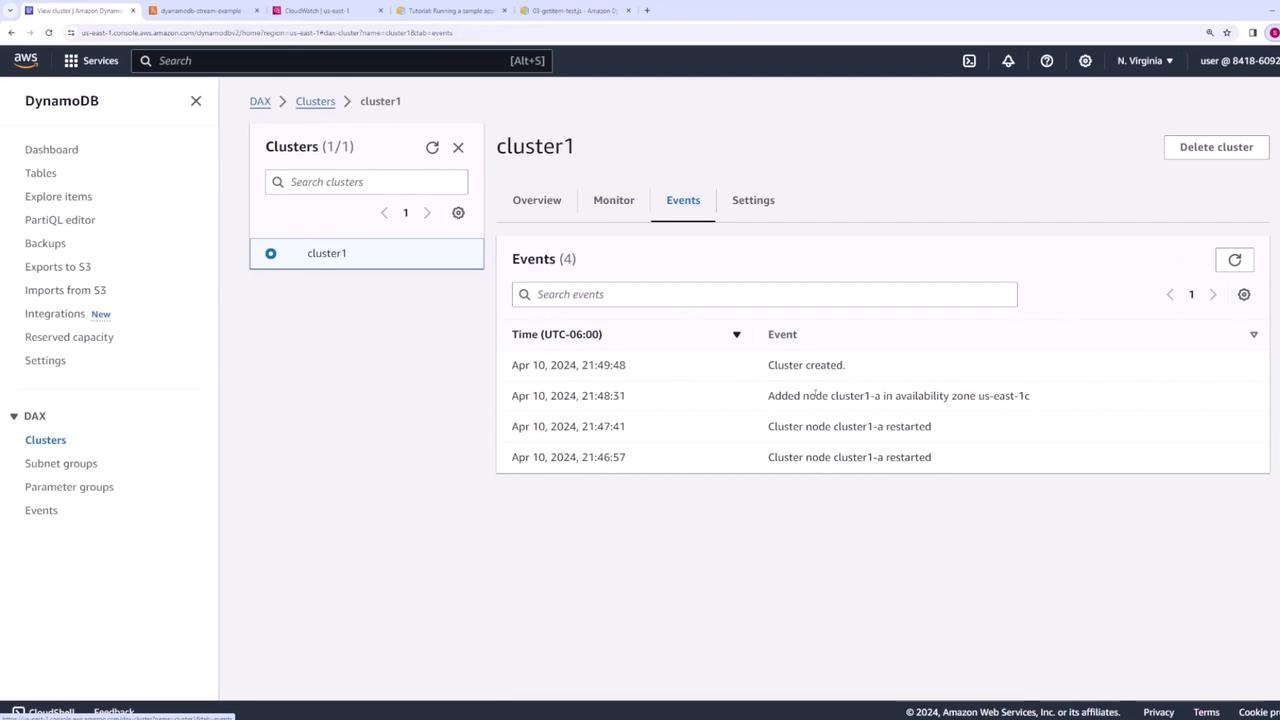
In addition, you can review any events related to the DAX cluster, such as creation events or node status updates.
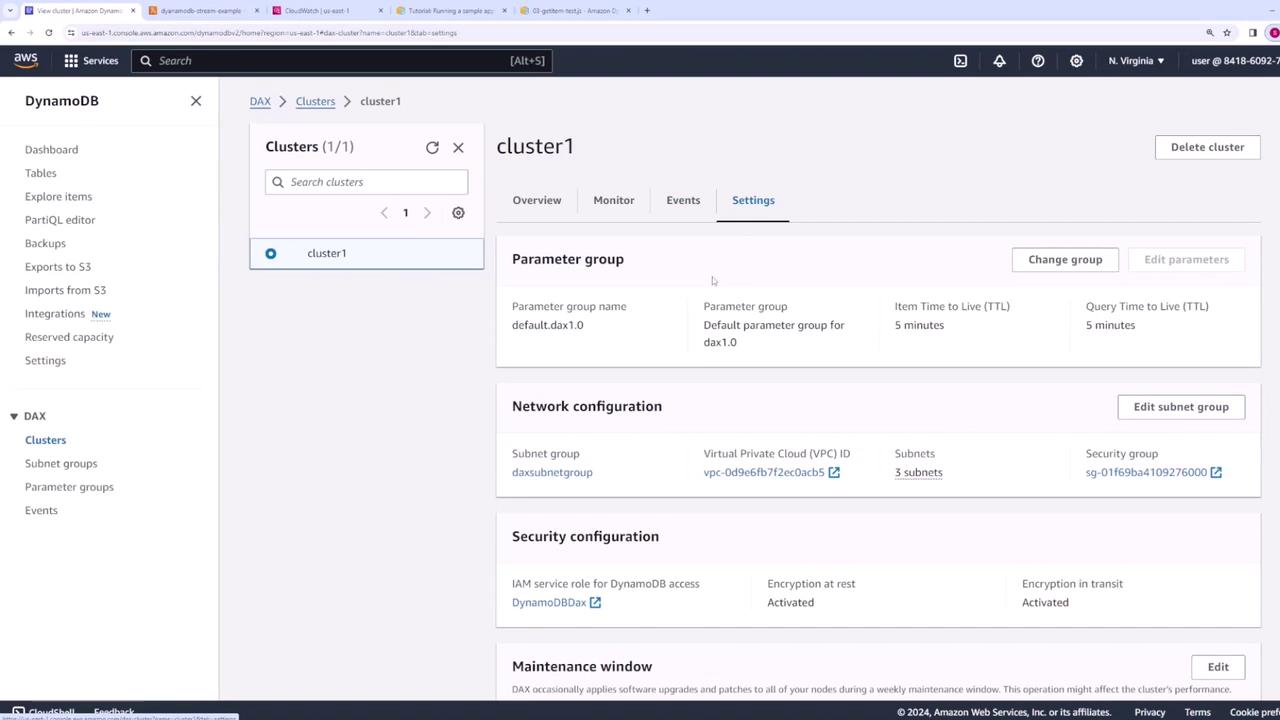
Step 7: Configuring Additional Settings
For further configuration adjustments such as updating the parameter group, modifying network settings, or fine-tuning security configurations, access the settings page in the AWS console. This section also allows you to manage maintenance windows and add tags for improved cluster management.
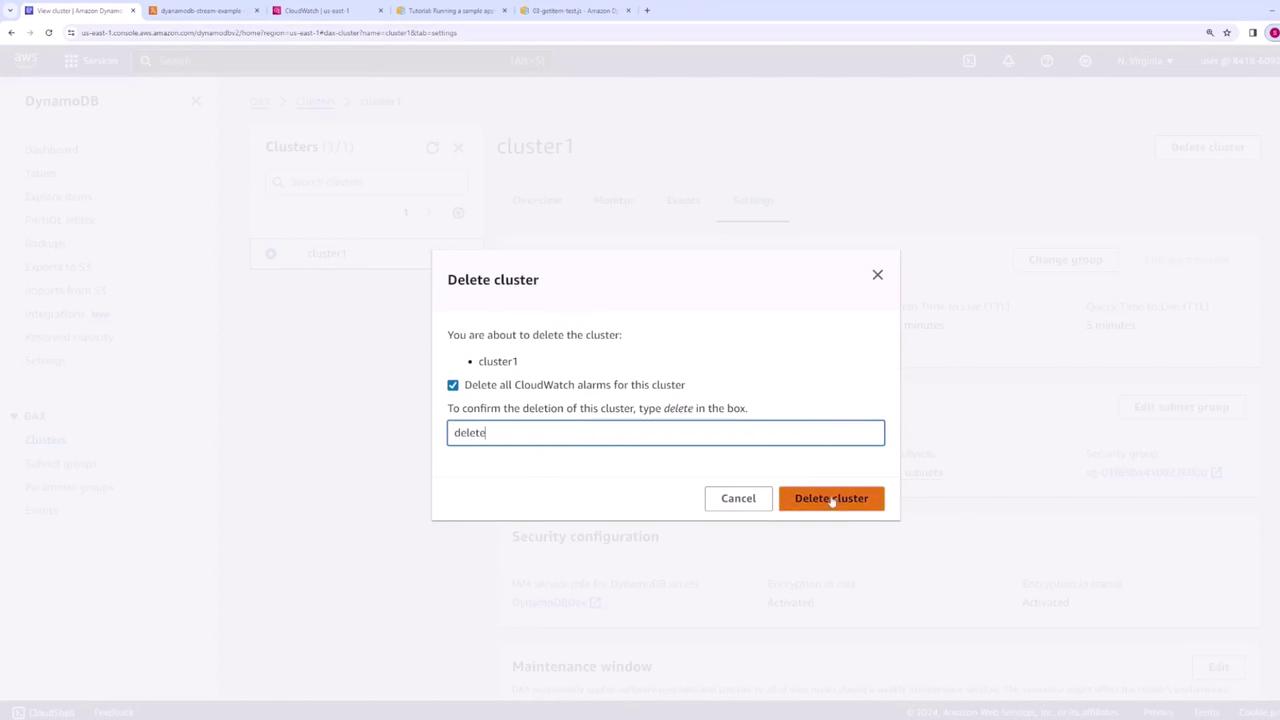
Deleting the DAX Cluster
When you have completed testing or your demonstration, it is a best practice to delete the DAX cluster if it is no longer required. To do this:
- Click on the "Delete" button.
- Confirm the deletion by typing "delete".
- If prompt appears, choose to remove the associated CloudWatch alarms.
This completes the demonstration of how to set up and manage a DAX cluster in DynamoDB. For further reading, visit the AWS DynamoDB Documentation to explore more advanced configurations and best practices.
Watch Video
Watch video content