AWS Certified Developer - Associate

Databases

DynamoDB SDK Part1 Demo

In this lesson, we will demonstrate how to use the AWS SDK (version 3) with Node.js to interact with DynamoDB. You will learn how to create, update, delete, and retrieve entries from a DynamoDB table. Although this demo uses Node.js, these techniques are applicable to other programming languages such as Python.


Installing the AWS SDK for DynamoDB

The first step is to install the DynamoDB client library. For Node.js, use npm:

npm install @aws-sdk/client-dynamodb

After installation, you should see an output similar to this:

C:\...>npm install @aws-sdk/client-dynamodb
added 83 packages, and audited 84 packages in 2s

2 packages are looking for funding
run `npm fund` for details

found 0 vulnerabilities

Initializing the DynamoDB Client

Once the library is installed, import the necessary modules and create an instance of the DynamoDB client. Remember to provide your AWS region and credentials.

Note

Never hardcode your credentials in production applications. Use environment variables or secure secrets management instead.

import { DynamoDBClient } from "@aws-sdk/client-dynamodb";

const client = new DynamoDBClient({
  region: "us-east-1",
  credentials: {
    accessKeyId: "AKIA4IAWSJ5UZT3W7PEN",
    secretAccessKey: "GDJYKyQifTDaaA8SRm7gXyQ2CYXkgz/DJBRje0dJ",
  },
});

When you run your Node.js application, the npm installation output should resemble:

C:\...>npm install @aws-sdk/client-dynamodb
added 83 packages, and audited 84 packages in 2s

2 packages are looking for funding
run `npm fund` for details

found 0 vulnerabilities

Retrieving an Item from the DynamoDB Table

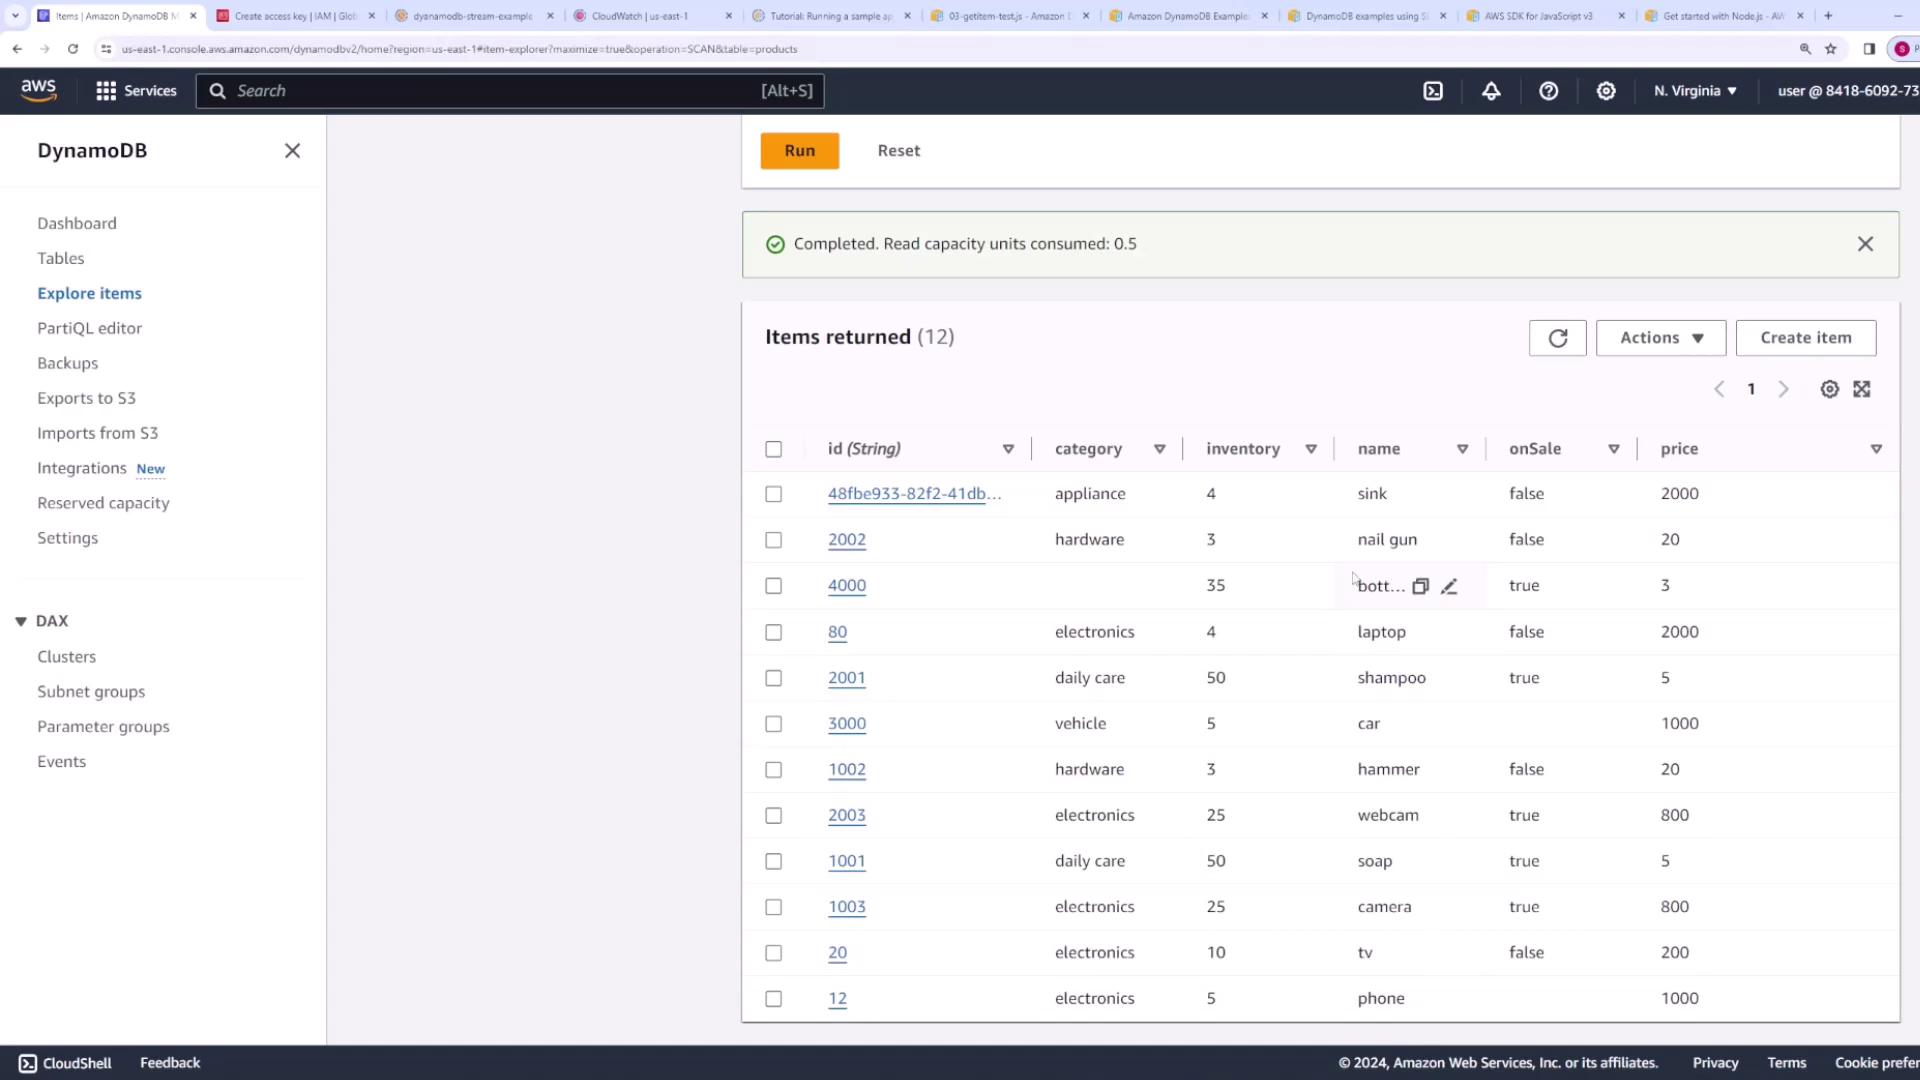
Assume you have a DynamoDB table named products that stores items with attributes such as ID (string), category (string), inventory (number), name (string), price (number), and onSale (Boolean). To retrieve an item—for example, an item with an ID of "80"—use the GetItem command.

import { DynamoDBClient, GetItemCommand } from "@aws-sdk/client-dynamodb";

const client = new DynamoDBClient({
  region: "us-east-1",
  credentials: {
    accessKeyId: "YOUR_ACCESS_KEY_ID",
    secretAccessKey: "YOUR_SECRET_ACCESS_KEY",
  },
});

const command = new GetItemCommand({
  TableName: "products",
  Key: {
    id: { S: "80" }
  }
});

const response = await client.send(command);
console.log(response);

The console output will be similar to:

Node.js v20.12.1
{
  $metadata: {
    httpStatusCode: 200,
    requestId: 'Q46HIT95LVKPO8HB708JFS47VV4KQNSO5AEMVJF66Q9ASUAAJG',
    extendedRequestId: undefined,
    cfId: undefined,
    attempts: 1,
    totalRetryDelay: 0
  },
  Item: {
    onSale: { BOOL: false },
    inventory: { N: '4' },
    category: { S: 'electronics' },
    id: { S: '80' },
    price: { N: '2000' },
    name: { S: 'laptop' }
  }
}

This output shows the retrieved item along with metadata such as the HTTP status code.


Adding an Item with the PutItem Command

To add an item to your DynamoDB table, import the PutItemCommand and define an object representing the new item. The following example demonstrates how to add a new product with an ID of "3000".

import { DynamoDBClient, GetItemCommand, PutItemCommand } from "@aws-sdk/client-dynamodb";

const client = new DynamoDBClient({
  region: "us-east-1",
  credentials: {
    accessKeyId: "AKIAI4AWSJ5UZT3W7PEN",
    secretAccessKey: "GDJYKyQifTDaaA8SRm7gXyQ2CYXkgz/DJBRje0dJ",
  },
});

// Example for retrieving an item (currently commented out)
// const getCommand = new GetItemCommand({
//   TableName: "products",
//   Key: { id: { S: "80" } }
// });
// const getResponse = await client.send(getCommand);
// console.log(getResponse);

const itemToPut = {
  TableName: "products",
  Item: {
    id: { S: "3000" },
    name: { S: "car" },
    inventory: { N: "5" },
    price: { N: "1000" },
    category: { S: "vehicle" },
  },
};

const putCommand = new PutItemCommand(itemToPut);
const putResponse = await client.send(putCommand);
console.log(putResponse);

A successful response from DynamoDB will include an HTTP status code of 200. Note that by default, DynamoDB does not return the newly created item unless additional parameters are provided.


Introducing the DynamoDB Document Client

The DynamoDB Document Client offers a higher-level abstraction, allowing you to work with native JavaScript types without explicitly specifying data types (such as { S: "value" } or { N: "value" }). First, install the additional library:

npm install @aws-sdk/lib-dynamodb

Then, initialize the Document Client alongside the standard DynamoDB client:

import { DynamoDBClient } from "@aws-sdk/client-dynamodb";
import { DynamoDBDocumentClient } from "@aws-sdk/lib-dynamodb";

const client = new DynamoDBClient({
  region: "us-east-1",
  credentials: {
    accessKeyId: "AKIA4IAWSJ5UZT3W7PEN",
    secretAccessKey: "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",
  },
});

const docClient = new DynamoDBDocumentClient(client);

Retrieving an Item Using the Document Client

For a more streamlined retrieval process, use the GetCommand from the Document Client library. This method allows you to avoid manual type conversion:

import { GetCommand } from "@aws-sdk/lib-dynamodb";

const getCommand = new GetCommand({
  TableName: "products",
  Key: {
    id: "3000",
  },
});

const docResponse = await docClient.send(getCommand);
console.log(docResponse);

If you encounter errors due to issues like missing the new keyword, ensure that your instantiation of the Document Client is correct.


Adding an Item Using the Document Client

To insert an item using native JavaScript data types, import the PutCommand and format your item accordingly:

import { PutCommand } from "@aws-sdk/lib-dynamodb";

const putDocCommand = new PutCommand({
  TableName: "products",
  Item: {
    id: "4000",
    name: "bottled water",
    price: 3,
    inventory: 35,
    onSale: true,
  },
});

const putDocResponse = await docClient.send(putDocCommand);
console.log(putDocResponse);

After running this code, verify that your DynamoDB table now contains an entry with ID "4000" featuring the correct attributes.


Bulk Operations with the Batch Write Command

When you need to handle multiple items simultaneously, the Batch Write command is a convenient option.

Preparing Items for a Batch Write

Begin by defining an array of JavaScript objects that represent the items to insert. Then, convert each object into the required format by mapping it to an object with a PutRequest property:

const itemsToInsert = [
  {
    id: "2001",
    name: "shampoo",
    price: 5,
    inventory: 50,
    category: "daily care",
    onSale: true,
  },
  {
    id: "2002",
    name: "nail gun",
    price: 20,
    inventory: 3,
    category: "hardware",
    onSale: false,
  },
  {
    id: "2003",
    name: "webcam",
    price: 800,
    inventory: 25,
    category: "electronics",
    onSale: true,
  },
];

const Items = itemsToInsert.map((item) => ({
  PutRequest: { Item: item },
}));

console.log(Items);

The output will be an array similar to:

[
  { PutRequest: { Item: [Object] } },
  { PutRequest: { Item: [Object] } },
  { PutRequest: { Item: [Object] } }
]

Executing the Batch Write

With your items prepared, import the BatchWriteCommand from the Document Client library and execute the command:

import { BatchWriteCommand } from "@aws-sdk/lib-dynamodb";

const batchCommand = new BatchWriteCommand({
  RequestItems: {
    "products": Items,
  },
});

const batchResponse = await docClient.send(batchCommand);
console.log(batchResponse);

A successful response will include a metadata object with an HTTP status code of 200 and an empty UnprocessedItems object:

{
  '$metadata': {
    httpStatusCode: 200,
    requestId: '...',
    extendedRequestId: undefined,
    cfId: undefined,
    attempts: 1,
    totalRetryDelay: 0
  },
  UnprocessedItems: {}
}

If everything executes correctly, check your DynamoDB table to confirm that the new items (shampoo, nail gun, and webcam) have been added.


The image shows an Amazon DynamoDB console with a table displaying items, including columns for ID, category, inventory, name, onSale status, and price. The sidebar contains navigation options like Dashboard, Tables, and Explore items.


Conclusion

In this article, we demonstrated how to:

  • Install and set up the AWS SDK for DynamoDB.
  • Retrieve items using the low-level GetItemCommand.
  • Insert new items using the PutItemCommand.
  • Leverage the higher-level DynamoDB Document Client to work with native JavaScript types.
  • Perform bulk write operations using the BatchWriteCommand.

These techniques form the foundation for building applications that perform basic CRUD operations via an API, and future lessons will explore these concepts further.

Watch Video

Watch video content

Previous
DynamoDB CLI Demo