AWS Certified Developer - Associate

Elastic Beanstalk

Deployment Modes Demo

In this lesson, you'll learn how to update and deploy new versions of your application using AWS Elastic Beanstalk. We cover switching between production and development environments, modifying deployment configurations, deploying updated application code, and leveraging features like environment domain swapping and version rollback.


Switching Environments and Upgrading Code

Currently, you are working in the production environment. To begin testing changes, switch to your development environment by navigating to your application and selecting the corresponding environment.

In the development environment, after making code changes, click Upload and Deploy to deploy a new version. You will be prompted to upload a zip file and assign a label. Note that the exact behavior during deployment depends on your environment configuration.

Below is an image of the AWS Elastic Beanstalk dashboard for an environment named "My-webapp-dev," which is running Node.js 20 on Amazon Linux and is in a healthy state.

The image shows an AWS Elastic Beanstalk dashboard for an environment named "My-webapp-dev," indicating that the environment is successfully launched and healthy, running on Node.js 20 with Amazon Linux.


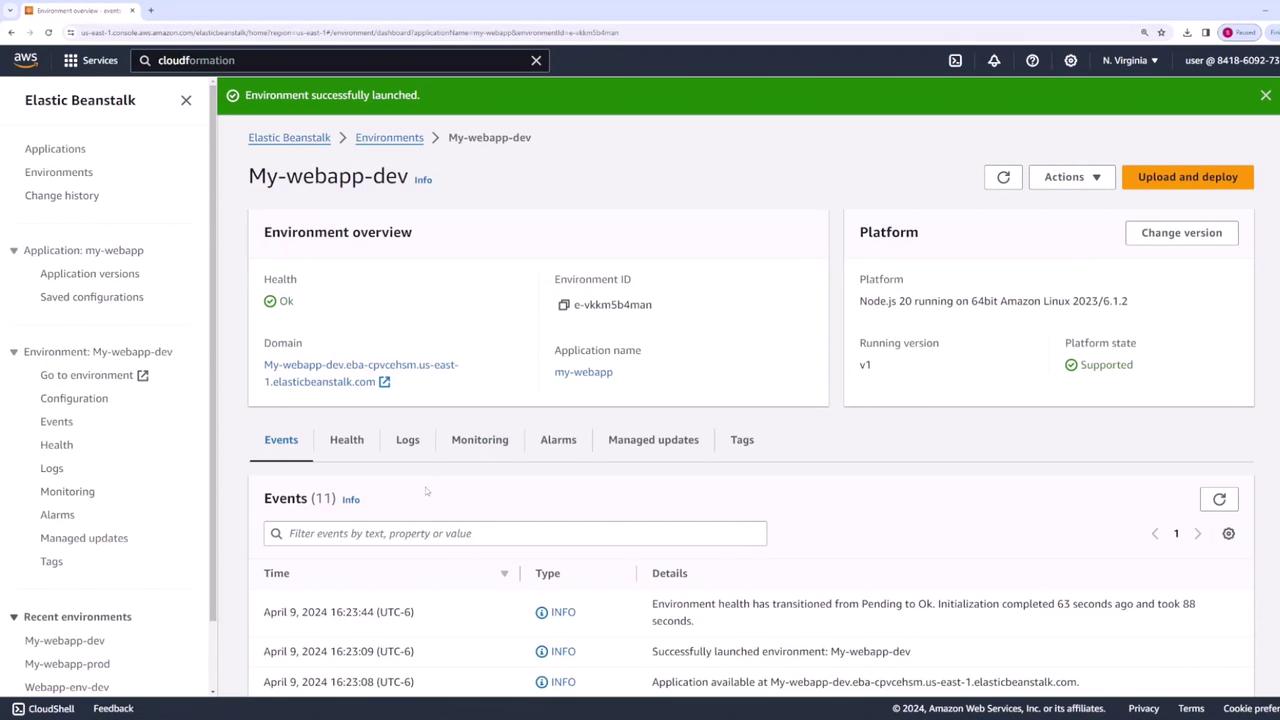
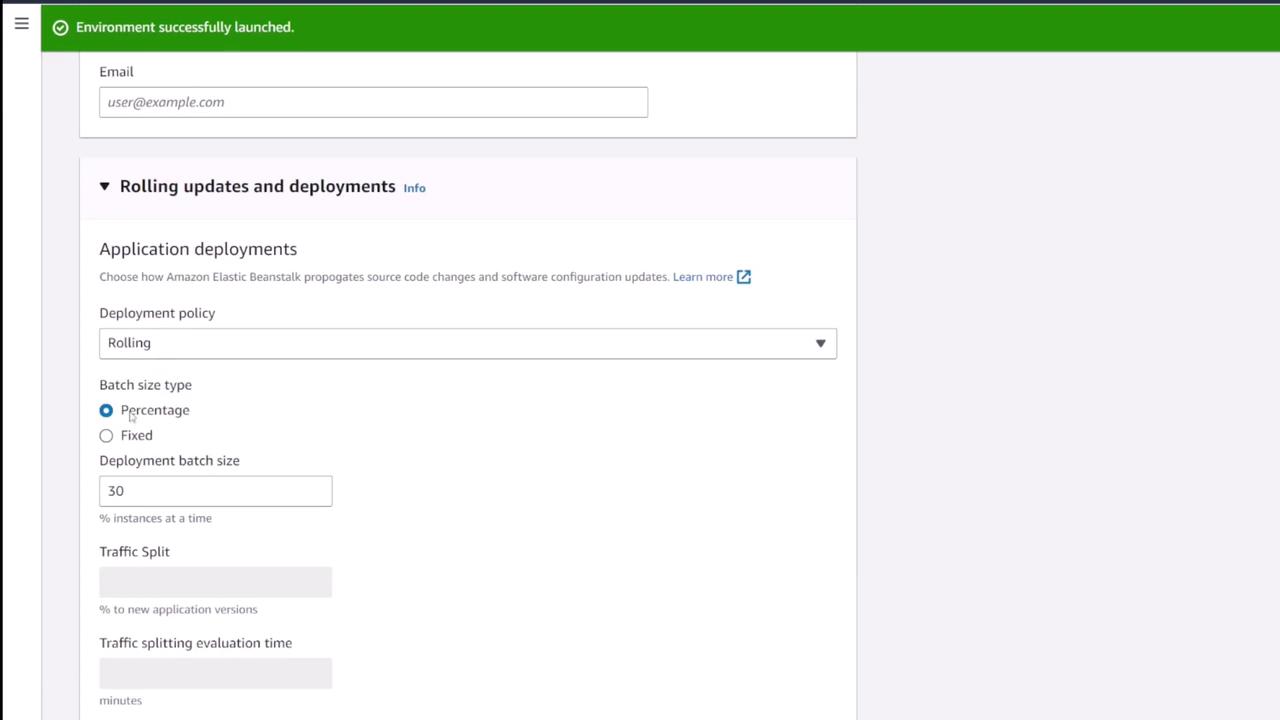
Viewing and Editing Deployment Configuration

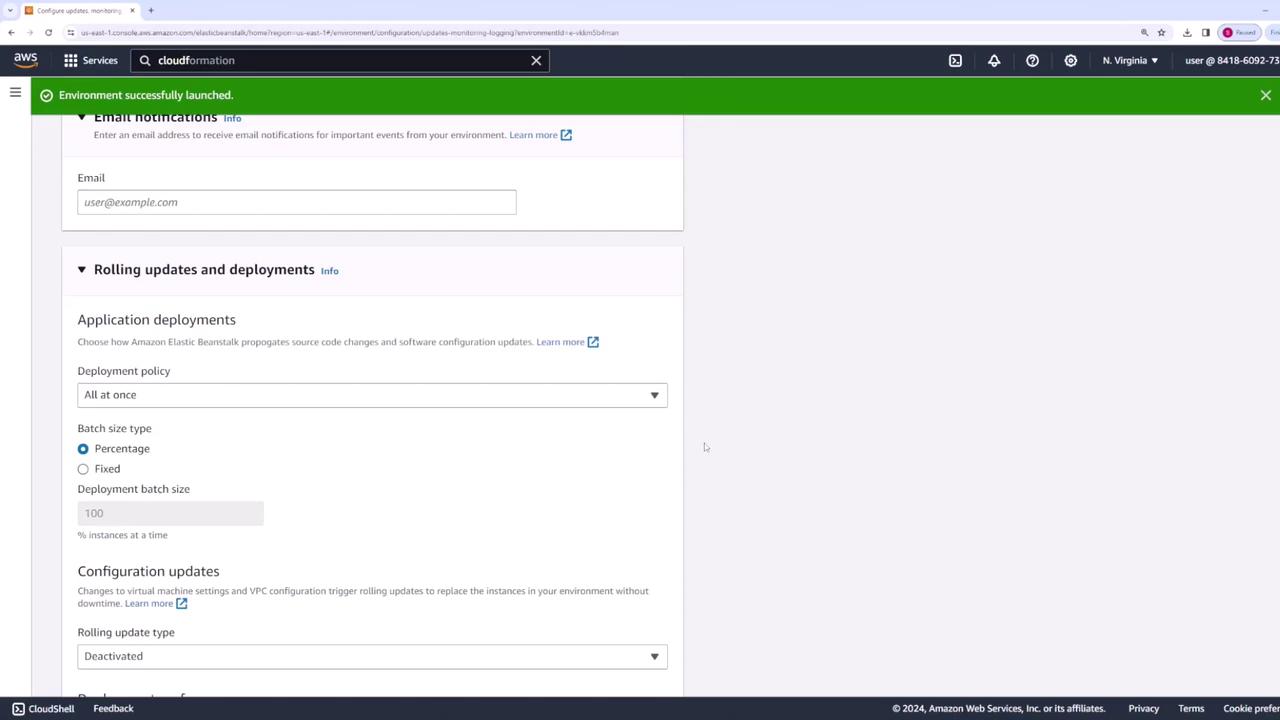
To review and adjust how Elastic Beanstalk updates your environment, go to the Updates, Monitoring, and Logging section in your development environment and click Edit. Under Rolling Updates and Deployment, you can select from several deployment policies.

For instance, with a single instance in development, your choices might be limited (e.g., "all at once" or a basic version of "immutable"). To access additional options, switch to the production environment, where multiple instances enable more deployment strategies.

In the production environment, scroll to the Updates, Monitoring, and Logging section and click Edit. When you open the deployment policy drop-down menu, you'll see the following options:

  1. Rolling Updates
    Updates a subset of instances at a time. For example, if you set a 30% update rate on a four-instance setup, Elastic Beanstalk updates one instance at a time to minimize downtime.

    The image shows a configuration screen for Amazon Elastic Beanstalk, focusing on application deployments with options for deployment policy, batch size type, and traffic split settings.

  2. All at Once
    Updates every instance simultaneously. Although fast, this method may cause a service disruption since all instances are updated at the same time. This approach is typically reserved for non-production environments.

  3. Rolling with Additional Batch
    Similar to rolling updates, this method temporarily launches an extra instance, ensuring that the overall active capacity remains constant during deployment. This may result in additional costs due to the extra instance.

  4. Immutable Deployments
    Launches a parallel set of instances that match your existing instance count. Once the new instances are running and verified, traffic is shifted over to them, allowing for a quick rollback if issues arise.

  5. Traffic Splitting
    Gradually routes a percentage of traffic to the new version. Only after confirming the update's stability does Elastic Beanstalk shift all traffic to the new version.

For this demonstration, we will continue with the Rolling Updates configuration. After selecting this option, click Apply and then Continue to finalize the changes in your production environment.

The image shows an AWS Elastic Beanstalk configuration page with options for email notifications, application deployments, and configuration updates. A green banner at the top indicates the environment was successfully launched.


Deploying a New Application Version

After updating your deployment configuration, it's time to deploy a new application version to the production environment. Start by modifying your code locally. For example, consider a Node.js application with an HTTP server setup:

const port = process.env.PORT || 3000,
      http = require('http'),
      fs = require('fs'),
      html = fs.readFileSync('index.html');

const log = function(entry) {
    fs.appendFileSync('/tmp/sample-app.log', new Date().toISOString() + ' - ' + entry + '\n');
};

const server = http.createServer(function (req, res) {
    if (req.method === 'POST') {
        let body = '';
        req.on('data', function(chunk) {
            body += chunk;
        });
        req.on('end', function() {
            if (req.url === '/') {
                log('Received a message.');
            }
        });
    }
});

The initial HTML file (version one) might resemble the following:

<html>
  <head>
    <style>
      ui {
      }
      li {
        margin: 1em 0;
      }
    </style>
  </head>
  <body>
    <div class="textColumn">
      <h1>Congratulations</h1>
      <p>Your first AWS Elastic Beanstalk Node.js application is now running on your own dedicated environment in the AWS Cloud</p>
      <p>This environment is launched with the Elastic Beanstalk Node.js Platform</p>
    </div>
    <div class="linksColumn">
      <h2>What's Next?</h2>
      <ul>
        <li><a href="https://docs.aws.amazon.com/elasticbeanstalk/latest/dg/">AWS Elastic Beanstalk Documentation</a></li>
      </ul>
    </div>
  </body>
</html>

To deploy a new version, update the HTML content (version two) to indicate the upgrade:

<html>
  <head>
    <style>
      ui {
      }
      li {
        margin: 1em 0;
      }
    </style>
  </head>
  <body>
    <div class="textColumn">
      <h1>Congratulations! V2</h1>
      <p>Your first AWS Elastic Beanstalk Node.js application is now running on your own dedicated environment in the AWS Cloud</p>
      <p>This environment is launched with the Elastic Beanstalk Node.js Platform</p>
    </div>
    <div class="linksColumn">
      <h2>What's Next?</h2>
      <ul>
        <li><a href="https://docs.aws.amazon.com/elasticbeanstalk/latest/dg/">AWS Elastic Beanstalk Documentation</a></li>
      </ul>
    </div>
  </body>
</html>

After saving your changes, compress the files into a zip archive (e.g., "version2.zip"). Return to the AWS Elastic Beanstalk console in your production environment, click Upload and Deploy, select the zip file, and assign the label "version 2."

You may also override the default deployment preferences for this deployment. For instance, you could choose the All at Once deployment method, but for this demo, continue using the existing Rolling Updates configuration. Click Deploy to proceed.

The image shows an AWS Elastic Beanstalk interface for uploading and deploying an application, with options for deployment preferences and batch size settings.

During deployment, Elastic Beanstalk updates your production environment using the rolling update strategy. For an environment with a single instance, the update is applied directly to that instance.

After the deployment completes, visit your production environment's domain. You should see the "Congratulations! V2" message, confirming that version two is now active.

The image shows an AWS Elastic Beanstalk environment dashboard for "My-webapp-prod," indicating a successful environment update with details about the platform and recent events.


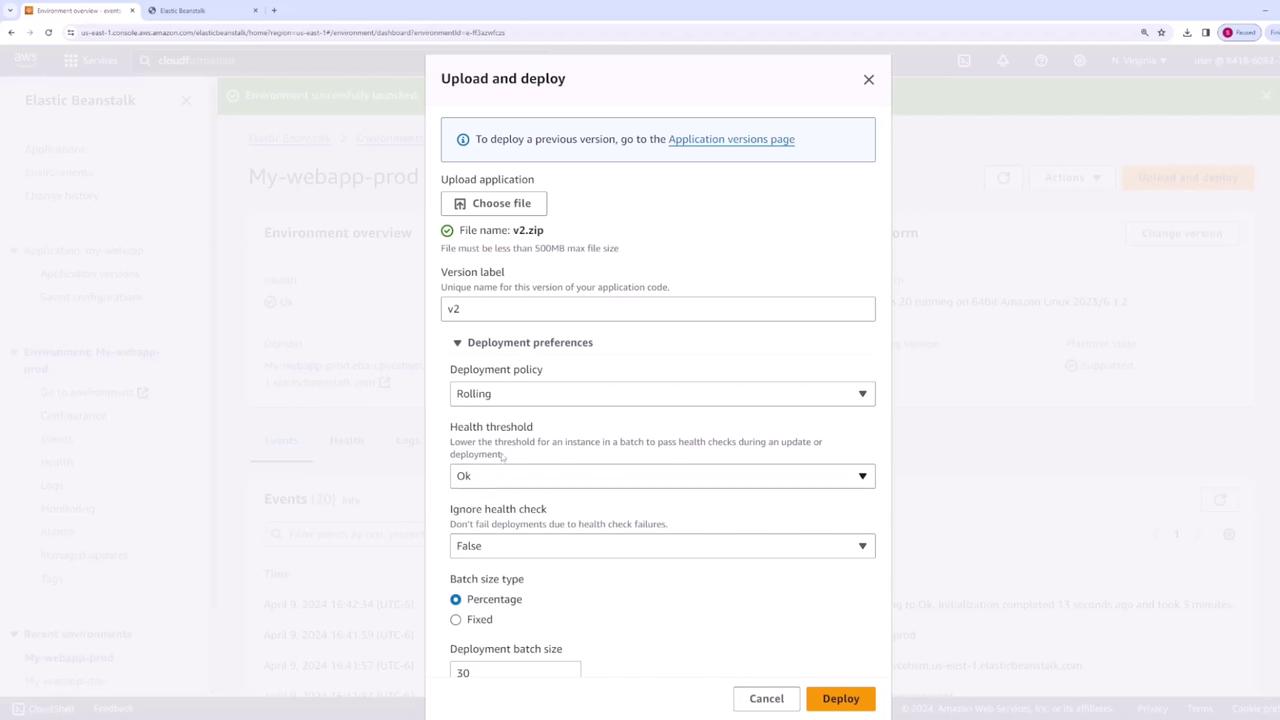
Managing Multiple Environments and Additional Deployment Actions

Switching back to your development environment, you'll notice it continues running version one. This illustrates that production and development environments are managed independently.

Other Available Actions

  1. Restart All App Servers
    Restart all servers if required.

  2. Swap Environment Domains

    Note

    This feature allows you to deploy a new version in a separate environment and then swap the domain. For example, after deploying a new version (e.g., "prod v3") in a secondary environment, you can swap the domain with the current production environment, ensuring a seamless transition for users.

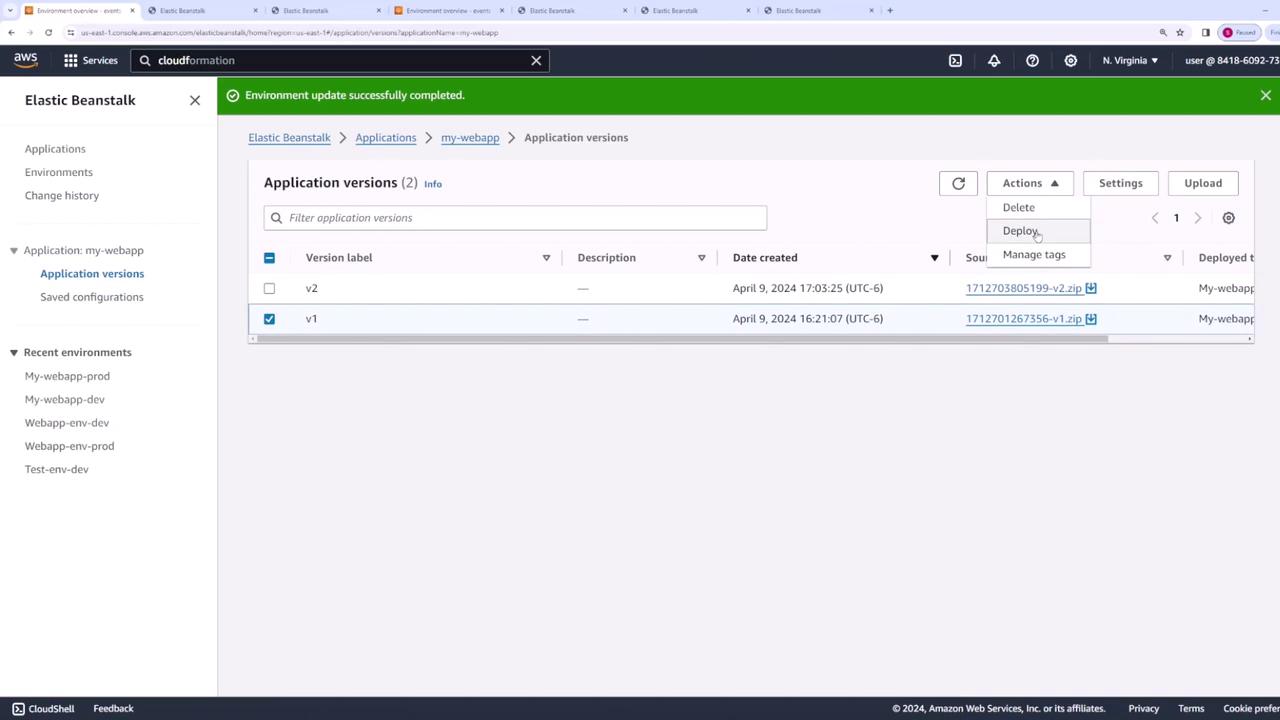
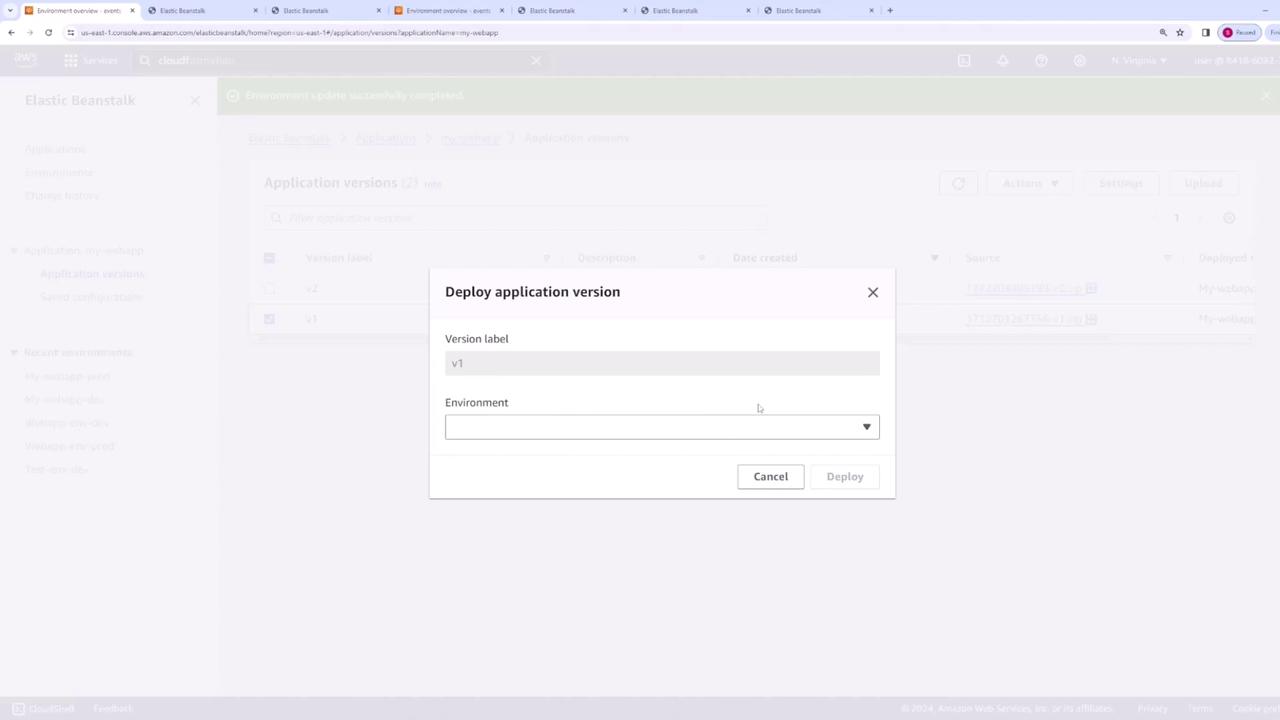
  3. Rollback to a Previous Version
    If necessary, you can revert the production environment to a prior application version. To do so, click Upload and Deploy in the production environment and select the desired earlier version from the Application Versions page.

    The image shows the AWS Elastic Beanstalk console displaying application versions for "my-webapp," with options to delete or deploy selected versions.

    After choosing an older version (e.g., version one), click Deploy to initiate a rolling update back to that version.

    The image shows a dialog box titled "Deploy application version" on the AWS Elastic Beanstalk console, with fields for "Version label" and "Environment."

This flexibility in deployment methods allows you to efficiently manage application updates, ensuring a smooth transition between versions while minimizing downtime.


Summary

In this lesson, you learned how to:

  • Switch between production and development environments.
  • Configure various deployment methods, including Rolling Updates, All at Once, Rolling with Additional Batch, Immutable Deployments, and Traffic Splitting.
  • Deploy a new application version by updating your code and uploading a new zip file.
  • Leverage features such as environment domain swapping and rollback to manage releases effectively.

By understanding and applying these strategies, you can harness AWS Elastic Beanstalk to streamline application updates while keeping service disruptions to a minimum.

For more information, check out the AWS Elastic Beanstalk Documentation.

Watch Video

Watch video content

Previous
Deployment Options