This lesson explores Network Access Control Lists in AWS, their configuration, and differences from security groups for managing subnet-level traffic.
Welcome to this lesson on Network Access Control Lists (NACLs). In this article, we will explore how NACLs operate, how they differ from security groups, and how to configure them in AWS. Unlike stateful security groups that protect individual instances, NACLs are stateless and apply at the subnet level, controlling traffic to and from an entire subnet.Before diving into NACL configurations, we first ensure that the EC2 instances are not limited by their security groups. This allows us to focus solely on NACL functionality.
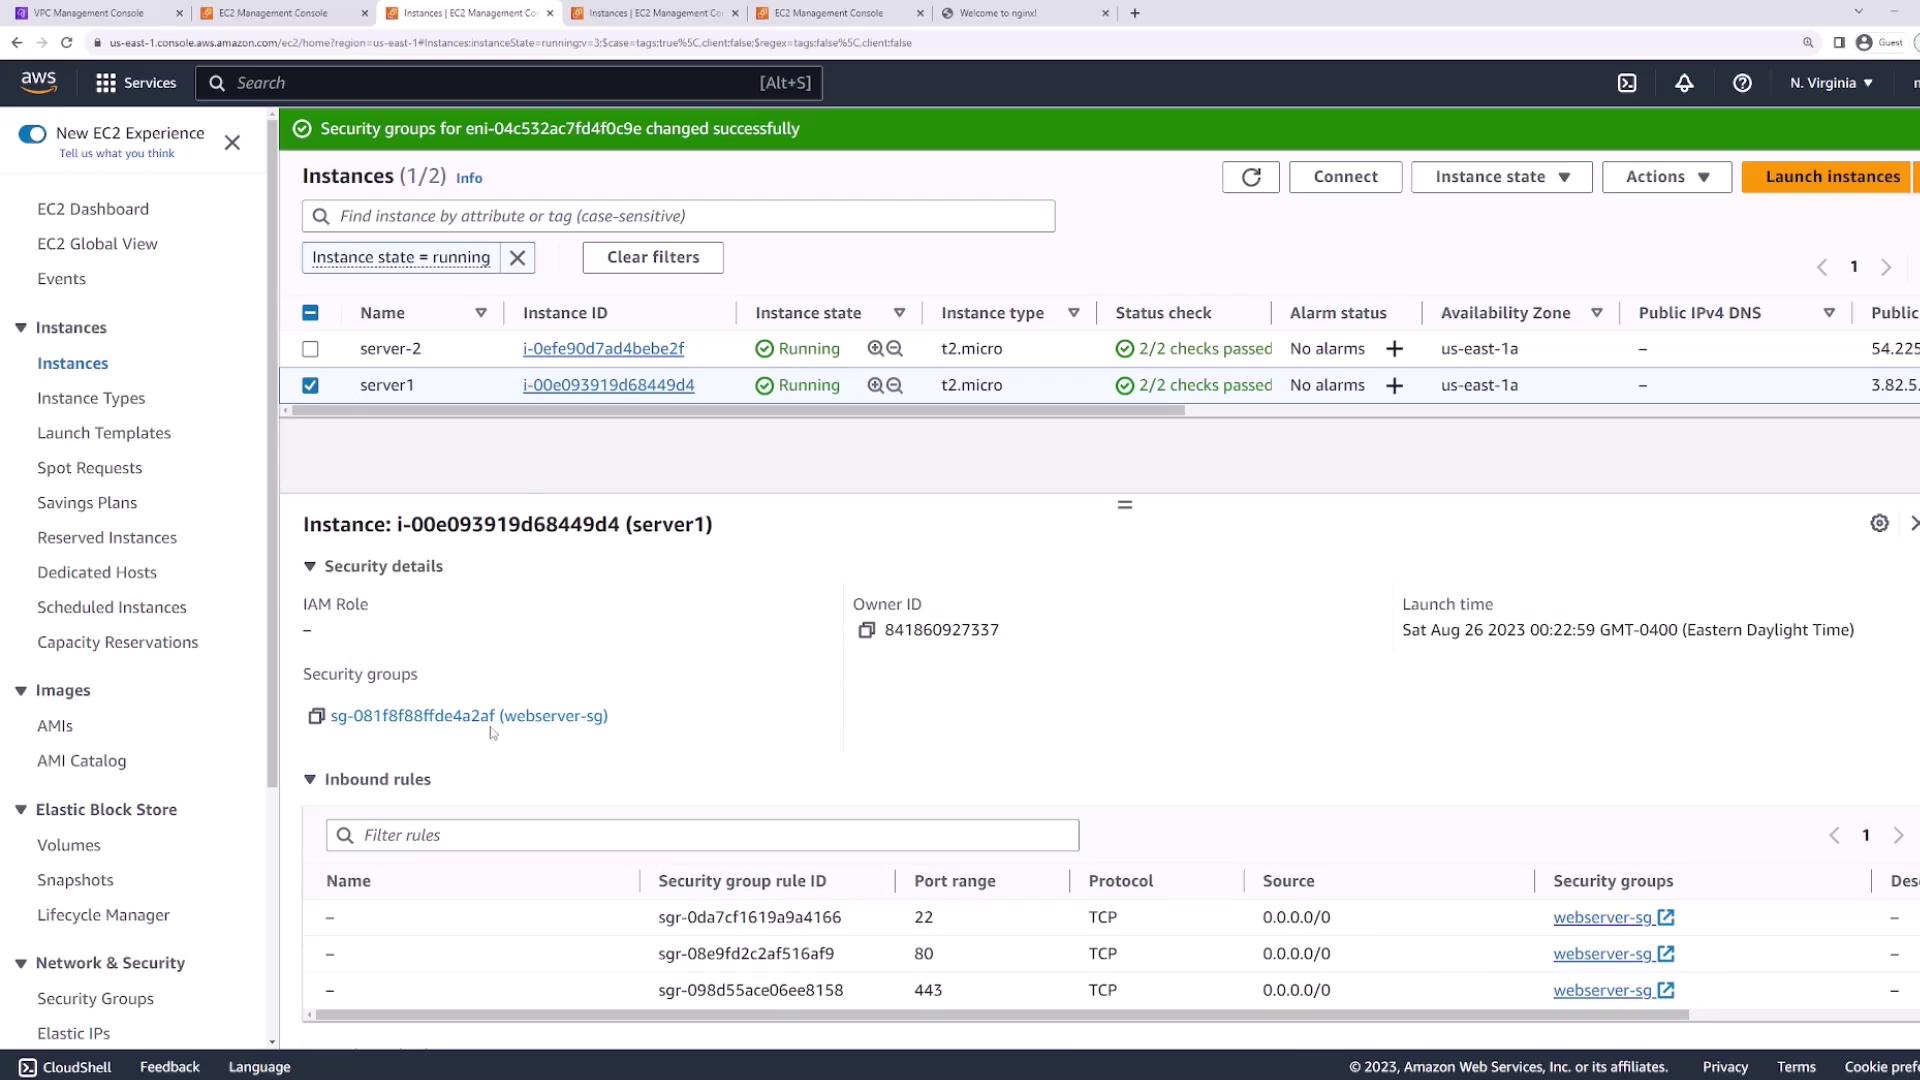
We begin by reviewing and updating the security group settings for our EC2 instances:
Server 1: This instance is associated with a “web server security group.”
Server 2: Initially, this instance has no security group assigned. To ensure consistency, we update it by assigning the same web server security group.
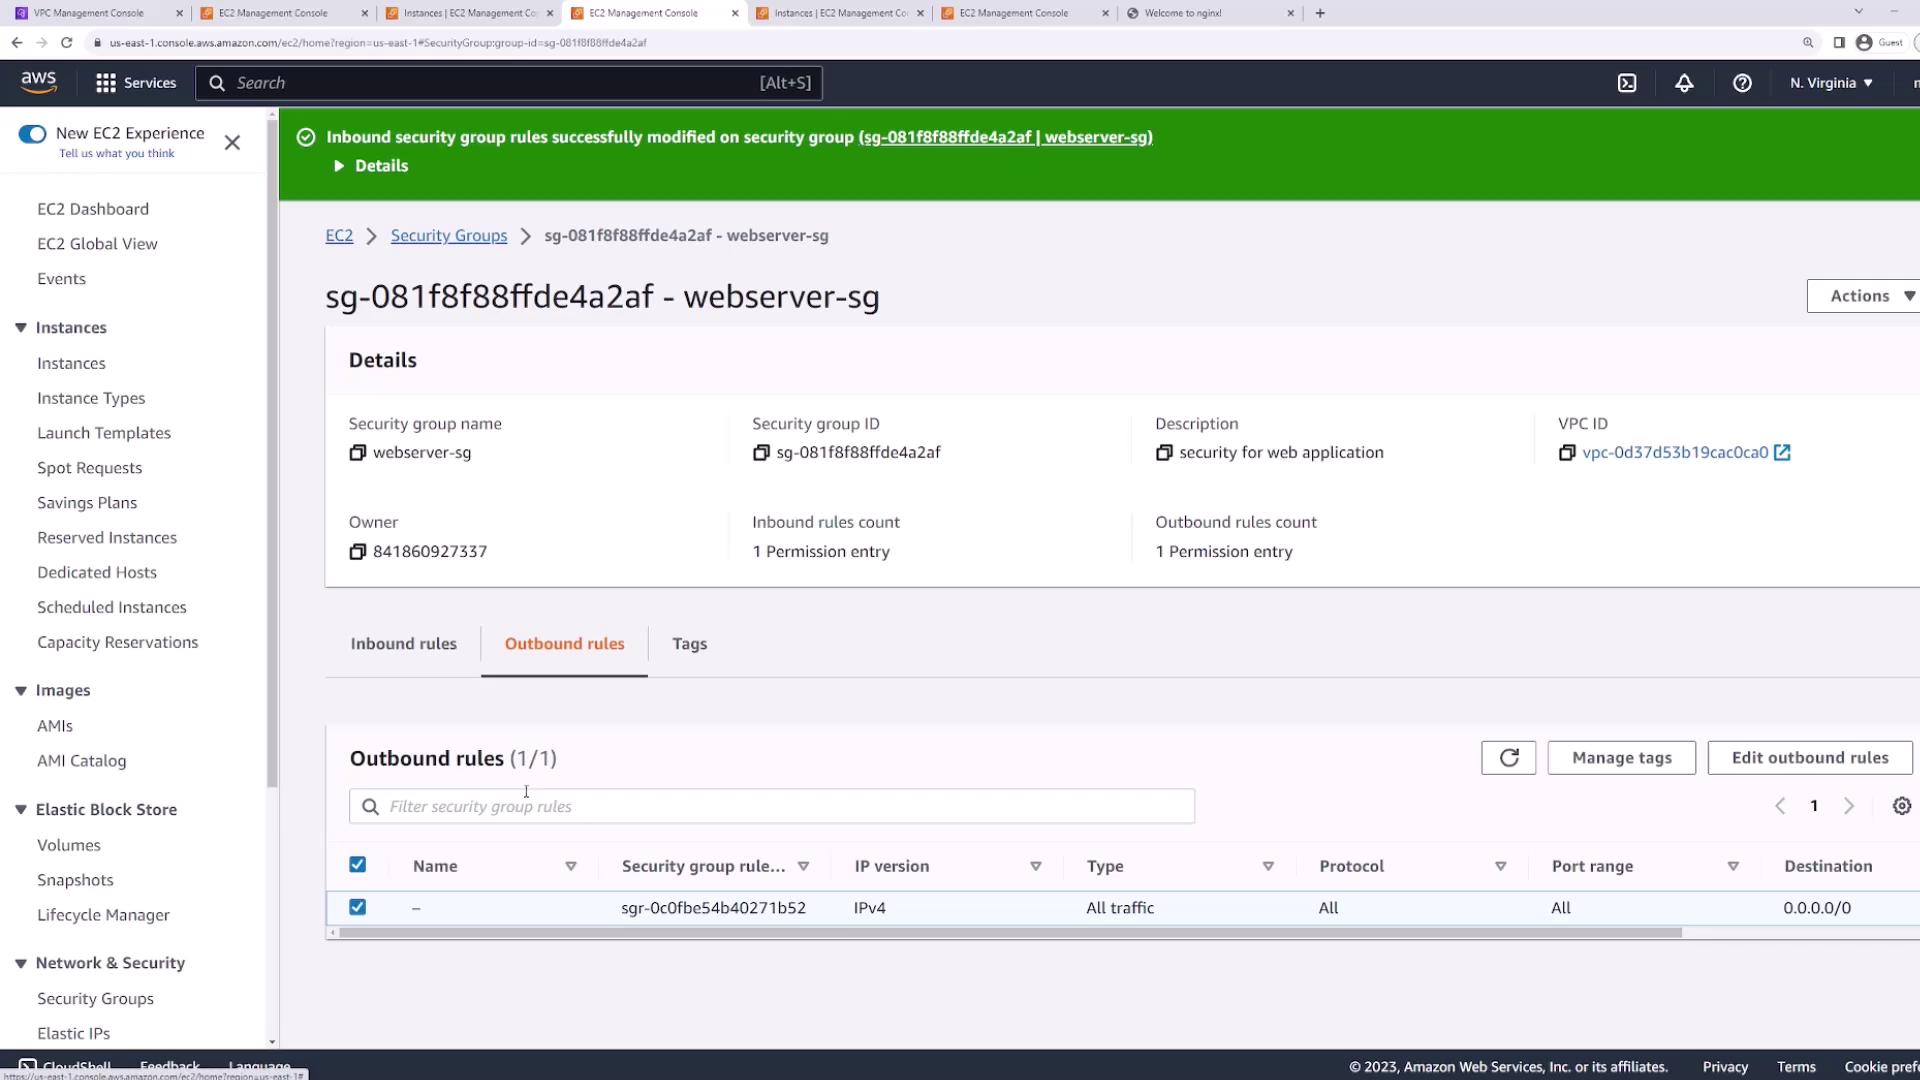
For both servers, we modify the security group rules to allow all inbound and outbound traffic. This setup prevents the security group from interfering with our NACL tests.
After the updates, the security group now permits all traffic:
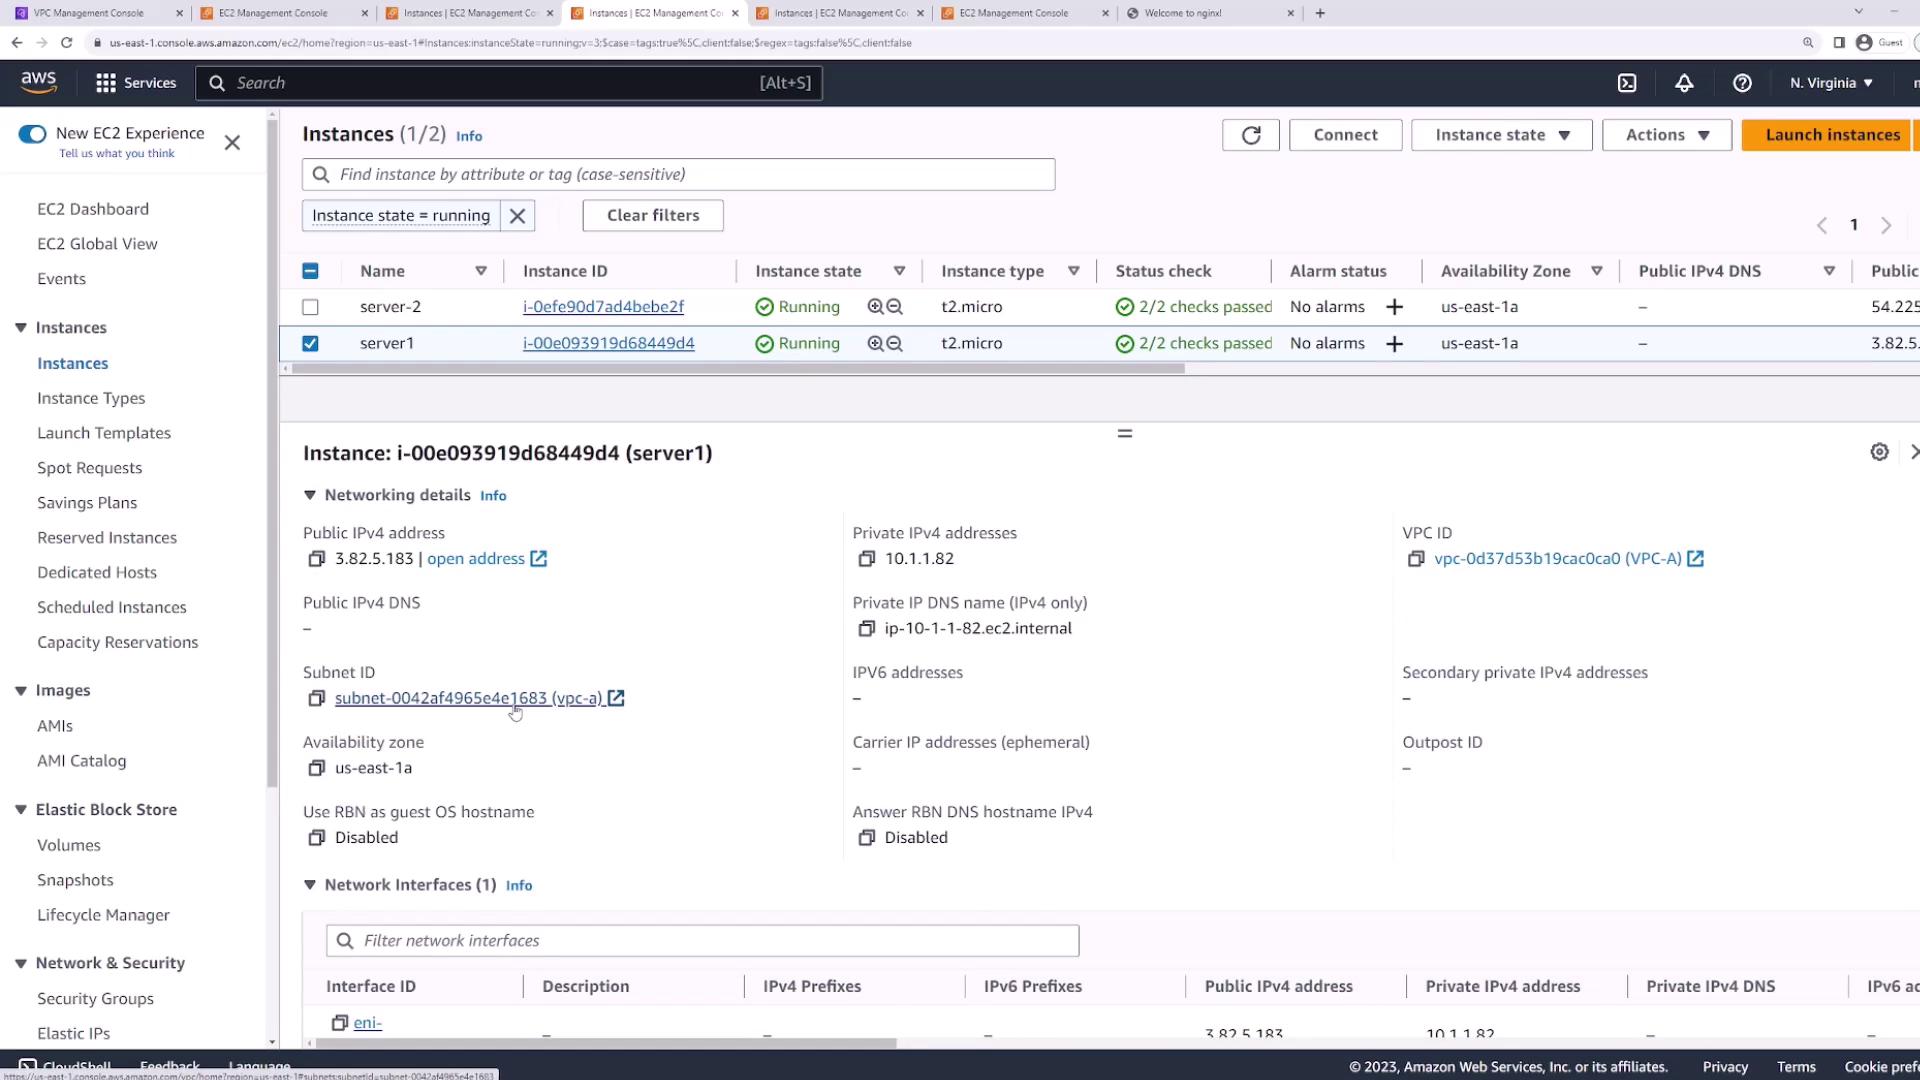
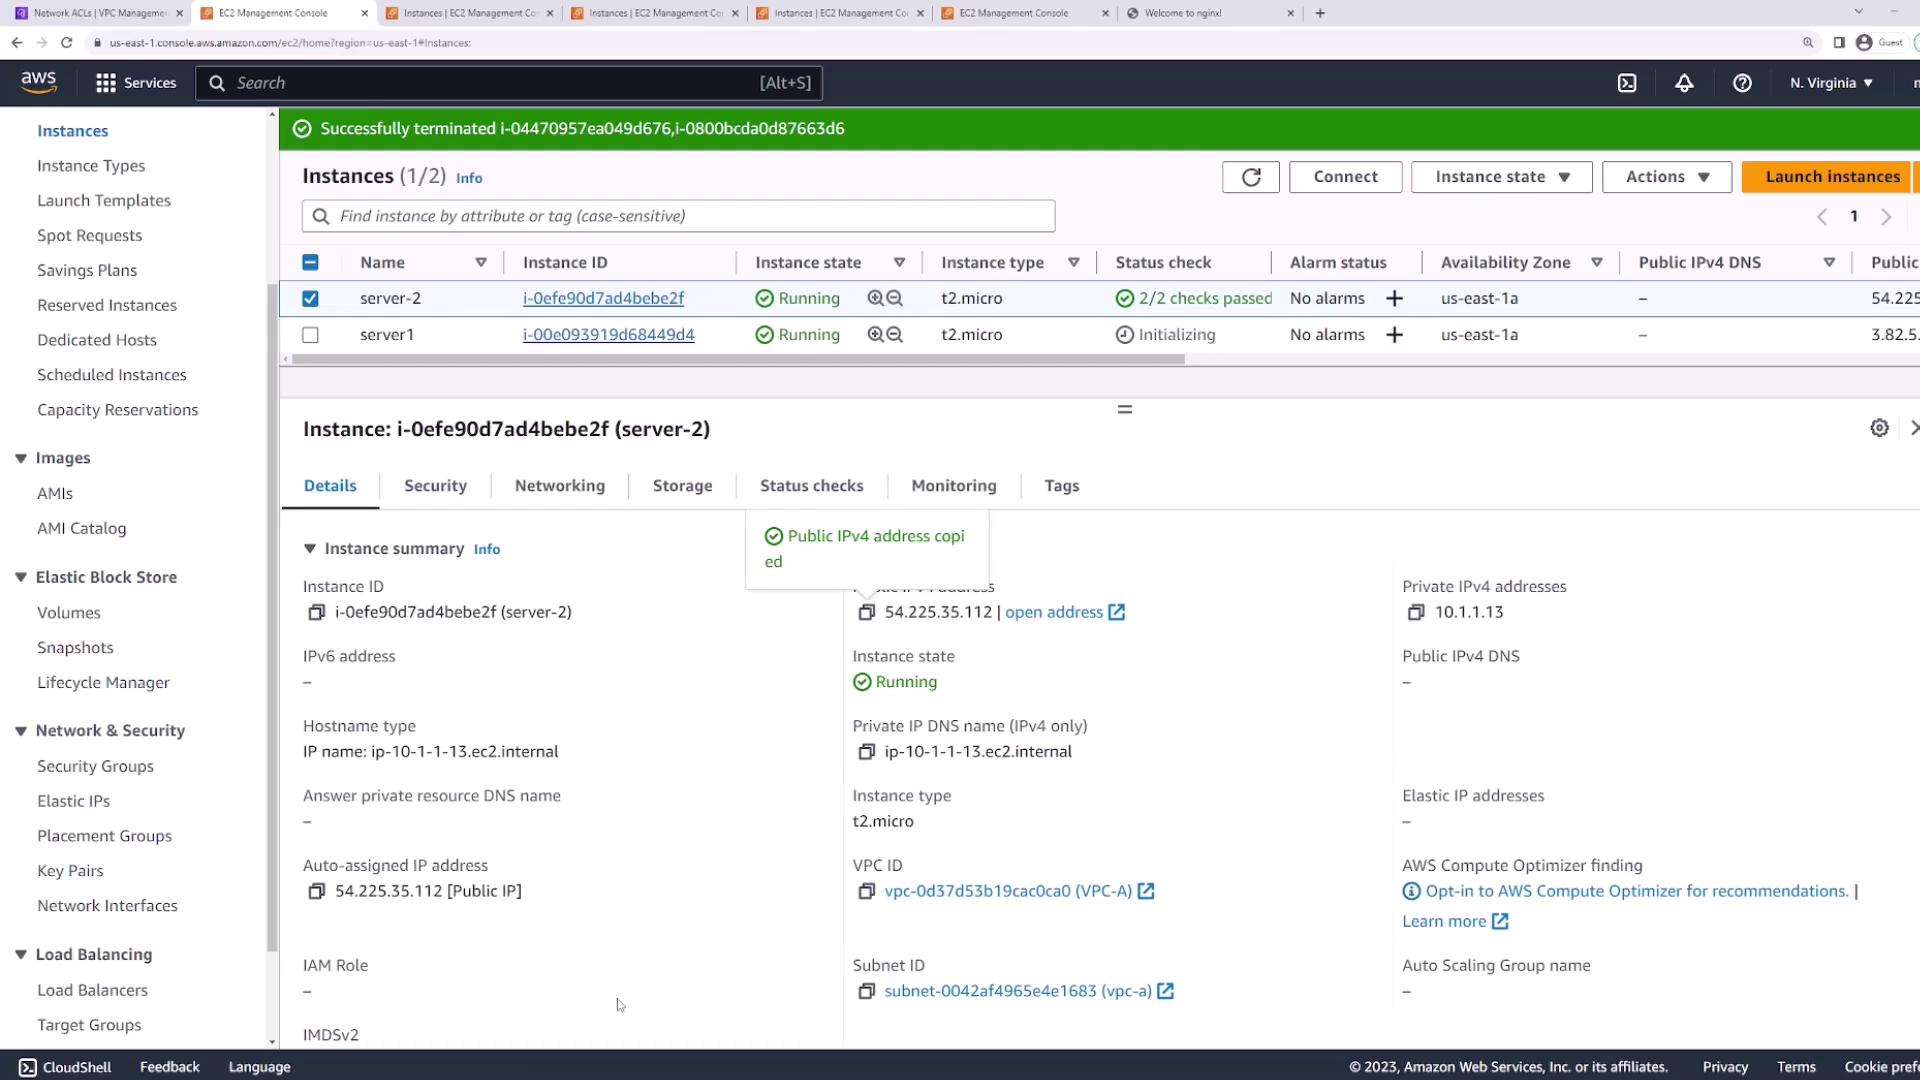
Next, verify that both EC2 instances reside in the same subnet. For example, by selecting Server 1 and reviewing its networking details, you can see it is on subnet E1683:
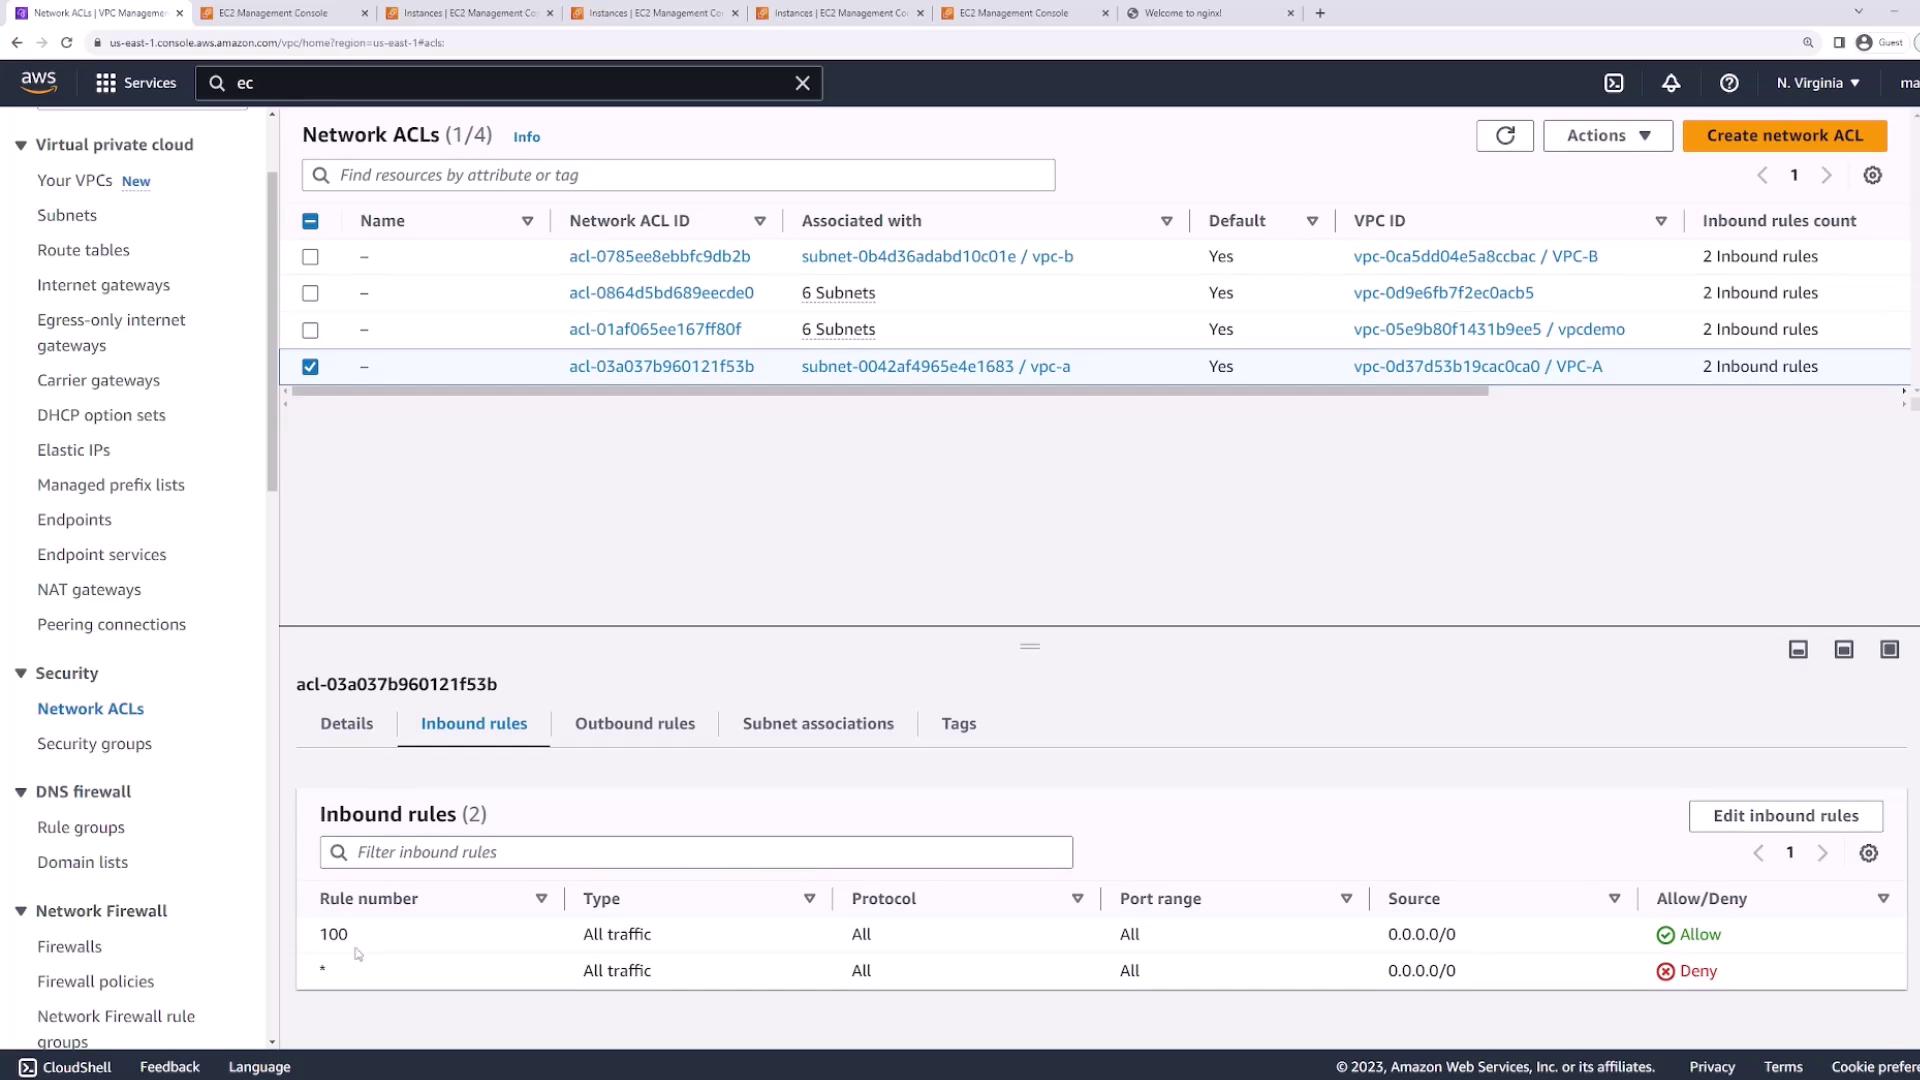
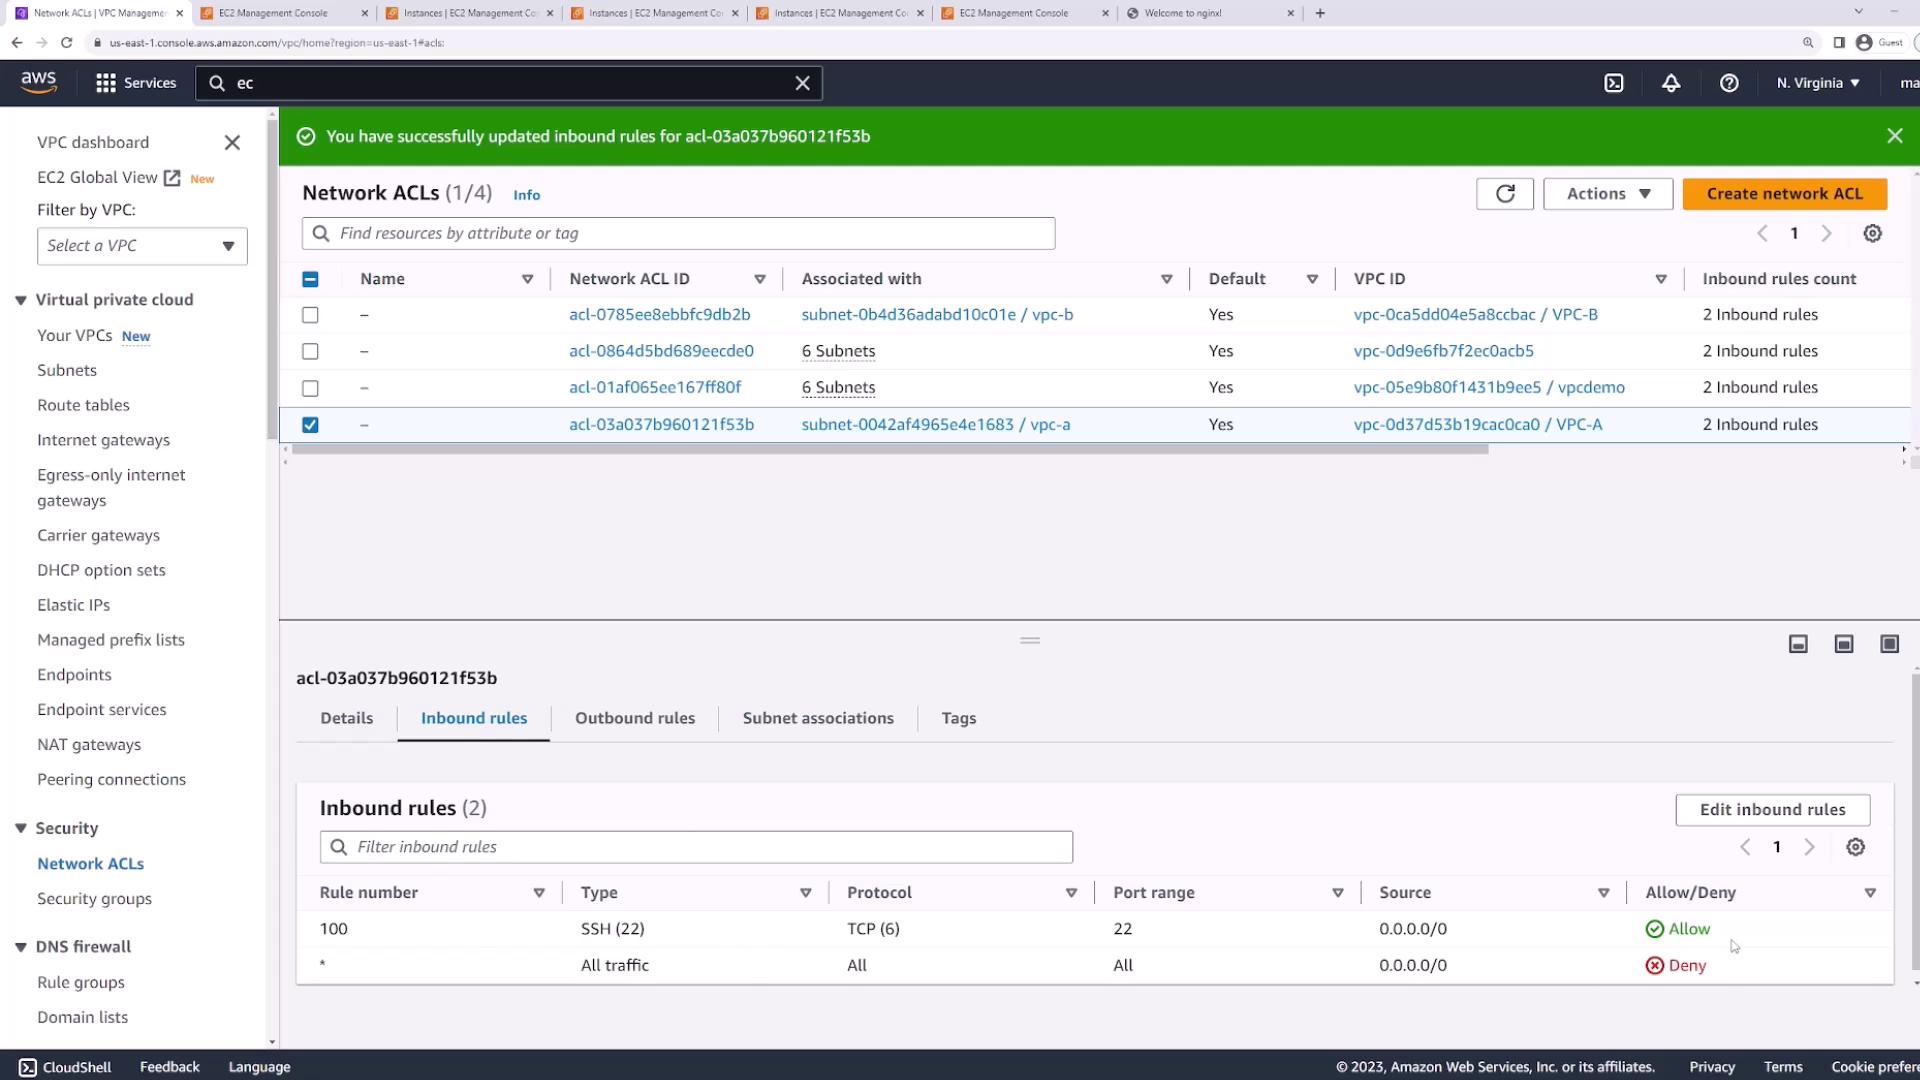
Switch to the VPC console and navigate to the “Security” section, then click on “Network ACLs.” Locate the default ACL for VPC A—the one associated with your EC2 instances—and confirm that subnet E1683 is attached to this ACL.Examine the inbound rules. Notice that rule 100 allows all traffic on all protocols and ports from any IP address. Because NACL evaluation is top-down, placing any rule below rule 100 would be ineffective. This default configuration guarantees that all traffic reaches the instance until we modify the rules.
At this stage, test connectivity by SSHing into your instance:
# Example SSH test and ping output:[ec2-user@ip-10-1-1-82 ~]$ ping 8.8.8.864 bytes from 8.8.8.8: icmp_seq=1 ttl=53 time=1.58 ms64 bytes from 8.8.8.8: icmp_seq=2 ttl=53 time=1.61 ms64 bytes from 8.8.8.8: icmp_seq=3 ttl=53 time=1.61 ms64 bytes from 8.8.8.8: icmp_seq=4 ttl=53 time=1.91 ms64 bytes from 8.8.8.8: icmp_seq=5 ttl=53 time=1.62 ms64 bytes from 8.8.8.8: icmp_seq=6 ttl=53 time=1.65 ms64 bytes from 8.8.8.8: icmp_seq=7 ttl=53 time=1.57 ms--- 8.8.8.8 ping statistics ---7 packets transmitted, 7 received, 0% packet loss, time 601msrtt min/avg/max/mdev = 1.572/1.651/1.909/0.107 ms
After exiting the SSH session and reconnecting, the successful test confirms that connectivity is intact.
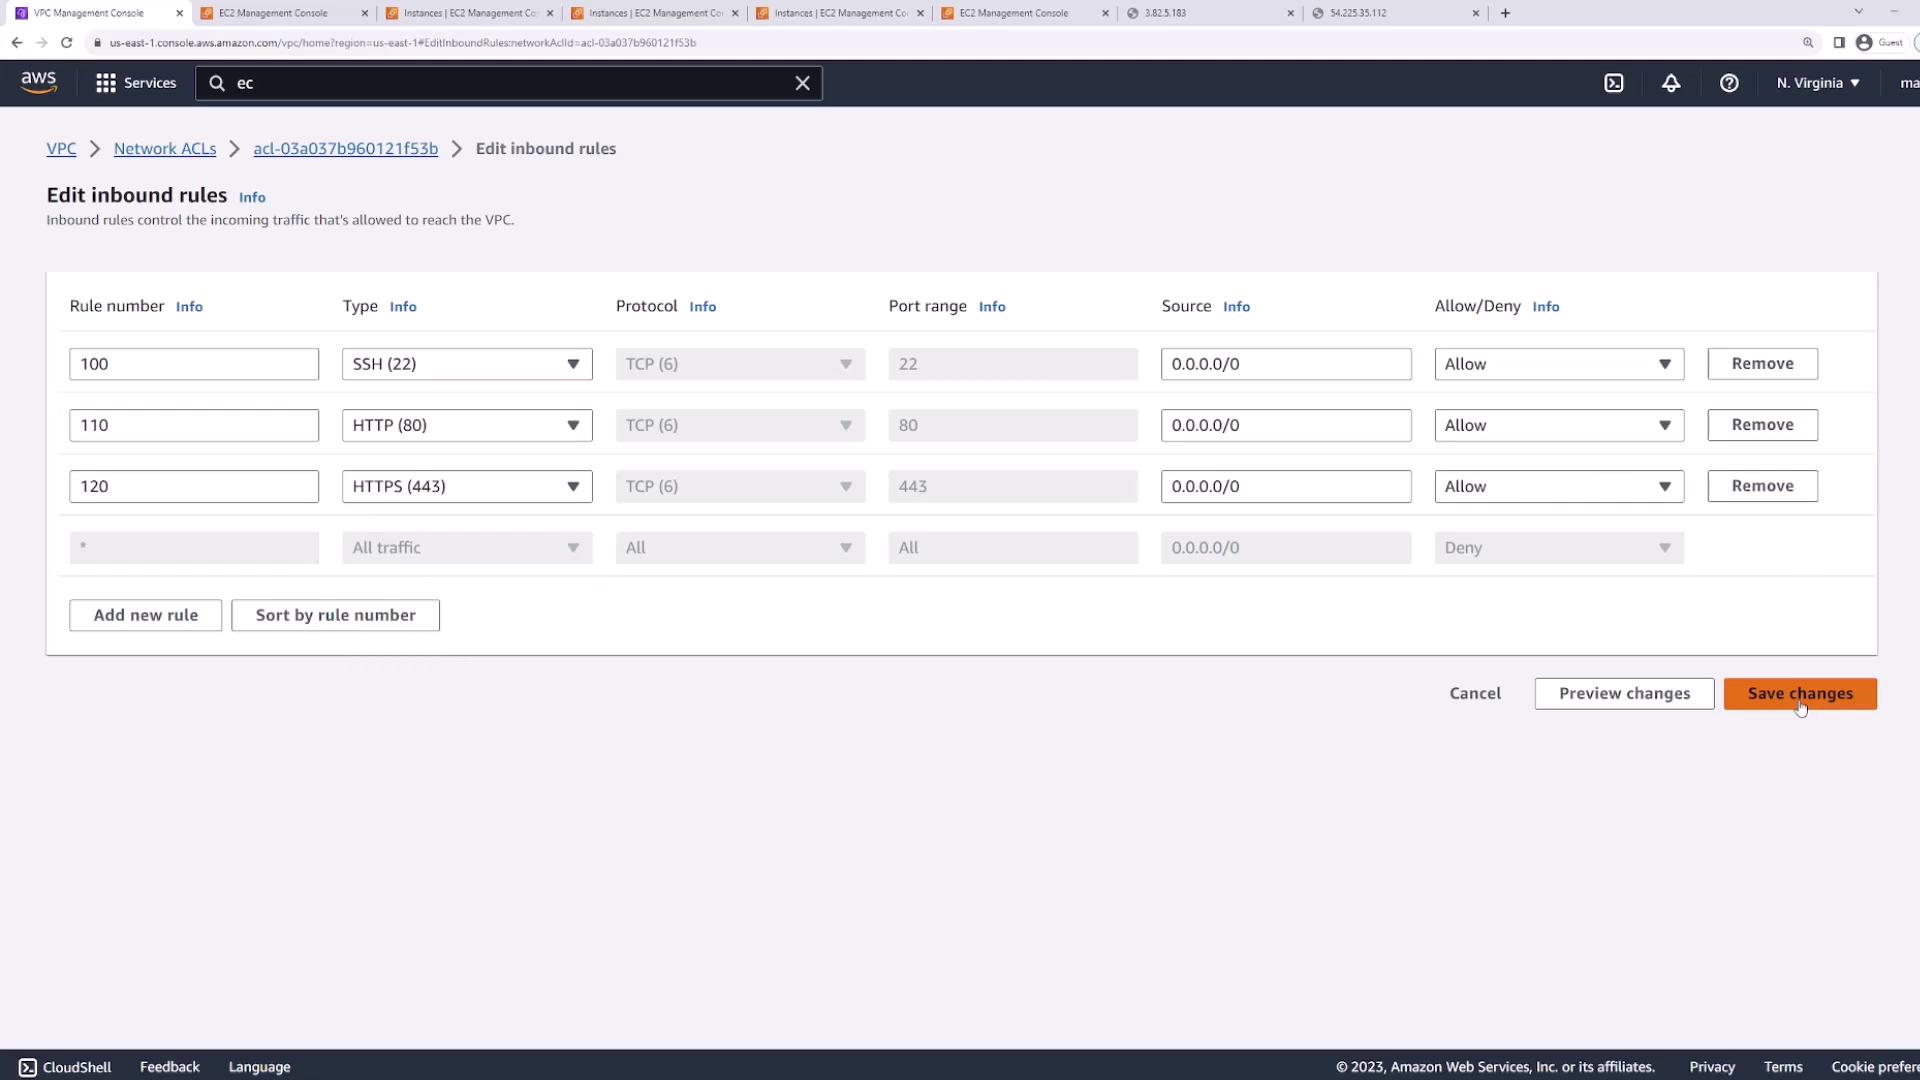
Next, modify the inbound rules for the NACL to allow only SSH traffic. Update rule 100 to permit SSH (port 22) from any IP address and save the changes. With this update, even though the security groups allow all traffic, the NACL now blocks all inbound traffic except for SSH.
Test this configuration by SSHing into one of the instances. Since both instances are in the same subnet, they adhere to the same rules. Confirm SSH access with Server 2:
After confirming that SSH remains functional, attempt to access the web service by refreshing your browser. The request should hang because only SSH is allowed. To restore web access, update the NACL by adding:
A new inbound rule (e.g., rule 110) to allow HTTP (port 80)
Another inbound rule (e.g., rule 120) to allow HTTPS (port 443)
Save the changes. With these rules in place, both servers can handle SSH, HTTP, and HTTPS traffic. Remember that Server 2 must have NGINX (or another web server) installed to serve HTTP content.
Last metadata expiration check: 21:18:14 ago on Fri Aug 25 07:39:09 2023.Dependencies resolved.================================================================================================================================= Package Architecture Version Repository Size=================================================================================================================================Installing: nginx x86_64 1:1.24.0-1.amzn2023.0.1 amazonlinux 32 kInstalling dependencies: generic-logos-httpd noarch 18.0.0-12.amzn2023.0.3 amazonlinux 19 k gperftools-libs x86_64 2.9.1-1.amzn2023.0.2 amazonlinux 309 k libunwind x86_64 1.4.0-5.amzn2023.0.2 amazonlinux 66 k nginx-core x86_64 1:1.24.0-1.amzn2023.0.1 amazonlinux 586 k nginx-filesystem noarch 1:1.24.0-1.amzn2023.0.1 amazonlinux 9.0 k nginx-mimetypes noarch 2.1.49-3.amzn2023.0.3 amazonlinux 21 kTransaction SummaryInstall 7 PackagesTotal download size: 1.0 MInstalled size: 3.4 MDownloading Packages:
Because NACLs are stateless, outbound package installation requests are allowed by the security group’s outbound rules. However, the corresponding inbound responses must be explicitly permitted by the NACL. If the inbound rules are restricted to only SSH, HTTP, and HTTPS, the package download may fail. To resolve this, temporarily add an inbound rule (e.g., rule 130) that allows all traffic. Once the installation is complete, remove the temporary rule.
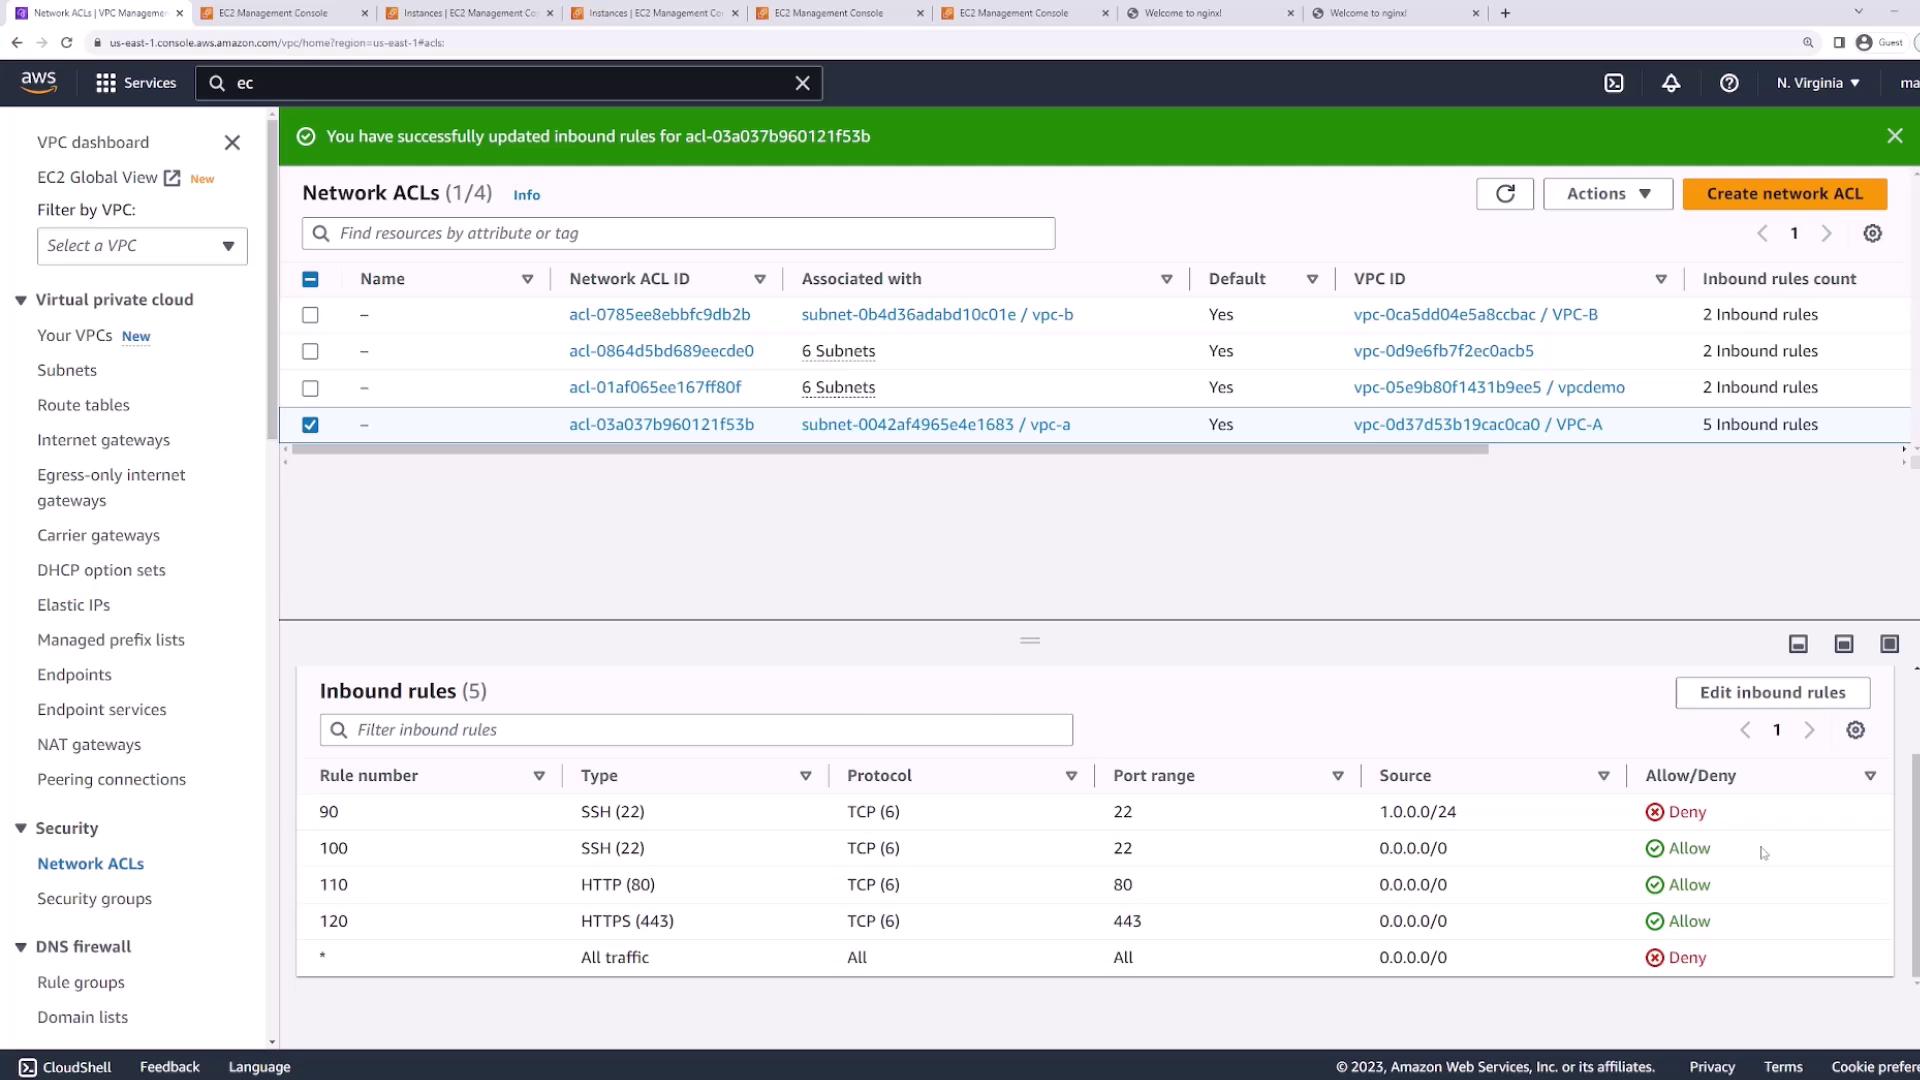
One major advantage of NACLs over security groups is the ability to set both allow and deny rules. This flexibility enables scenarios like allowing SSH from everywhere except a specific IP address range. To configure such a setup:
Create a rule (e.g., rule 90) that denies SSH traffic from the unwanted IP range.
Create another rule (with a higher rule number) that allows SSH from all other IP addresses.
Remember that NACLs evaluate rules in numeric order from lowest to highest. Ensure that the deny rule comes before the allow rule to enforce the intended restriction.
This lesson demonstrated how to work with NACLs and highlighted the key differences compared to security groups. By filtering traffic at the subnet level and configuring both allow and deny rules, NACLs provide granular control over network traffic. A proper understanding of NACL configurations is essential for maintaining secure and efficient network environments in AWS.Happy learning!