AWS Certified Developer - Associate

Security

ACM Demo

In this lesson, we demonstrate how to work with AWS Certificate Manager (ACM) to generate an SSL certificate. This certificate enables HTTPS on your load balancer, ensuring secure traffic delivery to your EC2 instance running a basic nginx server. When accessing the application via HTTP (using a URL like http://), you see the default nginx HTML page with insecure traffic—even though the load balancer successfully forwards requests. By enabling HTTPS for your purchased domain, you improve security and performance.

We assume you have set up a hosted zone in Route 53 for the domain "KodeKloudDemo123". Once HTTPS traffic is sent to "KodeKloudDemo123", the SSL certificate secures the connection and forwards the traffic to your load balancer.

Region-Specific ACM Certificate

AWS Certificate Manager is region-specific. For example, if your load balancer is deployed in the Northern Virginia region, you must generate the certificate in that same region.

The image shows an AWS Management Console page displaying details of a load balancer named "webapp-lb," which is an internet-facing application load balancer with an active status. It includes information about the VPC, availability zones, IP address type, and creation date.

Requesting a Public Certificate

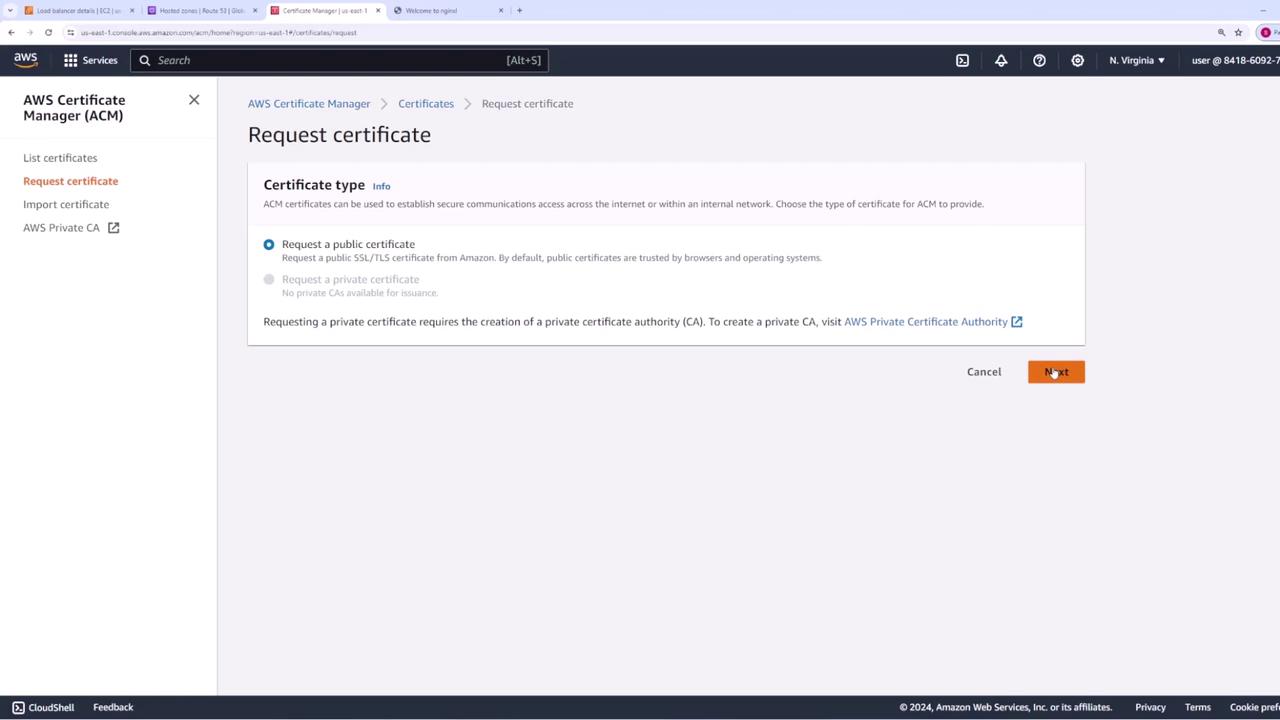
Follow these steps to request a public SSL certificate using ACM:

  1. Open ACM in the AWS Management Console and select Request a certificate.

  2. Choose Request a public certificate to obtain a certificate accessible on the internet.

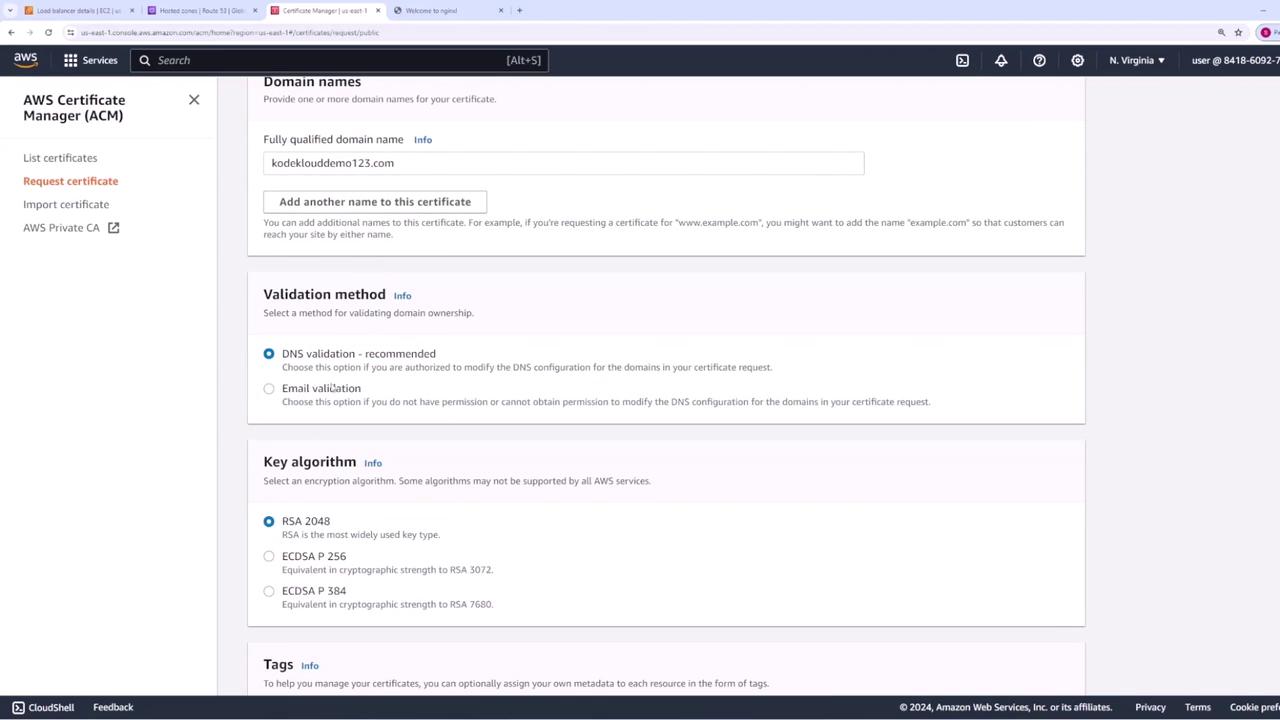
  3. Click Next and add the domain names to be covered (for example, "kodeklouddemo123.com"). You may also add additional names such as "www.kodeklouddemo123.com" if required.

  4. Select the validation method. You have two options:

    • Email validation: An email is sent to the domain owner.
    • DNS validation: You create a DNS record in Route 53.

    For simplicity with AWS integration, we use DNS validation. Choose the key algorithm of your preference and then click Request.

ACM will now display your certificate along with its ID, type (Amazon issued), and a pending validation status.

The image shows the AWS Certificate Manager interface where a user is selecting the option to request a public certificate.

The image shows the AWS Certificate Manager (ACM) interface for requesting a certificate, with options to enter domain names, select a validation method, and choose a key algorithm.

Validating Domain Ownership
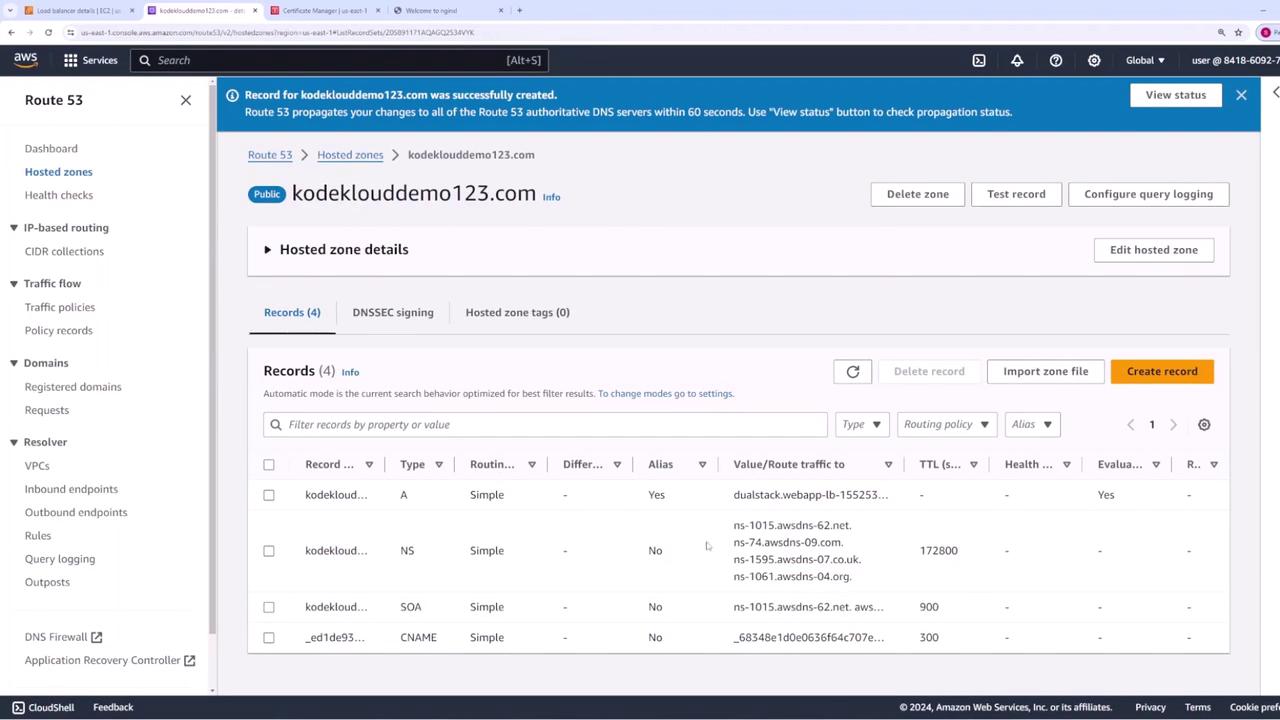
To validate your domain ownership:

  1. Create a CNAME record in Route 53. You can manually add the record with the provided values or use the integration button (available with DNS validation) to automatically create it.
  2. Refresh the ACM console. Once the certificate status changes from "Pending validation" to "Issued," your certificate is ready for use.

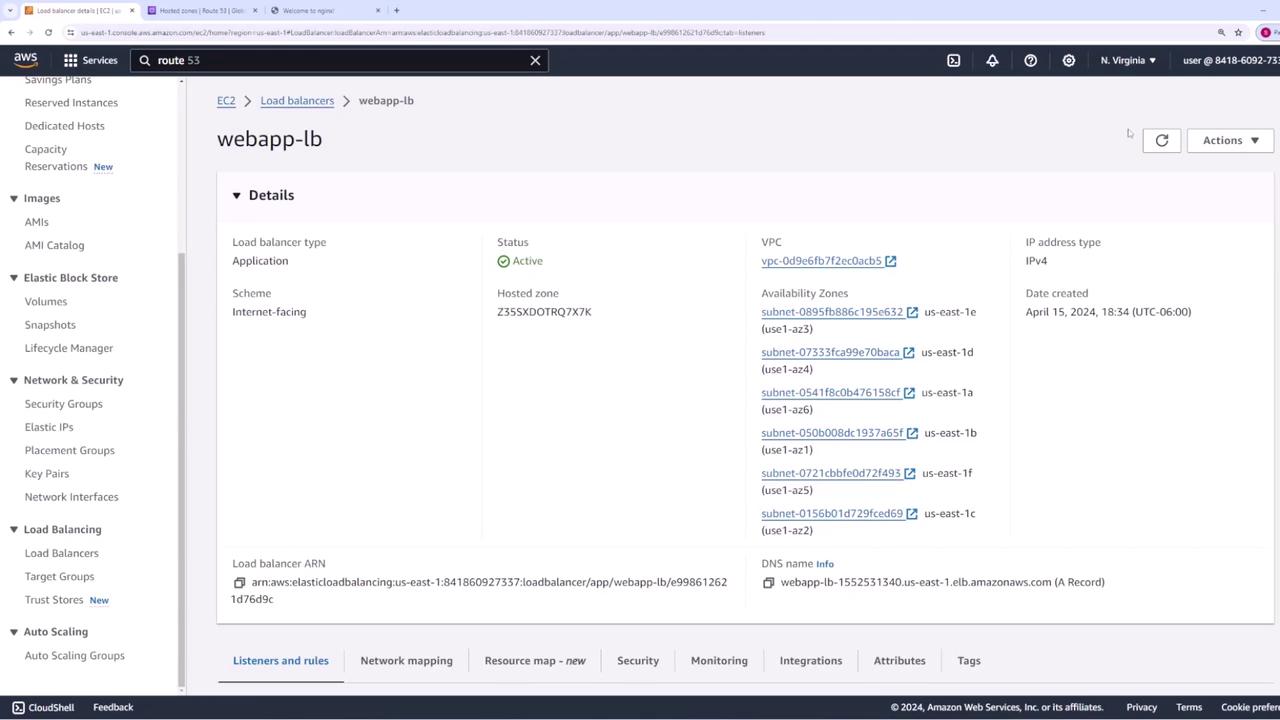
Configuring the Load Balancer for HTTPS

Next, assign the new SSL certificate to your load balancer by following these steps:

  1. Open the Load Balancer details in the AWS Management Console.
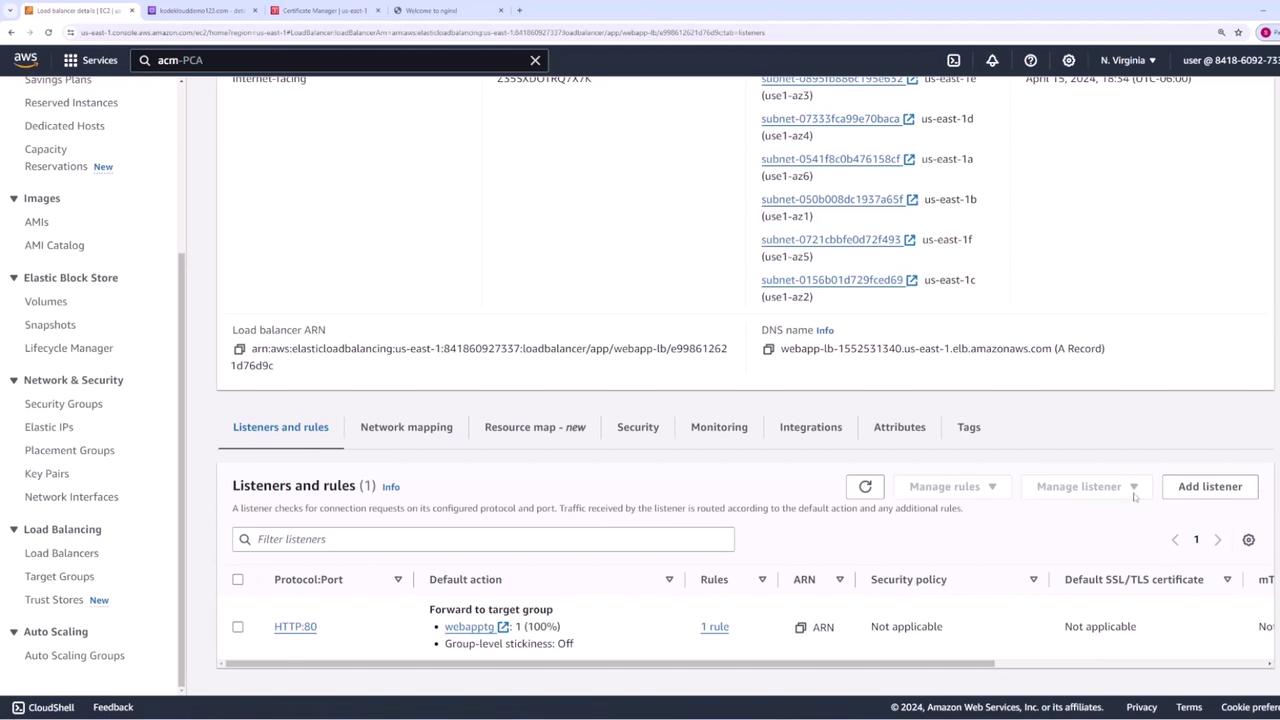
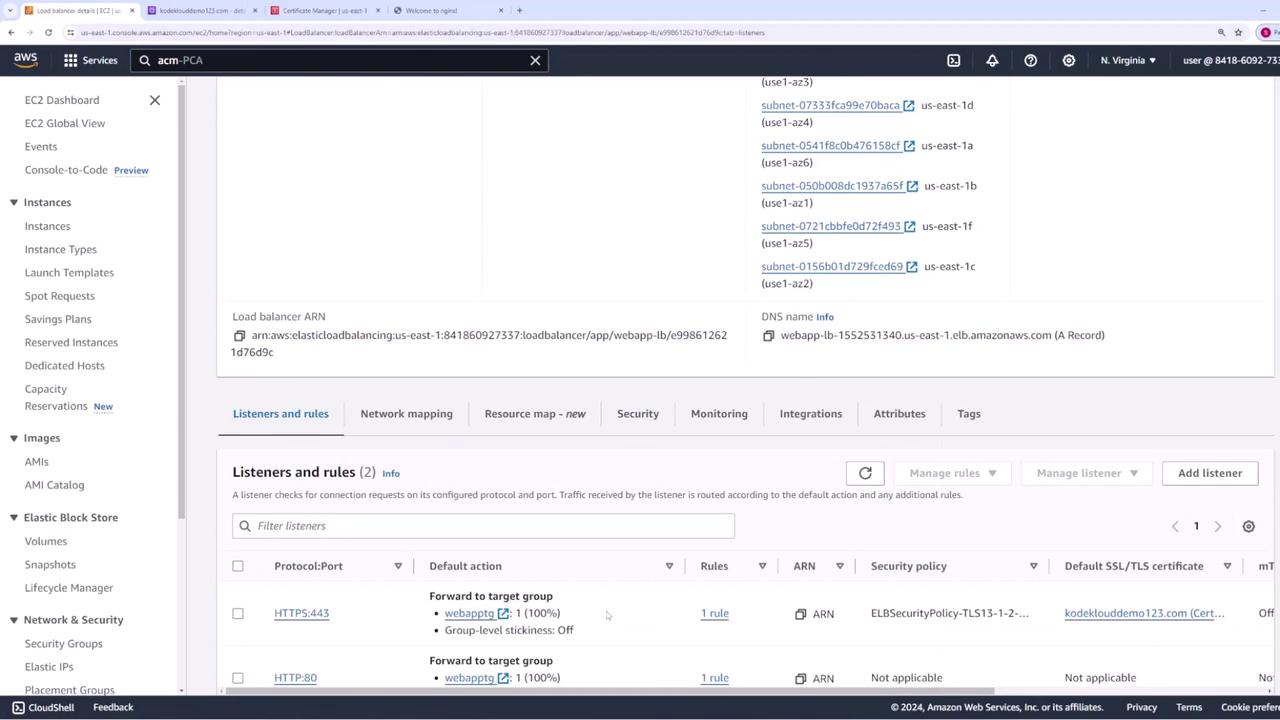
  2. Your load balancer currently has an HTTP listener on port 80. Add a new listener for HTTPS on port 443.
  3. In the HTTPS listener configuration, forward the traffic to the same target group as the HTTP listener.
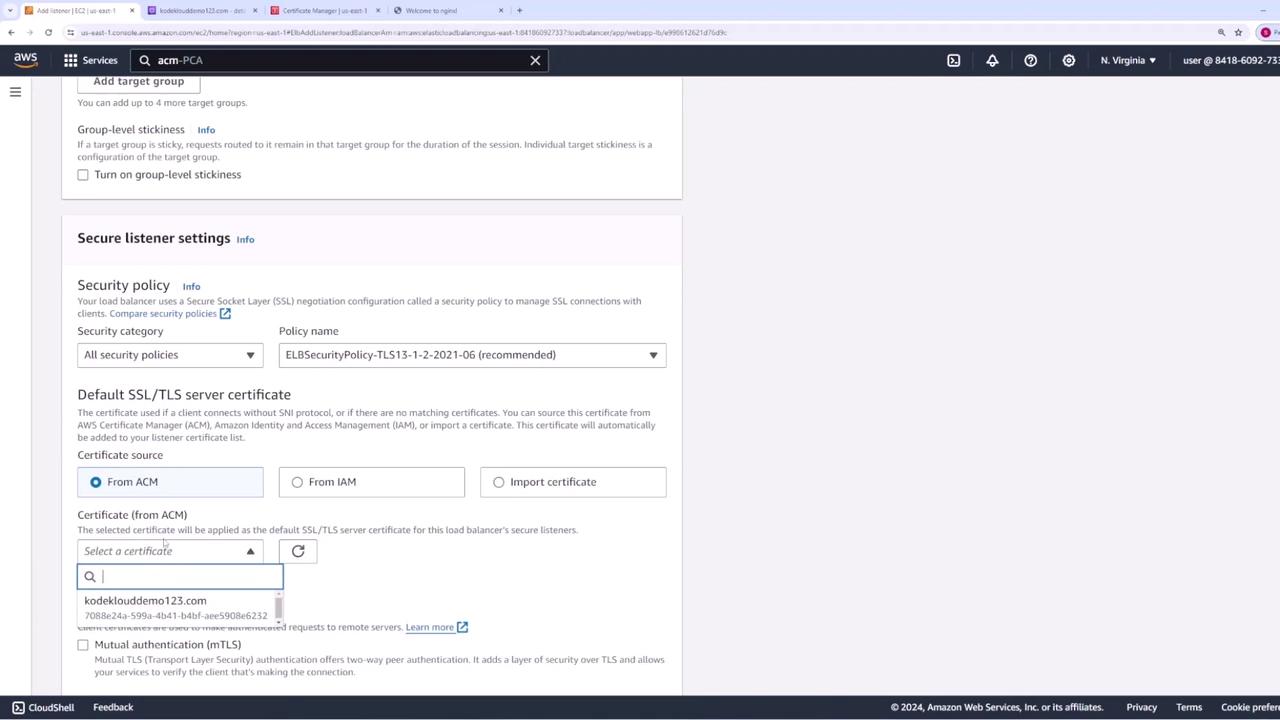
  4. Under secure listener settings, choose ACM as the source for the SSL certificate, then select the certificate you created.
  5. Save the configuration.

The image shows an AWS management console interface, specifically the Load Balancer section, displaying details about listeners and rules for a web application. It includes information about protocol, port, and target group settings.

The image shows a screenshot of the AWS management console, specifically the "Secure listener settings" section for configuring SSL/TLS server certificates and security policies for a load balancer.

With the HTTPS listener correctly configured, your load balancer now supports secure traffic.

Updating DNS Records in Route 53
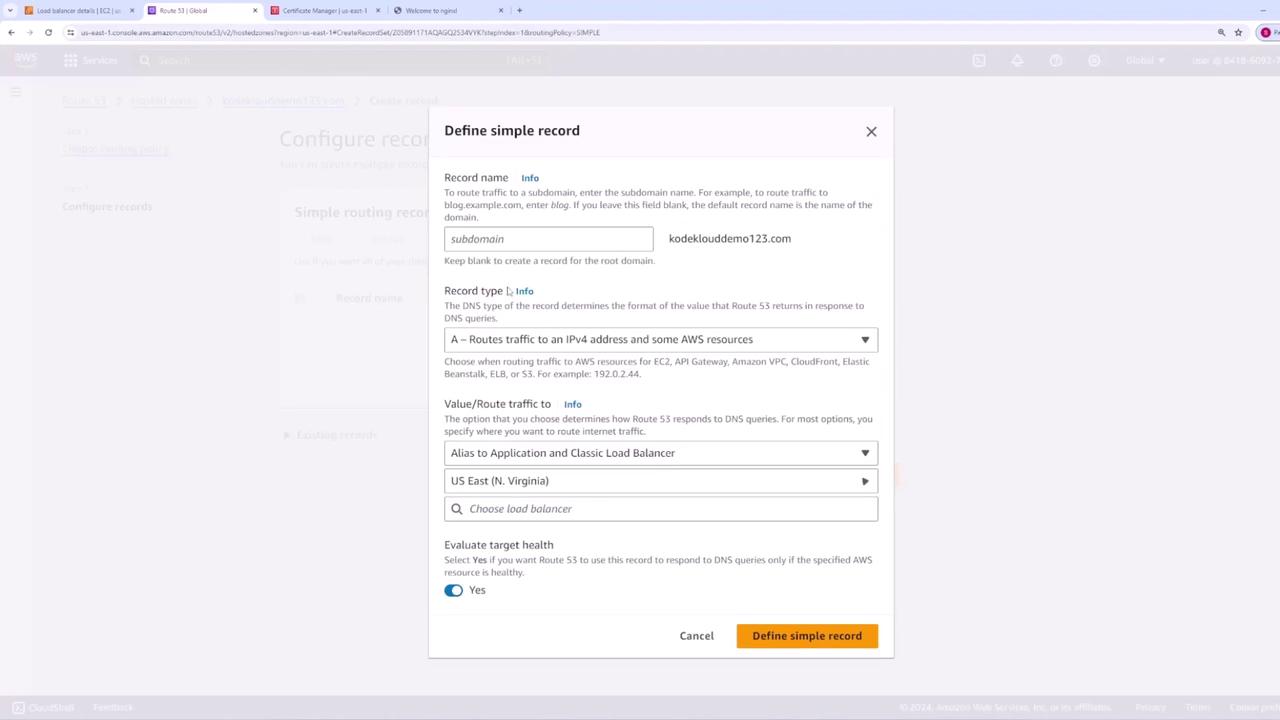
To route traffic for "KodeKloudDemo123.com" to your load balancer:

  1. Create a new A record using simple routing in Route 53.
  2. Set the record name to your root domain and select Application Load Balancer as the endpoint.
  3. Choose the appropriate AWS region and select your load balancer.
  4. Save the record.

This configuration ensures that both HTTP and HTTPS traffic are directed to your load balancer.

The image shows a configuration window for defining a simple DNS record in AWS Route 53, with options for record name, record type, and routing traffic settings.

The image shows an AWS Route 53 dashboard displaying DNS records for the domain "kodeklouddemo123.com," including A, NS, SOA, and CNAME records.

Now, when you access your domain via HTTPS, the load balancer will use the assigned SSL certificate to secure the connection.

Testing and Verifying the Certificate

To confirm your SSL certificate is active:

  1. Open your browser and navigate to https://kodeklouddemo123.com.
  2. Verify that the web application loads securely over HTTPS.
  3. Click the padlock icon in the browser address bar to inspect the certificate details, ensuring the common name matches your domain and checking the validity dates and encryption settings.

The image shows an AWS EC2 dashboard with details of a load balancer, including listeners and rules for HTTP and HTTPS protocols. It displays subnet information and configuration options for managing listeners and rules.

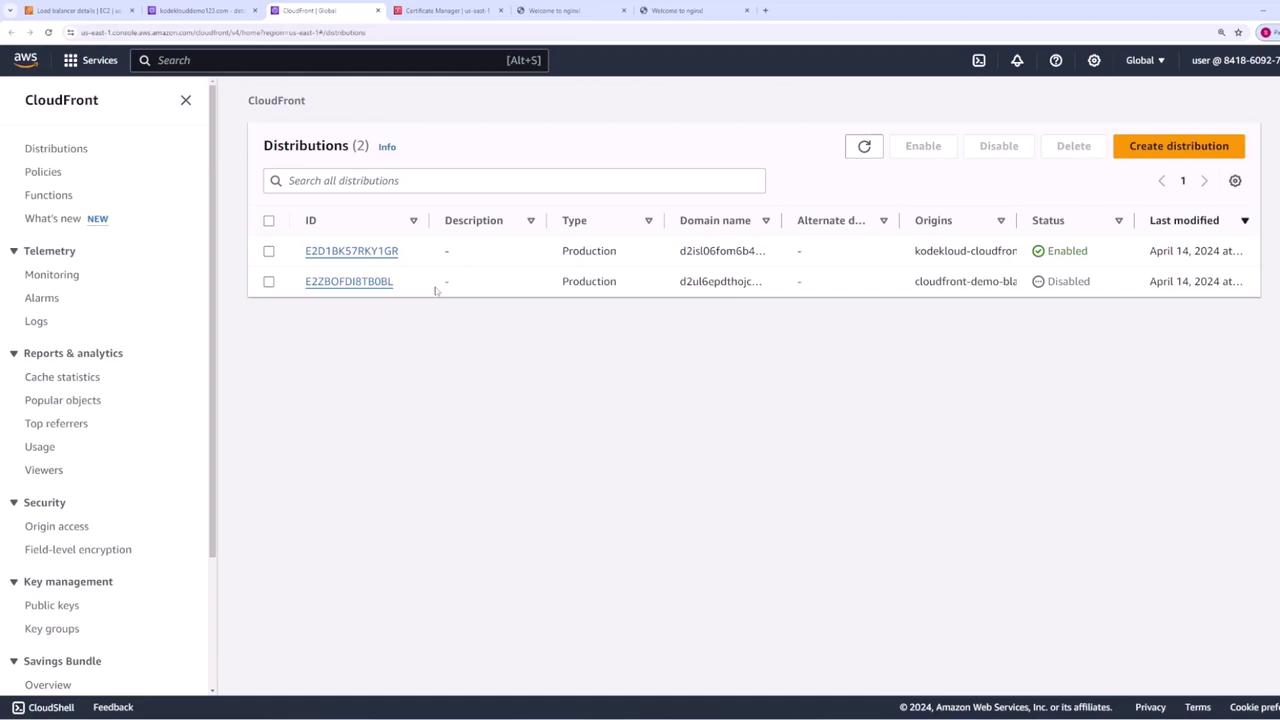
Using ACM with CloudFront

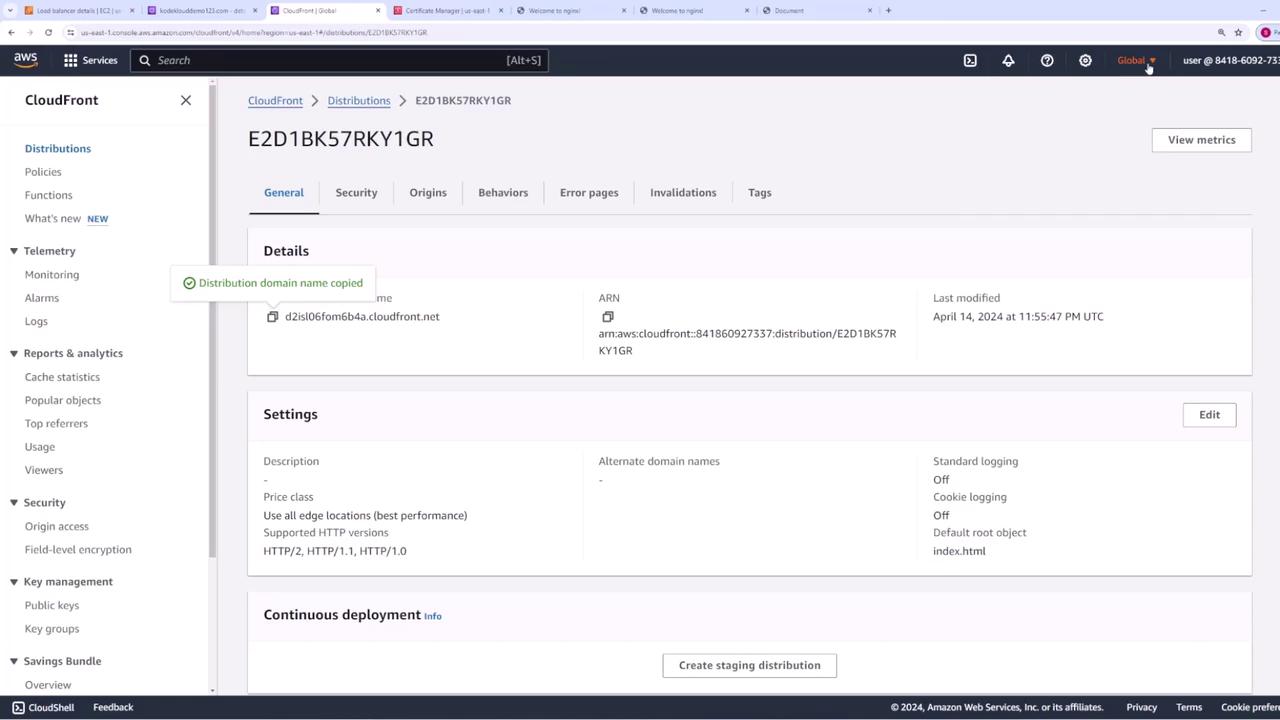
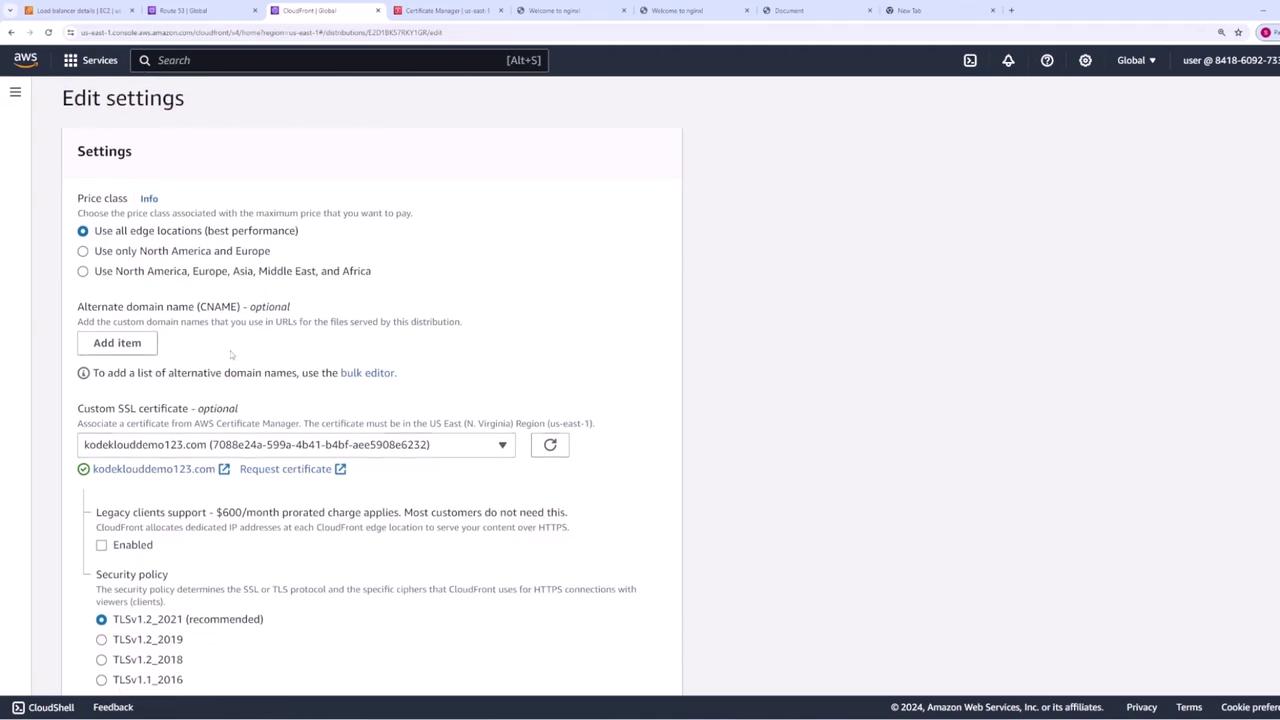
You can also assign your ACM SSL certificate to a CloudFront distribution. In this scenario, you initially access your web application using the CloudFront-provided domain name. To enhance your setup with your custom domain "KodeKloudDemo123.com" secured by an ACM certificate, follow these steps.

CloudFront Certificate Region Requirement

Remember that CloudFront requires the SSL certificate to be created in the US East (N. Virginia) region. If your certificate was created in another region, you must issue a new one in US East 1.

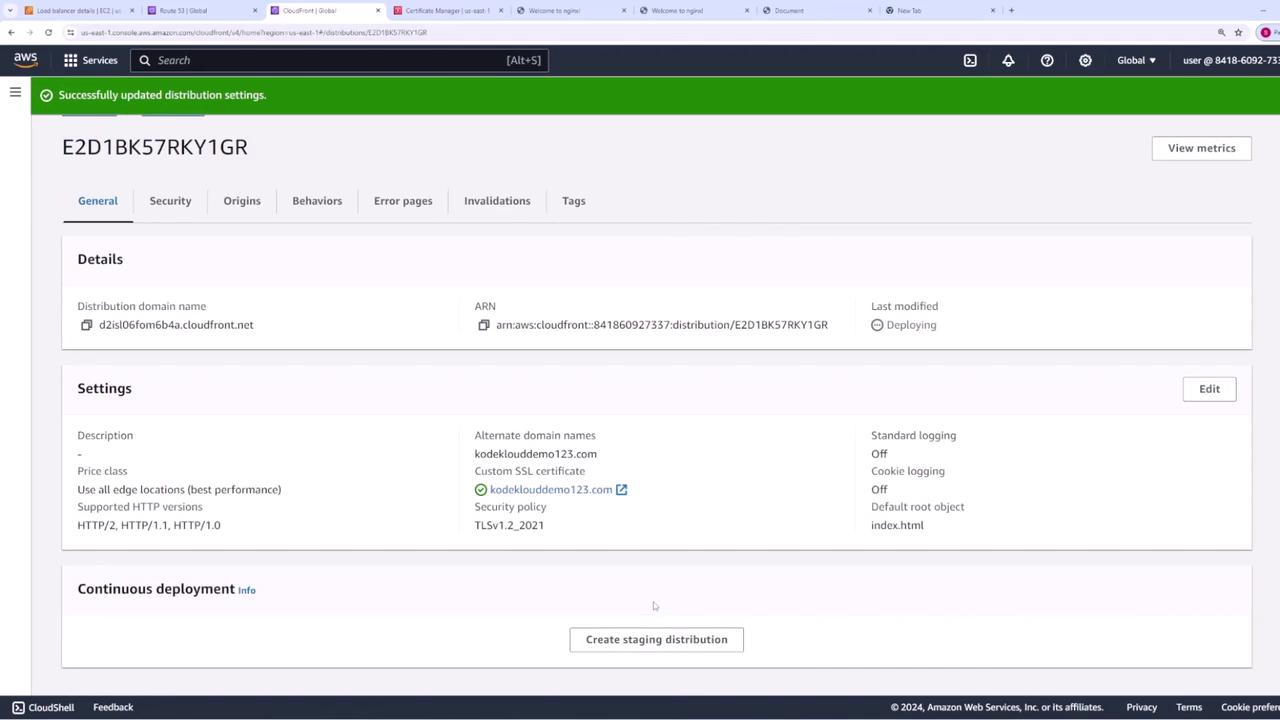
  1. Open your CloudFront distribution settings and click General then Edit.
  2. Under Custom SSL Certificate, CloudFront will display certificates available from US East (N. Virginia). Select the desired certificate.
  3. (Optionally) Choose the appropriate TLS versions—the default settings are typically sufficient—and then save your changes.

The image shows an AWS CloudFront console with a list of distributions, including their IDs, types, domain names, statuses, and last modified dates.

The image shows an AWS CloudFront distribution details page, displaying information such as the distribution domain name, ARN, and settings like logging and HTTP versions.

At this point, your CloudFront distribution is associated with the ACM certificate. However, you must update your DNS settings in Route 53 to direct traffic to CloudFront.

Updating Route 53 for CloudFront

  1. Delete the previous A record pointing to your load balancer.
  2. Create a new A record with simple routing for "KodeKloudDemo123.com".
  3. Under Alias to CloudFront distribution, search for and select your CloudFront distribution.

If your CloudFront distribution does not appear, verify that you have added "KodeKloudDemo123.com" as an Alternate Domain Name in your CloudFront settings. Wait a moment, then refresh the Route 53 console.

The image shows an AWS settings page for editing configurations, including options for price class, alternate domain names, and custom SSL certificates.

The image shows an AWS CloudFront distribution settings page, displaying details such as the distribution domain name, ARN, and settings related to SSL certificates and logging.

When the new DNS record is active, accessing "KodeKloudDemo123.com" will forward traffic to your CloudFront distribution over HTTPS.

Final Verification

To complete your configuration:

  1. Open your browser and navigate to https://kodekloudDemo123.com.
  2. Verify that the CloudFront-hosted web application loads securely using the ACM SSL certificate.
  3. Inspect the certificate by clicking the padlock icon in your browser to ensure all details are correct.

This concludes our lesson on generating and assigning SSL certificates using AWS Certificate Manager with both a load balancer and a CloudFront distribution. Enjoy the enhanced security and functionality provided by these AWS services, and see you in the next lesson!

Watch Video

Watch video content

Previous
ACM