This lesson explores securing data in Amazon S3 by configuring encryption settings and demonstrates various encryption options like SSE-S3 and AWS KMS.
In this lesson, we explore how to secure your data in Amazon S3 by configuring encryption settings. You’ll learn how to create an S3 bucket, set up default encryption, and upload objects using different encryption options such as SSE-S3 and AWS KMS.
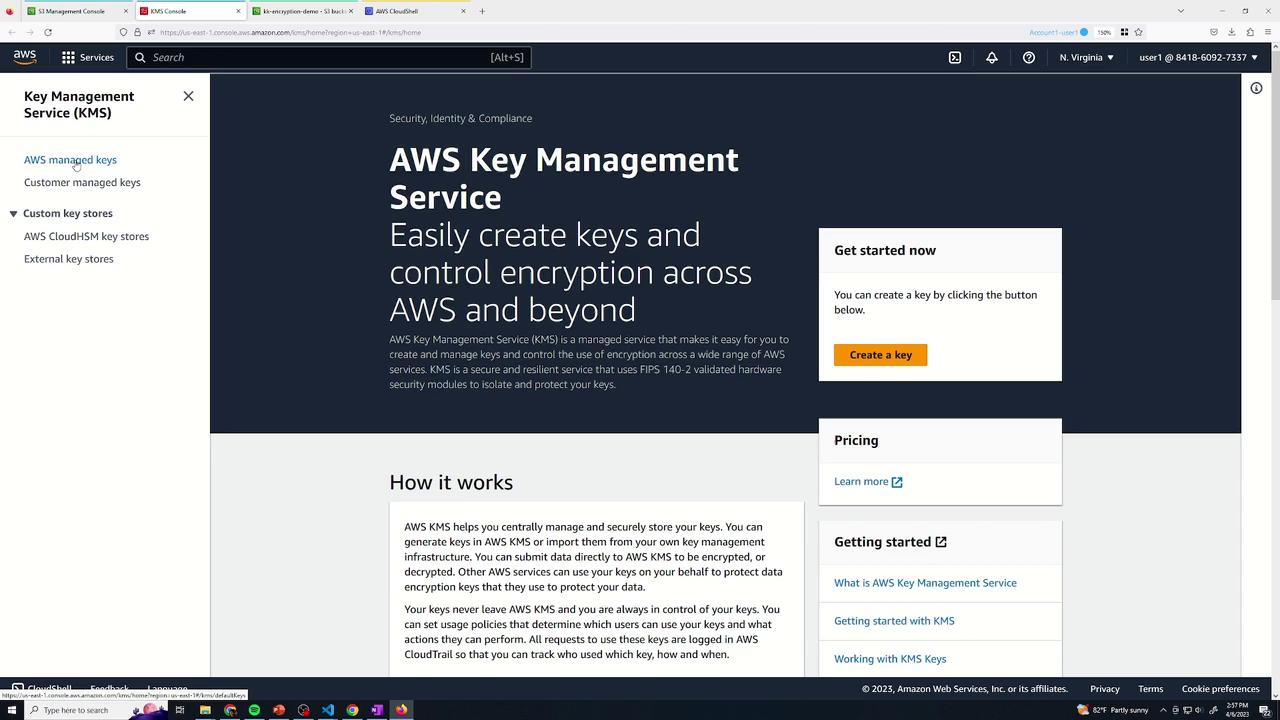
Creating the Bucket and Reviewing Default Encryption
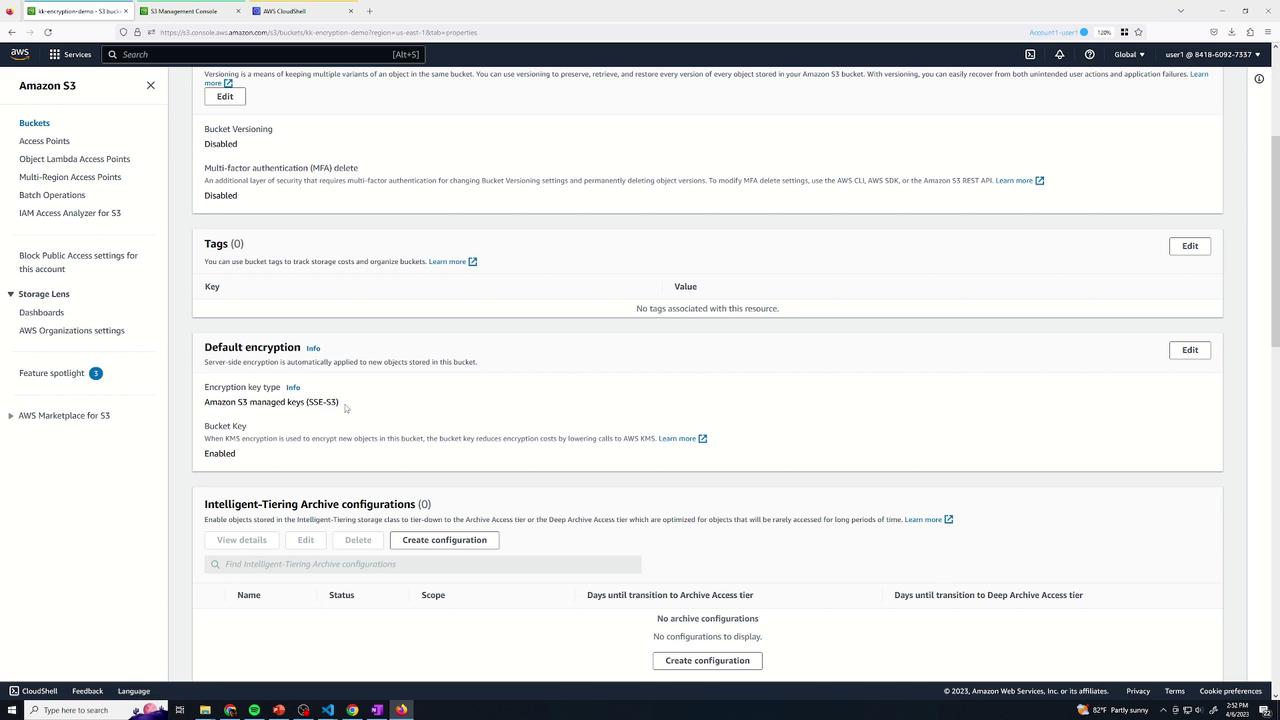
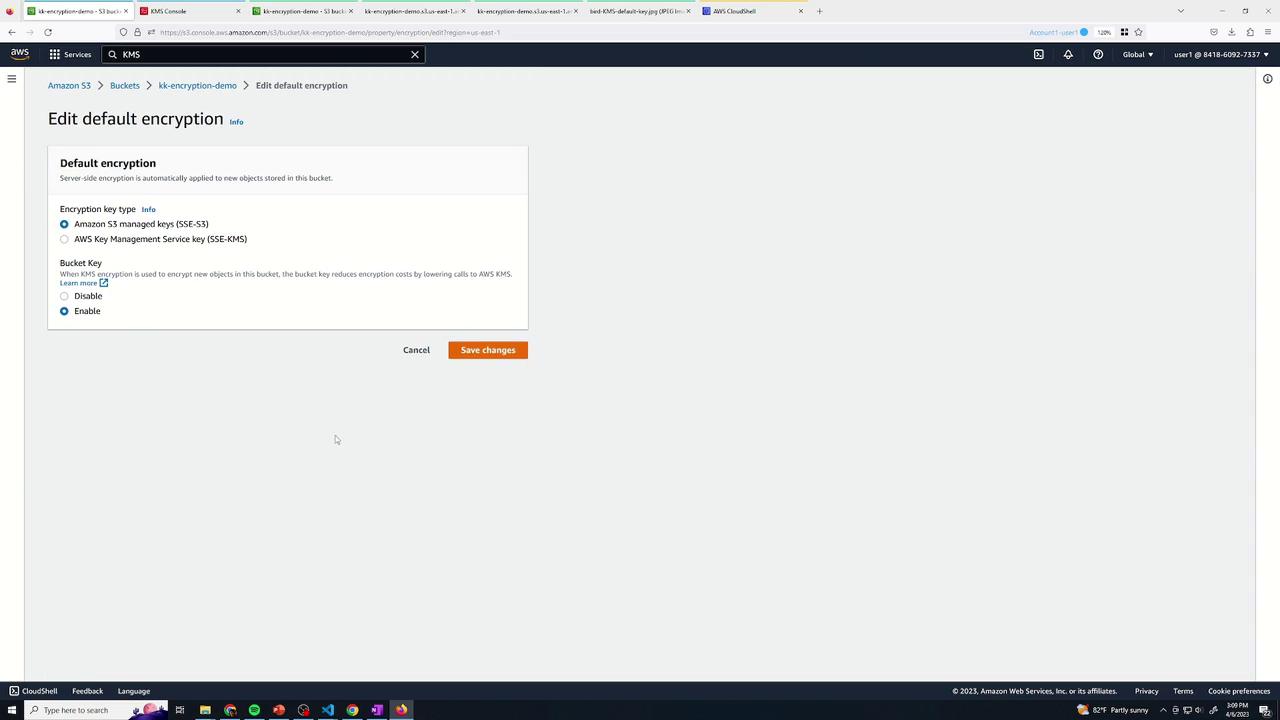
Begin by navigating to the S3 console and creating a new bucket with the default settings. Once the bucket is successfully created, go to its Properties and scroll down to the Encryption settings. By default, Amazon S3 applies SSE-S3 encryption, meaning that any object uploaded without specifying an encryption type will automatically use SSE-S3.
If needed, you can change the default encryption to AWS KMS. However, in this demo, we will retain SSE-S3 by default and later demonstrate how to override these settings during object uploads.
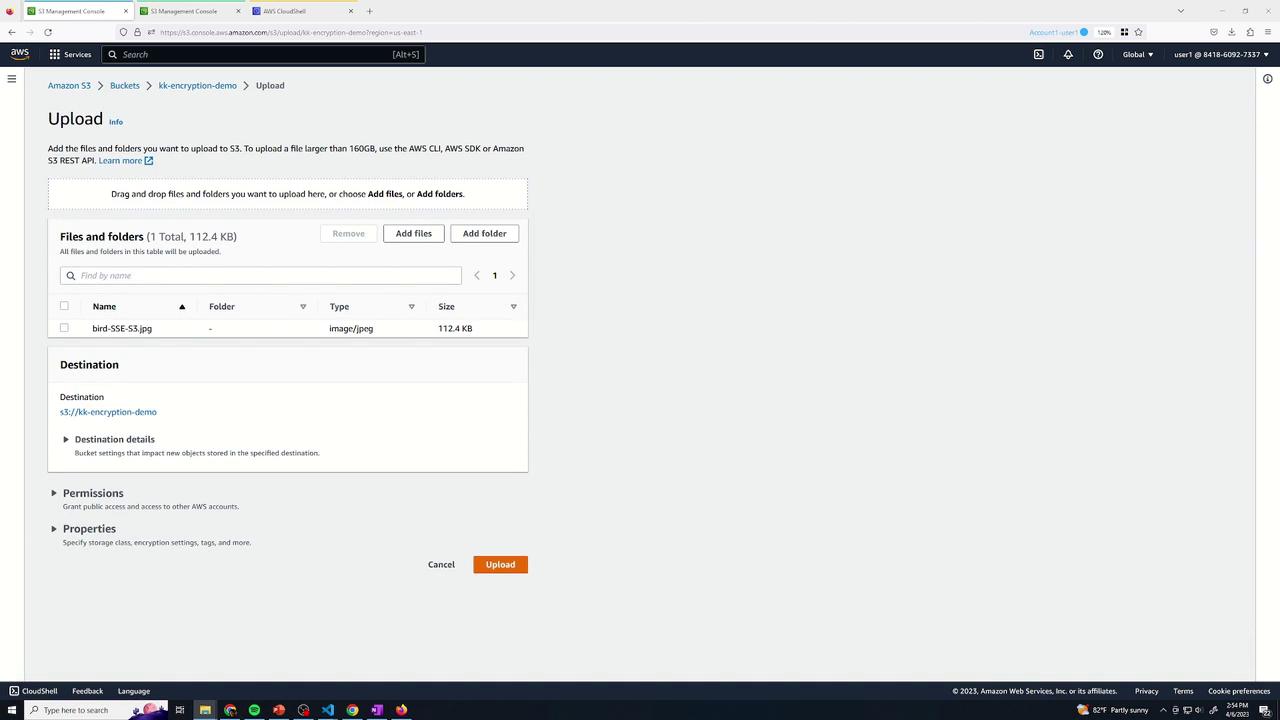
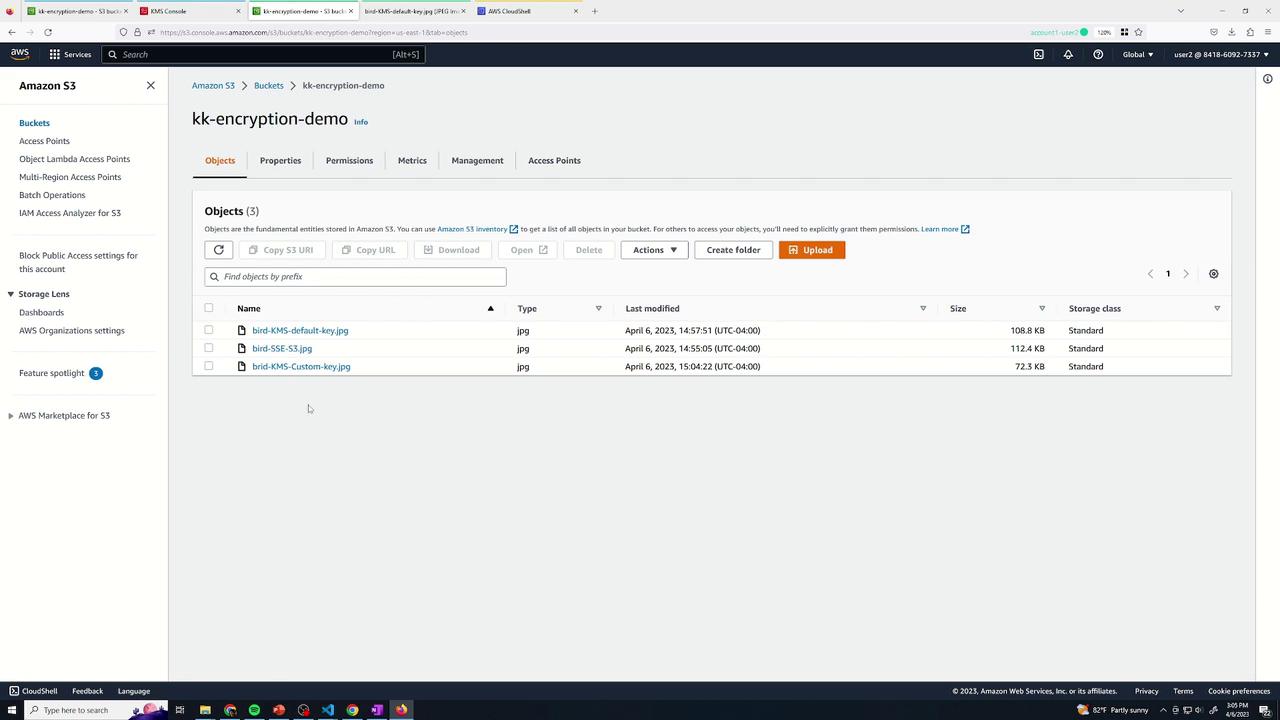
To demonstrate the encryption process with SSE-S3, switch to the Objects tab and upload a file. During the upload process, you have the option to select your preferred encryption type. Even if you leave it unspecific, the bucket-level default of SSE-S3 is applied automatically. For clarity in this demo, we explicitly choose SSE-S3.
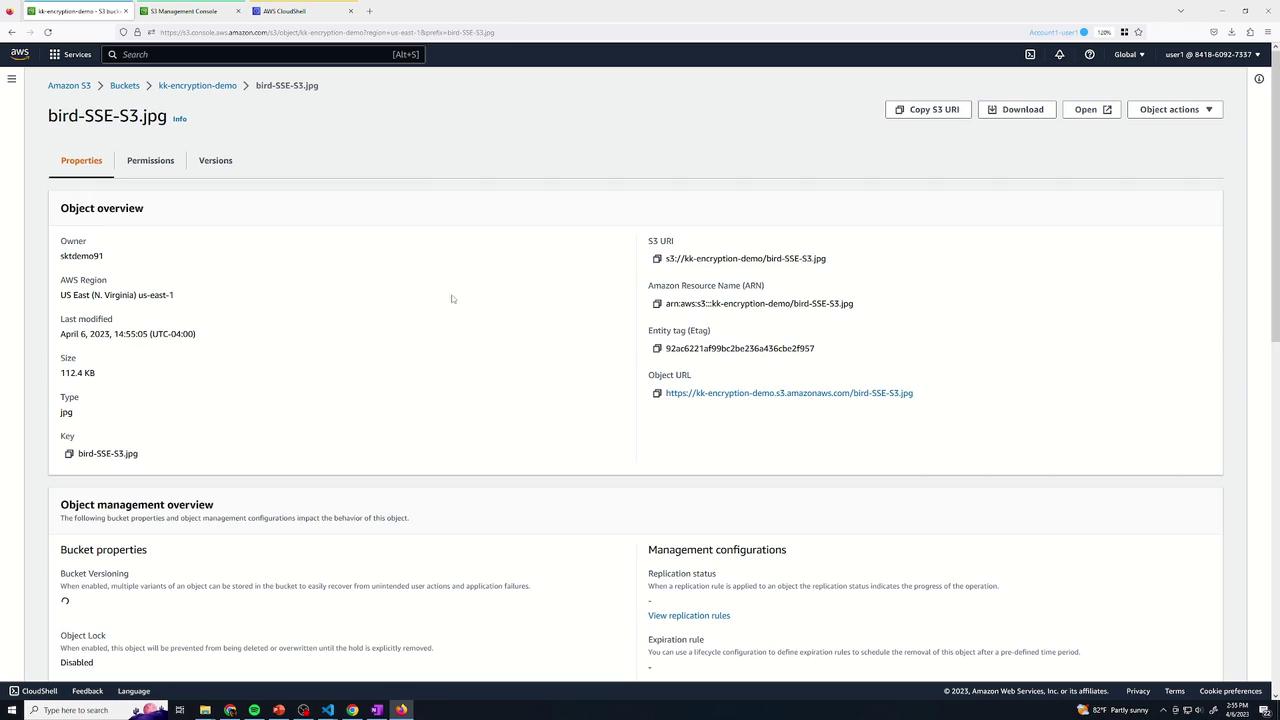
After the upload, verify the encryption by checking the object’s details in the S3 console:
Even secondary users with proper S3 permissions can access and decrypt objects encrypted using SSE-S3.
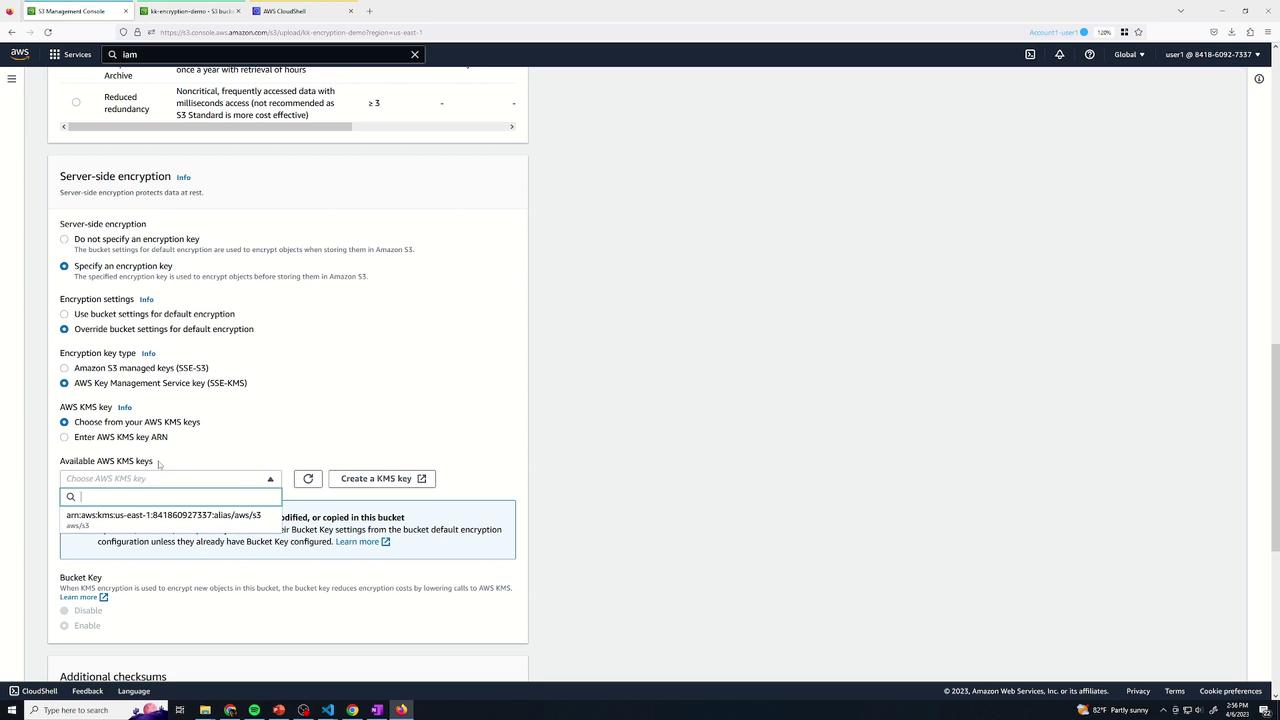
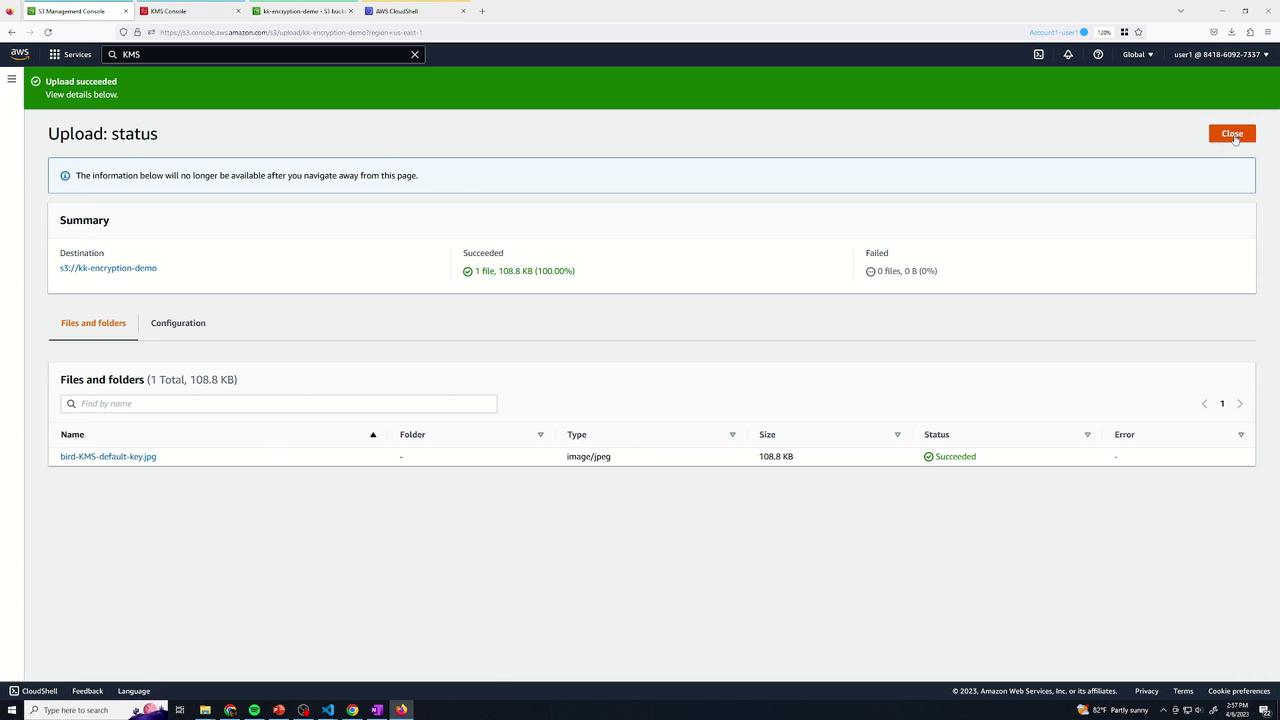
Now, let’s switch to AWS KMS encryption. Log in as an admin user and upload another file, this time overriding the bucket’s default encryption settings. In the file’s Properties, select KMS encryption. You will notice that a default AWS managed KMS key for S3 is available, which is created automatically if it doesn’t exist.
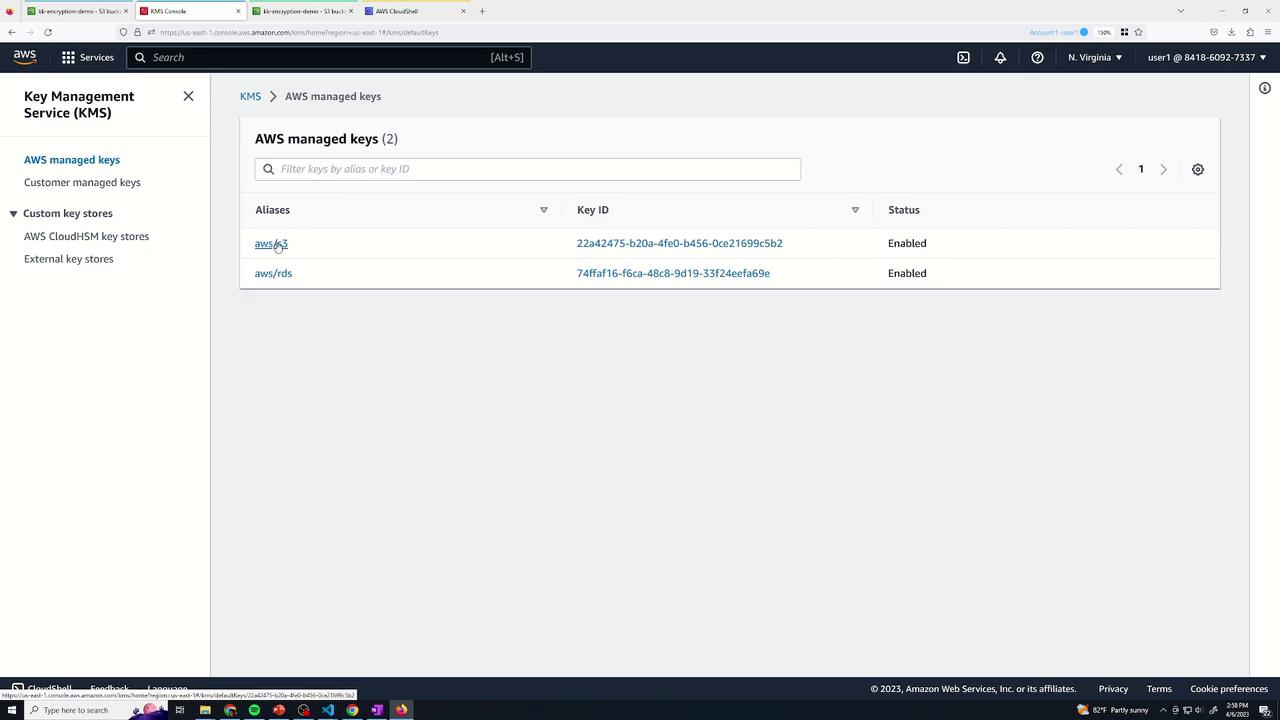
AWS managed keys are controlled entirely by AWS; you cannot modify their policies or enable key rotation. You can confirm this behavior by visiting the KMS console:
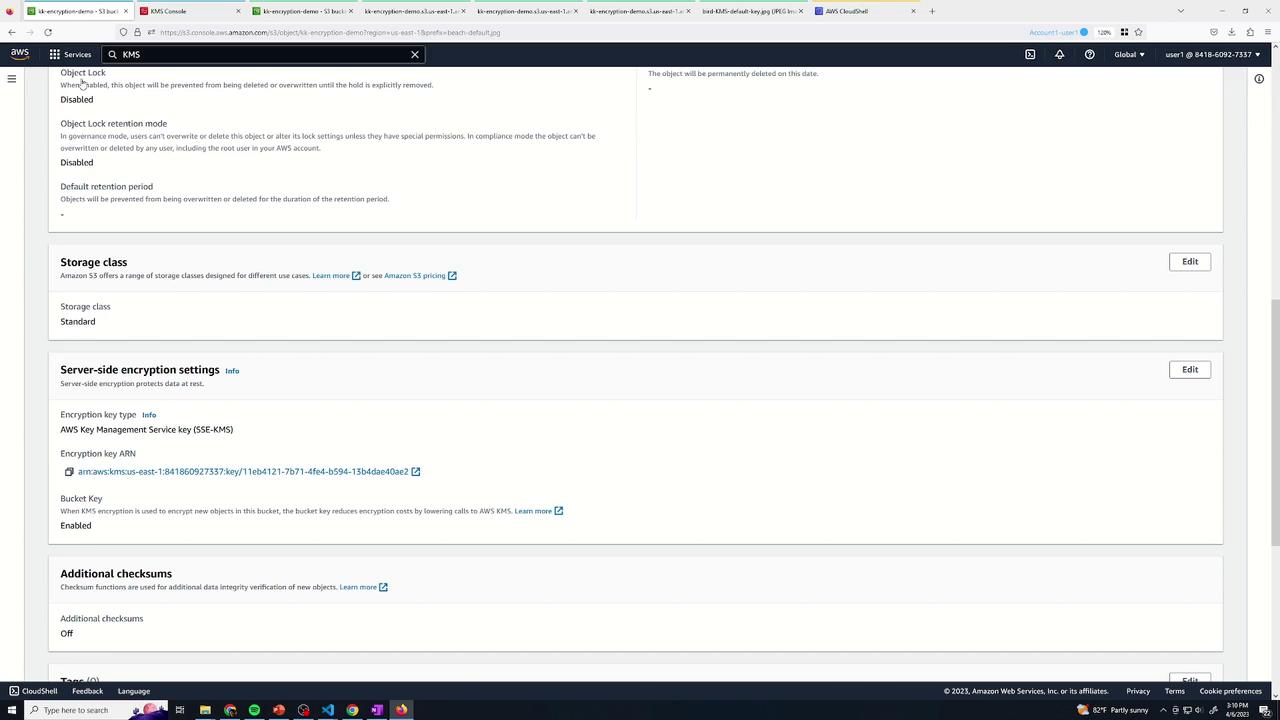
After uploading the file, verify in its details that it uses the AWS managed KMS key for encryption:
In the KMS console, your AWS managed keys will appear in a list similar to the following:
Below is a sample policy for AWS managed keys. You can view this policy, but modifications are not permitted:
{ "Version": "2012-10-17", "Id": "auto-s3-2", "Statement": [ { "Sid": "Allow access through S3 for all principals in the account that are authorized to use S3", "Effect": "Allow", "Principal": { "AWS": "*" }, "Action": [ "kms:Encrypt", "kms:Decrypt", "kms:ReEncrypt*", "kms:GenerateDataKey*" ] } ]}
As an admin user, you’ll be able to open and decrypt objects encrypted with the default AWS managed key. Secondary users with only S3 access, however, can also decrypt the files if the AWS managed KMS key is used.
Introducing Customer Managed Keys for Role Separation
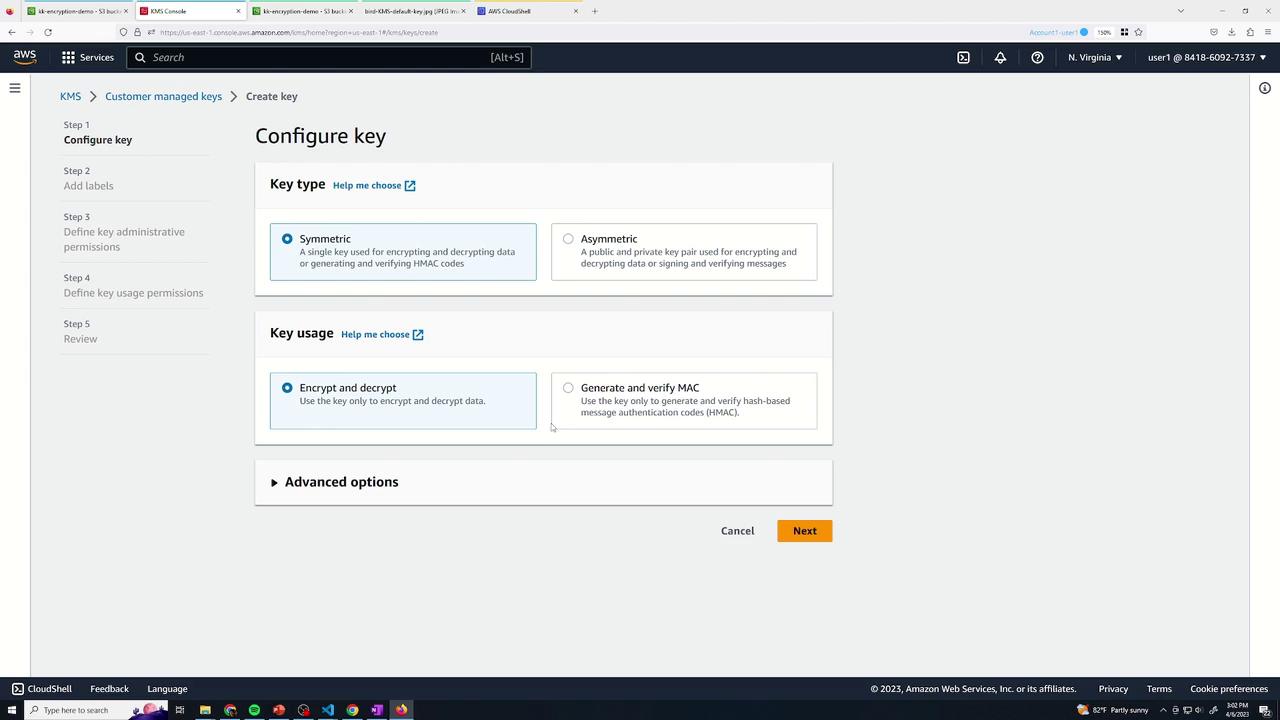
While AWS managed keys offer simplicity, they do not facilitate role separation. In situations where you want users to have S3 access without decryption capabilities, customer managed keys in KMS are the ideal solution. Customer managed keys allow you to define custom key policies and enable key rotation for enhanced security.To create a customer managed key, follow these steps:
Open the KMS console.
Click on Create key.
Choose the symmetric key type (default option).
Accept the default settings or adjust advanced options as needed.
Provide a unique alias for the key (e.g., “my-key”).
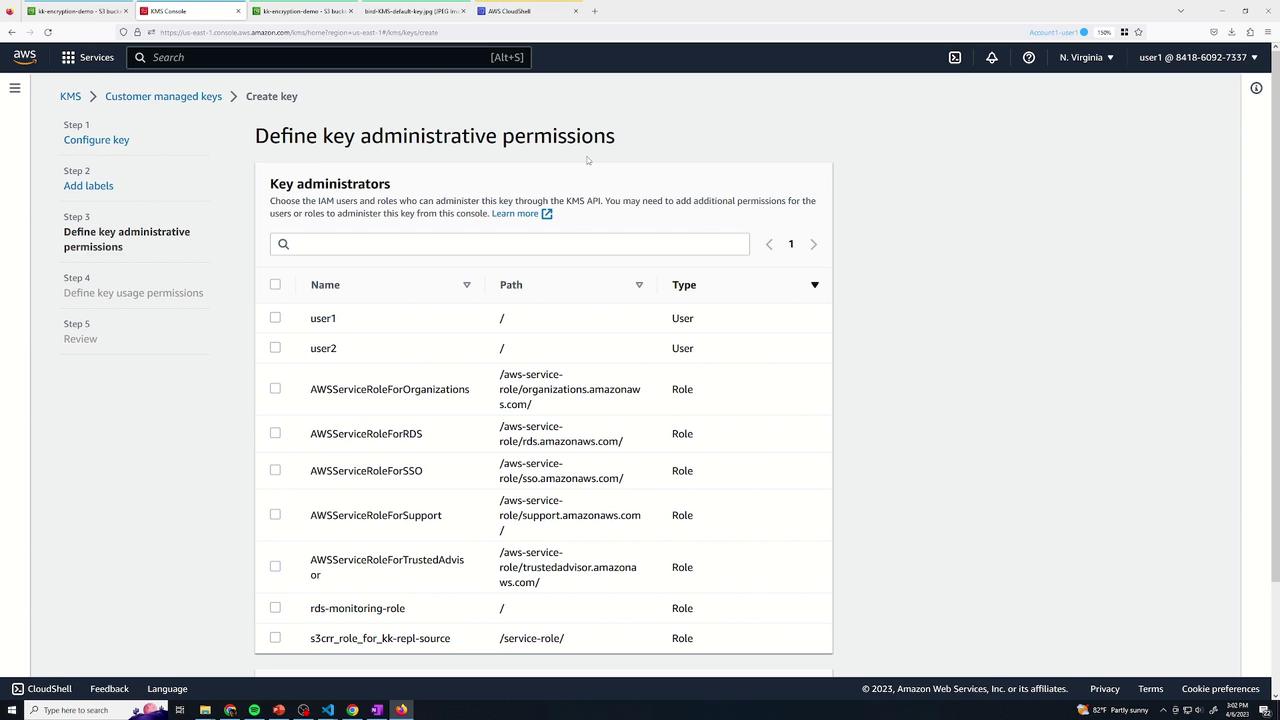
Next, configure the key administrative and usage permissions to control who can manage and use the key for cryptographic functions. Below is an example of a key policy for a customer managed key:
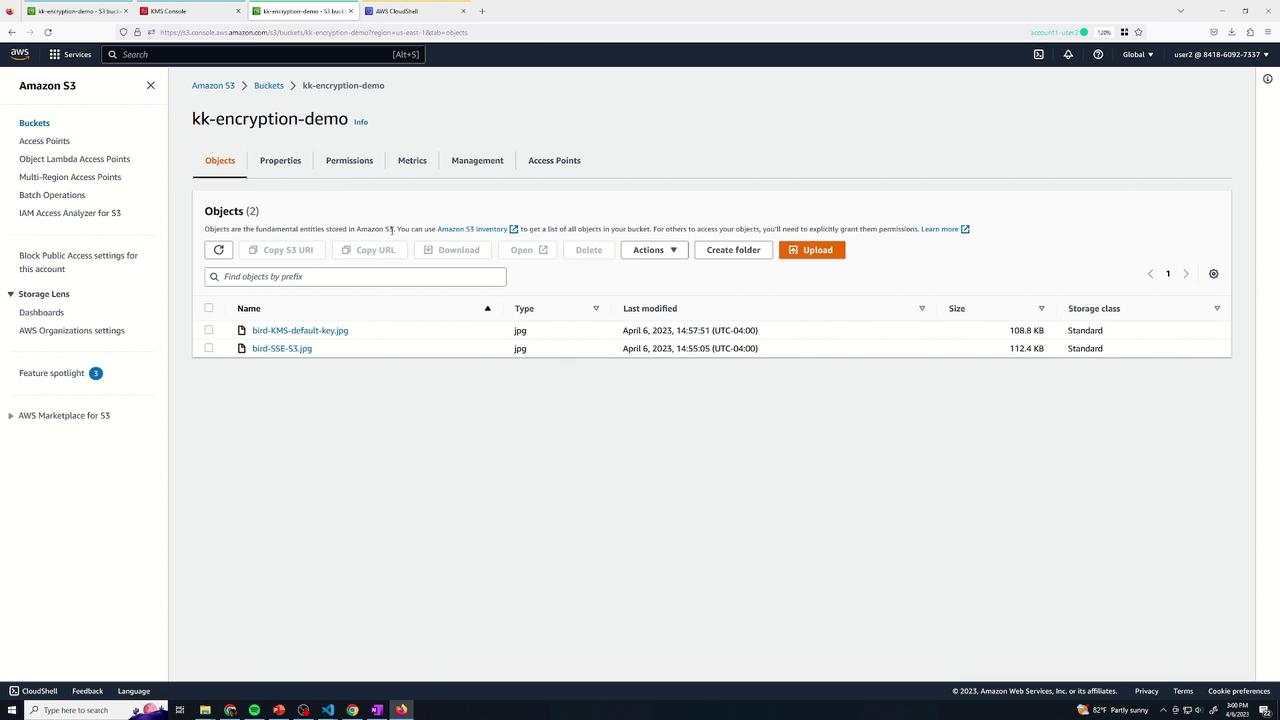
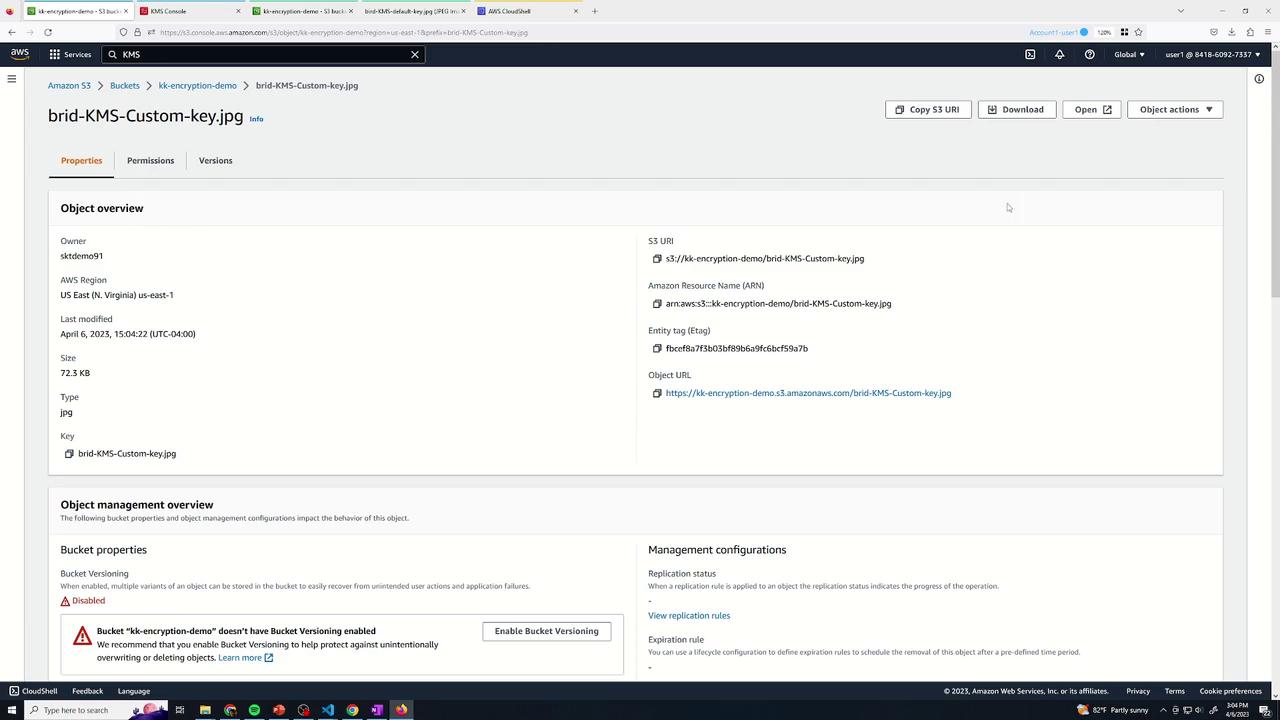
After creating your customer managed key, return to your S3 bucket to upload another file. This time, override the bucket’s default encryption by selecting SSE-KMS and choosing your customer managed key.As an admin user with both S3 and KMS access, you can decrypt the file once uploaded:
However, if a secondary user with only S3 permissions tries to decrypt the file, they will encounter an error. While they can access the file metadata or delete the file, decryption fails with an error message similar to:
<Error> <Code>AccessDenied</Code> <Message>The ciphertext refers to a customer master key that does not exist, does not exist in this region, or you are not allowed to access.</Message> <RequestId>45V16V31G01JFASB</RequestId> <HostId> kW0M7+PFX6X0wxcmlK7pXmxFkeBHM2zYJWFgU8iBKgPqHyb6YBUOzViWIrk8bDtk= </HostId></Error>
This separation of roles is essential in environments where users only require object management privileges without access to sensitive decrypted data. With customer managed keys, you can enforce these policies and enable key rotation for added security.
Setting a Default Customer Managed Key for the Bucket
To further enhance security, you can set your customer managed key as the default encryption for the bucket. Follow these steps:
Open the bucket’s Properties.
Scroll to the Default encryption section.
Select AWS KMS and choose your customer managed key.
Save the changes.
With this configuration, any file uploaded without explicit encryption settings will use your customer managed key by default. Only users with both S3 access and the corresponding KMS permissions will be able to decrypt these files.
After setting the default encryption, upload a test file and verify the encryption settings:
In this lesson, we demonstrated how to configure default encryption on an S3 bucket, override these settings during file uploads, and implement role separation using AWS KMS and customer managed keys. Leveraging AWS KMS for key management provides enhanced control over encryption policies and supports key rotation, which is vital for meeting stringent regulatory and security requirements.Happy encrypting, and see you in the next lesson!