> ## Documentation Index
> Fetch the complete documentation index at: https://notes.kodekloud.com/llms.txt
> Use this file to discover all available pages before exploring further.

# S3 Static Website Hosting Demo

> Learn to host a static website on Amazon S3 using HTML, CSS, and custom error pages.

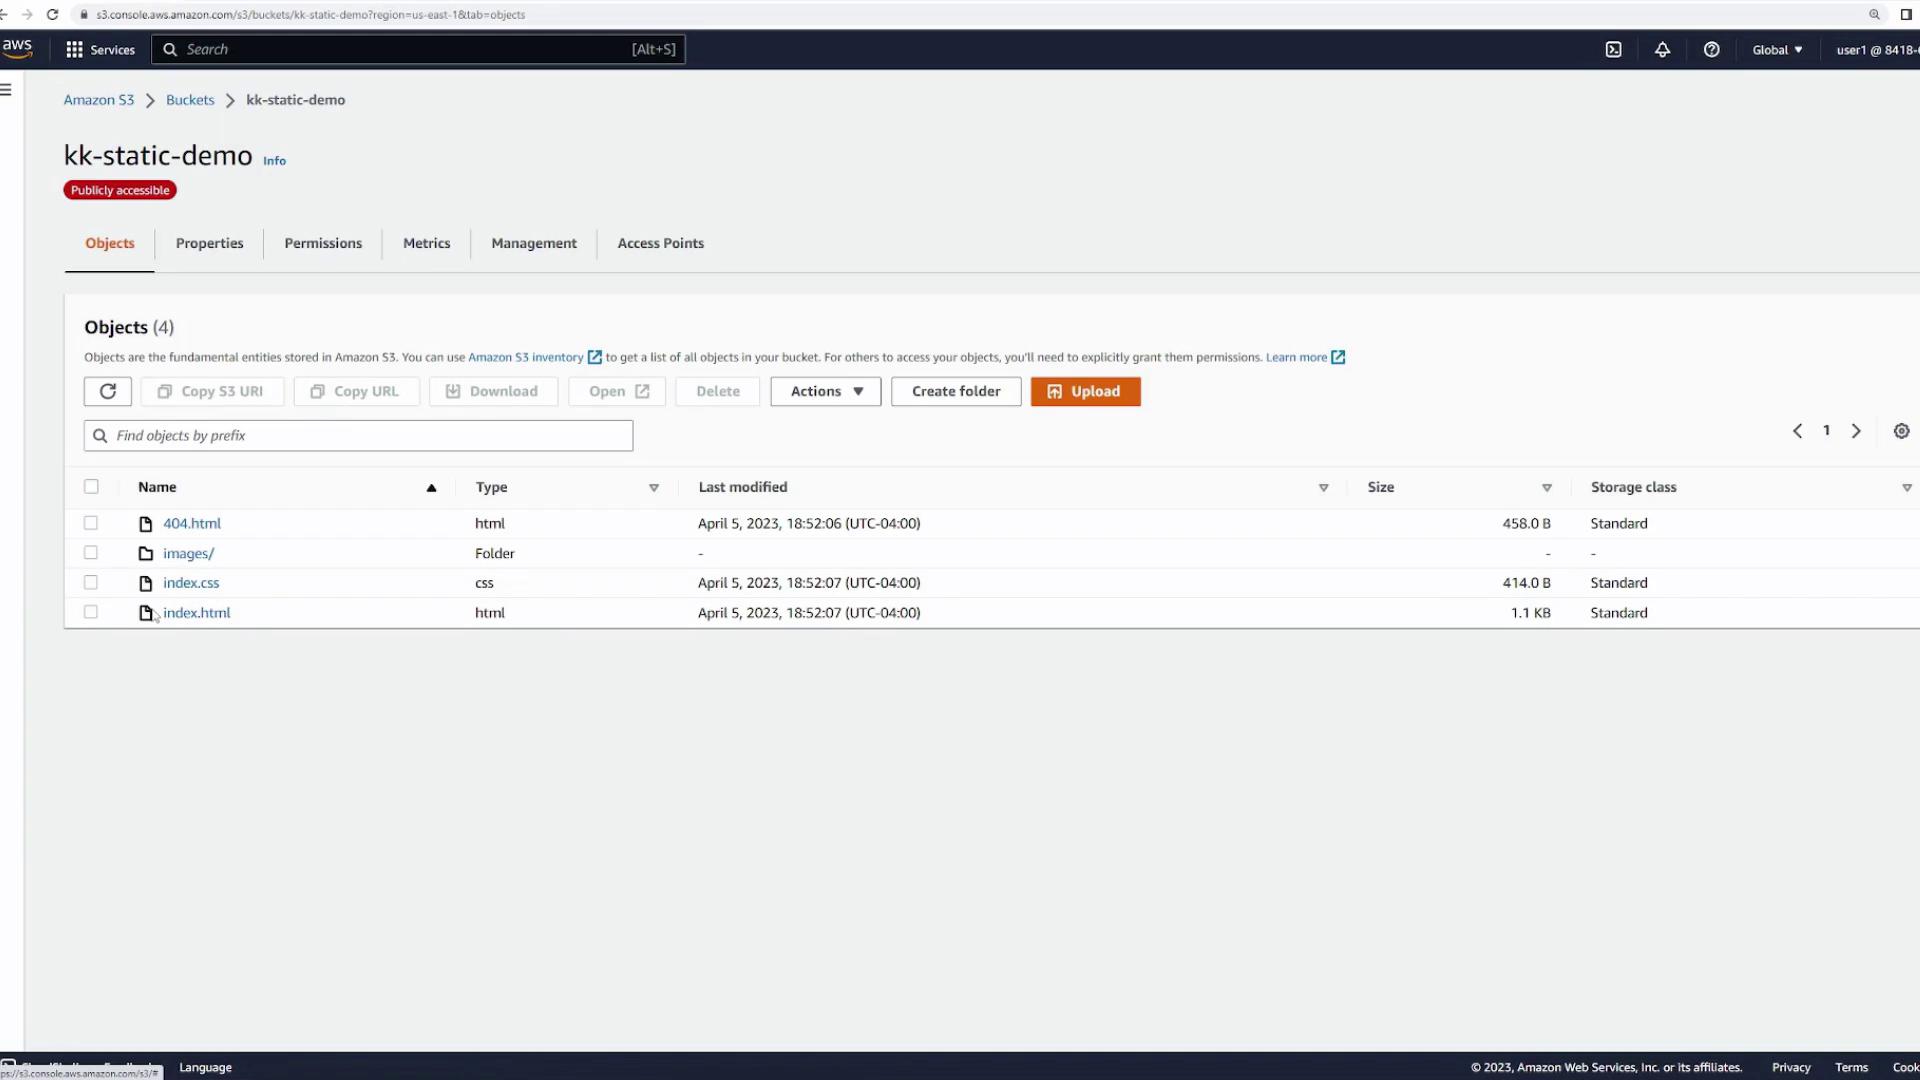
In this guide, you'll learn how to host a static website on Amazon S3. This tutorial uses a simple website that includes an HTML file (index.html), a CSS stylesheet (index.css), a custom error page (404.html), and an images folder containing various pictures.

## Website Structure Overview

Your website comprises the following files:

• **index.html** – Contains the main website content.\
• **index.css** – Provides styling for the website.\
• **404.html** – Displays a custom error page when a user requests a non-existent resource.\
• **images folder** – Contains images that the website loads.

Below is an image illustrating the AWS Console Home page alongside a Windows File Explorer window that displays the "static-demo" folder with HTML and CSS files.
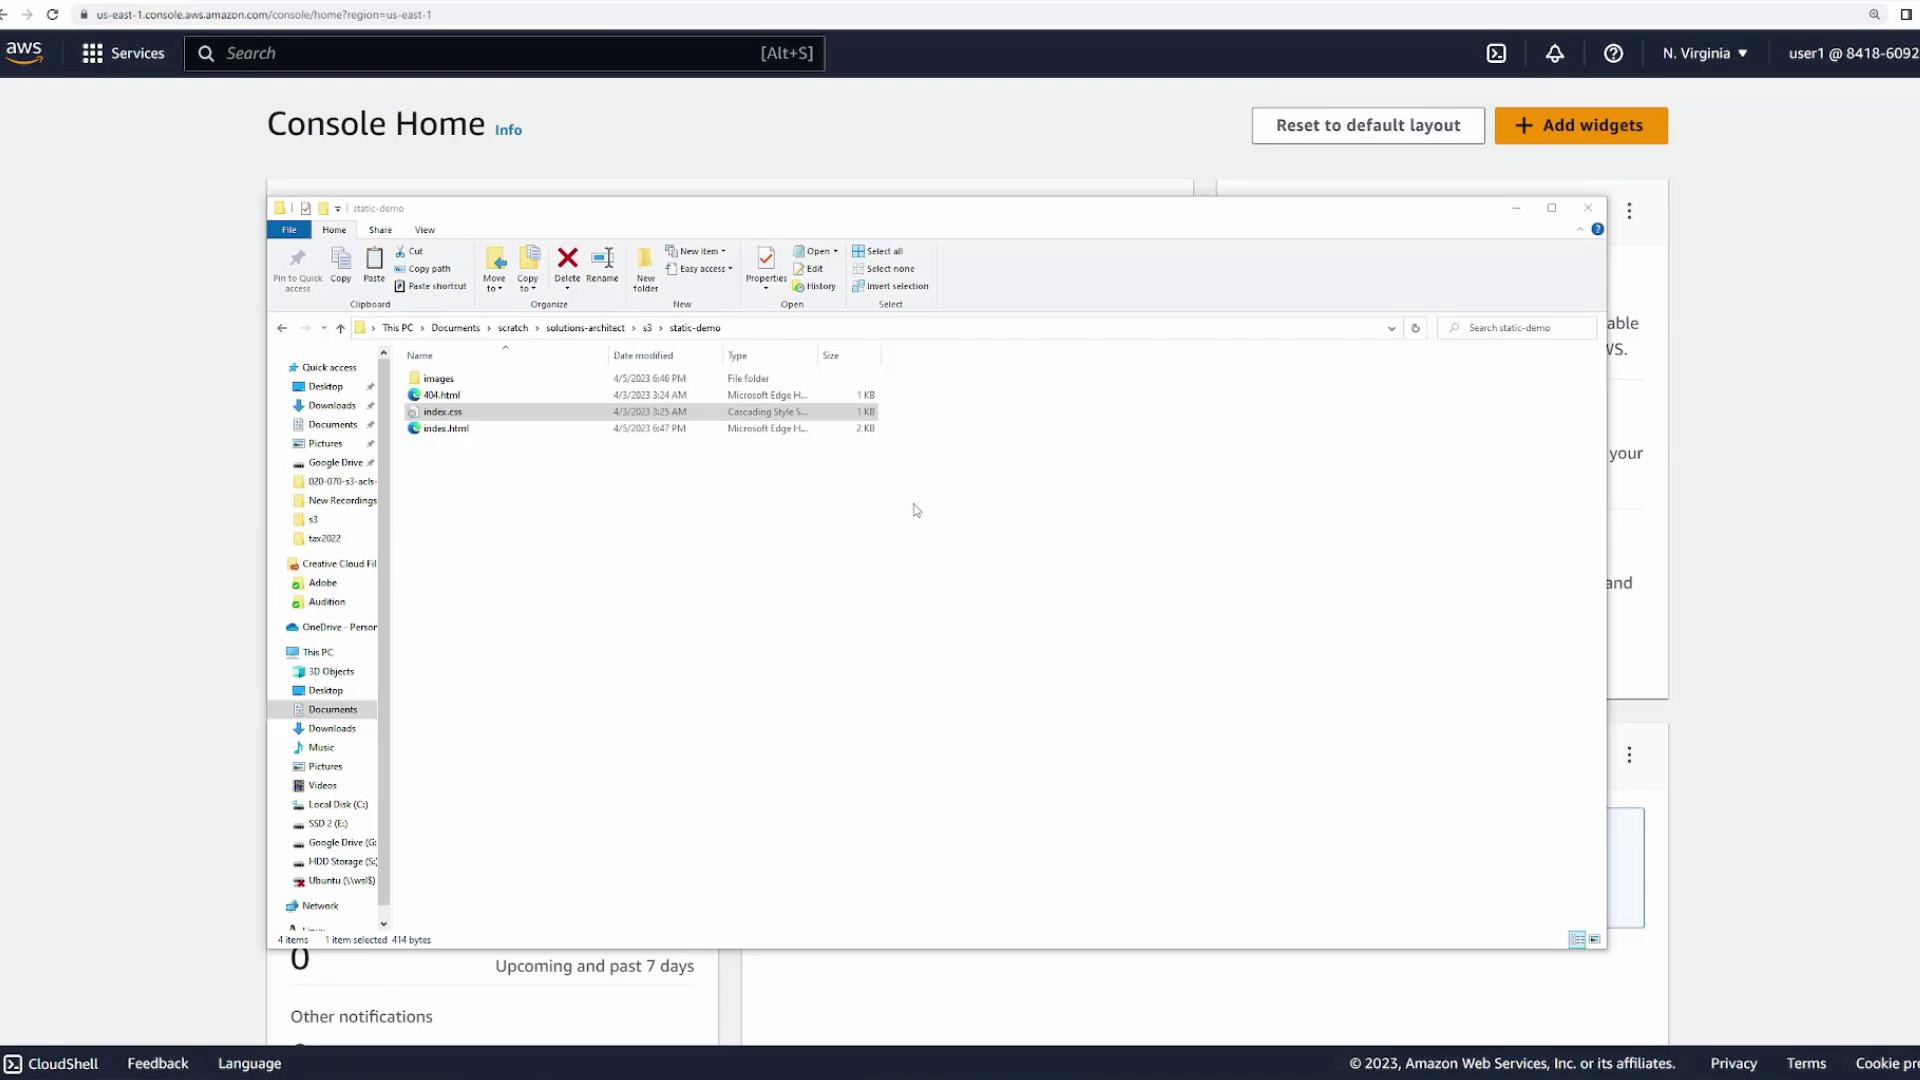
<Frame>
  ![The image shows an AWS Console Home page with a Windows File Explorer window open, displaying a folder named "static-demo" containing HTML and CSS files.](https://kodekloud.com/kk-media/image/upload/v1752859786/notes-assets/images/AWS-Certified-Developer-Associate-S3-Static-Website-Hosting-Demo/aws-console-windows-file-explorer.jpg)
</Frame>

***

## index.html

The **index.html** file structures the primary content of your website. When a user navigates to your site, the browser requests this file, which then loads the linked CSS and images.

```html theme={null}
<!DOCTYPE html>
<html lang="en">
<head>
    <meta charset="UTF-8" />
    <meta http-equiv="X-UA-Compatible" content="IE=edge" />
    <meta name="viewport" content="width=device-width, initial-scale=1.0" />
    <link rel="stylesheet" href="index.css" />
    <title>Document</title>
</head>
<body>
    <div class="container">
        <div class="images">
            <div class="image"><img src="images/food1.jpg" alt="" /></div>
            <div class="image"><img src="images/food2.jpg" alt="" /></div>
            <div class="image"><img src="images/food3.jpg" alt="" /></div>
            <div class="image"><img src="images/food4.jpg" alt="" /></div>
            <div class="image"><img src="images/food5.jpg" alt="" /></div>
            <div class="image"><img src="images/food6.jpg" alt="" /></div>
            <div class="image"><img src="images/food7.jpg" alt="" /></div>
            <div class="image"><img src="images/food8.jpg" alt="" /></div>
            <div class="image"><img src="images/food9.jpg" alt="" /></div>
            <div class="image"><img src="images/food10.jpg" alt="" /></div>
        </div>
    </div>
</body>
</html>
```

***

## 404.html

The **404.html** file customizes the error page displayed when a user attempts to access a non-existent page or file. This enhances user experience by providing a clear message for unavailable content.

```html theme={null}
<!DOCTYPE html>
<html lang="en">
<head>
    <meta charset="UTF-8" />
    <meta http-equiv="X-UA-Compatible" content="IE=edge" />
    <meta name="viewport" content="width=device-width, initial-scale=1.0" />
    <link rel="stylesheet" href="index.css" />
    <title>Document</title>
</head>
<body>
    <div class="container">
        <h1 class="head-404">404</h1>
        <h2 class="text-404">Page not found</h2>
    </div>
</body>
</html>
```

When a user visits your website, the browser loads the **index.html** file along with its associated CSS and image files. If a user requests a file that does not exist, the **404.html** custom error page is displayed.

***

## Creating the S3 Bucket and Uploading Files

Follow these steps to create an S3 bucket and upload your website files:

1. Open the AWS S3 console and create a new bucket. Name it (for example) "static-demo" and keep the default settings.
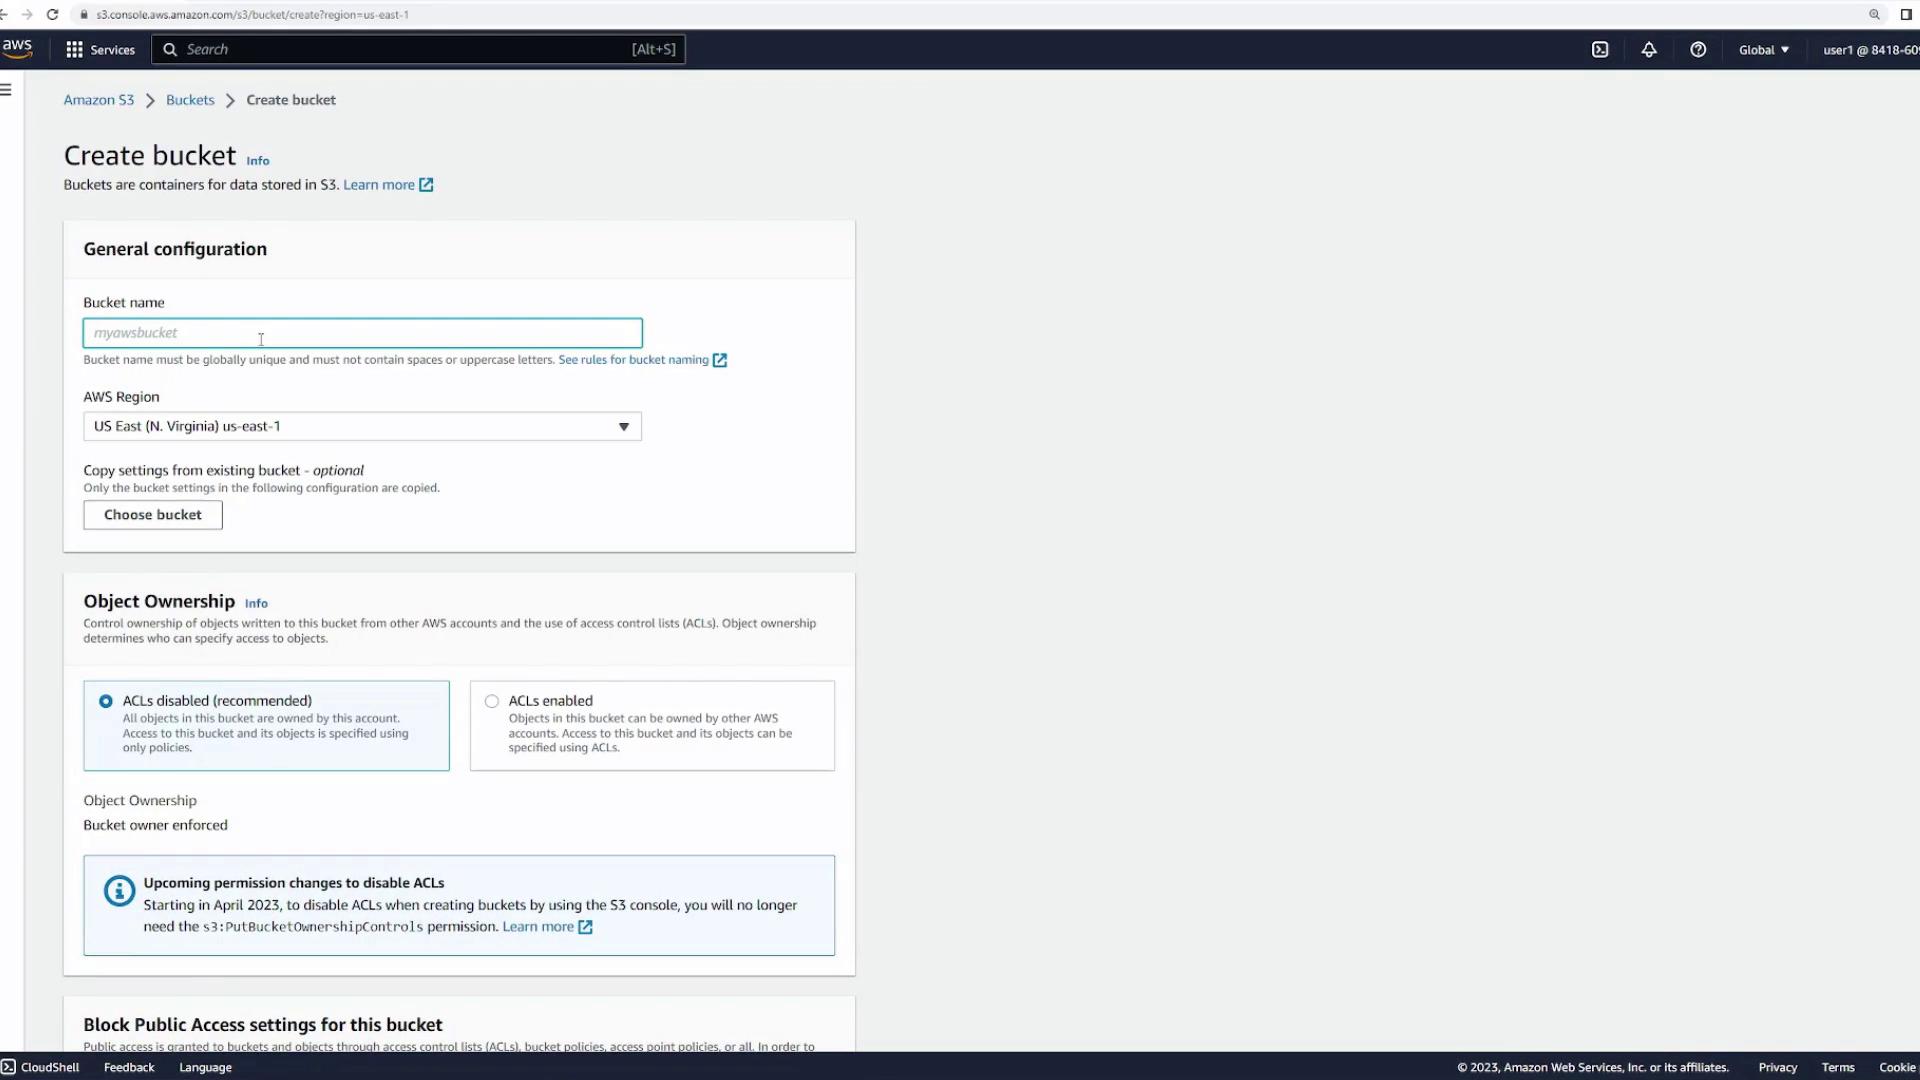
<Frame>
  ![The image shows the AWS S3 console interface for creating a new bucket, with fields for bucket name, region selection, and object ownership settings.](https://kodekloud.com/kk-media/image/upload/v1752859788/notes-assets/images/AWS-Certified-Developer-Associate-S3-Static-Website-Hosting-Demo/aws-s3-console-create-bucket.jpg)
</Frame>

2. After bucket creation, the AWS console displays a confirmation message.
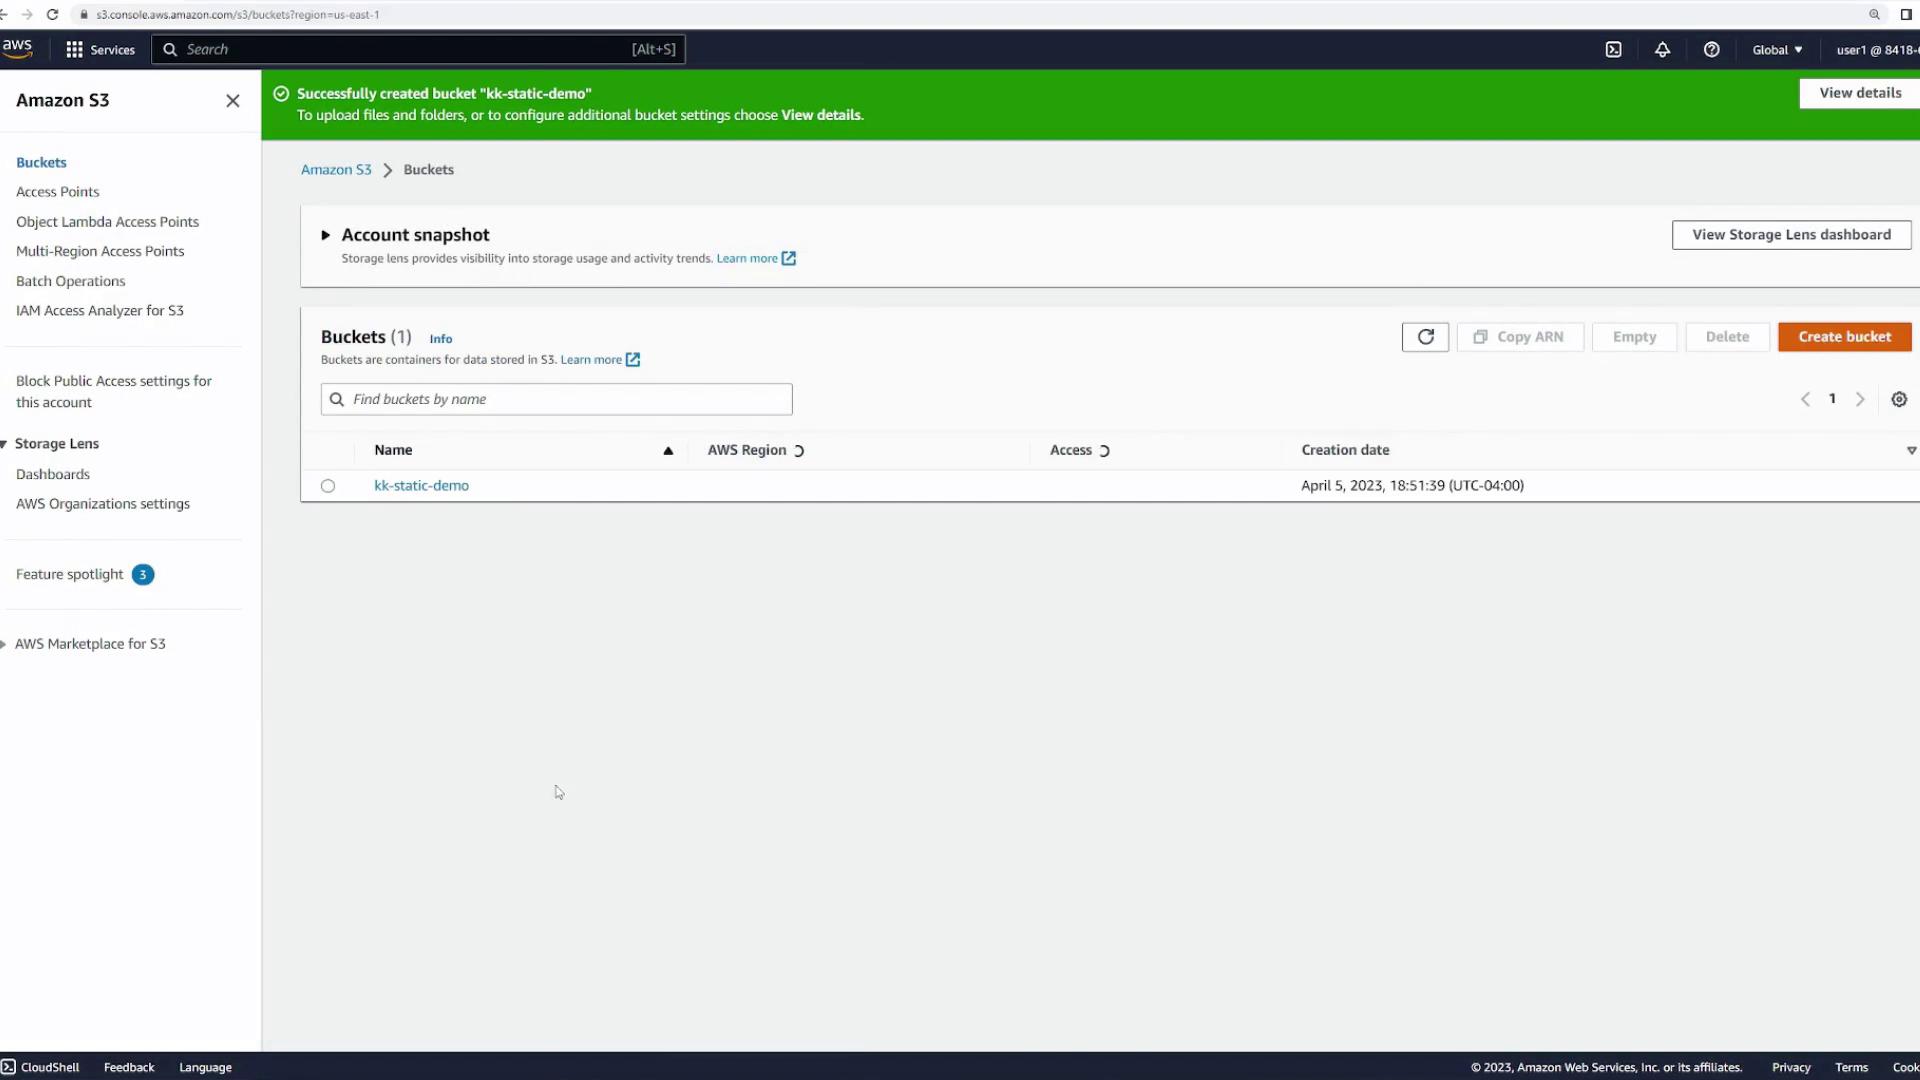
<Frame>
  ![The image shows an Amazon S3 console with a notification of a successfully created bucket named "kk-static-demo." The interface displays options for managing buckets and storage settings.](https://kodekloud.com/kk-media/image/upload/v1752859789/notes-assets/images/AWS-Certified-Developer-Associate-S3-Static-Website-Hosting-Demo/amazon-s3-console-kk-static-demo.jpg)
</Frame>

3. Next, drag and drop all website files (HTML, CSS, images, etc.) into the newly created bucket. Depending on the number of images and files, the upload may take a short while.
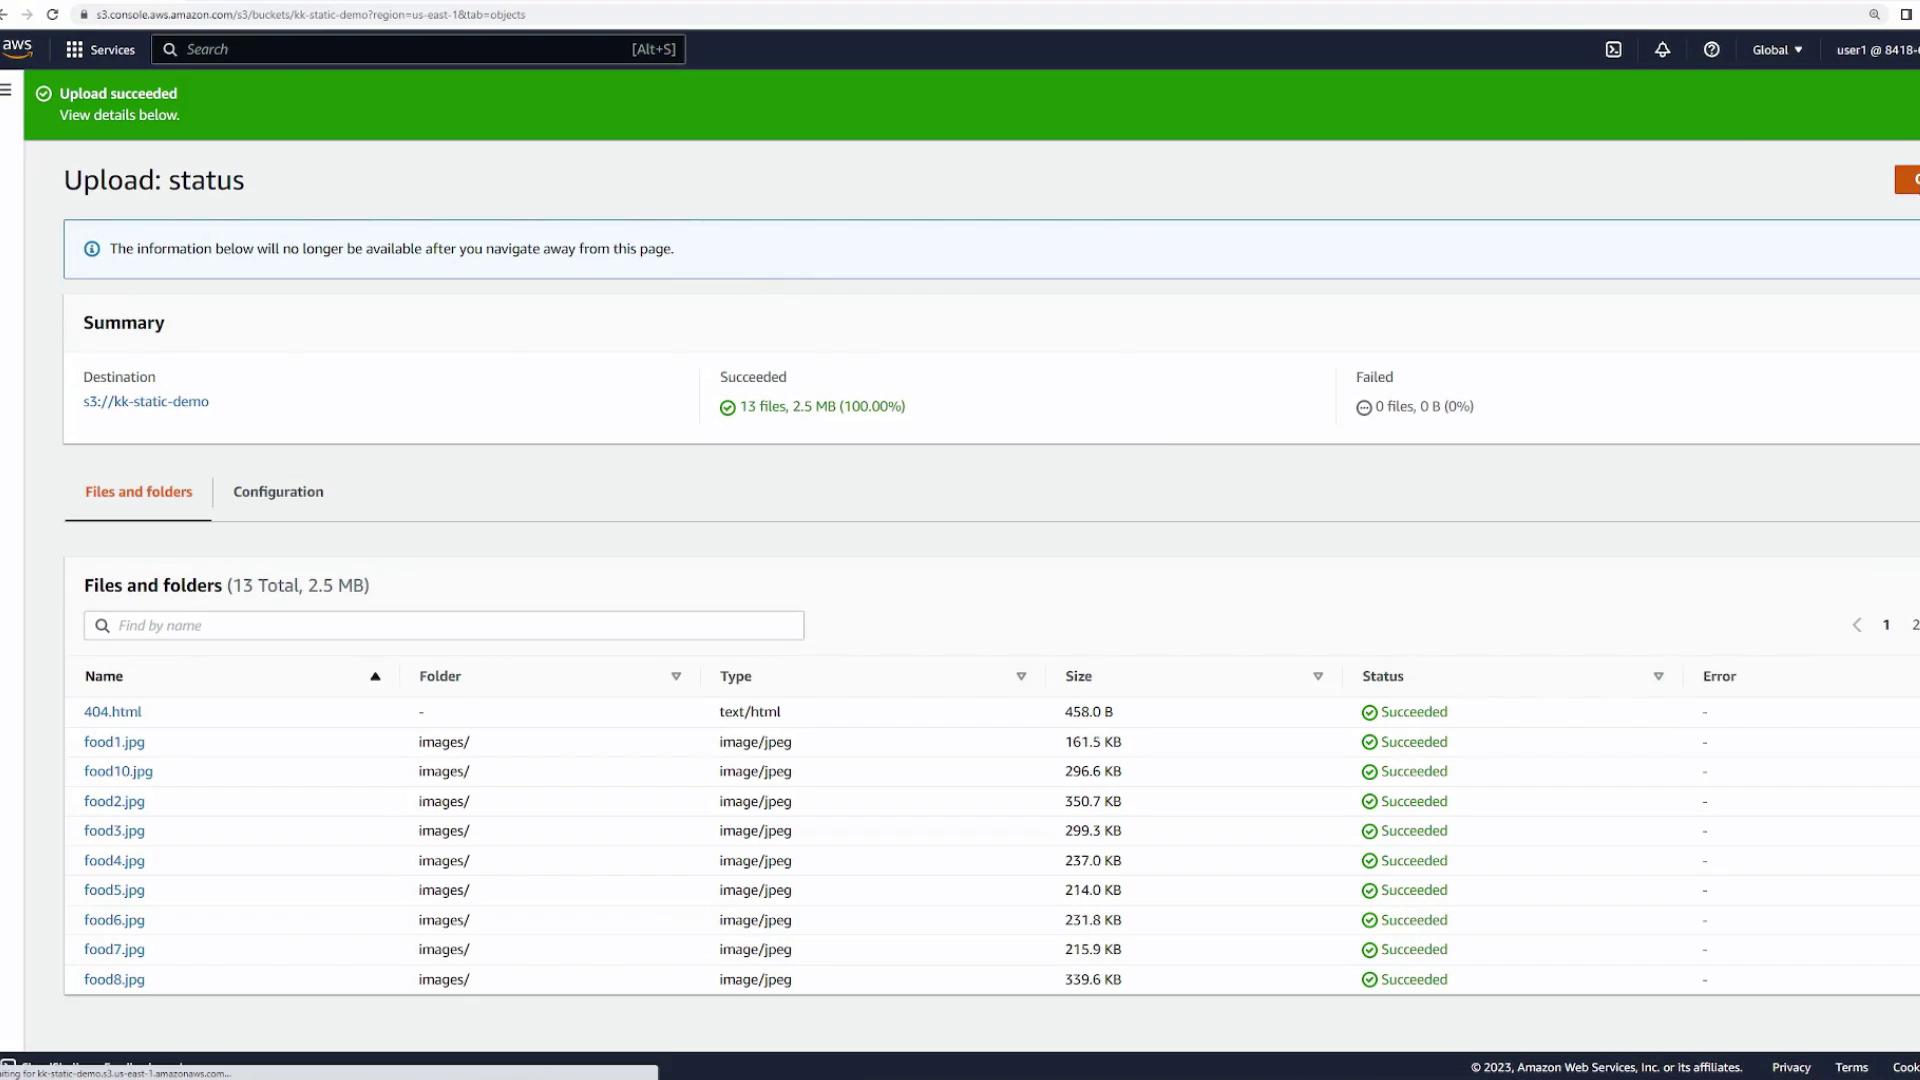
<Frame>
  ![The image shows an Amazon S3 console screen with a successful upload status for 13 files totaling 2.5 MB. The files listed include HTML and JPEG images, all marked as "Succeeded."](https://kodekloud.com/kk-media/image/upload/v1752859790/notes-assets/images/AWS-Certified-Developer-Associate-S3-Static-Website-Hosting-Demo/amazon-s3-upload-success-13-files.jpg)
</Frame>

***

## Enabling Static Website Hosting

To serve your website through S3, you must enable static website hosting:

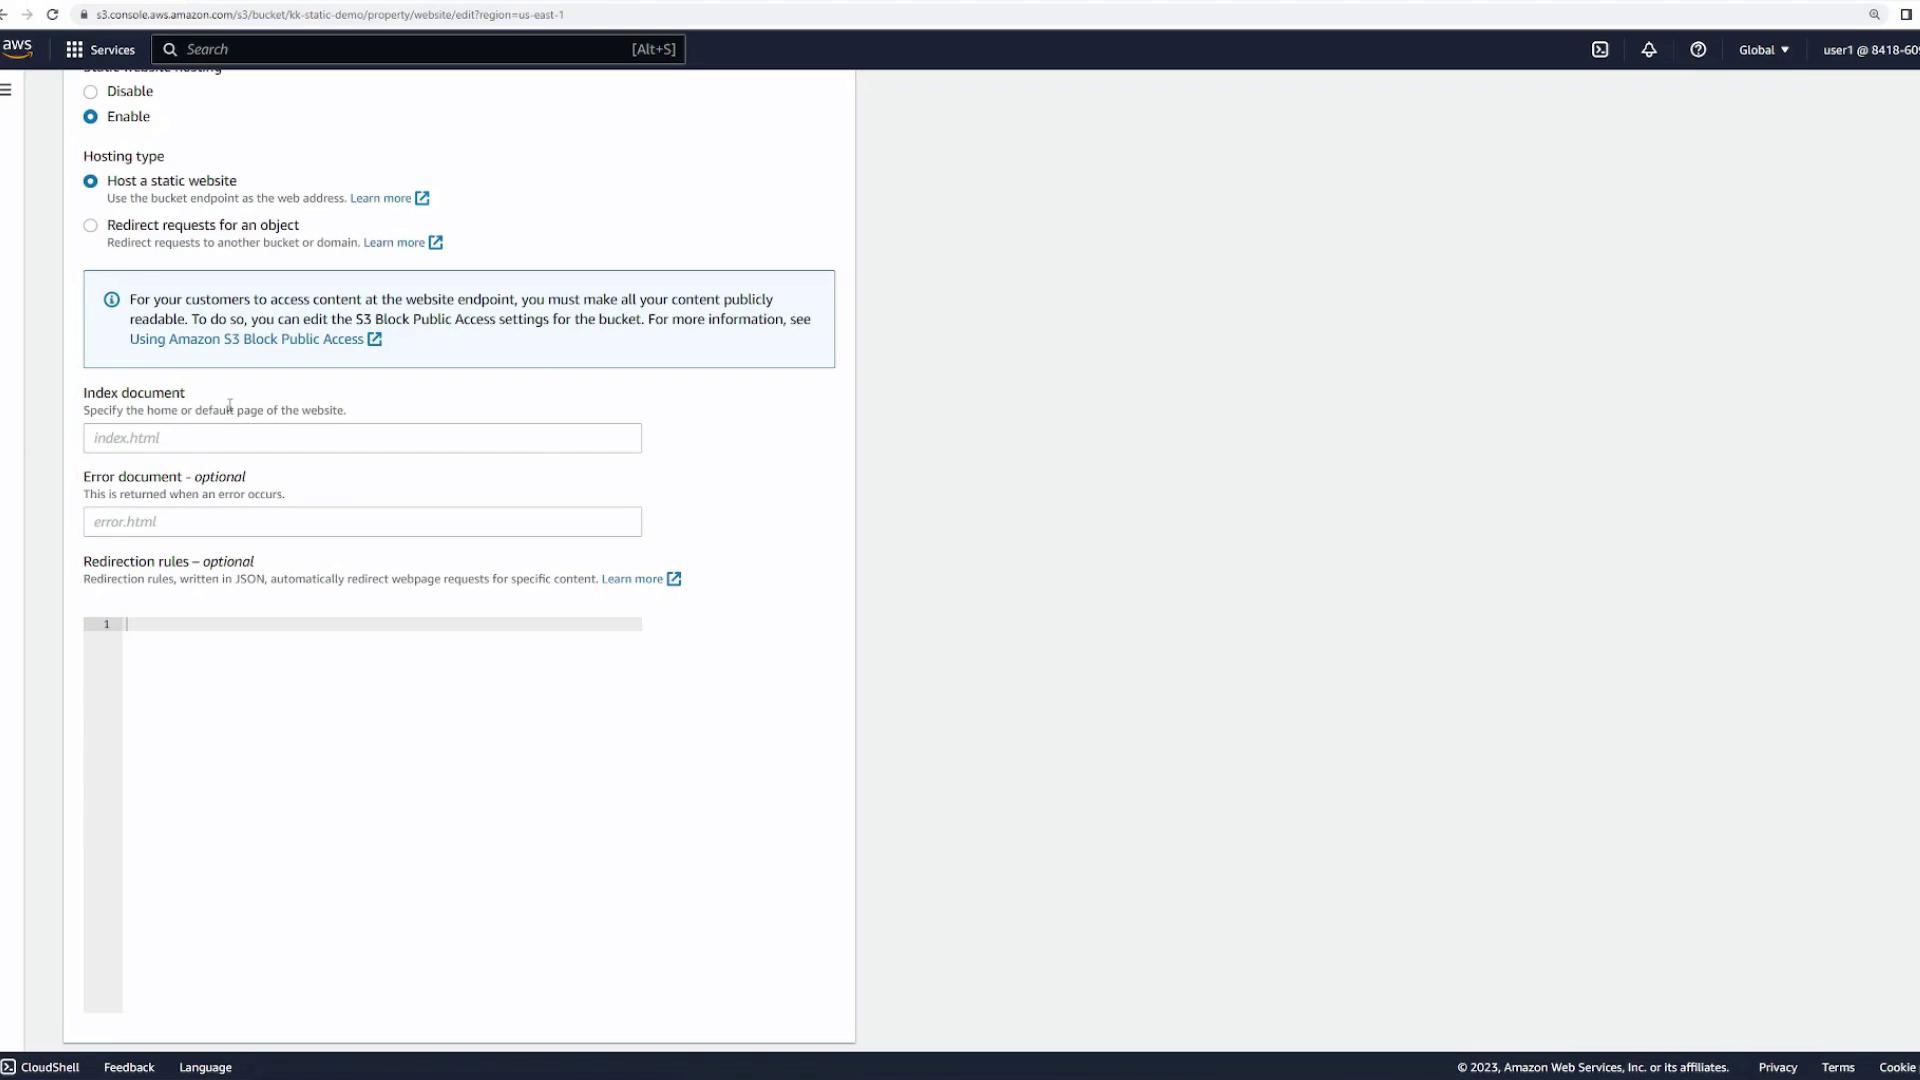
1. In your bucket, open the **Properties** tab and scroll down to the **S3 Static Website Hosting** section.
2. Click **Edit** and enable static website hosting.
3. Specify the following details:
   * **Index Document:** index.html
   * **Error Document:** 404.html

These settings ensure that the **index.html** file loads by default when the bucket URL is accessed and that the **404.html** error page is used for invalid URLs.
<Frame>
  ![The image shows an Amazon S3 console interface for configuring static website hosting, with options to specify index and error documents.](https://kodekloud.com/kk-media/image/upload/v1752859792/notes-assets/images/AWS-Certified-Developer-Associate-S3-Static-Website-Hosting-Demo/amazon-s3-static-website-hosting.jpg)
</Frame>

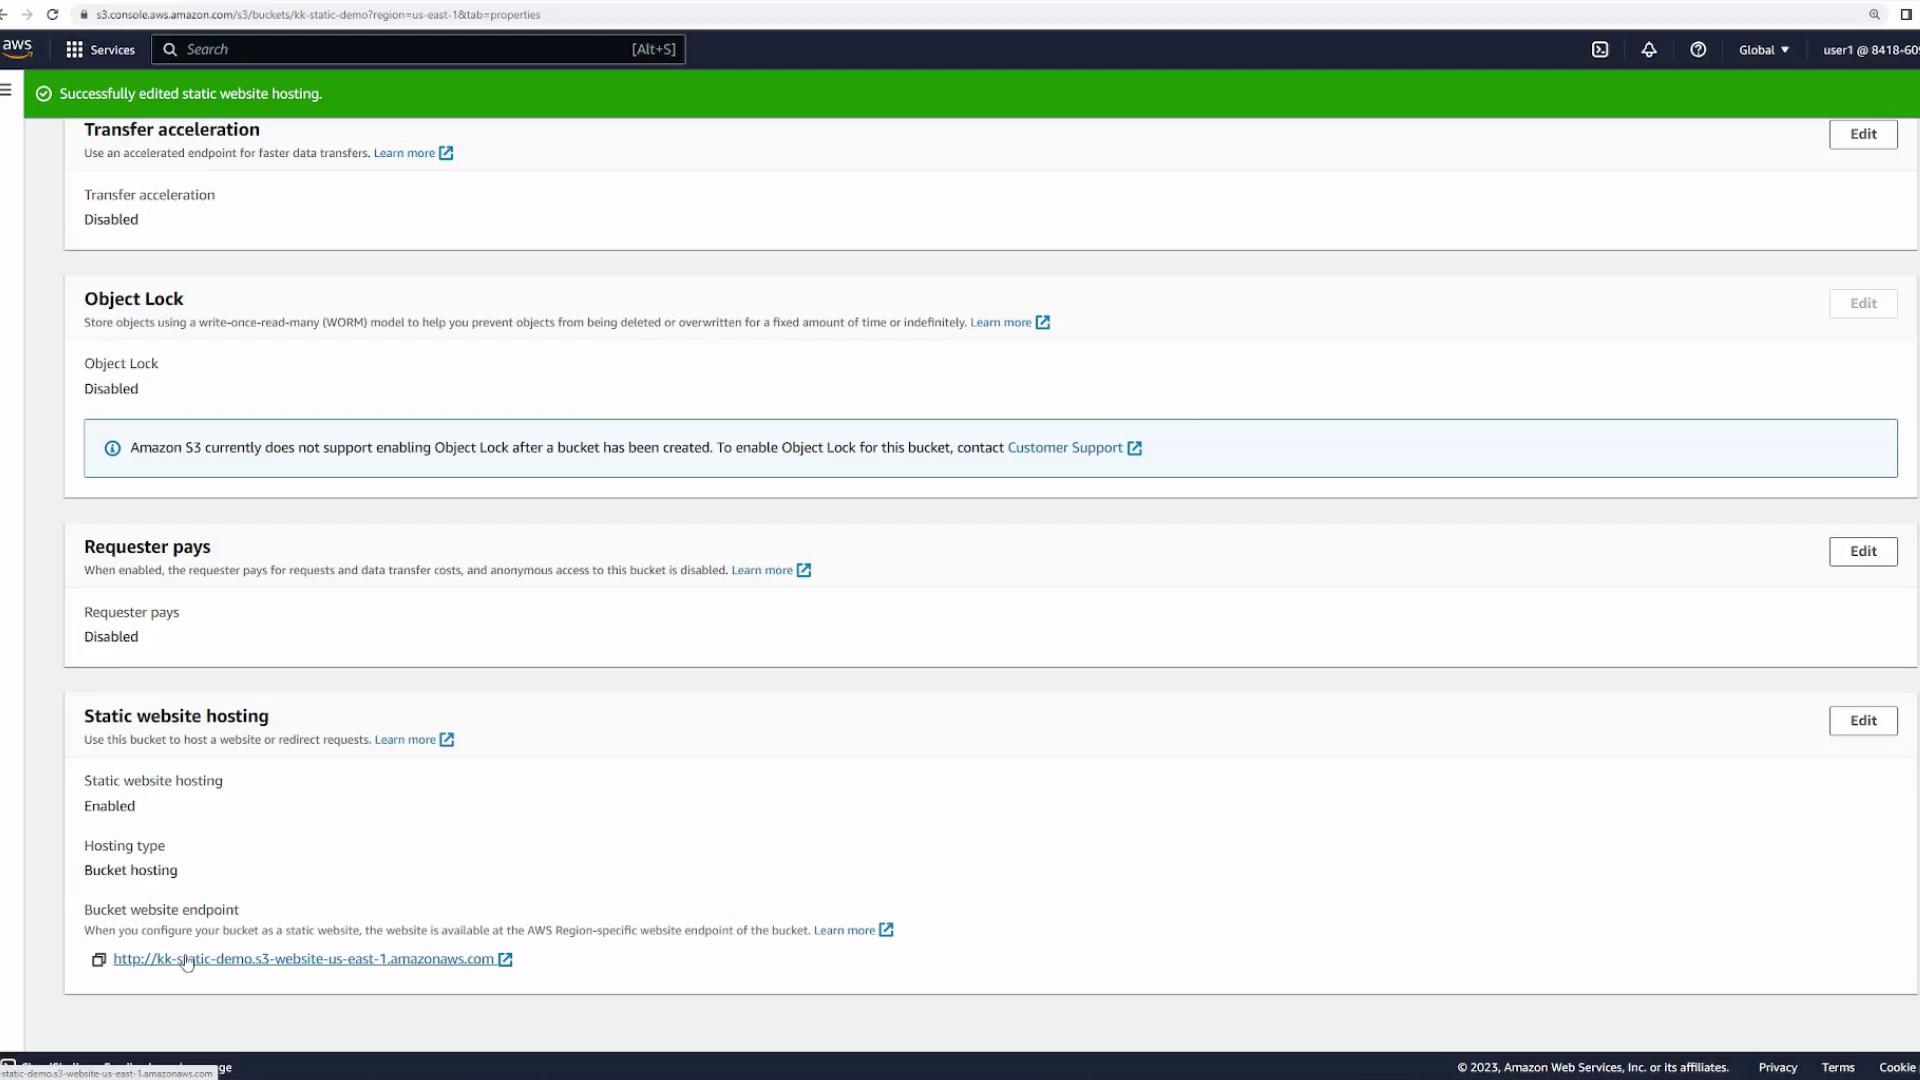
4. Save your configuration. The console will provide a URL that serves as your website's public endpoint.
<Frame>
  ![The image shows an Amazon S3 console page with settings for transfer acceleration, object lock, requester pays, and static website hosting. Static website hosting is enabled, and a bucket website endpoint is provided.](https://kodekloud.com/kk-media/image/upload/v1752859793/notes-assets/images/AWS-Certified-Developer-Associate-S3-Static-Website-Hosting-Demo/amazon-s3-console-settings-static-hosting.jpg)
</Frame>

Click this URL to view your website. Note that, initially, you might encounter an "Access Denied" error.

<Callout icon="lightbulb" color="#1CB2FE">
  Before your website is fully accessible, you'll need to update bucket permissions to allow public access.
</Callout>

***

## Updating Bucket Permissions for Public Access

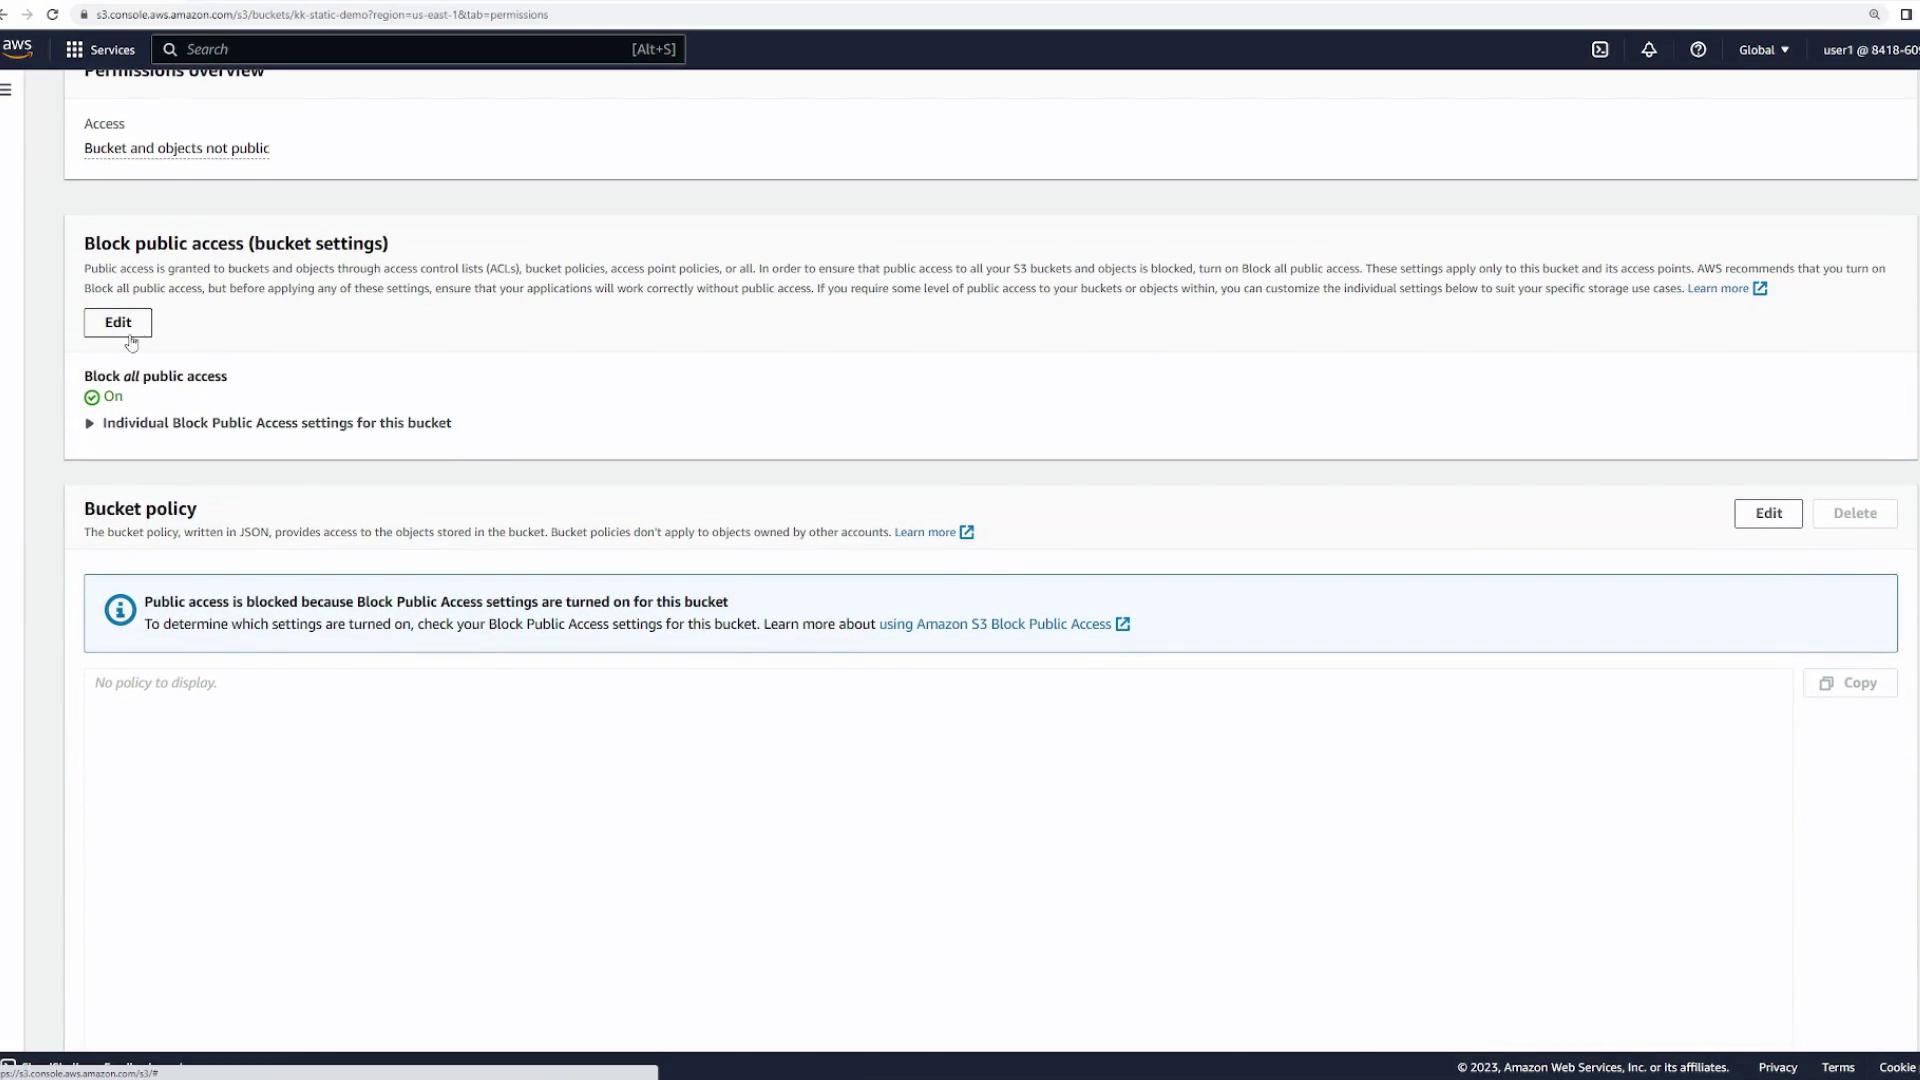
By default, S3 buckets are not publicly accessible. To adjust this:

1. Go to the **Permissions** tab of your bucket.
2. Disable the **Block all public access** setting.
<Frame>
  ![The image shows an AWS S3 console screen with settings for blocking public access to a bucket. It indicates that public access is currently blocked for the bucket.](https://kodekloud.com/kk-media/image/upload/v1752859794/notes-assets/images/AWS-Certified-Developer-Associate-S3-Static-Website-Hosting-Demo/aws-s3-block-public-access-settings.jpg)
</Frame>

Save these settings. This change allows public access, but you must also apply a bucket policy to grant public read permissions.

***

## Configuring the Bucket Policy

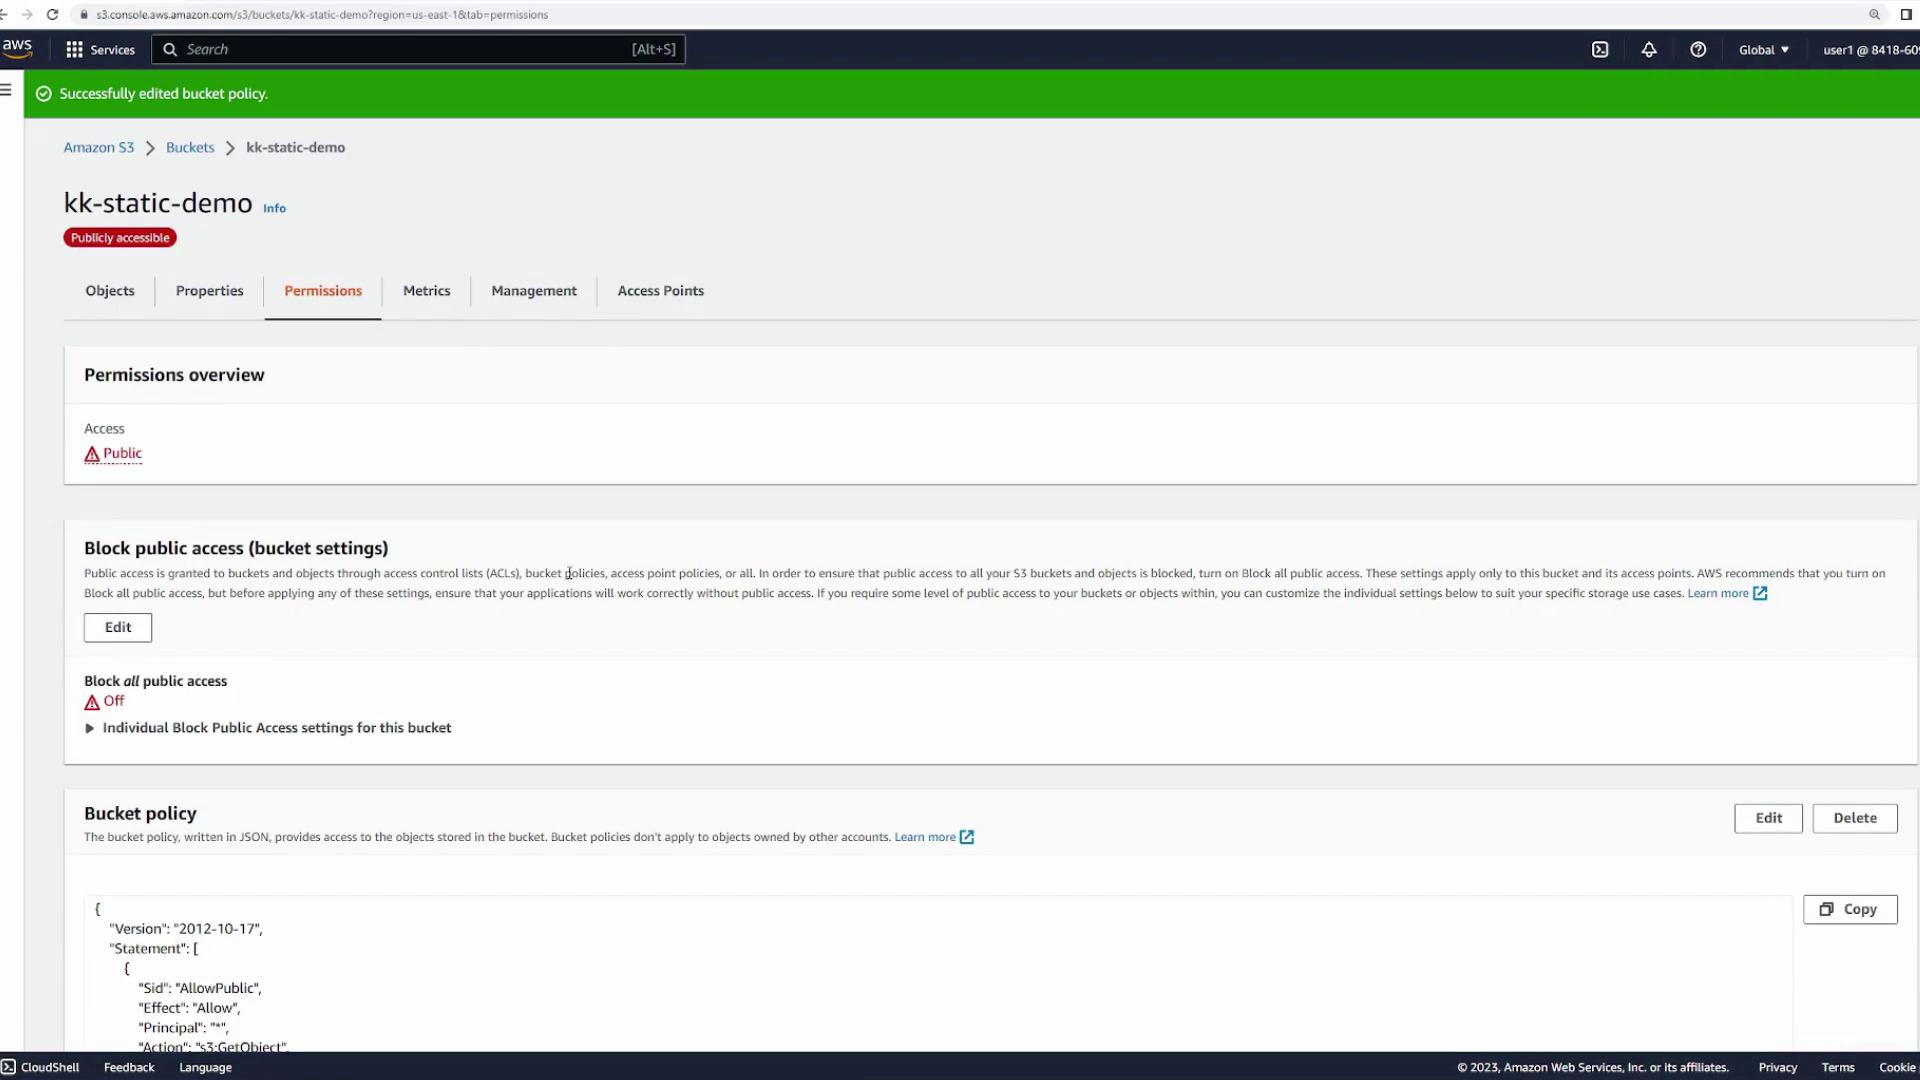
To grant public read access, open the bucket policy editor and add a statement similar to the example below. Replace "your-bucket-name" with the actual name of your bucket:

```json theme={null}
{
  "Version": "2012-10-17",
  "Statement": [
    {
      "Sid": "AllowPublic",
      "Principal": "*",
      "Effect": "Allow",
      "Action": [
          "s3:GetObject"
      ],
      "Resource": [
          "arn:aws:s3:::your-bucket-name/*"
      ]
    }
  ]
}
```

This policy permits public users to retrieve objects (via `s3:GetObject`) without the ability to delete or modify them.

Save the policy. The bucket will now be publicly accessible.
<Frame>
  ![The image shows an Amazon S3 bucket permissions page, indicating that the bucket is publicly accessible with options to edit public access settings and view the bucket policy in JSON format.](https://kodekloud.com/kk-media/image/upload/v1752859796/notes-assets/images/AWS-Certified-Developer-Associate-S3-Static-Website-Hosting-Demo/amazon-s3-bucket-permissions-public-access.jpg)
</Frame>

***

## Verifying the Website

Return to the **Properties** tab of your bucket and use the provided website URL to test your site:

• If you navigate to the base URL, **index.html** loads by default.\
• For specific files, append their path (e.g., `/images/food1.jpg` loads that image).\
• If a non-existent file is requested, the custom **404.html** error page appears.
<Frame>
  ![The image shows an Amazon S3 bucket interface with a list of objects, including HTML and CSS files, and a folder named "images."](https://kodekloud.com/kk-media/image/upload/v1752859797/notes-assets/images/AWS-Certified-Developer-Associate-S3-Static-Website-Hosting-Demo/amazon-s3-bucket-interface-files.jpg)
</Frame>

<Callout icon="lightbulb" color="#1CB2FE">
  Optimizing your S3-hosted static website for search engines involves ensuring that your HTML files include meta tags and relevant keywords, and that your website structure is easy to navigate.
</Callout>

***

By following these steps, you can efficiently host and publicly serve your website using an S3 bucket. Enjoy your scalable, cost-effective hosting solution on Amazon S3!

<CardGroup>
  <Card title="Watch Video" icon="video" cta="Learn more" href="https://learn.kodekloud.com/user/courses/aws-certified-developer-associate/module/e8ae2293-e16b-42d3-b32b-5c260a1f1e5d/lesson/e4535e47-c74f-4355-9994-9b371e1b2443" />

  <Card title="Practice Lab" icon="installation" cta="Learn more" href="https://learn.kodekloud.com/user/courses/aws-certified-developer-associate/module/e8ae2293-e16b-42d3-b32b-5c260a1f1e5d/lesson/3c3651cb-f48a-4fe8-bced-a899bbeda540" />
</CardGroup>
