> ## Documentation Index
> Fetch the complete documentation index at: https://notes.kodekloud.com/llms.txt
> Use this file to discover all available pages before exploring further.
# Demo Installing and setting up AWS CLI
> Guide to installing and configuring the AWS CLI, creating IAM access keys and profiles, verifying installation, and following security best practices.
In this lesson we'll install and configure the AWS Command Line Interface (AWS CLI). The AWS CLI enables programmatic access to AWS services (for example, CloudFormation and many others) directly from your local machine, avoiding the need to use the AWS Management Console for repetitive or scripted tasks.
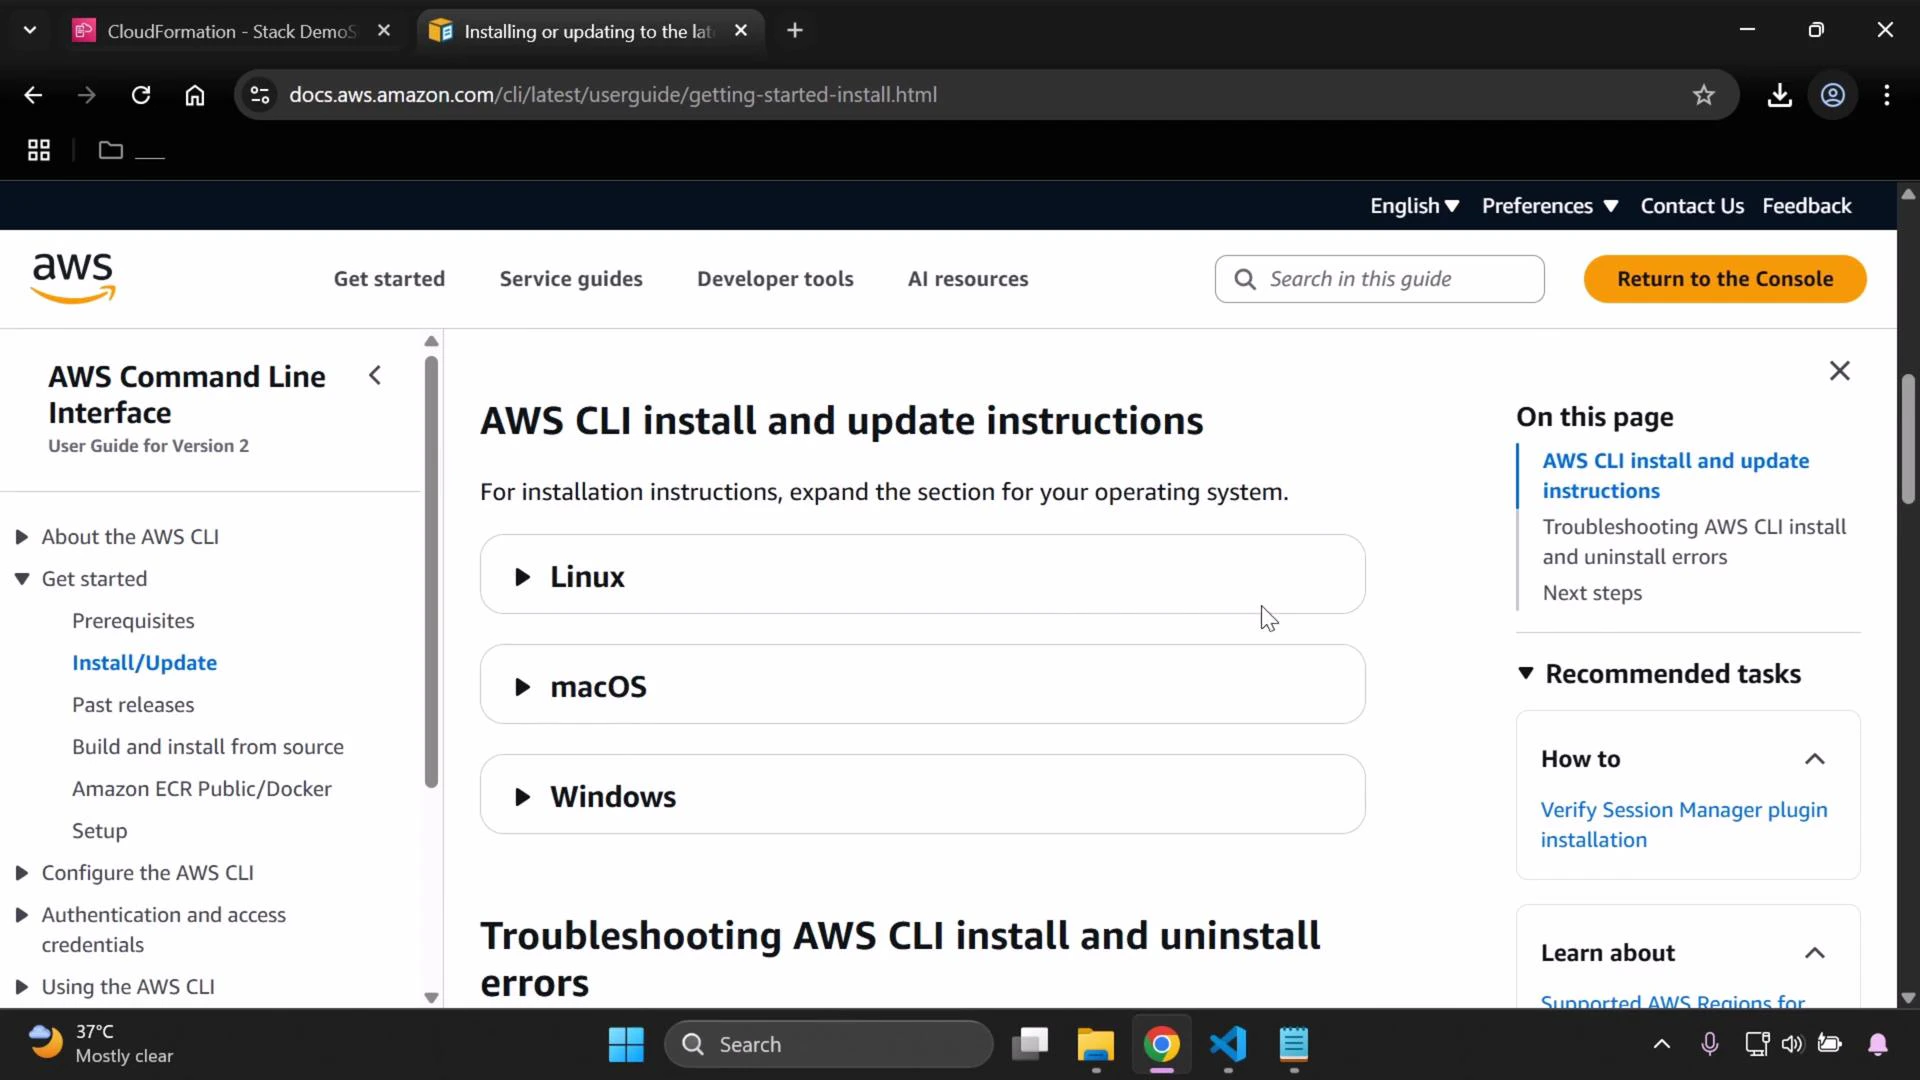
Begin by opening your browser and searching for "AWS CLI download" or visit the official AWS documentation page for installing/updating the AWS CLI:
[https://docs.aws.amazon.com/cli/latest/userguide/getting-started-install.html](https://docs.aws.amazon.com/cli/latest/userguide/getting-started-install.html). On that page, select the installer or instructions that match your operating system.
 ## Quick installer summary (by OS)
| Operating System | Recommended installer | Direct download URL / command |
| ------------------- | ---------------------------------------------- | -------------------------------------------------------------------------------------- |
| macOS (recommended) | Official .pkg installer | [https://awscli.amazonaws.com/AWSCLIV2.pkg](https://awscli.amazonaws.com/AWSCLIV2.pkg) |
| Windows | MSI installer (interactive or msiexec) | [https://awscli.amazonaws.com/AWSCLIV2.msi](https://awscli.amazonaws.com/AWSCLIV2.msi) |
| Linux | Platform-specific package or bundled installer | See the AWS docs for distribution-specific commands |
## macOS installation (recommended approach)
Download the official macOS installer package (.pkg) from the AWS docs or from:
[https://awscli.amazonaws.com/AWSCLIV2.pkg](https://awscli.amazonaws.com/AWSCLIV2.pkg)
Typical macOS installation locations:
* /usr/local/aws-cli
* /usr/local/bin/aws
Installation steps:
1. Download AWSCLIV2.pkg.
2. Double-click the .pkg and follow the installer prompts (Authenticate when prompted).
3. After installation, verify with aws --version.
Optional: If you prefer Homebrew, you can also install via:
```bash theme={null}
brew install awscli
```
(Refer to Homebrew docs if using that method.)
## Windows installation (MSI)
You can install interactively (GUI) or from the command line. An elevated Administrator Command Prompt or PowerShell is required for system-wide installs.
Interactive:
* Download the MSI and double-click it.
* Follow the setup wizard (Accept terms → Next → Install), handle any UAC prompts, and finish.
Command-line (interactive):
```powershell theme={null}
msiexec.exe /i https://awscli.amazonaws.com/AWSCLIV2.msi
```
Command-line (silent install):
```powershell theme={null}
msiexec.exe /i https://awscli.amazonaws.com/AWSCLIV2.msi /qn
```
After installation completes, close the installer.
## Verify the installation
Open a terminal (macOS/Linux) or Command Prompt / PowerShell (Windows) and run:
```bash theme={null}
aws --version
```
Example output (your versions may differ):
```text theme={null}
aws-cli/2.27.50 Python/3.10.6 Windows/10 exe/AMD64
```
If a version string appears, the AWS CLI is installed and available in your PATH.
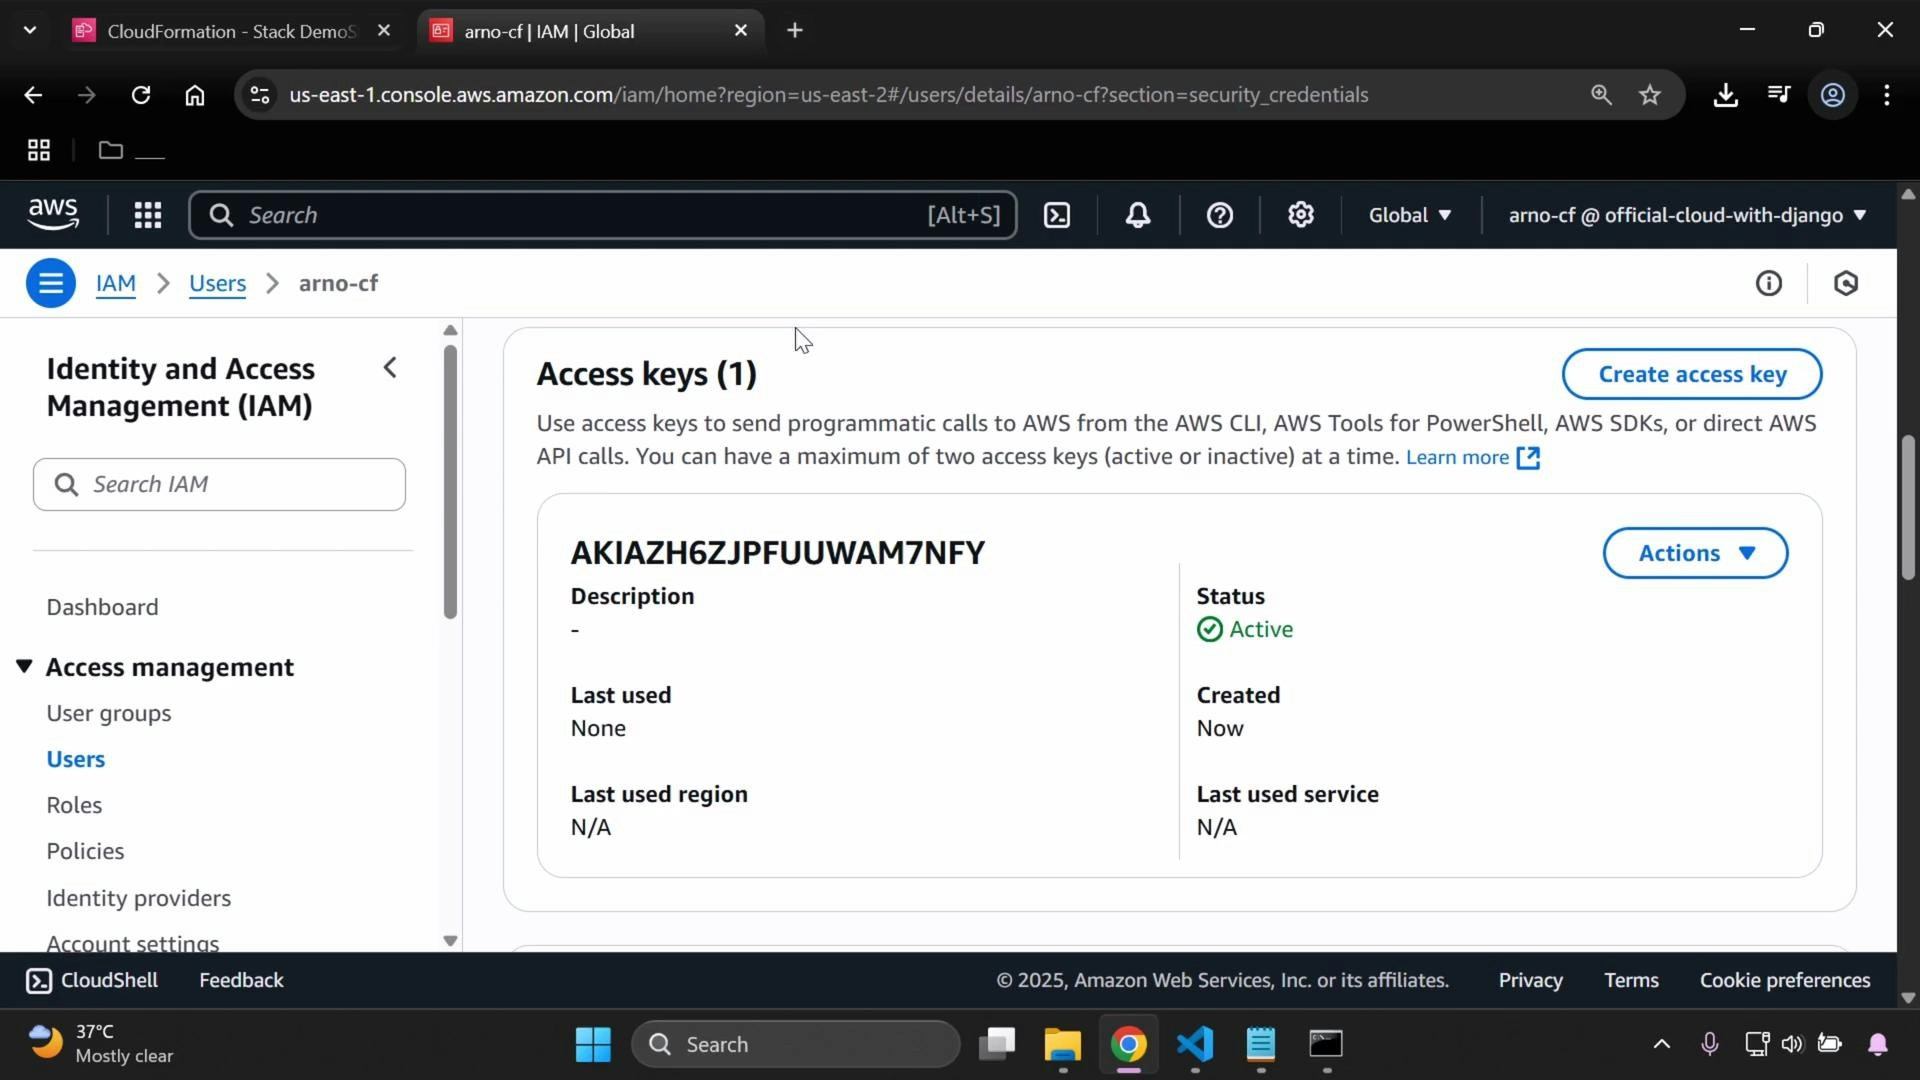
## Create access keys (IAM user)
To authenticate CLI requests, create access keys for an IAM user with the appropriate permissions:
1. Sign in to the AWS Management Console and open the IAM console: [https://console.aws.amazon.com/iam/](https://console.aws.amazon.com/iam/).
2. Select "Users" and choose the user you will use for CLI access.
3. Open the "Security credentials" tab and create a new access key.
4. Immediately copy or download the Access Key ID and Secret Access Key — you will not be able to view the secret again after closing the creation dialog.
## Quick installer summary (by OS)
| Operating System | Recommended installer | Direct download URL / command |
| ------------------- | ---------------------------------------------- | -------------------------------------------------------------------------------------- |
| macOS (recommended) | Official .pkg installer | [https://awscli.amazonaws.com/AWSCLIV2.pkg](https://awscli.amazonaws.com/AWSCLIV2.pkg) |
| Windows | MSI installer (interactive or msiexec) | [https://awscli.amazonaws.com/AWSCLIV2.msi](https://awscli.amazonaws.com/AWSCLIV2.msi) |
| Linux | Platform-specific package or bundled installer | See the AWS docs for distribution-specific commands |
## macOS installation (recommended approach)
Download the official macOS installer package (.pkg) from the AWS docs or from:
[https://awscli.amazonaws.com/AWSCLIV2.pkg](https://awscli.amazonaws.com/AWSCLIV2.pkg)
Typical macOS installation locations:
* /usr/local/aws-cli
* /usr/local/bin/aws
Installation steps:
1. Download AWSCLIV2.pkg.
2. Double-click the .pkg and follow the installer prompts (Authenticate when prompted).
3. After installation, verify with aws --version.
Optional: If you prefer Homebrew, you can also install via:
```bash theme={null}
brew install awscli
```
(Refer to Homebrew docs if using that method.)
## Windows installation (MSI)
You can install interactively (GUI) or from the command line. An elevated Administrator Command Prompt or PowerShell is required for system-wide installs.
Interactive:
* Download the MSI and double-click it.
* Follow the setup wizard (Accept terms → Next → Install), handle any UAC prompts, and finish.
Command-line (interactive):
```powershell theme={null}
msiexec.exe /i https://awscli.amazonaws.com/AWSCLIV2.msi
```
Command-line (silent install):
```powershell theme={null}
msiexec.exe /i https://awscli.amazonaws.com/AWSCLIV2.msi /qn
```
After installation completes, close the installer.
## Verify the installation
Open a terminal (macOS/Linux) or Command Prompt / PowerShell (Windows) and run:
```bash theme={null}
aws --version
```
Example output (your versions may differ):
```text theme={null}
aws-cli/2.27.50 Python/3.10.6 Windows/10 exe/AMD64
```
If a version string appears, the AWS CLI is installed and available in your PATH.
## Create access keys (IAM user)
To authenticate CLI requests, create access keys for an IAM user with the appropriate permissions:
1. Sign in to the AWS Management Console and open the IAM console: [https://console.aws.amazon.com/iam/](https://console.aws.amazon.com/iam/).
2. Select "Users" and choose the user you will use for CLI access.
3. Open the "Security credentials" tab and create a new access key.
4. Immediately copy or download the Access Key ID and Secret Access Key — you will not be able to view the secret again after closing the creation dialog.
 Never commit or share your Access Key ID and Secret Access Key publicly. Treat them like passwords. If an access key is accidentally exposed, delete it immediately and create a new one.
You can download the .csv file from the console for secure storage. After you finish the tasks that require the key, remove the access key if it is no longer needed.
Never commit or share your Access Key ID and Secret Access Key publicly. Treat them like passwords. If an access key is accidentally exposed, delete it immediately and create a new one.
You can download the .csv file from the console for secure storage. After you finish the tasks that require the key, remove the access key if it is no longer needed.
 ## Configure the AWS CLI
With your Access Key ID and Secret Access Key ready, run the interactive configuration command:
```bash theme={null}
aws configure
```
You will be prompted for these values. Example interactive session (replace with your actual keys and preferred region/output):
```text theme={null}
$ aws configure
AWS Access Key ID [None]:
AWS Secret Access Key [None]:
Default region name [None]: us-east-2
Default output format [None]: yaml
```
This creates/stores credentials and settings in these files:
* macOS / Linux:
* \~/.aws/credentials
* \~/.aws/config
* Windows:
* %USERPROFILE%.aws\credentials
* %USERPROFILE%.aws\config
Table: config file locations
| Platform | Credentials file | Config file |
| ------------- | ----------------------------- | ------------------------ |
| macOS / Linux | \~/.aws/credentials | \~/.aws/config |
| Windows | %USERPROFILE%.aws\credentials | %USERPROFILE%.aws\config |
## Working with multiple profiles
If you manage multiple AWS accounts or roles, create named profiles:
```bash theme={null}
aws configure --profile
```
Then use that profile with:
* The --profile option: aws s3 ls --profile \
* Environment variable: export AWS\_PROFILE=\ (macOS/Linux) or setx AWS\_PROFILE "\" (Windows)
If you work with multiple AWS accounts or roles, consider creating named profiles with:
aws configure --profile \
Then use that profile with --profile \ or set AWS\_PROFILE in your environment.
## Quick tips and housekeeping
* Clear the terminal:
* macOS/Linux: clear
* Windows Command Prompt: CLS
* Rotate and remove keys you no longer need.
* Prefer IAM roles (EC2/ECS/STS) where possible for temporary credentials and improved security.
* Follow the principle of least privilege when assigning IAM permissions.
## Links and references
* AWS CLI official docs: [https://docs.aws.amazon.com/cli/latest/userguide/getting-started-install.html](https://docs.aws.amazon.com/cli/latest/userguide/getting-started-install.html)
* IAM console: [https://console.aws.amazon.com/iam/](https://console.aws.amazon.com/iam/)
* IAM best practices: [https://docs.aws.amazon.com/IAM/latest/UserGuide/best-practices.html](https://docs.aws.amazon.com/IAM/latest/UserGuide/best-practices.html)
* CloudFormation (for examples and further lessons): [https://learn.kodekloud.com/user/courses/aws-cloud-formation](https://learn.kodekloud.com/user/courses/aws-cloud-formation)
That’s it — the AWS CLI should now be installed and configured. Remember to secure and rotate access keys, and prefer roles and least-privilege IAM policies whenever possible.
## Configure the AWS CLI
With your Access Key ID and Secret Access Key ready, run the interactive configuration command:
```bash theme={null}
aws configure
```
You will be prompted for these values. Example interactive session (replace with your actual keys and preferred region/output):
```text theme={null}
$ aws configure
AWS Access Key ID [None]:
AWS Secret Access Key [None]:
Default region name [None]: us-east-2
Default output format [None]: yaml
```
This creates/stores credentials and settings in these files:
* macOS / Linux:
* \~/.aws/credentials
* \~/.aws/config
* Windows:
* %USERPROFILE%.aws\credentials
* %USERPROFILE%.aws\config
Table: config file locations
| Platform | Credentials file | Config file |
| ------------- | ----------------------------- | ------------------------ |
| macOS / Linux | \~/.aws/credentials | \~/.aws/config |
| Windows | %USERPROFILE%.aws\credentials | %USERPROFILE%.aws\config |
## Working with multiple profiles
If you manage multiple AWS accounts or roles, create named profiles:
```bash theme={null}
aws configure --profile
```
Then use that profile with:
* The --profile option: aws s3 ls --profile \
* Environment variable: export AWS\_PROFILE=\ (macOS/Linux) or setx AWS\_PROFILE "\" (Windows)
If you work with multiple AWS accounts or roles, consider creating named profiles with:
aws configure --profile \
Then use that profile with --profile \ or set AWS\_PROFILE in your environment.
## Quick tips and housekeeping
* Clear the terminal:
* macOS/Linux: clear
* Windows Command Prompt: CLS
* Rotate and remove keys you no longer need.
* Prefer IAM roles (EC2/ECS/STS) where possible for temporary credentials and improved security.
* Follow the principle of least privilege when assigning IAM permissions.
## Links and references
* AWS CLI official docs: [https://docs.aws.amazon.com/cli/latest/userguide/getting-started-install.html](https://docs.aws.amazon.com/cli/latest/userguide/getting-started-install.html)
* IAM console: [https://console.aws.amazon.com/iam/](https://console.aws.amazon.com/iam/)
* IAM best practices: [https://docs.aws.amazon.com/IAM/latest/UserGuide/best-practices.html](https://docs.aws.amazon.com/IAM/latest/UserGuide/best-practices.html)
* CloudFormation (for examples and further lessons): [https://learn.kodekloud.com/user/courses/aws-cloud-formation](https://learn.kodekloud.com/user/courses/aws-cloud-formation)
That’s it — the AWS CLI should now be installed and configured. Remember to secure and rotate access keys, and prefer roles and least-privilege IAM policies whenever possible.