> ## Documentation Index
> Fetch the complete documentation index at: https://notes.kodekloud.com/llms.txt
> Use this file to discover all available pages before exploring further.
# Demo Using a CloudFormation template to provision an S3 Bucket
> Guide to provision an Amazon S3 bucket by uploading a CloudFormation YAML template to create a stack via the AWS Management Console, including validation, console steps, and verification
This guide shows how to provision an Amazon S3 bucket by moving a CloudFormation template into a CloudFormation stack using the AWS Management Console. It includes a minimal YAML template, validation tips, step-by-step console instructions, and verification steps to confirm the bucket was created.
Resources:
* CloudFormation overview and console: [https://learn.kodekloud.com/user/courses/aws-cloud-formation](https://learn.kodekloud.com/user/courses/aws-cloud-formation)
* Amazon S3 overview and console: [https://learn.kodekloud.com/user/courses/amazon-simple-storage-service-amazon-s3](https://learn.kodekloud.com/user/courses/amazon-simple-storage-service-amazon-s3)
* CloudFormation linter (cfn-lint): [https://github.com/aws-cloudformation/cfn-lint](https://github.com/aws-cloudformation/cfn-lint)
## Minimal CloudFormation template (YAML)
Create a file named `s3-bucket.yml` with the following contents:
```yaml theme={null}
Resources:
MyS3Bucket:
Type: AWS::S3::Bucket
Properties:
BucketName: eden-kodekloud-xcvt-bkt
```
This template defines a single S3 bucket resource using the logical ID `MyS3Bucket`. The BucketName property sets the physical S3 bucket name created by the stack.
## Before creating the stack — validation and best practices
Follow these quick checks before uploading the template to CloudFormation:
* Save the template file locally (e.g., `s3-bucket.yml`).
* Validate the template with a linter to catch syntax and resource issues early:
```bash theme={null}
cfn-lint s3-bucket.yml
```
* Use concise, unique stack names to help identify resources later (e.g., `demo-stack`).
* Confirm the bucket name follows S3 naming rules and is globally unique.
Checklist:
| Task | Command / Action |
| -------------------------- | ---------------------------------------------- |
| Save template locally | `s3-bucket.yml` |
| Lint template | `cfn-lint s3-bucket.yml` |
| Confirm unique bucket name | Choose a globally unique name (S3 requirement) |
| Upload template | Use the CloudFormation console or CLI |
## Create the stack in the AWS Management Console
1. Open the AWS Management Console and navigate to CloudFormation.
2. Click **Create stack**.
3. Under **Prepare template**, select **Upload a template file** and choose your `s3-bucket.yml`. CloudFormation accepts both JSON and YAML templates.
4. Click **Next**.
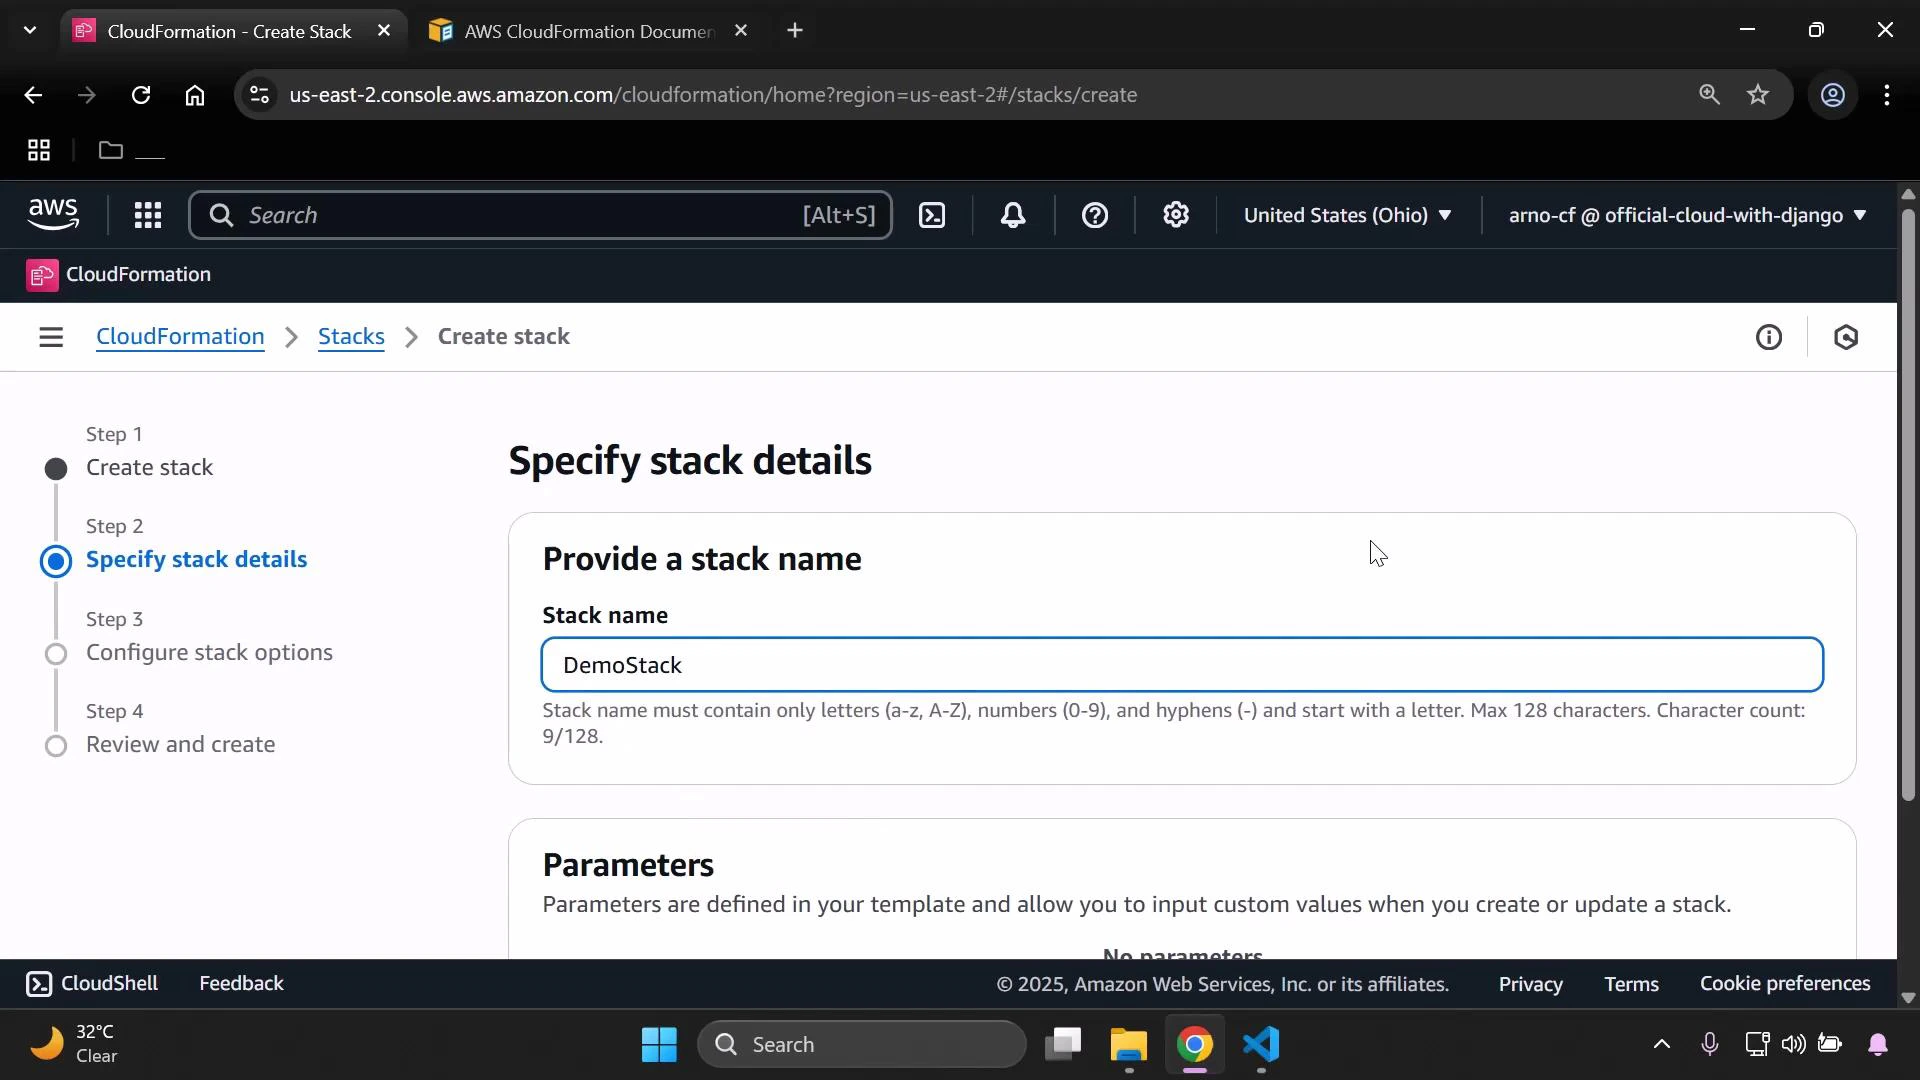
5. Provide a stack name (for example, `demo-stack`), accept the defaults, and submit to create the stack.
 Note: When you upload a template through the console, CloudFormation automatically stores the uploaded template content in an internal S3 location (you will typically see a `cf-templates` bucket appear in your S3 console for these uploads).
## Monitor stack creation
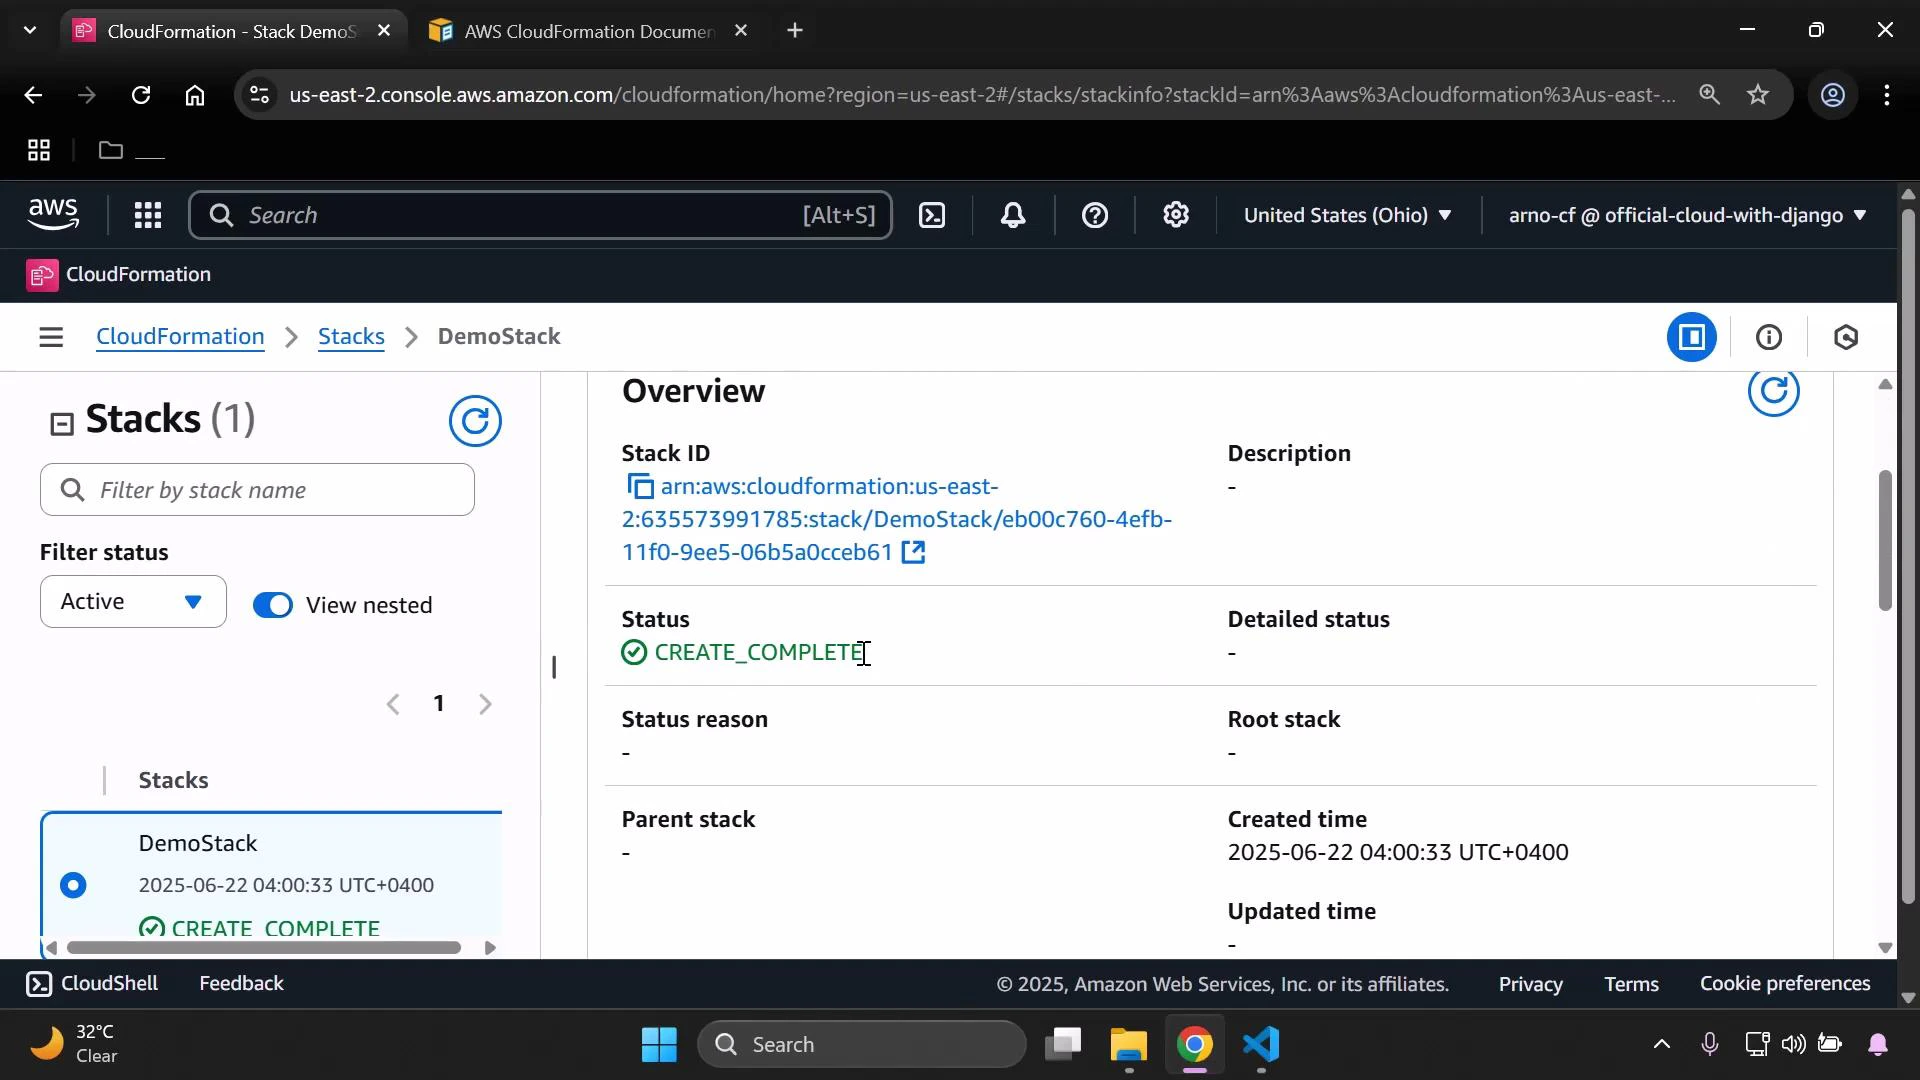
After submission, CloudFormation begins creating the stack. Use the Events tab to monitor progress and surface any errors. When creation completes successfully, the stack status will change to `CREATE_COMPLETE`.
* Refresh the CloudFormation console to update the stack status and events.
* The Stack info pane shows the stack ID, creation time, and current status.
Note: When you upload a template through the console, CloudFormation automatically stores the uploaded template content in an internal S3 location (you will typically see a `cf-templates` bucket appear in your S3 console for these uploads).
## Monitor stack creation
After submission, CloudFormation begins creating the stack. Use the Events tab to monitor progress and surface any errors. When creation completes successfully, the stack status will change to `CREATE_COMPLETE`.
* Refresh the CloudFormation console to update the stack status and events.
* The Stack info pane shows the stack ID, creation time, and current status.
 ## Verify the provisioned S3 bucket
1. Open the stack and go to the Resources tab.
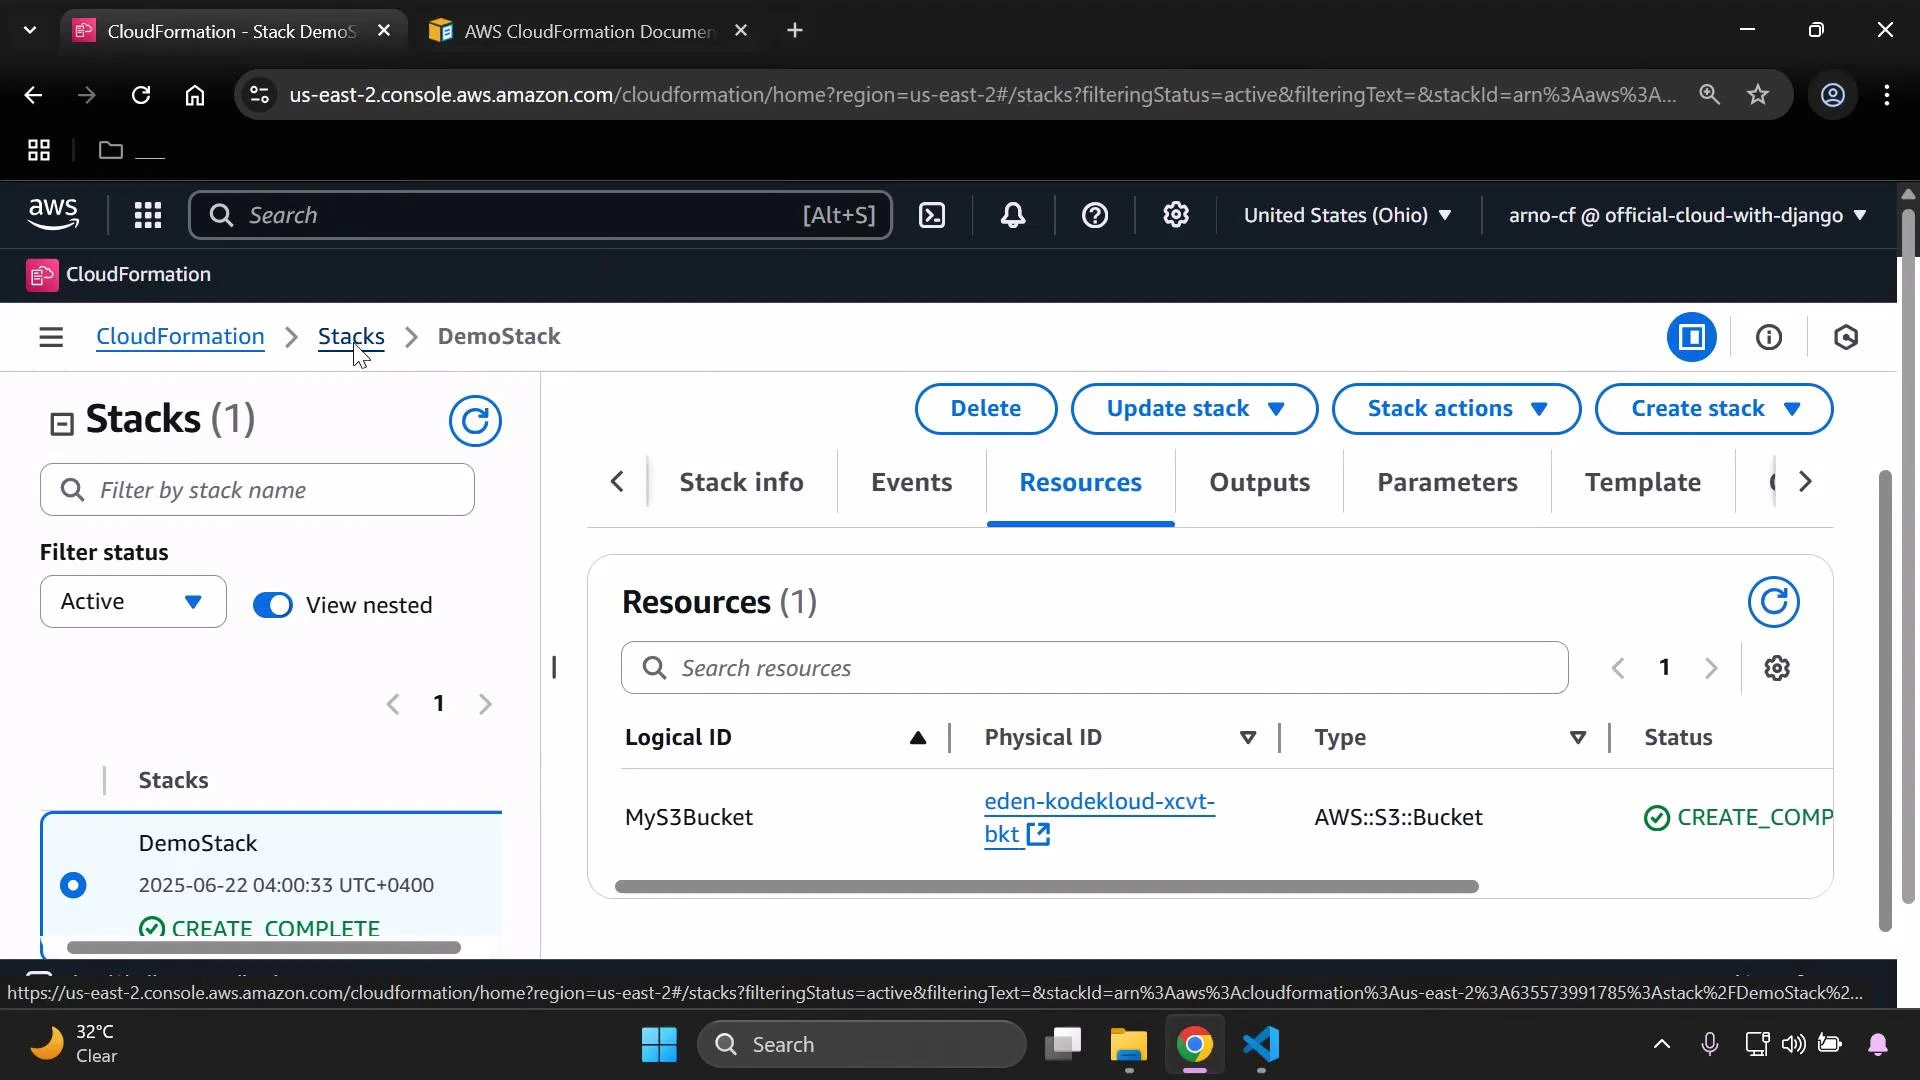
* The logical ID in the template (`MyS3Bucket`) appears here along with the resource type (`AWS::S3::Bucket`).
* The Physical ID is the actual S3 bucket name created (`eden-kodekloud-xcvt-bkt` in this example). Click the Physical ID to open the bucket in the S3 console.
2. Check the S3 console to confirm the new bucket exists. You will usually see:
* The bucket created by your stack (the physical ID shown in CloudFormation).
* A `cf-templates` bucket prefixed bucket used by CloudFormation to store uploaded templates (created automatically for console uploads).
## Verify the provisioned S3 bucket
1. Open the stack and go to the Resources tab.
* The logical ID in the template (`MyS3Bucket`) appears here along with the resource type (`AWS::S3::Bucket`).
* The Physical ID is the actual S3 bucket name created (`eden-kodekloud-xcvt-bkt` in this example). Click the Physical ID to open the bucket in the S3 console.
2. Check the S3 console to confirm the new bucket exists. You will usually see:
* The bucket created by your stack (the physical ID shown in CloudFormation).
* A `cf-templates` bucket prefixed bucket used by CloudFormation to store uploaded templates (created automatically for console uploads).
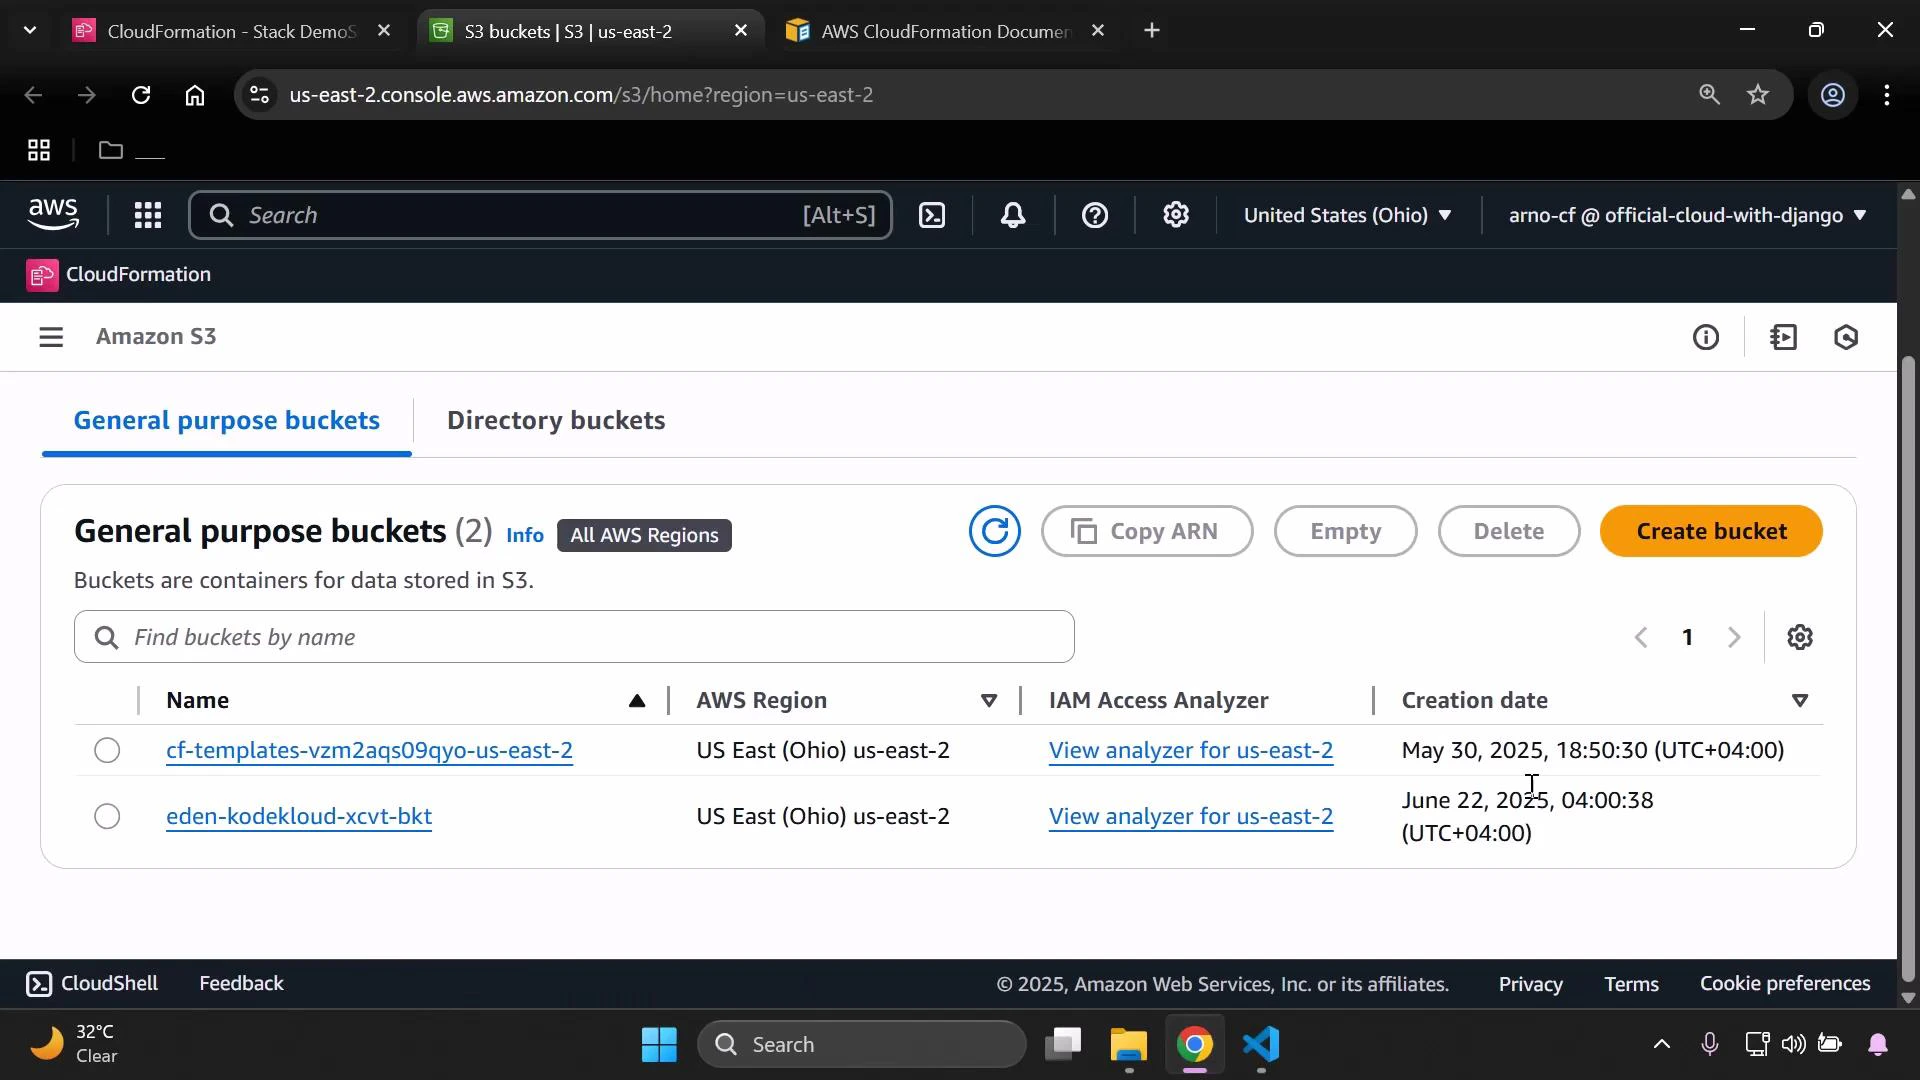 When you upload a template through the CloudFormation console, CloudFormation creates and uses a `cf-templates` S3 bucket in your account to store the uploaded template. This is expected behavior for console uploads.
Back in CloudFormation, the Resources tab shows the S3 resource with status `CREATE_COMPLETE` and provides a direct link to the physical S3 bucket created by the stack.
When you upload a template through the CloudFormation console, CloudFormation creates and uses a `cf-templates` S3 bucket in your account to store the uploaded template. This is expected behavior for console uploads.
Back in CloudFormation, the Resources tab shows the S3 resource with status `CREATE_COMPLETE` and provides a direct link to the physical S3 bucket created by the stack.
 ## Summary and next steps
* Create a simple CloudFormation template that defines an S3 bucket.
* Validate the template locally (for example, with cfn-lint) before uploading.
* Upload the template through the CloudFormation console, provide a stack name, and create the stack.
* CloudFormation creates the S3 bucket defined in the template and an internal `cf-templates` bucket to store the uploaded template.
* Use the CloudFormation Events and Resources tabs to verify creation and to navigate directly to the S3 bucket.
Further reading:
* [AWS CloudFormation Documentation](https://learn.kodekloud.com/user/courses/aws-cloud-formation)
* [Amazon S3 Documentation](https://learn.kodekloud.com/user/courses/amazon-simple-storage-service-amazon-s3)
* [cfn-lint on GitHub](https://github.com/aws-cloudformation/cfn-lint)
## Summary and next steps
* Create a simple CloudFormation template that defines an S3 bucket.
* Validate the template locally (for example, with cfn-lint) before uploading.
* Upload the template through the CloudFormation console, provide a stack name, and create the stack.
* CloudFormation creates the S3 bucket defined in the template and an internal `cf-templates` bucket to store the uploaded template.
* Use the CloudFormation Events and Resources tabs to verify creation and to navigate directly to the S3 bucket.
Further reading:
* [AWS CloudFormation Documentation](https://learn.kodekloud.com/user/courses/aws-cloud-formation)
* [Amazon S3 Documentation](https://learn.kodekloud.com/user/courses/amazon-simple-storage-service-amazon-s3)
* [cfn-lint on GitHub](https://github.com/aws-cloudformation/cfn-lint)