> ## Documentation Index
> Fetch the complete documentation index at: https://notes.kodekloud.com/llms.txt
> Use this file to discover all available pages before exploring further.
# Demo Explore CloudWatch Console
> Learn to navigate AWS CloudWatch and create SNS topics for email notifications when alarms trigger.
In this lesson, you’ll learn how to navigate the AWS CloudWatch console and create an Amazon SNS topic for email notifications. This SNS topic will be used in upcoming demos to send alert emails whenever your CloudWatch alarms trigger.
If you’re on the AWS Free Tier, many CloudWatch metrics are free up to specified limits. Standard charges apply once you exceed those quotas.\
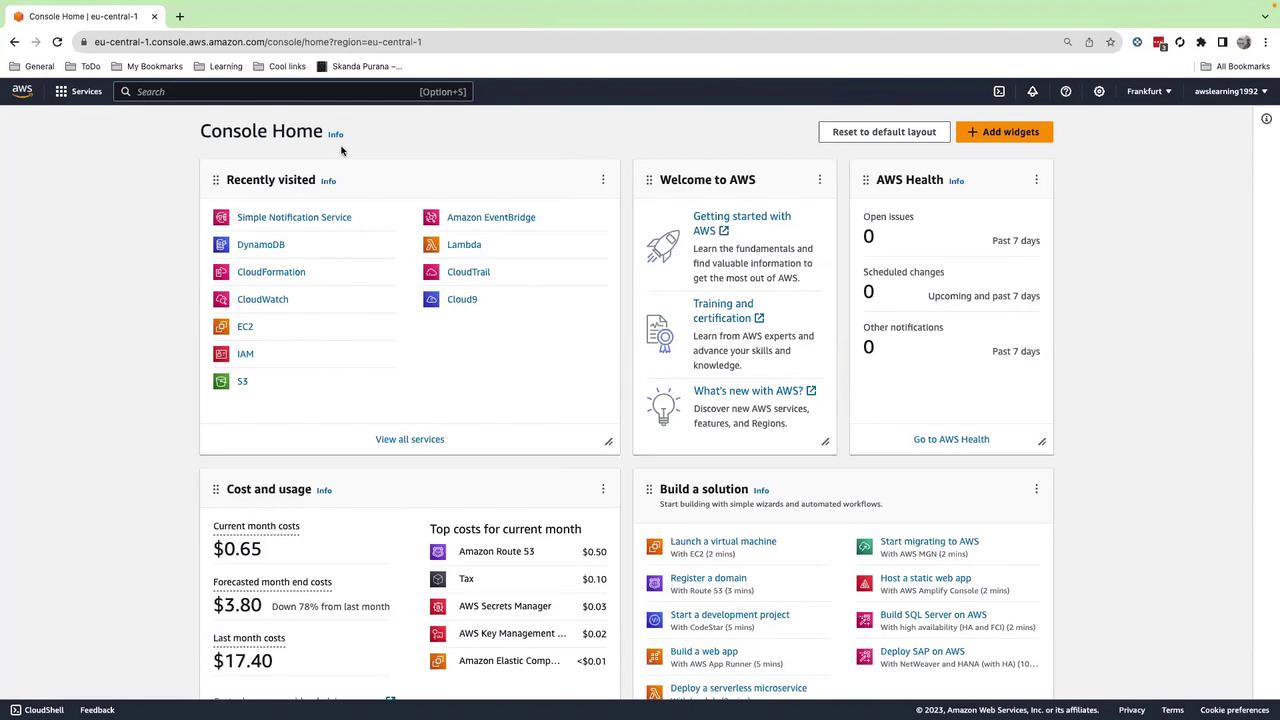
Be sure to choose a region close to you—here we’re using **eu-central-1 (Frankfurt)** for optimal latency.
First, sign in to the AWS Management Console.
***
## 1. Navigating to CloudWatch
1. In the console’s search bar, type **CloudWatch**.
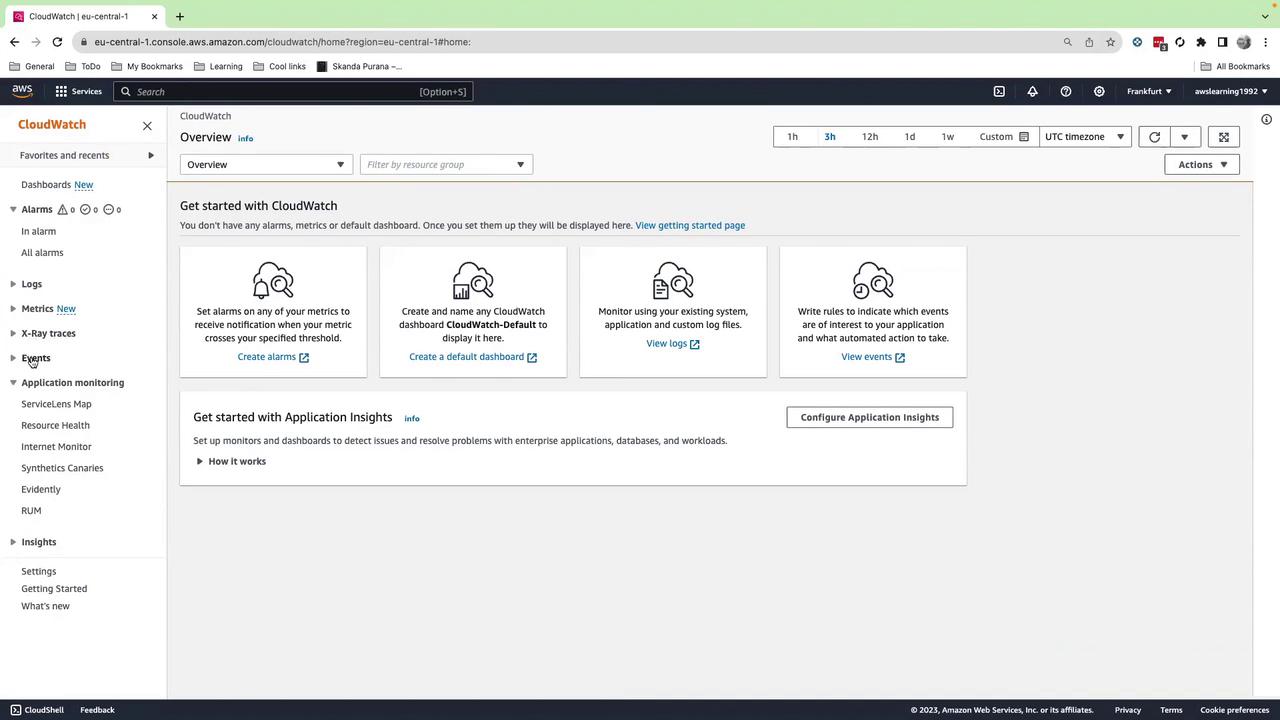
2. Select **CloudWatch** from the drop-down to open the **CloudWatch Overview**.
On the Overview page, you’ll find these main sections:
| Section | Description |
| ---------------------- | ---------------------------------------------------------- |
| Alarms | Set thresholds and trigger actions |
| Logs | Store, search, and analyze log streams |
| Metrics | Visualize performance data over time |
| X-Ray | Trace and debug requests across distributed services |
| Events | Respond to state changes in AWS resources |
| Application Monitoring | Monitor application health and dependencies |
| Insights | Query and visualize log data with CloudWatch Logs Insights |
Use the **Favorites** tab to bookmark dashboards or alarms you check frequently.
***
## 2. Creating an SNS Topic
Amazon SNS (Simple Notification Service) lets you push notifications via email, SMS, HTTP endpoints, and more. To configure email alerts:
1. In the console search bar, type **SNS** and select **Simple Notification Service**.
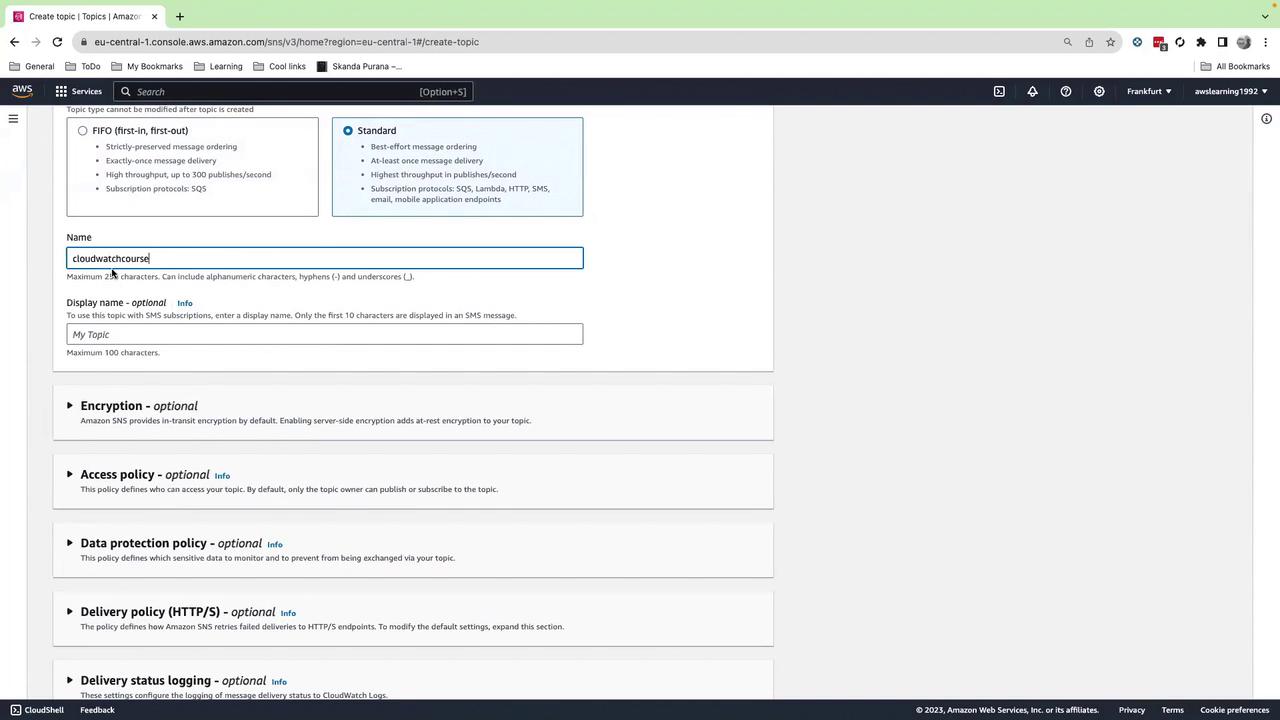
2. In the left menu, click **Topics**, then **Create topic**.
3. Choose **Standard** as the topic type.
4. For **Name**, enter `CloudWatchCourse`.\
*(You can optionally set a Display name for SMS protocols.)*
5. Leave other settings at their defaults and click **Create topic**.
***
## 3. Subscribing an Email Endpoint
Next, attach your email address to the SNS topic so you can receive notifications:
1. Select your newly created `CloudWatchCourse` topic.
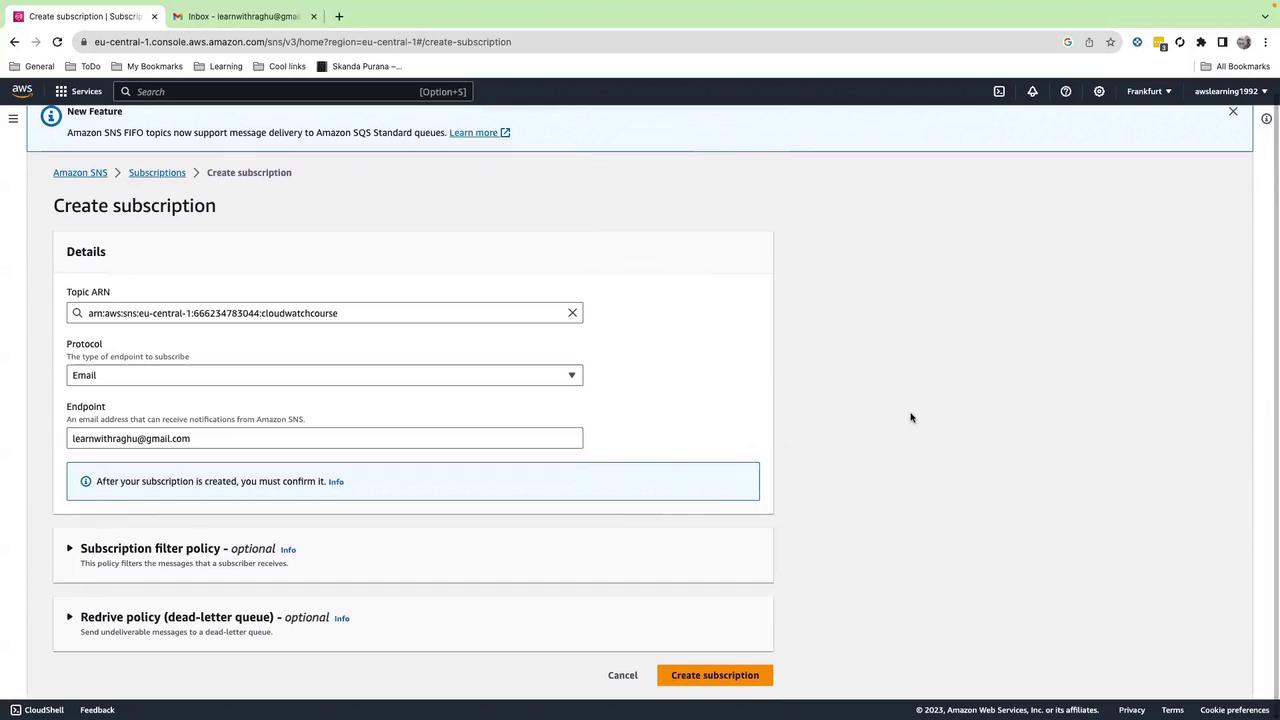
2. Click **Create subscription**.
3. For **Protocol**, choose **Email**.
4. In **Endpoint**, enter your email address.
5. Click **Create subscription**.
This action sends a confirmation email to the address you specified.
| Protocol | Use Case | Example |
| -------- | ------------------------------- | -------------------------------- |
| Email | Receive notifications via email | `user@example.com` |
| SMS | SMS/text message alerts | `+15551234567` |
| HTTP | Webhook delivery | `https://my-endpoint.com/notify` |
***
## 4. Confirming the Subscription
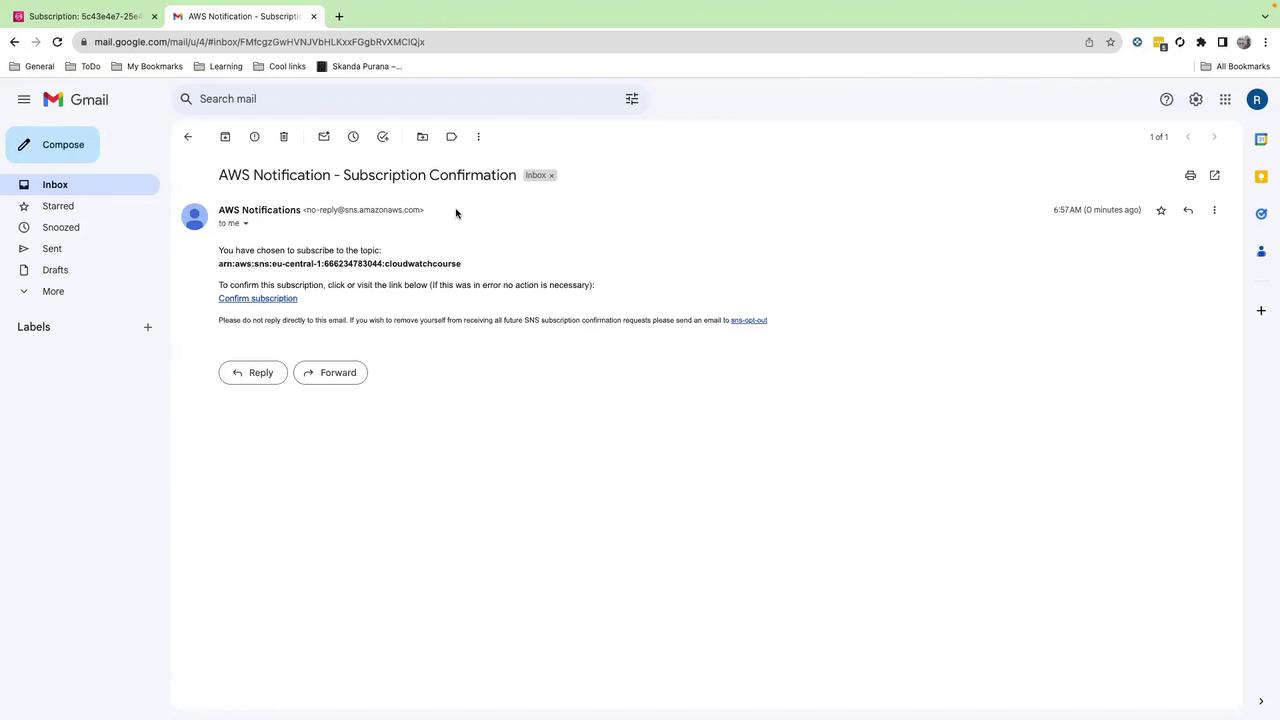
Check your inbox for an email from **AWS Notifications**. It contains a **Confirm subscription** link. Click this link to activate your subscription.
If you do not confirm the subscription, SNS will not deliver any alerts to your email address.
***
## 5. Verifying the Subscription
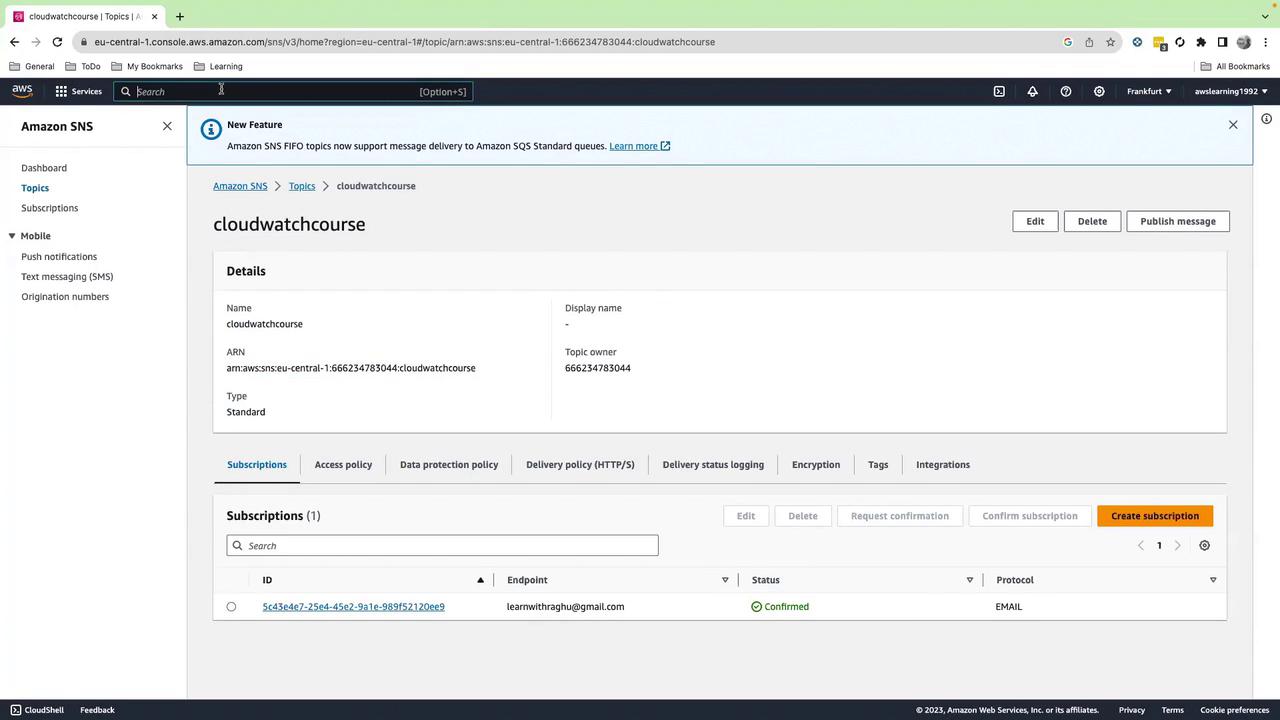
Back in the SNS console, open your `CloudWatchCourse` topic. Under **Subscriptions**, you should see your email address listed with **Confirmed** status next to the Topic ARN. You’ll reference this ARN when creating CloudWatch alarms.
***
## 6. Switching Time Zones in CloudWatch
By default, CloudWatch displays all metrics and logs in UTC. To switch to your local time zone:
1. In the CloudWatch console, click the **clock** icon in the top-right corner.
2. Select **Local**.
Many teams prefer UTC for consistency across global deployments, but local time can simplify troubleshooting.
***
## Next Steps
* Use this SNS topic ARN when you create CloudWatch alarms in our next lesson.
* Explore [CloudWatch Alarms](https://docs.aws.amazon.com/AmazonCloudWatch/latest/monitoring/AlarmThatSendsEmail.html) to set up threshold-based notifications.
* Dive into [SNS Documentation](https://docs.aws.amazon.com/sns/latest/dg/welcome.html) for advanced delivery options.
***
## Links and References
* [AWS CloudWatch Overview](https://docs.aws.amazon.com/AmazonCloudWatch/latest/monitoring/WhatIsCloudWatch.html)
* [Amazon SNS Developer Guide](https://docs.aws.amazon.com/sns/latest/dg/welcome.html)
* [AWS Free Tier Details](https://aws.amazon.com/free/)