> ## Documentation Index
> Fetch the complete documentation index at: https://notes.kodekloud.com/llms.txt
> Use this file to discover all available pages before exploring further.

# Demonstration 1 Create 2 Stage Pipeline

> This tutorial guides you in building a two-stage CI/CD pipeline using AWS services for application deployment.

In this step-by-step tutorial, you’ll build a basic two-stage pipeline using **Amazon S3** for source storage and **AWS CodeDeploy** for deployment. We’ll follow the [AWS CodePipeline tutorial: Deploying from Amazon S3 to AWS CodeDeploy](https://docs.aws.amazon.com/codepipeline/latest/userguide/tutorials-s3-codedeploy.html) and use your [AWS Free Tier account](https://aws.amazon.com/free/). By the end, you’ll have a working CI/CD flow that pushes a sample application to EC2 Windows instances.

If you’re ready, let’s get started!

***

## 1. Create an S3 Bucket

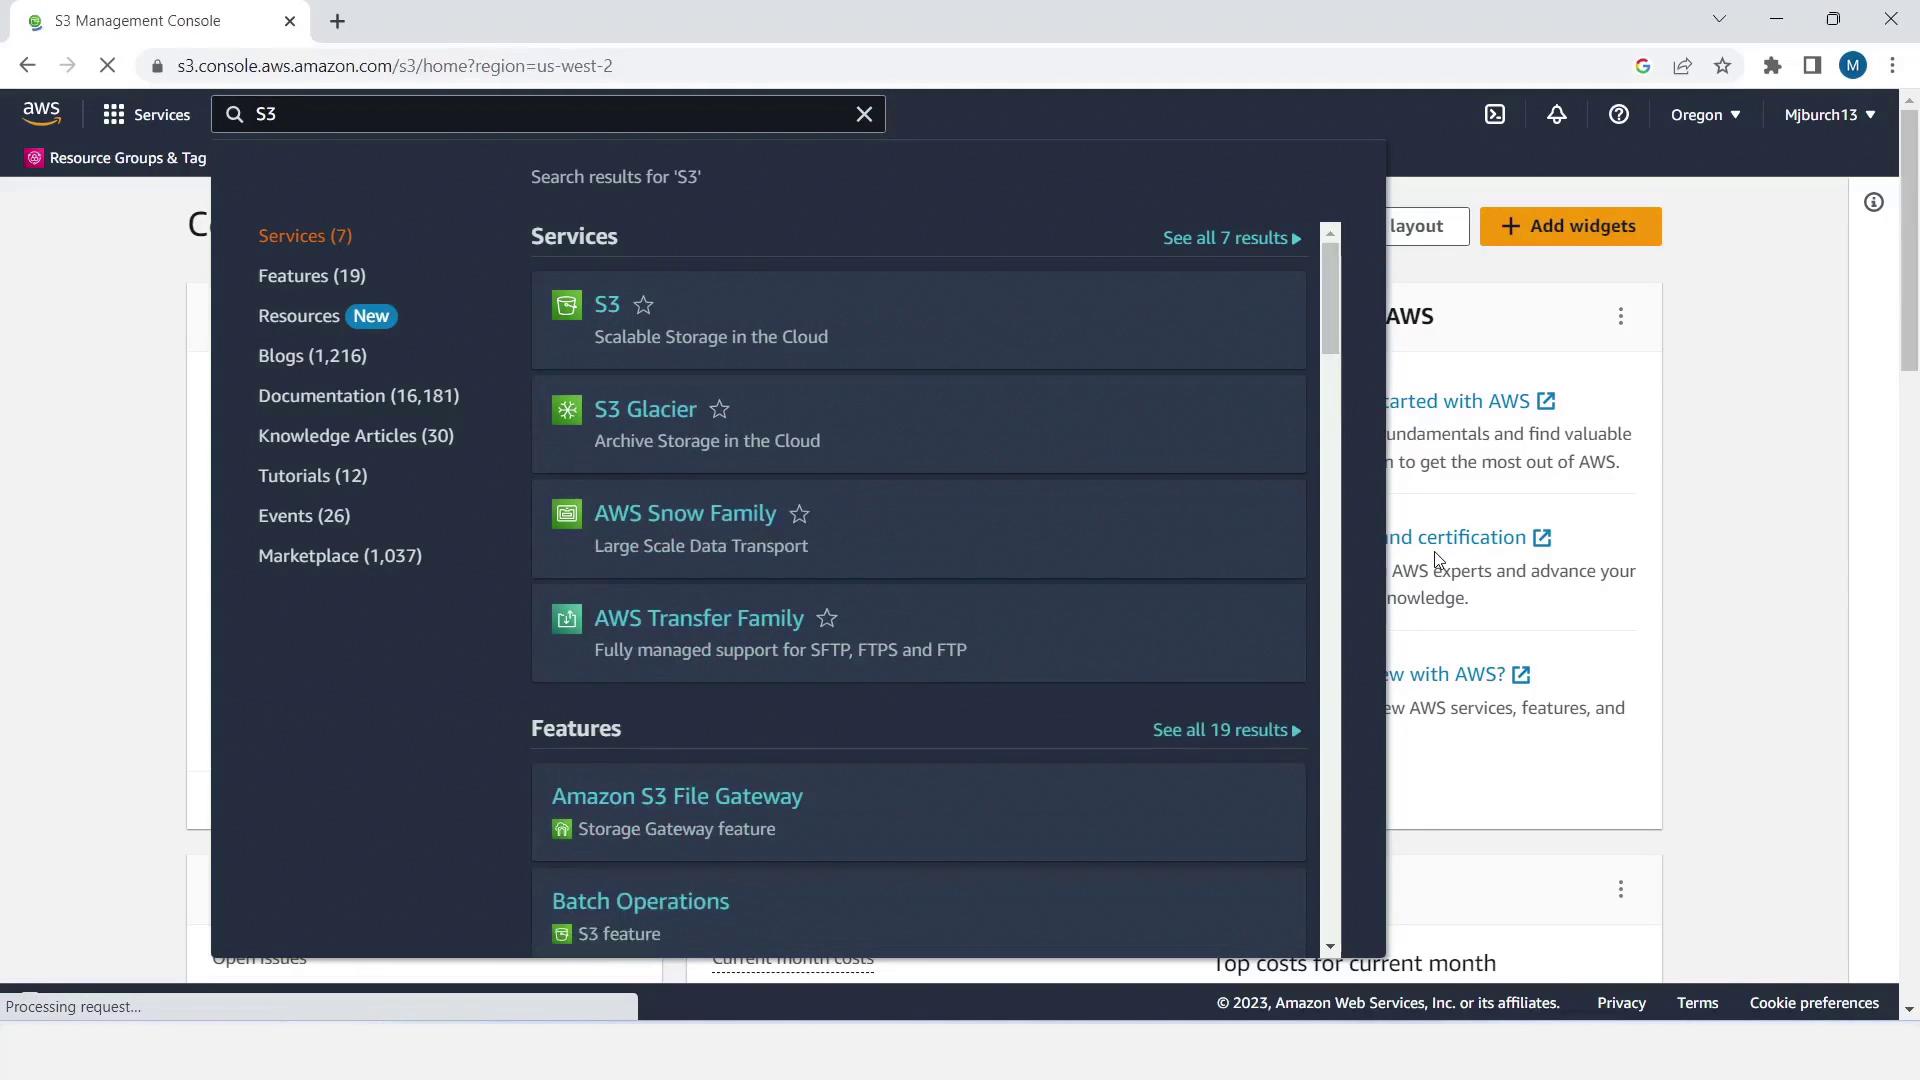
1. Sign in to the AWS Management Console and open **Services > S3**.
2. Click **Create bucket** in the top-right corner.
3. Enter a unique bucket name (for example, `aws-codepipeline-demobucket-example-kodekloudmv`) and choose your region (e.g., **US West 2**).
4. Scroll down and click **Create bucket**.
<Frame>
  ![The image shows the AWS Management Console with a search for "S3," displaying various related services and features like S3, S3 Glacier, AWS Snow Family, and AWS Transfer Family.](https://kodekloud.com/kk-media/image/upload/v1752862657/notes-assets/images/AWS-CodePipeline-CICD-Pipeline-Demonstration-1-Create-2-Stage-Pipeline/aws-management-console-s3-search-services.jpg)
</Frame>

After the bucket is created, you’ll see a success notification. Select your new bucket to configure it.

<Frame>
  ![The image shows the Amazon S3 Management Console with a list of buckets, including their names, regions, access status, and creation dates. A green notification at the top indicates a bucket was successfully created.](https://kodekloud.com/kk-media/image/upload/v1752862659/notes-assets/images/AWS-CodePipeline-CICD-Pipeline-Demonstration-1-Create-2-Stage-Pipeline/amazon-s3-management-console-buckets-list.jpg)
</Frame>

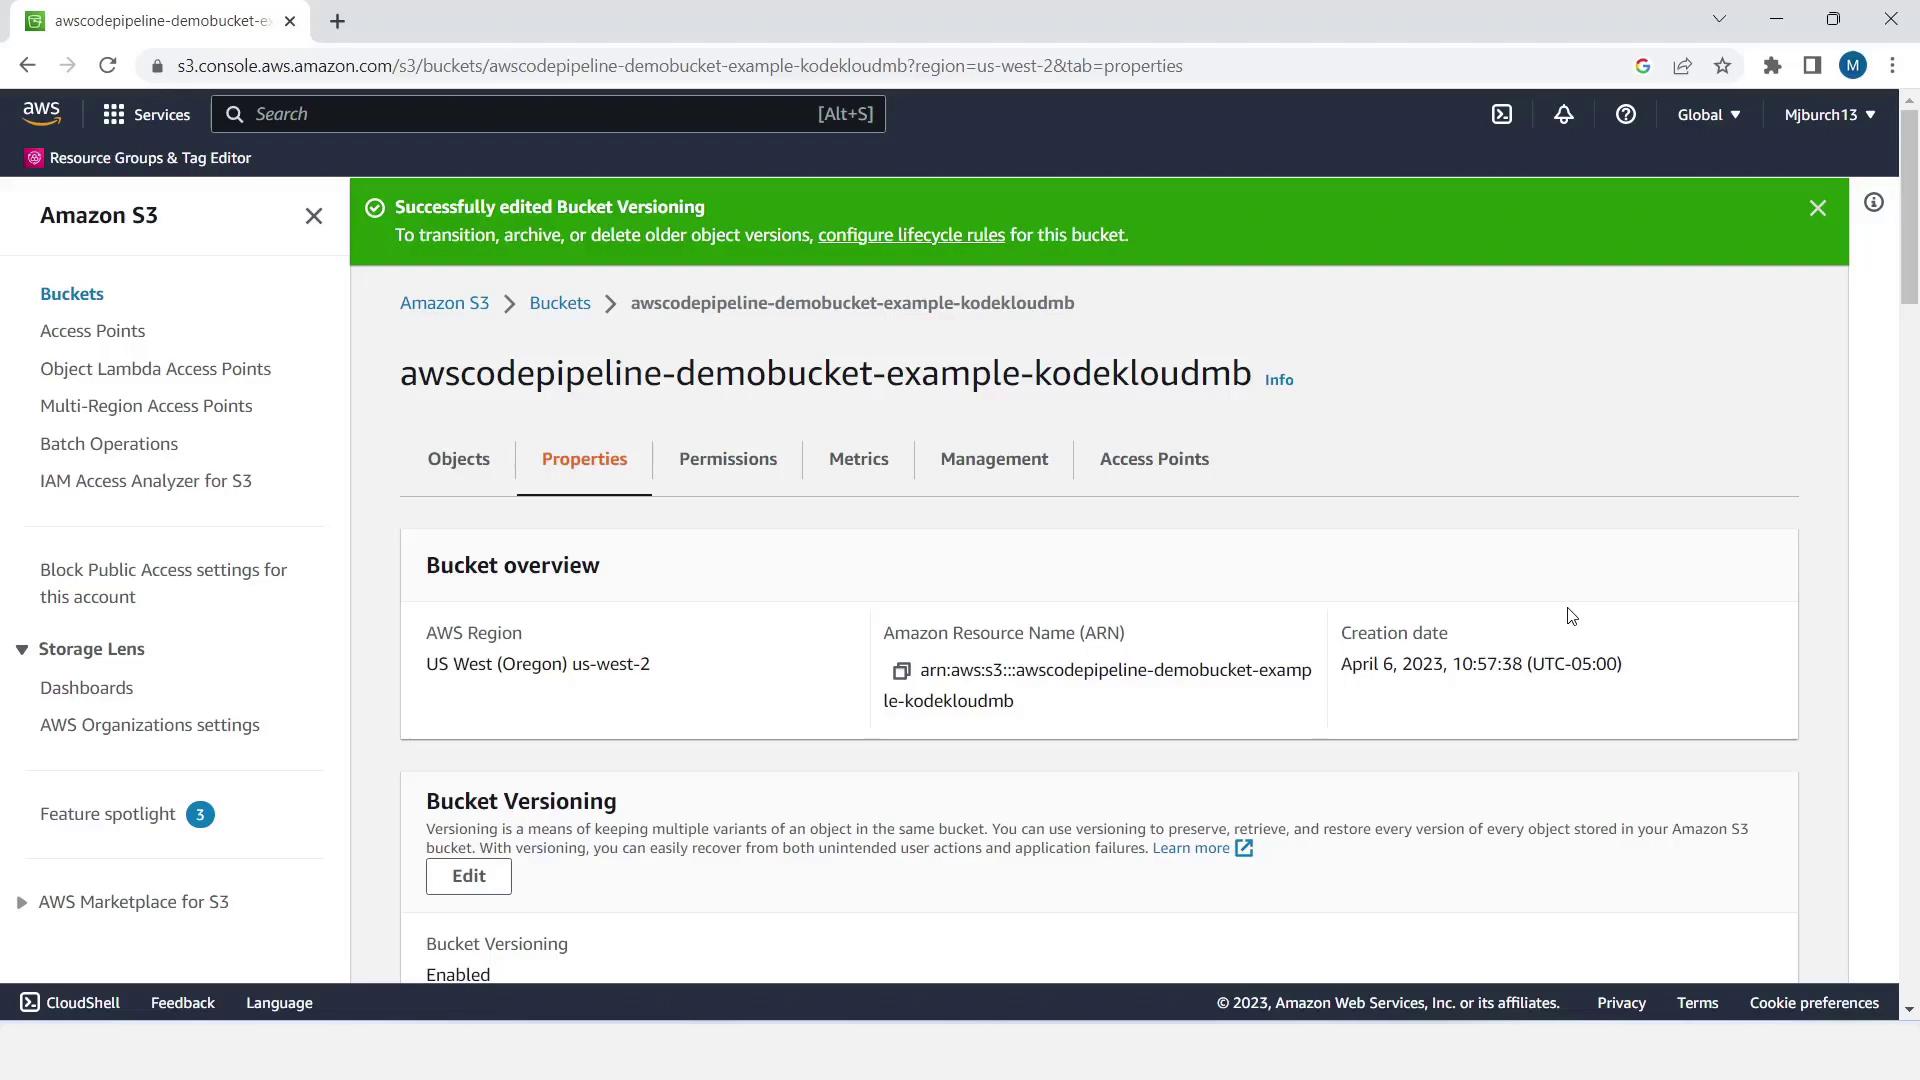
5. Go to **Properties**, enable **Bucket Versioning**, and click **Save changes**.
6. Download the sample application ZIP (Windows or Linux) as referenced in the tutorial.
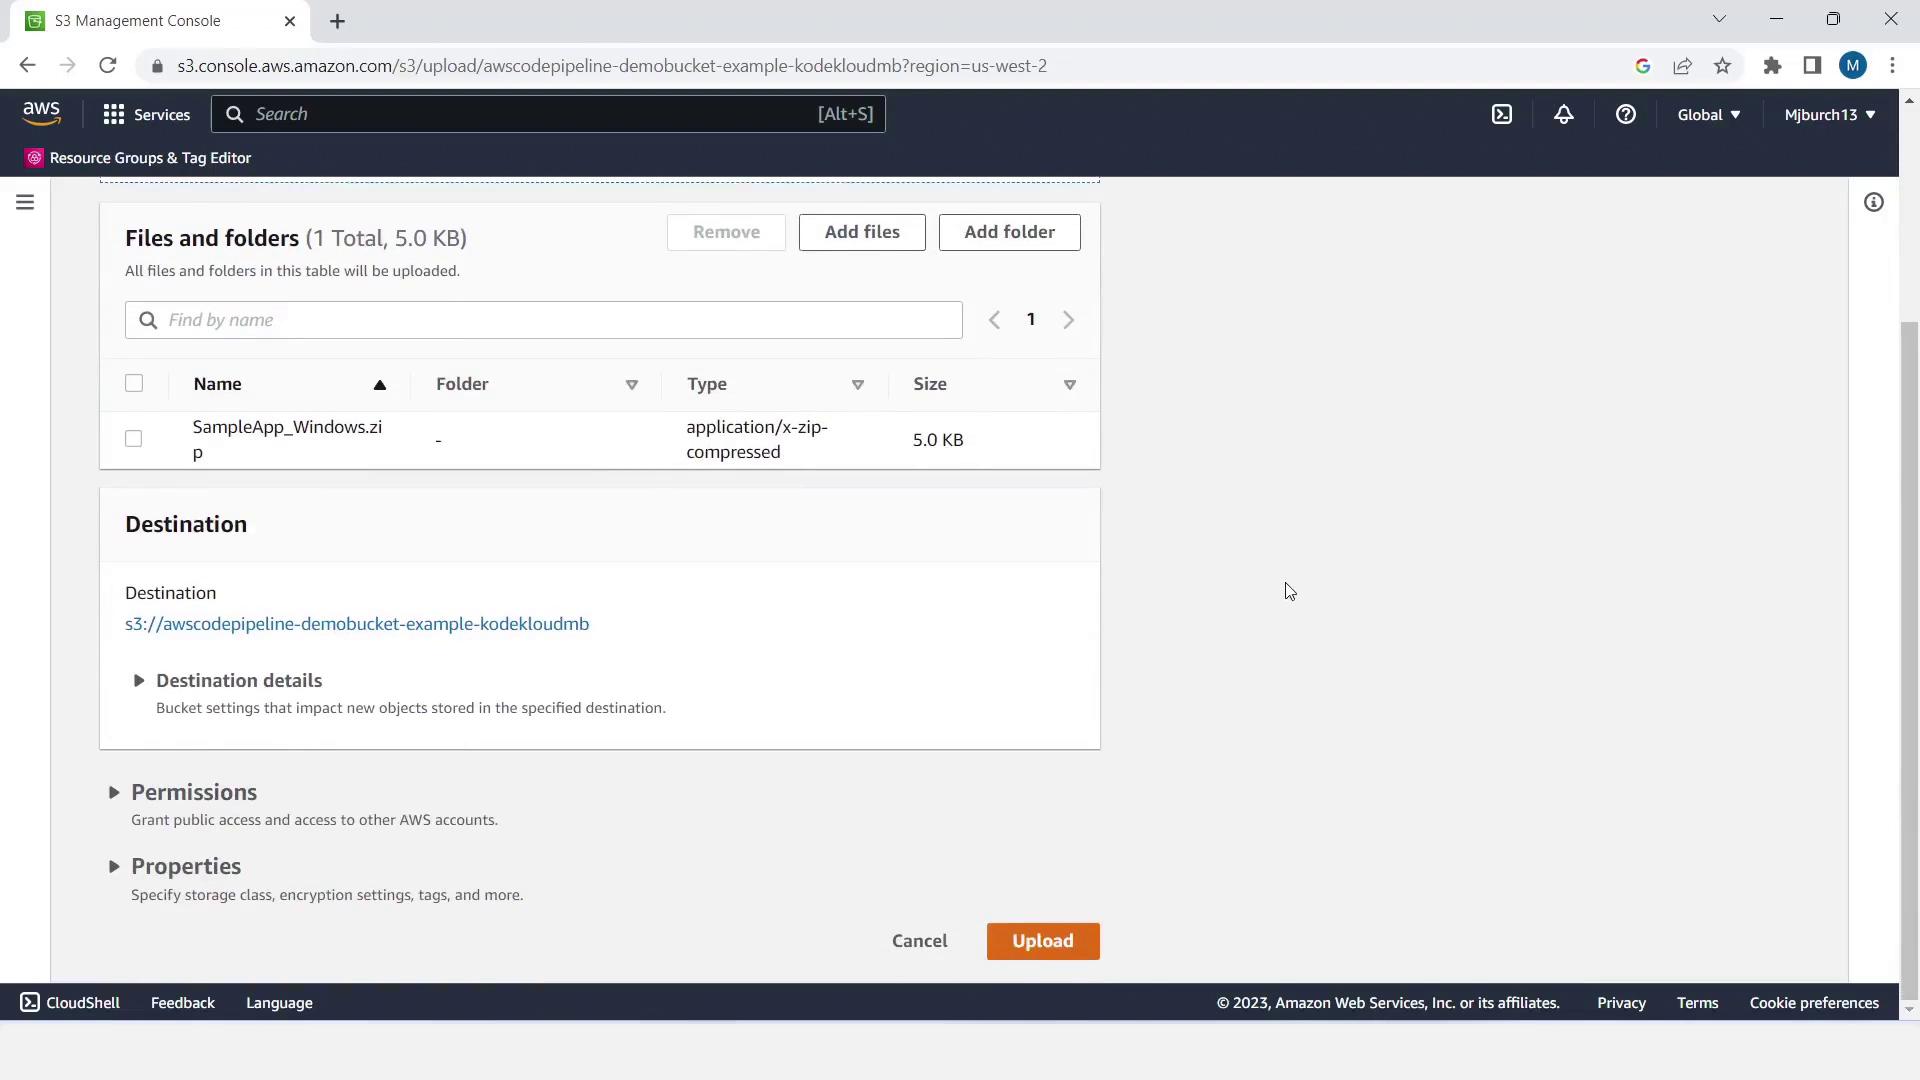
7. Switch to **Objects** and **Upload** the sample ZIP file.
<Frame>
  ![The image shows an Amazon S3 console page for a bucket named "awscodepipeline-demobucket-example-kodekloudmb," displaying its properties, including region, ARN, and versioning status. A green notification indicates successful editing of bucket versioning.](https://kodekloud.com/kk-media/image/upload/v1752862660/notes-assets/images/AWS-CodePipeline-CICD-Pipeline-Demonstration-1-Create-2-Stage-Pipeline/amazon-s3-console-bucket-properties.jpg)
</Frame>

<Frame>
  ![The image shows an AWS S3 Management Console interface with a file named "SampleApp\_Windows.zip" ready to be uploaded to a specified S3 bucket. The file is 5.0 KB in size and is of type "application/x-zip-compressed."](https://kodekloud.com/kk-media/image/upload/v1752862661/notes-assets/images/AWS-CodePipeline-CICD-Pipeline-Demonstration-1-Create-2-Stage-Pipeline/aws-s3-console-sampleapp-upload.jpg)
</Frame>

<Callout icon="lightbulb" color="#1CB2FE">
  Bucket Versioning allows you to roll back to previous object versions and maintain a full history—critical for CI/CD source artifacts.
</Callout>

***

## 2. Create an IAM Role for EC2 Instances

This role grants EC2 instances the permissions needed by CodeDeploy and SSM.

1. Open **Services > IAM**, select **Roles**, then **Create role**.
2. Under **Trusted entity**, choose **AWS service** and select **EC2**.
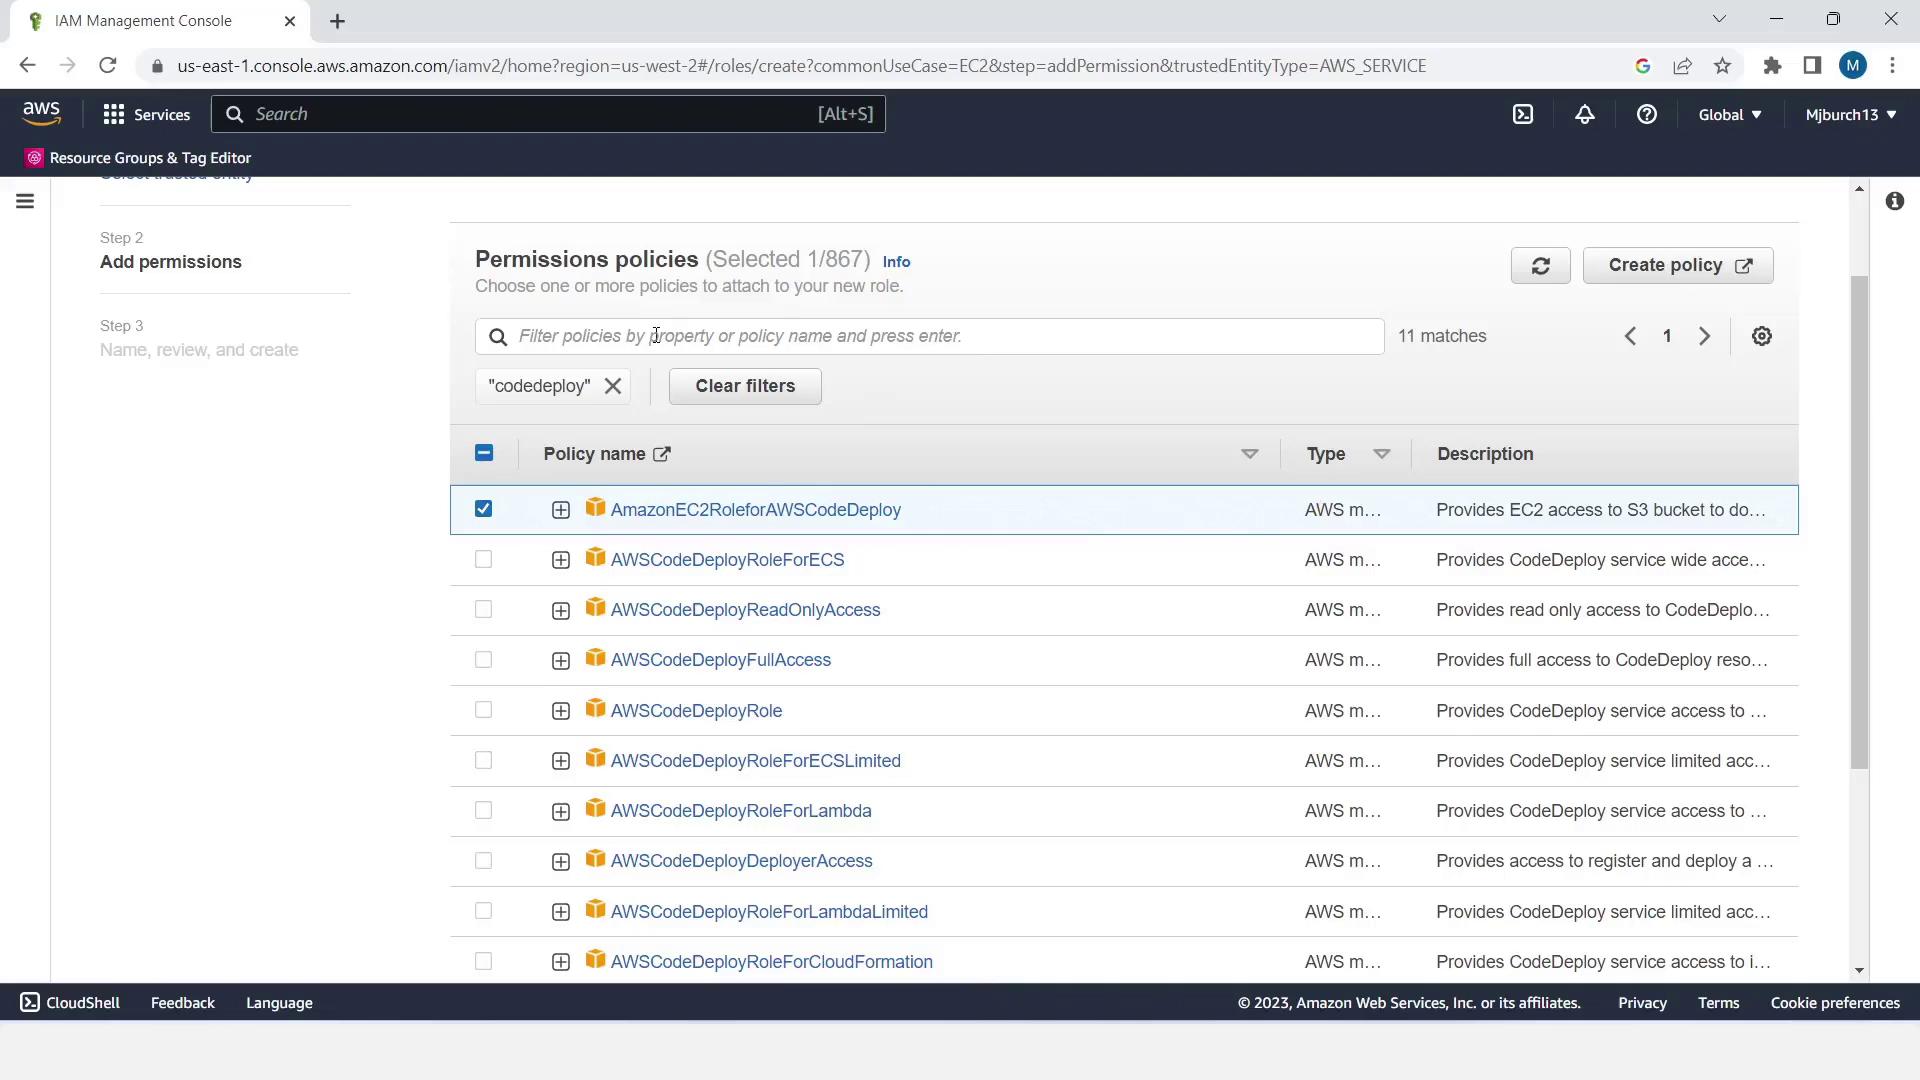
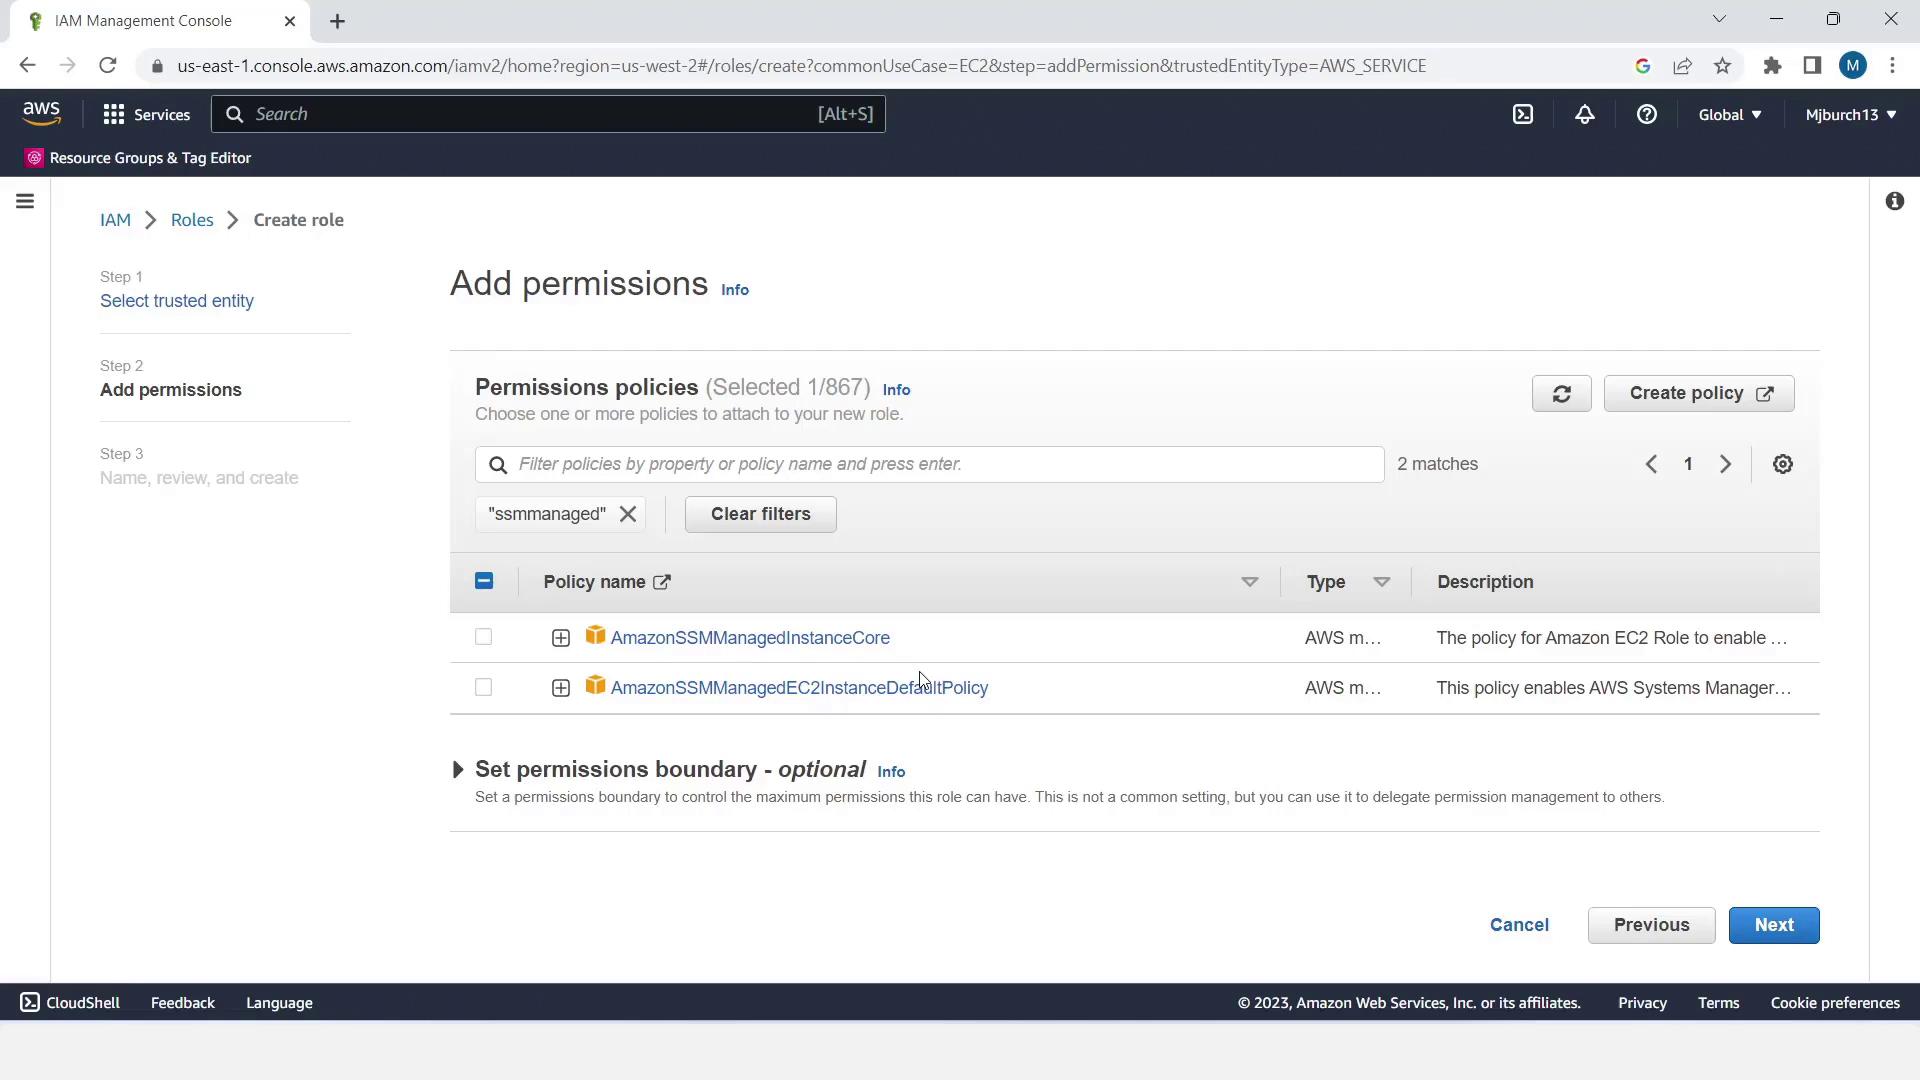
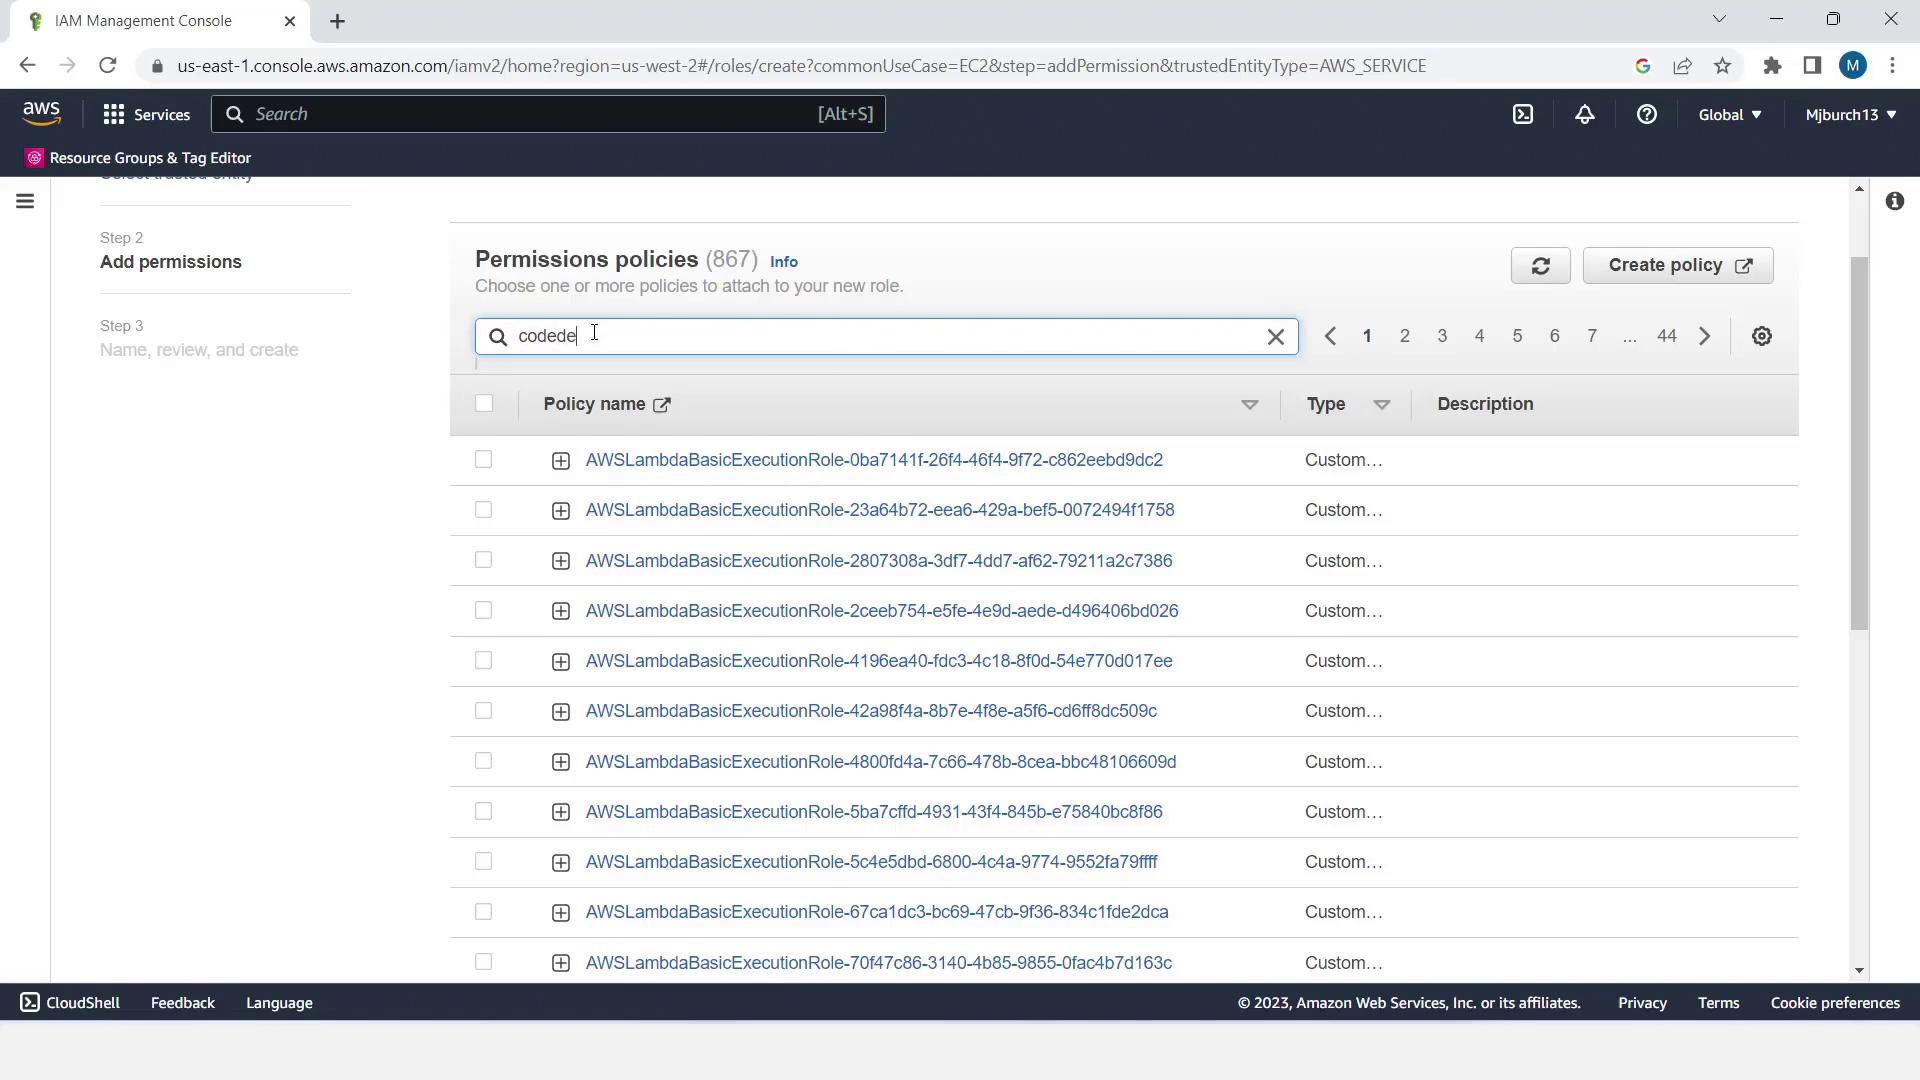
3. Click **Next** and attach the following policies:

| Policy Name                   | Description                                                    |
| ----------------------------- | -------------------------------------------------------------- |
| AmazonEC2RoleforAWSCodeDeploy | Permissions for CodeDeploy to deploy applications on EC2       |
| AmazonSSMManagedInstanceCore  | Allows AWS Systems Manager Agent to manage and patch instances |

4. Click **Next**, name the role **EC2InstanceRole**, and choose **Create role**.
<Frame>
  ![The image shows the AWS IAM Management Console with a list of permission policies, specifically focusing on policies related to AWS Lambda execution roles.](https://kodekloud.com/kk-media/image/upload/v1752862663/notes-assets/images/AWS-CodePipeline-CICD-Pipeline-Demonstration-1-Create-2-Stage-Pipeline/aws-iam-management-console-lambda-policies.jpg)
</Frame>

<Frame>
  ![The image shows the AWS Management Console, specifically the IAM section, where a user is selecting permission policies related to AWS CodeDeploy.](https://kodekloud.com/kk-media/image/upload/v1752862665/notes-assets/images/AWS-CodePipeline-CICD-Pipeline-Demonstration-1-Create-2-Stage-Pipeline/aws-management-console-iam-codedeploy-policies.jpg)
</Frame>

<Frame>
  ![The image shows the AWS IAM Management Console, specifically the "Add permissions" step for creating a role. It displays a list of permission policies related to "ssmmanaged" with options to select and set permissions boundaries.](https://kodekloud.com/kk-media/image/upload/v1752862666/notes-assets/images/AWS-CodePipeline-CICD-Pipeline-Demonstration-1-Create-2-Stage-Pipeline/aws-iam-management-console-add-permissions.jpg)
</Frame>

***

## 3. Launch EC2 Windows Instances

We’ll deploy two Windows instances tagged for CodeDeploy.

1. Go to **Services > EC2** and click **Launch Instance**.
2. Set **Name and tags** → Name: `MyCodePipelineDemo`.
3. Choose a Windows Free Tier AMI and **t2.micro** instance type.
4. Under **Key pair**, select **Proceed without a key pair** (demo only).
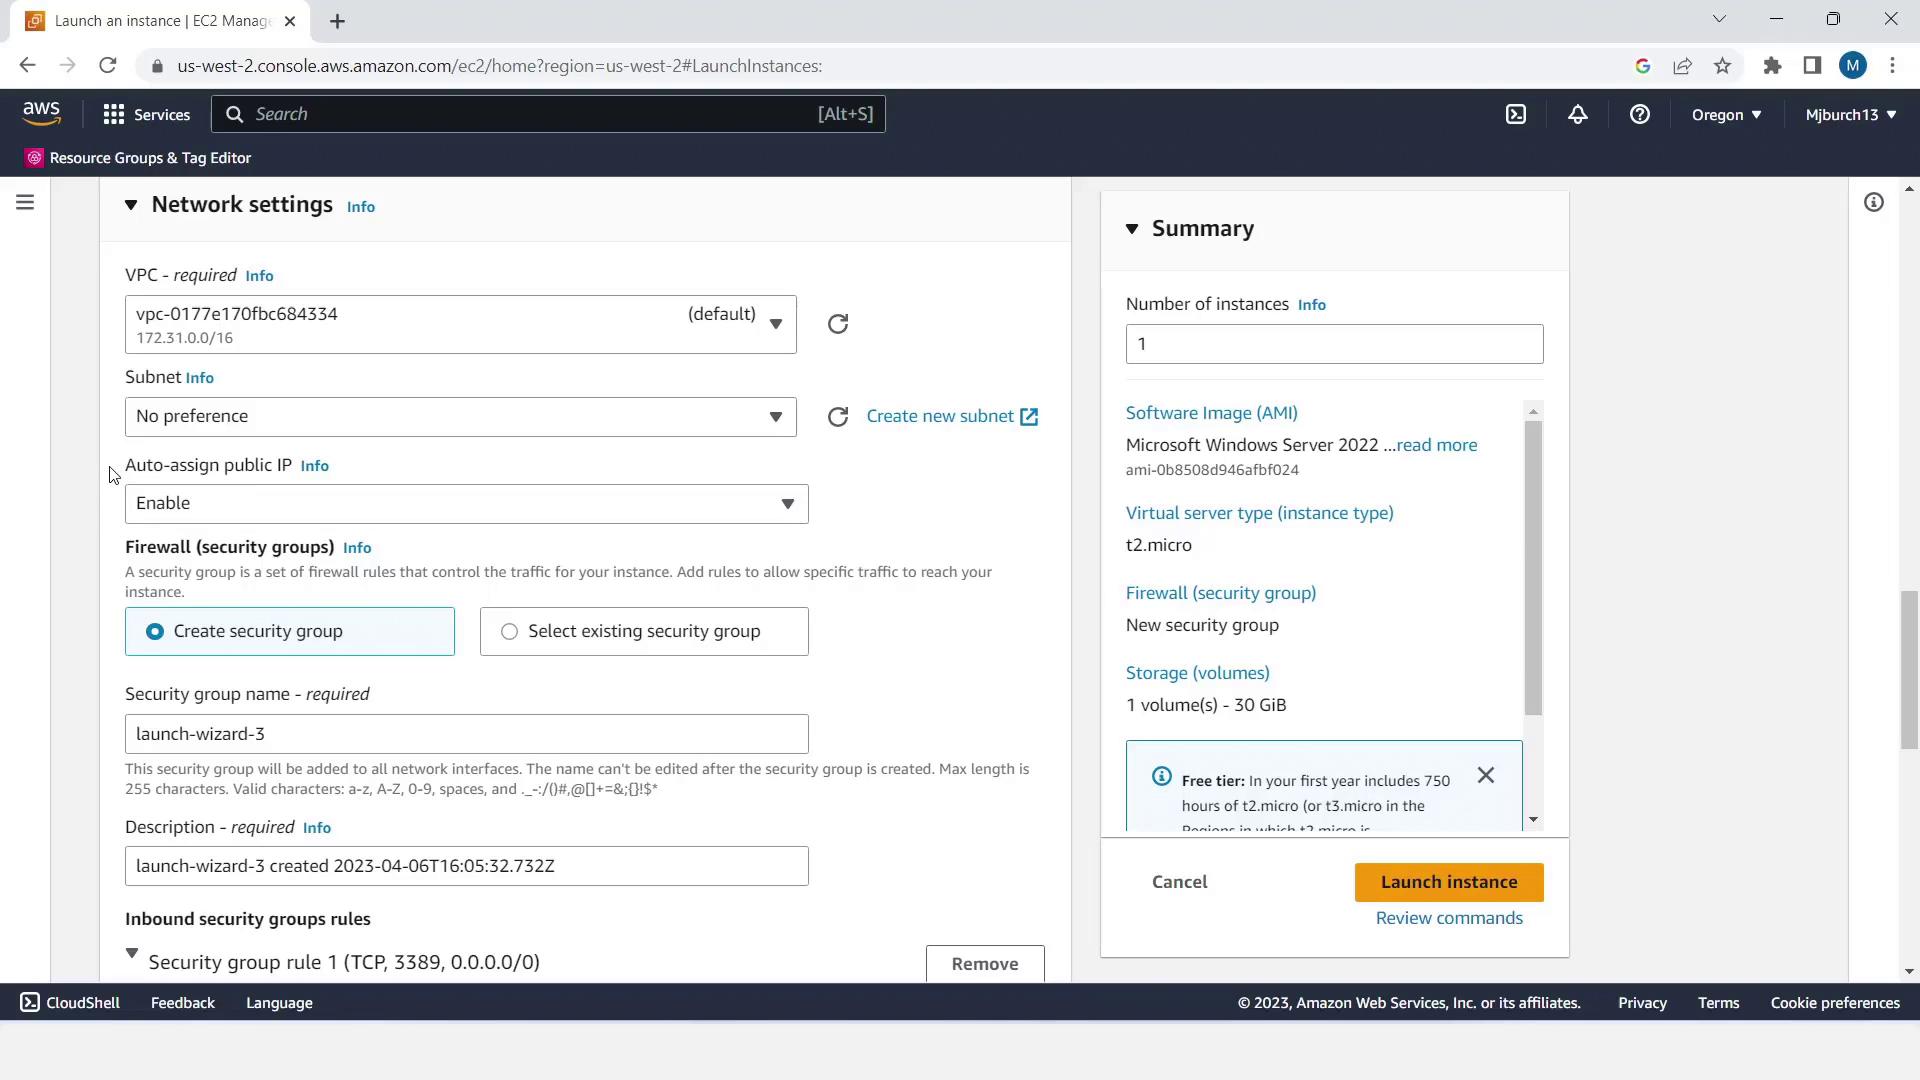
5. In **Network settings**, enable **Auto-assign Public IP**.
<Frame>
  ![The image shows the AWS EC2 management console, specifically the "Launch an instance" page, where network settings and instance details are being configured.](https://kodekloud.com/kk-media/image/upload/v1752862667/notes-assets/images/AWS-CodePipeline-CICD-Pipeline-Demonstration-1-Create-2-Stage-Pipeline/aws-ec2-launch-instance-console.jpg)
</Frame>

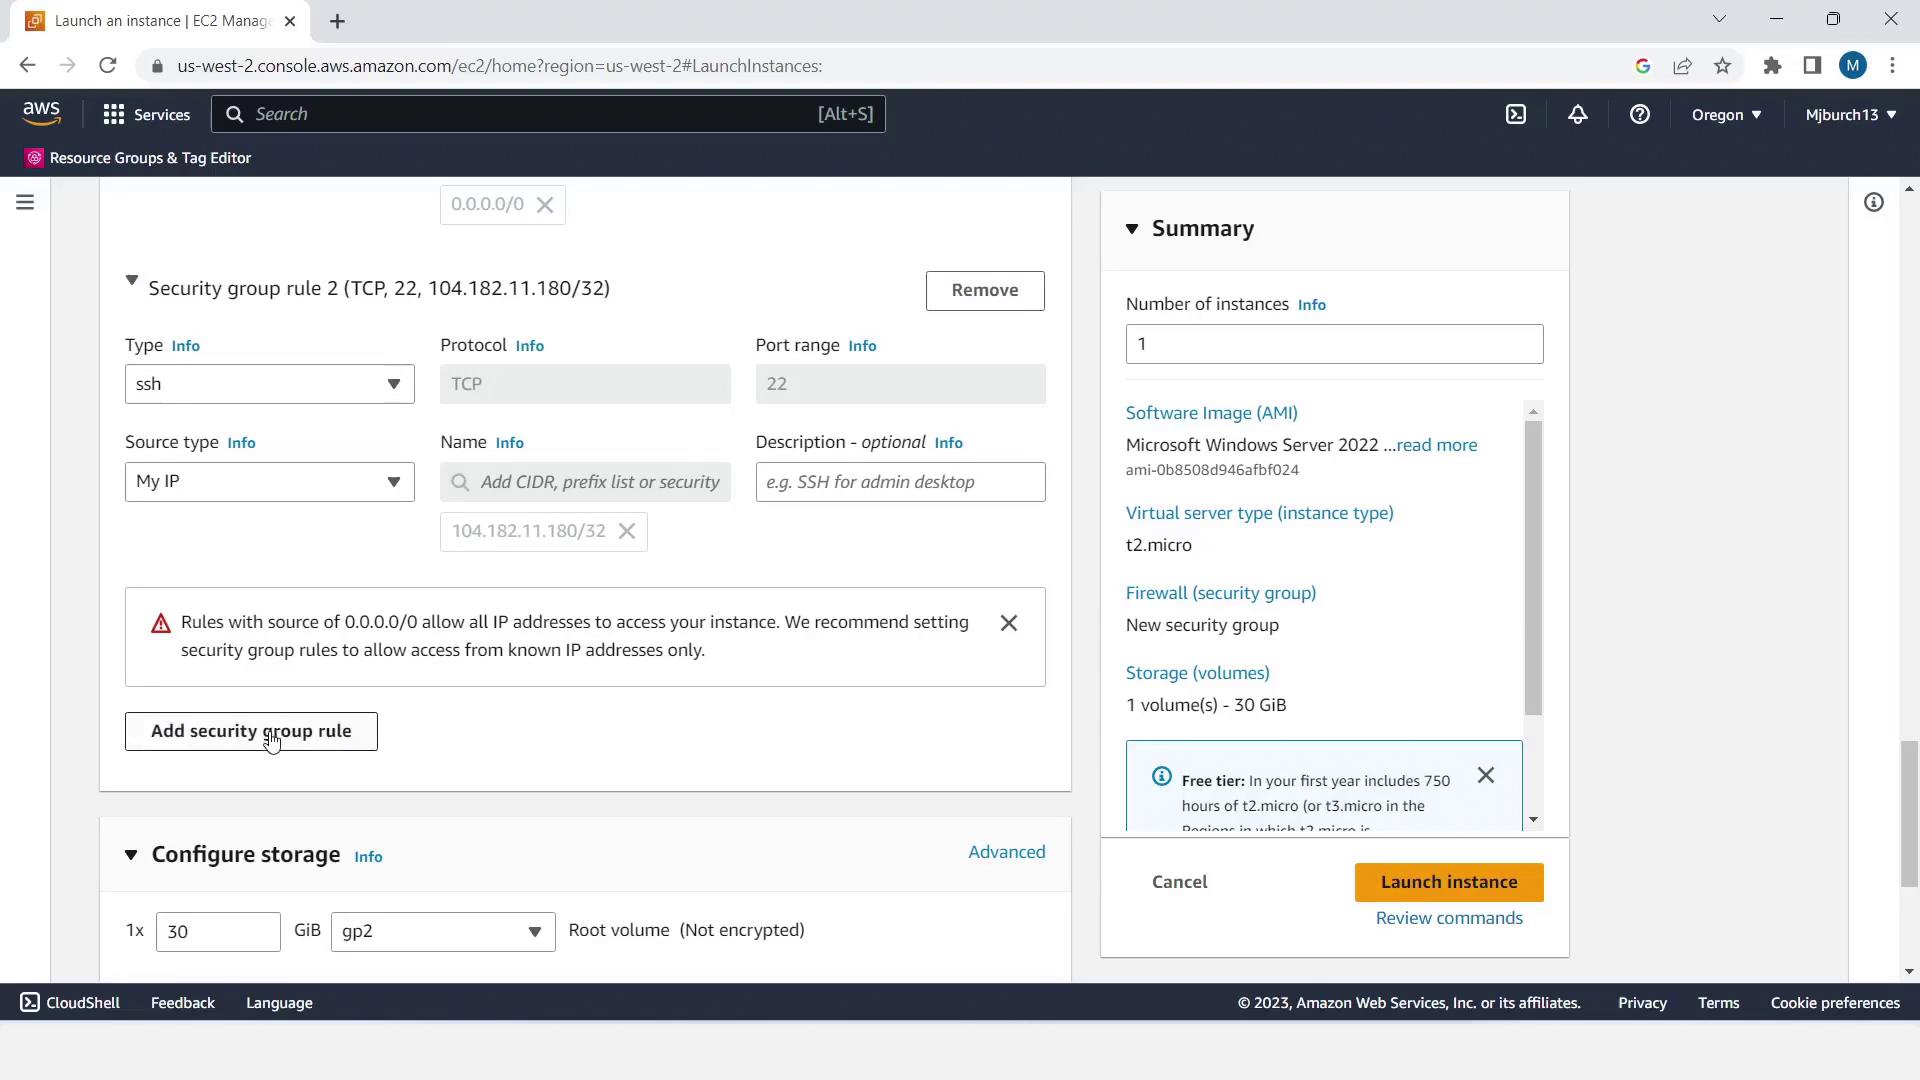
6. Create a new security group allowing SSH (port 22) and HTTP (port 80) from your IP.
<Frame>
  ![The image shows an AWS EC2 instance launch configuration screen, detailing security group rules and instance settings. It includes options for SSH access, storage configuration, and a warning about IP address access.](https://kodekloud.com/kk-media/image/upload/v1752862668/notes-assets/images/AWS-CodePipeline-CICD-Pipeline-Demonstration-1-Create-2-Stage-Pipeline/aws-ec2-instance-launch-configuration.jpg)
</Frame>

<Callout icon="triangle-alert" color="#FF6B6B">
  Skipping a key pair is only for demo purposes. In production, always use key pairs or Systems Manager Session Manager for secure access.
</Callout>

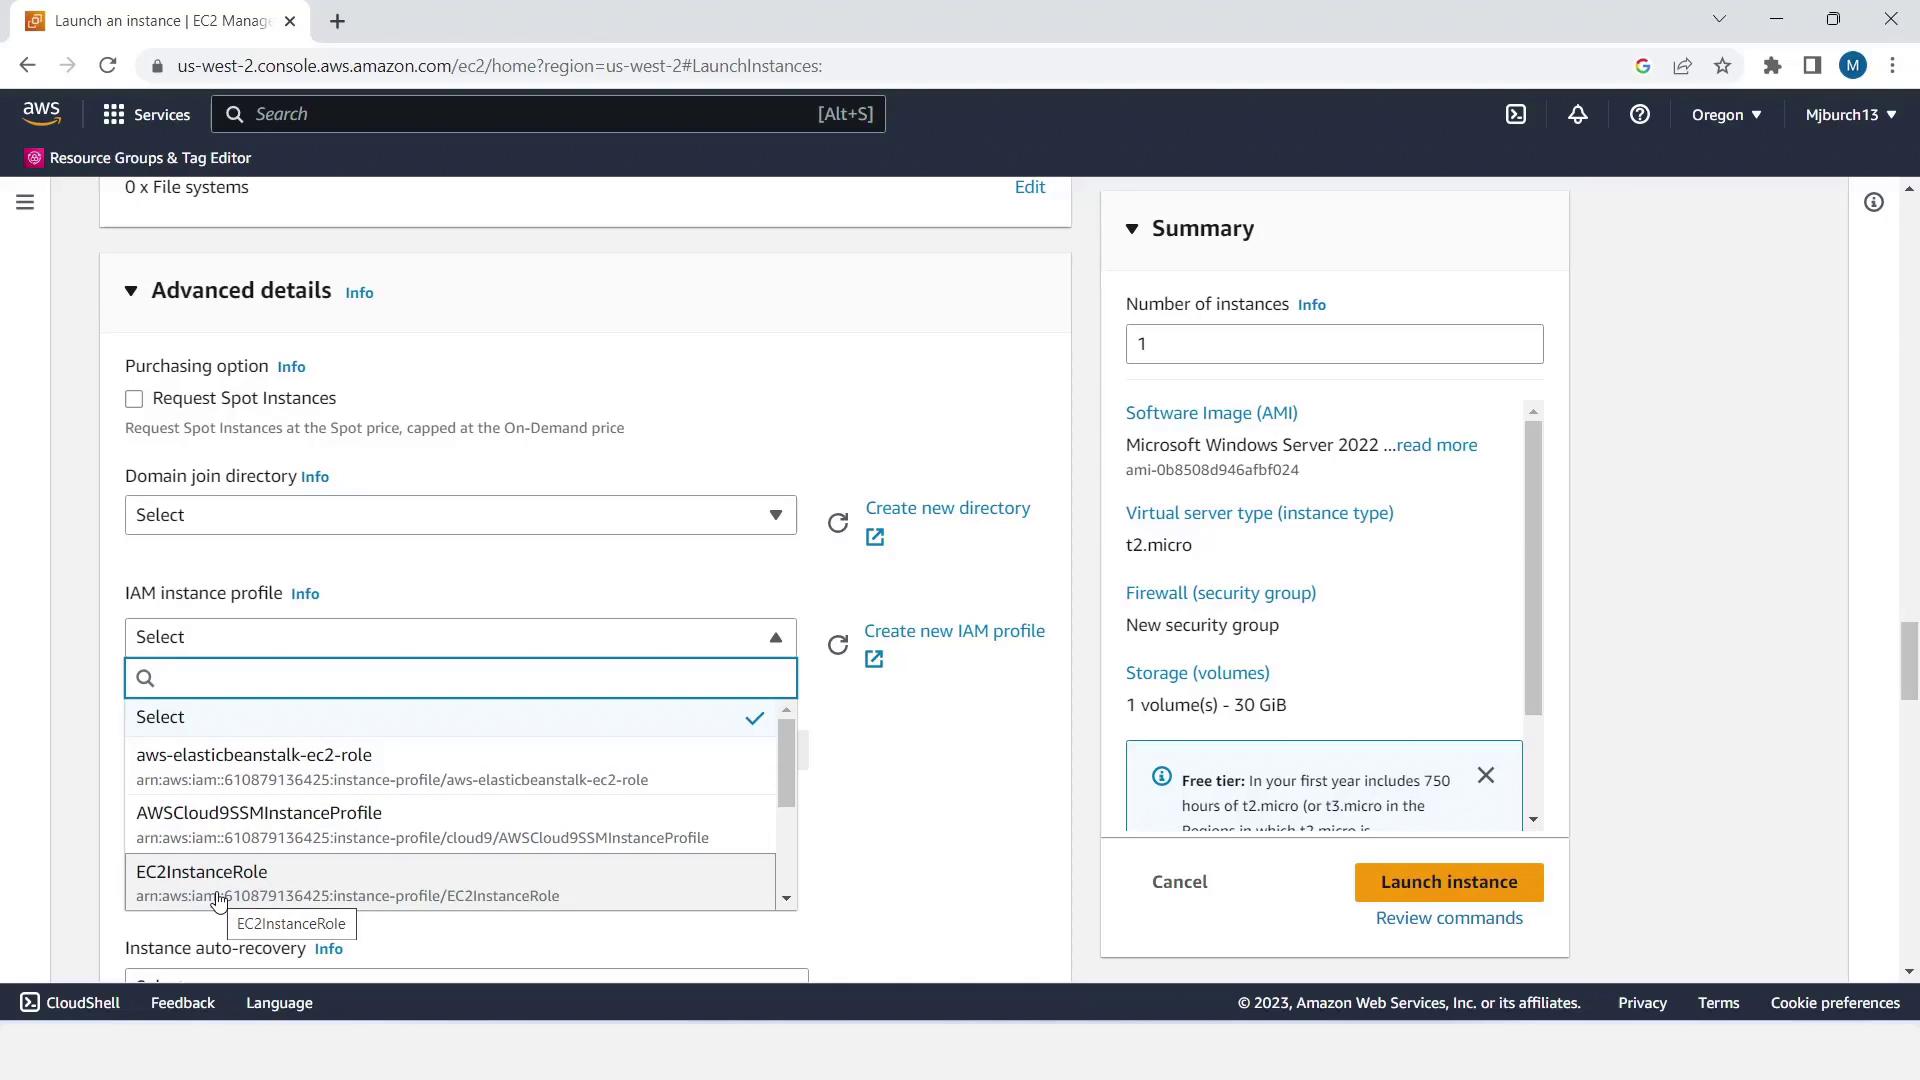
7. Expand **Advanced Details**, set **IAM instance profile** to **EC2InstanceRole**, and increase **Number of instances** to **2**.
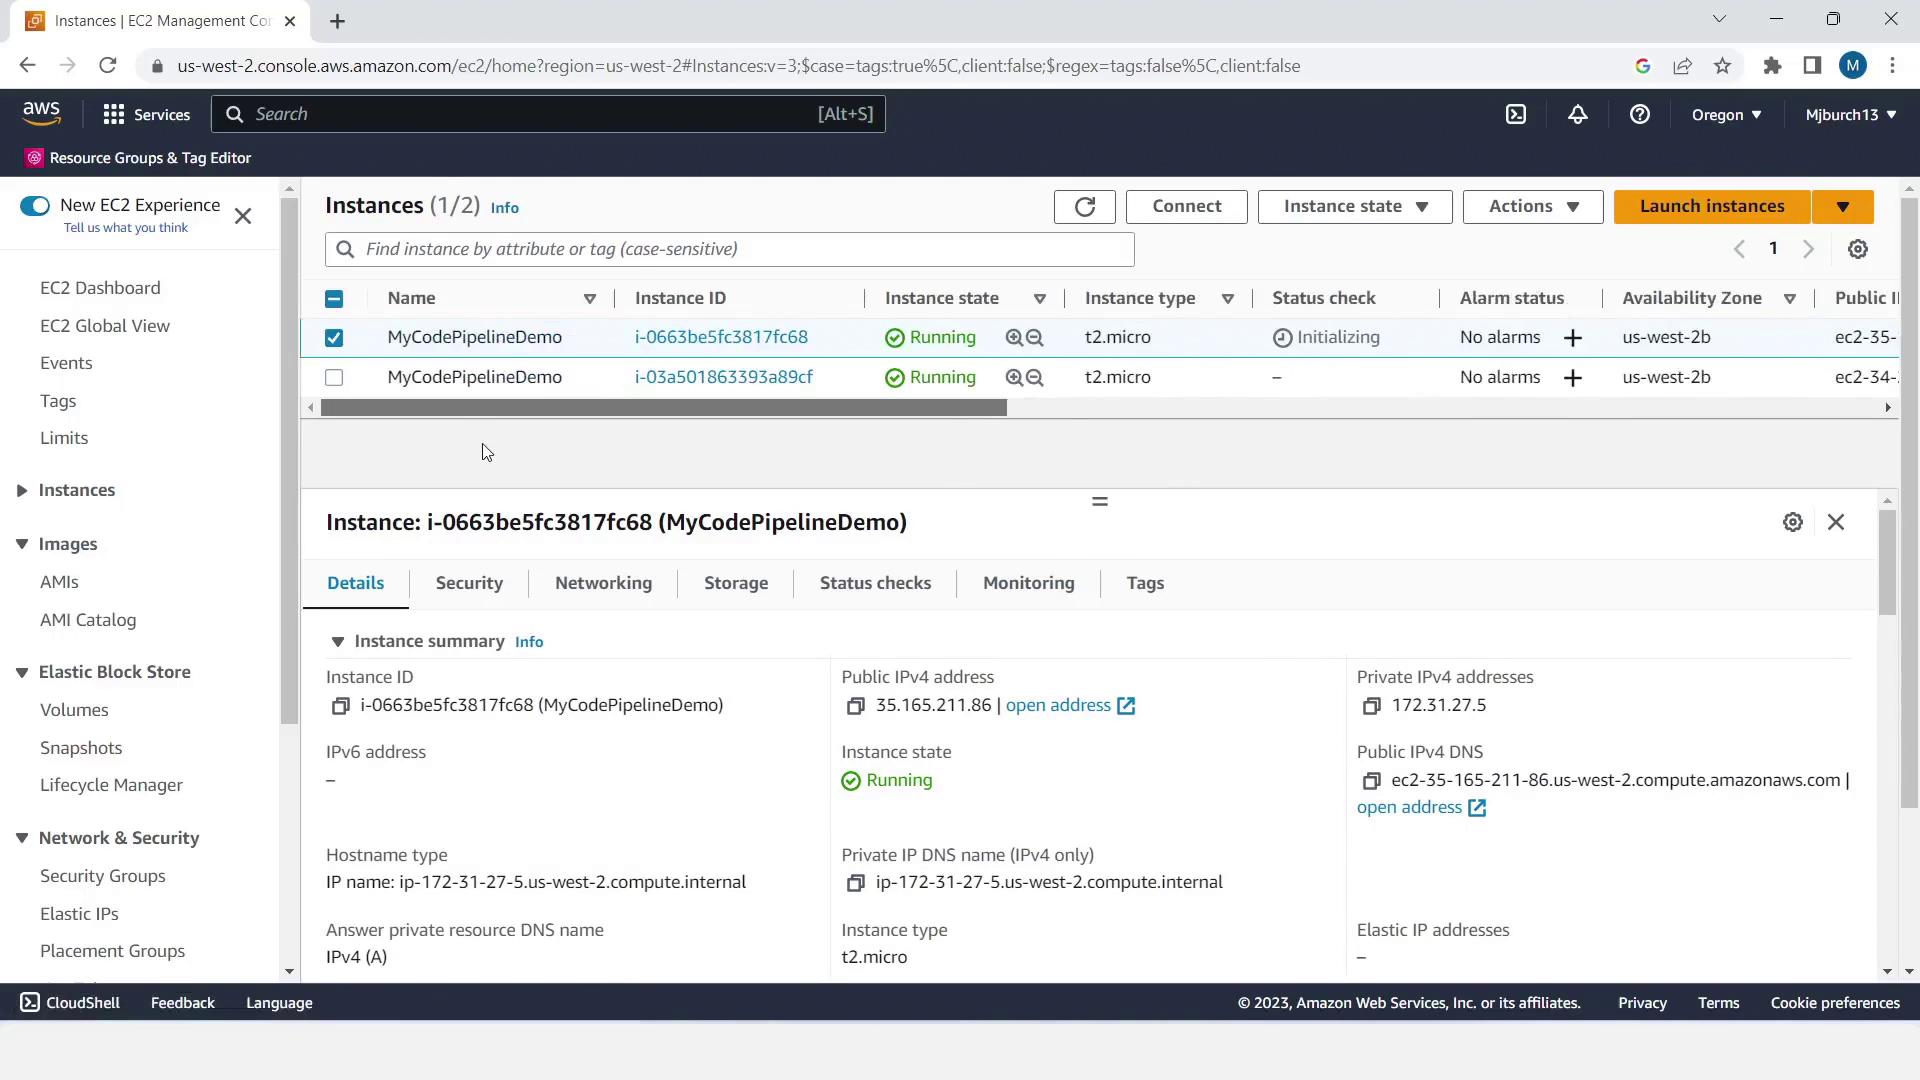
8. Click **Launch instances**.
9. Note each instance’s **Public IPv4 DNS**—you’ll test the deployment later.
<Frame>
  ![The image shows the AWS EC2 management console where a user is configuring the launch of an instance, with options for purchasing, domain join directory, and IAM instance profile visible. The summary on the right includes details like the software image, server type, and storage volume.](https://kodekloud.com/kk-media/image/upload/v1752862670/notes-assets/images/AWS-CodePipeline-CICD-Pipeline-Demonstration-1-Create-2-Stage-Pipeline/aws-ec2-launch-instance-console-2.jpg)
</Frame>

<Frame>
  ![The image shows an AWS EC2 Management Console with two running instances named "MyCodePipelineDemo," both of type t2.micro, with details about one instance displayed below.](https://kodekloud.com/kk-media/image/upload/v1752862671/notes-assets/images/AWS-CodePipeline-CICD-Pipeline-Demonstration-1-Create-2-Stage-Pipeline/aws-ec2-management-console-instances.jpg)
</Frame>

***

## 4. Create an IAM Role for CodeDeploy

1. In **IAM**, select **Roles > Create role**.
2. Choose **AWS service** → **CodeDeploy**, click **Next**.
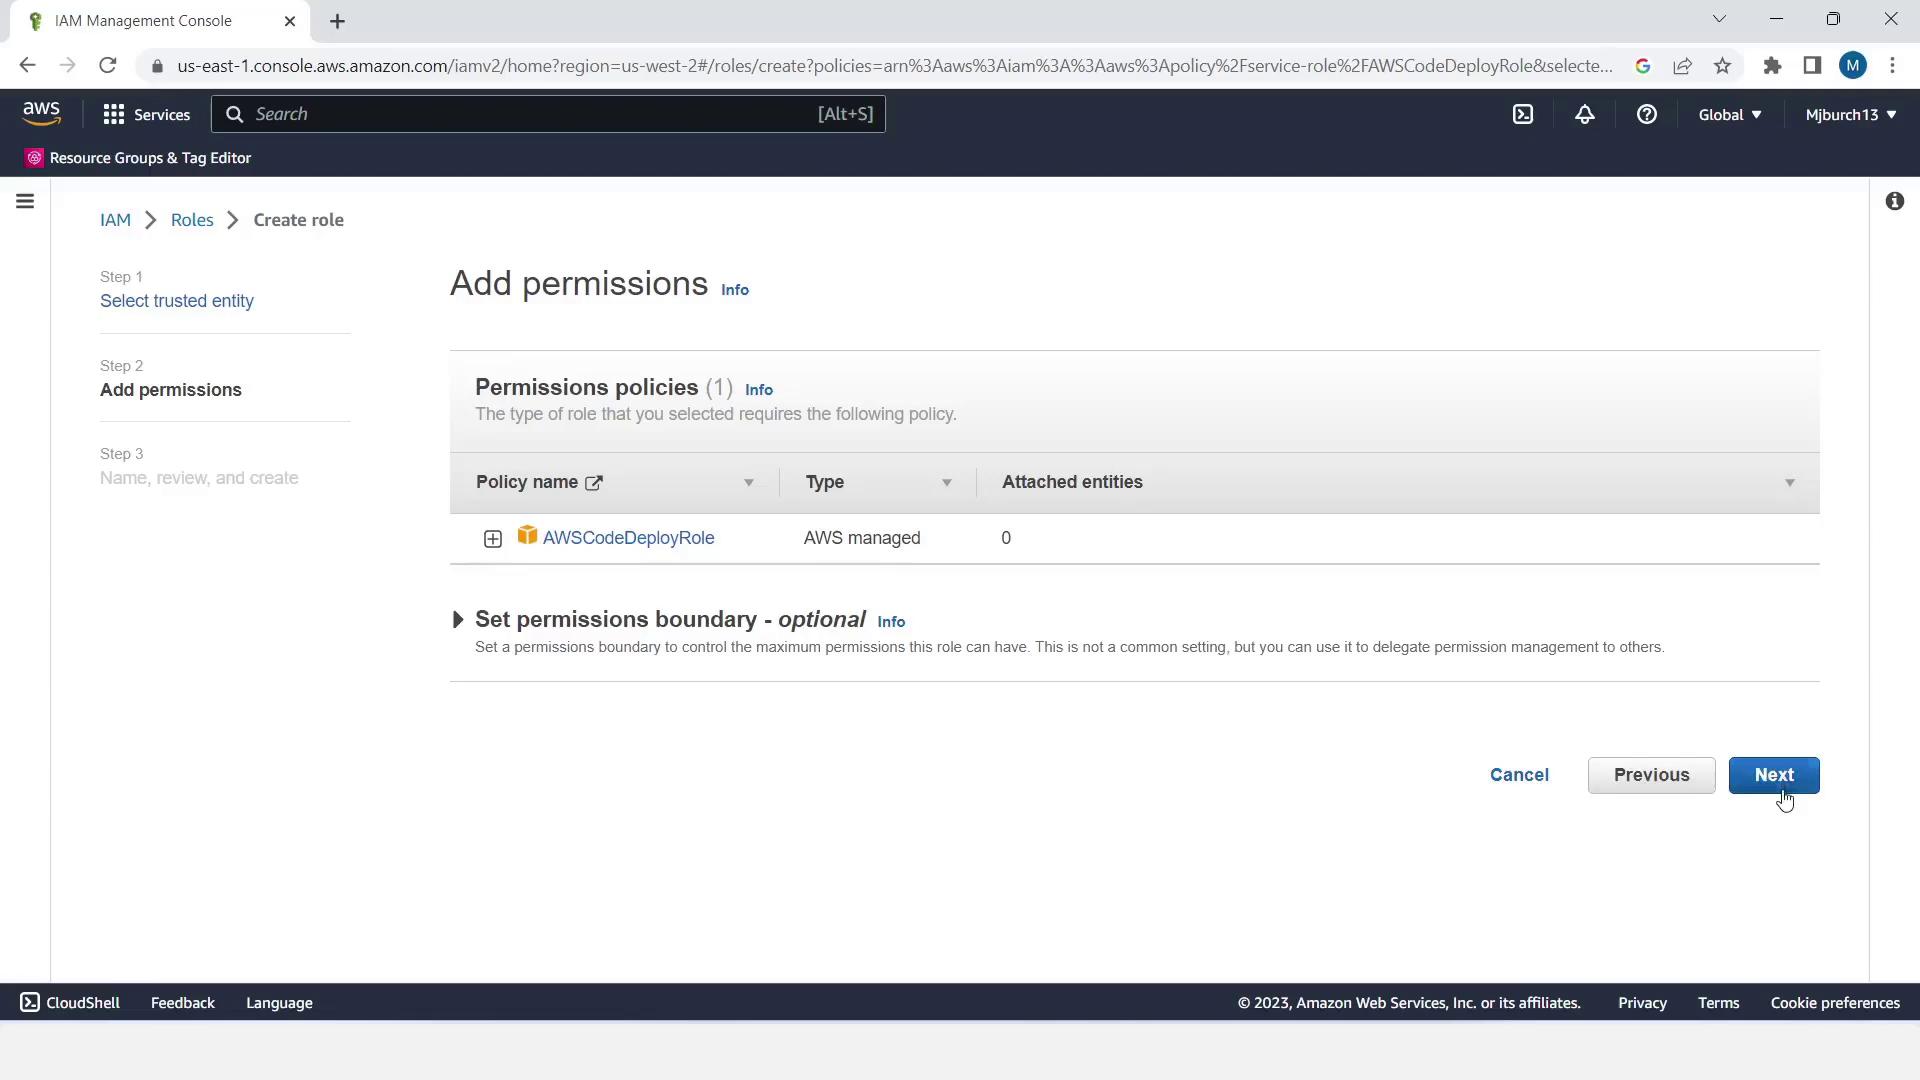
3. The **AWSCodeDeployRole** policy is preselected—click **Next**.
4. Name the role **CodeDeployRole** and click **Create role**.
<Frame>
  ![The image shows the AWS IAM Management Console where a user is adding permissions to a role, specifically selecting the "AWSCodeDeployRole" policy. There is an option to set a permissions boundary, and navigation buttons for "Cancel," "Previous," and "Next" are visible.](https://kodekloud.com/kk-media/image/upload/v1752862672/notes-assets/images/AWS-CodePipeline-CICD-Pipeline-Demonstration-1-Create-2-Stage-Pipeline/aws-iam-management-console-add-permissions-2.jpg)
</Frame>

<Frame>
  ![The image shows the AWS Identity and Access Management (IAM) console, specifically the "Roles" section, listing various roles with their trusted entities and last activity details.](https://kodekloud.com/kk-media/image/upload/v1752862673/notes-assets/images/AWS-CodePipeline-CICD-Pipeline-Demonstration-1-Create-2-Stage-Pipeline/aws-iam-console-roles-listing.jpg)
</Frame>

***

## 5. Configure CodeDeploy Application and Deployment Group

1. Navigate to **Services > CodeDeploy > Applications**, then **Create application**.
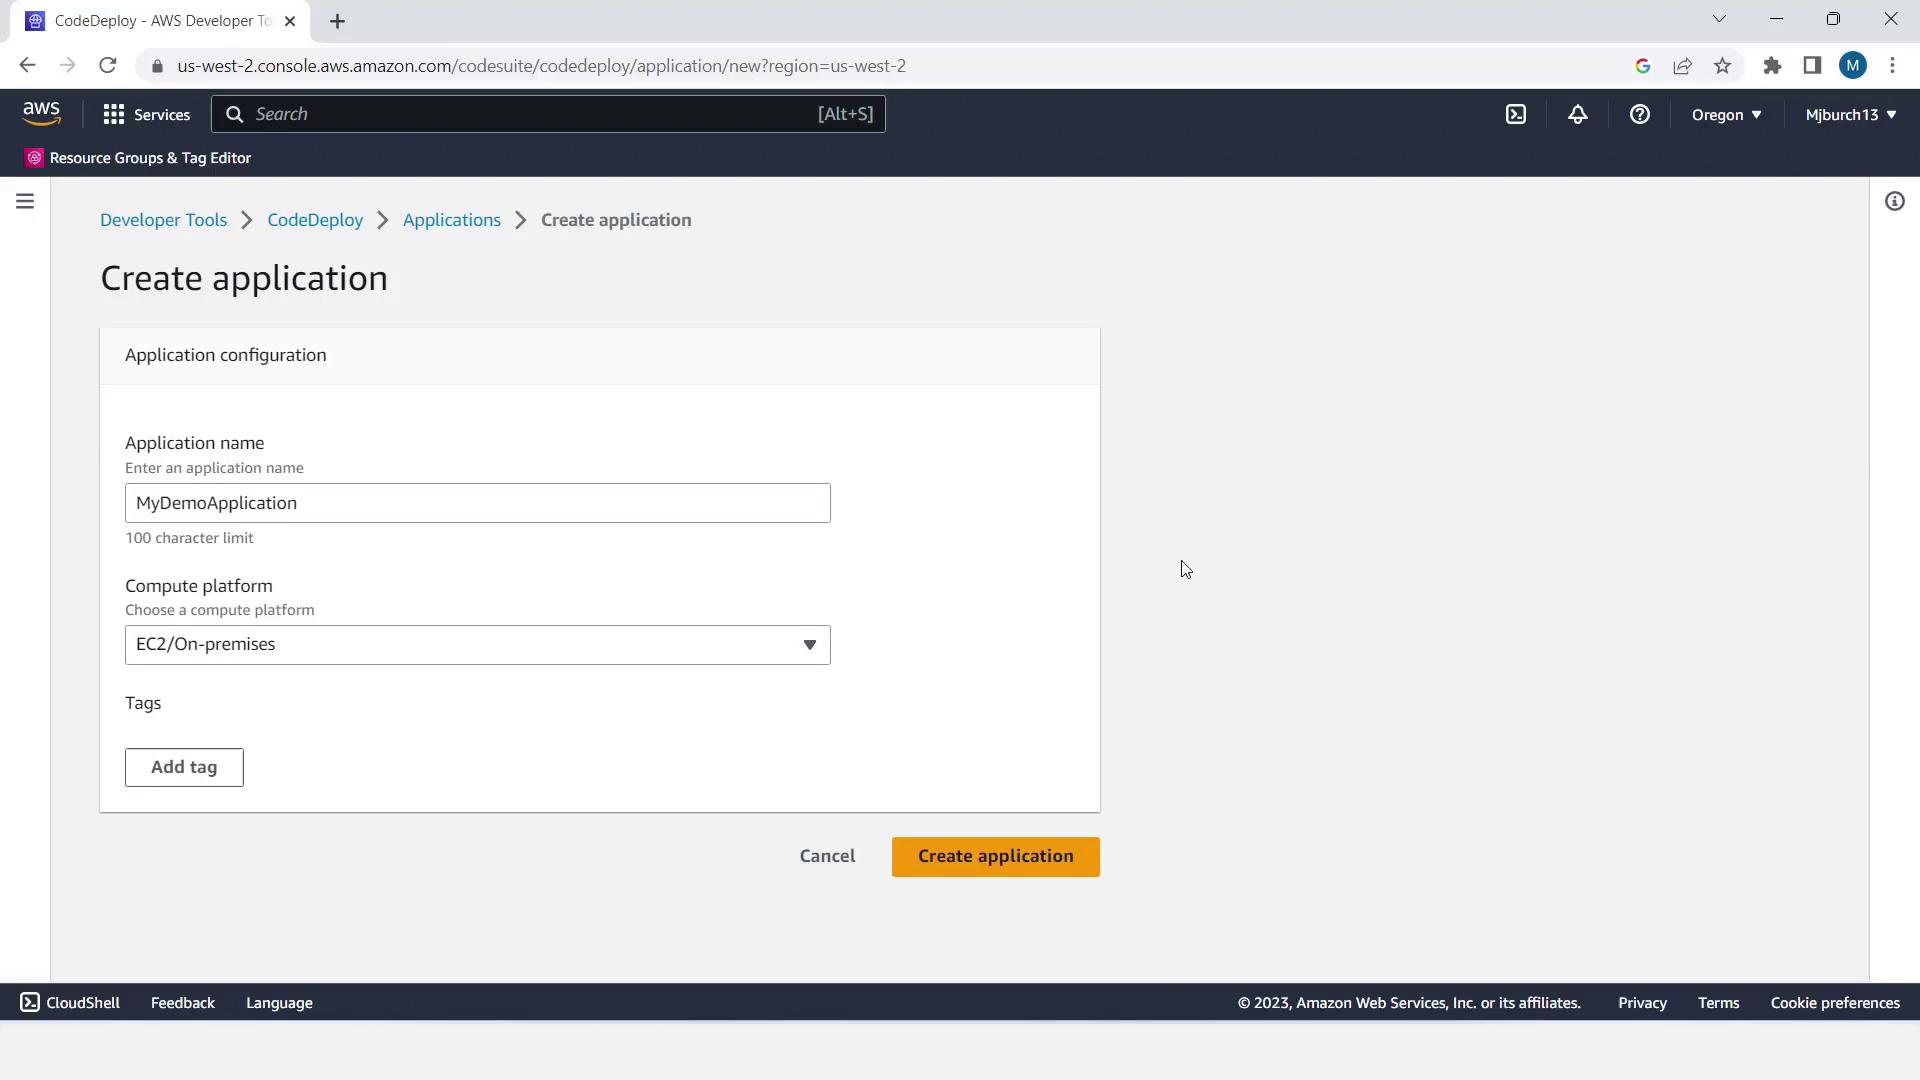
2. Enter **Application name**: `MyDemoApplication`. Select **EC2/On-premises** and click **Create application**.
<Frame>
  ![The image shows an AWS CodeDeploy interface for creating an application, with fields for application name, compute platform, and tags.](https://kodekloud.com/kk-media/image/upload/v1752862674/notes-assets/images/AWS-CodePipeline-CICD-Pipeline-Demonstration-1-Create-2-Stage-Pipeline/aws-codedeploy-application-interface.jpg)
</Frame>

3. Click **Create deployment group**.
4. Set **Deployment group name**: `MyDemoDeploymentGroup`. Choose **CodeDeployRole**.
5. Under **Environment configuration**, select **Amazon EC2 instances** and filter by tag:
   * Key = `Name`
   * Value = `MyCodePipelineDemo`
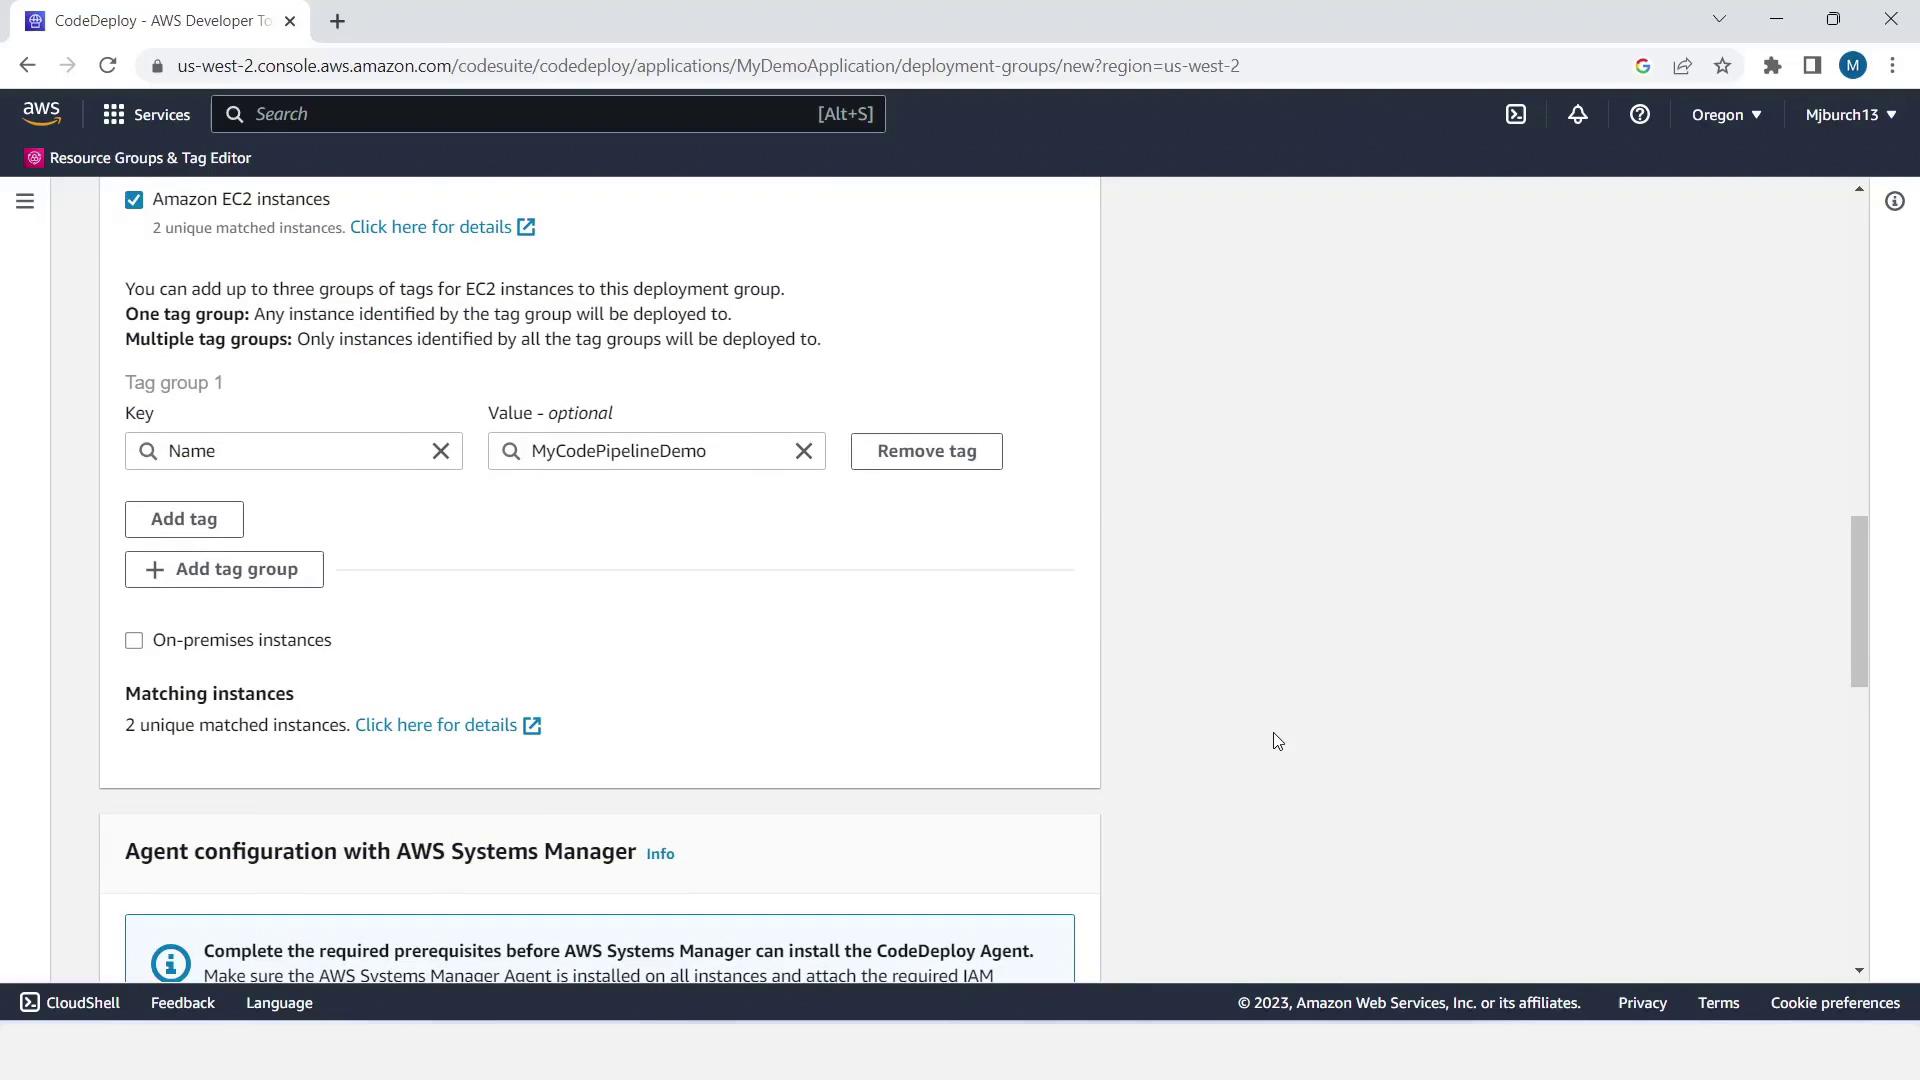
<Frame>
  ![The image shows an AWS CodeDeploy interface where a user is configuring deployment groups for Amazon EC2 instances, with options to add tags and configure the AWS Systems Manager Agent.](https://kodekloud.com/kk-media/image/upload/v1752862676/notes-assets/images/AWS-CodePipeline-CICD-Pipeline-Demonstration-1-Create-2-Stage-Pipeline/aws-codedeploy-deployment-groups-ec2.jpg)
</Frame>

6. In **Agent configuration**, choose **Latest run** (schedule future updates).
7. For **Deployment settings**, select **CodeDeployDefault.OneAtATime**.
8. Disable **Load Balancing** and click **Create deployment group**.
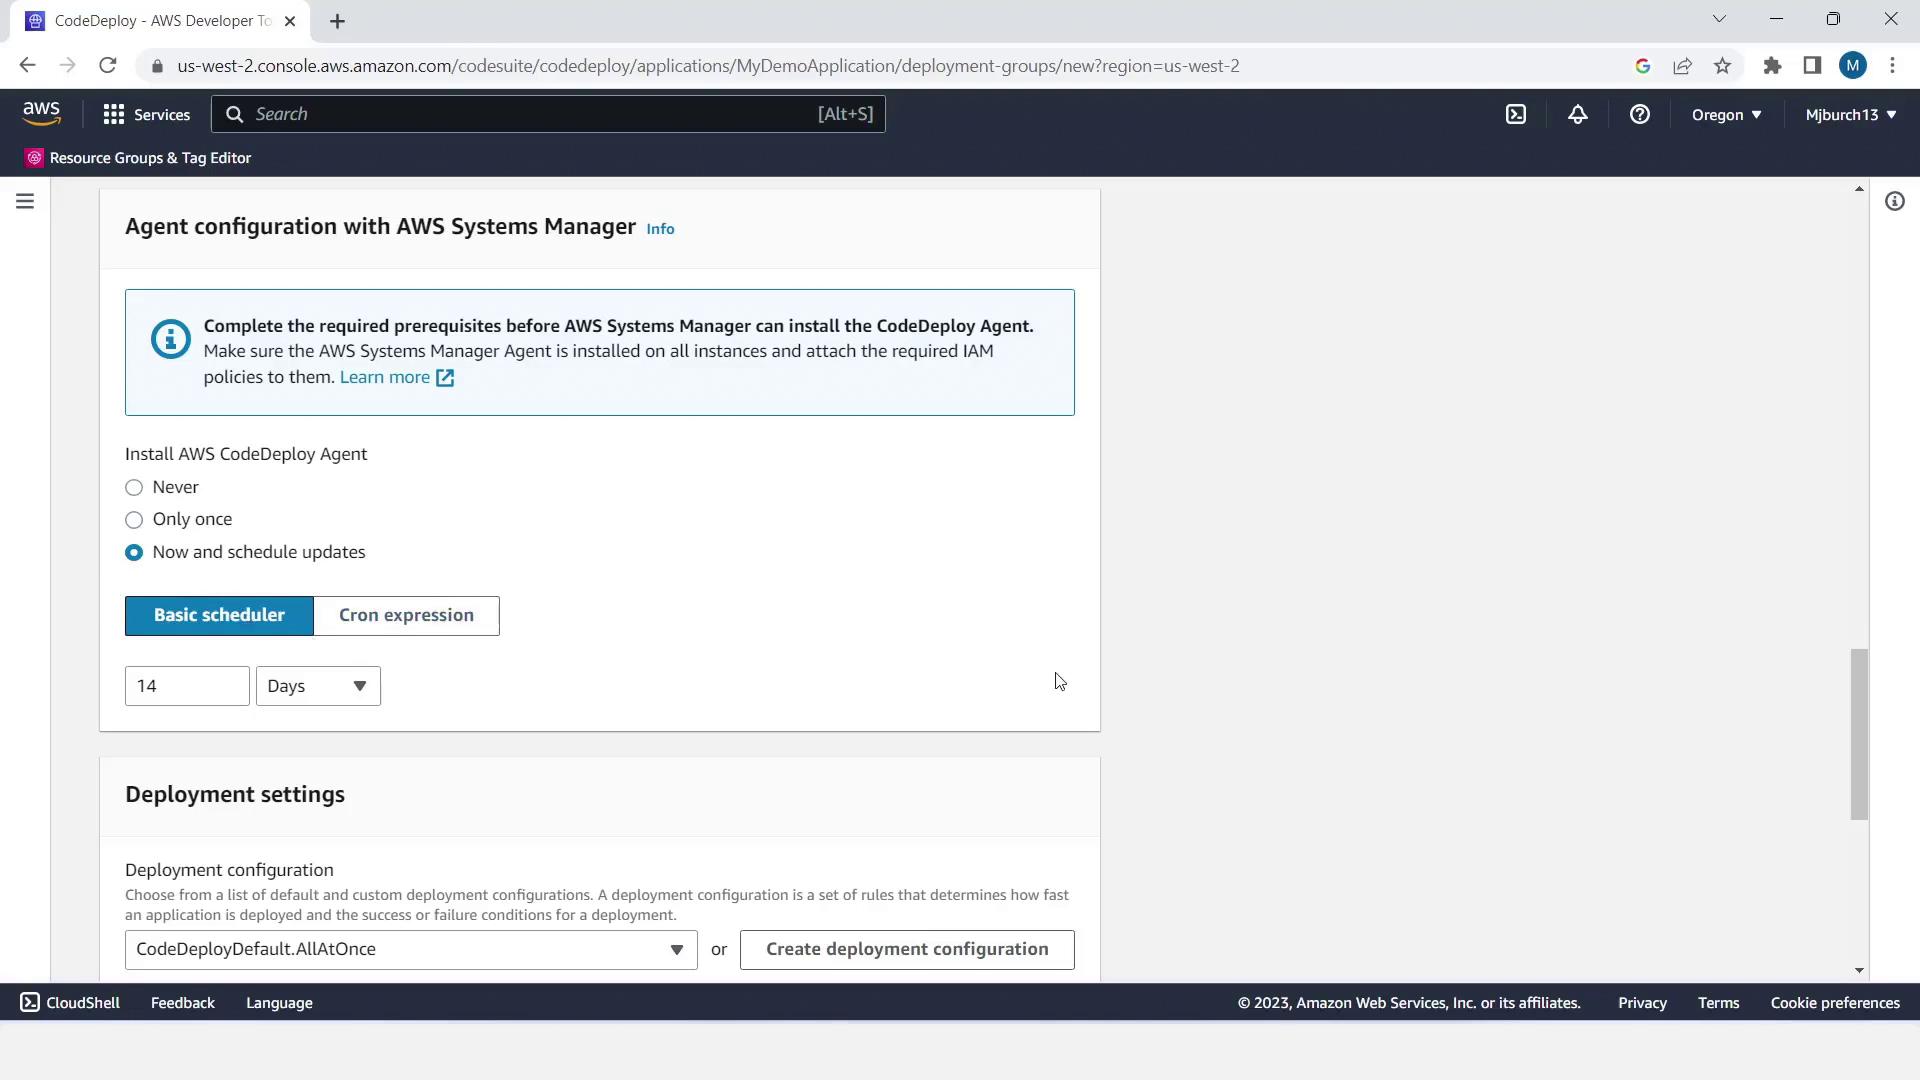
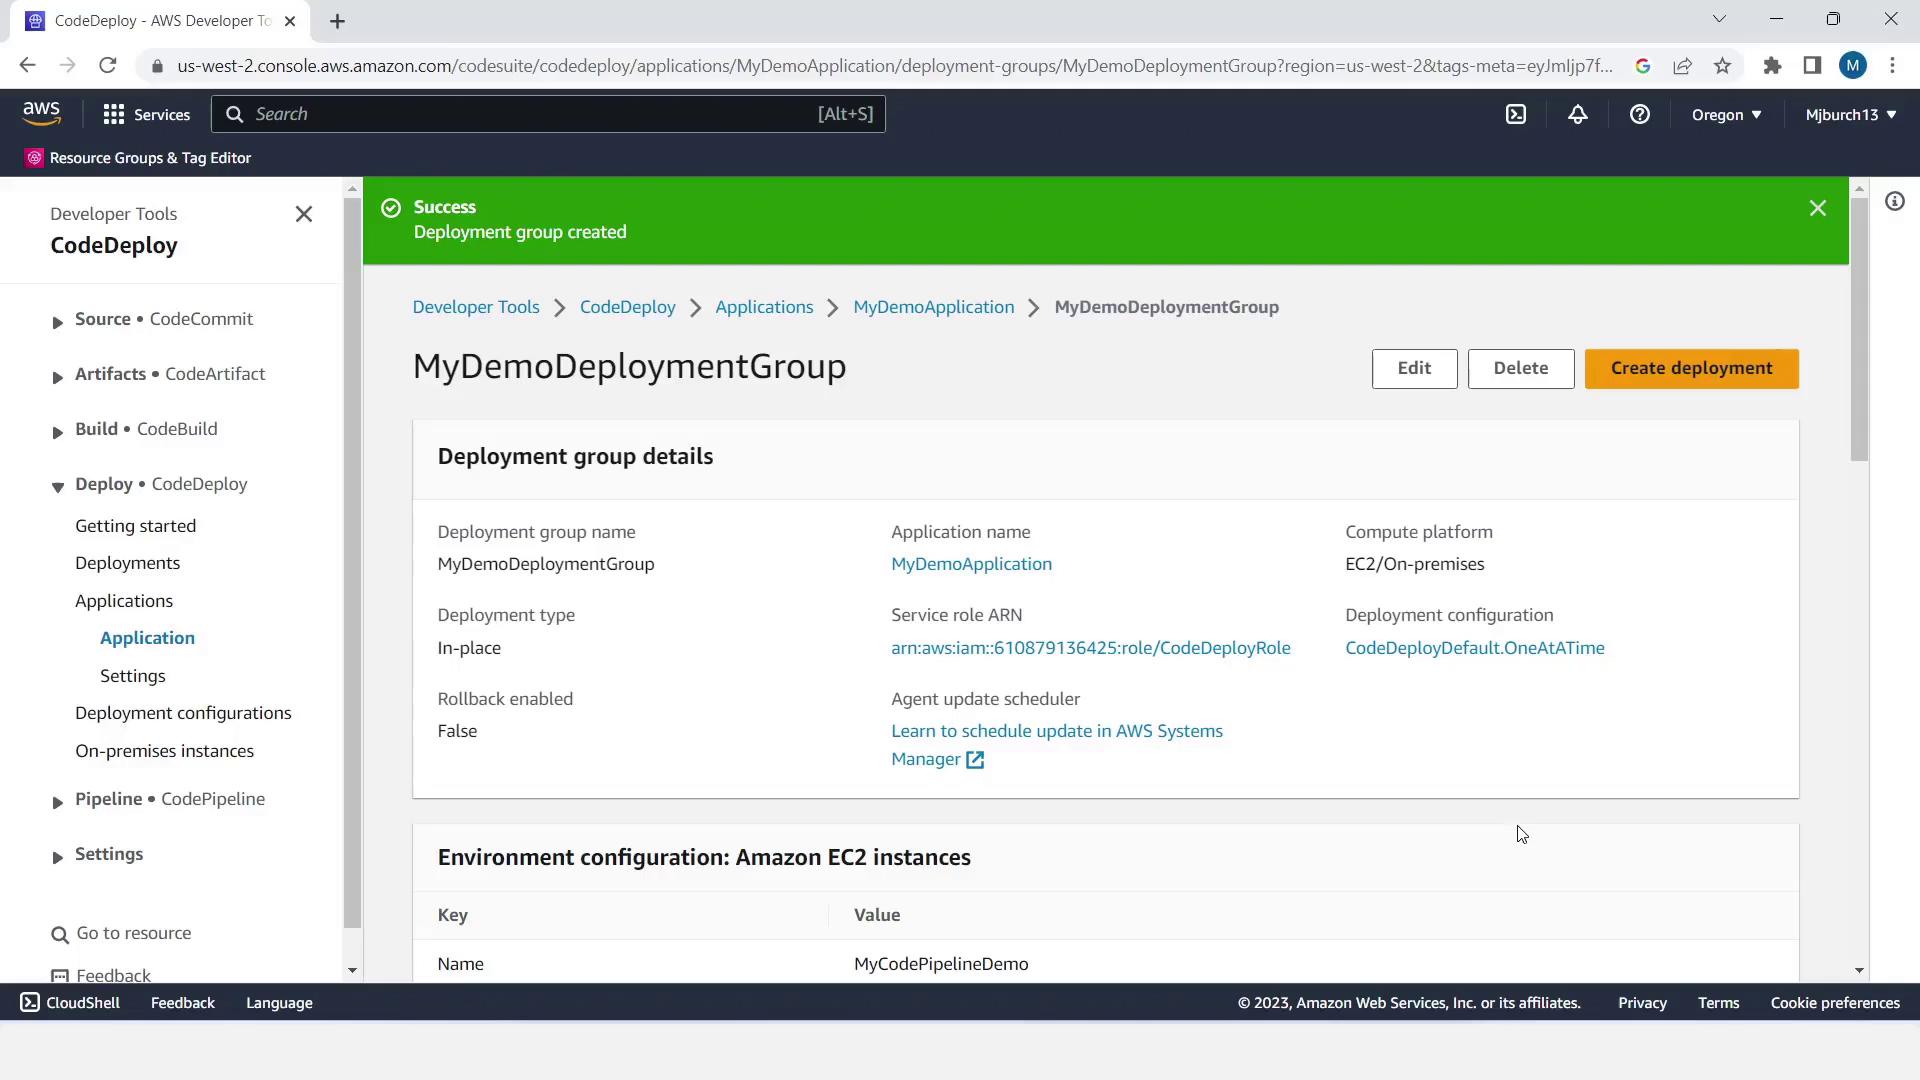
<Frame>
  ![The image shows an AWS CodeDeploy configuration screen where users can set up the CodeDeploy Agent with AWS Systems Manager, including scheduling updates and selecting deployment settings.](https://kodekloud.com/kk-media/image/upload/v1752862677/notes-assets/images/AWS-CodePipeline-CICD-Pipeline-Demonstration-1-Create-2-Stage-Pipeline/aws-codedeploy-configuration-screen.jpg)
</Frame>

<Frame>
  ![The image shows an AWS CodeDeploy interface with details of a deployment group named "MyDemoDeploymentGroup," including its configuration and environment settings. A success message indicates the deployment group was created.](https://kodekloud.com/kk-media/image/upload/v1752862679/notes-assets/images/AWS-CodePipeline-CICD-Pipeline-Demonstration-1-Create-2-Stage-Pipeline/aws-codedeploy-mydemodeploymentgroup-interface.jpg)
</Frame>

***

## 6. Create the CodePipeline Pipeline

1. Open **Services > CodePipeline** and click **Create pipeline**.
2. Enter **Pipeline name**: `MyFirstPipeline`. Choose **New service role** and **Next**.
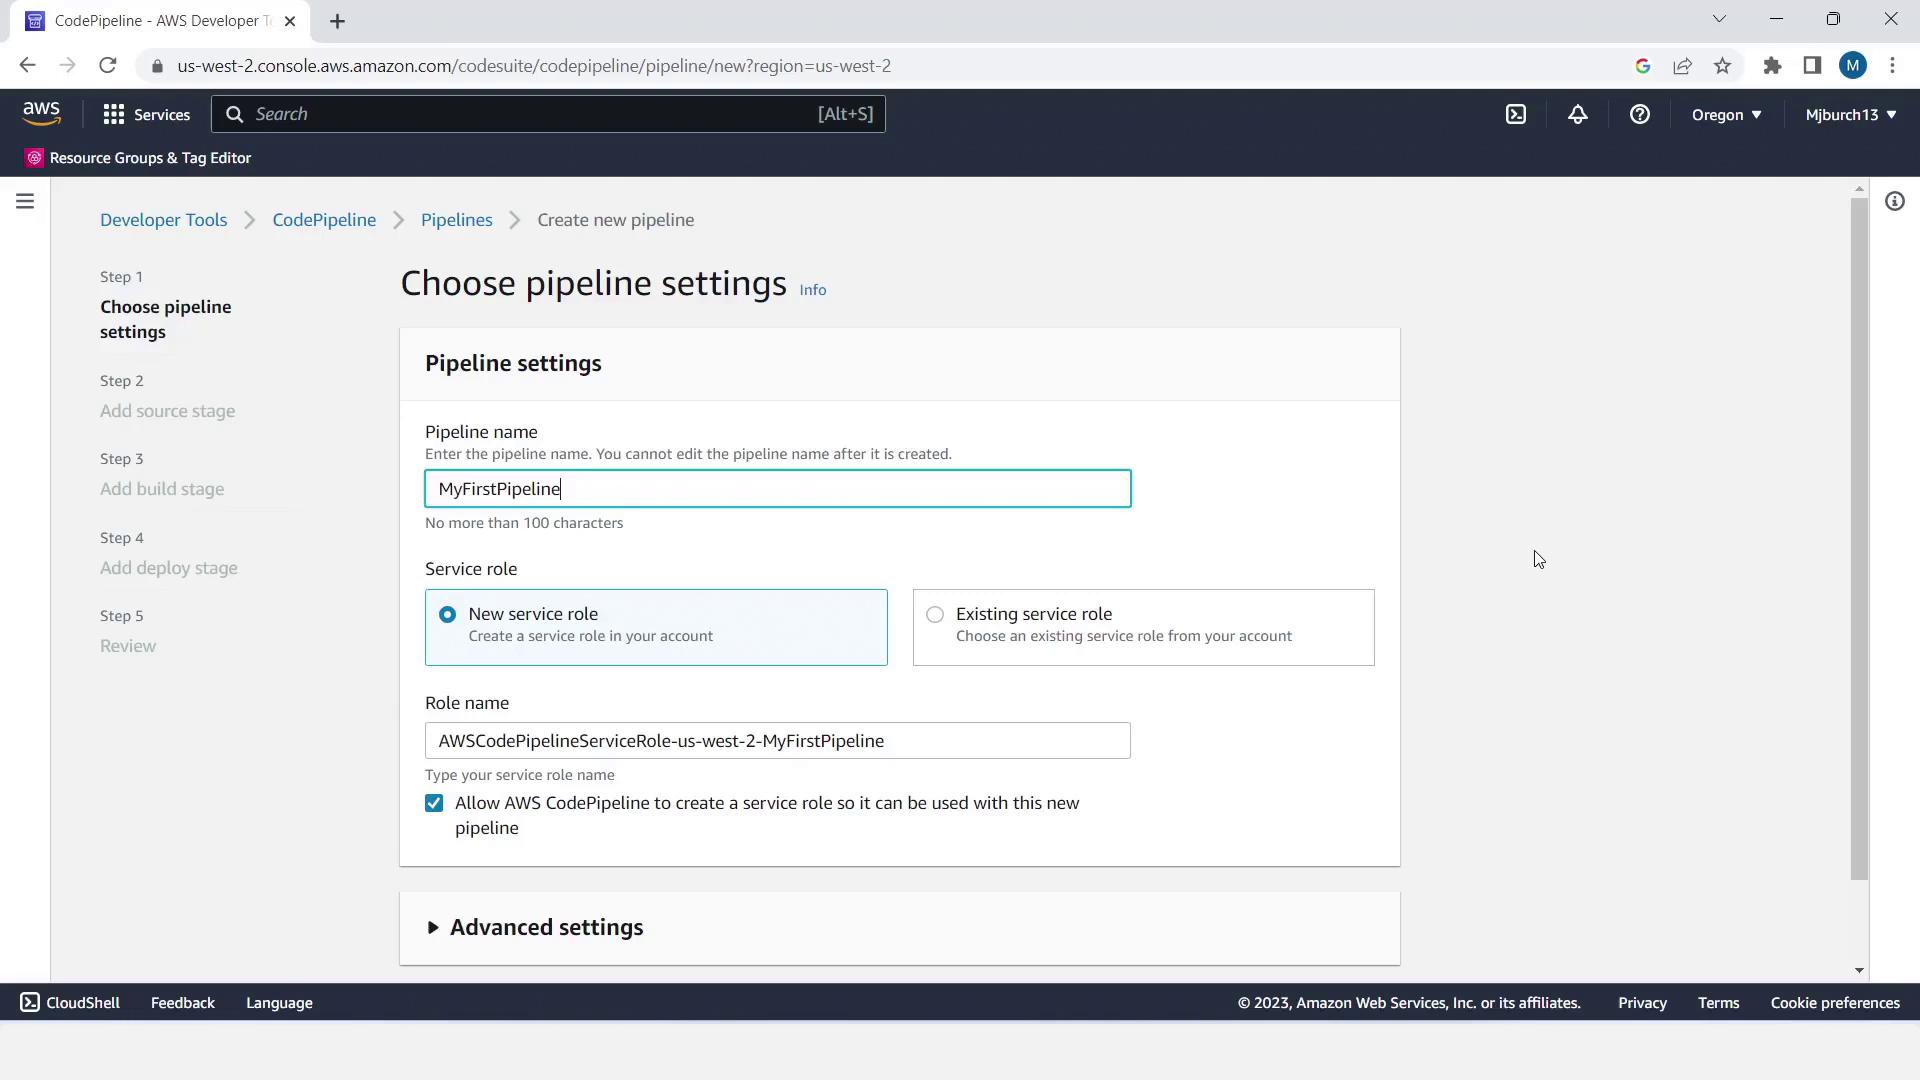
<Frame>
  ![The image shows the AWS CodePipeline interface where a user is setting up a new pipeline named "MyFirstPipeline" and selecting a new service role.](https://kodekloud.com/kk-media/image/upload/v1752862680/notes-assets/images/AWS-CodePipeline-CICD-Pipeline-Demonstration-1-Create-2-Stage-Pipeline/aws-codepipeline-myfirstpipeline-setup.jpg)
</Frame>

3. Configure the stages:

| Stage  | Action              | Provider       |
| ------ | ------------------- | -------------- |
| Source | Fetch application   | Amazon S3      |
| Build  | *(skip for demo)*   | —              |
| Deploy | Release to EC2 pool | AWS CodeDeploy |

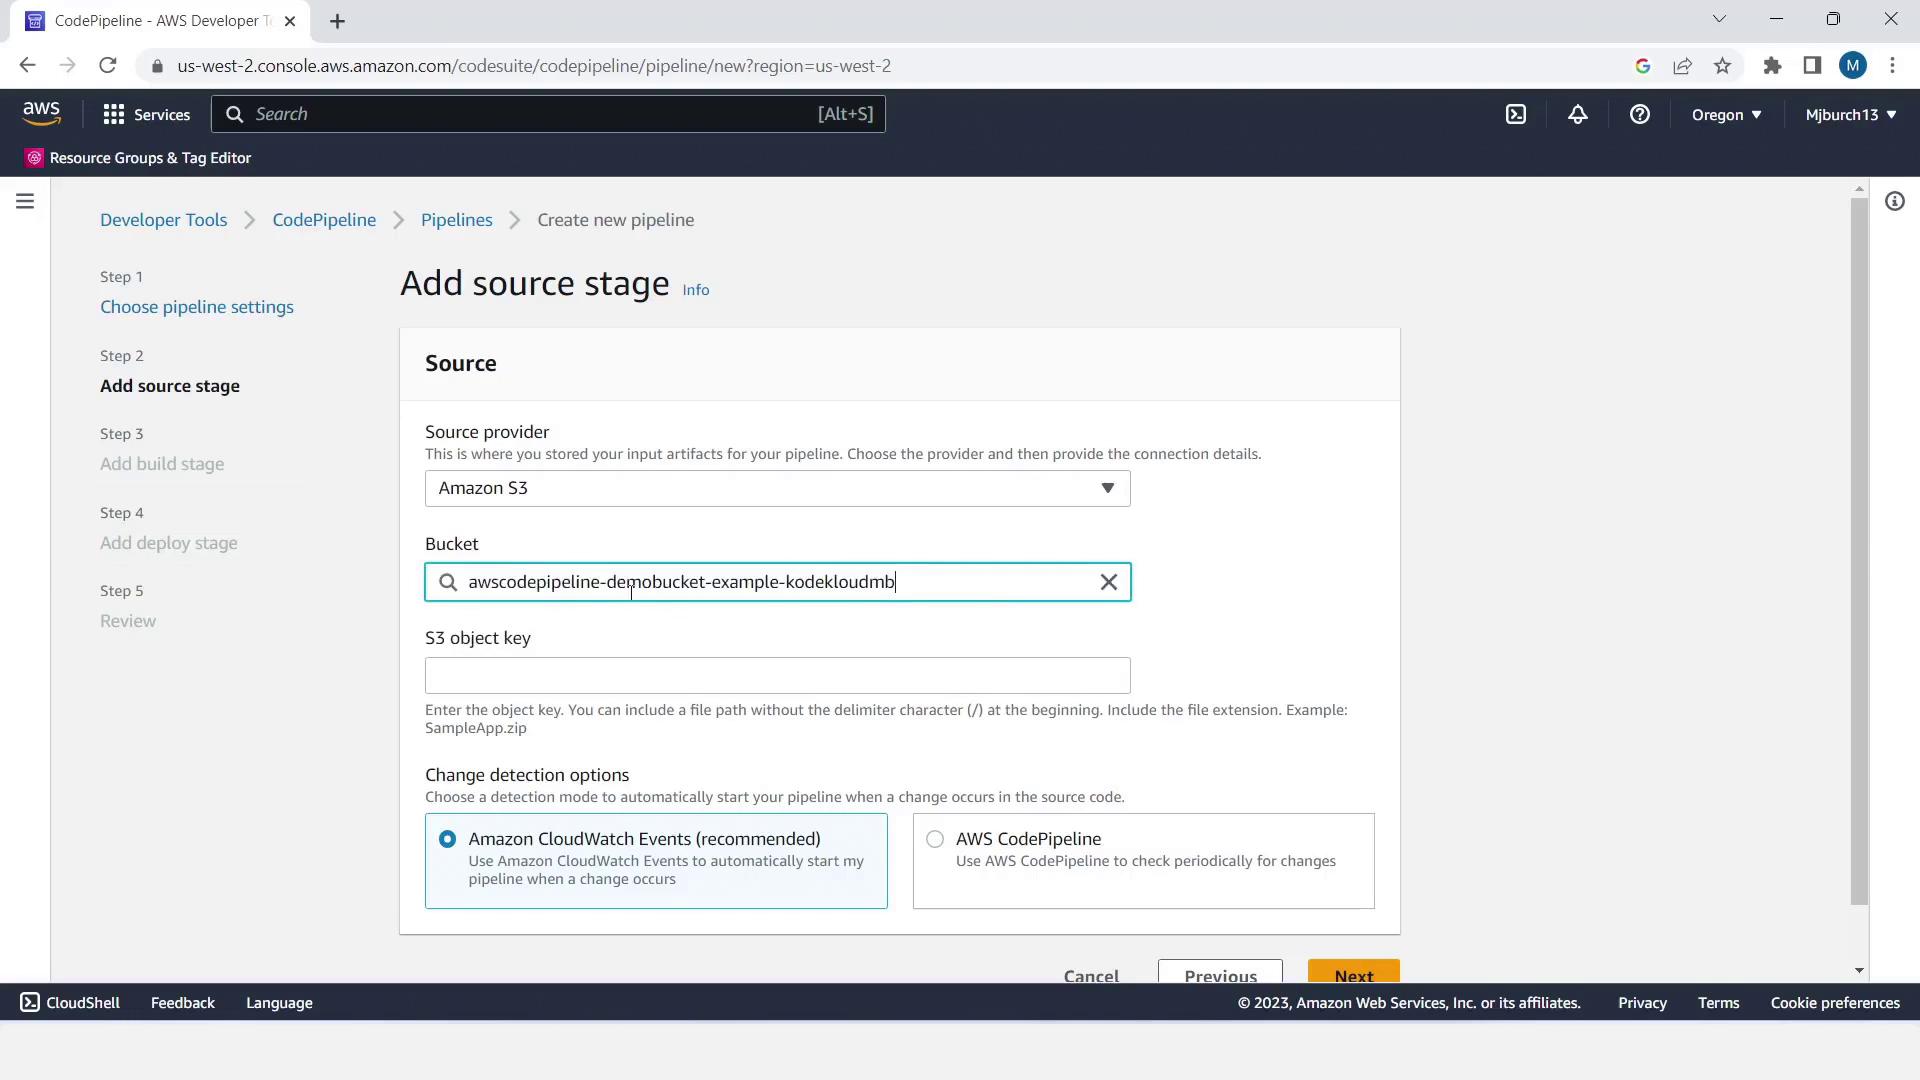
4. **Source stage**:
   * Provider: **Amazon S3**
   * Bucket: your demo bucket
   * S3 object key: your uploaded ZIP filename
   * Enable change detection
   * Click **Next**
<Frame>
  ![The image shows an AWS CodePipeline interface where a user is adding a source stage, selecting Amazon S3 as the source provider, and specifying a bucket name. Options for change detection are also visible.](https://kodekloud.com/kk-media/image/upload/v1752862681/notes-assets/images/AWS-CodePipeline-CICD-Pipeline-Demonstration-1-Create-2-Stage-Pipeline/aws-codepipeline-source-stage-s3.jpg)
</Frame>

<Callout icon="lightbulb" color="#1CB2FE">
  You can add a build or test stage here later—e.g., AWS CodeBuild or Jenkins—to run unit tests before deployment.
</Callout>

5. **Build stage**: click **Skip stage**.
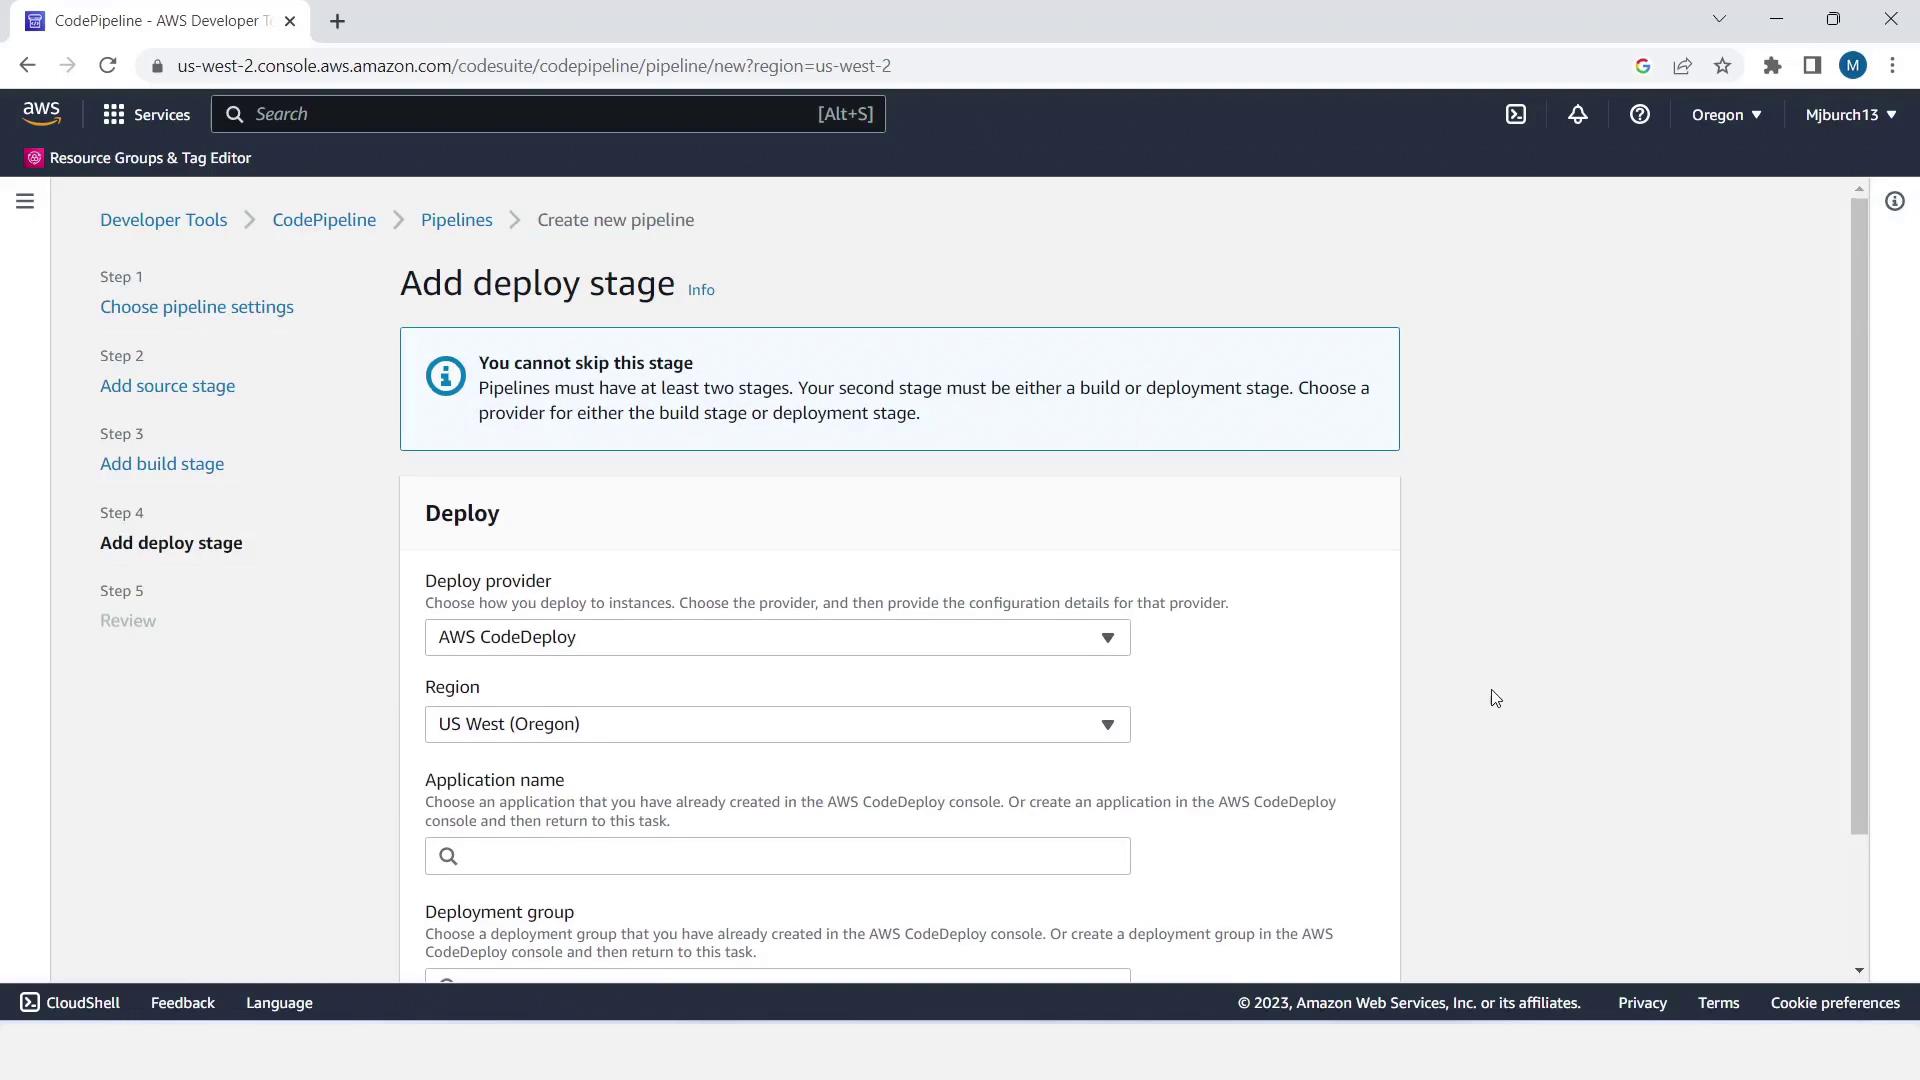
6. **Deploy stage**:
   * Provider: **AWS CodeDeploy**
   * Region: your chosen region
   * Application name: `MyDemoApplication`
   * Deployment group: `MyDemoDeploymentGroup`
   * Click **Next**, then **Create pipeline**
<Frame>
  ![The image shows an AWS CodePipeline interface where a user is adding a deploy stage, with options to select a deploy provider, region, application name, and deployment group.](https://kodekloud.com/kk-media/image/upload/v1752862682/notes-assets/images/AWS-CodePipeline-CICD-Pipeline-Demonstration-1-Create-2-Stage-Pipeline/aws-codepipeline-deploy-stage-interface.jpg)
</Frame>

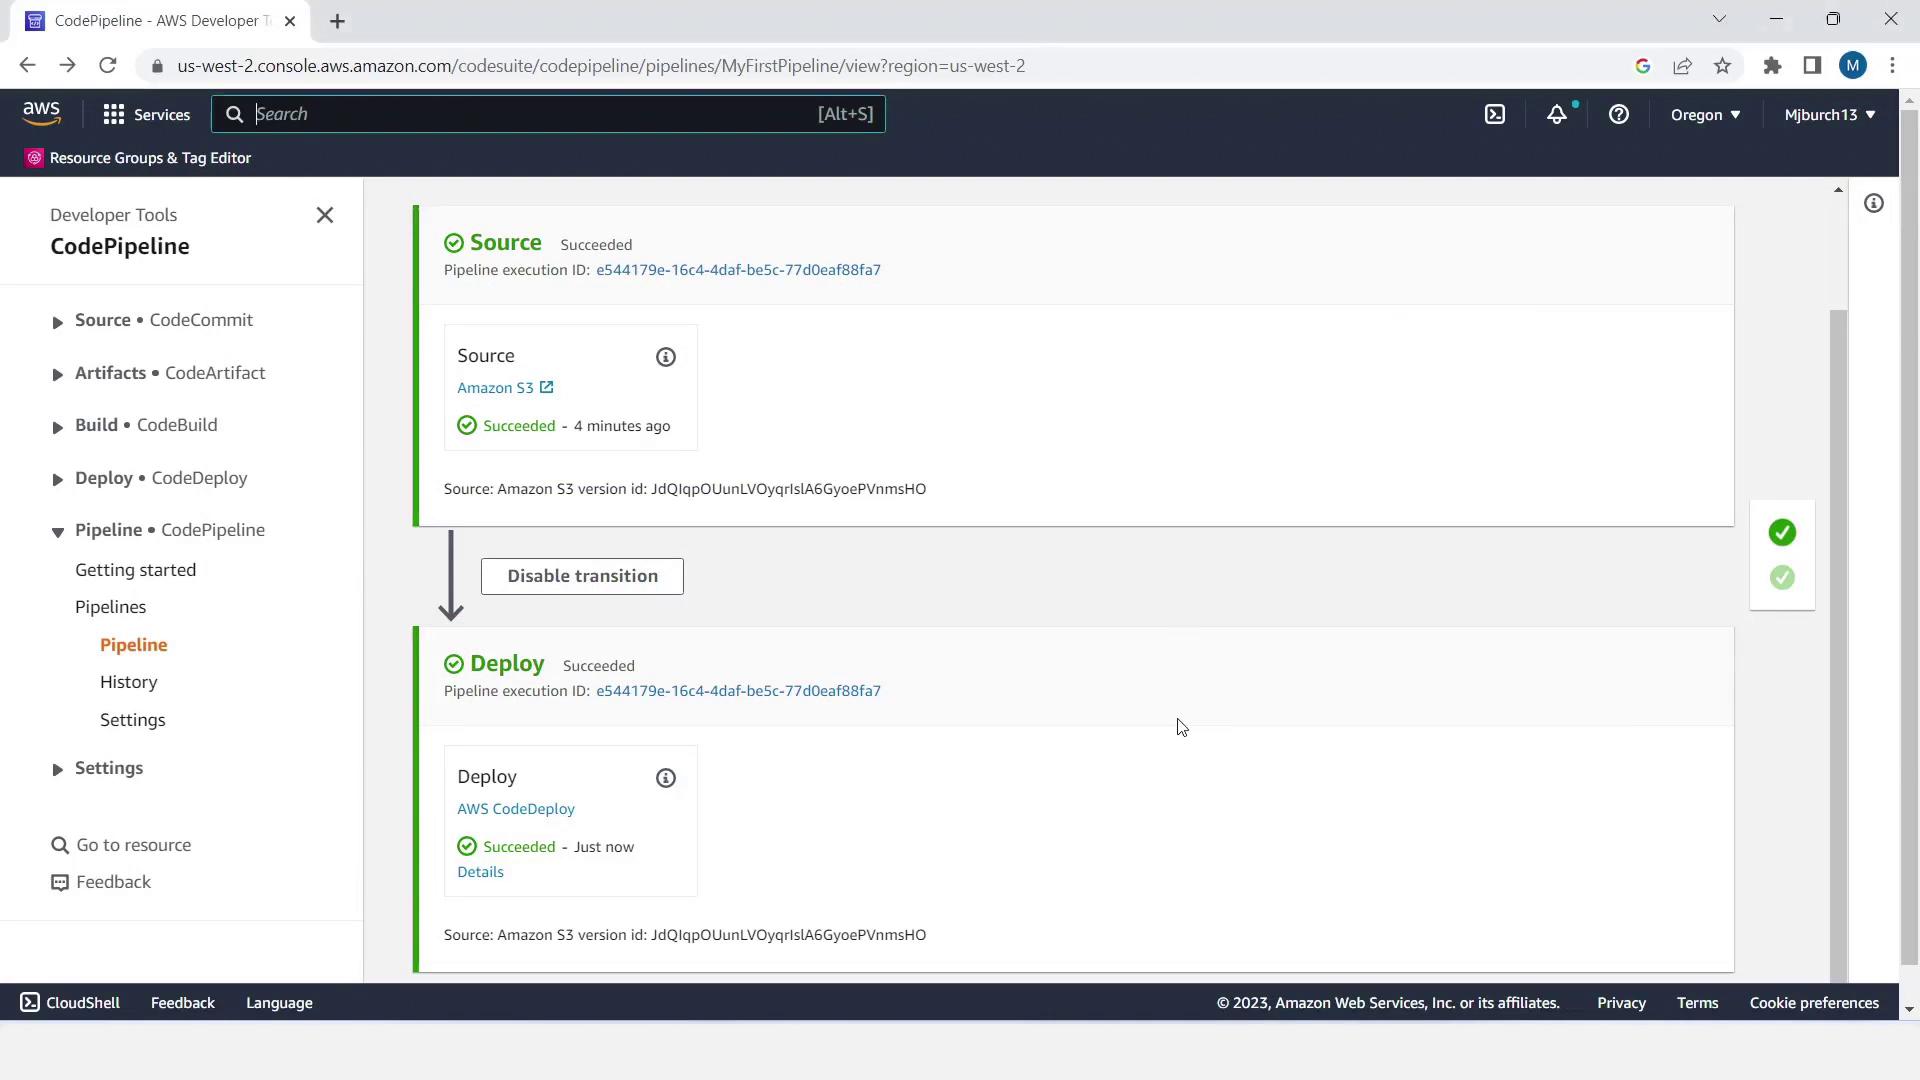
The pipeline will initialize and run automatically. You’ll see progress bars and success indicators.
<Frame>
  ![The image shows an AWS CodePipeline interface with a successful pipeline execution, including a source stage from Amazon S3 and a deploy stage using AWS CodeDeploy. The pipeline stages are marked as succeeded.](https://kodekloud.com/kk-media/image/upload/v1752862684/notes-assets/images/AWS-CodePipeline-CICD-Pipeline-Demonstration-1-Create-2-Stage-Pipeline/aws-codepipeline-successful-execution-diagram.jpg)
</Frame>

***

## 7. Validate the Deployment

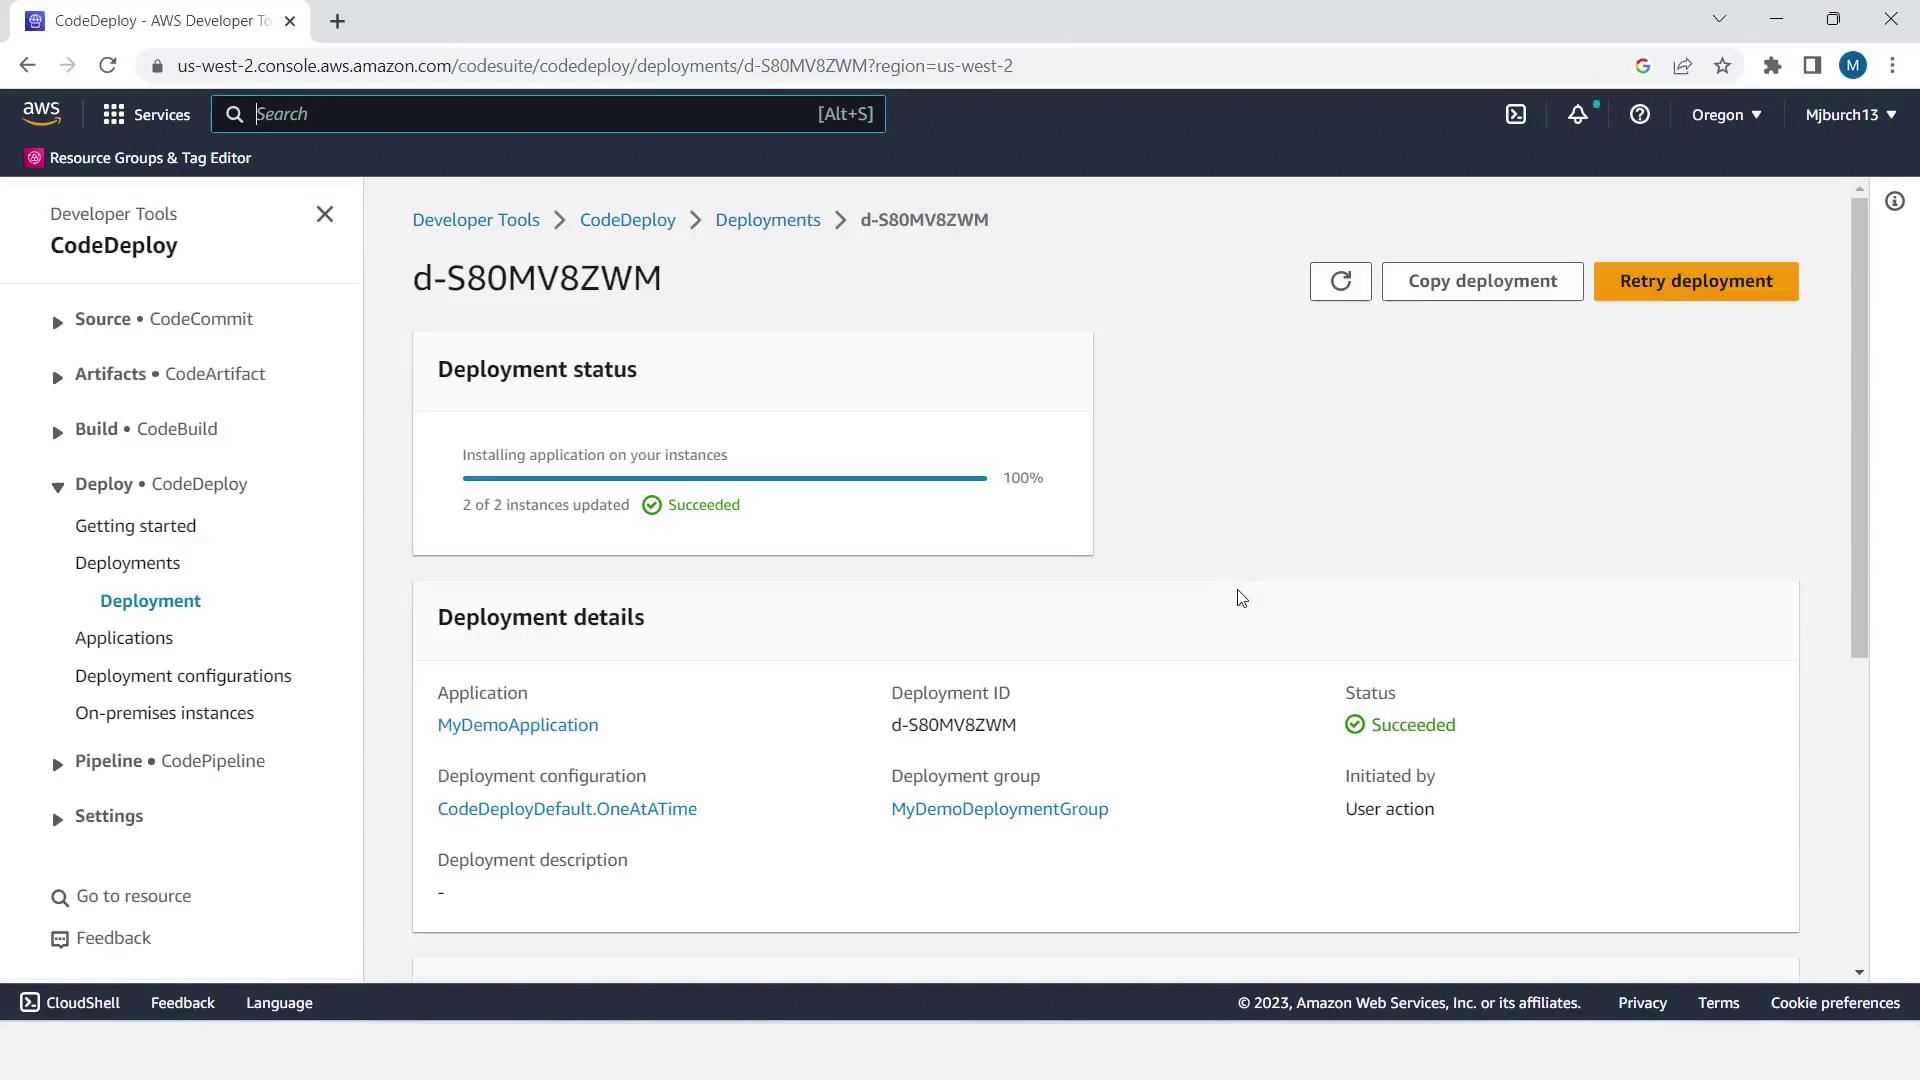
1. In CodePipeline, click **Details** to review execution logs.
<Frame>
  ![The image shows an AWS CodeDeploy interface with a deployment status indicating success, updating 2 of 2 instances. Deployment details such as application name and configuration are also displayed.](https://kodekloud.com/kk-media/image/upload/v1752862685/notes-assets/images/AWS-CodePipeline-CICD-Pipeline-Demonstration-1-Create-2-Stage-Pipeline/aws-codedeploy-success-status-update.jpg)
</Frame>

2. Open the EC2 console, copy one instance’s **Public IPv4 DNS**, and paste it into your browser.
3. Confirm you see the sample HTML page—successful deployment!

Congratulations! You’ve built and validated your first CI/CD pipeline with AWS CodePipeline, using S3 as the source and CodeDeploy on EC2. In our next lesson, we'll dive into advanced stages and integrations.

***

## Links and References

* AWS CodePipeline tutorial: Deploying from S3 to CodeDeploy
* [AWS CodePipeline Documentation](https://docs.aws.amazon.com/codepipeline/)
* [AWS CodeDeploy Documentation](https://docs.aws.amazon.com/codedeploy/)
* [AWS IAM Best Practices](https://docs.aws.amazon.com/IAM/latest/UserGuide/best-practices.html)
* [Amazon S3 Documentation](https://docs.aws.amazon.com/s3/)

<CardGroup>
  <Card title="Watch Video" icon="video" cta="Learn more" href="https://learn.kodekloud.com/user/courses/aws-codepipeline-ci-cd-pipeline/module/d0ecdc6d-aba5-4798-80c9-171edb45c9dc/lesson/08345f2e-656b-4b71-93f6-902e31ae01d1" />

  <Card title="Practice Lab" icon="installation" cta="Learn more" href="https://learn.kodekloud.com/user/courses/aws-codepipeline-ci-cd-pipeline/module/d0ecdc6d-aba5-4798-80c9-171edb45c9dc/lesson/3ef3ded1-e3e0-495d-a830-37edbbf21e1b" />
</CardGroup>