> ## Documentation Index
> Fetch the complete documentation index at: https://notes.kodekloud.com/llms.txt
> Use this file to discover all available pages before exploring further.

# Load Balancers Demo

> This hands-on tutorial guides setting up an AWS Application Load Balancer to distribute HTTP requests across two EC2 web servers running Nginx.

In this hands-on tutorial, you’ll set up an AWS Application Load Balancer (ALB) to distribute HTTP requests across two EC2 web servers running Nginx, each in a different Availability Zone. By the end, you’ll have a resilient, internet-facing load balancer serving content from both servers.

## Prerequisites

<Callout icon="lightbulb" color="#1CB2FE">
  Make sure you already have:

  * Two t2.micro EC2 instances (**web-server-1**, **web-server-2**) with Nginx and distinct landing pages.
  * A VPC configured with an Internet Gateway.
  * Two public subnets in us-east-1a and us-east-1b.
</Callout>

| Resource       | Description           | Details                                                  |
| -------------- | --------------------- | -------------------------------------------------------- |
| EC2 Instances  | Web servers           | `web-server-1` (us-east-1a), `web-server-2` (us-east-1b) |
| VPC            | Virtual Private Cloud | Includes an Internet Gateway and public subnets          |
| Public Subnets | Hosts web servers     | 10.0.201.0/24 (AZ a), 10.0.202.0/24 (AZ b)               |

### EC2 Instances

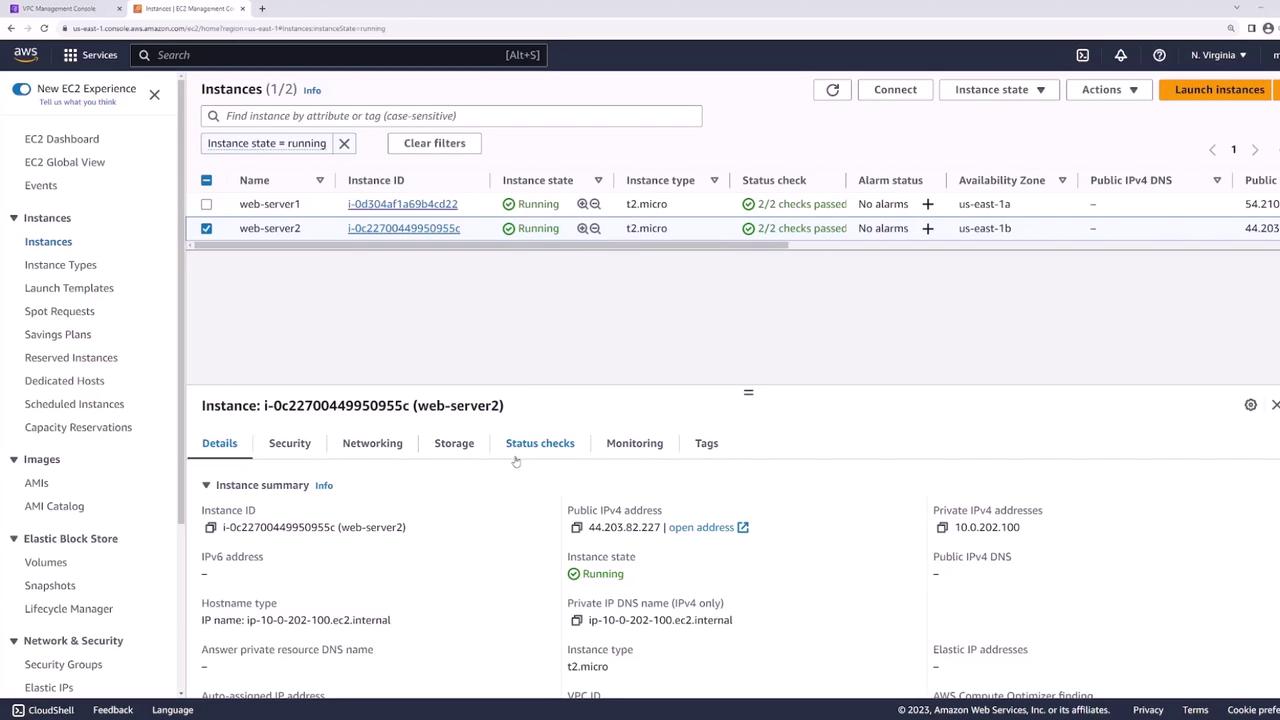
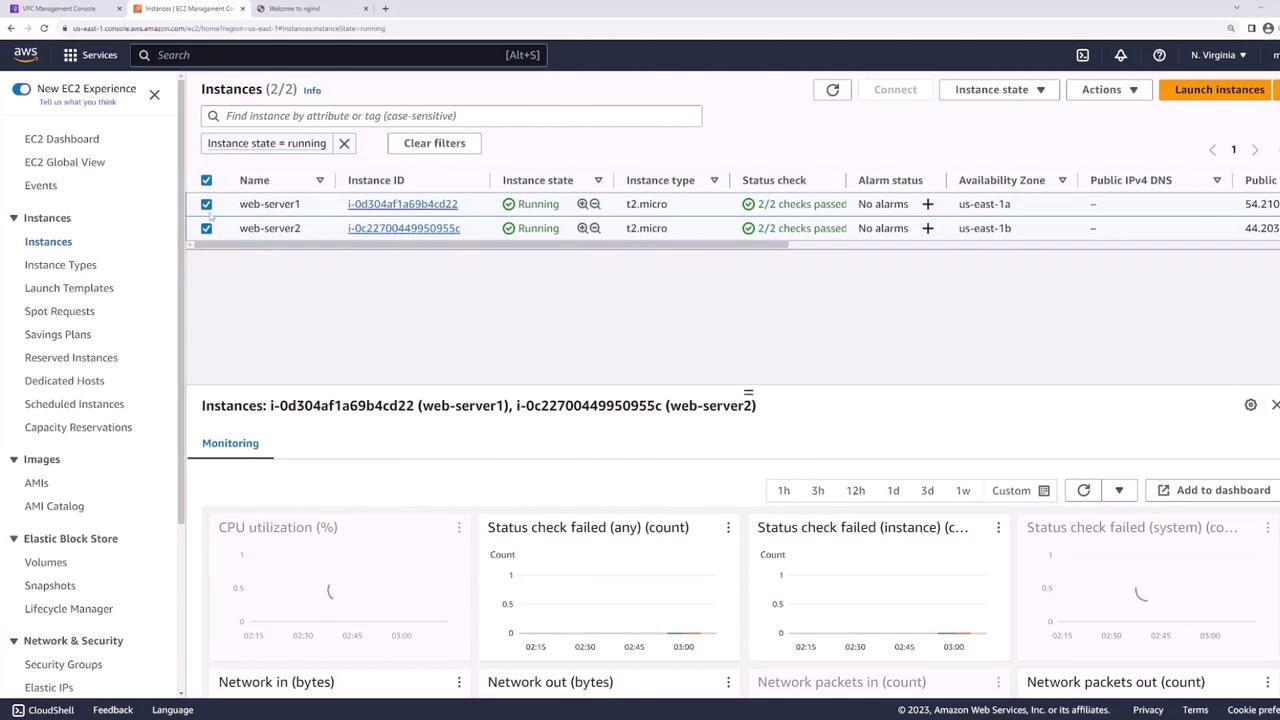
Our EC2 console shows both instances running:
<Frame>
  ![The image shows an AWS EC2 Management Console with two running instances, "web-server1" and "web-server2," both of type t2.micro. The details of "web-server2" are displayed, including its instance ID, public IP address, and status checks.](https://kodekloud.com/kk-media/image/upload/v1752863240/notes-assets/images/AWS-Networking-Fundamentals-Load-Balancers-Demo/aws-ec2-management-console-instances.jpg)
</Frame>

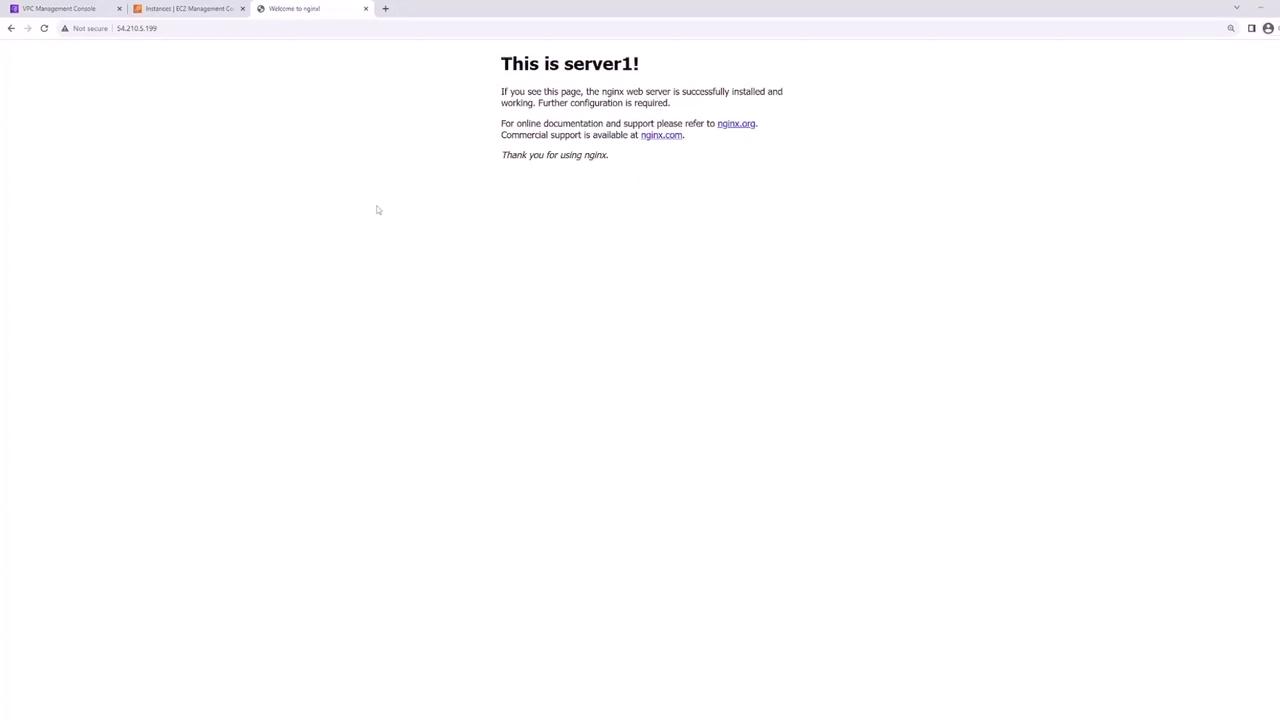
Visiting **web-server-1** confirms Nginx is up:
<Frame>
  ![The image shows a web page with a message indicating that "server1" is running, confirming the successful installation of the Nginx web server. It includes links for online documentation and support.](https://kodekloud.com/kk-media/image/upload/v1752863242/notes-assets/images/AWS-Networking-Fundamentals-Load-Balancers-Demo/nginx-server1-running-installation-confirmation.jpg)
</Frame>

And **web-server-2** is similarly healthy:
<Frame>
  ![The image shows an AWS EC2 Management Console with two running instances, "web-server1" and "web-server2," both of type t2.micro, with status checks passed and no alarms. Monitoring graphs for CPU utilization and network activity are displayed below.](https://kodekloud.com/kk-media/image/upload/v1752863243/notes-assets/images/AWS-Networking-Fundamentals-Load-Balancers-Demo/aws-ec2-management-console-instances-2.jpg)
</Frame>

### Network Layout

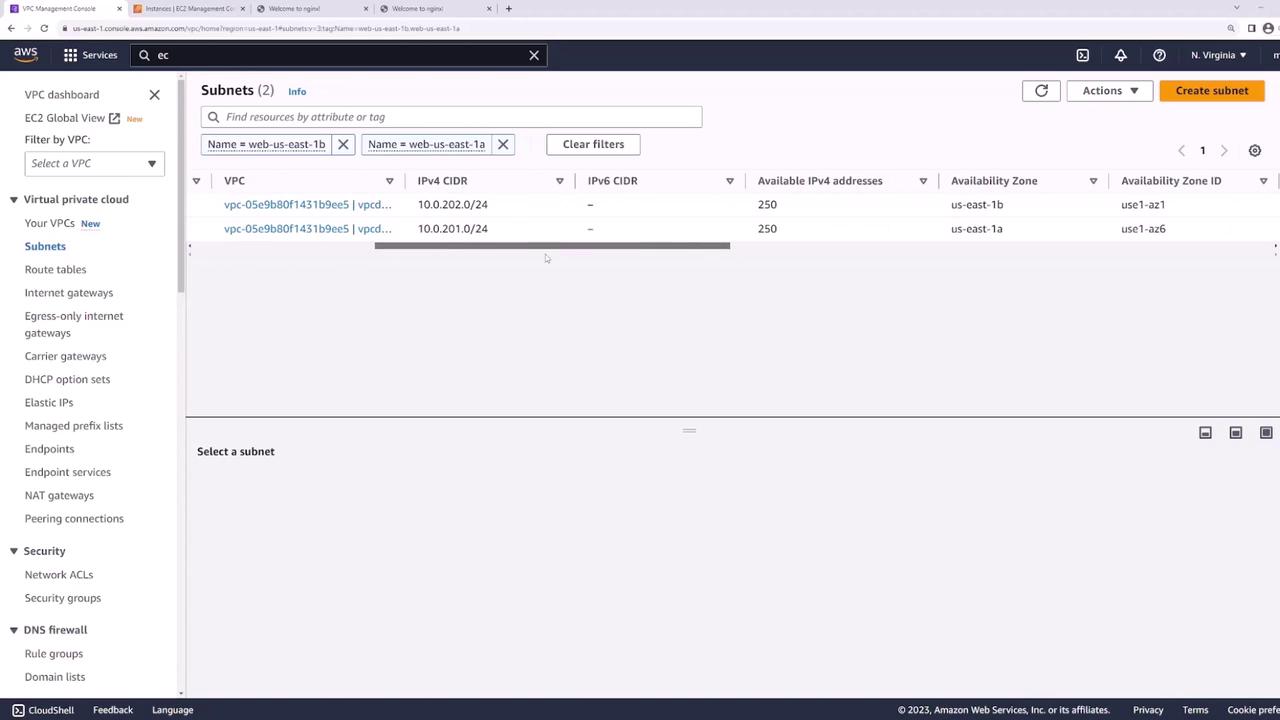
Your VPC’s public subnets:
<Frame>
  ![The image shows an AWS Management Console screen displaying the subnets section of a VPC dashboard, listing two subnets with their details such as VPC ID, IPv4 CIDR, and availability zones.](https://kodekloud.com/kk-media/image/upload/v1752863244/notes-assets/images/AWS-Networking-Fundamentals-Load-Balancers-Demo/aws-management-console-vpc-subnets-dashboard.jpg)
</Frame>

* **web-us-east-1a**: 10.0.201.0/24
* **web-us-east-1b**: 10.0.202.0/24

These subnets host your web servers and route traffic through the Internet Gateway.

***

## Step 1: Create Dedicated Subnets for the Load Balancer

Add two new public subnets—one in each AZ—for the ALB:

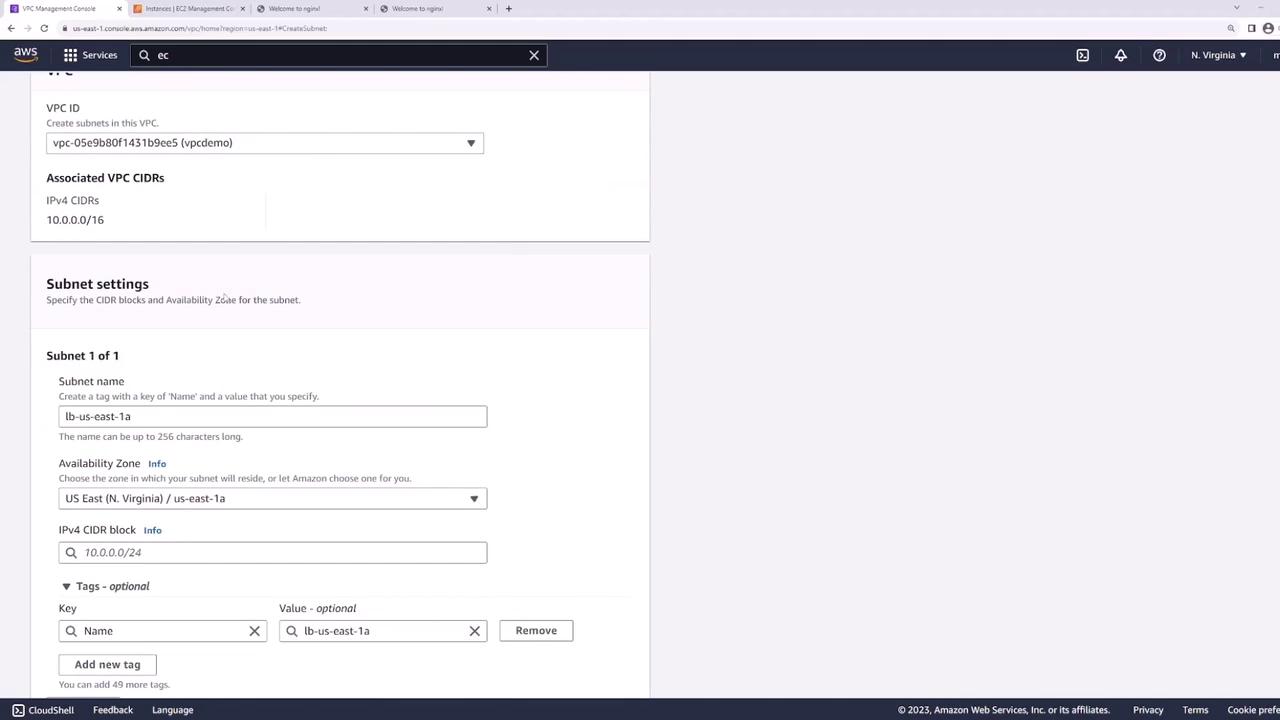
1. In the VPC console, click **Create Subnet**.
2. Configure:
   * **LB-us-east-1a**: us-east-1a, 10.0.101.0/24
   * **LB-us-east-1b**: us-east-1b, 10.0.102.0/24
<Frame>
  ![The image shows a screenshot of the AWS Management Console, specifically the VPC (Virtual Private Cloud) setup page, where subnet settings are being configured. It includes fields for VPC ID, associated CIDRs, subnet name, availability zone, and IPv4 CIDR block.](https://kodekloud.com/kk-media/image/upload/v1752863245/notes-assets/images/AWS-Networking-Fundamentals-Load-Balancers-Demo/aws-vpc-setup-screenshot-subnet-settings.jpg)
</Frame>

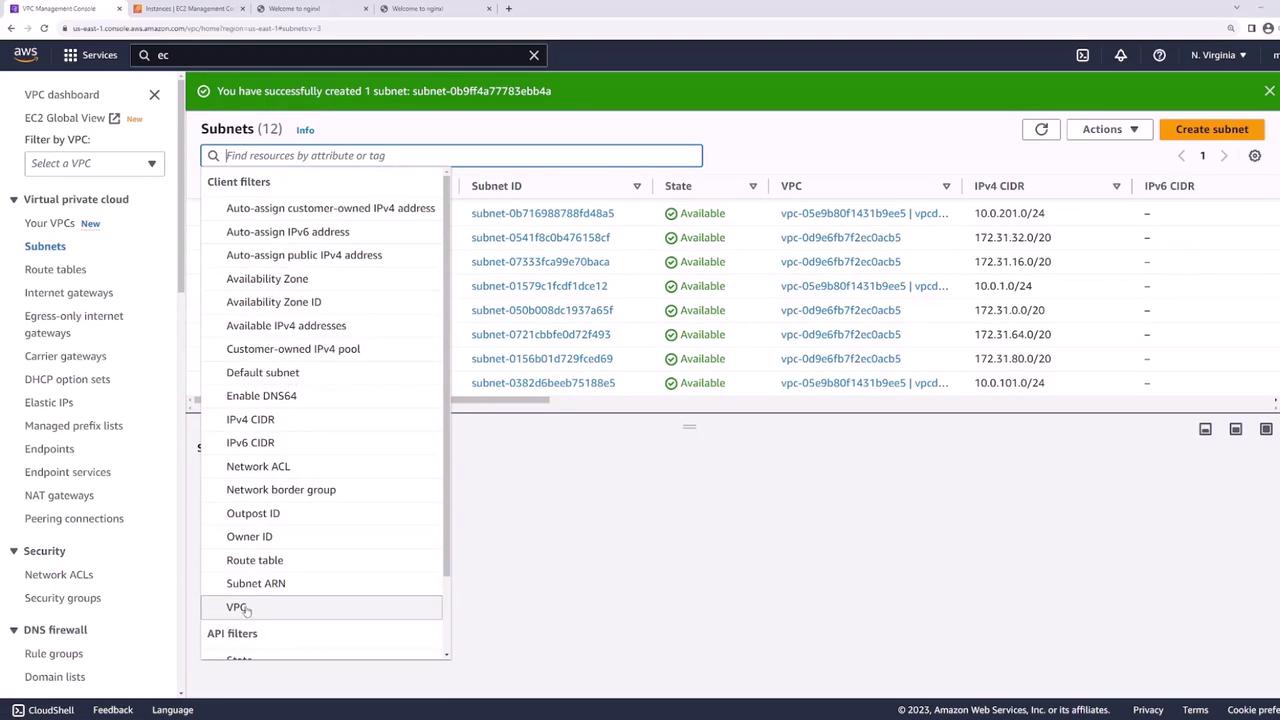
After creation, verify you have four public subnets:
<Frame>
  ![The image shows the AWS Management Console displaying the VPC dashboard with a list of subnets. A notification at the top indicates that a new subnet has been successfully created.](https://kodekloud.com/kk-media/image/upload/v1752863247/notes-assets/images/AWS-Networking-Fundamentals-Load-Balancers-Demo/aws-management-console-vpc-dashboard-subnets.jpg)
</Frame>

***

## Step 2: Verify Public Subnet Configuration

<Callout icon="lightbulb" color="#1CB2FE">
  Confirm each new subnet’s route table includes a default route (`0.0.0.0/0`) to the Internet Gateway—this makes the ALB internet-facing.
</Callout>

Select **LB-us-east-1a** (and **LB-us-east-1b**) to inspect its Route Table:
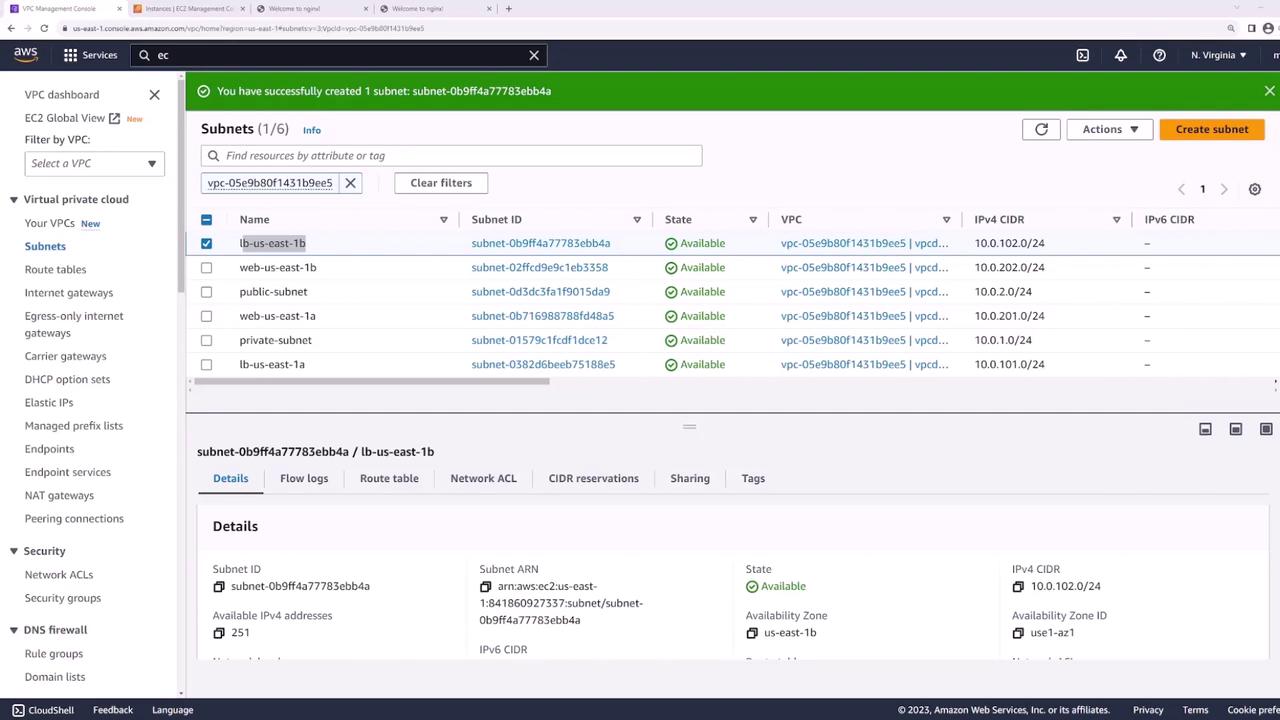
<Frame>
  ![The image shows an AWS VPC Management Console displaying a list of subnets, with details of a selected subnet including its ID, state, and availability zone.](https://kodekloud.com/kk-media/image/upload/v1752863248/notes-assets/images/AWS-Networking-Fundamentals-Load-Balancers-Demo/aws-vpc-management-console-subnets-details.jpg)
</Frame>

***

## Step 3: Create the Application Load Balancer

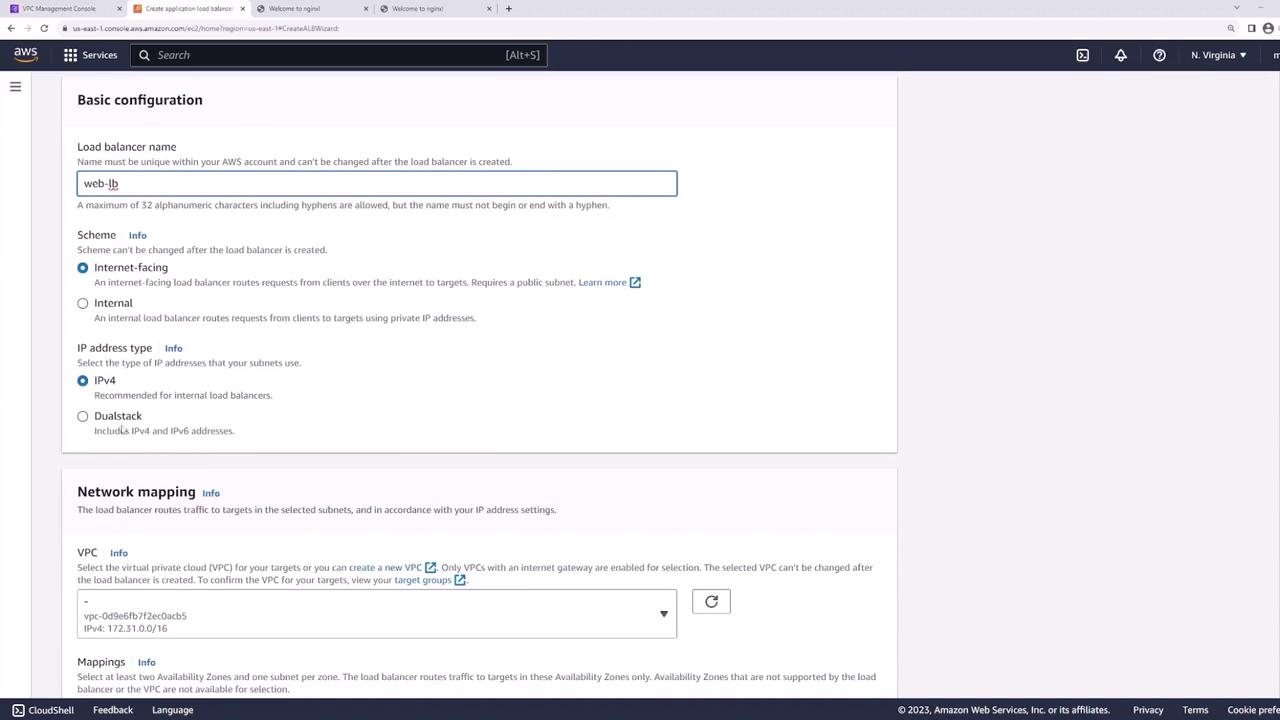
1. In the EC2 console, go to **Load Balancers** → **Create Load Balancer** → **Application Load Balancer**.
2. Set:
   * **Name**: web-lb
   * **Scheme**: Internet-facing
   * **IP address type**: IPv4
   * **VPC**: demo
3. Select subnets **LB-us-east-1a** and **LB-us-east-1b**.
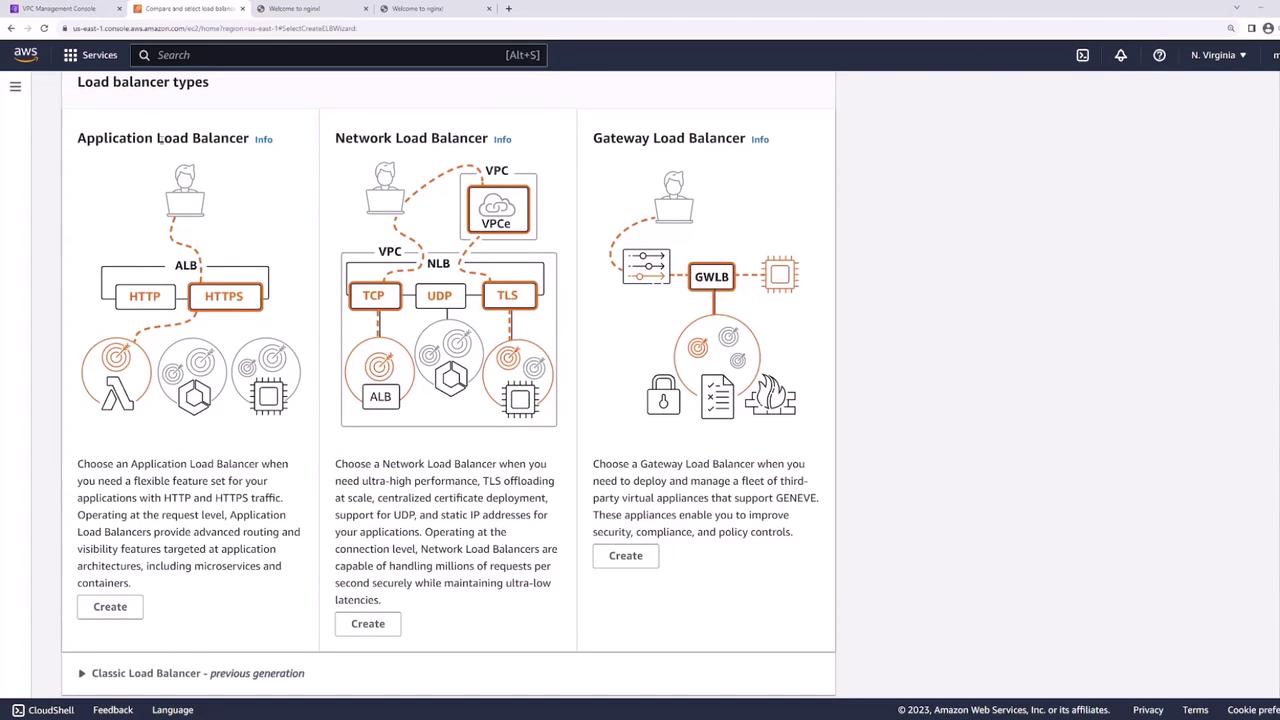
<Frame>
  ![The image shows a comparison of three types of AWS load balancers: Application Load Balancer, Network Load Balancer, and Gateway Load Balancer, each with a brief description and a "Create" button.](https://kodekloud.com/kk-media/image/upload/v1752863249/notes-assets/images/AWS-Networking-Fundamentals-Load-Balancers-Demo/aws-load-balancer-comparison-diagram.jpg)
</Frame>

Configure the ALB network mapping:

<Frame>
  ![The image shows a configuration page for creating an application load balancer in the AWS Management Console, with options for naming, scheme selection, IP address type, and network mapping.](https://kodekloud.com/kk-media/image/upload/v1752863250/notes-assets/images/AWS-Networking-Fundamentals-Load-Balancers-Demo/aws-application-load-balancer-configuration.jpg)
</Frame>

Attach a security group allowing HTTP (80) and HTTPS (443):

<Frame>
  ![The image shows a screenshot of the AWS Management Console, specifically the section for configuring security groups for a load balancer. It includes options to select or create security groups and displays a dropdown list of available groups.](https://kodekloud.com/kk-media/image/upload/v1752863251/notes-assets/images/AWS-Networking-Fundamentals-Load-Balancers-Demo/aws-management-console-security-groups-load-balancer.jpg)
</Frame>

***

## Step 4: Configure Listener and Target Group

### Listener

Add an HTTP listener on port 80:
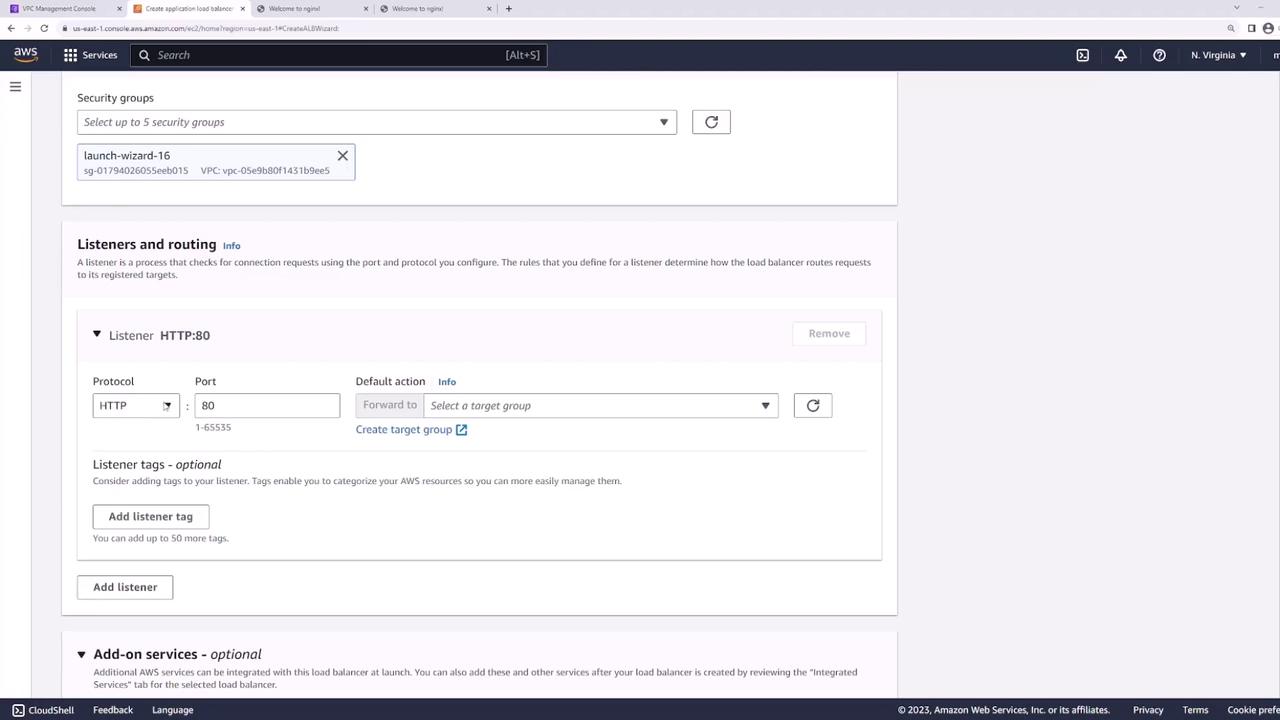
<Frame>
  ![The image shows an AWS Management Console interface for configuring a load balancer, including settings for security groups and listener routing with HTTP protocol on port 80.](https://kodekloud.com/kk-media/image/upload/v1752863252/notes-assets/images/AWS-Networking-Fundamentals-Load-Balancers-Demo/aws-management-console-load-balancer-configuration.jpg)
</Frame>

### Target Group

1. Create a new target group:
   * **Target type**: Instances
   * **Name**: web-targets
   * **Protocol**: HTTP
   * **Port**: 80
   * **VPC**: demo
   * **Health check path**: `/`
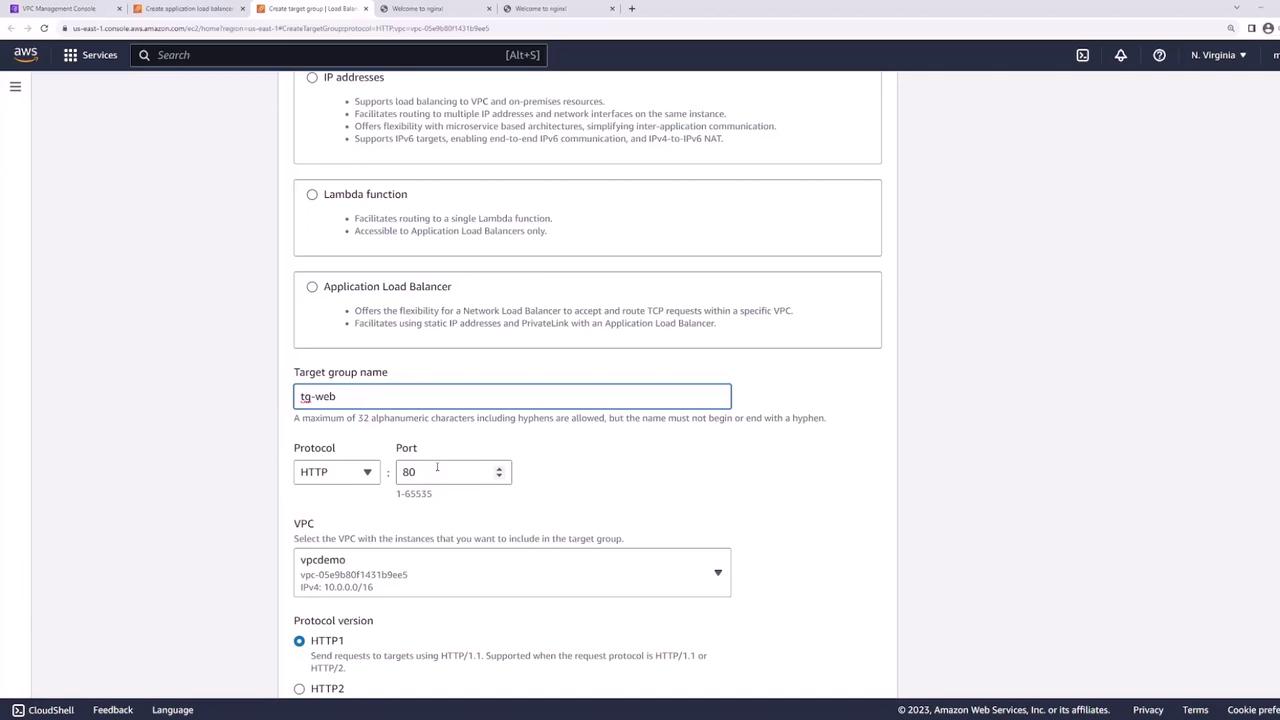
<Frame>
  ![The image shows a screenshot of the AWS Management Console, specifically the section for creating a target group for a load balancer. It includes options for setting the target group name, protocol, port, VPC, and protocol version.](https://kodekloud.com/kk-media/image/upload/v1752863253/notes-assets/images/AWS-Networking-Fundamentals-Load-Balancers-Demo/aws-management-console-target-group-creation.jpg)
</Frame>

2. Register **web-server-1** and **web-server-2** on port 80:
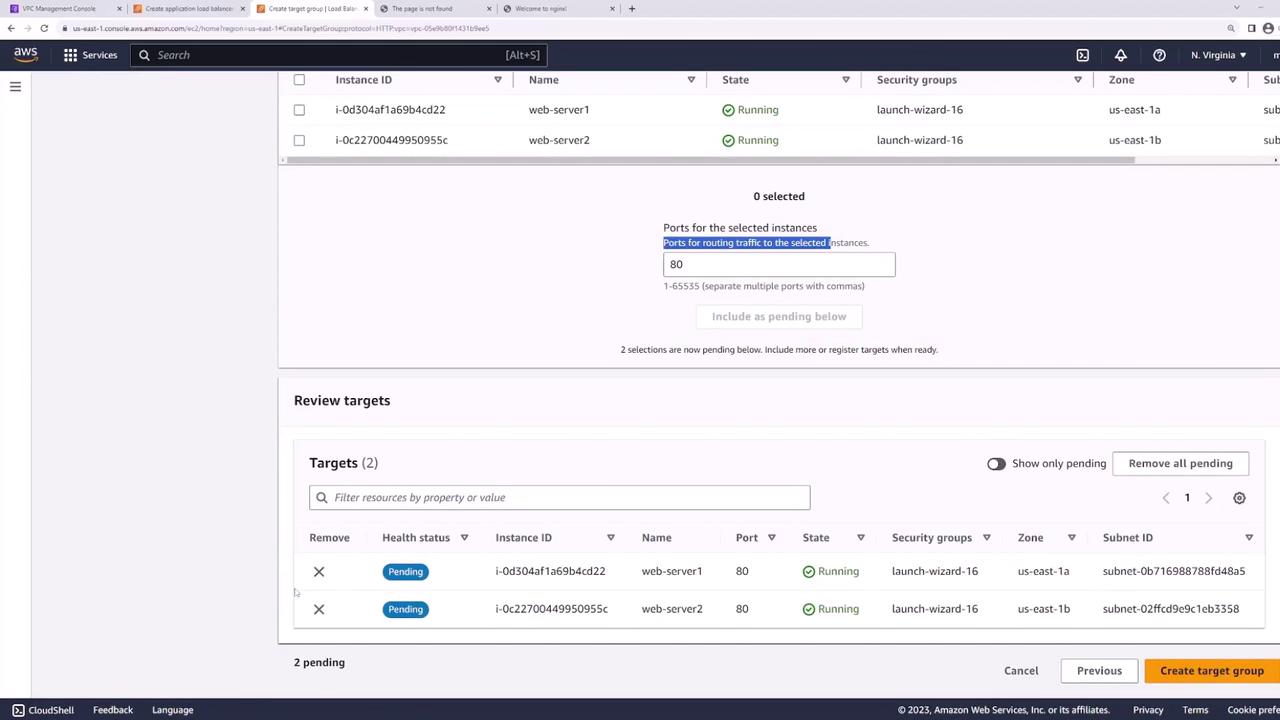
<Frame>
  ![The image shows an AWS Management Console interface, specifically the section for creating a target group for load balancing, with two instances listed as targets.](https://kodekloud.com/kk-media/image/upload/v1752863255/notes-assets/images/AWS-Networking-Fundamentals-Load-Balancers-Demo/aws-management-console-target-group-load-balancing.jpg)
</Frame>

3. Back in the ALB wizard, set **web-targets** as the default action for the HTTP listener:

<Frame>
  ![The image shows an AWS Management Console interface for configuring listeners and routing for a load balancer, with options for HTTP and HTTPS protocols. It includes settings for ports, default actions, and listener tags.](https://kodekloud.com/kk-media/image/upload/v1752863256/notes-assets/images/AWS-Networking-Fundamentals-Load-Balancers-Demo/aws-management-console-load-balancer-listeners.jpg)
</Frame>

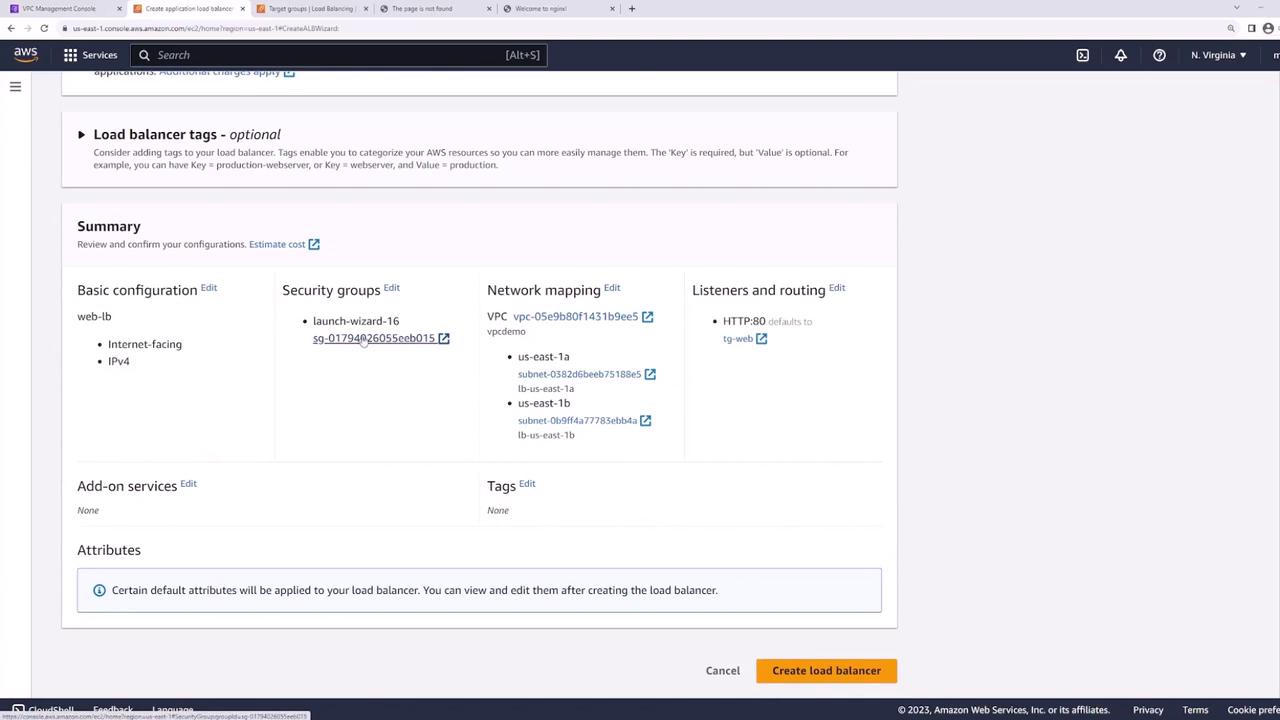
4. Review and create the ALB:

<Frame>
  ![The image shows an AWS Management Console screen for configuring a load balancer, displaying sections for basic configuration, security groups, network mapping, and listeners and routing.](https://kodekloud.com/kk-media/image/upload/v1752863257/notes-assets/images/AWS-Networking-Fundamentals-Load-Balancers-Demo/aws-management-console-load-balancer-config.jpg)
</Frame>

***

## Step 5: Test the Load Balancer

Wait until the ALB status is **active**, then copy its DNS name:

<Frame>
  ![The image shows an AWS EC2 Management Console displaying details of a load balancer named "web-lb," which is active and internet-facing, with information about its VPC, availability zones, and other settings.](https://kodekloud.com/kk-media/image/upload/v1752863258/notes-assets/images/AWS-Networking-Fundamentals-Load-Balancers-Demo/aws-ec2-load-balancer-web-lb.jpg)
</Frame>

From your terminal or browser:

```bash theme={null}
curl http://<load-balancer-dns-name>
```

Refreshing the request should alternate responses between **server1** and **server2**, confirming traffic distribution.

***

## Best Practice: Secure Your Web Servers

<Callout icon="triangle-alert" color="#FF6B6B">
  Currently, both web servers have public IPs:
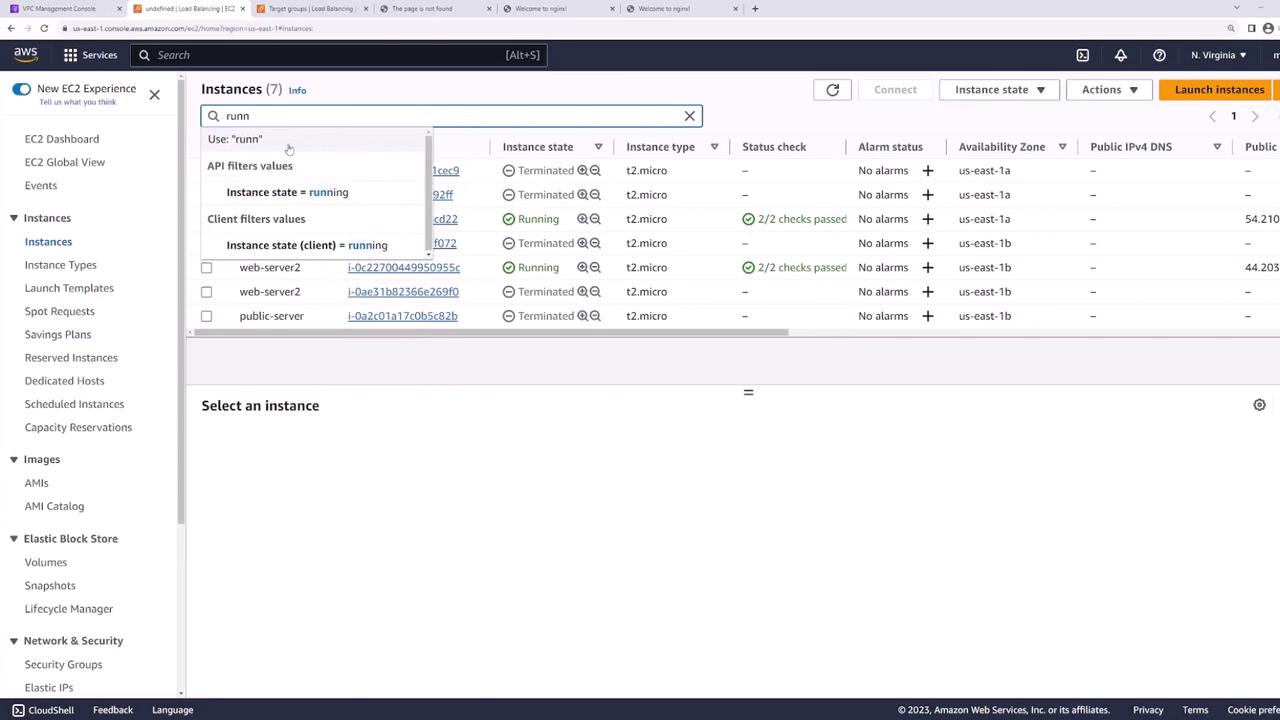
  <Frame>
    ![The image shows an AWS EC2 Management Console with a list of instances, some running and some terminated. The user is searching for instances with the state "running."](https://kodekloud.com/kk-media/image/upload/v1752863259/notes-assets/images/AWS-Networking-Fundamentals-Load-Balancers-Demo/aws-ec2-management-console-running-instances.jpg)
  </Frame>

  To harden your architecture:

  1. Move web servers into private subnets.
  2. Keep the ALB in public subnets.
  3. Configure the web servers’ security group to accept traffic only from the ALB’s security group.
</Callout>

This ensures all external requests pass through the ALB, improving security and isolation.

***

## Links and References

* [AWS Documentation: Application Load Balancers](https://docs.aws.amazon.com/elasticloadbalancing/latest/application/introduction.html)
* [Nginx Official Documentation](https://nginx.org/en/docs/)
* [AWS VPC User Guide](https://docs.aws.amazon.com/vpc/latest/userguide/)

<CardGroup>
  <Card title="Watch Video" icon="video" cta="Learn more" href="https://learn.kodekloud.com/user/courses/aws-networking-fundamentals/module/406e4440-01a6-45f6-ab45-e14485d333c3/lesson/b9eb7f48-a153-45b4-8155-fd65a8c8f0b3" />
</CardGroup>