> ## Documentation Index
> Fetch the complete documentation index at: https://notes.kodekloud.com/llms.txt
> Use this file to discover all available pages before exploring further.
# NAT Gateways VPC Demo
> This walkthrough explains how to configure an AWS NAT Gateway for internet access in a private subnet while blocking unsolicited inbound connections.
In this walkthrough, you’ll learn how to configure an AWS NAT Gateway to enable internet access for EC2 instances in a private subnet—while preventing unsolicited inbound connections from the internet. By the end, only instances that initiate outbound requests will receive responses.
## 1. Create a New VPC
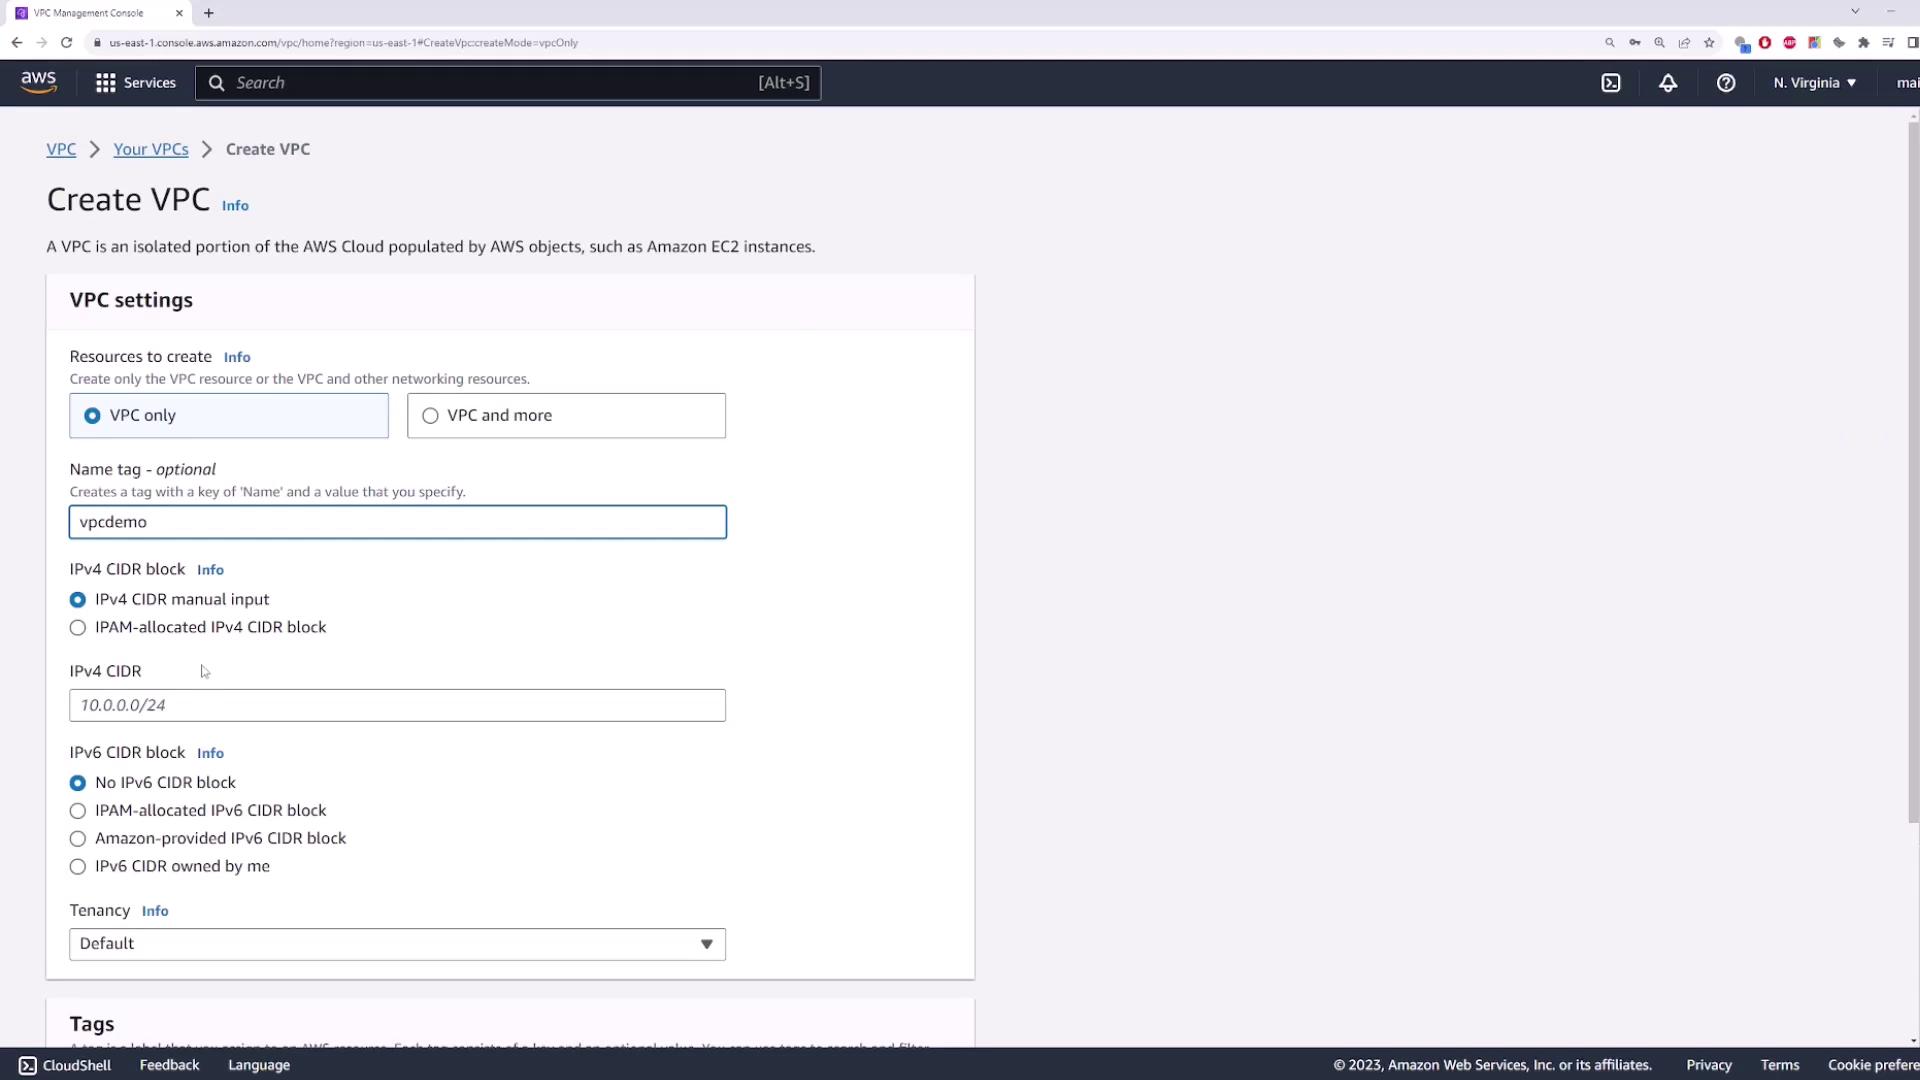
1. Open the **VPC** console and select **Create VPC**.
2. Enter a **Name tag** (e.g., `demo-vpc`) and set the **IPv4 CIDR block** to `10.0.0.0/16`.
3. Leave IPv6 settings disabled and click **Create**.
## 2. Create a Private Subnet
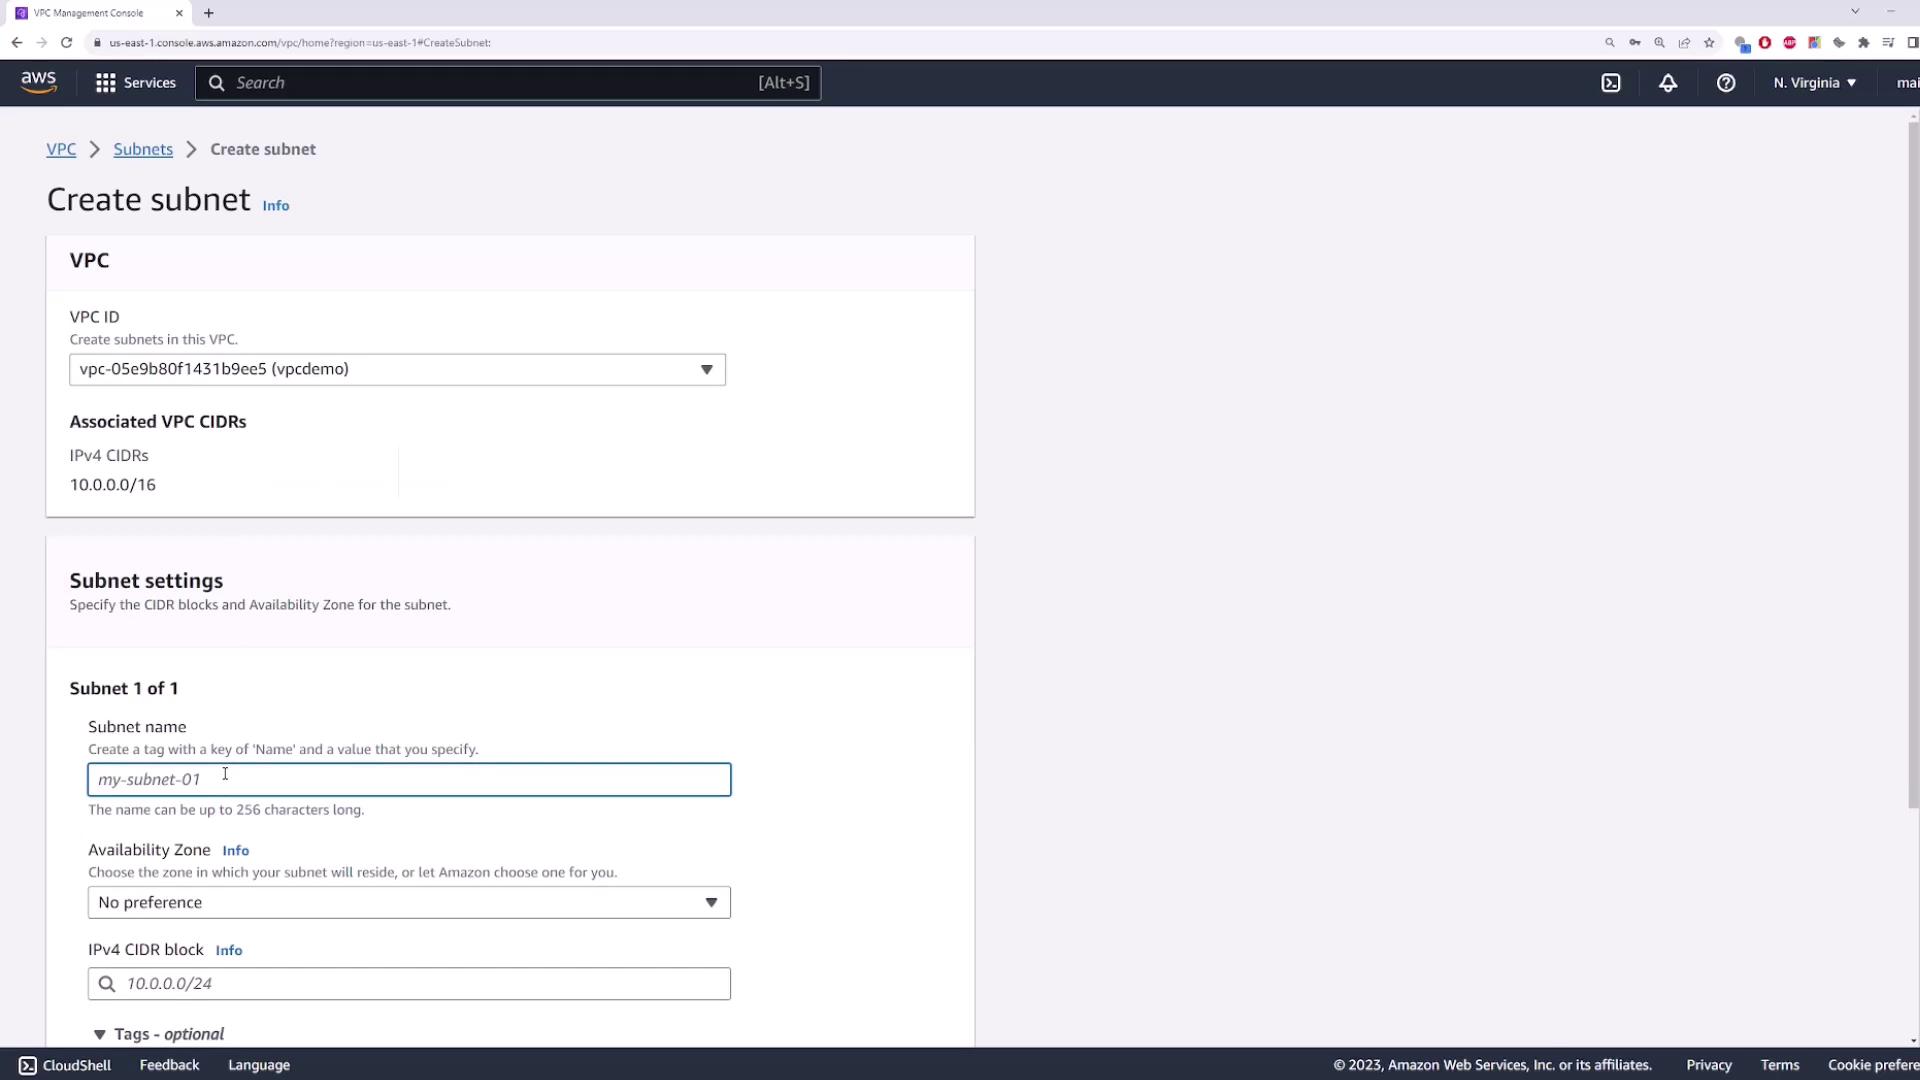
This subnet will host your EC2 instance without a public IP.
* **Name**: `private-subnet`
* **Availability Zone**: e.g., `us-east-1b`
* **IPv4 CIDR block**: `10.0.1.0/24`
## 3. Launch an EC2 Instance in the Private Subnet
1. Navigate to the **EC2** console → **Launch Instance**.
2. Select the **Amazon Linux 2 AMI** (or your preferred AMI).
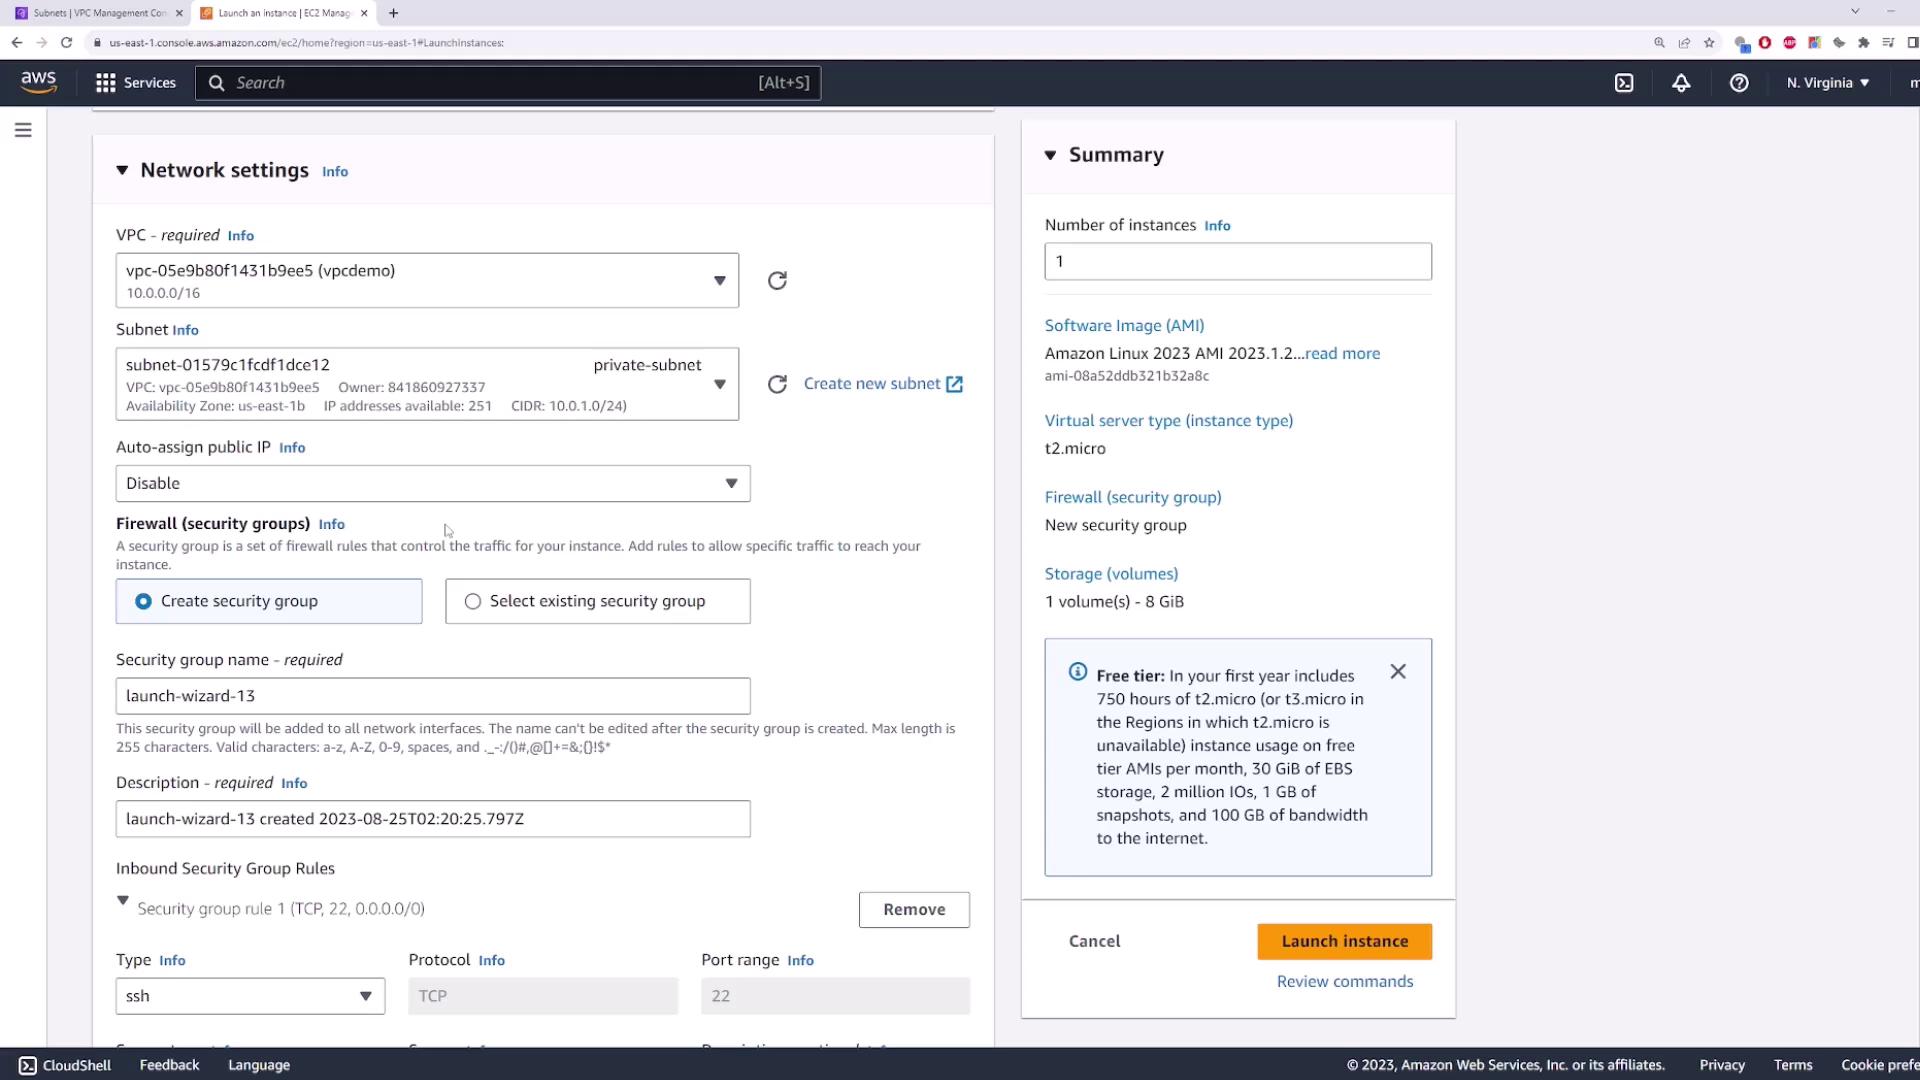
3. Under **Network settings**:
* Choose your **demo-vpc** and the **private-subnet**.
* Disable **Auto-assign Public IP**.
4. Configure or select a security group (default settings are fine).
5. Review and **Launch**. Name it `private-server`.
Because there’s no public IP, the instance cannot be reached directly from the internet.
## 4. Create and Attach an Internet Gateway
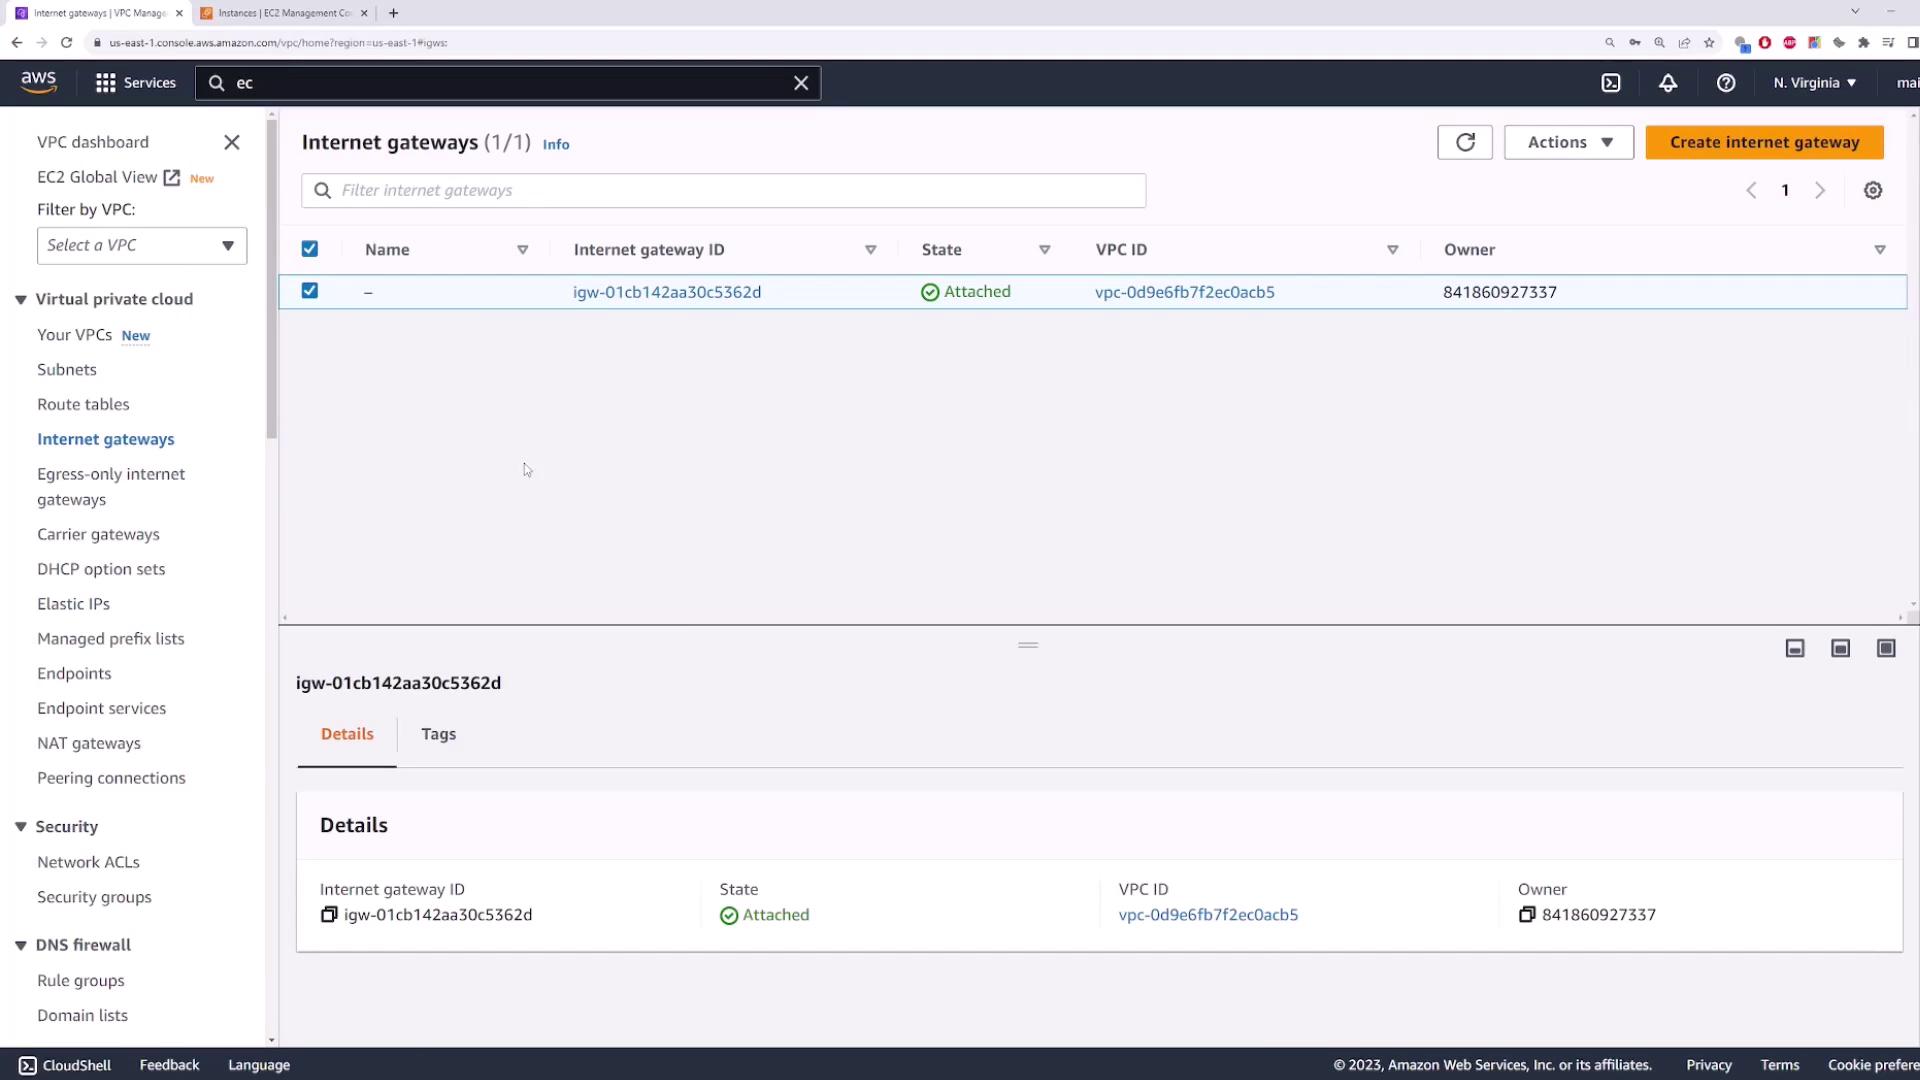
An Internet Gateway (IGW) is required to give public subnets internet access.
1. In the VPC console, go to **Internet Gateways** → **Create Internet Gateway**.
2. Name it `my-igw` and click **Create**.
3. Select the new IGW → **Actions** → **Attach to VPC** → choose `demo-vpc`.
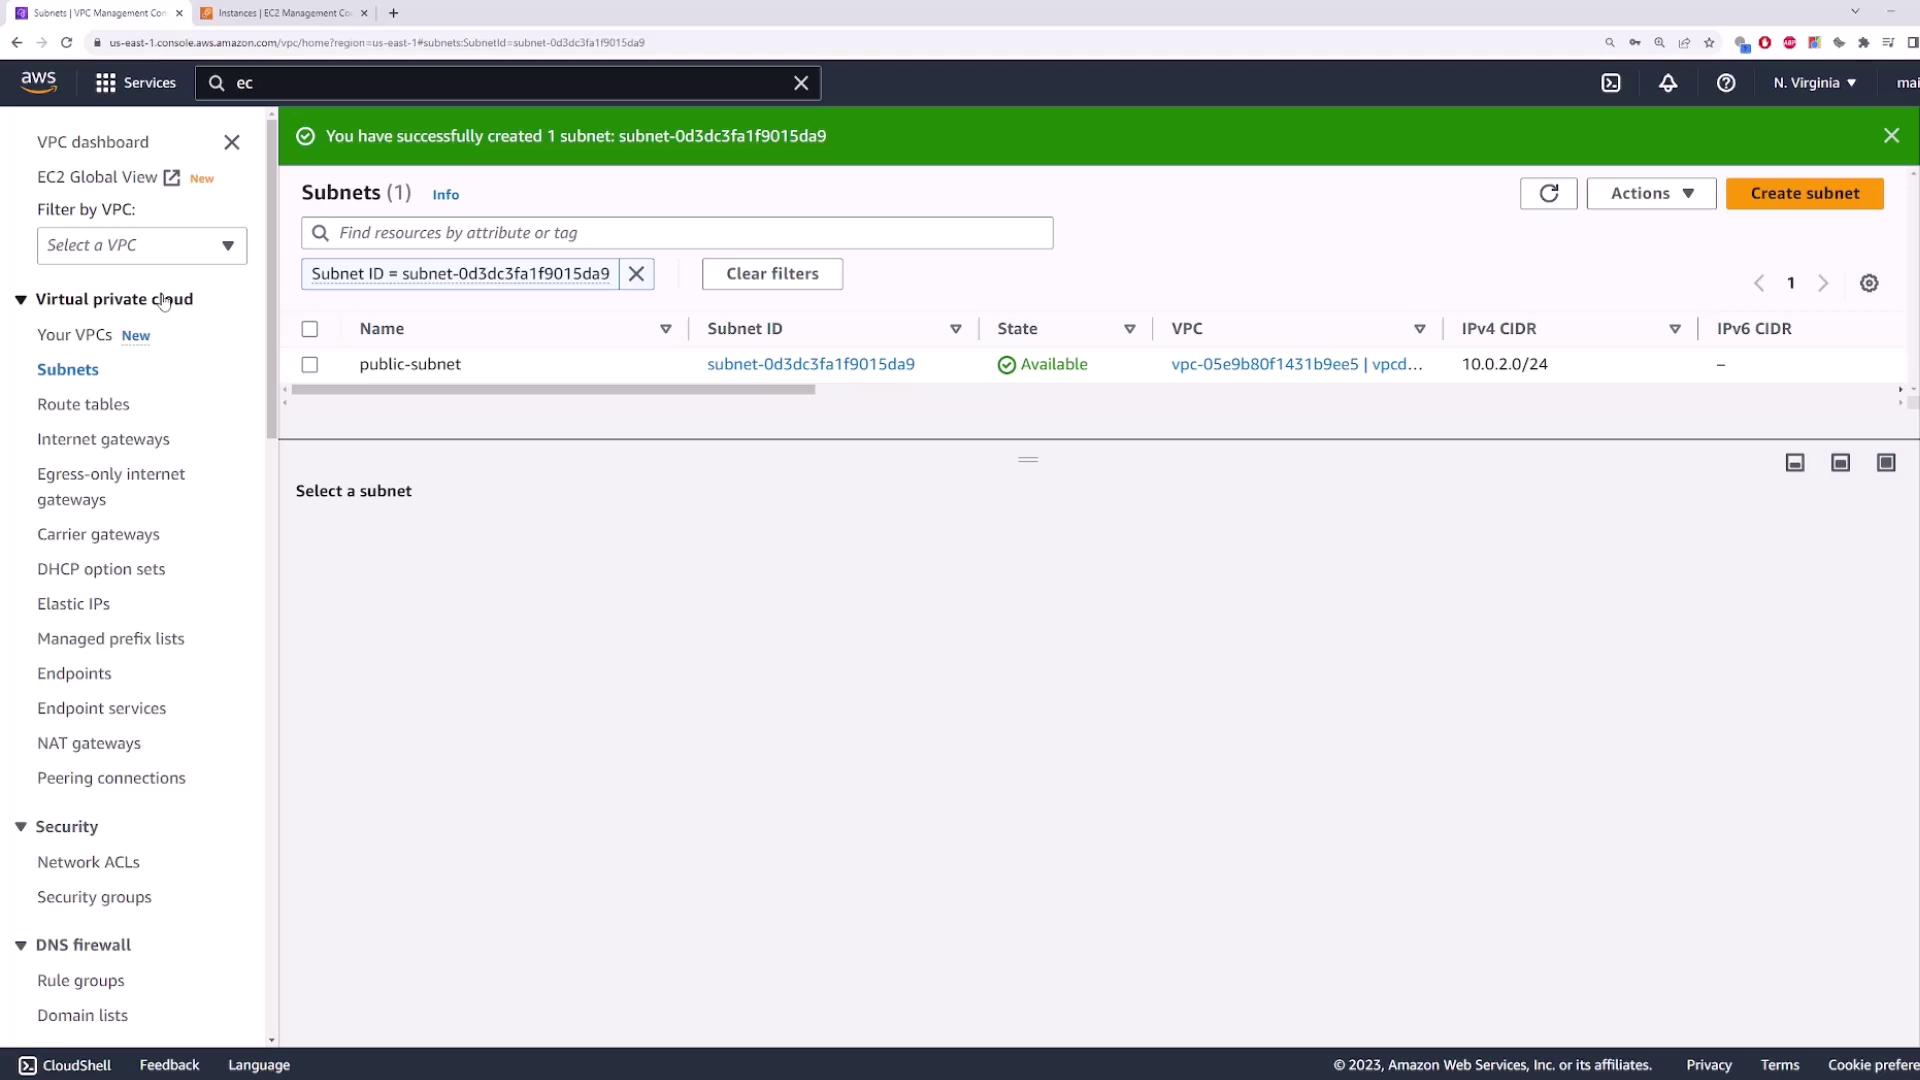
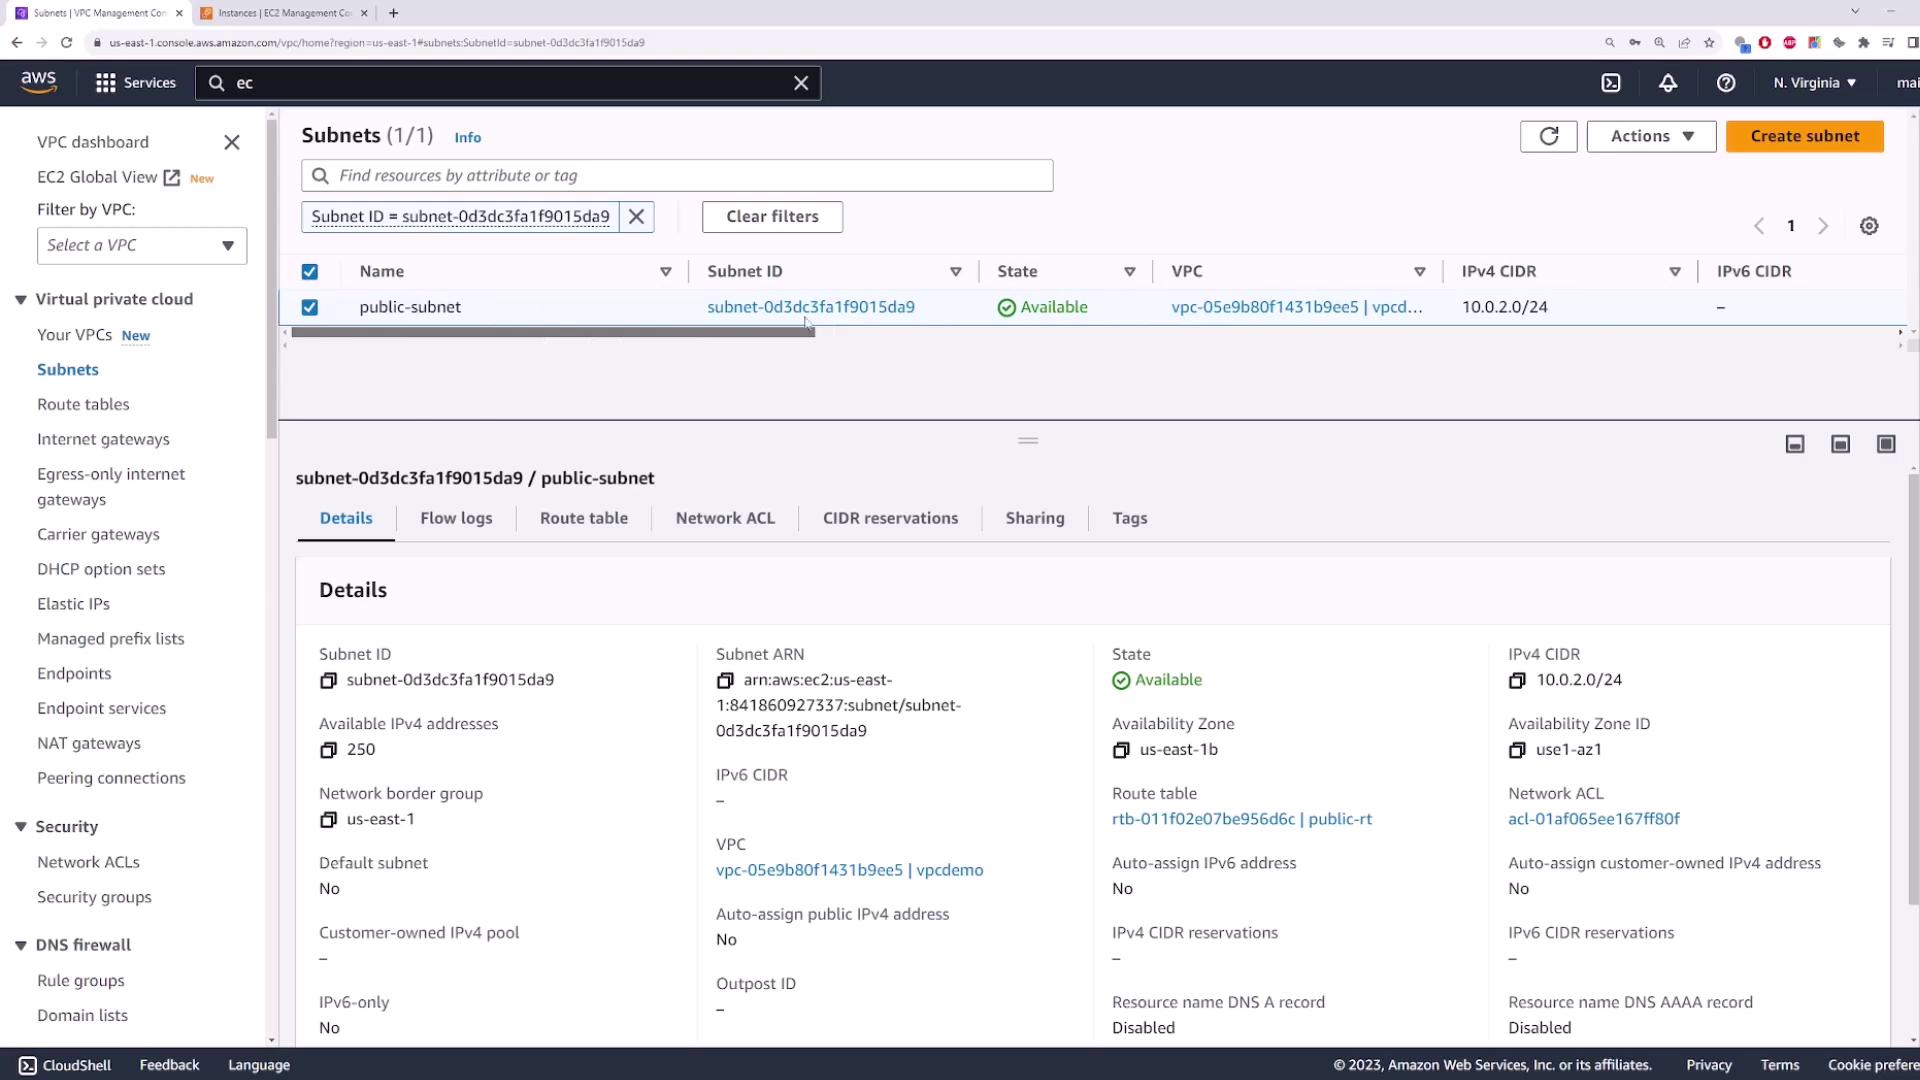
## 5. Create a Public Subnet
This subnet will host the NAT Gateway and must have a route to the IGW.
* **Name**: `public-subnet`
* **Availability Zone**: same or different (e.g., `us-east-1b`)
* **IPv4 CIDR block**: `10.0.2.0/24`
## 6. Configure Route Tables
You need two route tables: one public and one private.
Separate route tables help isolate internet-facing and internal traffic.
| Route Table Name | Associated Subnet | Default Route Target |
| ------------------- | ----------------- | --------------------------- |
| public-route-table | public-subnet | Internet Gateway (`my-igw`) |
| private-route-table | private-subnet | (added after NAT creation) |
### Steps
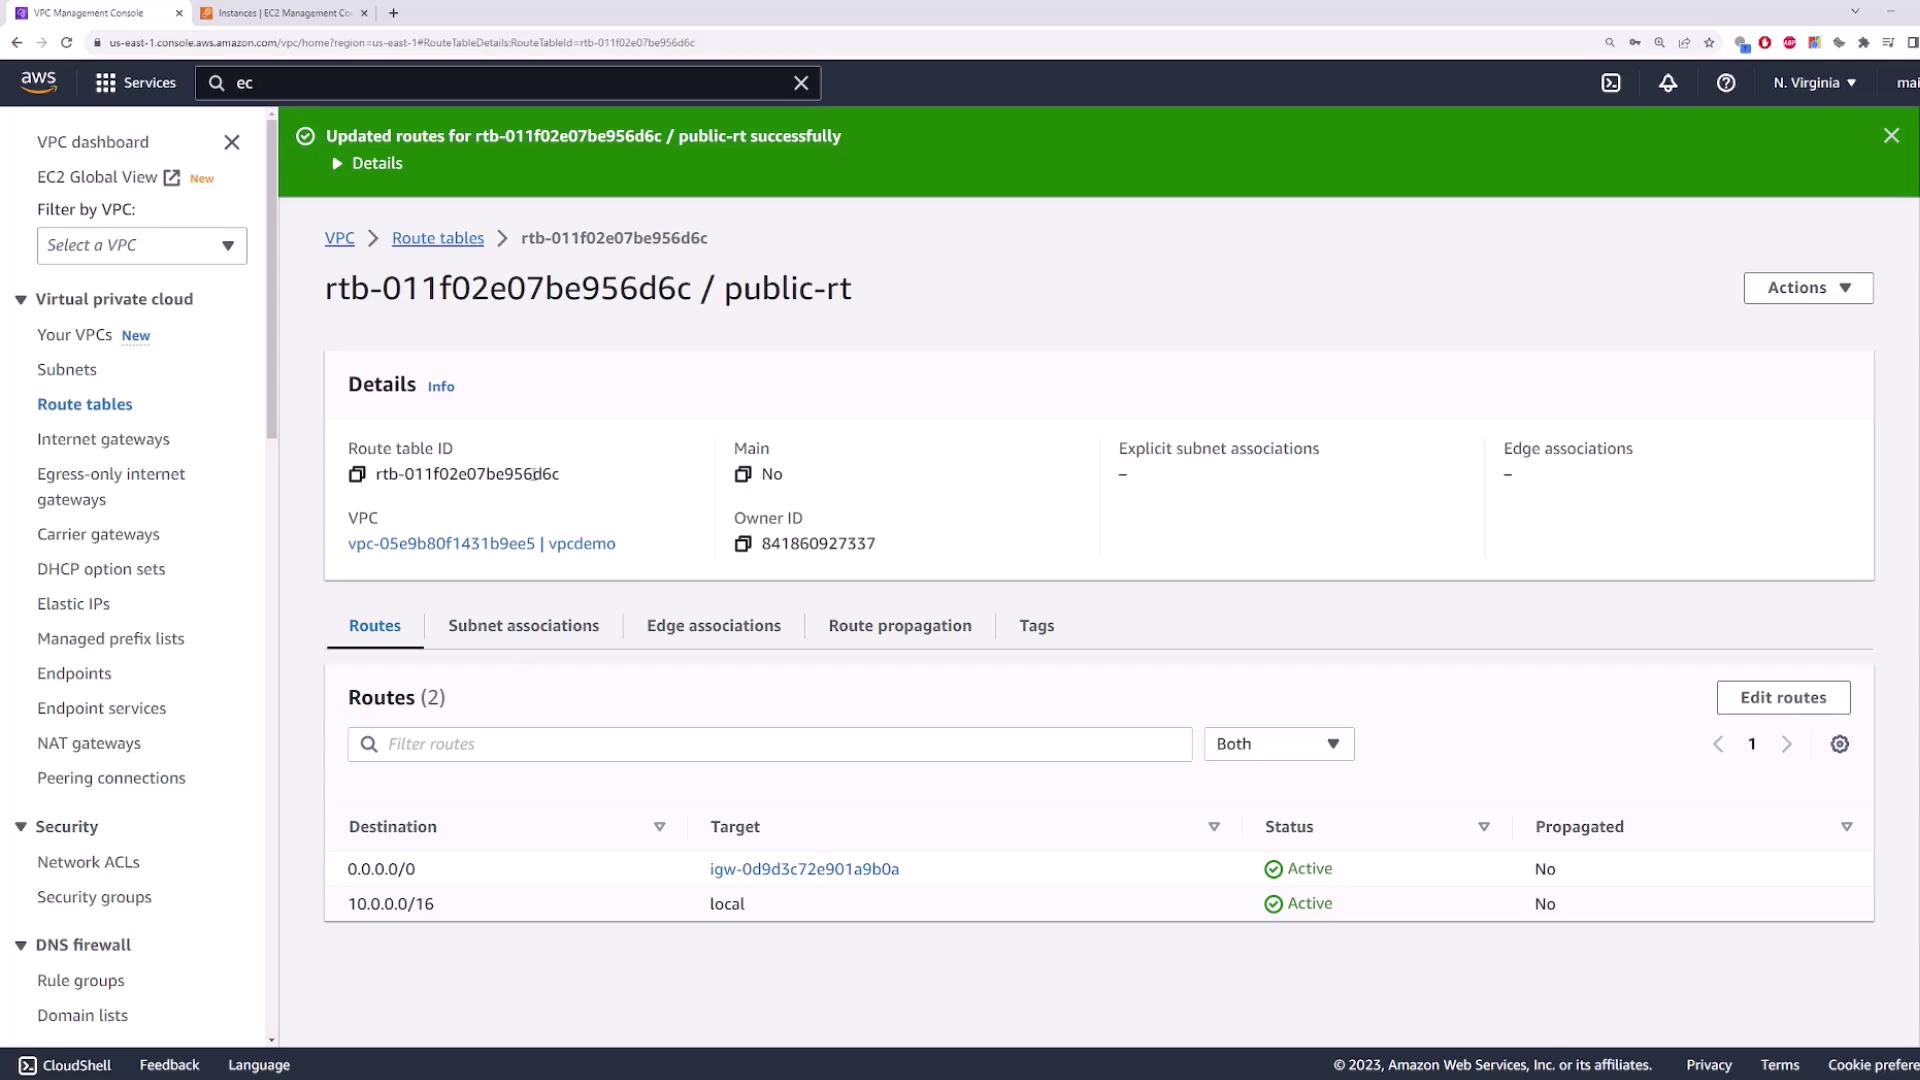
1. **Create** `public-route-table` → select `demo-vpc` → **Create**.
2. **Edit routes** → **Add route** `0.0.0.0/0` → Target: **Internet Gateway** → choose `my-igw` → **Save**.
3. **Associate** with `public-subnet`.
4. **Create** `private-route-table` → select `demo-vpc` → **Create**.
5. **Associate** with `private-subnet` (no default route yet).
## 7. Deploy a NAT Gateway
In a public subnet, NAT Gateways allow private instances to access the internet securely.
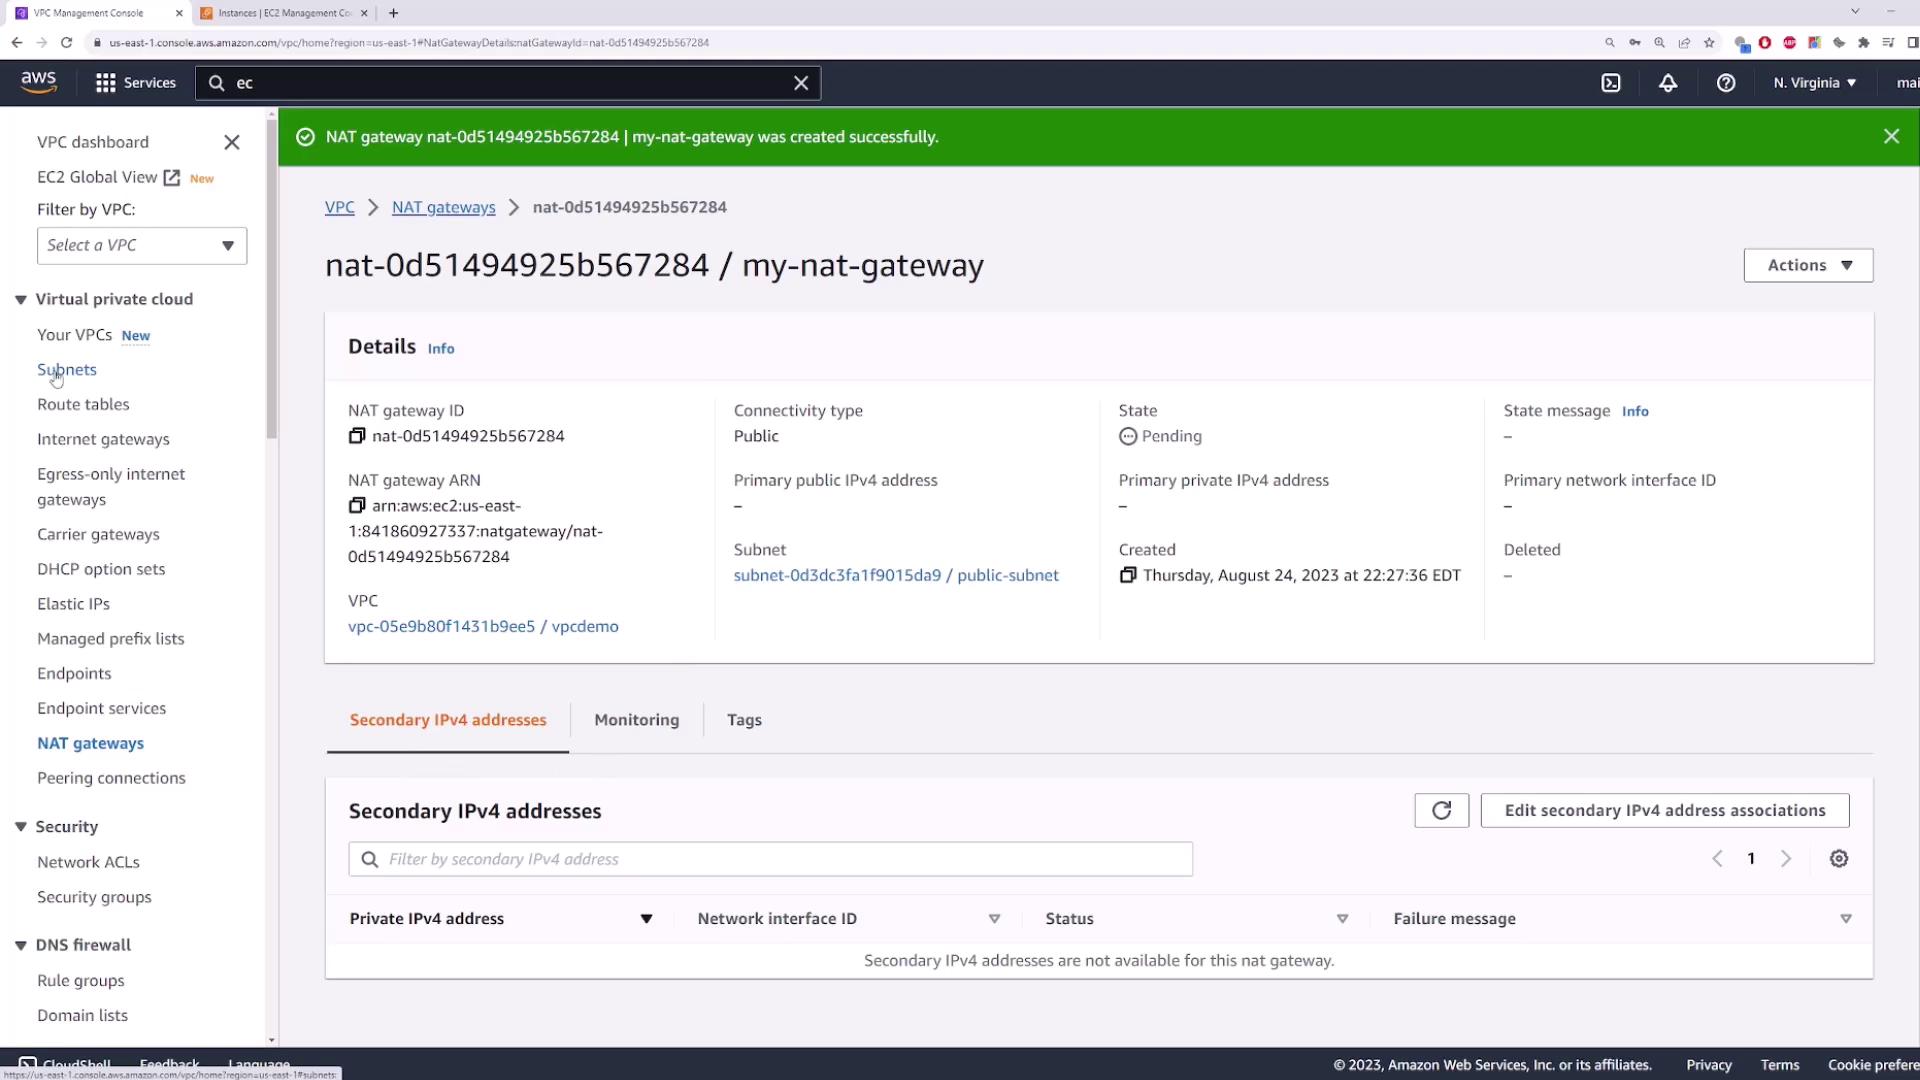
1. Go to **NAT Gateways** → **Create NAT Gateway**.
2. Name it `my-nat-gateway`.
3. Subnet: **public-subnet**.
4. Allocate a new **Elastic IP**.
5. Click **Create NAT Gateway**.
You can also use the AWS CLI:
```bash theme={null}
aws ec2 create-nat-gateway \
--subnet-id \
--allocation-id
```
## 8. Update the Private Route Table
After the NAT Gateway becomes **available**:
1. Open `private-route-table` → **Edit routes**.
2. **Add route** `0.0.0.0/0` → Target: **NAT Gateway** → select `my-nat-gateway`.
3. **Save**.
Now, instances in `private-subnet` will send outbound traffic through the NAT Gateway while remaining inaccessible from the internet.
## 9. Plan for High Availability
NAT Gateways are zonal resources. To avoid a single point of failure:
* Deploy one NAT Gateway per Availability Zone.
* Update each private route table to point to the NAT Gateway in its own AZ.
If the AZ with your NAT Gateway goes down, all instances using it lose internet access.
## Links and References
* [Amazon VPC Documentation](https://docs.aws.amazon.com/vpc/latest/userguide/what-is-amazon-vpc.html)
* [AWS NAT Gateway](https://docs.aws.amazon.com/vpc/latest/userguide/vpc-nat-gateway.html)
* [AWS CLI Command Reference](https://docs.aws.amazon.com/cli/latest/index.html)