> ## Documentation Index
> Fetch the complete documentation index at: https://notes.kodekloud.com/llms.txt
> Use this file to discover all available pages before exploring further.
# Route 53 Demo
> Learn to register a domain with AWS Route 53, explore hosted zones, and create an A record for web server connection.
In this guide, you’ll learn how to register a domain name with AWS Route 53, explore your hosted zone, and create an A record to point your domain to a web server. By the end, you’ll understand how to leverage Route 53’s global DNS network for reliable name resolution.
## Prerequisites
* An active AWS account with Route 53 permissions
* A public IPv4 address for your web server
* Basic knowledge of DNS concepts
## 1. Register a Domain Name
1. Sign in to the AWS Management Console and navigate to **Route 53**.
2. In the left pane, select **Registered domains** and click **Register domains**.
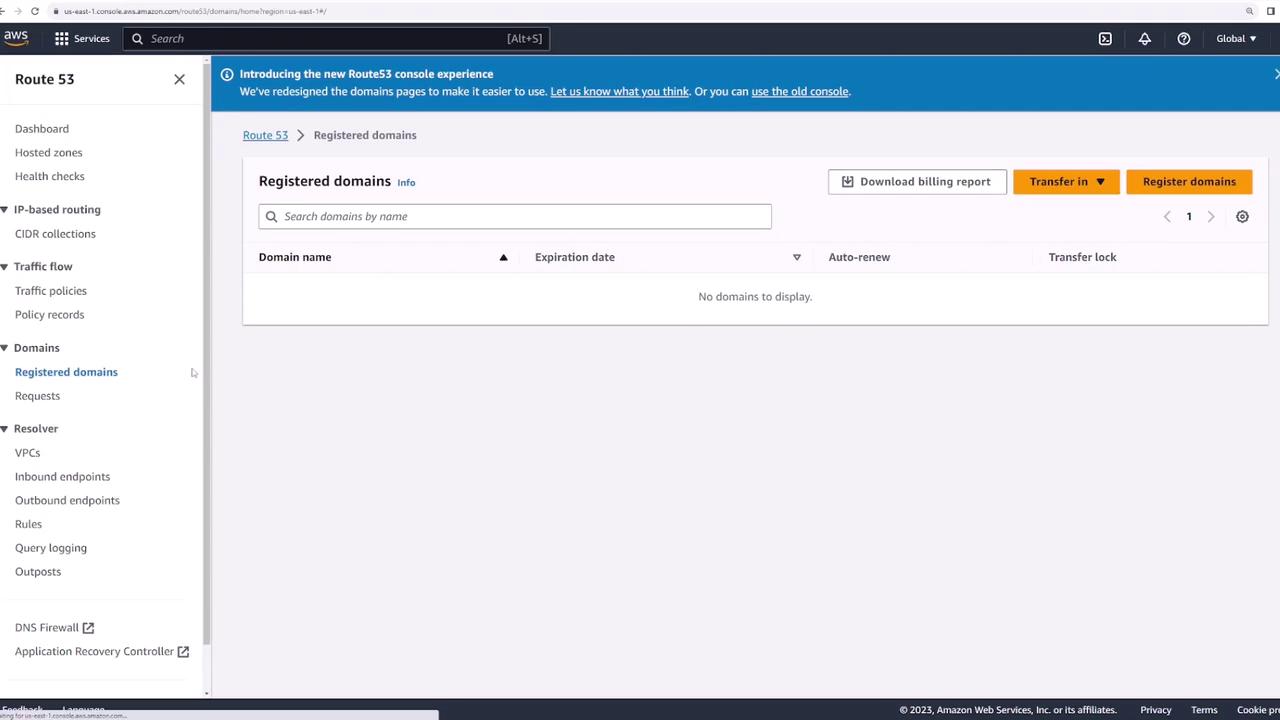
3. Enter your desired domain (e.g., `kodeklouddemo123.com`) and click **Check** to verify availability.
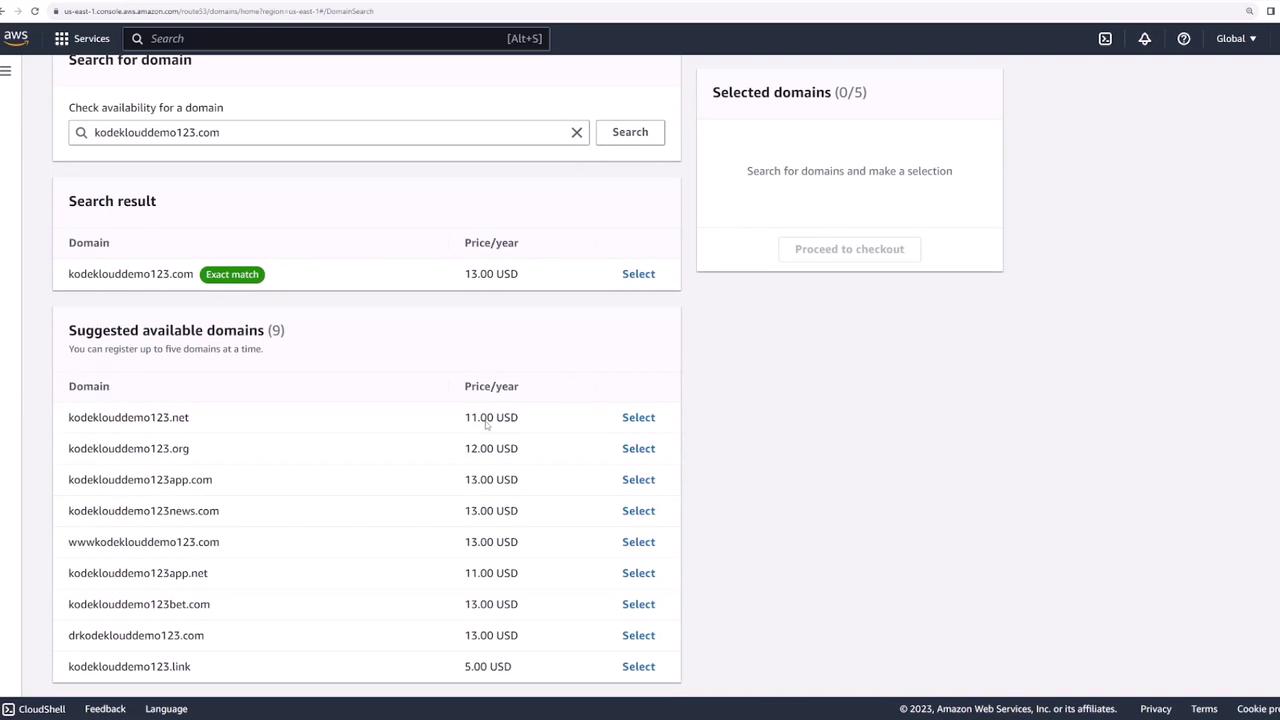
Make sure your chosen domain doesn’t infringe on trademarks or copyrights. Unauthorized use may result in legal issues.
4. Select the domain and choose **Proceed to checkout**.
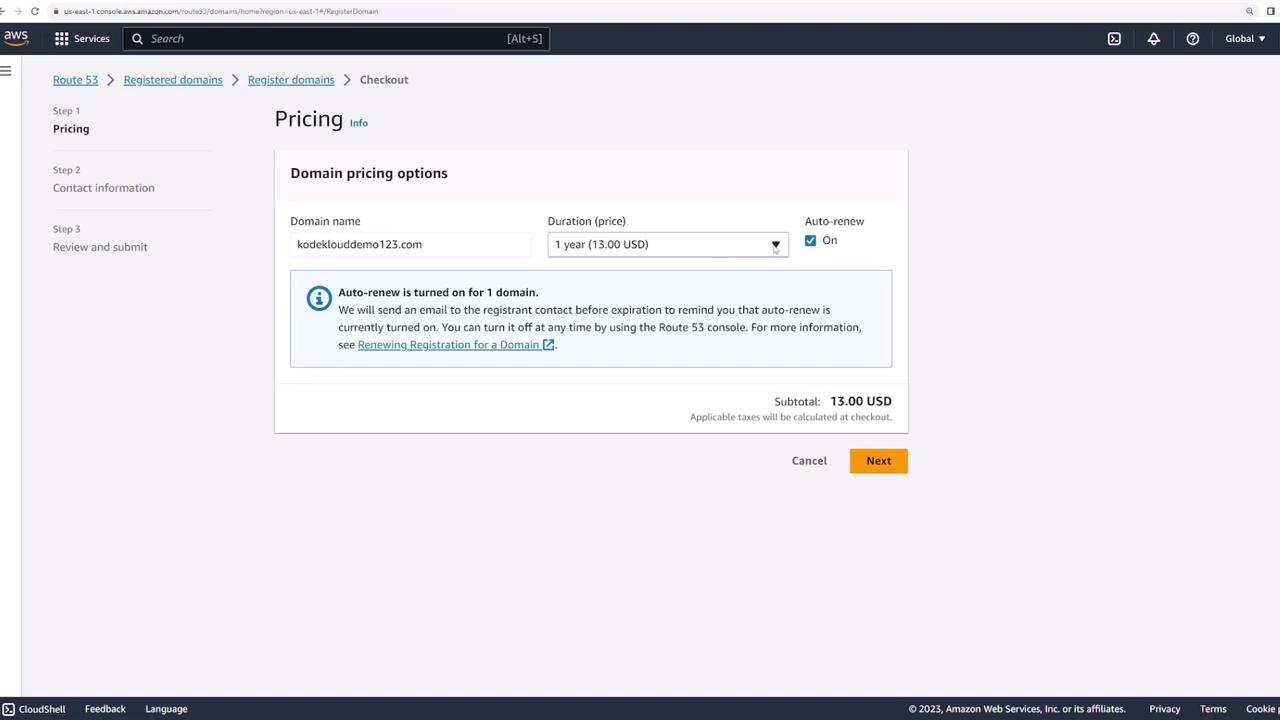
5. Enable **Auto-renewal** (recommended) and confirm **Privacy protection** is on for all contacts.
6. Provide registrant, admin, and tech contact information, review the terms, and click **Submit**.
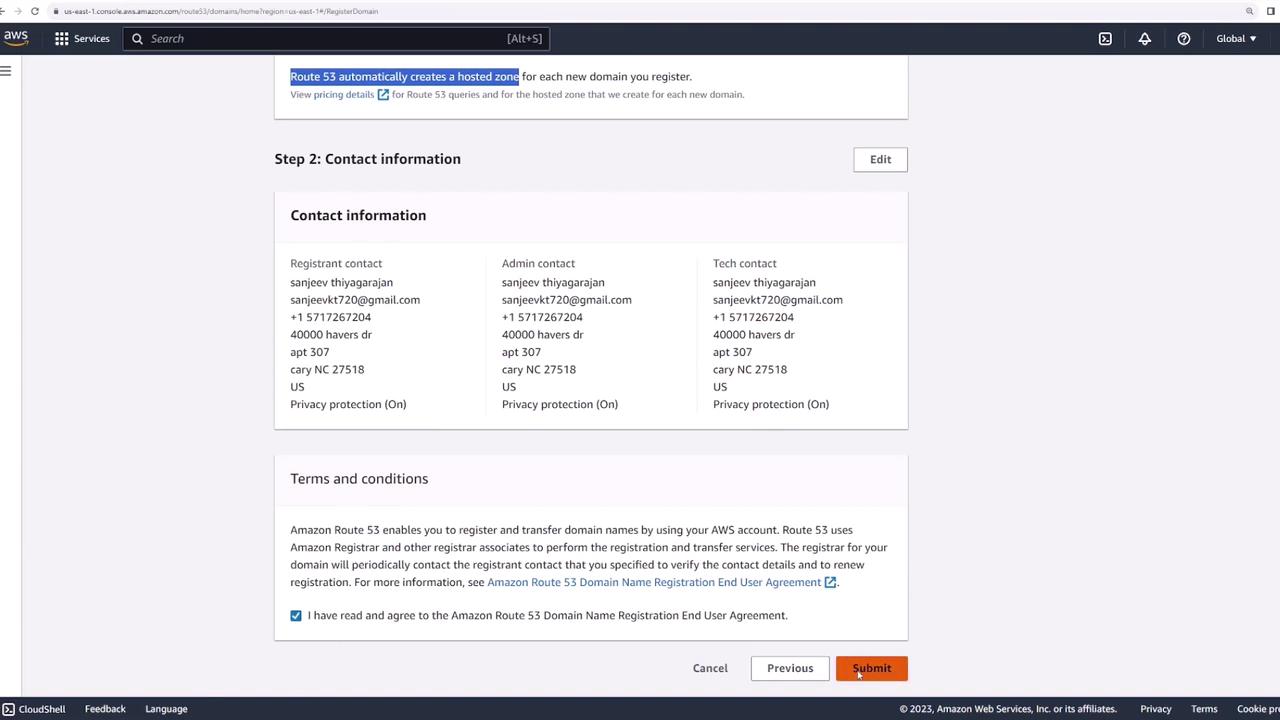
AWS automatically creates a hosted zone when you register a domain. A small hosted zone fee applies in addition to the registration cost. See [Route 53 Pricing](https://aws.amazon.com/route53/pricing/).
7. After AWS processes your request, you’ll receive a confirmation email. The new domain will appear under **Registered domains**.
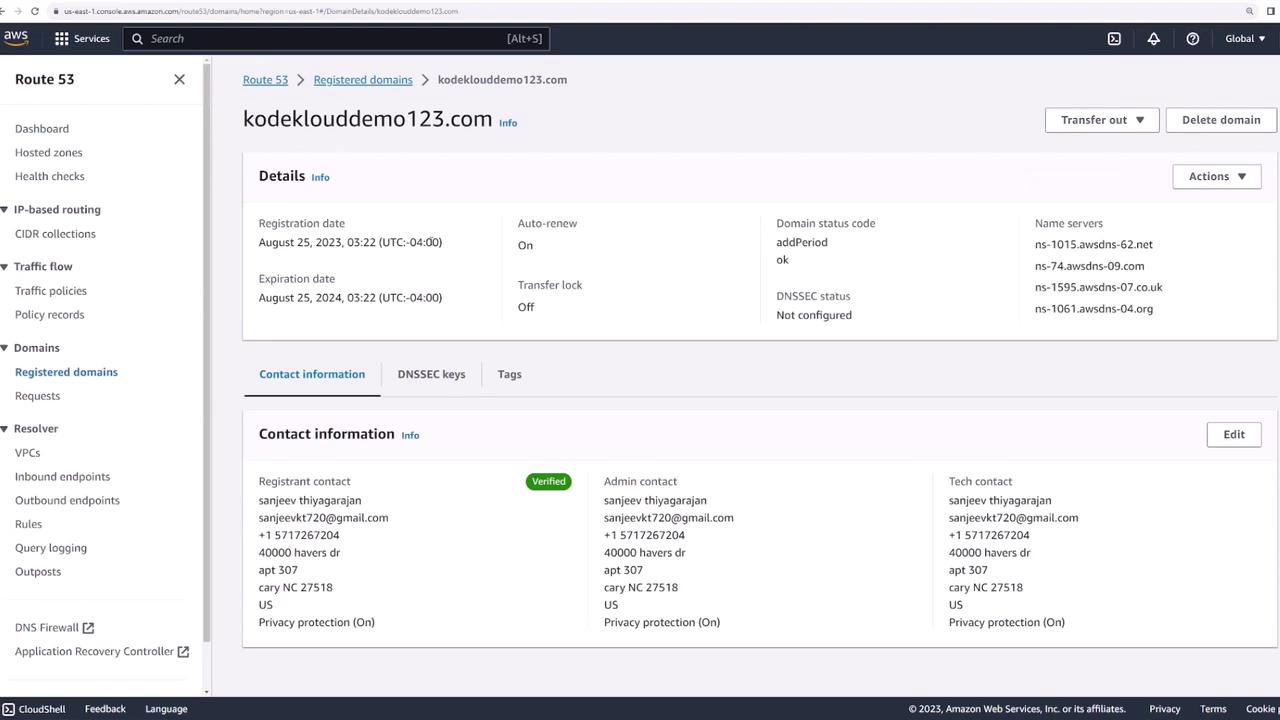
## 2. View Domain Details
Click your domain in **Registered domains** to see:
* Registration and expiration dates
* Contact information
* Assigned name servers
## 3. Explore the Hosted Zone
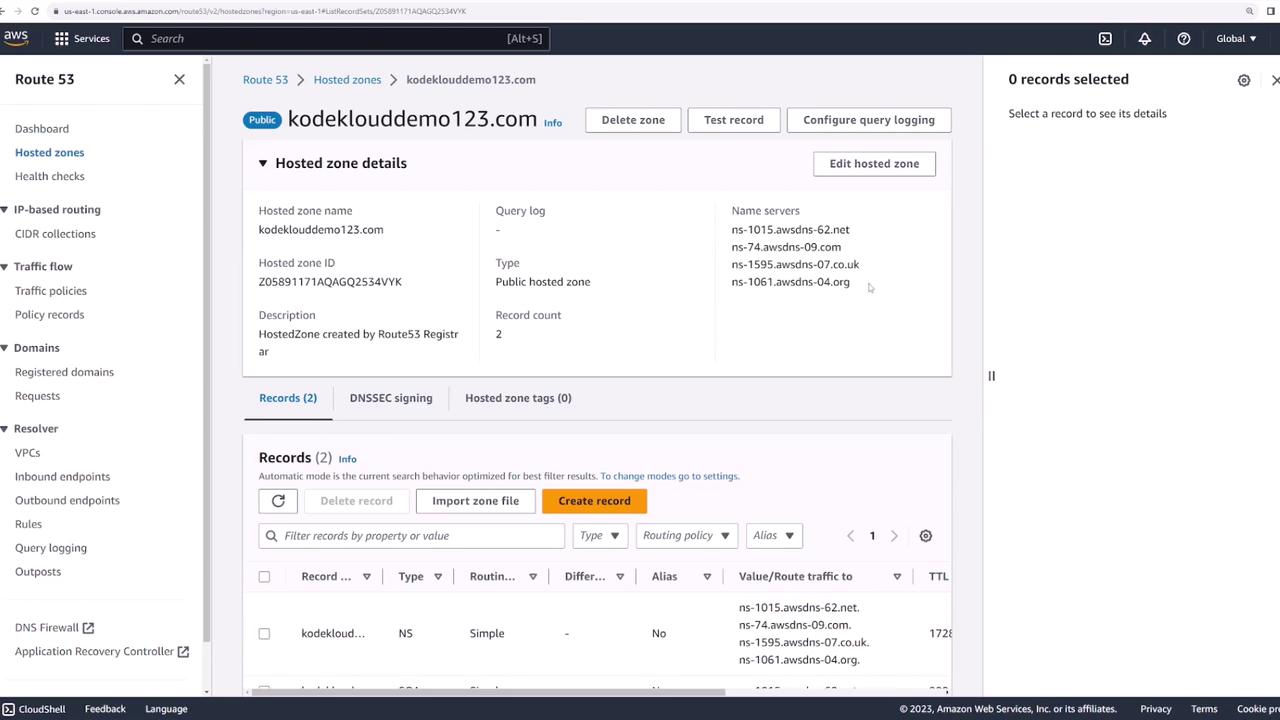
1. In the Route 53 dashboard, select **Hosted zones**.
2. Click the hosted zone named after your domain (e.g., `kodeklouddemo123.com`).
Inside, you’ll find:
* The four name servers assigned by AWS
* Default DNS records created automatically
## 4. Create an A Record
An A record maps your domain (or subdomain) to an IPv4 address.
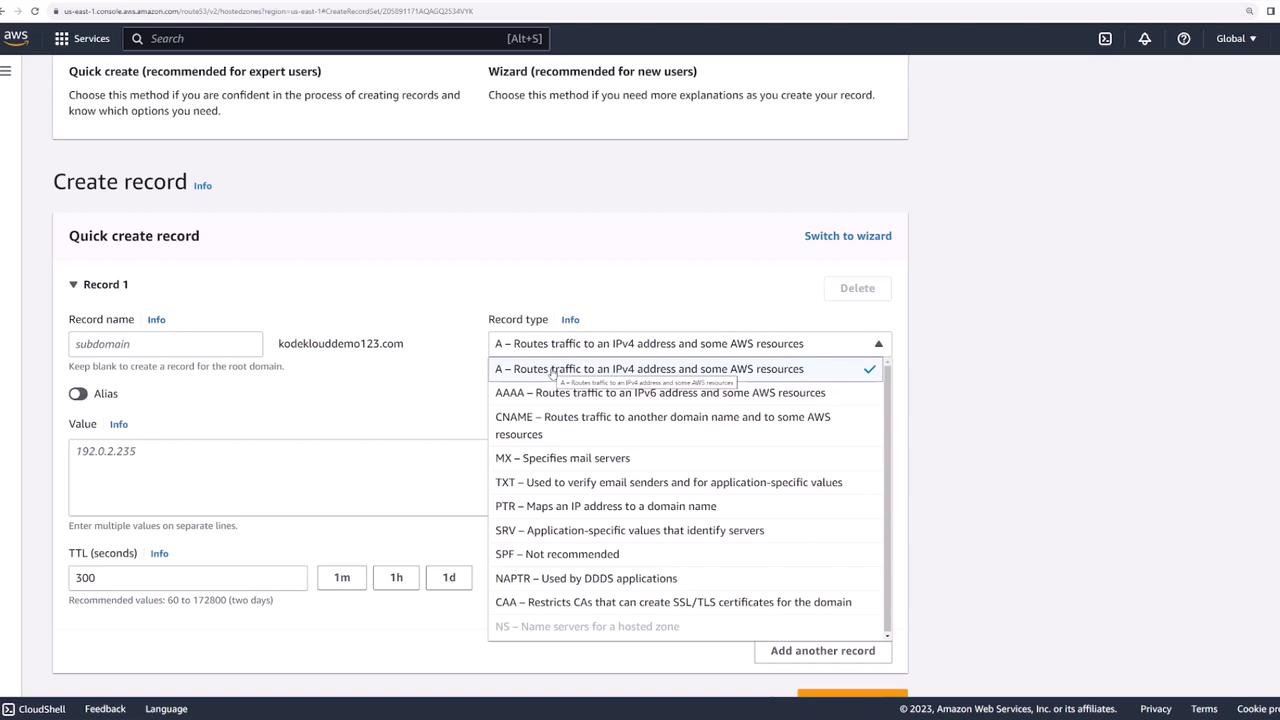
1. In your hosted zone, click **Create records**.
2. Select **A – IPv4 address** as the record type.
3. For **Record name**, leave blank to map the root domain or enter a prefix (e.g., `www`).
4. Under **Value**, enter your server’s public IPv4 address.
5. Accept the default TTL and click **Create records**.
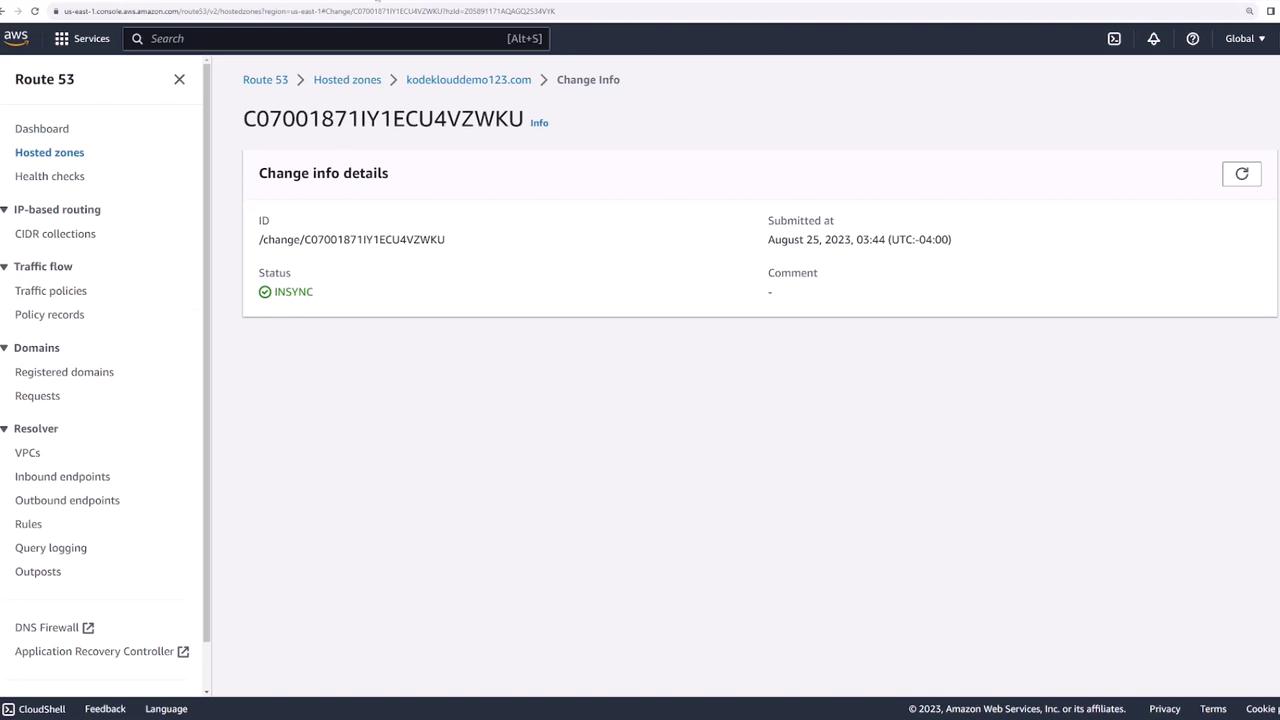
DNS updates typically propagate within 60 seconds. Use **View status** to verify when your record is `INSYNC`.
## 5. Validate Your Setup
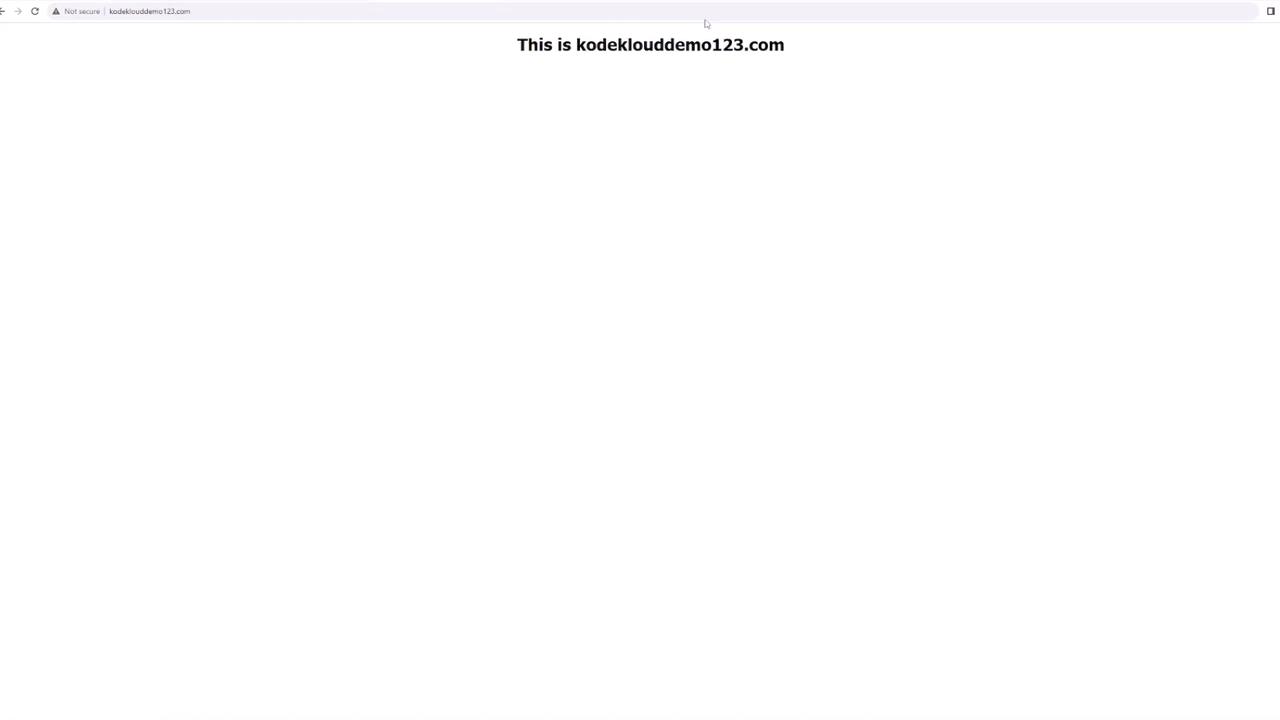
Once your A record is `INSYNC`, open a browser and navigate to:
```text theme={null}
https://kodeklouddemo123.com
```
You should see your web server’s default page.
## Common DNS Record Types
| Record Type | Description | Example |
| ----------- | -------------------------------- | ------------------------------------- |
| A | Maps a domain to an IPv4 address | `example.com` → `192.0.2.44` |
| CNAME | Points a name to another domain | `www.example.com` → `example.com` |
| MX | Specifies mail servers | `10 mail.example.com` |
| TXT | Holds text for SPF, DKIM, etc. | `"v=spf1 include:amazonses.com ~all"` |
## Summary
* Register and manage domains in one place
* Configure DNS records (A, CNAME, MX, TXT)
* Benefit from AWS’s global DNS infrastructure
## Links & References
* [AWS Route 53 Documentation](https://docs.aws.amazon.com/route53/)
* [Domain Registration Guide](https://docs.aws.amazon.com/route53/latest/DeveloperGuide/domain-register.html)
* [Route 53 Pricing](https://aws.amazon.com/route53/pricing/)
* [AWS Certified Solutions Architect – Associate](https://aws.amazon.com/certification/certified-solutions-architect-associate/)