> ## Documentation Index
> Fetch the complete documentation index at: https://notes.kodekloud.com/llms.txt
> Use this file to discover all available pages before exploring further.
# Demo Feature Engineering in SageMaker Studio
> Demonstrates interactive feature engineering in SageMaker Studio with pandas and scikit learn, then offloads batch target encoding to a SageMaker Processing job and stores outputs in S3
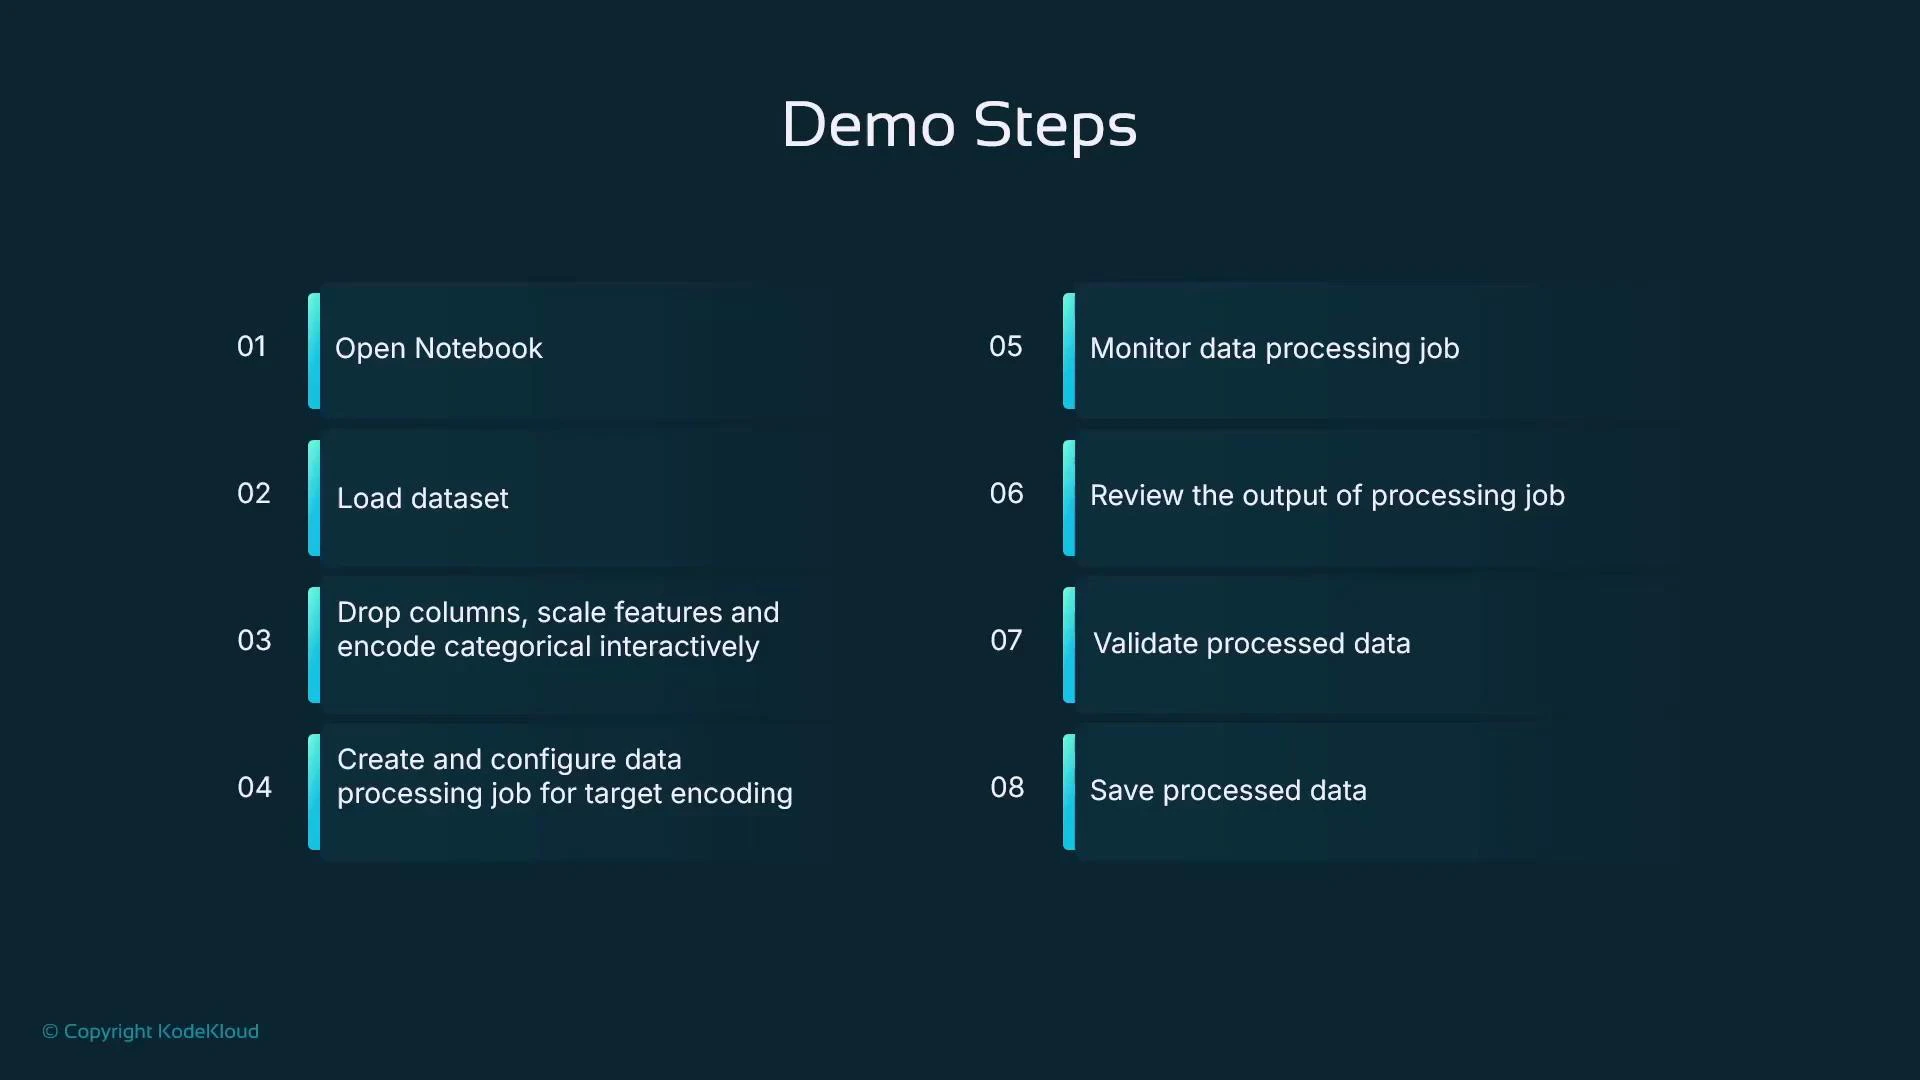
This lesson demonstrates simple feature engineering inside Amazon SageMaker Studio (JupyterLab). We'll work interactively in a notebook to explore and engineer features, then offload a heavier transformation (postcode target encoding) to a SageMaker Processing job that runs as a batch job and writes results to Amazon S3.
What we'll cover:
* Open a Jupyter Notebook in SageMaker Studio
* Load a sample dataset into a pandas DataFrame
* Interactively engineer features: create derived features, drop columns, scale numeric features, one-hot encode categorical features
* Save the intermediate result and upload it to S3
* Create and run a SageMaker Processing job (scikit-learn processor) to perform postcode target encoding
* Monitor the processing job, download and validate the output
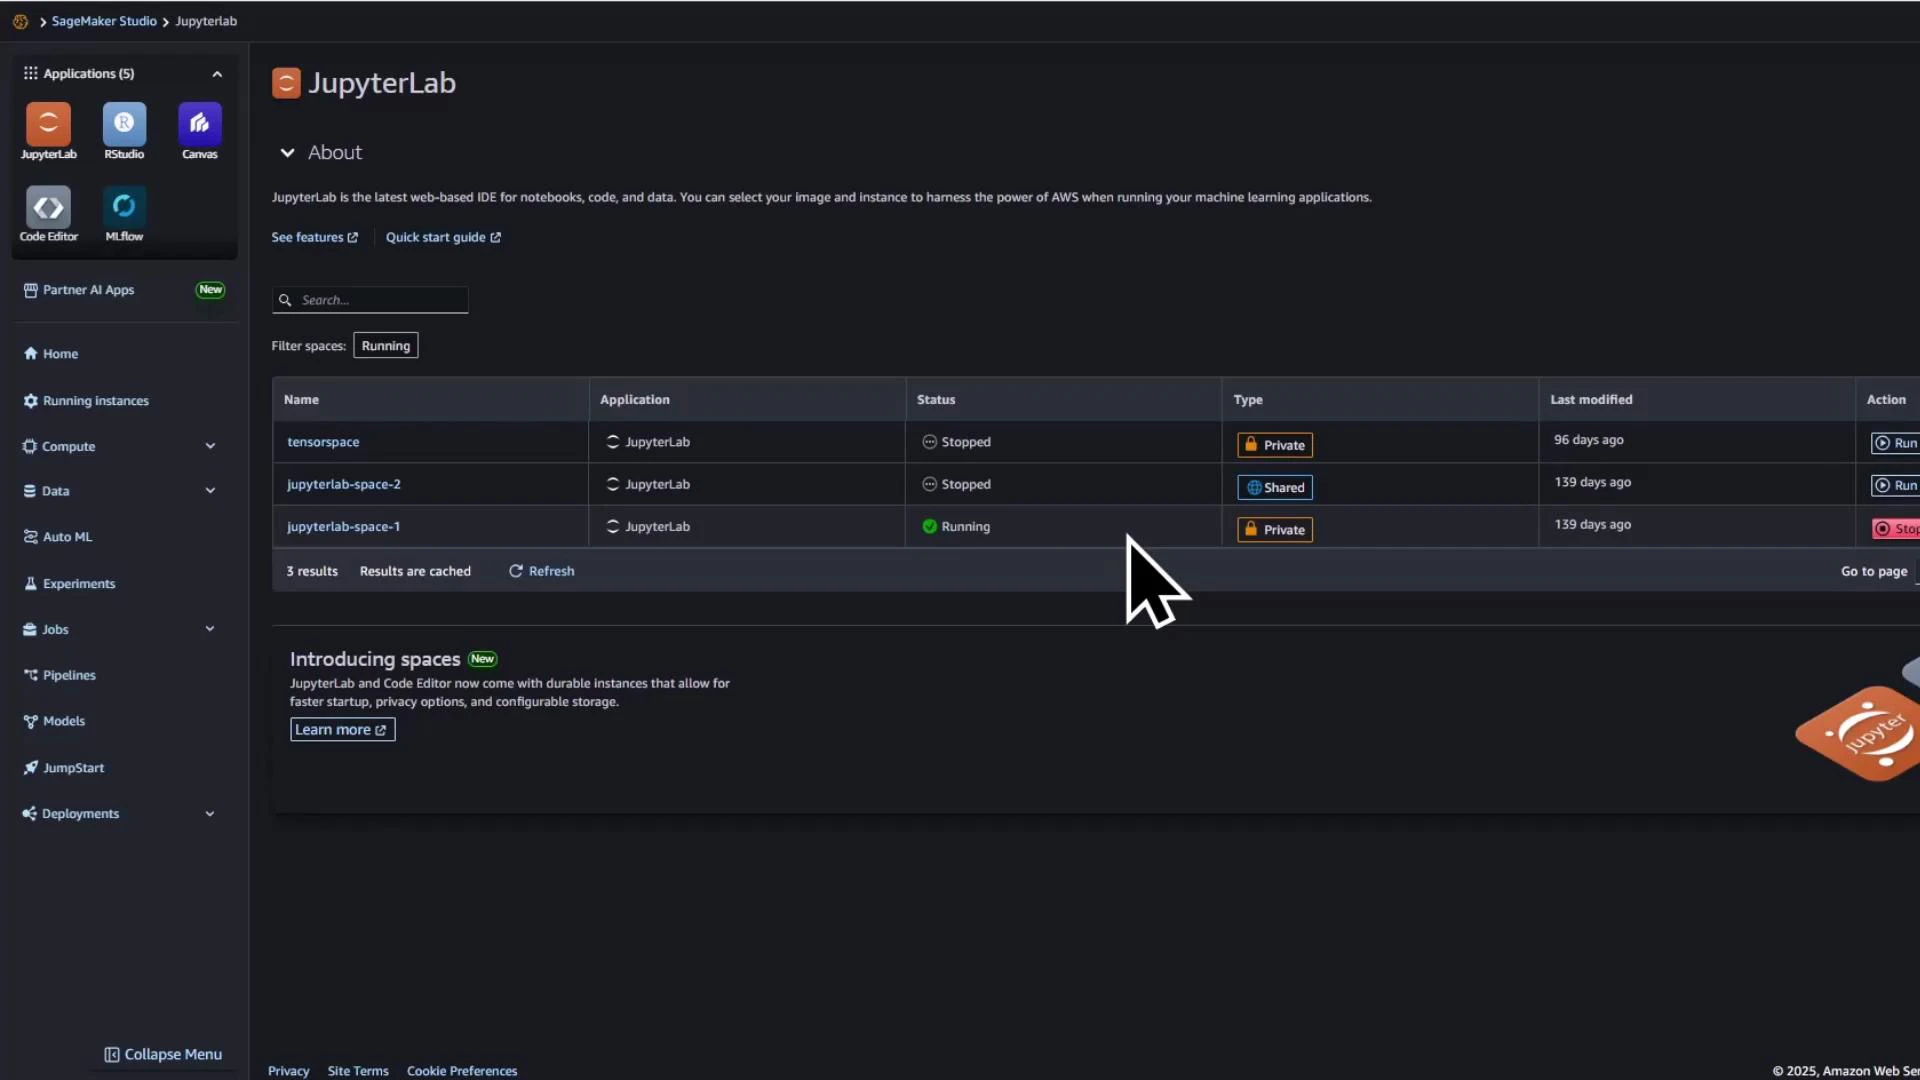
## Open the notebook in SageMaker Studio
Start a Studio user and open the notebook named `feature_engineering_house_prices.ipynb` (or a similarly named notebook). Select an appropriate Python kernel (e.g., conda\_mle\_p38) and run the first cell to import libraries and prepare the environment.
 ## Prepare the notebook kernel and imports
Run the imports below to enable interactive feature engineering and SageMaker integration:
```python theme={null}
# Imports for interactive feature engineering and SageMaker integration
import os
import pandas as pd
from sklearn.preprocessing import StandardScaler, OneHotEncoder
import sagemaker
from sagemaker.sklearn.processing import SKLearnProcessor
from sagemaker.processing import ProcessingInput, ProcessingOutput
from sagemaker.s3 import S3Downloader
```
## Load a small sample dataset
Load a small example dataset into a pandas DataFrame for rapid iteration and demonstration:
```python theme={null}
# Sample dataset
data = {
"postcode": ["A1", "A1", "B2", "B2", "C3", "C3", "C3"],
"selling_agent": ["Bob", "Ifraf", "Grace", "Abdul", "Chinmay", "Zichen", "Bob"],
"property_type": ["flat", "house", "house", "bungalow", "house", "flat", "house"],
"sqft": [1500, 1800, 1200, 1300, 2000, 2100, 2500],
"num_bedrooms": [3, 4, 2, 3, 5, 5, 6],
"num_bathrooms": [2, 3, 1, 2, 3, 3, 4],
"price": [400000, 450000, 250000, 275000, 600000, 650000, 700000],
}
df = pd.DataFrame(data)
df
```
## Create derived features
Add arithmetic-derived features that may help your model, such as total rooms and price per square foot:
```python theme={null}
# Derived features
df["total_rooms"] = df["num_bedrooms"] + df["num_bathrooms"]
df["price_per_sqft"] = df["price"] / df["sqft"]
# Show the updated DataFrame
df
```
## Drop irrelevant columns, scale numeric fields, and one-hot encode categorical fields
Example steps to clean and prepare the dataset for modeling:
```python theme={null}
# Drop an irrelevant column
df.drop(columns=["selling_agent"], inplace=True)
# Scale sqft using StandardScaler
scaler = StandardScaler()
df["sqft_scaled"] = scaler.fit_transform(df[["sqft"]])
# One-hot encode property_type
encoder = OneHotEncoder(sparse_output=False) # use sparse=False if using an older sklearn version
encoded = encoder.fit_transform(df[["property_type"]])
encoded_cols = encoder.get_feature_names_out(["property_type"])
encoded_df = pd.DataFrame(encoded, columns=encoded_cols, index=df.index)
# Concatenate encoded columns and drop the original property_type column
df_encoded = pd.concat([df.drop(columns=["property_type"]), encoded_df], axis=1)
# Final DataFrame after these transformations
print(df_encoded)
```
### Summary of transformations
| Transformation | Resulting column(s) | Use case |
| ------------------ | --------------------------------------------------------------------- | -------------------------------------------------- |
| Derived arithmetic | total\_rooms, price\_per\_sqft | Capture aggregated/normalized signals |
| Scaling | sqft\_scaled | Normalize magnitudes for models sensitive to scale |
| One-hot encoding | property\_type\_bungalow, property\_type\_flat, property\_type\_house | Represent categorical types as numeric features |
These interactive steps are great for exploration and iteration. For reproducibility and larger datasets, run repeatable transformations as part of a batch processing job.
## Save transformed data and upload to S3
Save the transformed DataFrame to CSV and upload it to S3 to serve as input for the processing job:
```python theme={null}
# Save dataset for processing job
df_encoded.to_csv("transformed_house_data.csv", index=False)
# SageMaker session and role (in Studio, get_execution_role() typically works)
sagemaker_session = sagemaker.Session()
role = sagemaker.get_execution_role()
# Upload dataset to S3
bucket = sagemaker_session.default_bucket()
s3_key_prefix = "demo_feature_engineering"
input_s3_path = f"s3://{bucket}/{s3_key_prefix}/transformed_house_data.csv"
sagemaker_session.upload_data(path="transformed_house_data.csv", bucket=bucket, key_prefix=s3_key_prefix)
print("Input S3 path:", input_s3_path)
# Define where the processing job should write outputs in S3
output_s3_path = f"s3://{bucket}/processed_data/"
print("Output S3 path:", output_s3_path)
```
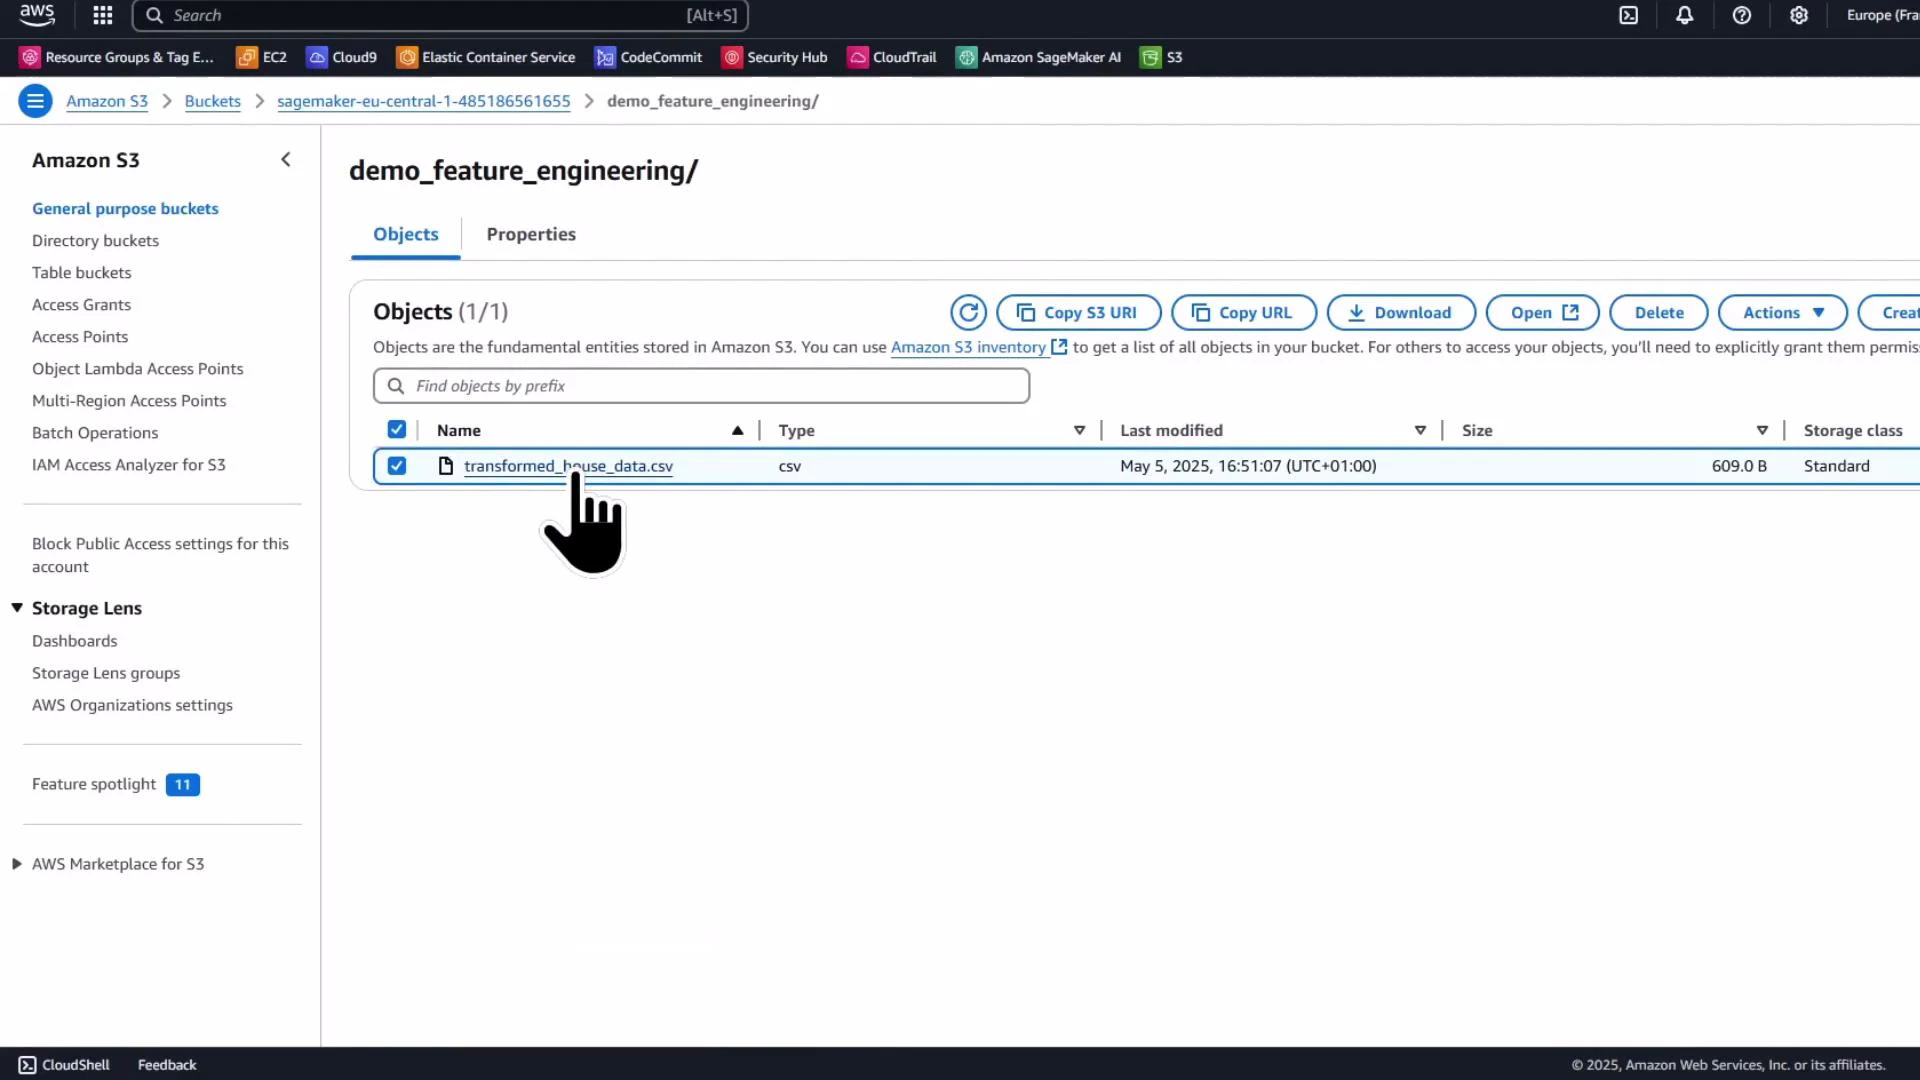
After uploading, validate the object exists in S3 via the S3 console.
## Prepare the notebook kernel and imports
Run the imports below to enable interactive feature engineering and SageMaker integration:
```python theme={null}
# Imports for interactive feature engineering and SageMaker integration
import os
import pandas as pd
from sklearn.preprocessing import StandardScaler, OneHotEncoder
import sagemaker
from sagemaker.sklearn.processing import SKLearnProcessor
from sagemaker.processing import ProcessingInput, ProcessingOutput
from sagemaker.s3 import S3Downloader
```
## Load a small sample dataset
Load a small example dataset into a pandas DataFrame for rapid iteration and demonstration:
```python theme={null}
# Sample dataset
data = {
"postcode": ["A1", "A1", "B2", "B2", "C3", "C3", "C3"],
"selling_agent": ["Bob", "Ifraf", "Grace", "Abdul", "Chinmay", "Zichen", "Bob"],
"property_type": ["flat", "house", "house", "bungalow", "house", "flat", "house"],
"sqft": [1500, 1800, 1200, 1300, 2000, 2100, 2500],
"num_bedrooms": [3, 4, 2, 3, 5, 5, 6],
"num_bathrooms": [2, 3, 1, 2, 3, 3, 4],
"price": [400000, 450000, 250000, 275000, 600000, 650000, 700000],
}
df = pd.DataFrame(data)
df
```
## Create derived features
Add arithmetic-derived features that may help your model, such as total rooms and price per square foot:
```python theme={null}
# Derived features
df["total_rooms"] = df["num_bedrooms"] + df["num_bathrooms"]
df["price_per_sqft"] = df["price"] / df["sqft"]
# Show the updated DataFrame
df
```
## Drop irrelevant columns, scale numeric fields, and one-hot encode categorical fields
Example steps to clean and prepare the dataset for modeling:
```python theme={null}
# Drop an irrelevant column
df.drop(columns=["selling_agent"], inplace=True)
# Scale sqft using StandardScaler
scaler = StandardScaler()
df["sqft_scaled"] = scaler.fit_transform(df[["sqft"]])
# One-hot encode property_type
encoder = OneHotEncoder(sparse_output=False) # use sparse=False if using an older sklearn version
encoded = encoder.fit_transform(df[["property_type"]])
encoded_cols = encoder.get_feature_names_out(["property_type"])
encoded_df = pd.DataFrame(encoded, columns=encoded_cols, index=df.index)
# Concatenate encoded columns and drop the original property_type column
df_encoded = pd.concat([df.drop(columns=["property_type"]), encoded_df], axis=1)
# Final DataFrame after these transformations
print(df_encoded)
```
### Summary of transformations
| Transformation | Resulting column(s) | Use case |
| ------------------ | --------------------------------------------------------------------- | -------------------------------------------------- |
| Derived arithmetic | total\_rooms, price\_per\_sqft | Capture aggregated/normalized signals |
| Scaling | sqft\_scaled | Normalize magnitudes for models sensitive to scale |
| One-hot encoding | property\_type\_bungalow, property\_type\_flat, property\_type\_house | Represent categorical types as numeric features |
These interactive steps are great for exploration and iteration. For reproducibility and larger datasets, run repeatable transformations as part of a batch processing job.
## Save transformed data and upload to S3
Save the transformed DataFrame to CSV and upload it to S3 to serve as input for the processing job:
```python theme={null}
# Save dataset for processing job
df_encoded.to_csv("transformed_house_data.csv", index=False)
# SageMaker session and role (in Studio, get_execution_role() typically works)
sagemaker_session = sagemaker.Session()
role = sagemaker.get_execution_role()
# Upload dataset to S3
bucket = sagemaker_session.default_bucket()
s3_key_prefix = "demo_feature_engineering"
input_s3_path = f"s3://{bucket}/{s3_key_prefix}/transformed_house_data.csv"
sagemaker_session.upload_data(path="transformed_house_data.csv", bucket=bucket, key_prefix=s3_key_prefix)
print("Input S3 path:", input_s3_path)
# Define where the processing job should write outputs in S3
output_s3_path = f"s3://{bucket}/processed_data/"
print("Output S3 path:", output_s3_path)
```
After uploading, validate the object exists in S3 via the S3 console.
 ## Offload heavier transformations to a SageMaker Processing job
For heavier or repeatable transforms (e.g., target encoding high-cardinality categories), use a SageMaker Processing job. Processing jobs run your script in a managed container and use the container paths (by convention) /opt/ml/processing/input and /opt/ml/processing/output to read and write data.
Processing jobs read from and write to paths inside the container (by convention /opt/ml/processing/input and /opt/ml/processing/output). Use ProcessingInput and ProcessingOutput to map S3 locations to these container paths when you call run().
### Create and run an SKLearnProcessor
Package a Python script (example `target_encoding.py`) in the notebook's working directory and run it inside the SKLearnProcessor container:
```python theme={null}
# Define the SKLearnProcessor
sklearn_processor = SKLearnProcessor(
framework_version="0.23-1",
role=role,
instance_type="ml.m5.large",
instance_count=1,
sagemaker_session=sagemaker_session,
)
# Run the processing job; the code file target_encoding.py must exist locally in the notebook's working dir
sklearn_processor.run(
code="target_encoding.py", # See the script below
inputs=[ProcessingInput(source=input_s3_path, destination="/opt/ml/processing/input")],
outputs=[ProcessingOutput(source="/opt/ml/processing/output", destination=output_s3_path)],
)
```
### Processing script (target\_encoding.py)
Create this file in your notebook working directory before submitting the processing job. It reads the CSV from /opt/ml/processing/input, computes mean price per postcode, merges the result back into the DataFrame as `postcode_target_encoded`, and writes the processed CSV to /opt/ml/processing/output.
```python theme={null}
# target_encoding.py
import os
import pandas as pd
# Define input and output directories inside the SageMaker processing container
input_dir = "/opt/ml/processing/input"
output_dir = "/opt/ml/processing/output"
# Read input dataset
input_file = os.path.join(input_dir, "transformed_house_data.csv")
df = pd.read_csv(input_file)
# Compute target encoding: mean house price per postcode
postcode_mean_price = df.groupby("postcode")["price"].mean().reset_index()
postcode_mean_price.rename(columns={"price": "postcode_target_encoded"}, inplace=True)
# Merge encoded feature back into dataset
df = df.merge(postcode_mean_price, on="postcode", how="left")
# Save processed dataset
output_file = os.path.join(output_dir, "processed_house_data.csv")
df.to_csv(output_file, index=False)
print(f"Processed data saved to {output_file}")
```
Ensure the IAM role you supply to the processor has permissions to read from/read to the configured S3 bucket and to create processing jobs. In Studio, get\_execution\_role() typically returns a valid role, but verify it outside Studio.
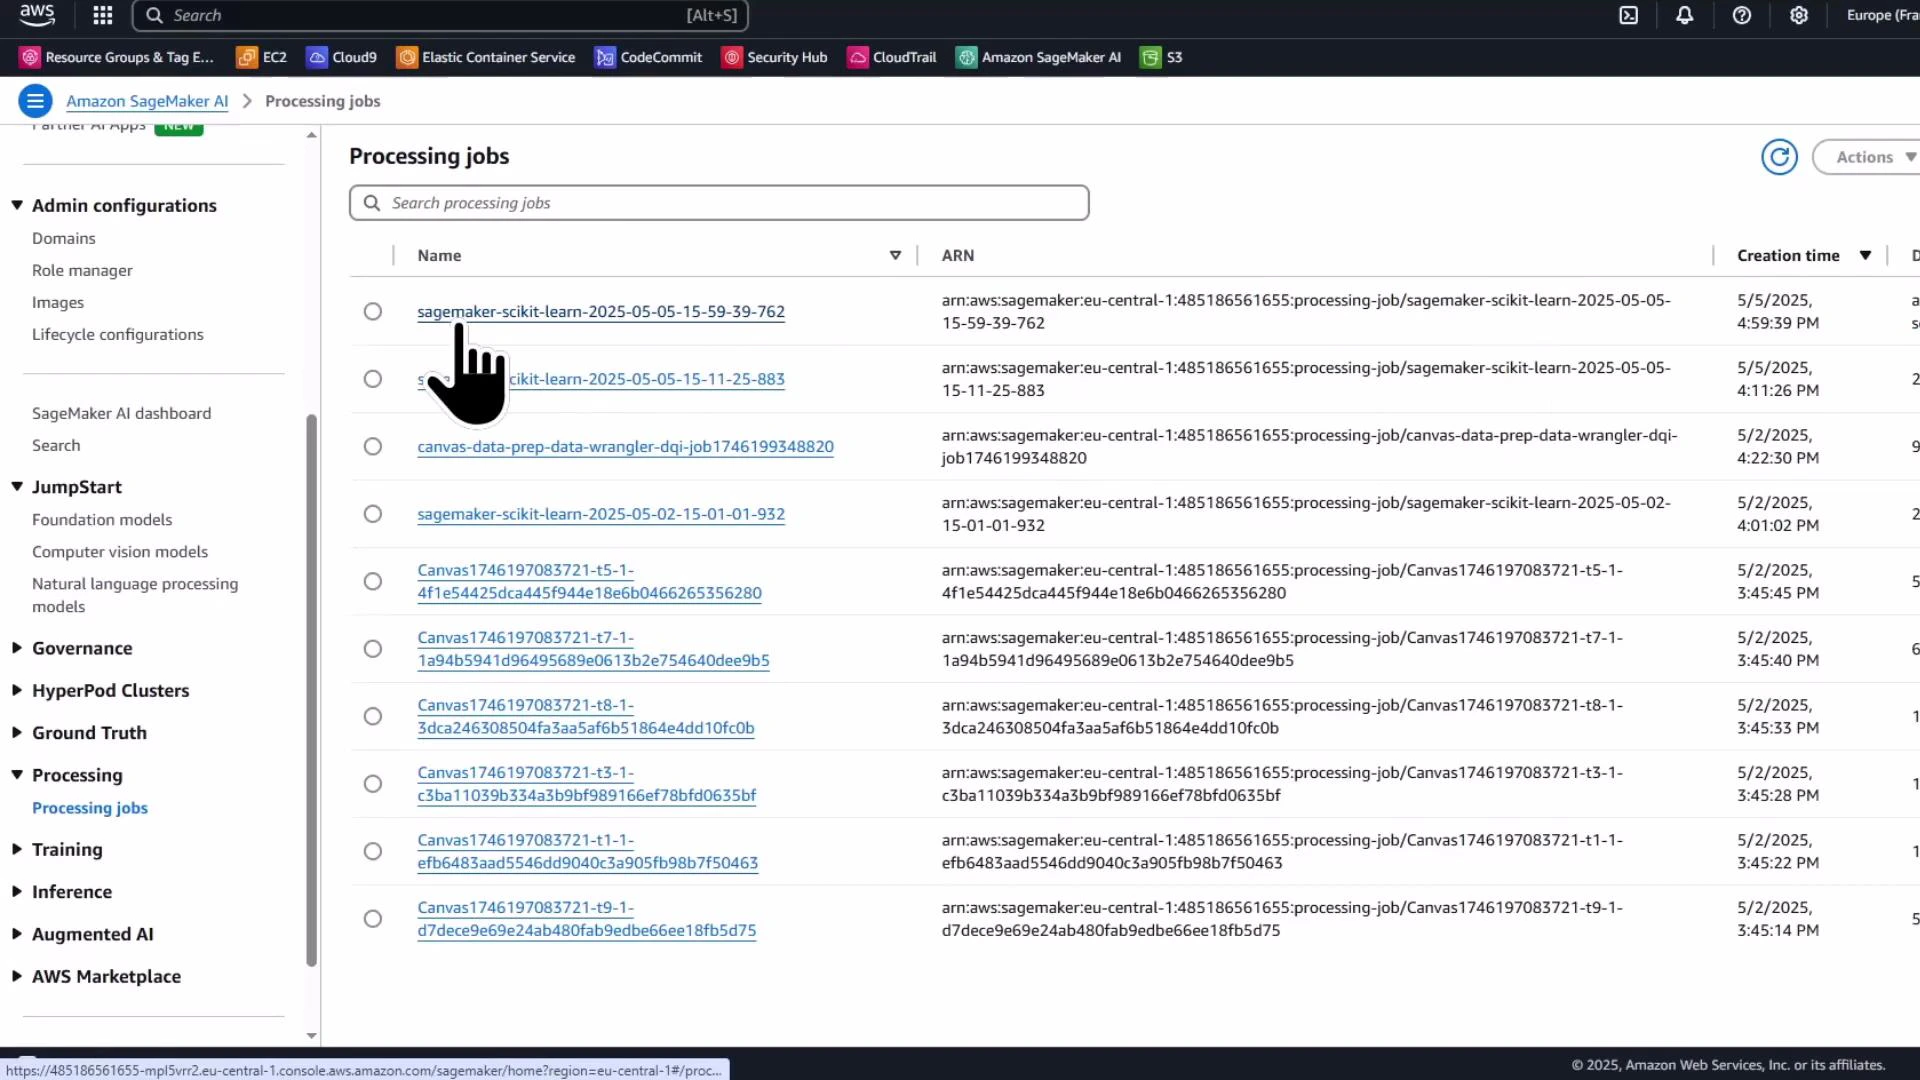
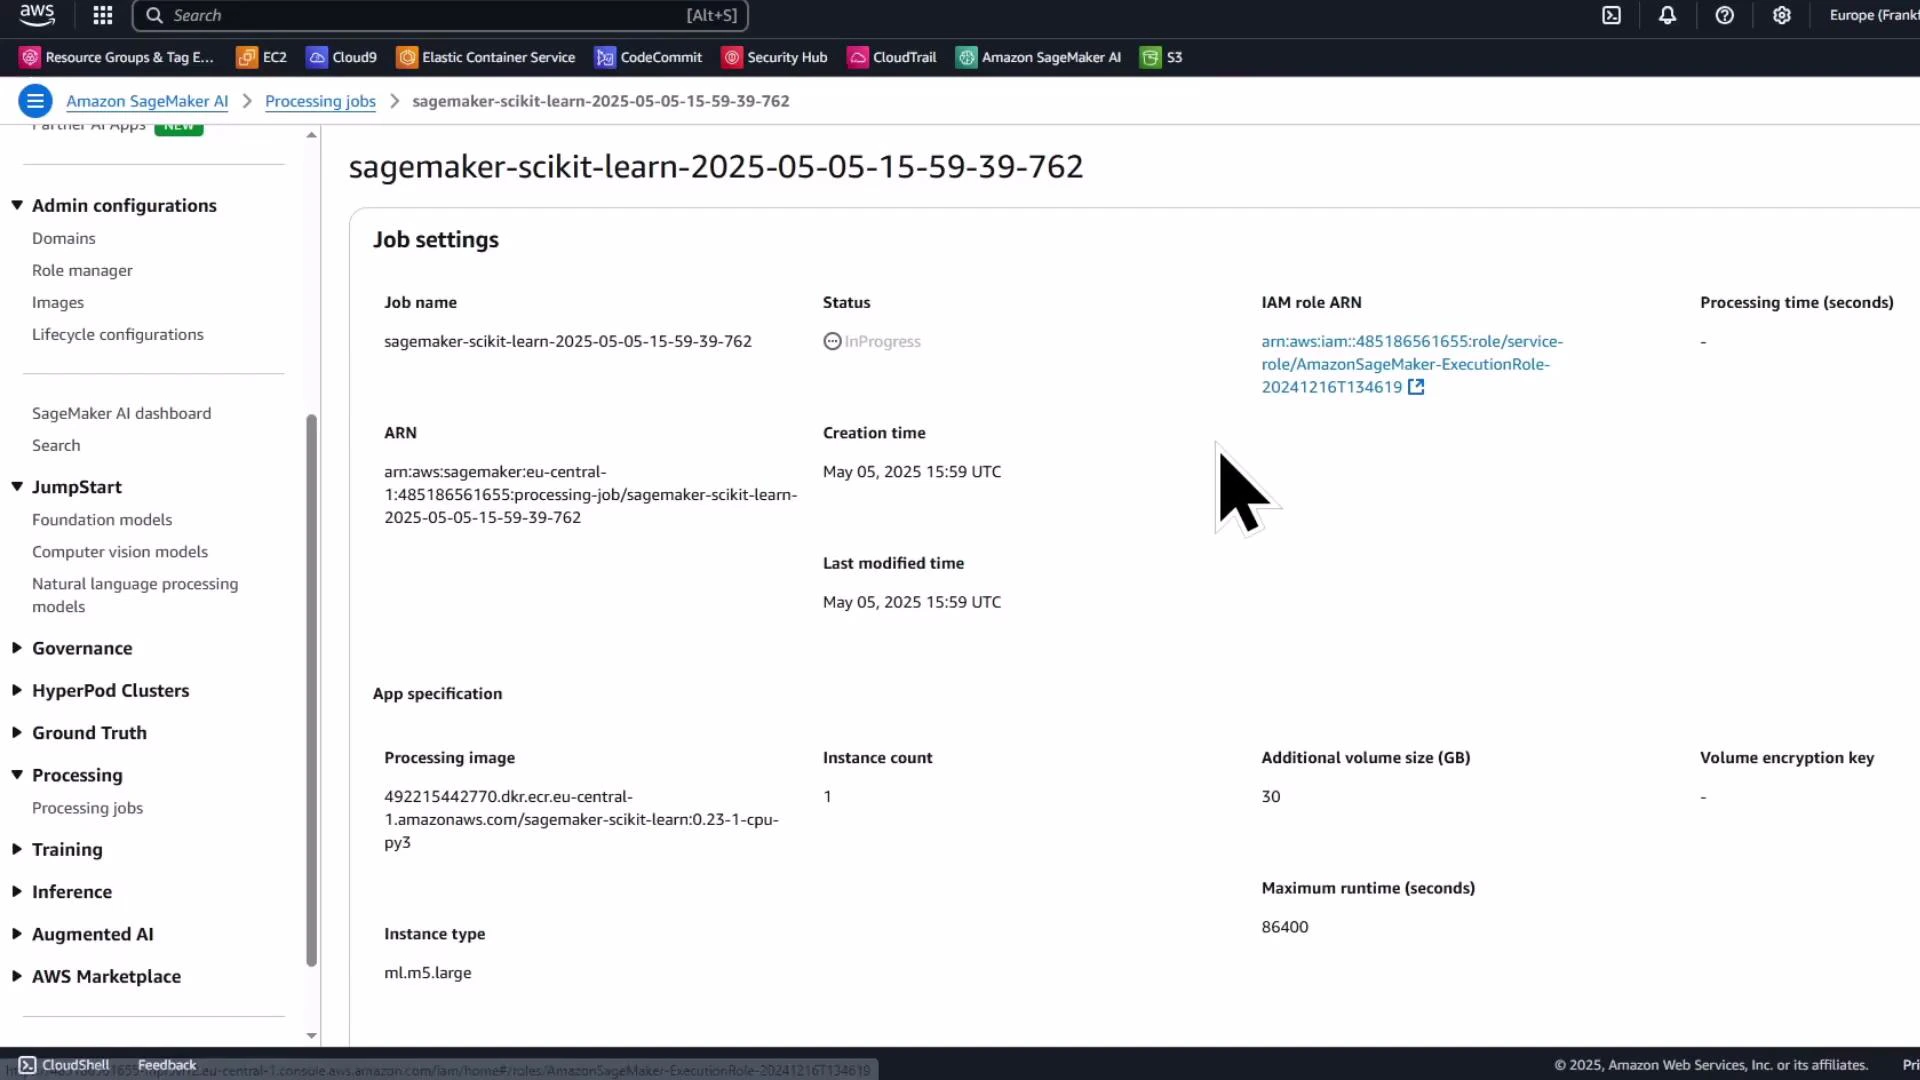
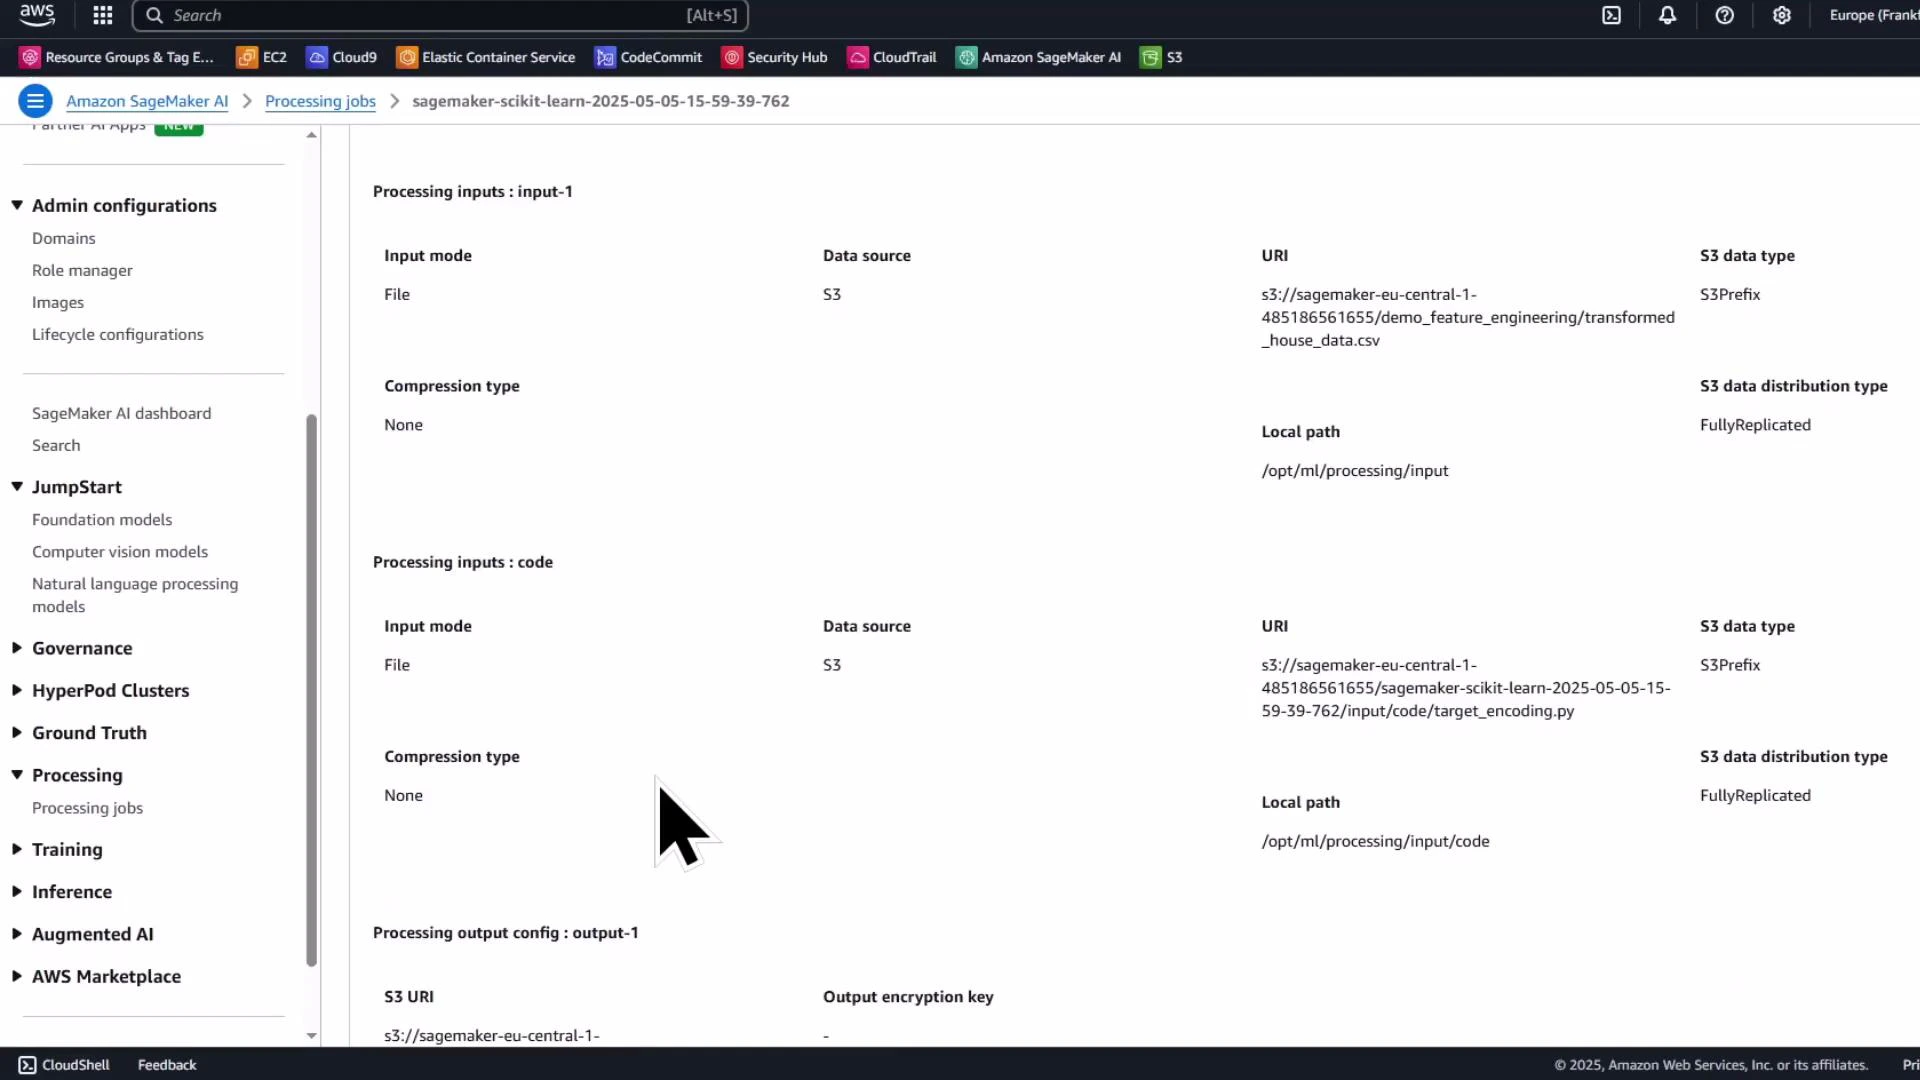
## Monitor the processing job in the SageMaker console
The Processing jobs list and job details pages show the job name, status, instance type, entry point, input S3 URI, output configuration, and logs. Use the console to troubleshoot and view container logs.
## Offload heavier transformations to a SageMaker Processing job
For heavier or repeatable transforms (e.g., target encoding high-cardinality categories), use a SageMaker Processing job. Processing jobs run your script in a managed container and use the container paths (by convention) /opt/ml/processing/input and /opt/ml/processing/output to read and write data.
Processing jobs read from and write to paths inside the container (by convention /opt/ml/processing/input and /opt/ml/processing/output). Use ProcessingInput and ProcessingOutput to map S3 locations to these container paths when you call run().
### Create and run an SKLearnProcessor
Package a Python script (example `target_encoding.py`) in the notebook's working directory and run it inside the SKLearnProcessor container:
```python theme={null}
# Define the SKLearnProcessor
sklearn_processor = SKLearnProcessor(
framework_version="0.23-1",
role=role,
instance_type="ml.m5.large",
instance_count=1,
sagemaker_session=sagemaker_session,
)
# Run the processing job; the code file target_encoding.py must exist locally in the notebook's working dir
sklearn_processor.run(
code="target_encoding.py", # See the script below
inputs=[ProcessingInput(source=input_s3_path, destination="/opt/ml/processing/input")],
outputs=[ProcessingOutput(source="/opt/ml/processing/output", destination=output_s3_path)],
)
```
### Processing script (target\_encoding.py)
Create this file in your notebook working directory before submitting the processing job. It reads the CSV from /opt/ml/processing/input, computes mean price per postcode, merges the result back into the DataFrame as `postcode_target_encoded`, and writes the processed CSV to /opt/ml/processing/output.
```python theme={null}
# target_encoding.py
import os
import pandas as pd
# Define input and output directories inside the SageMaker processing container
input_dir = "/opt/ml/processing/input"
output_dir = "/opt/ml/processing/output"
# Read input dataset
input_file = os.path.join(input_dir, "transformed_house_data.csv")
df = pd.read_csv(input_file)
# Compute target encoding: mean house price per postcode
postcode_mean_price = df.groupby("postcode")["price"].mean().reset_index()
postcode_mean_price.rename(columns={"price": "postcode_target_encoded"}, inplace=True)
# Merge encoded feature back into dataset
df = df.merge(postcode_mean_price, on="postcode", how="left")
# Save processed dataset
output_file = os.path.join(output_dir, "processed_house_data.csv")
df.to_csv(output_file, index=False)
print(f"Processed data saved to {output_file}")
```
Ensure the IAM role you supply to the processor has permissions to read from/read to the configured S3 bucket and to create processing jobs. In Studio, get\_execution\_role() typically returns a valid role, but verify it outside Studio.
## Monitor the processing job in the SageMaker console
The Processing jobs list and job details pages show the job name, status, instance type, entry point, input S3 URI, output configuration, and logs. Use the console to troubleshoot and view container logs.
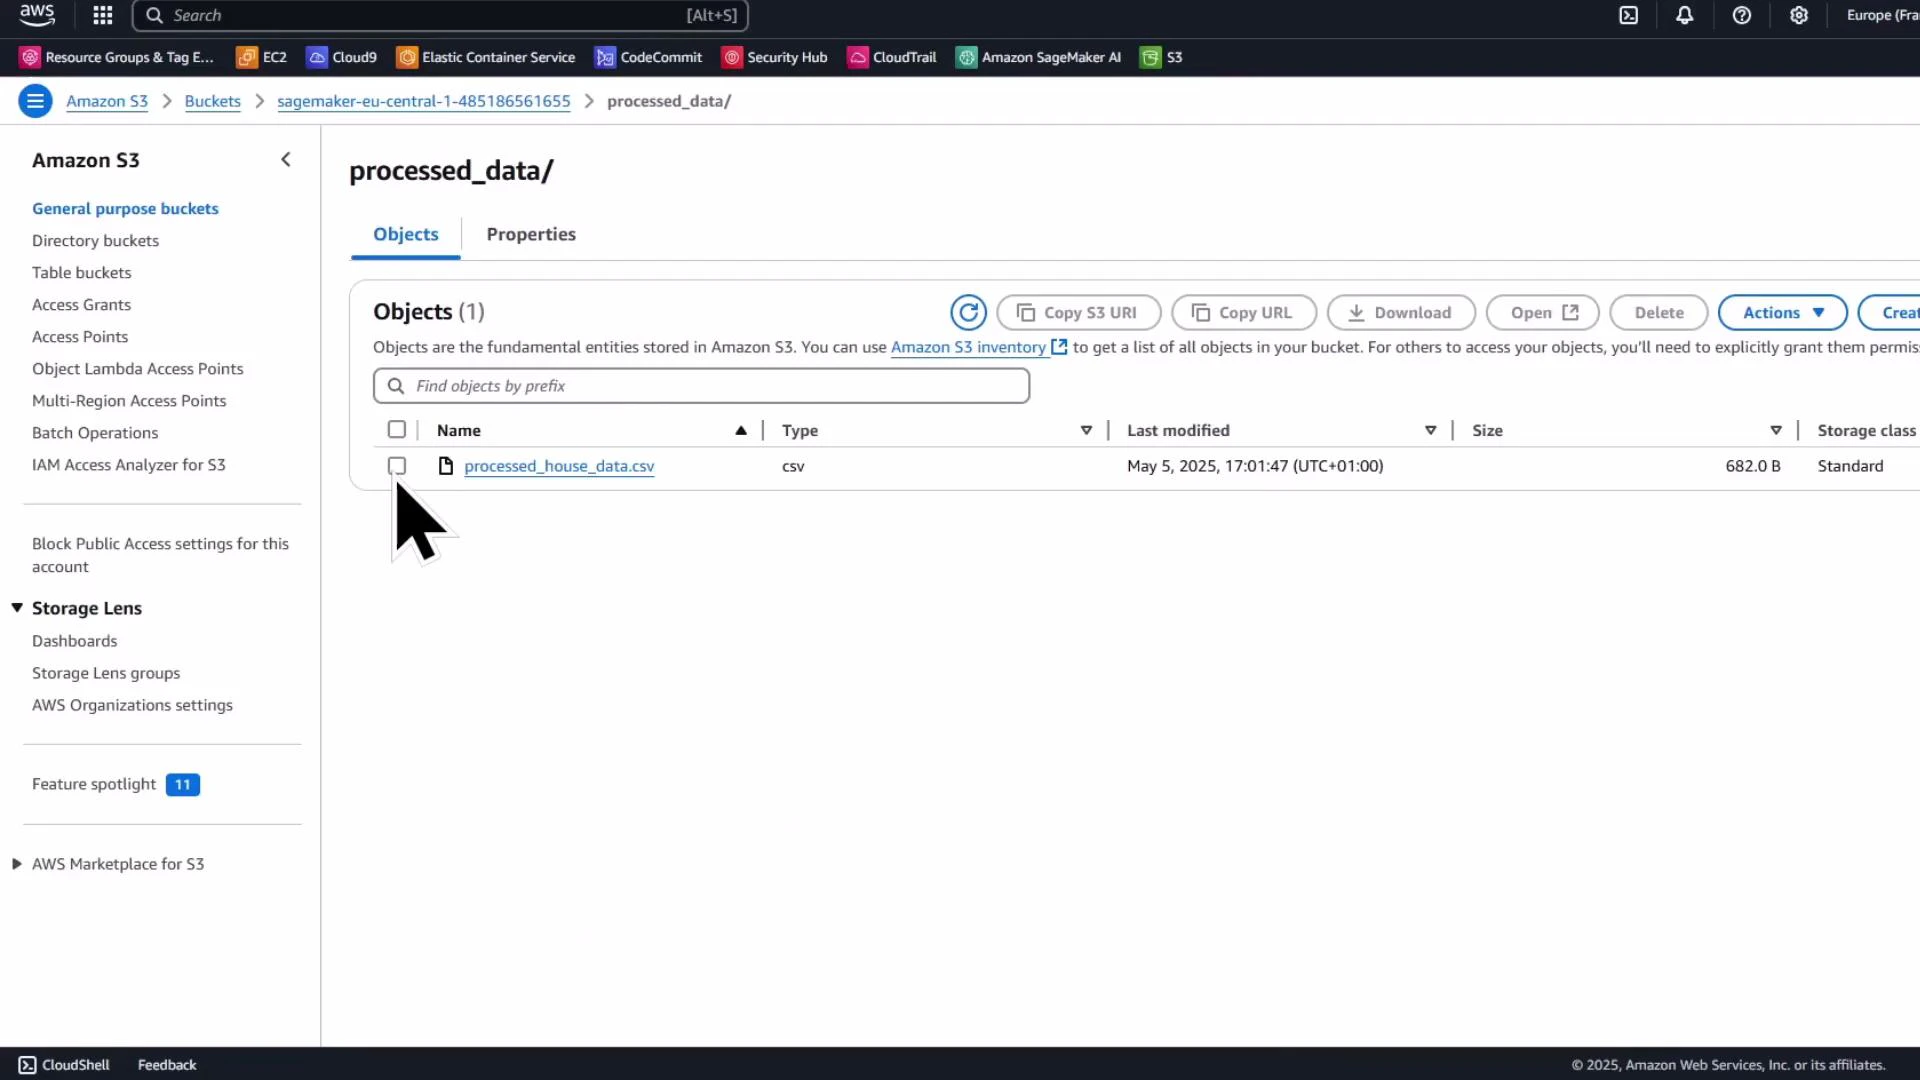
 ## Verify processed output in S3
When the processing job completes, the processed CSV will be written to the S3 output path you specified. Verify the object in the S3 console and download it back to the notebook for inspection.
## Verify processed output in S3
When the processing job completes, the processed CSV will be written to the S3 output path you specified. Verify the object in the S3 console and download it back to the notebook for inspection.
 Download the processed CSV and inspect it in pandas:
```python theme={null}
# Download the processed file from S3 and display it
s3_path = f"s3://{bucket}/processed_data/processed_house_data.csv"
S3Downloader.download(s3_path, ".")
df_processed = pd.read_csv("processed_house_data.csv")
df_processed.head()
```
You should now see:
* the previously engineered features (total\_rooms, price\_per\_sqft)
* scaled numeric feature (sqft\_scaled)
* one-hot encoded property type columns
* the newly added postcode\_target\_encoded column (mean price per postcode)
For model training, you may choose to drop the original `postcode` column and keep `postcode_target_encoded` instead.
Download the processed CSV and inspect it in pandas:
```python theme={null}
# Download the processed file from S3 and display it
s3_path = f"s3://{bucket}/processed_data/processed_house_data.csv"
S3Downloader.download(s3_path, ".")
df_processed = pd.read_csv("processed_house_data.csv")
df_processed.head()
```
You should now see:
* the previously engineered features (total\_rooms, price\_per\_sqft)
* scaled numeric feature (sqft\_scaled)
* one-hot encoded property type columns
* the newly added postcode\_target\_encoded column (mean price per postcode)
For model training, you may choose to drop the original `postcode` column and keep `postcode_target_encoded` instead.
 ## Summary
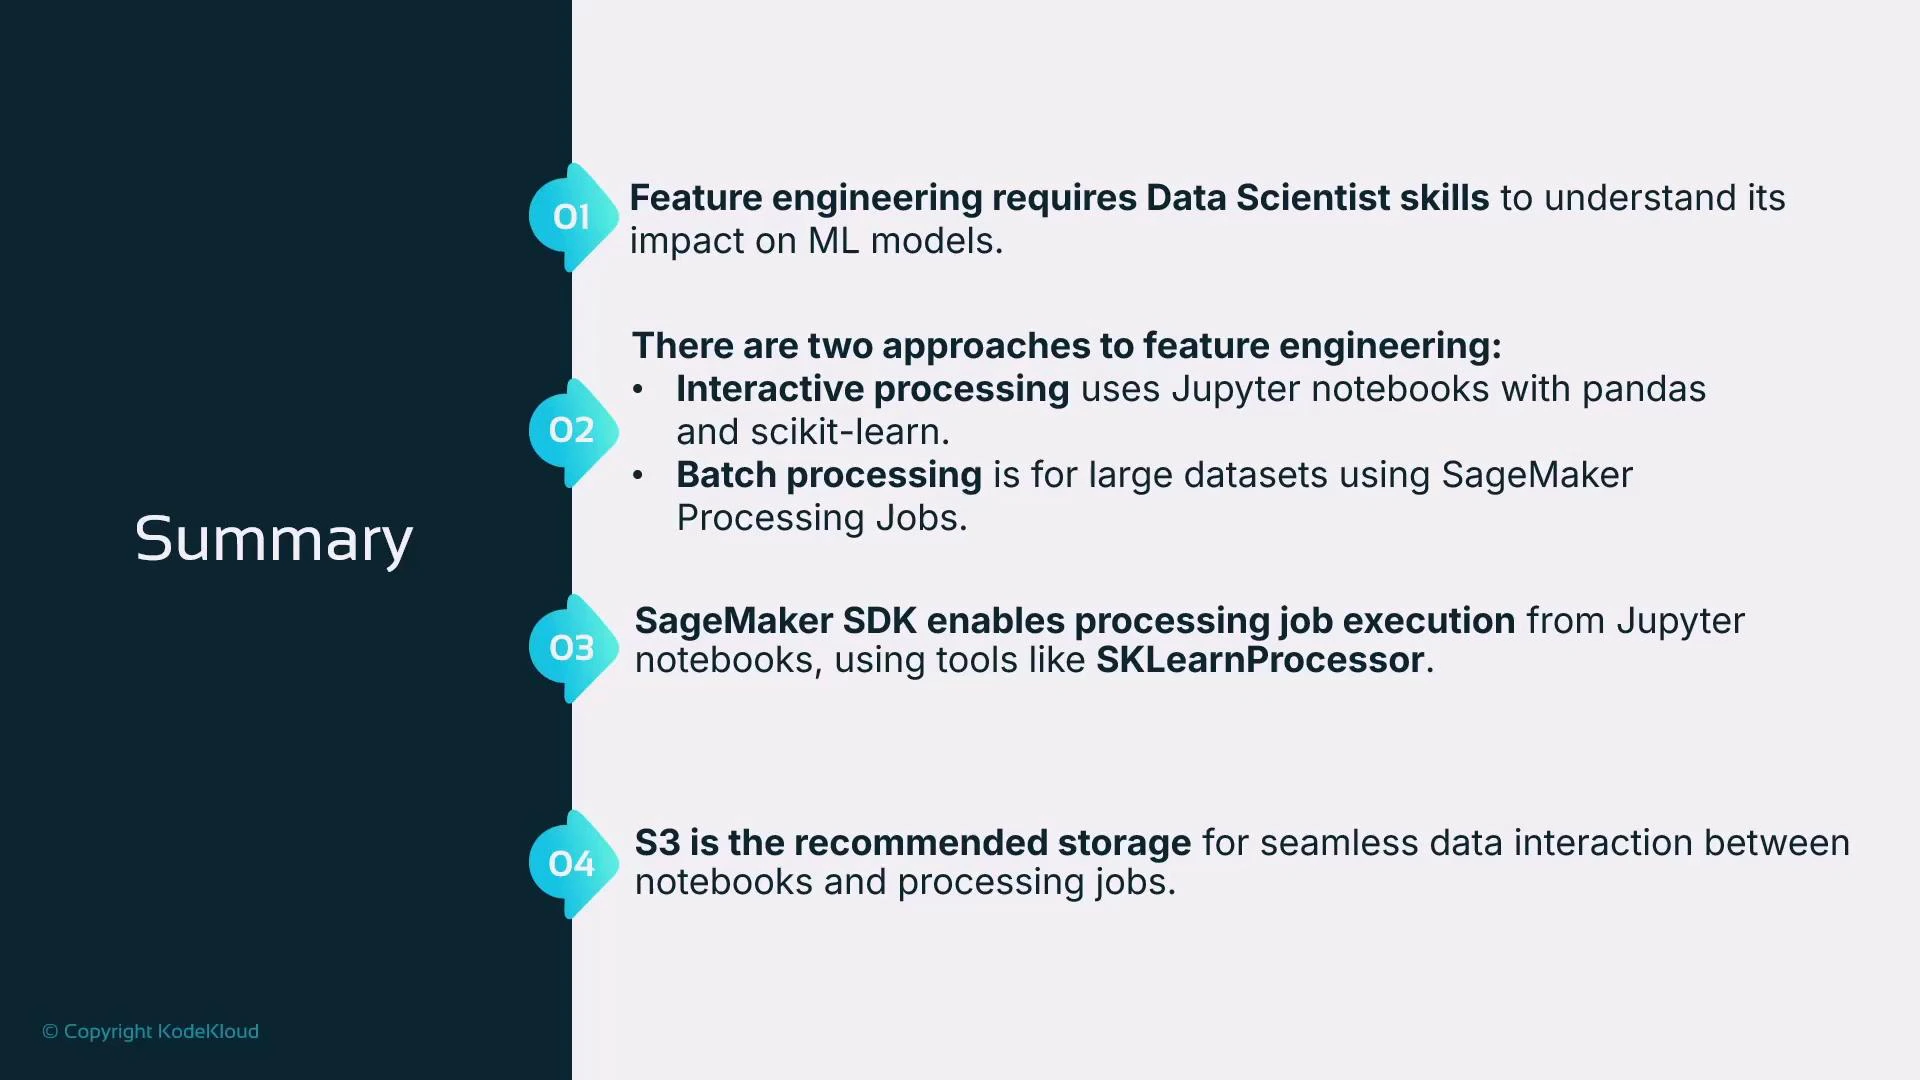
* Use Jupyter/pandas and scikit-learn for interactive feature engineering and quick experimentation.
* For repeatable or computationally heavy transforms (e.g., target encoding, large-scale feature generation), use SageMaker Processing jobs (SKLearnProcessor) to run scripts in managed containers.
* Processing jobs copy inputs into the container (commonly /opt/ml/processing/input) and expect outputs under /opt/ml/processing/output; map S3 paths using ProcessingInput and ProcessingOutput.
* Store inputs and outputs in S3 so compute resources can be terminated when jobs finish and results persist.
## Summary
* Use Jupyter/pandas and scikit-learn for interactive feature engineering and quick experimentation.
* For repeatable or computationally heavy transforms (e.g., target encoding, large-scale feature generation), use SageMaker Processing jobs (SKLearnProcessor) to run scripts in managed containers.
* Processing jobs copy inputs into the container (commonly /opt/ml/processing/input) and expect outputs under /opt/ml/processing/output; map S3 paths using ProcessingInput and ProcessingOutput.
* Store inputs and outputs in S3 so compute resources can be terminated when jobs finish and results persist.
 ## Next steps and references
* Consider creating a SageMaker Training job that consumes the processed data for model training and hyperparameter tuning.
* Explore additional encoding strategies (target smoothing, leave-one-out encoding) for high-cardinality categorical variables.
Useful references:
* [Amazon SageMaker Processing documentation](https://docs.aws.amazon.com/sagemaker/latest/dg/processing.html)
* [SageMaker Python SDK — SKLearnProcessor](https://sagemaker.readthedocs.io/en/stable/processing.html#sklearnprocessor)
* [Amazon S3 documentation](https://docs.aws.amazon.com/s3/index.html)
* [scikit-learn preprocessing documentation](https://scikit-learn.org/stable/modules/preprocessing.html)
That wraps up this demonstration lesson. A companion lecture is available that explains creating a SageMaker training job to consume prepared data for model training.
## Next steps and references
* Consider creating a SageMaker Training job that consumes the processed data for model training and hyperparameter tuning.
* Explore additional encoding strategies (target smoothing, leave-one-out encoding) for high-cardinality categorical variables.
Useful references:
* [Amazon SageMaker Processing documentation](https://docs.aws.amazon.com/sagemaker/latest/dg/processing.html)
* [SageMaker Python SDK — SKLearnProcessor](https://sagemaker.readthedocs.io/en/stable/processing.html#sklearnprocessor)
* [Amazon S3 documentation](https://docs.aws.amazon.com/s3/index.html)
* [scikit-learn preprocessing documentation](https://scikit-learn.org/stable/modules/preprocessing.html)
That wraps up this demonstration lesson. A companion lecture is available that explains creating a SageMaker training job to consume prepared data for model training.