> ## Documentation Index
> Fetch the complete documentation index at: https://notes.kodekloud.com/llms.txt
> Use this file to discover all available pages before exploring further.
# CloudFormation Demo
> Learn to use AWS CloudFormation with a YAML template to deploy an EC2 instance, including defining resources, parameters, and outputs.
In this lesson, you’ll learn how to work with AWS CloudFormation by using a YAML template to deploy an EC2 instance. While CloudFormation supports both YAML and JSON, this demo focuses on YAML for its readability and simplicity.
We'll walk through creating a file named `stack.yaml` that configures our CloudFormation stack. This template includes sections for defining resources such as EC2 instances and security groups, along with parameters and outputs to customize and retrieve important deployment details.
***
## Defining the EC2 Instance
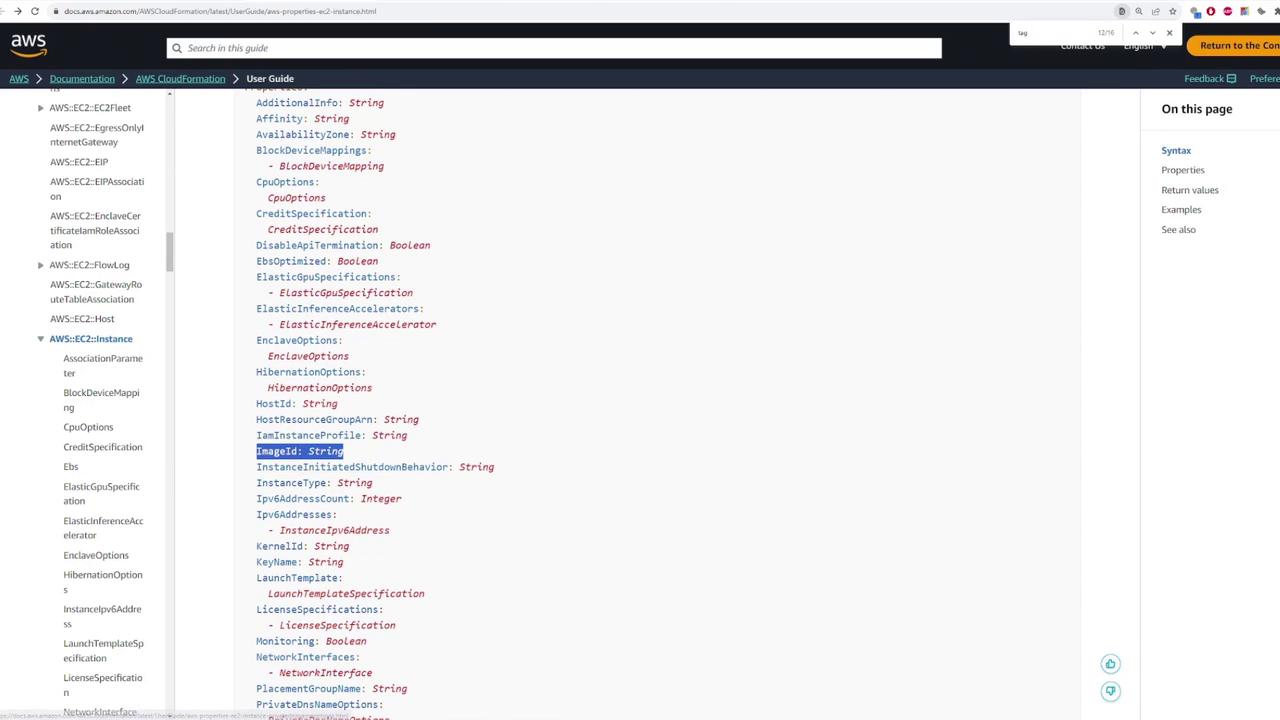
To start, we define an EC2 instance as a resource. First, we assign the resource a logical name ("Ec2Instance") and specify its type as `AWS::EC2::Instance`, as outlined in the AWS documentation.
```yaml theme={null}
Resources:
Ec2Instance:
```
Next, add the resource's Type and Properties. CloudFormation uses the `Type` field to identify the resource, and the Properties section allows you to specify configuration details for your instance such as security groups, tags, and AMI details. The example below highlights a standard configuration excerpt:
```yaml theme={null}
Type: AWS::EC2::Instance
Properties:
AdditionalInfo: String
Affinity: String
AvailabilityZone: String
BlockDeviceMappings:
- BlockDeviceMapping:
CpuOptions:
CpuOptions:
CreditSpecification:
CreditSpecification:
DisableApiTermination: Boolean
EbsOptimized: Boolean
ElasticGpuSpecifications:
- ElasticGpuSpecification:
ElasticInferenceAccelerators:
- ElasticInferenceAccelerator:
InstanceId: String
InstanceType: String
IamInstanceProfile: String
```
Following that, here’s a detailed configuration that specifies essential properties like the AMI, key pair, and tags:
```yaml theme={null}
Resources:
Ec2Instance:
Type: AWS::EC2::Instance
Properties:
ImageId: ami-041feb57c611358bd
KeyName: main
Tags:
- Key: Name
Value: myEc2Instance
```
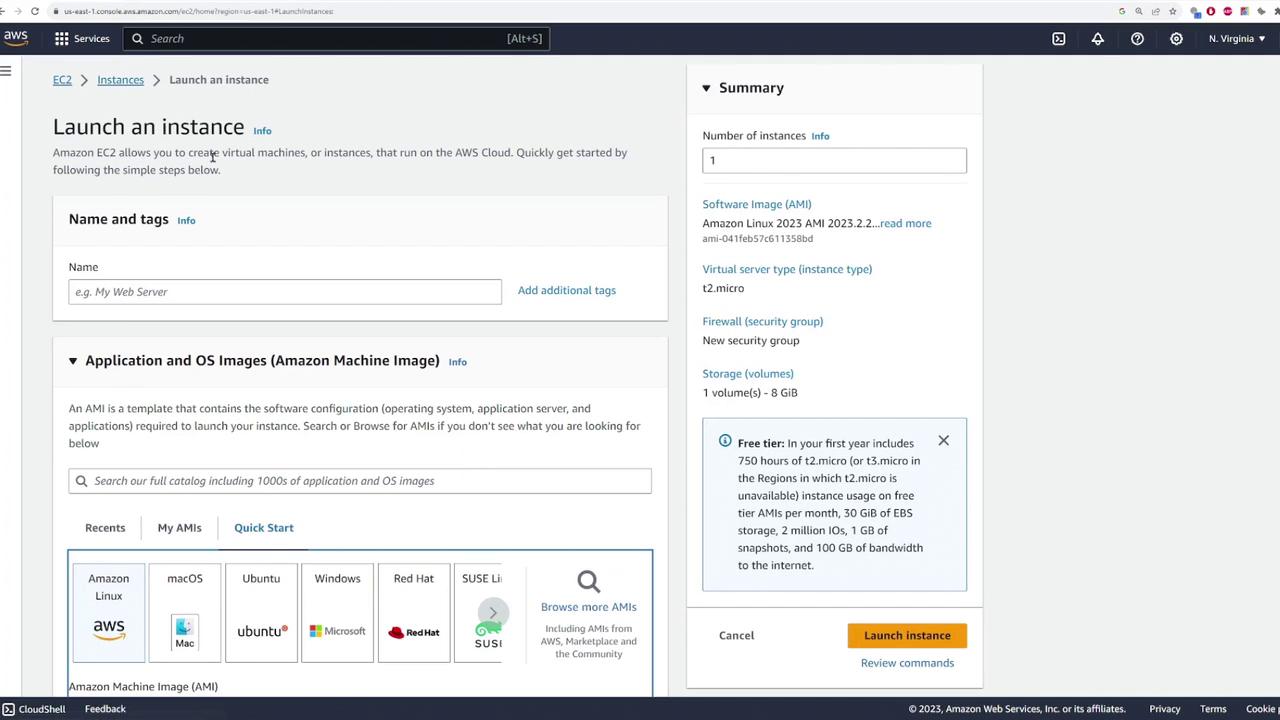
For the appropriate AMI, navigate to the EC2 console, launch an instance, and choose a suitable Amazon Machine Image.
Refer to the [AWS CloudFormation User Guide](https://docs.aws.amazon.com/AWSCloudFormation/latest/UserGuide/) for a full list of configurable properties.
Below is an image from the AWS documentation that illustrates the properties of an EC2 instance:
The next image shows the EC2 console for instance selection:
***
## Adding a Security Group
To enhance your deployment, you can add a security group resource that controls access to your instance. Begin by defining the security group with a logical name ("InstanceSecurityGroup"), its type (`AWS::EC2::SecurityGroup`), and a description.
```yaml theme={null}
Resources:
Ec2Instance:
Type: AWS::EC2::Instance
Properties:
ImageId: ami-041feb57c611358bd
KeyName: main
Tags:
- Key: Name
Value: myEc2Instance
InstanceSecurityGroup:
Type: AWS::EC2::SecurityGroup
Properties:
GroupDescription: Enable SSH access via port 22
```
Then, specify the ingress rules for this security group. In the example below, TCP port 22 is opened for SSH access from any IP address:
```yaml theme={null}
Properties:
ImageId: ami-041feb57c611358bd
KeyName: main
Tags:
- Key: Name
Value: myEc2Instance
InstanceSecurityGroup:
Type: AWS::EC2::SecurityGroup
Properties:
GroupDescription: Enable SSH access via port 22
SecurityGroupIngress:
- IpProtocol: tcp
FromPort: 22
ToPort: 22
CidrIp: 0.0.0.0/0
```
If you intend to allow access over a range of ports, modify `FromPort` and `ToPort` accordingly. For a single port, both values remain the same.
Finally, integrate the security group reference into the EC2 instance. CloudFormation enables you to refer to other resources using the `!Ref` intrinsic function:
```yaml theme={null}
Resources:
Ec2Instance:
Type: AWS::EC2::Instance
Properties:
SecurityGroups:
- !Ref InstanceSecurityGroup
ImageId: ami-041feb57c611358bd
KeyName: main
Tags:
- Key: Name
Value: myEc2Instance
InstanceSecurityGroup:
Type: AWS::EC2::SecurityGroup
Properties:
GroupDescription: Enable SSH access via port 22
SecurityGroupIngress:
- IpProtocol: tcp
FromPort: 22
ToPort: 22
CidrIp: 0.0.0.0/0
```
***
## Adding Parameters for Dynamic Input
To provide flexibility during deployment, you can introduce parameters for customizable values such as the EC2 instance name and key pair. The example below creates parameters for the key pair and instance name. By setting the type of `KeyName` to `AWS::EC2::KeyPair::KeyName`, CloudFormation displays a dropdown list of available key pairs.
```yaml theme={null}
Parameters:
KeyName:
Description: The EC2 key pair
Type: AWS::EC2::KeyPair::KeyName
Ec2Name:
Type: String
Resources:
Ec2Instance:
Type: AWS::EC2::Instance
Properties:
SecurityGroups:
- !Ref InstanceSecurityGroup
ImageId: ami-041feb57c611358bd
KeyName: !Ref KeyName
Tags:
- Key: Name
Value: !Ref Ec2Name
InstanceSecurityGroup:
Type: AWS::EC2::SecurityGroup
Properties:
GroupDescription: Enable SSH access via port 22
SecurityGroupIngress:
- IpProtocol: tcp
FromPort: 22
ToPort: 22
CidrIp: 0.0.0.0/0
```
***
## Adding Outputs
Outputs enable you to extract and display key information after the stack is deployed. In this template, the public IP address of the EC2 instance is output using the `!GetAtt` function to access the `PublicIp` attribute.
```yaml theme={null}
Outputs:
PublicIp:
Description: Server Public IP
Value: !GetAtt Ec2Instance.PublicIp
```
***
## Complete CloudFormation Template
Below is the final version of the CloudFormation template combining parameters, resources, and outputs:
```yaml theme={null}
Parameters:
KeyName:
Description: The EC2 key pair
Type: AWS::EC2::KeyPair::KeyName
Ec2Name:
Type: String
Resources:
Ec2Instance:
Type: AWS::EC2::Instance
Properties:
SecurityGroups:
- !Ref InstanceSecurityGroup
ImageId: ami-041feb57c611358bd
KeyName: !Ref KeyName
Tags:
- Key: Name
Value: !Ref Ec2Name
InstanceSecurityGroup:
Type: AWS::EC2::SecurityGroup
Properties:
GroupDescription: Enable SSH access via port 22
SecurityGroupIngress:
- IpProtocol: tcp
FromPort: 22
ToPort: 22
CidrIp: 0.0.0.0/0
Outputs:
PublicIp:
Description: Server Public IP
Value: !GetAtt Ec2Instance.PublicIp
```
***
## Deploying the CloudFormation Stack
To deploy your CloudFormation stack:
1. Open the [AWS CloudFormation console](https://console.aws.amazon.com/cloudformation).
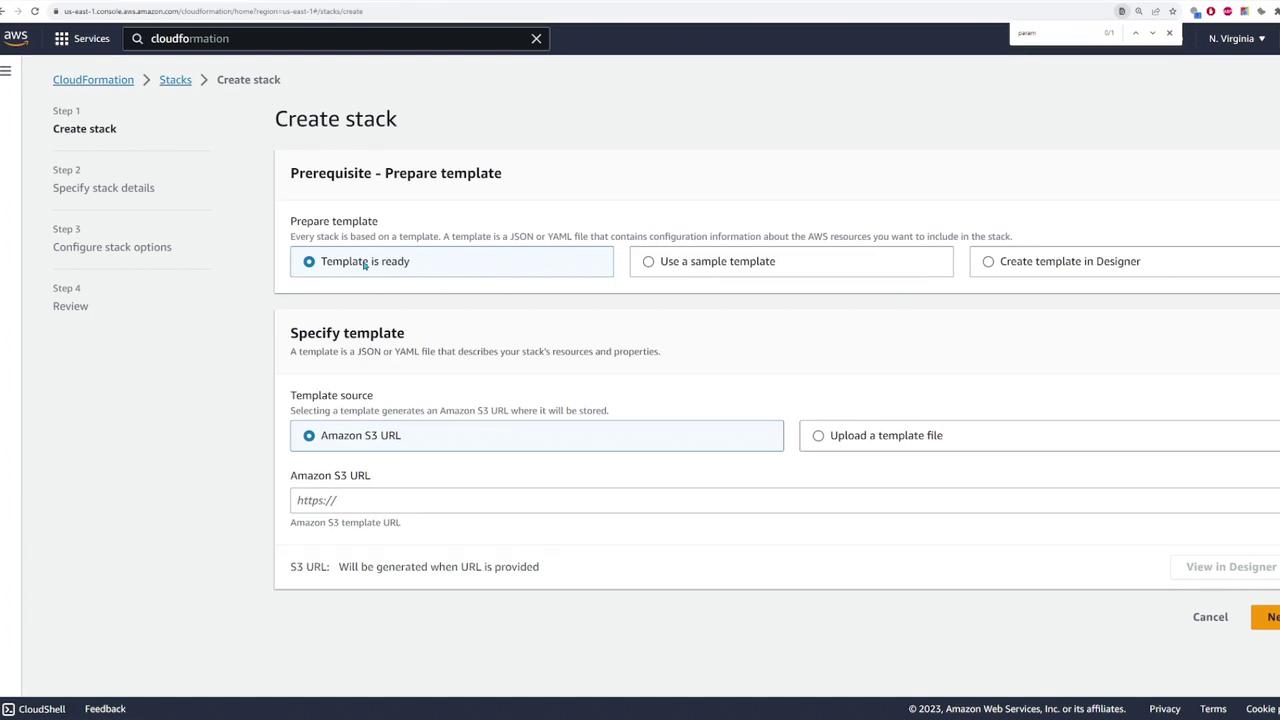
2. Click **Create stack** and choose to upload your template file.
3. Select the `stack.yaml` file.
4. Enter a stack name (e.g., "my-deployment").
5. Specify the parameters:
* For the EC2 instance name, enter a desired value (for example, "this is the server").
* For the key pair, select the appropriate key from the dropdown.
6. Click **Next** to configure additional options such as tags, rollback settings, or notifications.
7. Review and submit the stack for deployment.
The image below illustrates the AWS CloudFormation console during stack creation:
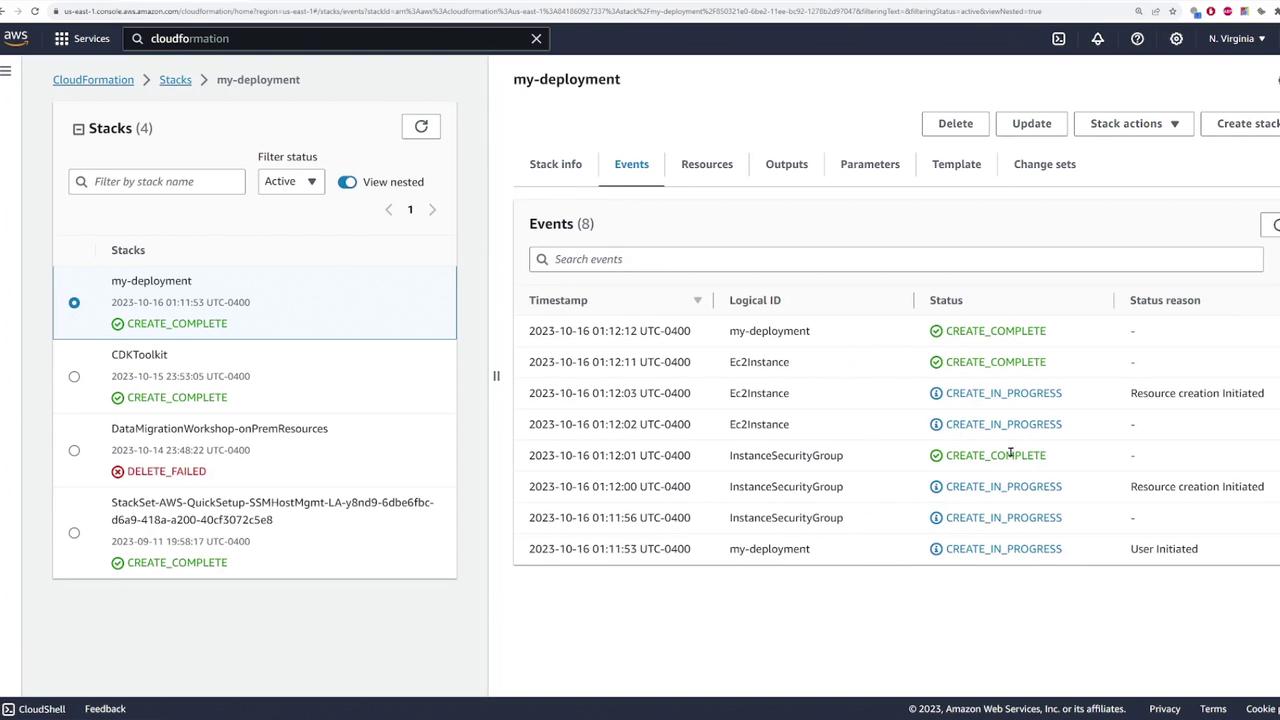
After deployment, the stack status will change to "CREATE\_COMPLETE". You can review the events and check resource details, including obtaining the EC2 instance's public IP address from the Outputs tab.
The following image shows the stack deployment events in the CloudFormation console:
***
## Updating or Deleting the Stack
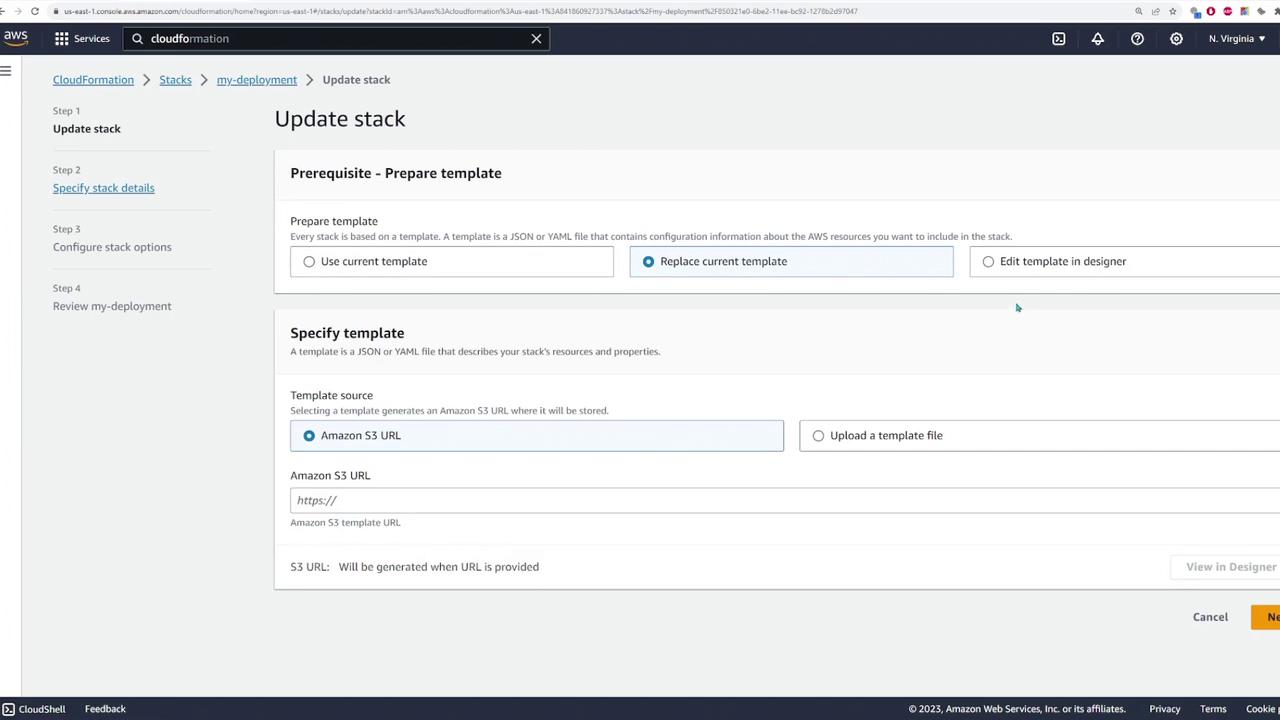
If you need to make changes, update the stack using the template designer within the AWS CloudFormation console. To delete a stack, simply select it in the console and click **Delete**. This action removes all resources created by the stack.
The image below shows the update interface in the AWS CloudFormation console:
***
That concludes this lesson on AWS CloudFormation. Enjoy automating your infrastructure and check back for more detailed tutorials in our upcoming lessons!