Key Features
Azure App Service is built to help your application scale efficiently at minimal cost. It supports both manual and automated scaling based on defined metrics. For instance, when CPU utilization exceeds 90%, the platform can automatically add new instances to handle the increased load. Additionally, you can adjust your App Service Plan to scale up or down based on performance requirements. Another major feature is its robust continuous integration and deployment support. Azure App Service integrates with popular tools such as Azure DevOps, GitHub, Bitbucket, FTP, and local Git repositories, ensuring your development and deployment workflows remain smooth and efficient. This enables continuous updates to your application with little to no downtime. Deployment slots further enhance the deployment process by allowing you to target different environments (e.g., testing or production) without impacting the live site. With customizable settings swaps between these slots, you gain greater control, reducing the risks associated with new deployments.
Leveraging deployment slots can significantly reduce downtime during application updates.
App Service Plans
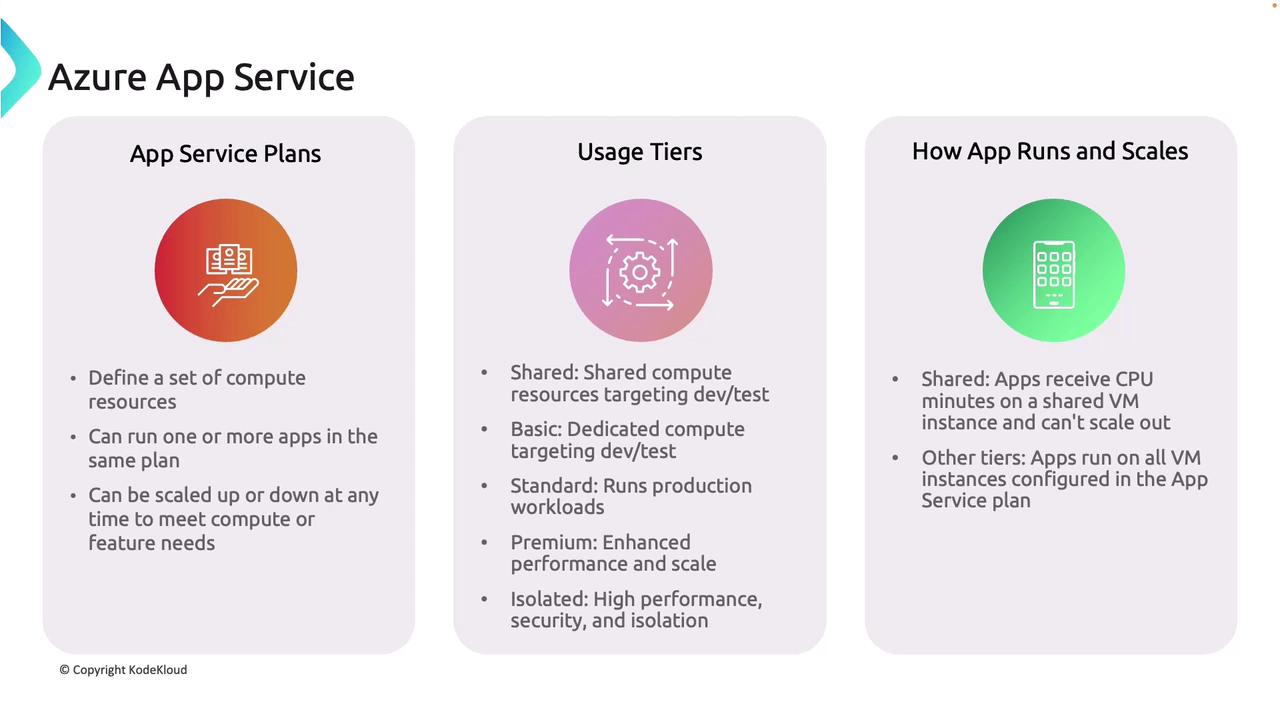
The App Service Plan is the foundation for how your apps are hosted in Azure App Service. It defines the compute resources—CPU, memory, and storage—used by your web applications, APIs, or mobile applications. Multiple applications can share the same App Service Plan, allowing for efficient resource allocation. Importantly, you can scale an App Service Plan up or down to meet changing workloads without redeploying your apps. Imagine App Service Plans as different subscription tiers on a streaming service like Netflix—each tier offers varying levels of performance and features, similar to plans offering mobile-only, full HD, or even 4K viewing.Usage Tiers
App Service Plans are available in multiple usage tiers:- Free Tier: Provides 60 minutes of daily usage, ideal for testing purposes.
- Shared Tier: Uses shared compute resources, making it a cost-efficient option for development and testing. Note that scaling out is not supported in this tier.
- Basic Tier: Offers dedicated compute resources for improved performance and isolation, still targeting development and testing.
- Standard Tier: Designed for production workloads—it offers features like custom domains, auto scaling, staging slots, backups, and VNET integration.
- Premium Tier: Enhances performance and scalability for high-traffic applications with additional reliability.
- Isolated Tier: Caters to applications needing the highest level of performance, security, and isolation for strict compliance and regulatory requirements.
Deploying an App Service
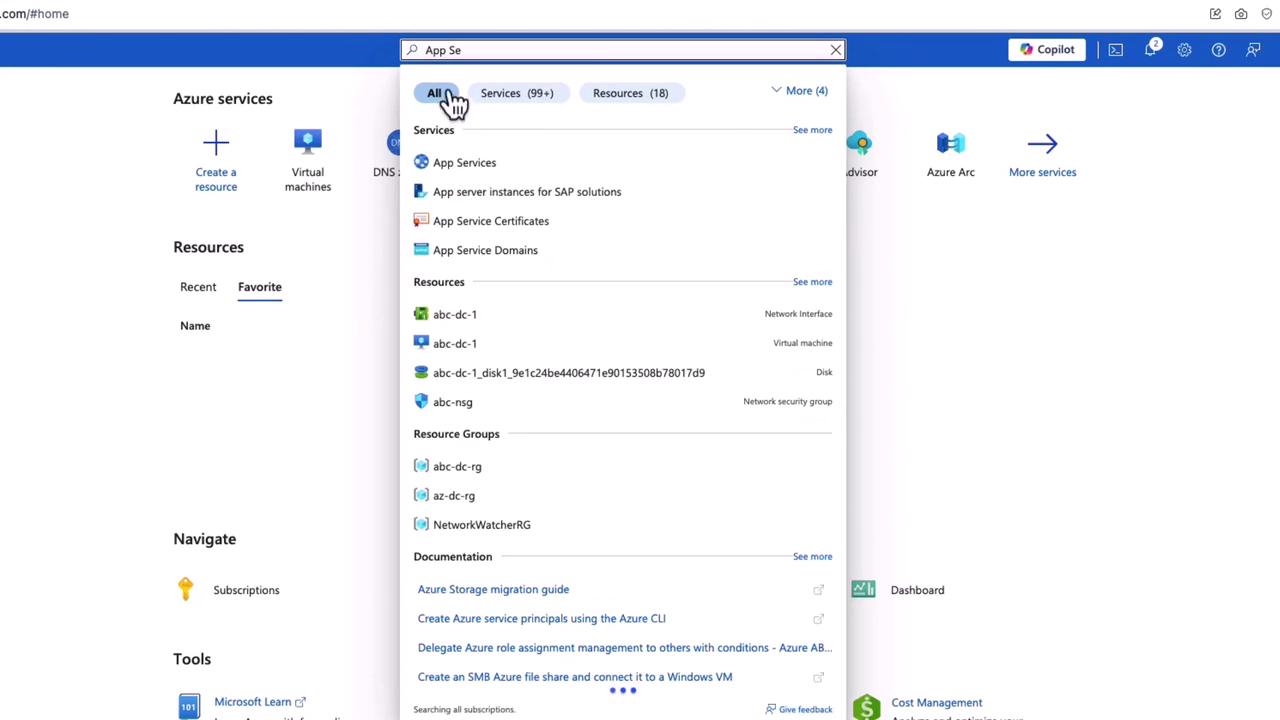
In this section, we will walk through deploying an Azure App Service using the Azure portal. When deploying, an App Service Plan is either created or an existing one is reused to host your application.Step 1: Search and Create a Web App
- In the Azure portal, search for “App Service” and click on Create a web app.
Step 2: Configure Web App Settings
- Resource Group: Create a new resource group (e.g., “app01 for AZ204”).
- App Name: Specify a unique app name (e.g., “AC204demoapp01”) as it will be registered under azurewebsites.net.
- Uniqueness Feature: Choose whether to enable the preview feature that appends random letters and region names for uniqueness. In this example, the feature is disabled.
Step 3: Create the App Service Plan
Click to create a new plan (e.g., “ASPAC20401”) and choose your pricing tier. While the standard plan is selected by default, you can review other available pricing options by clicking on Explore pricing plans.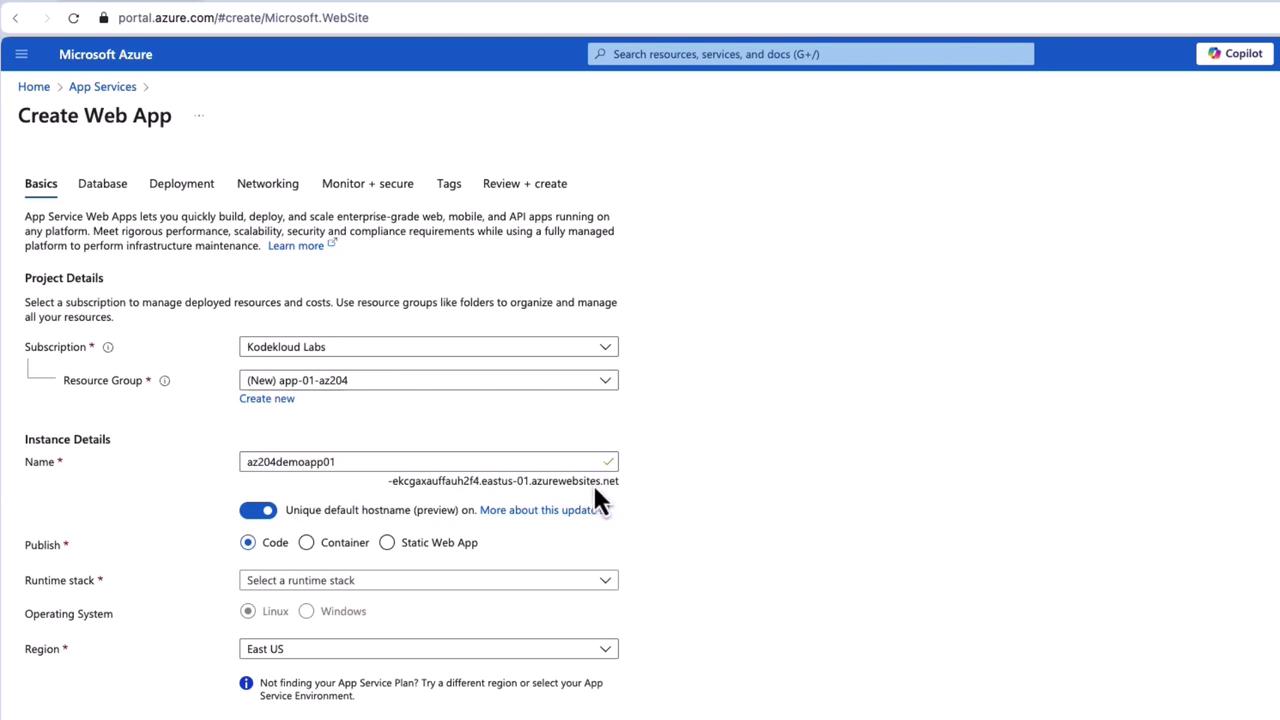
Step 4: Review Pricing Options
Azure offers various hardware-based pricing tiers:| Pricing Tier | Features | Typical Use Case |
|---|---|---|
| Free (F1) and Shared (D) | Limited features, no auto scaling or staging slots | Testing and development |
| Basic (B1, B2, B3) | Dedicated compute resources | Small-scale production or testing |
| Standard (S1, S2, S3) | Custom domains, auto scaling, staging slots, backups, VNET integration | Production workloads |
| Premium (P1, PV2, PV3) and Isolated | Enhanced performance, high scalability, and isolation | High-traffic, mission-critical applications |
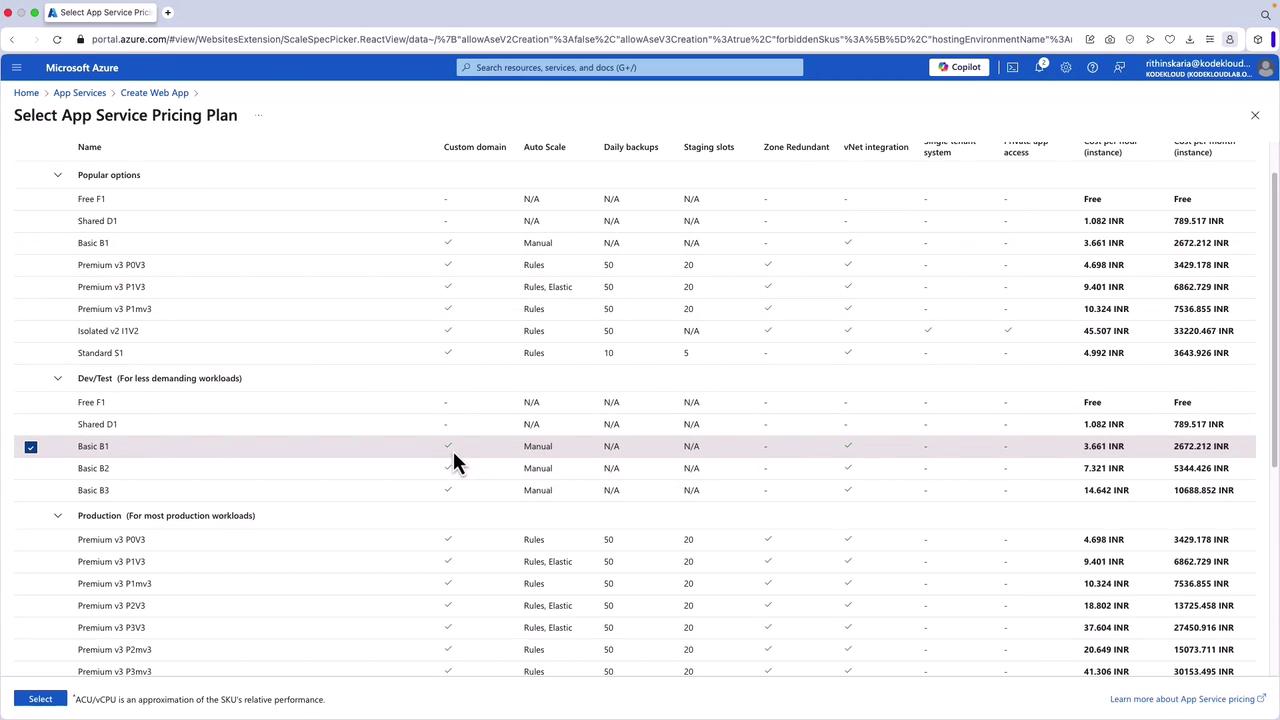
Be aware that the shared tier has limitations, such as no auto scaling, staging slots, or zone redundancy.
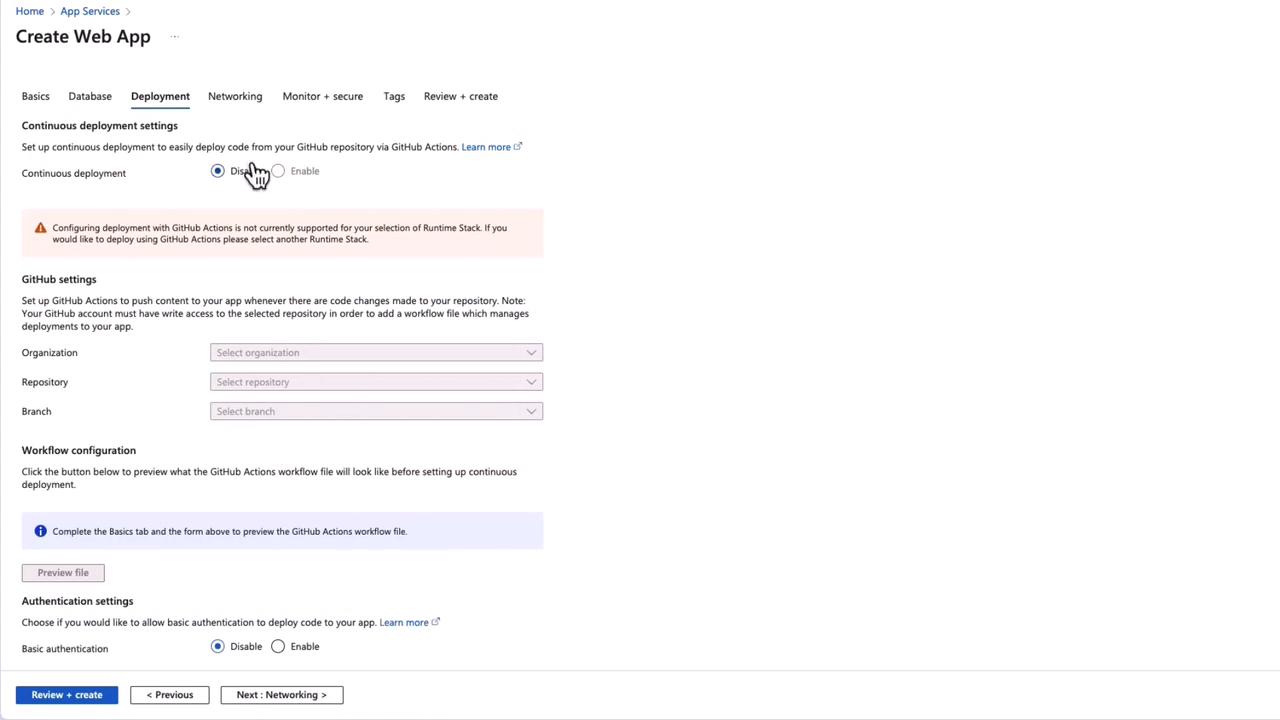
Step 5: Configure Deployment and Additional Settings
- Integration Features: In the shared tier, options like zone redundancy, database integration, and continuous deployment (via GitHub, Azure DevOps, etc.) may be limited.
- Networking & Monitoring: Higher tiers allow configuring advanced features such as networking settings and monitoring tools like Application Insights.
Step 6: Confirm and Deploy
After reviewing your configuration, click Review and Create and then Create to deploy the web application along with the selected App Service Plan. If you already have an existing plan, you can reuse it, as a single App Service Plan can support multiple applications—even those with different runtime stacks—provided there are enough resources.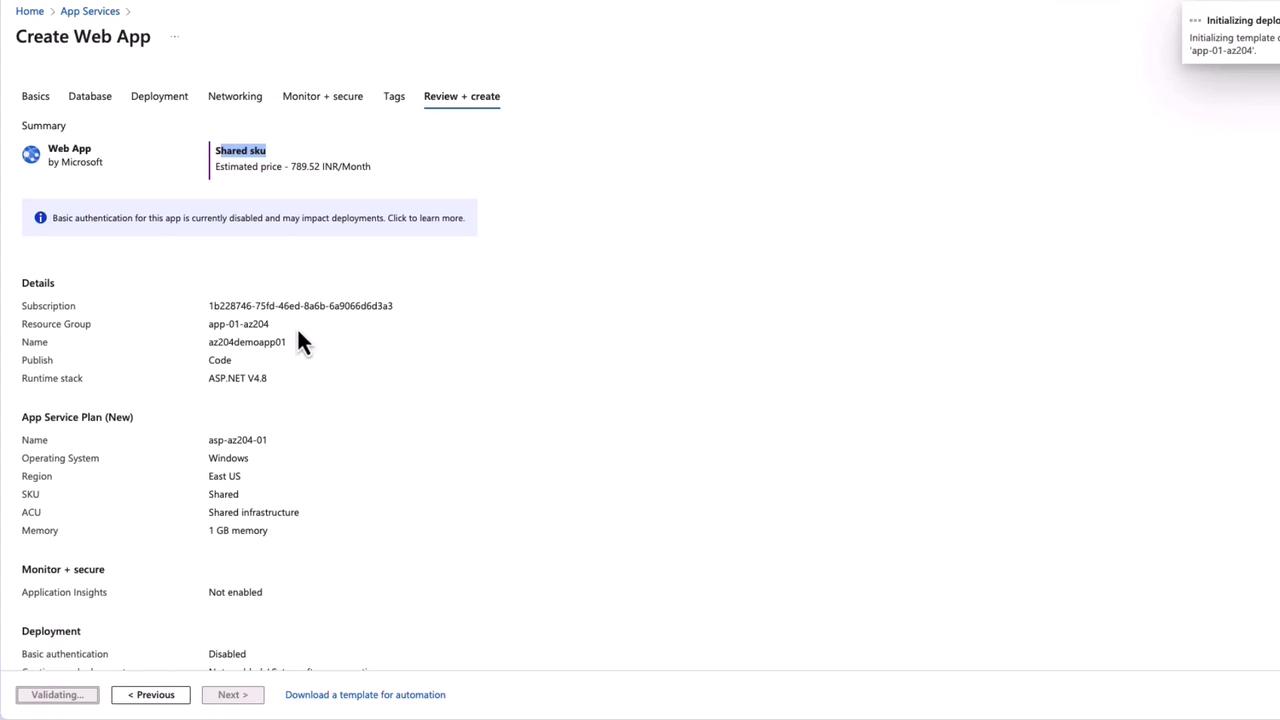
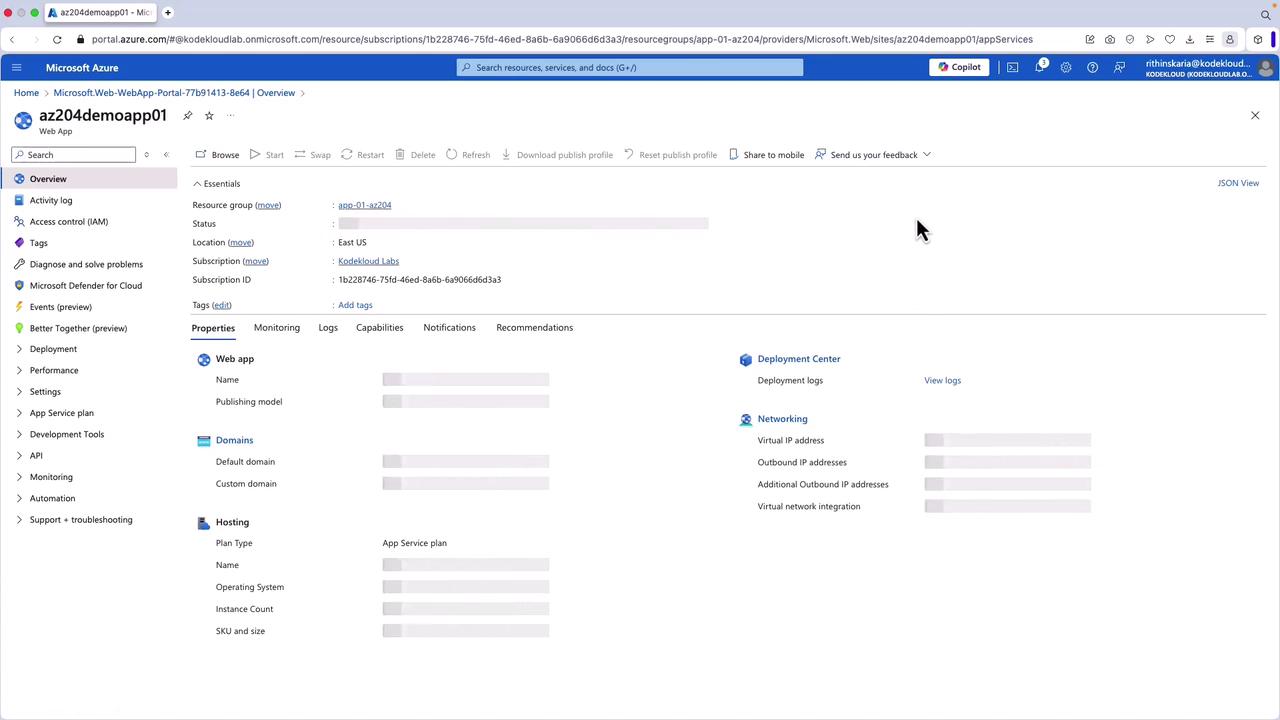
Step 7: Access Your Application
Once the deployment is complete, click Go to resource to access your web app’s overview page. There, you will find the URL which, when opened in a browser, confirms that your Azure App Service is running and ready to host your content.