Consistency Levels in Azure Cosmos DB
Strong Consistency
Strong consistency guarantees that every read returns the most recent committed version of an item. This means once a write operation is acknowledged, all subsequent reads reflect that write immediately. This level is ideal for scenarios where data precision is critical, such as financial applications. However, it may incur higher latency and lower throughput due to the strict synchronization required.Ensure that strong consistency is used in scenarios where data correctness is paramount, even if it might affect performance.
Bounded Staleness
Bounded staleness allows reads to lag behind writes by a specified interval, sequence number, or a defined number of operations. For instance, you can configure your system to return data that is X seconds or Y versions old. This option offers a middle ground between strong consistency and high availability, making it suitable when a slight delay is acceptable.Session Consistency
Session consistency offers consistent reads and writes within a single session. In this model, data modifications made during a session are immediately visible within that same session, even if there might be some divergence across different sessions or users. This level is perfect for user-centric applications, ensuring that the user’s interactions remain internally consistent.Consistent Prefix
Consistent prefix maintains the order of data updates across replicas. Although it may not immediately reflect the latest updates, it guarantees that all responses preserve the sequence in which writes occurred, preventing out-of-order data. This consistency level is especially useful for event logging systems where maintaining chronological order is essential.Eventual Consistency
Eventual consistency is the most lenient model, where reads may not reflect the very latest writes, but all replicas eventually converge to the same state. It is optimized for high availability, low latency, and high throughput, making it ideal for applications such as social media feeds or product catalogs, where real-time precision is less critical. As you move from strong to eventual consistency, the guarantee of data accuracy decreases while improvements in availability, latency, and throughput increase.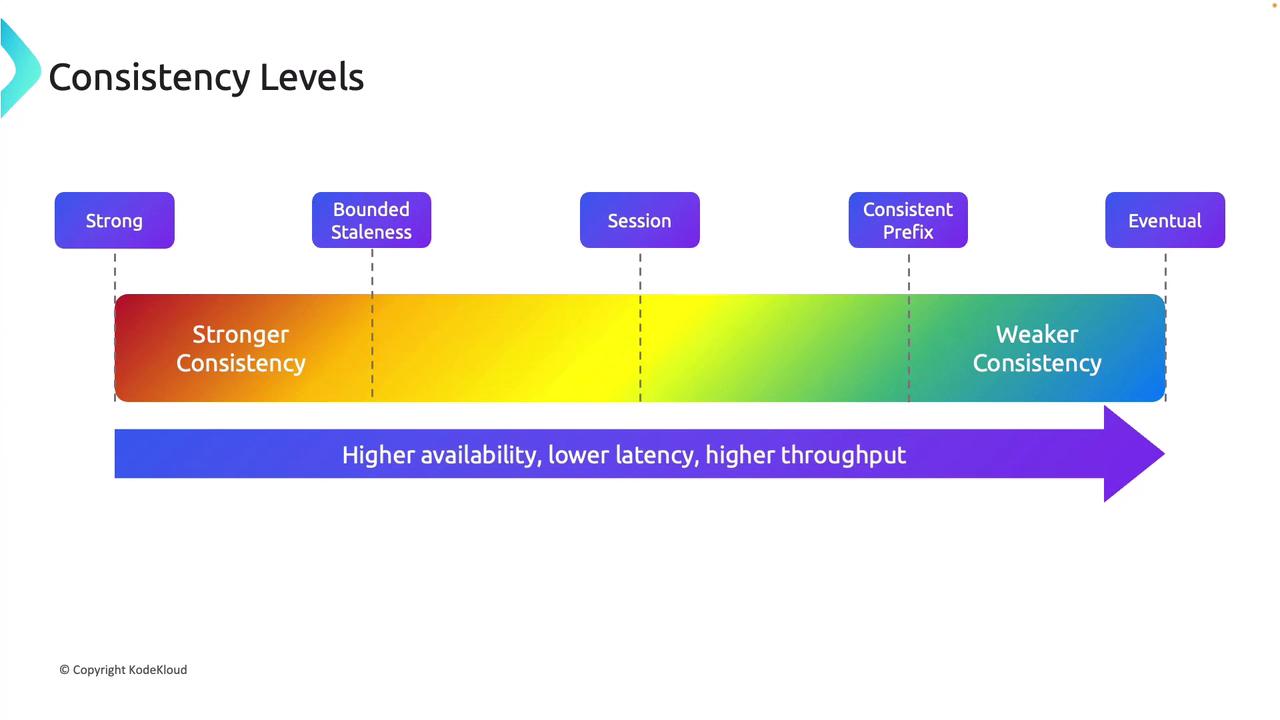
Comparing Consistency Levels
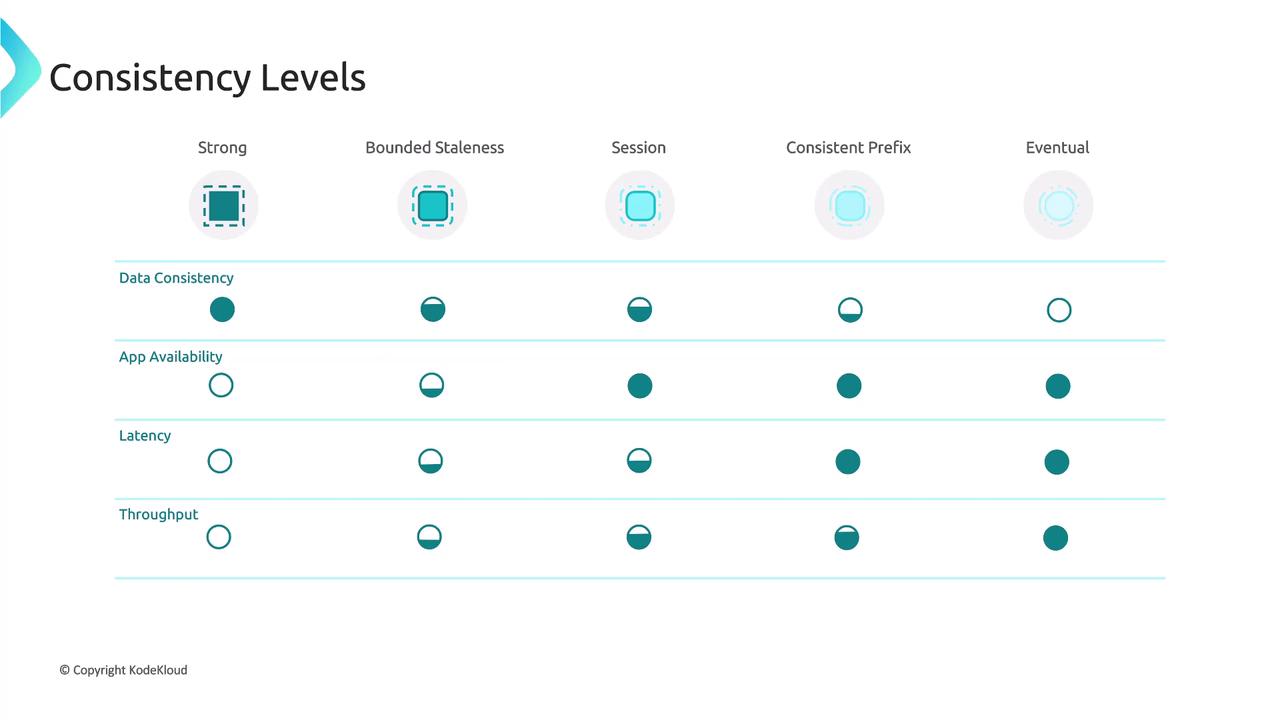
Understanding how consistency levels impact data consistency, application availability, latency, and throughput is crucial. The table below summarizes these trade-offs:| Criterion | Strong Consistency | Bounded Staleness | Session Consistency | Consistent Prefix | Eventual Consistency |
|---|---|---|---|---|---|
| Data Consistency | Highest | High | Moderate | Moderate | Lowest |
| App Availability | Limited | Moderate | Good | Good | Highest |
| Latency | High | Moderate | Low | Low | Lowest |
| Throughput | Lower | Moderate | Higher | Higher | Highest |
Choosing the Right Consistency Level
Azure Cosmos DB offers a range of consistency levels tailored for diverse use cases and APIs. Consider the following guidelines when making your selection:- Session Consistency: Ideal for many user-centric applications due to its balanced approach. It ensures that within a session, reads and writes are consistent.
- Bounded Staleness Consistency: Best for scenarios where global data freshness is required with a tolerable delay.
- Eventual Consistency: Recommended when the primary focus is on high availability and low latency, and immediate synchronization is not crucial.
Note that the probability-bounded staleness metric in Cosmos DB can help predict how often a stronger consistency level might effectively be achieved compared to the configured setting, highlighting the trade-offs involved.
Deploying an Azure Cosmos DB Account
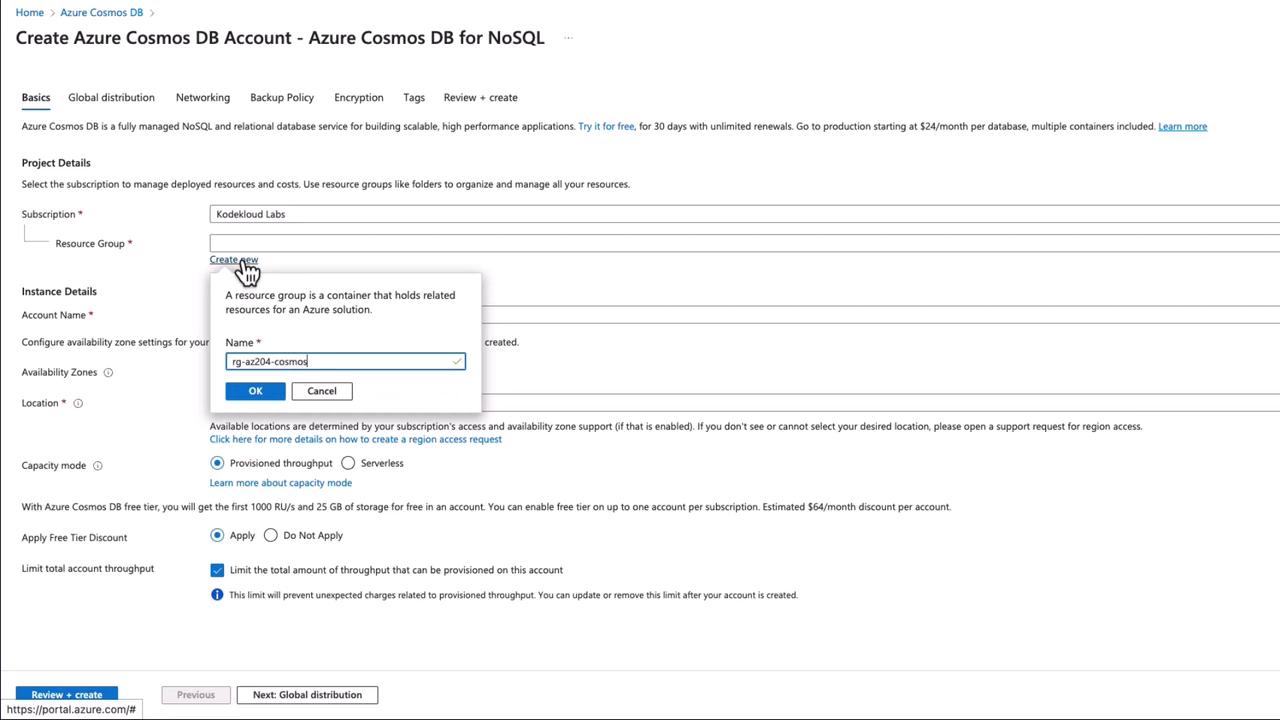
After understanding consistency guarantees, the next step is to deploy an Azure Cosmos DB account. Use the Azure Portal to set up your environment by following these steps:- Log in to the Azure Portal and select the option to create a new Azure Cosmos DB account.
- Choose the appropriate API (for example, the NoSQL native API).
- Create a new resource group if needed.
- Enter a unique Cosmos DB account name (e.g., AZ-204-Cosmos-DB-01). Account names must be unique across Azure; reserved words or names already in use will be rejected.
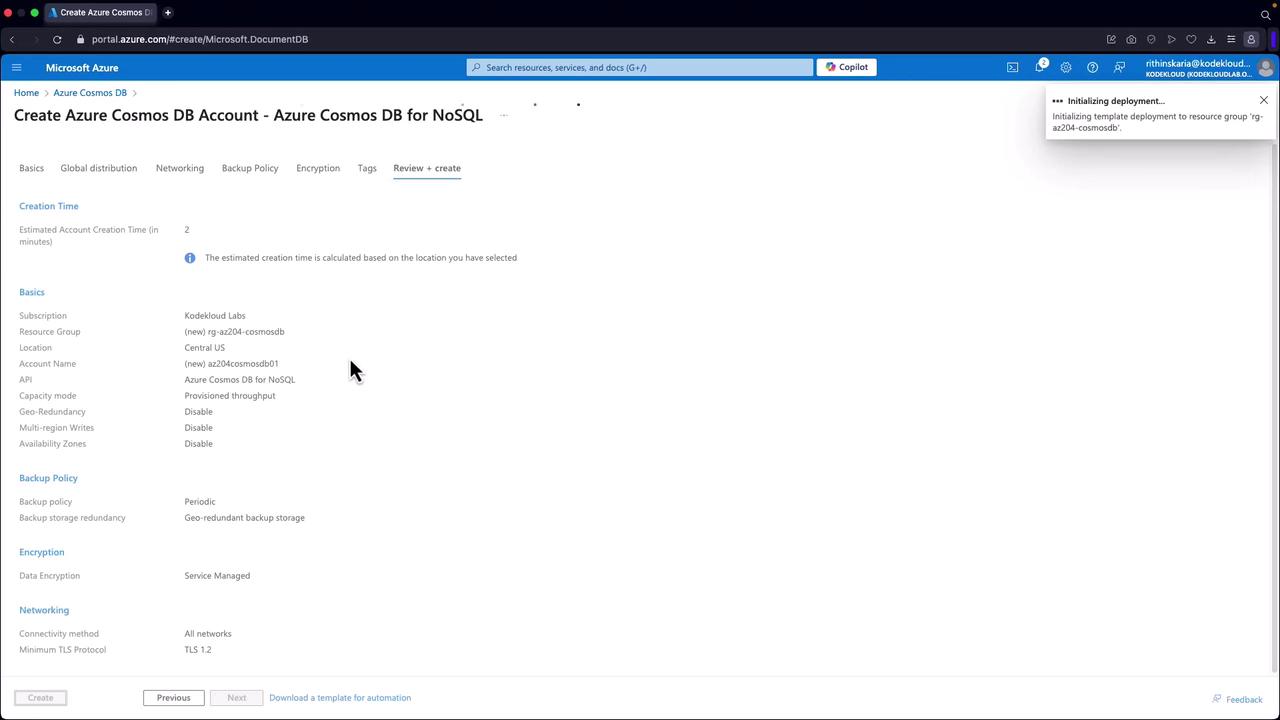
- Configure additional settings such as:
- Availability Zones and Region: Select the optimal region for your workload.
- Throughput: Choose between provisioned throughput (with a free tier option of the first 1000 Request Units and 25 GB of storage) or a serverless configuration.
- Networking, Backup Policy, and Encryption: Decide whether to use service-managed or customer-managed encryption keys.