AZ-204: Developing Solutions for Microsoft Azure
Exploring the Microsoft Identity Platform
Permissions and Consent
In this lesson, we explore the concept of permissions and consent within the Microsoft Identity Platform. Understanding how permissions are structured and how user consent is obtained is critical for securing your application and ensuring proper authorization. This guide covers the different types of permissions in Azure, explains various consent models, and demonstrates how to work with permissions using API calls.
Overview
By grasping the distinction between delegated and application permissions—as well as knowing when to use static, incremental, or admin consent—you ensure your applications request only the access they truly need, thereby enhancing security.
Permission Types
Delegated Permissions
Delegated permissions are used by applications that act on behalf of a signed-in user. In this model, the app can only access resources that the user is allowed to access. For instance, if a user logs in using their Microsoft account, the app may request access to the user's calendar; if granted, the app can read or modify the calendar using the user's permissions.
Application (App-Only) Permissions
Application permissions, also known as app-only permissions, allow an application to access resources without the need for a signed-in user. The app authenticates using its own identity. A common scenario is a background service that pulls data from SharePoint Online without any user intervention. In this case, the service authenticates with Microsoft Entra ID, obtains a token using its assigned permissions, and accesses the resource directly.
Consent Types
Static User Consent
With static user consent, a user grants an application permission once—typically during the initial sign-in process. For example, once a user consents to an app reading their profile, the permission is remembered for future sessions, and the app cannot request additional permissions later on.
Incremental and Dynamic User Consent
Incremental consent allows applications to request additional permissions over time, rather than overwhelming users with multiple prompts at the start. For example, a travel app may initially ask for location access and later request permission to access contacts when needed.
Admin Consent
Certain applications, particularly those accessing sensitive data such as full email or directory details, require an administrator to grant consent on behalf of the entire organization. For example, an app reading organization-wide data from Microsoft Graph must be approved by an administrator. If you encounter this scenario and you are not an admin, please contact your tenant administrator.
Key Takeaway
Understanding the differences between delegated and application permissions, and knowing the various consent models (static, incremental, and admin), ensures that you can configure access correctly while respecting user privacy.
Demonstration: Working with Permissions and Consent Using API Calls
Follow this step-by-step demonstration that uses API calls to manage permissions and consent.
1. Creating a Secret for Your Service Principal
First, navigate to your service principals in the Azure portal and create a secret. Select the relevant service principal (the one you created previously) and add a new secret.
When prompted, provide a descriptive name (for example, "secret 01") and set an expiry (e.g., three months). Click Add and make sure to copy the secret value immediately, as it will not be visible later. Save it securely in your notepad.
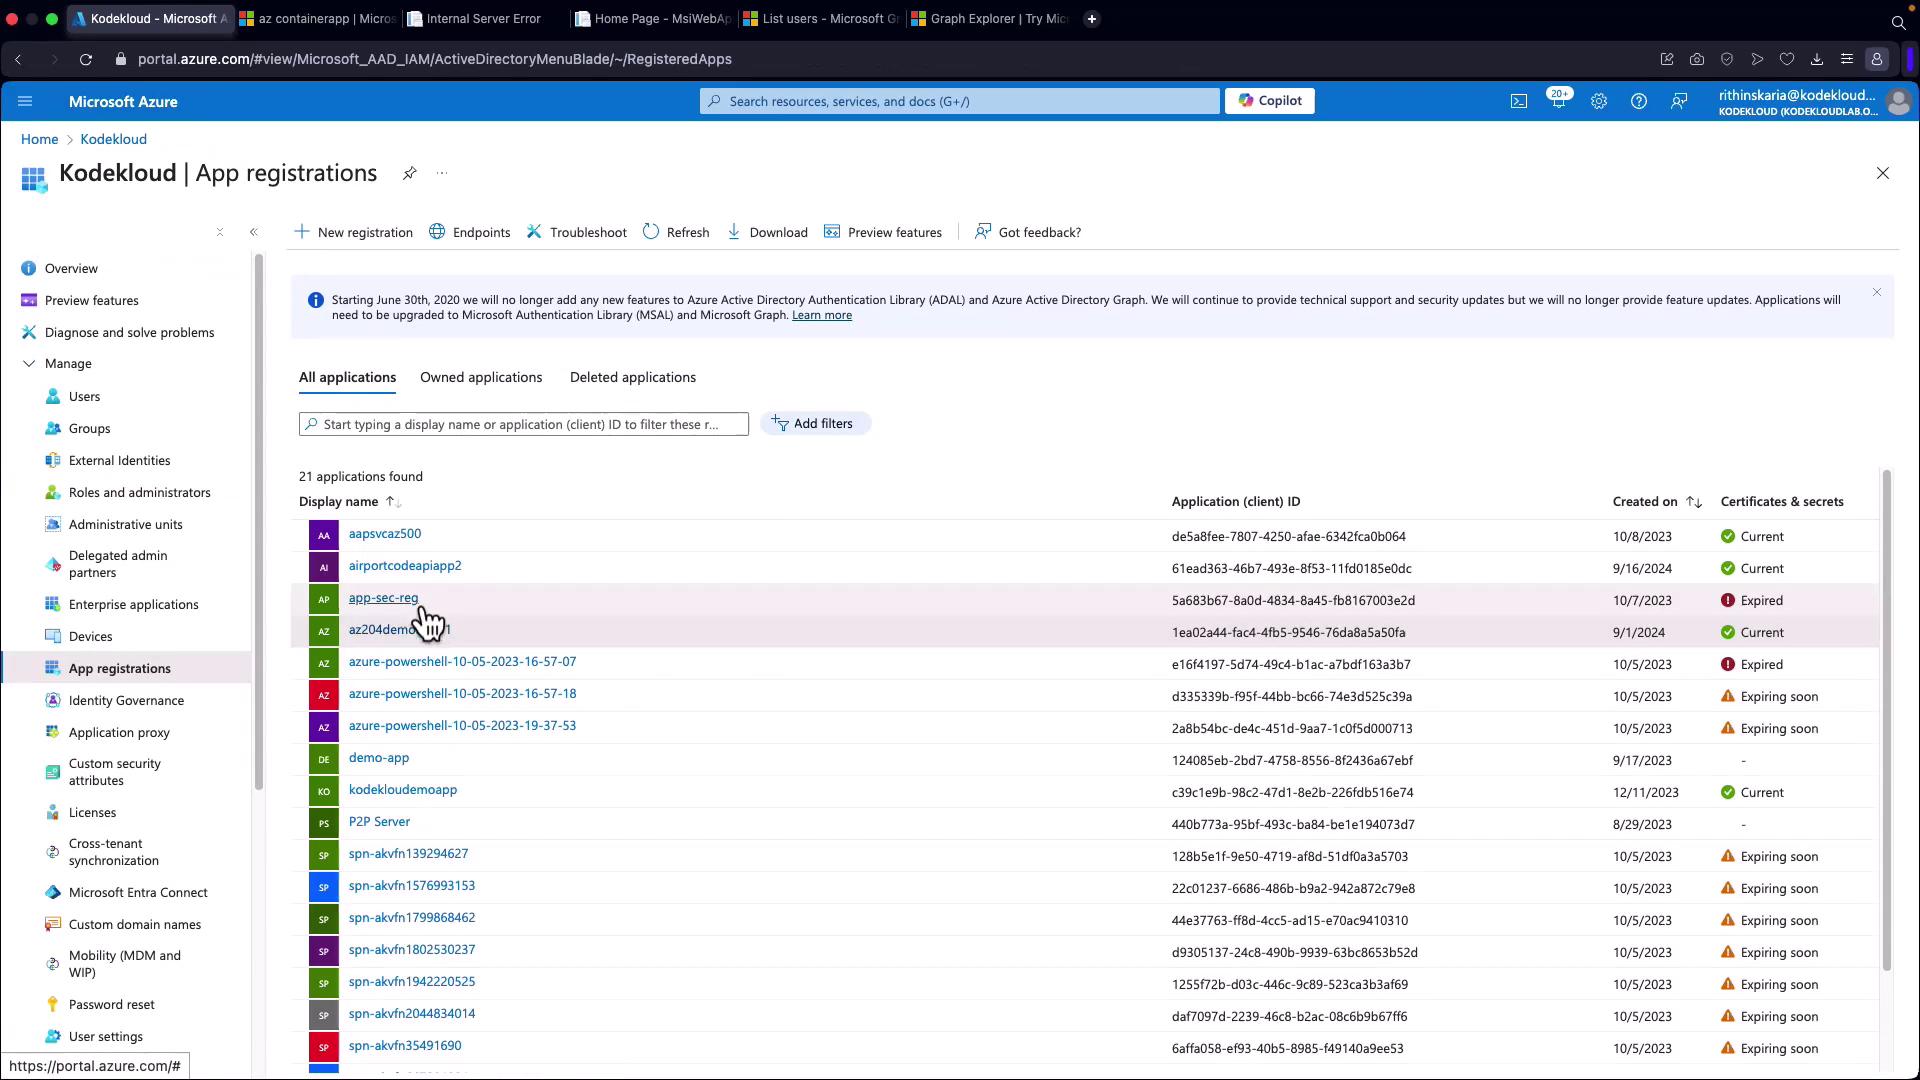
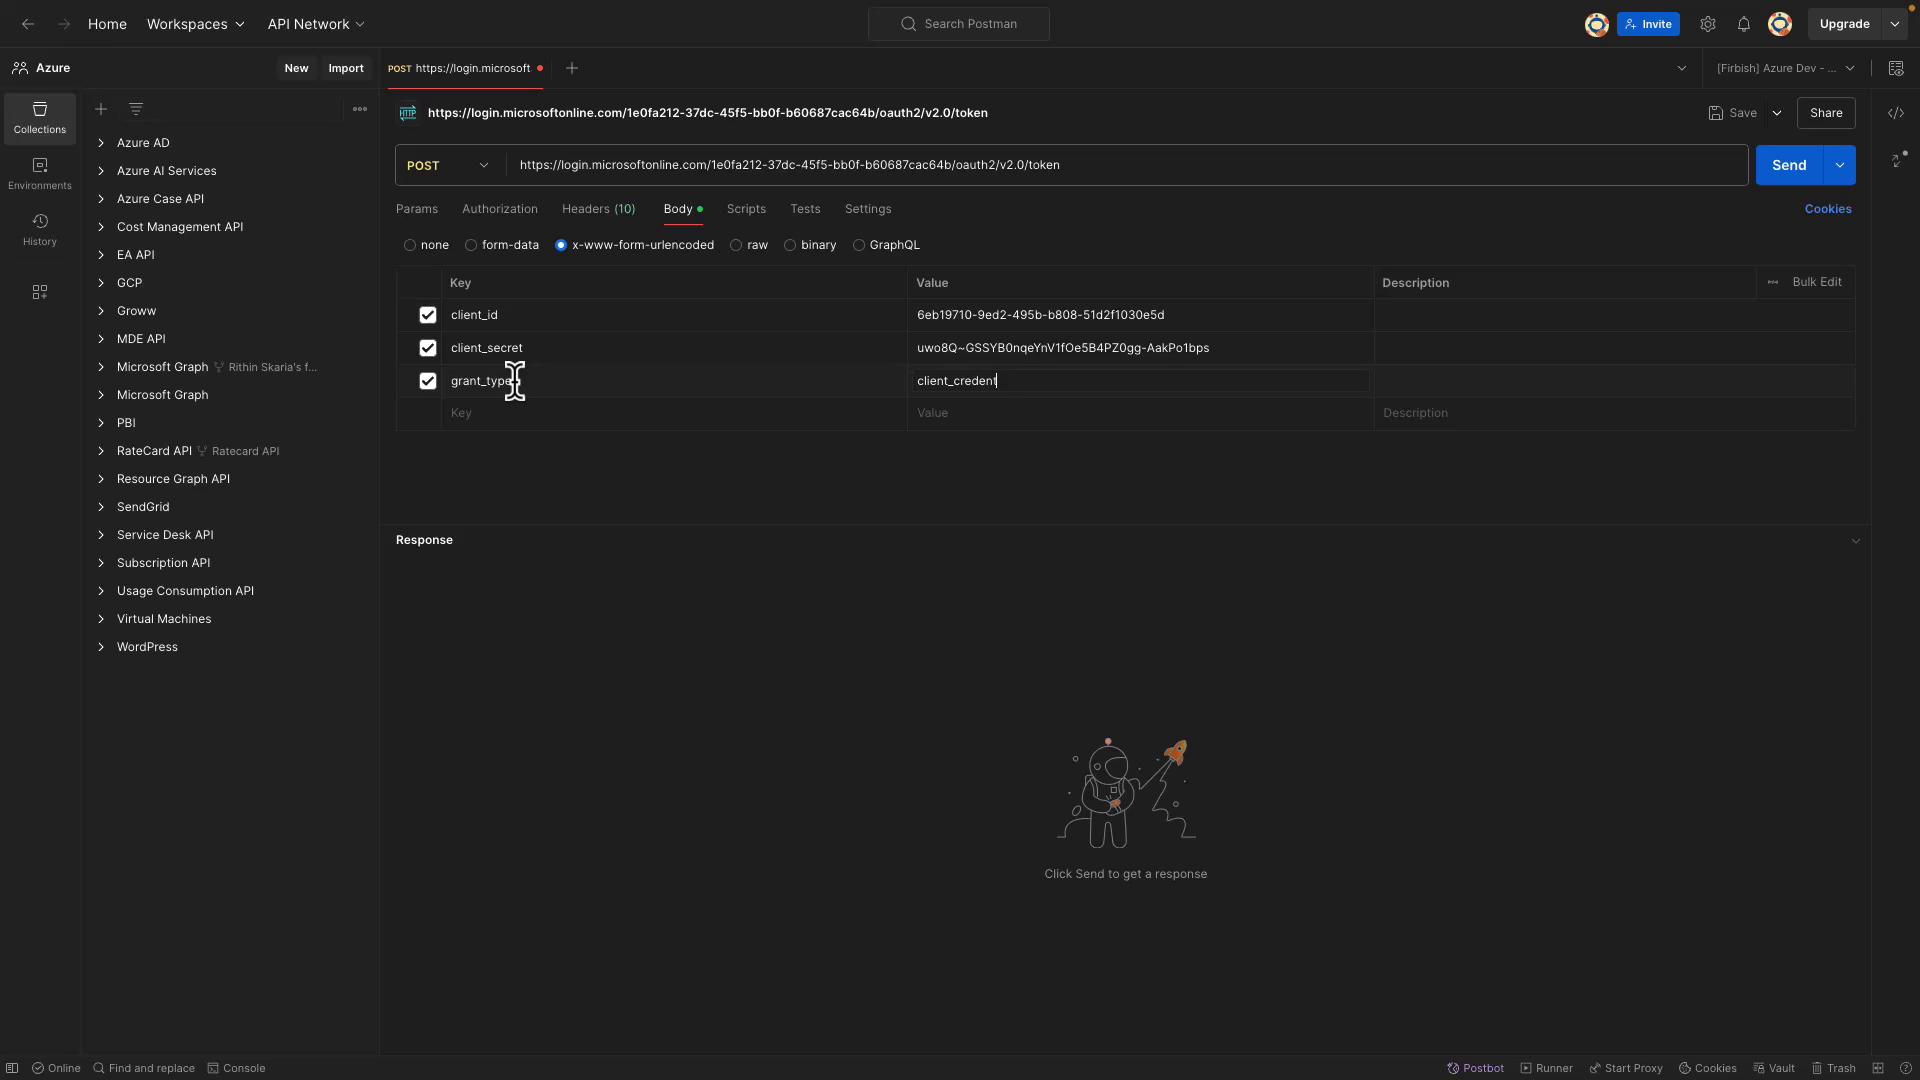
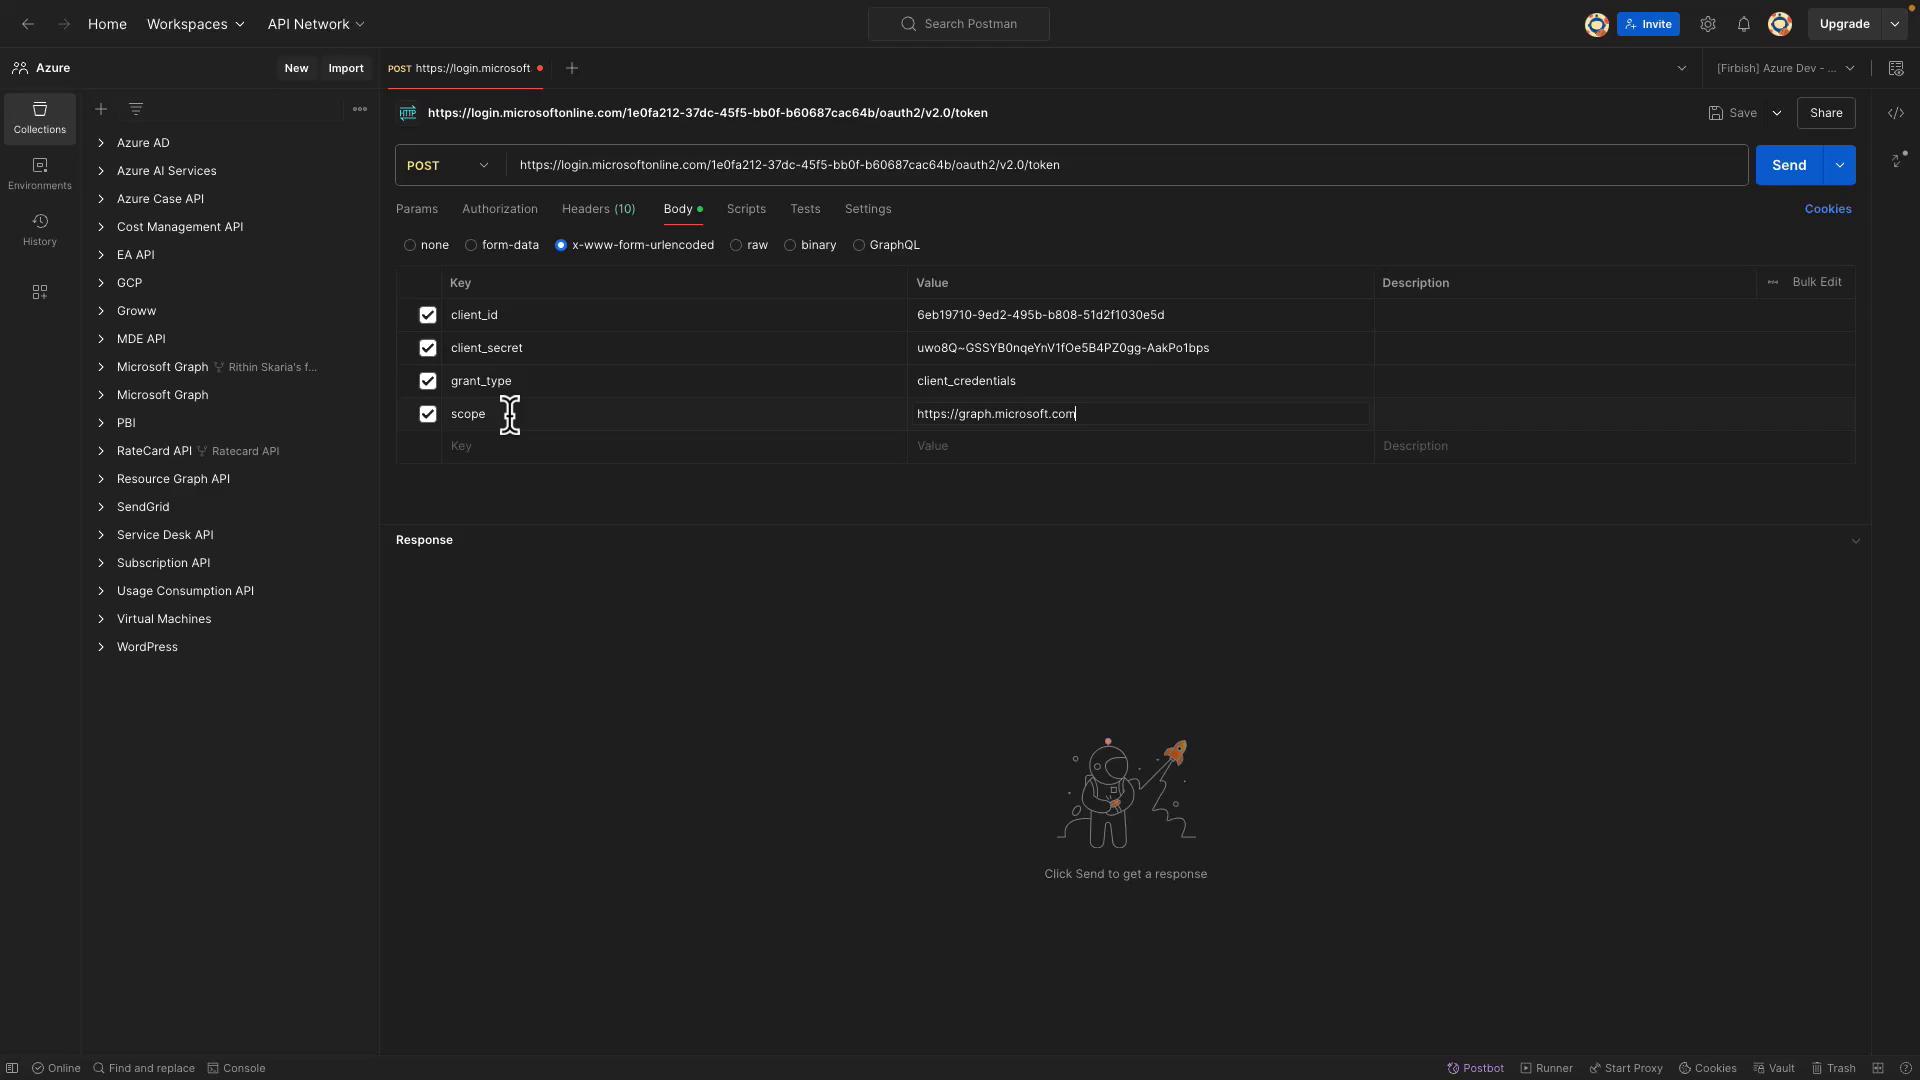
2. Obtaining an OAuth 2.0 Token
Next, go to the Endpoints section in the Azure portal and copy the OAuth 2.0 token URL.
Now, open Postman and create a new POST request using the following configuration:
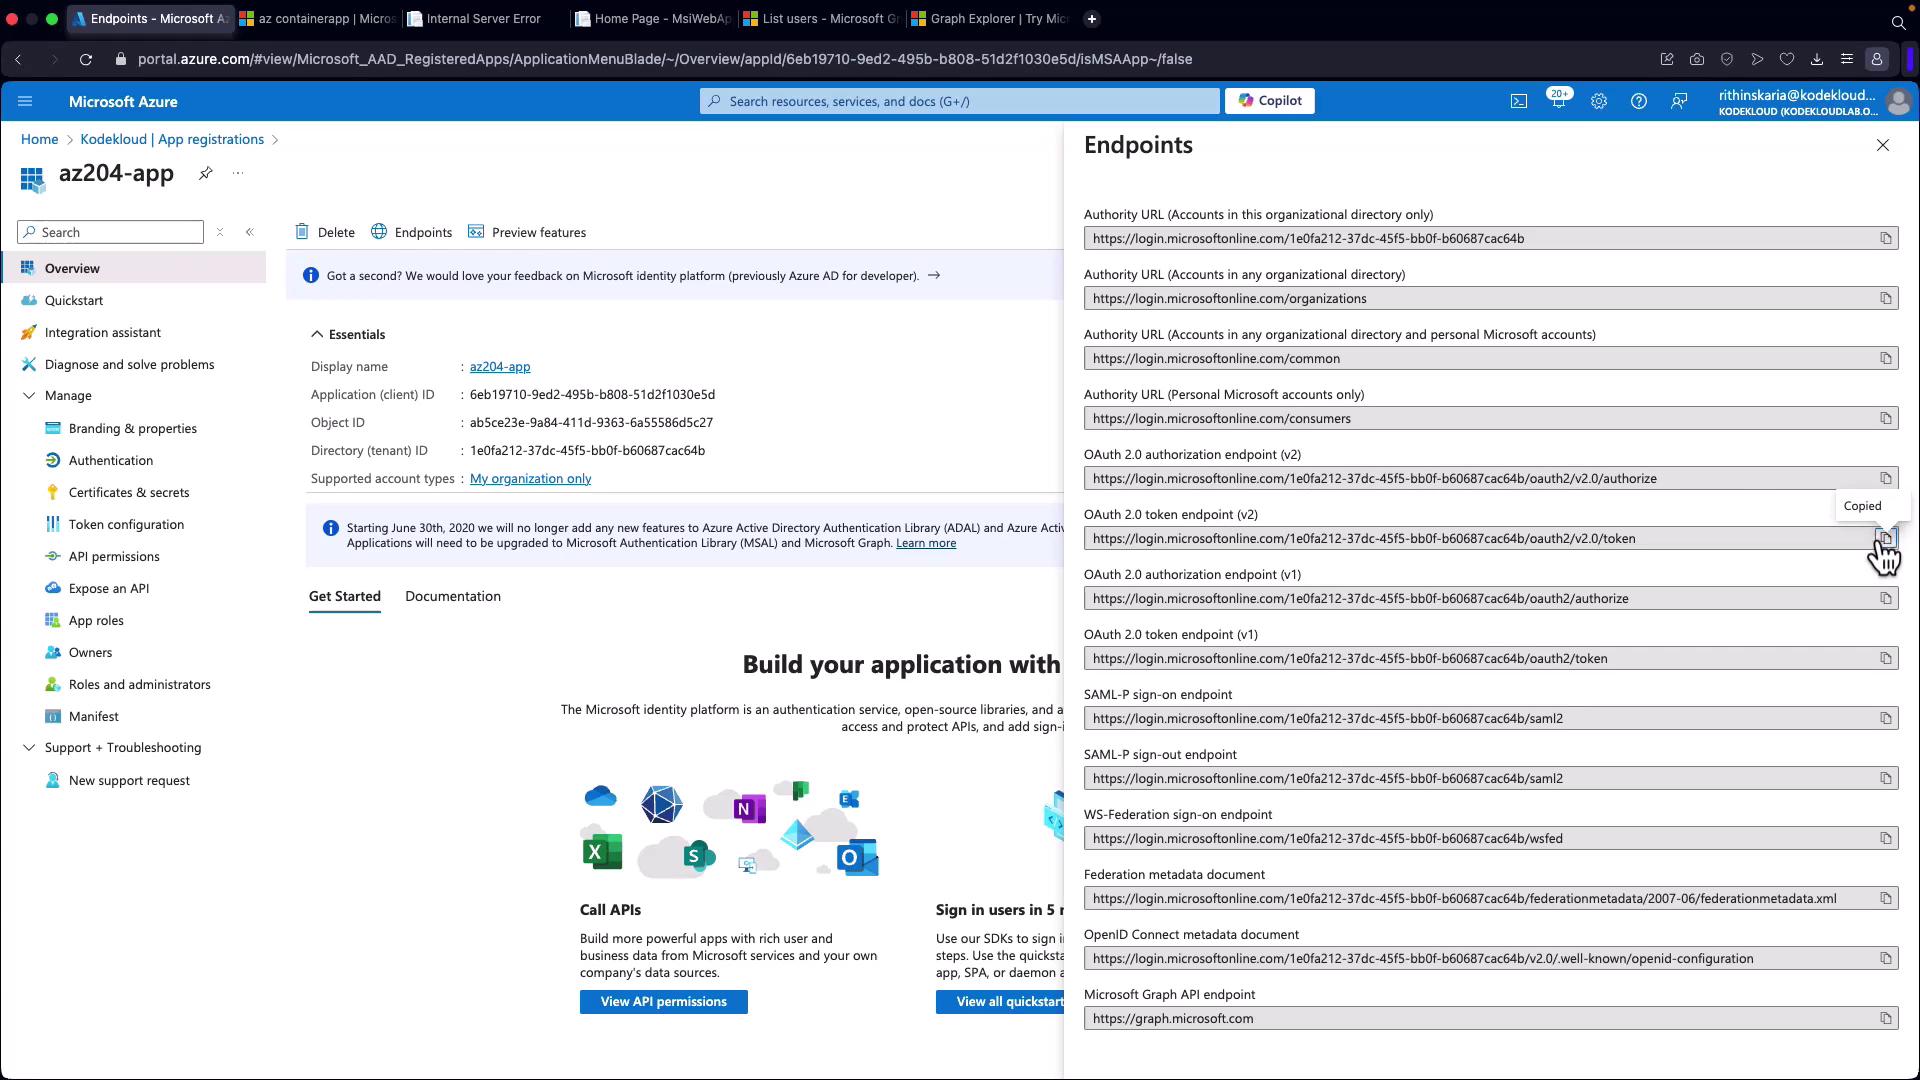
- Body Type: Form URL Encoded
- Parameters:
client_id
: (Paste the client ID copied from the Azure portal)client_secret
: (Paste the secret you saved earlier)grant_type
: client_credentialsscope
: https://graph.microsoft.com/.default
Configure the request as illustrated below:
Click on Send. If the request is successful, you will receive a response similar to the following:
{
"token_type": "Bearer",
"expires_in": 3599,
"ext_expires_in": 3599,
"access_token": "eyJ0eXAiOiJKV1QiLCJhbGciOiJSUzI1NiJ9.eyJhdWQiOiI2YjE5NzE0YjdhY2U0Yzc1MDhkNTY3MTZlYjc2ZWY2YyIsIm5iZiI6MTY4ODk5OTYyNSwianRpIjoiMTJmZjI4MDQtYzc3Ni00NjYwLTkxMmQtMDFmYTg2YTVjNmNiIiwiaWF0IjoxNjg4OTk5NjI1LCJzdWIiOiI2ZTk0NzRiZTE1OTFhLTUzZmEtMTFlZC04OTQ0LTJlNjg0NDJhMzM4NCIsInNjb3BlIjpbInVzZXIuYWRkcmVzcyIsInVzZXIuYXV0aCJdfQ.Wpryua0UtXAcd_CwYTdJhtDxdg2bMwRXId5TyC7QvdVEaH14MyLgxlQmU314s7D7JK_HybMfOLjoDD8r_kGfEI_gLEg9TkAzrMK0gcymTxbIKE1UpyMCU74lxX8JhZkYmEvHh7DQ9S88mFxzrw5V49n6Uy-rrd-Ji2YNq9zK7z6rbq3zHvdlpPJmshtNR4px7Y69rESeLN2UfgoRUnOILg903s8o-hq7AEdtt5gSHgCdu4vEX3nf3OHic_RF1i6VdQ7I-JUbrcTkXjVV8dPd5JaATByETxTPkk0K3h9Kum6QautE9Y4FA7w1az0p8WJij_kzGkLxvd8vsiA"
}
3. Calling Microsoft Graph API
To interact with Microsoft Graph API, you can use Graph Explorer to explore available endpoints. For this demonstration, we will use an endpoint that retrieves user profile data.
For example, when calling an endpoint that returns user profile data, you may receive a response similar to:
{
"jobTitle": "Corporate Security Officer",
"mail": "AllanD936x214355.onmicrosoft.com",
"officeLocation": "t4/1106",
"preferredLanguage": "en-US",
"surname": "Devoung",
"userPrincipalName": "[email protected]",
"id": "c83e6eaa-b6ab-46d5-b73e-7ce7ea1755"
}
Similarly, retrieving all users might yield a response such as:
{
"@odata.context": "https://graph.microsoft.com/v1.0/$metadata#users",
"value": [
{
"businessPhones": [],
"displayName": "Conf Room Adams",
"givenName": null,
"jobTitle": null,
"mail": "[email protected]",
"mobilePhone": null,
"officeLocation": null,
"preferredLanguage": null,
"surname": null,
"userPrincipalName": "[email protected]",
"id": "6e7b68e0-072e-4810-8459-48f84f8f1204"
}
]
}
To test this using Postman, create a new GET request to the desired Microsoft Graph API endpoint (for example, the endpoint to list users). Set the Authorization header as follows:
Authorization: Bearer <access_token>
Click Send. If you initially receive an "authorization denied – insufficient privileges" error, it means the required API permission is missing.
4. Granting API Permissions
Return to the Azure portal and select the API permissions tab for your app registration. You might notice that user.read
is already added. However, to list all users, you need to add an application permission.
Follow these steps:
- Click on Add a permission.
- Choose Microsoft Graph.
- Select Application permissions and then choose
user.read.all
. - Click on Add.
Admin Consent Required
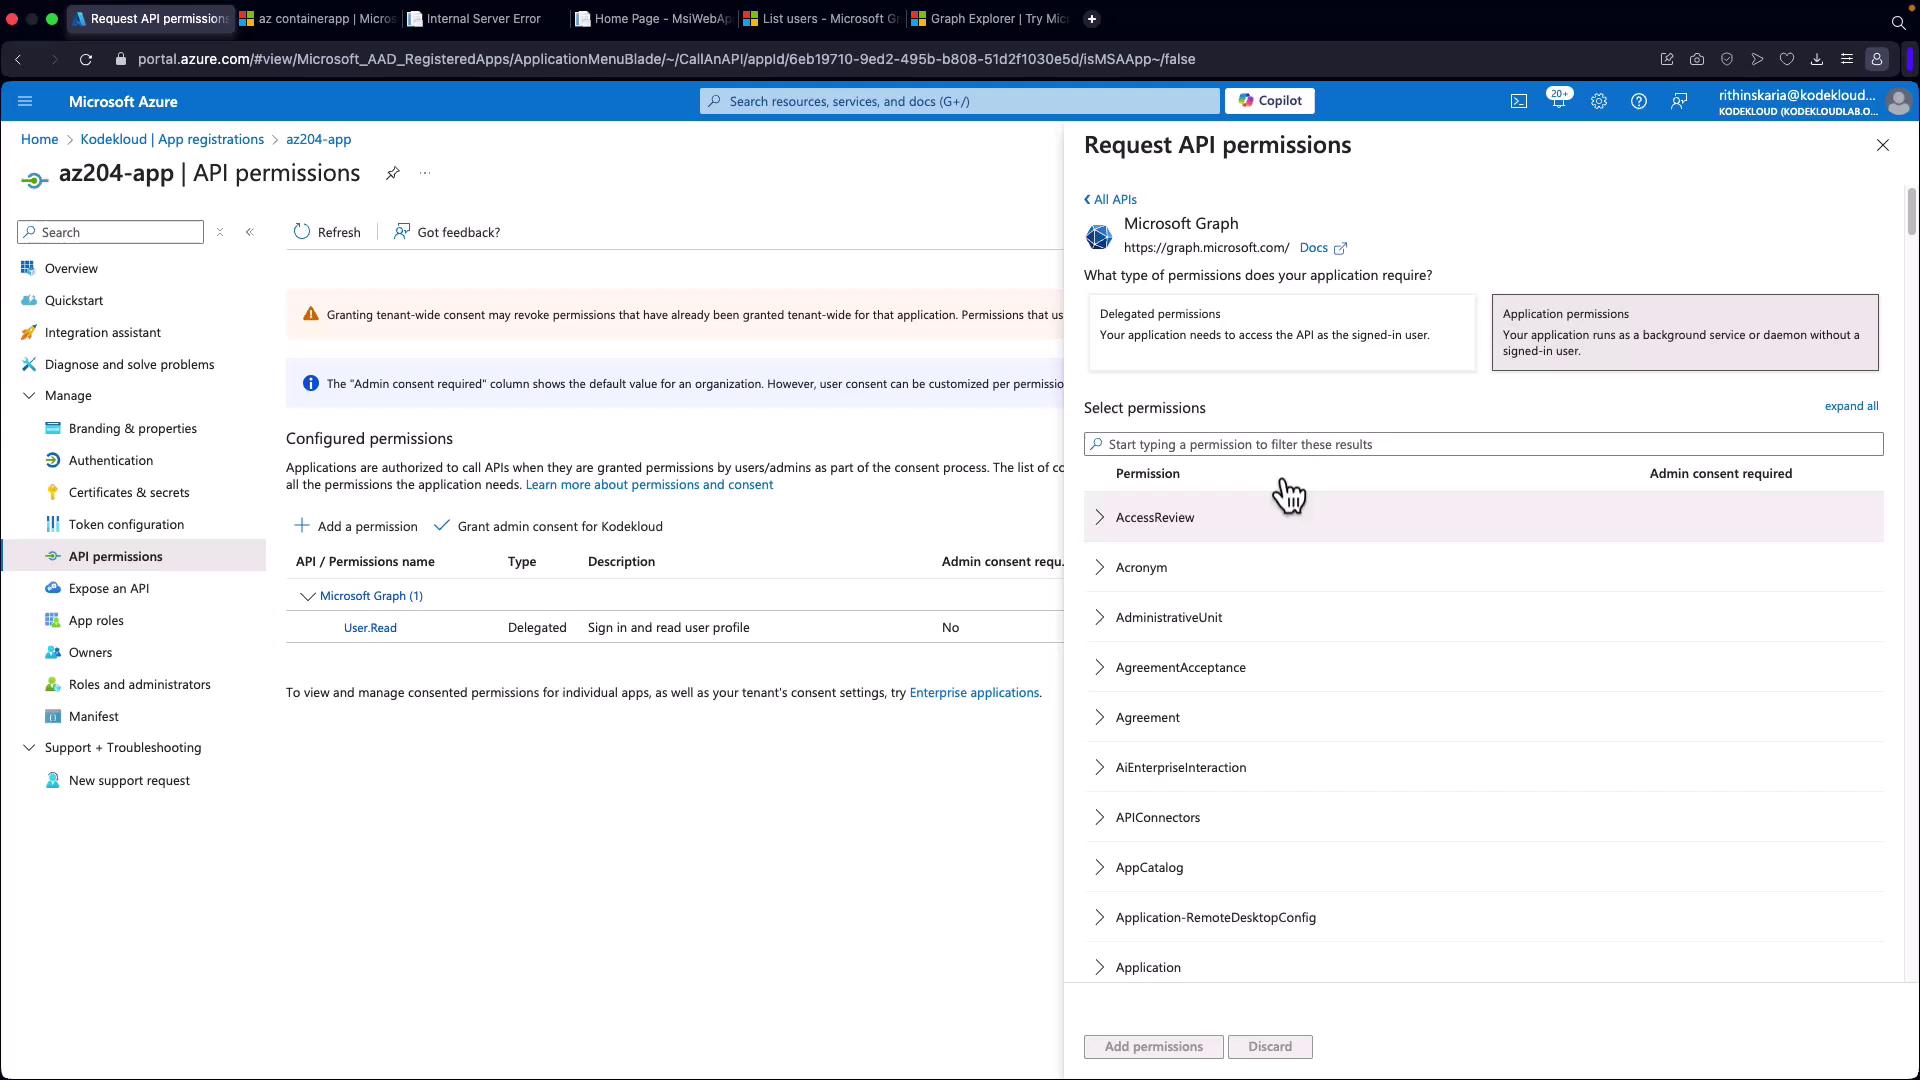
Simply adding the permission is not enough; user.read.all
requires admin consent. If you are not an administrator, contact your tenant administrator to grant the necessary permissions.
Once consent is granted, generate a new token in Postman so it includes the new permission. Verify the permissions in your token using jwt.ms by pasting your access token in your browser.
Replace the old token in your Postman request with the new one and click Send again. The API call should now return a list of users similar to this:
[
{
"businessPhones": [],
"displayName": "Adam Lloyd",
"givenName": null,
"jobTitle": null,
"mail": null,
"mobilePhone": null,
"officeLocation": null,
"preferredLanguage": null,
"surname": null,
"userPrincipalName": "[email protected]",
"id": "450b7da6-c73c-4bd8-56175515298f"
},
{
"businessPhones": [],
"displayName": "Alen Montgomery",
"givenName": null,
"jobTitle": null,
"mail": null,
"mobilePhone": null,
"officeLocation": null,
"preferredLanguage": null,
"surname": null,
"userPrincipalName": "[email protected]",
"id": "1fabc61b-1fa0-436a-bfa6-f700678d87d3"
}
]
This sequence demonstrates how permissions and consent function using Microsoft Graph API as an example. Similar approaches apply when integrating with other APIs or services.
Next, we will move on to discussing Conditional Access Policies, continuing our journey into securing and managing access for your applications.
Watch Video
Watch video content