1. Enable Autoscaling
Begin by enabling the autoscale feature in the Azure portal. Doing so allows Azure to dynamically adjust the number of instances based on your specified conditions. First, define the conditions that trigger scaling actions. For example, you might set the system to scale out when CPU usage exceeds a certain threshold or when memory usage becomes high. Clear conditions empower Azure to accurately decide when to scale your application. Next, establish the scale rules. These rules dictate when and how many instances to add or remove. For instance, you could define a rule to add two instances if CPU usage exceeds 80% and remove one instance if usage drops below 60%. Together, these rules ensure your application scales appropriately based on real-time usage. Finally, continuously monitor autoscale events and metrics to ensure your configuration is performing as expected. This ongoing observation will allow you to fine-tune your conditions and rules for further optimization.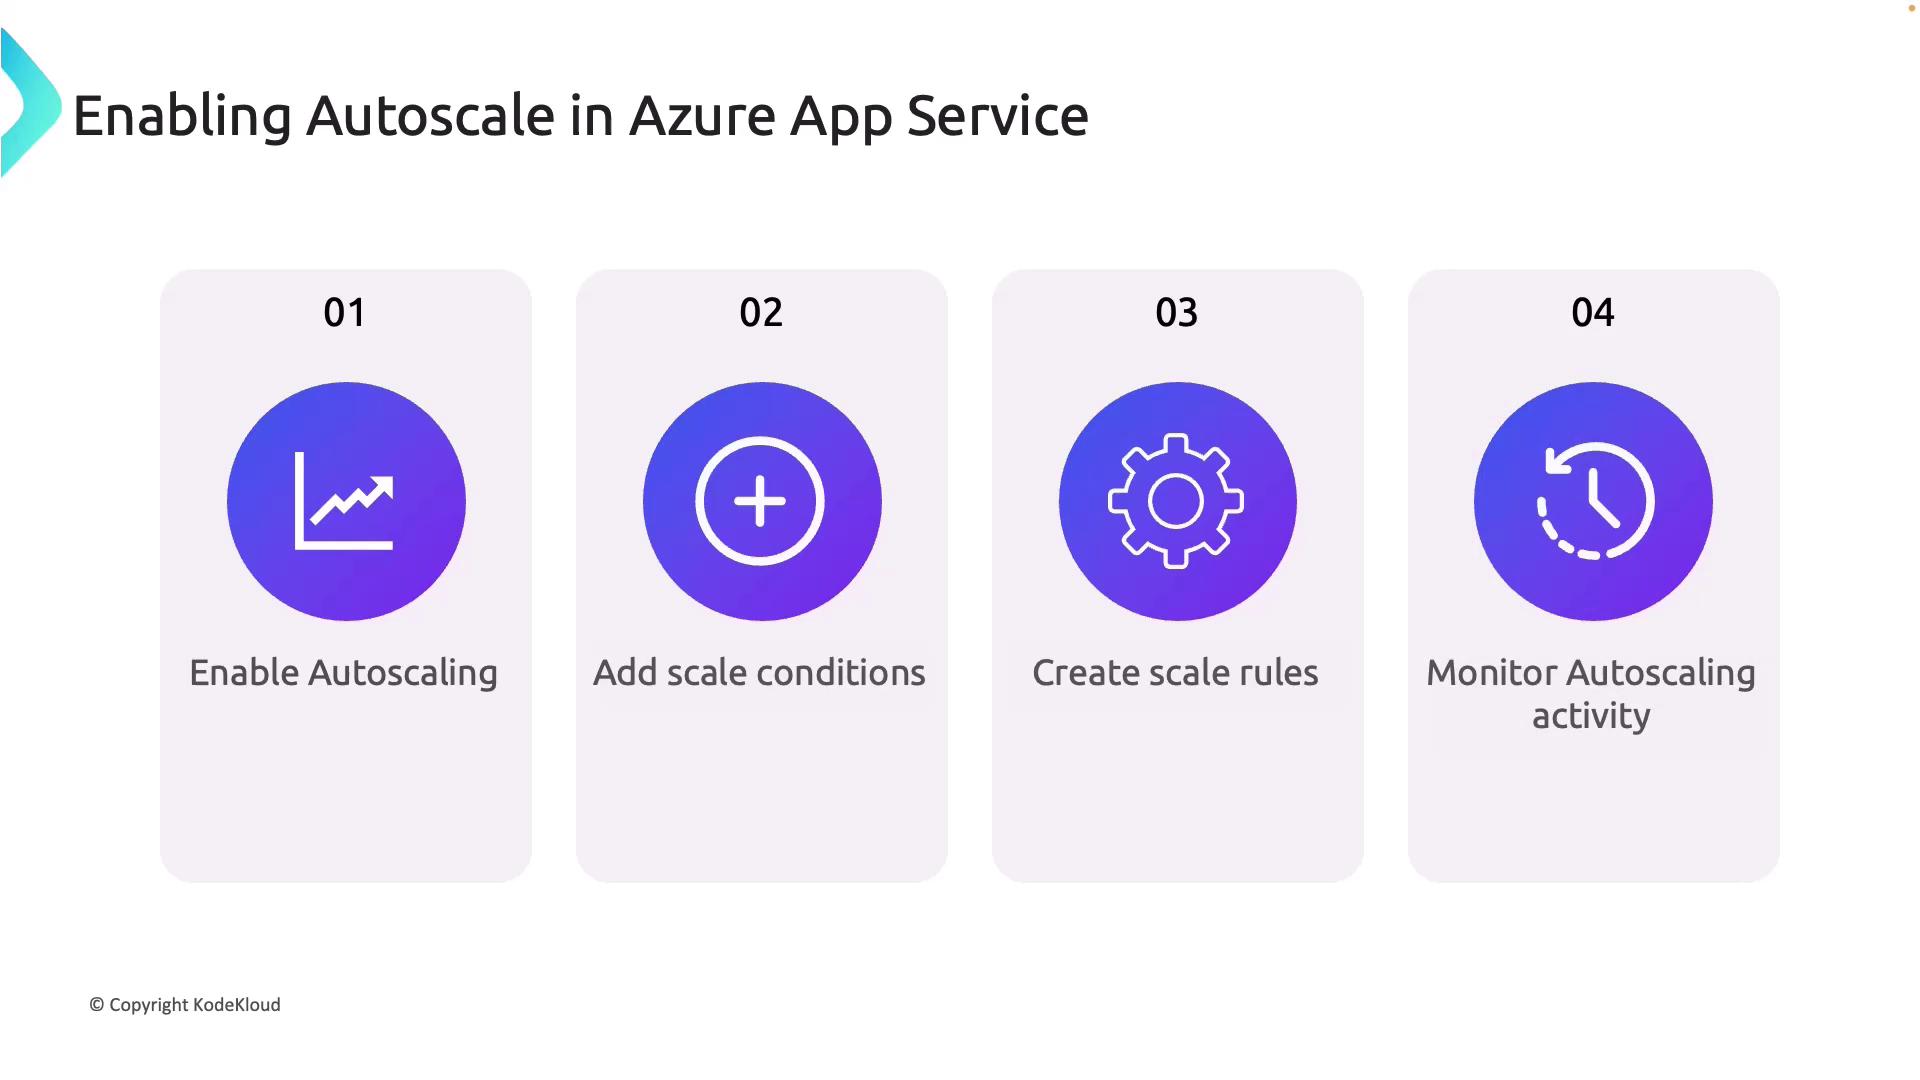
2. Configuring Autoscale in the Azure Portal
Follow these steps to navigate the Azure Portal and configure autoscale settings for your App Service:-
Navigating to the App Service:
Open the Azure Portal and select your Azure App Service. Remember, if your service is on a Basic plan, the autoscale feature is not available. -
Reviewing Current Scale-Out Settings:
In a Basic plan (e.g., B1), you might see:- Maximum instance count: 3
- Current instance count: 1
-
Upgrading the Plan:
Go to the Scale-Up section and upgrade your plan to Standard (e.g., S1, Standard One). After upgrading, return to the Scale-Out section. Although a basic automatic scaling feature based on traffic might be available, rule-based autoscaling requires a Premium V2 or Premium V3 plan.
Ensure you upgrade your plan to Premium V2 or Premium V3 to enable rule-based autoscaling.
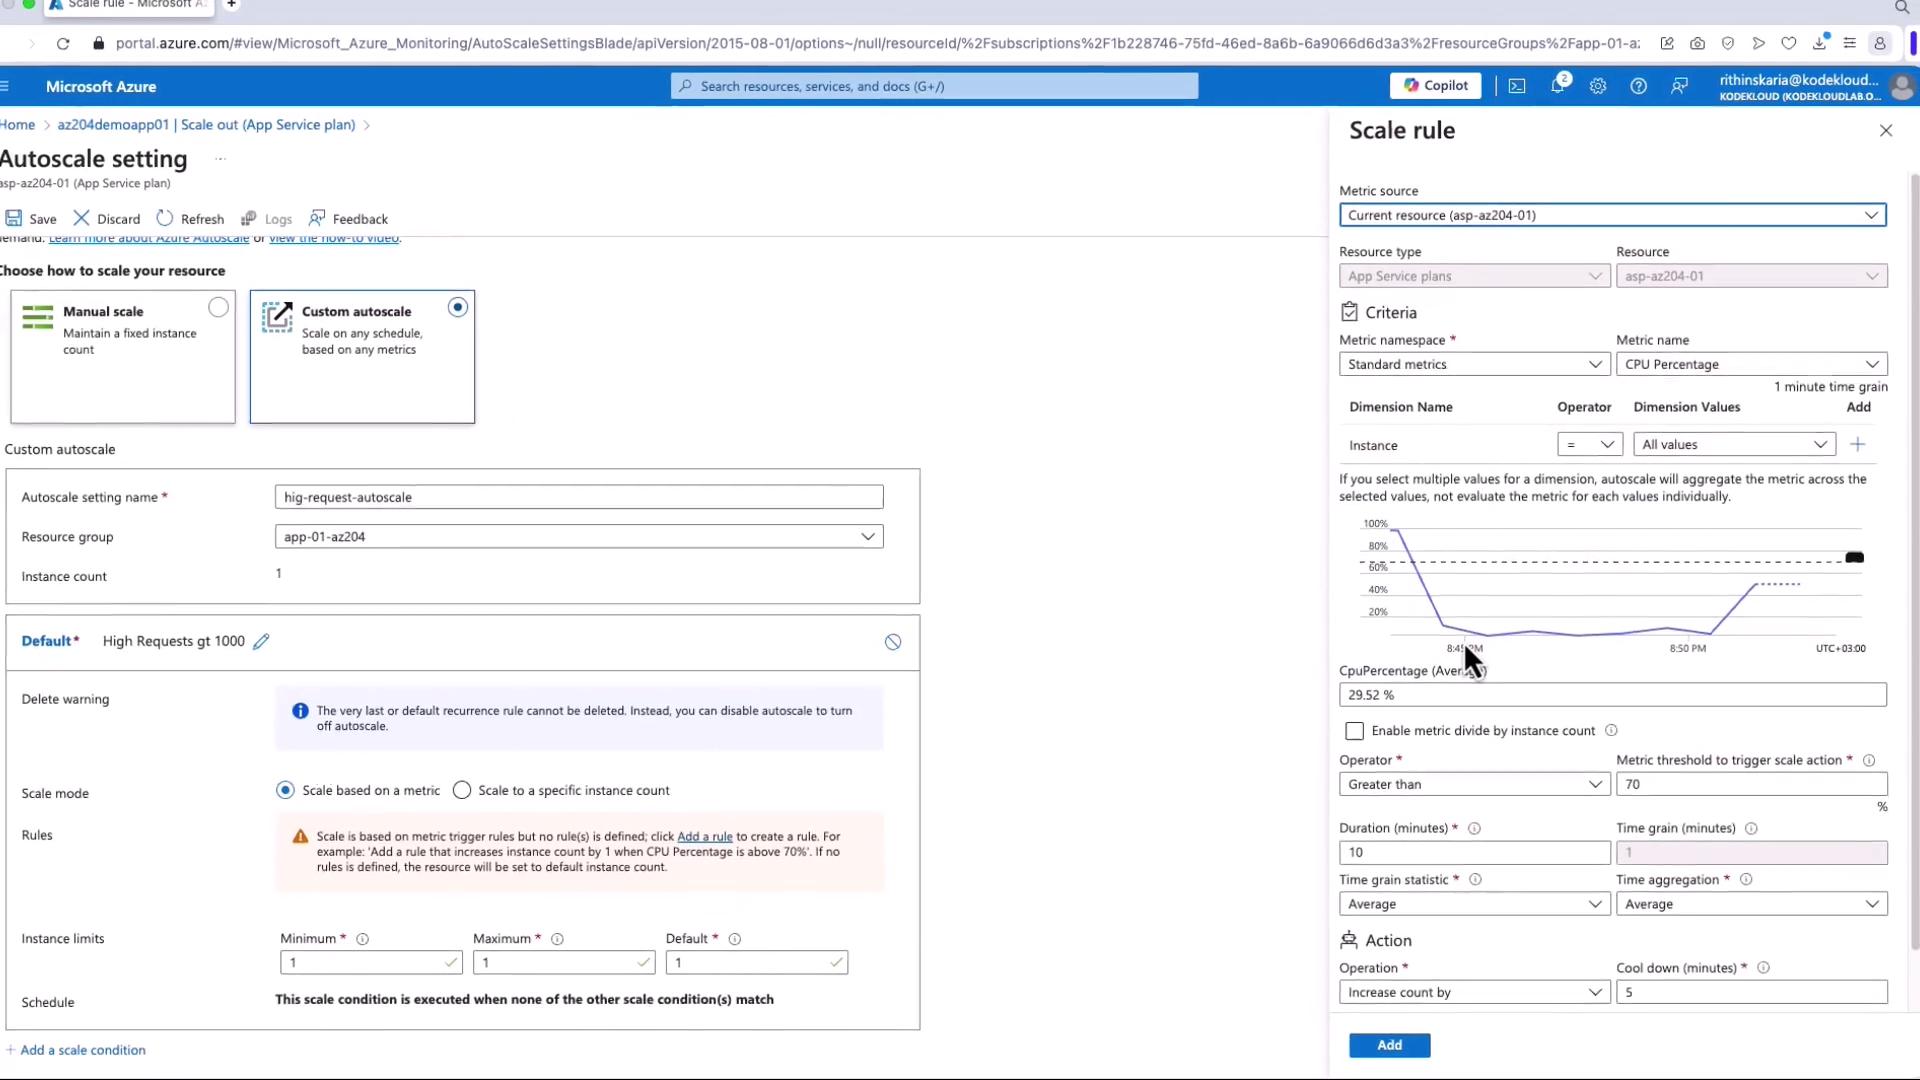
- Setting Up Rule-Based Autoscale:
Click on the “Configure” button to start setting up autoscale settings. Select “Custom autoscale” and provide a descriptive name—such as “High Request Autoscale”—for easier management. A default condition will be created, which can be modified or supplemented with additional rules to meet your application’s needs.
3. Creating an Autoscale Rule
Creating an effective autoscale rule involves the following steps:-
Define a Descriptive Rule Name:
For clarity, name the rule something like “High Request Greater Than 1,000” to clearly indicate its purpose. -
Add a Scaling Rule Based on a Metric:
Click on “Add a Rule”. In this configuration, choose a metric such as CPU percentage for scaling. Under normal conditions, CPU usage might average around 7-10%. -
Specify the Scaling Condition:
Configure the rule so that if CPU usage exceeds 70% for five minutes, the system scales out by increasing the instance count by one. Additionally, set a cooldown period (for example, five minutes) to avoid rapid, successive scaling actions. -
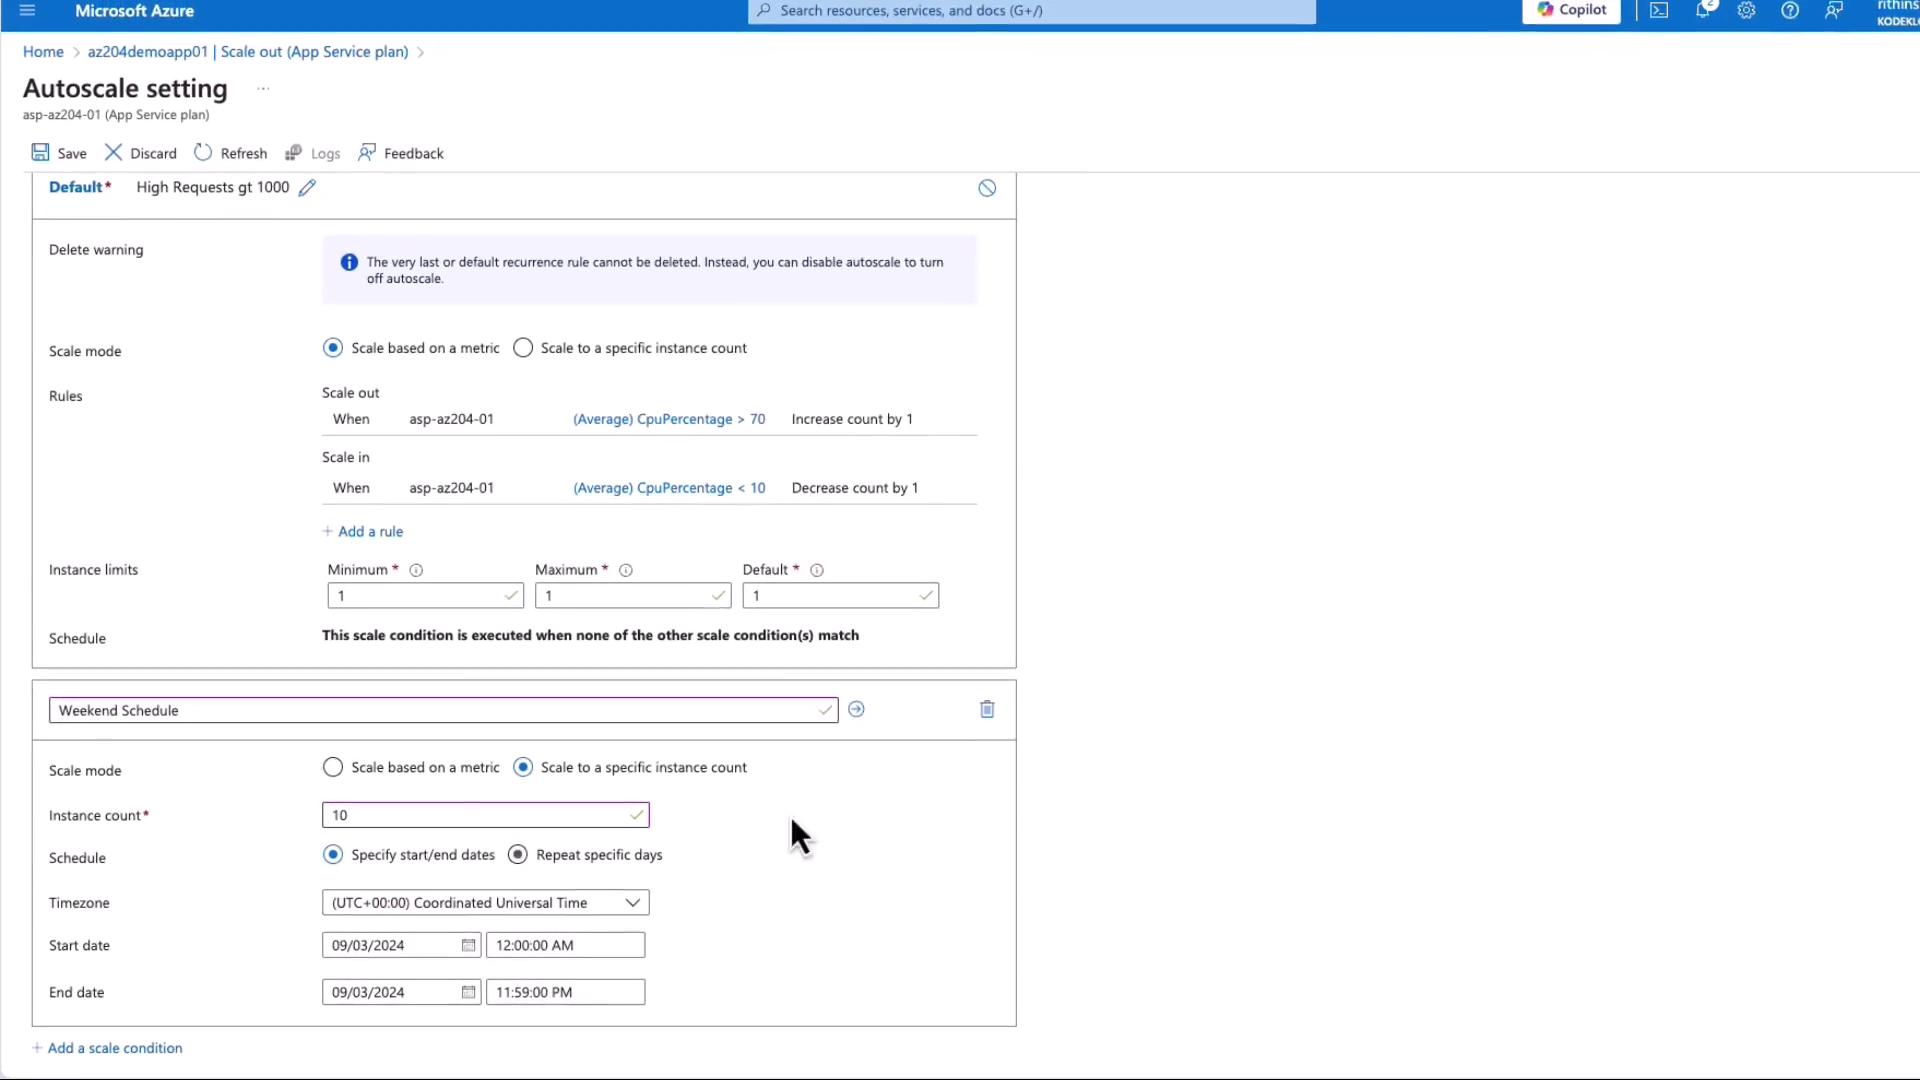
Adding a Scale-In Rule:
Add another rule to scale in when necessary. For example, if the CPU usage drops below 10% for five minutes, the instance count can be decreased or reset to one, based on your requirements.

-
Configuring Scheduled Scaling:
You can also set scheduling rules, such as running 10 instances over the weekend. Note that instance limits must be adjusted accordingly; for example, if the minimum, maximum, and default are all set to one, scaling will not occur. Adjust the maximum instance count (e.g., set it to 3) to enable autoscaling. -
Saving the Configuration:
After defining all rules and conditions, click “Save” to apply your settings.
4. Validating Autoscale Functionality
Ensure your autoscale configuration is working correctly by following these steps:-
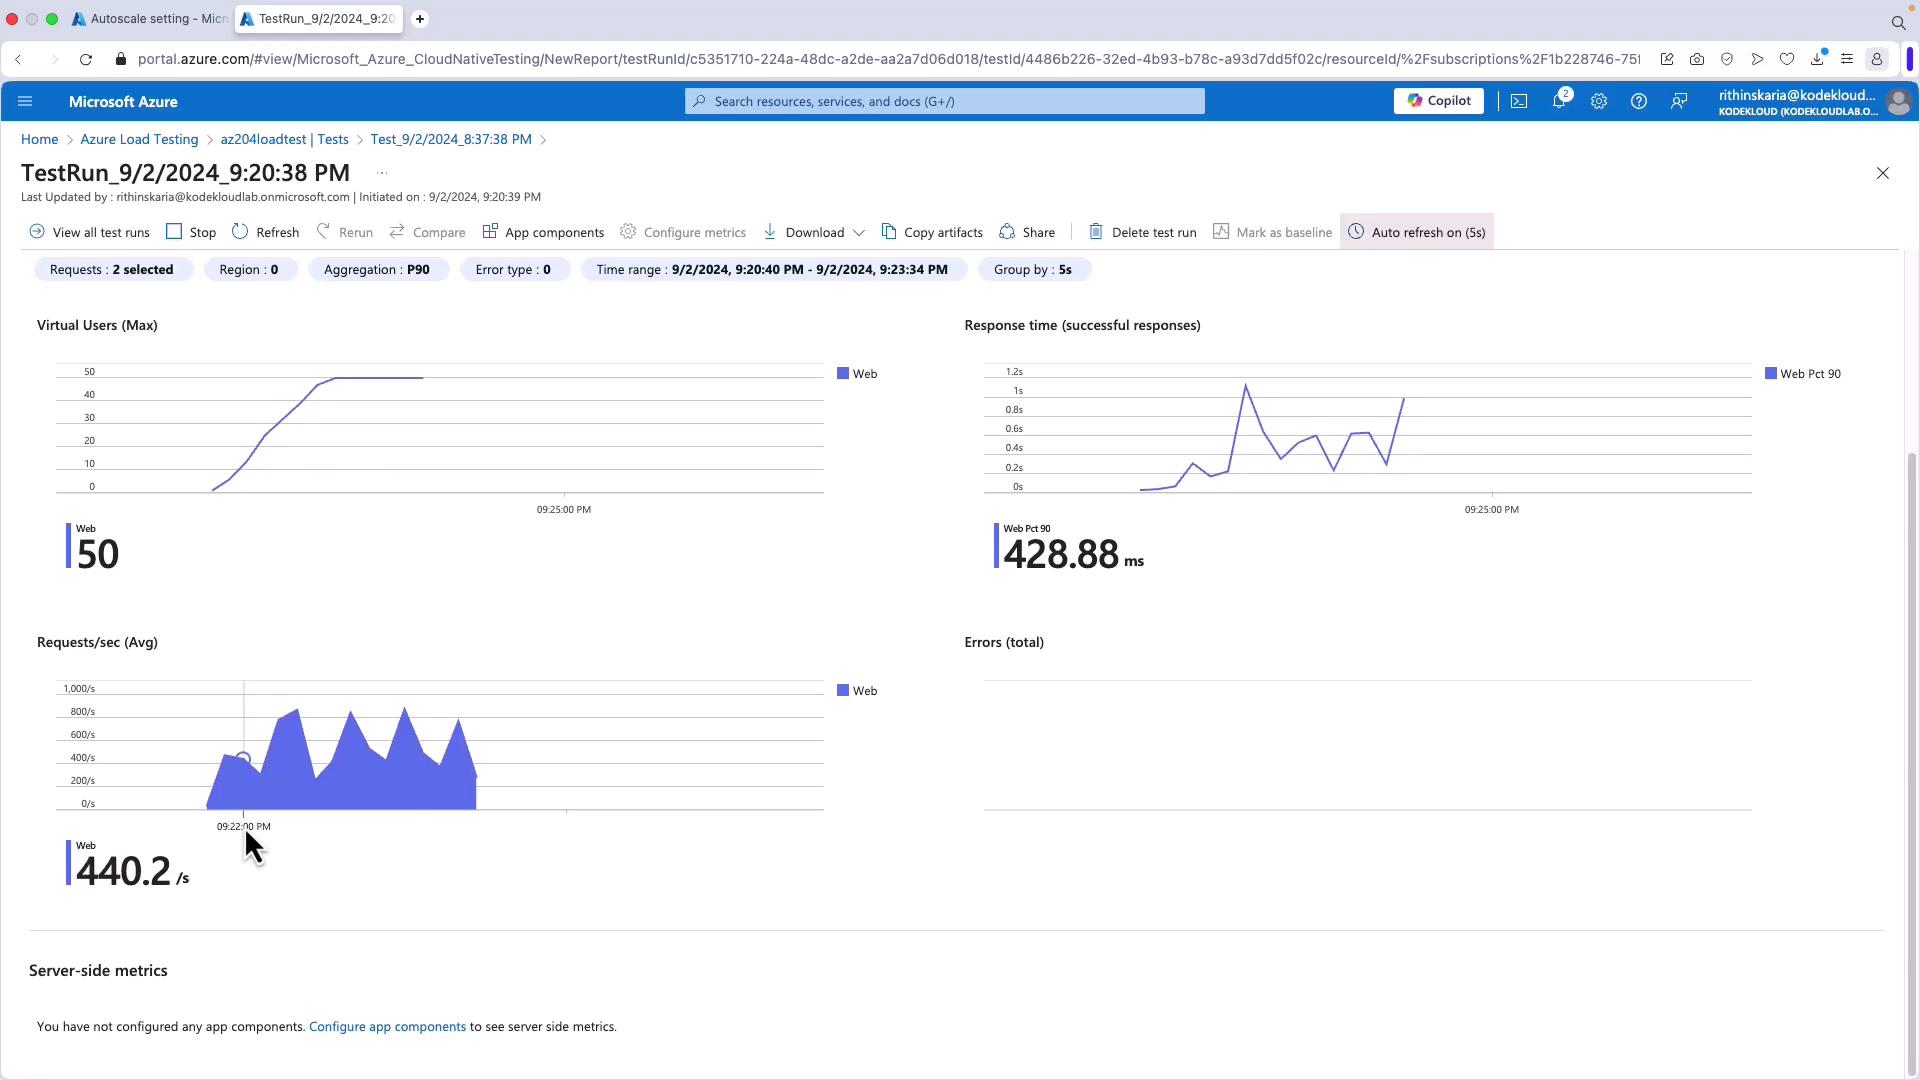
Load Testing:
Use Azure Load Testing to simulate high traffic on your App Service. Create a test that sends numerous requests to your application. As the load increases and CPU percentage exceeds the 70% threshold, verify that additional instances are added as per your autoscale rules. -
Monitoring Autoscale Events:
While the test is running, observe key metrics like requests per second. For example, if your service receives 521 requests per second, the autoscale configuration should trigger an increase in CPU load and subsequently add an extra instance. Monitor the “Run History” to review autoscale events. The cooldown period will prevent further scaling until its duration (e.g., five minutes) has elapsed.
5. Conclusion
In summary, this guide demonstrated how autoscale works in Azure App Service by covering the following key points:- Enabling the autoscale feature in the Azure portal.
- Configuring scale conditions and rules based on critical application metrics.
- Validating autoscale functionality using Azure Load Testing.