AZ-204: Developing Solutions for Microsoft Azure

Working With Azure Blob Storage

Developing Using Azure Blob Storage Client Library

This article explains how to work with the Azure Blob Storage Client Library to effectively manage blobs and storage environments. The library provides multiple client classes, each serving specialized purposes and offering a robust API to interact with Azure Storage Services.


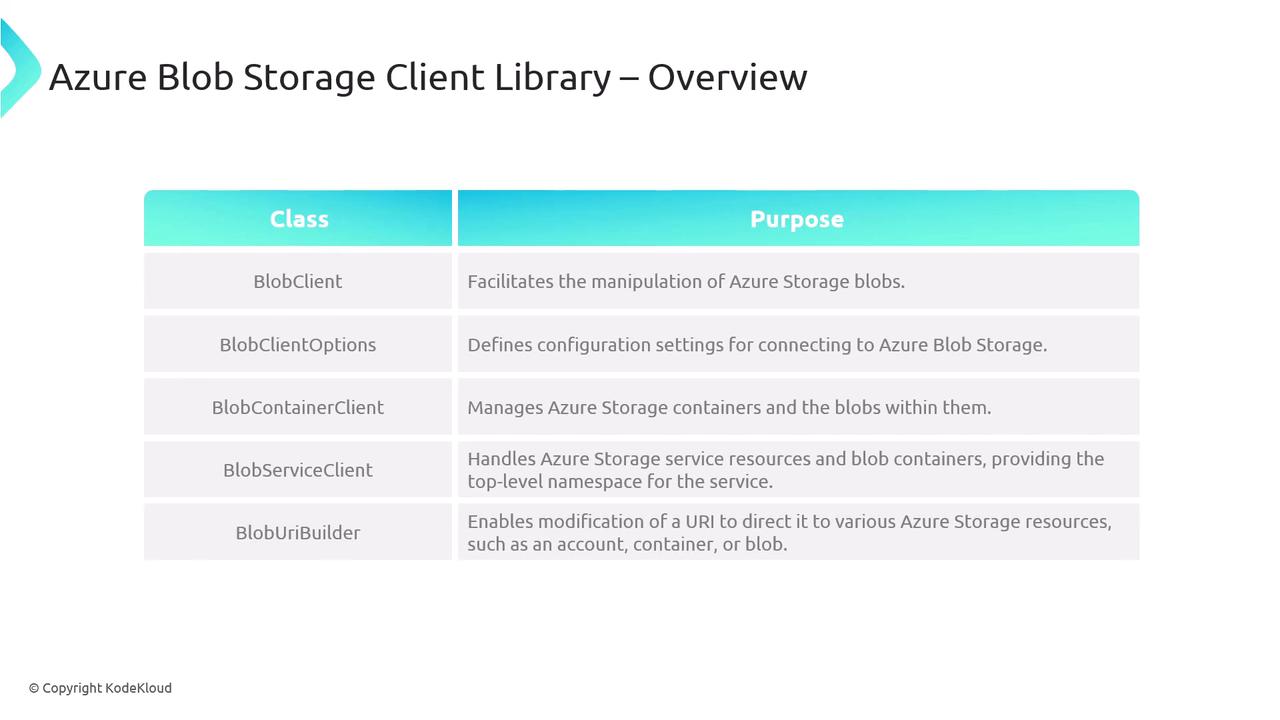
Overview of Azure Blob Client Classes

Each client class is designed for a specific function:

  • BlobClient
    Directly interacts with individual blobs within your storage account. It supports operations such as uploading, downloading, and deleting blobs—essential for managing file uploads and retrieving stored data.

  • BlobClientOptions
    Configures connection settings for Azure Blob Storage. With this class, you can adjust custom configurations including retry policies, request timeouts, and logging preferences, ensuring your application meets operational requirements.

  • BlobContainerClient
    Manages storage containers along with the blobs inside. This client class offers methods to create, delete, and list containers, as well as to enumerate blobs within them. Containers serve as logical groupings for blob objects.

  • BlobServiceClient
    Handles high-level service interactions with the storage account. It facilitates operations that affect the entire service or multiple containers, such as listing containers and managing lifecycle access policies.

  • BlobUriBuilder
    Builds or modifies a blob’s uniform resource identifier (URI), including modifications to the container or storage account URI. It is particularly useful when generating pre-signed URLs with Shared Access Signatures or dynamically adjusting the target resource during storage operations.

The image is an overview table of the Azure Blob Storage Client Library, listing different classes and their purposes, such as BlobClient and BlobServiceClient.

Each of these classes plays a vital role in managing Azure Blob Storage, providing developers with a comprehensive API to handle all storage-related tasks.


Creating a Client Object

To interact with Azure Blob Storage, you first need to create a BlobServiceClient. This client is essential for operations such as uploading, downloading, and managing blobs. Follow these key steps to create a client object:

  1. Provide the endpoint URI.
  2. Construct the URI in your code.
  3. Authenticate using the DefaultAzureCredential class.
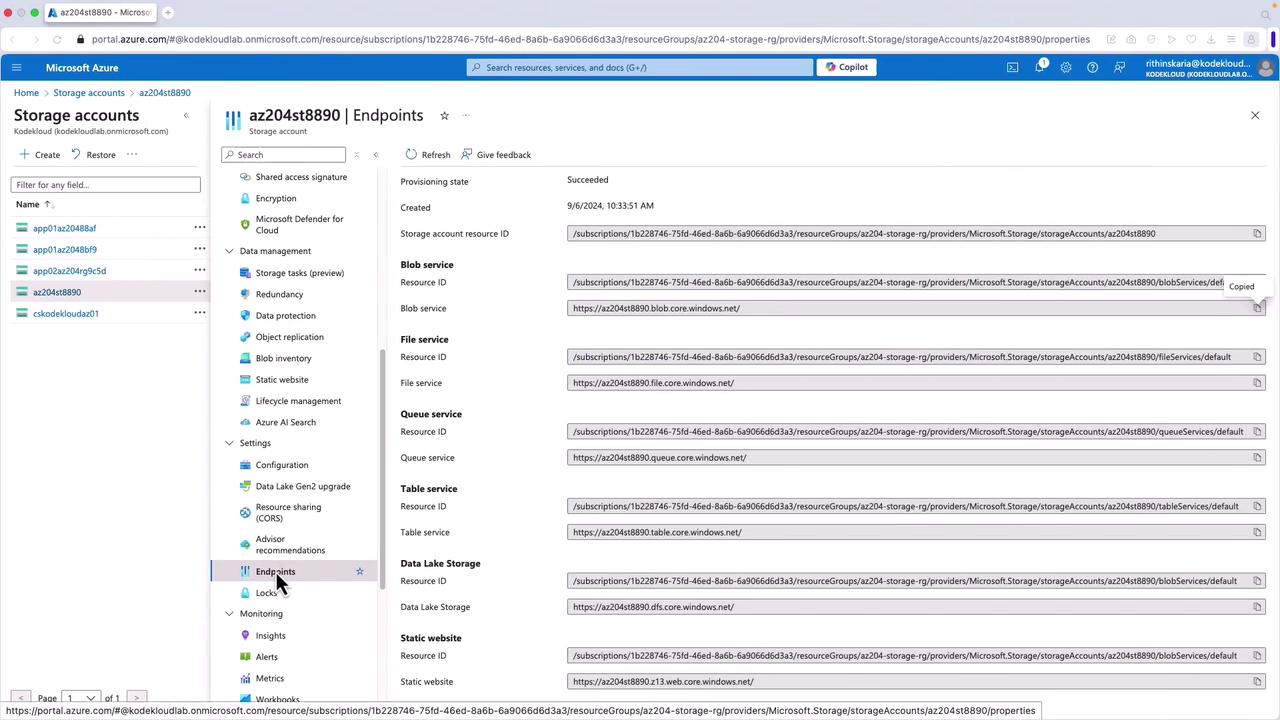
Endpoint URI

The endpoint URI directs to the storage account where your resources reside. Typically, the storage account URL follows this pattern:

https://{accountname}.blob.core.windows.net

Replace {accountname} with your unique storage account name to generate the correct endpoint URI. This URI is the foundation of any interaction with the storage service and can be built manually or retrieved dynamically using the Azure Storage Management Library.

Authentication

The final step is authentication. Using the DefaultAzureCredential class provides a unified approach to manage various authentication methods, such as managed identities or service principals. This approach adheres to best practices like the principle of least privilege, ensuring robust security management in cloud environments.

Note

Using DefaultAzureCredential automatically manages token retrieval and refresh, simplifying the authentication process in your cloud applications.

The image lists steps for creating a client object, including passing and constructing the endpoint URI, retrieving the endpoint at runtime, and authentication with DefaultAzureCredential.

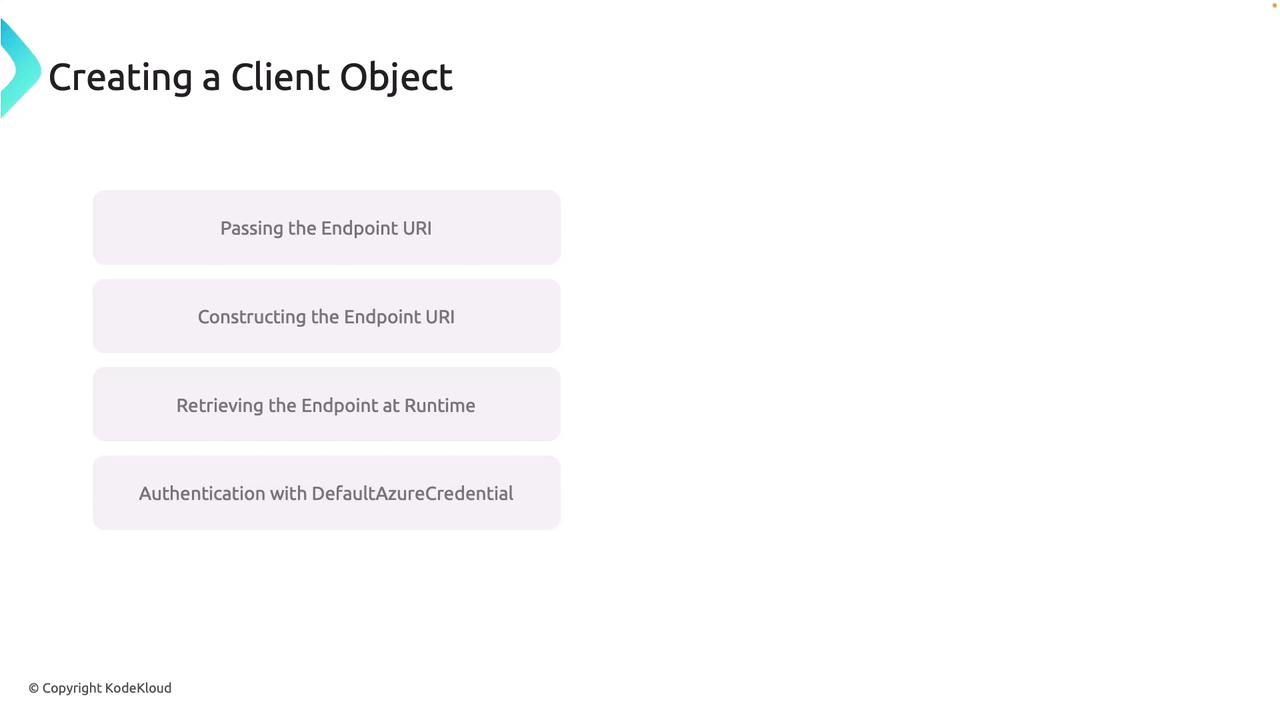
Code Example: Creating a BlobServiceClient

Below is a sample C# code snippet demonstrating how to create a BlobServiceClient:

using Azure.Storage.Blobs;
using Azure.Identity;
using System;

public class BlobServiceExample
{
    public BlobServiceClient CreateBlobServiceClient(string accountName)
    {
        // Construct the endpoint URI using the storage account name
        string endpointUri = $"https://{accountName}.blob.core.windows.net";
        Uri blobServiceUri = new Uri(endpointUri);
        
        // Create the BlobServiceClient using the endpoint URI and default Azure credentials
        BlobServiceClient blobServiceClient = new BlobServiceClient(blobServiceUri, new DefaultAzureCredential());
        
        return blobServiceClient;
    }
}

In this example, the endpoint URI is stored in a variable and used to instantiate the BlobServiceClient with default credentials. Once the client is created, you can query for the endpoint URI, list containers, or perform other storage operations.


Working with the Blob Storage Client in Visual Studio

Learn how to create a simple console application in Visual Studio using .NET 6 to interact with the Blob Storage Client.

Step 1: Create a Console Application

  1. Open Visual Studio and create a new console application.
  2. Name your project (for example, "BlobClientObjectDemo").

Step 2: Manage NuGet Packages

Add the following NuGet packages to your project:

  • Azure.Identity
  • Azure.Storage.Blobs

These packages enable you to use the DefaultAzureCredential for authentication and interact seamlessly with Azure Blob Storage.

Step 3: Write the Code

The code below demonstrates a complete console application that initializes a BlobServiceClient, retrieves the service endpoint, and lists all containers in the storage account:

using Azure.Identity;
using Azure.Storage.Blobs;
using System;
using System.Threading.Tasks;

class Program
{
    static async Task Main(string[] args)
    {
        // Define the Blob Storage service endpoint (replace with your storage account endpoint)
        string endpoint = "https://az204st8890.blob.core.windows.net/";
        
        // Define the default Azure credential for authentication
        var credential = new DefaultAzureCredential();
        
        // Initialize the BlobServiceClient using the endpoint and credential
        BlobServiceClient blobServiceClient = new BlobServiceClient(new Uri(endpoint), credential);
        Console.WriteLine("Connected to: " + endpoint);

        // List all containers in the storage account
        await ListContainersInAccount(blobServiceClient);
    }

    static async Task ListContainersInAccount(BlobServiceClient blobServiceClient)
    {
        Console.WriteLine("Getting container info....");
        await foreach (var container in blobServiceClient.GetBlobContainersAsync())
        {
            Console.WriteLine($"Container: {container.Name}");
        }
    }
}

When you run this application, it will display the storage endpoint and list the names of all containers within your storage account. Note that the credentials are obtained from your Azure login. If you haven't logged in using az login, the application will fail to authenticate.

The image shows a Microsoft Azure portal interface displaying the endpoints for a storage account, including details for blob, file, queue, and table services.

This example showcases a straightforward use case of the Azure Blob Storage Client Library in a .NET SDK environment. Once initialized, the BlobServiceClient can be used to perform various operations such as retrieving container information and managing blobs.


Next Steps

With the basics covered in this article, subsequent sections will dive into managing container properties, metadata, and advanced operations using the Azure Blob Storage Client Library. Continue exploring to enhance your storage solutions with the .NET SDK.

Happy coding!

Watch Video

Watch video content

Previous
Developing Static Websites