Learn to interact with Azure Cosmos DB using the Microsoft .NET SDK for operations like creating, reading, querying items, and bulk data imports.
In this article, you’ll learn how to interact with Azure Cosmos DB using the Microsoft .NET SDK. We will cover operations such as creating, reading, and querying items, as well as setting up a Cosmos DB database and container via the Azure portal. Additionally, we explain how to use the Data Migration Tool (DMT) for bulk data imports and integrate Cosmos DB operations within Visual Studio. This guide is ideal for developers looking to efficiently manage Azure Cosmos DB resources with .NET.
This section demonstrates how to create a new item (an employee record) in an Azure Cosmos DB container using the .NET SDK. First, a connection is established using the CosmosClient class where the endpoint and key are provided, and a container reference is acquired. Then, an employee record is defined and uploaded using both the CreateItemAsync and UpsertItemAsync methods to ensure idempotency.
Copy
// Get container referenceCosmosClient client = new CosmosClient(endpoint, key);Container container = client.GetContainer(databaseName, collectionName);// Create employee recordEmployee employeeRecord = new Employee { id = "123e4567-e89b-12d3-a456-426614174000", name = "John Doe", department = "Human Resources", isFullTime = true, salary = 4500, yearsOfExperience = 5};// Upload itemEmployee item = await container.CreateItemAsync(employeeRecord);item = await container.UpsertItemAsync(employeeRecord);
The snippet above shows the entire process: connecting to the database, defining an employee record with necessary fields (ID, name, department, full-time status, salary, and years of experience), and uploading that record while handling potential duplicates gracefully.
After setting up the container, you might need to retrieve a specific item using its unique ID and partition key. The following example demonstrates how to read an employee record from the container:
Copy
// Get container referenceCosmosClient client = new CosmosClient(endpoint, key);Container container = client.GetContainer(databaseName, collectionName);// Define unique item propertiesstring id = "123e4567-e89b-12d3-a456-426614174000";PartitionKey partitionKey = new PartitionKey("Human Resources");// Read item using unique id and partition keyItemResponse<Employee> response = await container.ReadItemAsync<Employee>(id, partitionKey);Employee item = response.Resource;
This code utilizes the ReadItemAsync method with the unique identifier and the appropriate partition key (“Human Resources”) to retrieve the employee record. The returned ItemResponse object holds the employee record that can be processed further in your application.
Azure Cosmos DB supports rich SQL queries to retrieve multiple items that match specific criteria. In this example, we fetch all employees with the property isFullTime set to true using the GetItemQueryIterator method.
Copy
// Get container referenceCosmosClient client = new CosmosClient(endpoint, key);Container container = client.GetContainer(databaseName, collectionName);// Create a feed iterator using a SQL queryFeedIterator<Employee> iterator = container.GetItemQueryIterator<Employee>( "SELECT * FROM employees e WHERE e.isFullTime = true");// Process query results in batcheswhile (iterator.HasMoreResults){ FeedResponse<Employee> batch = await iterator.ReadNextAsync(); foreach (Employee item in batch) { // Process each employee record }}
This method is efficient for working with large datasets by processing results in batches. The SQL statement filters the records for full-time employees, and the code iterates through each batch to handle individual records.
Creating a Database and Container in the Azure Portal
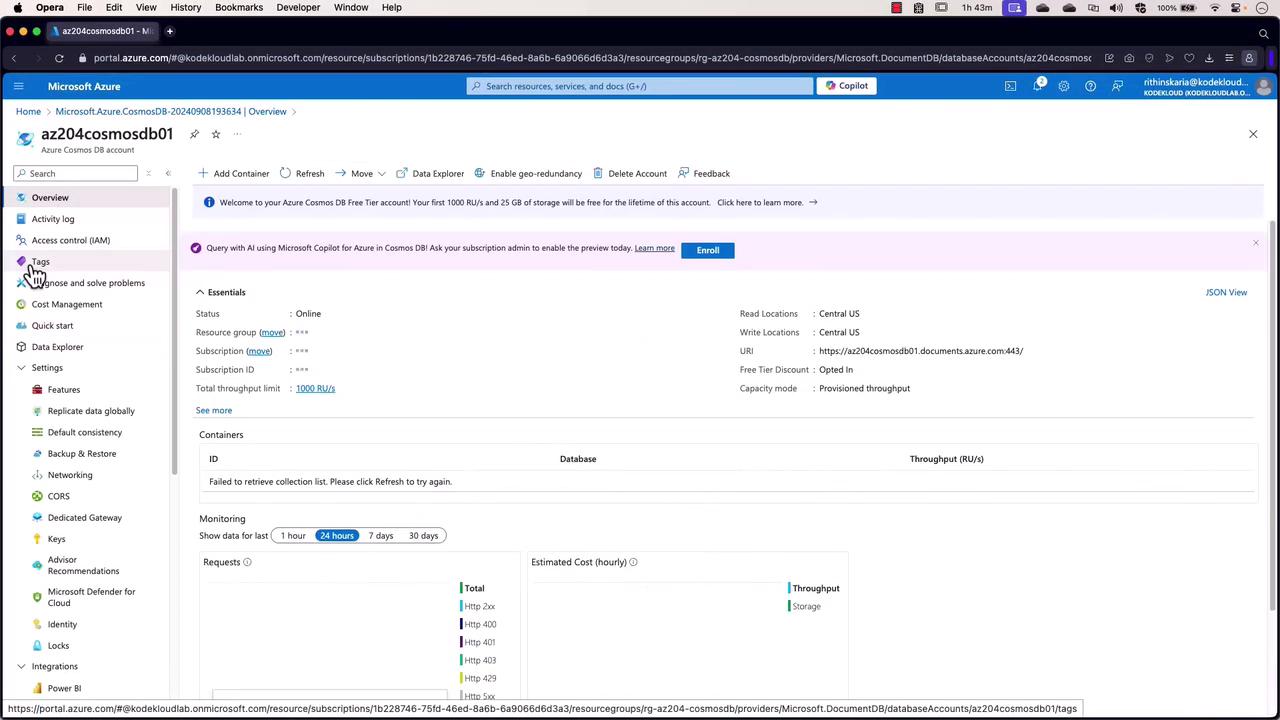
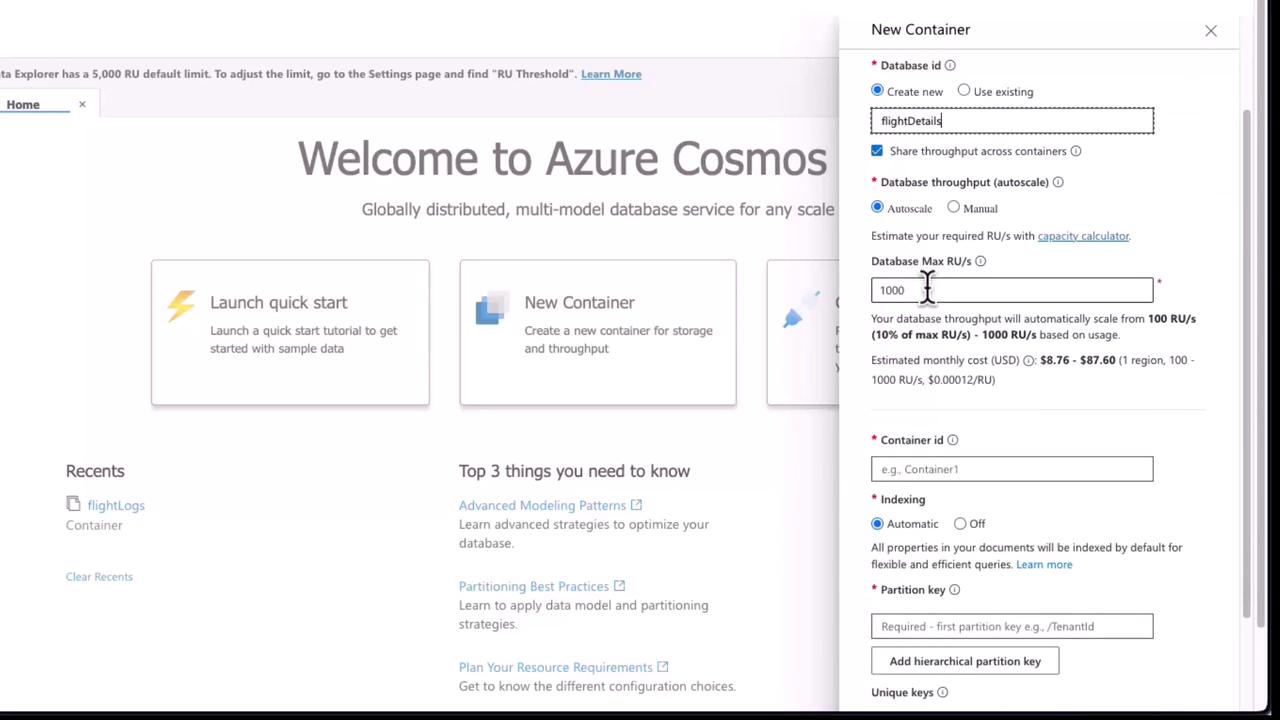
You can also create a Cosmos DB database and container directly through the Azure portal. In Data Explorer, select the option to create a new database if one does not exist. For example, you might create a database named FlightDetails and a container titled Airport Codes. During this process, you can configure the max Request Units (RUs) (e.g., 1000 RUs in the free tier) along with other indexing and partition key settings.
After creating the container, you can utilize it for bulk data import and advanced query operations through Data Explorer.
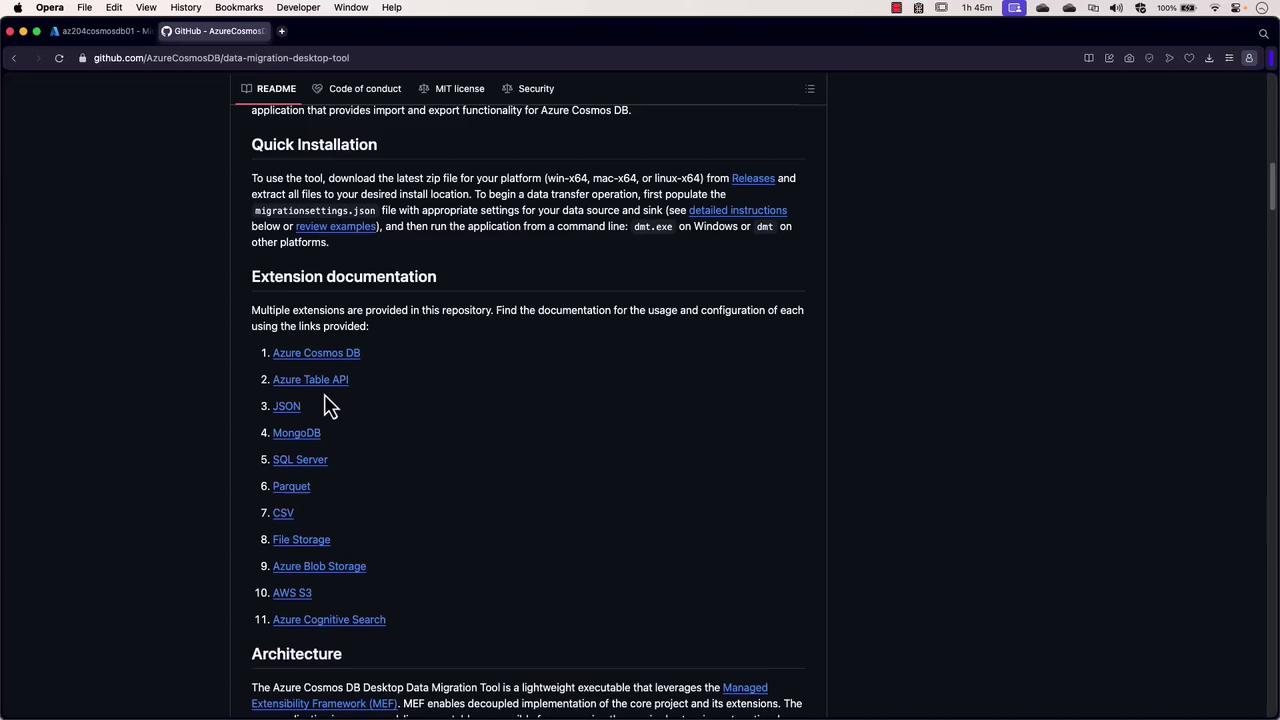
For bulk data import scenarios, the Data Migration Tool (DMT) is an excellent utility that allows for moving data from various sources (local JSON files, S3, Blob Storage, etc.) into Azure Cosmos DB.Below is an example JSON configuration snippet that shows how to transfer data from a local JSON file to a Cosmos DB NoSQL container:
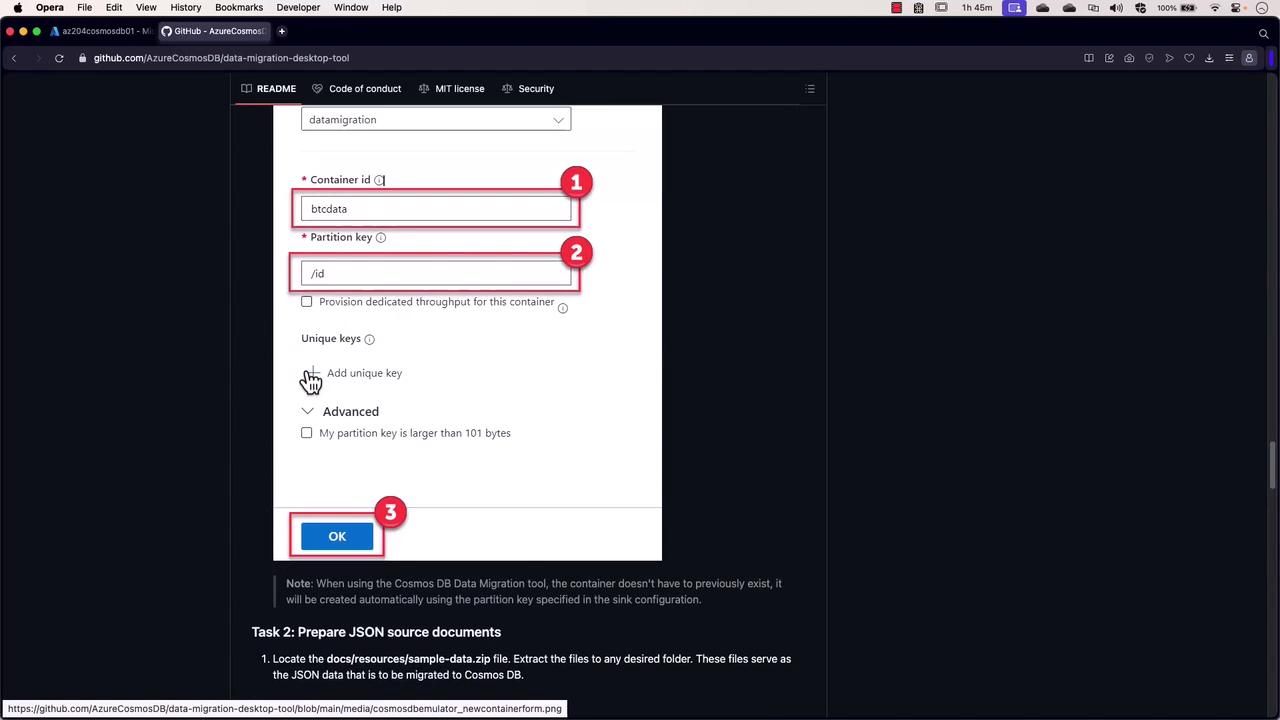
This configuration demonstrates how to designate a JSON file as the source and specify the connection details for the Cosmos DB target.A GitHub repository for the Data Migration Tool also provides additional sample configuration files and detailed usage instructions:
Another sample configuration after adjustments might look like this:
Running the DMT with the appropriate configuration will read the source file and transfer the data to Cosmos DB. For instance, if the file contains approximately 1,000 records, the import may complete in around eight seconds. You can verify the data import by inspecting the container with Data Explorer.
To begin, create a new Console Application (e.g., “Azure Cosmos DB Demo”) in Visual Studio and add the NuGet package “Microsoft.Azure.Cosmos”. Replace the default code with the following sample. This code initializes the Cosmos client, obtains a container reference, and inserts a new airport record into Cosmos DB.
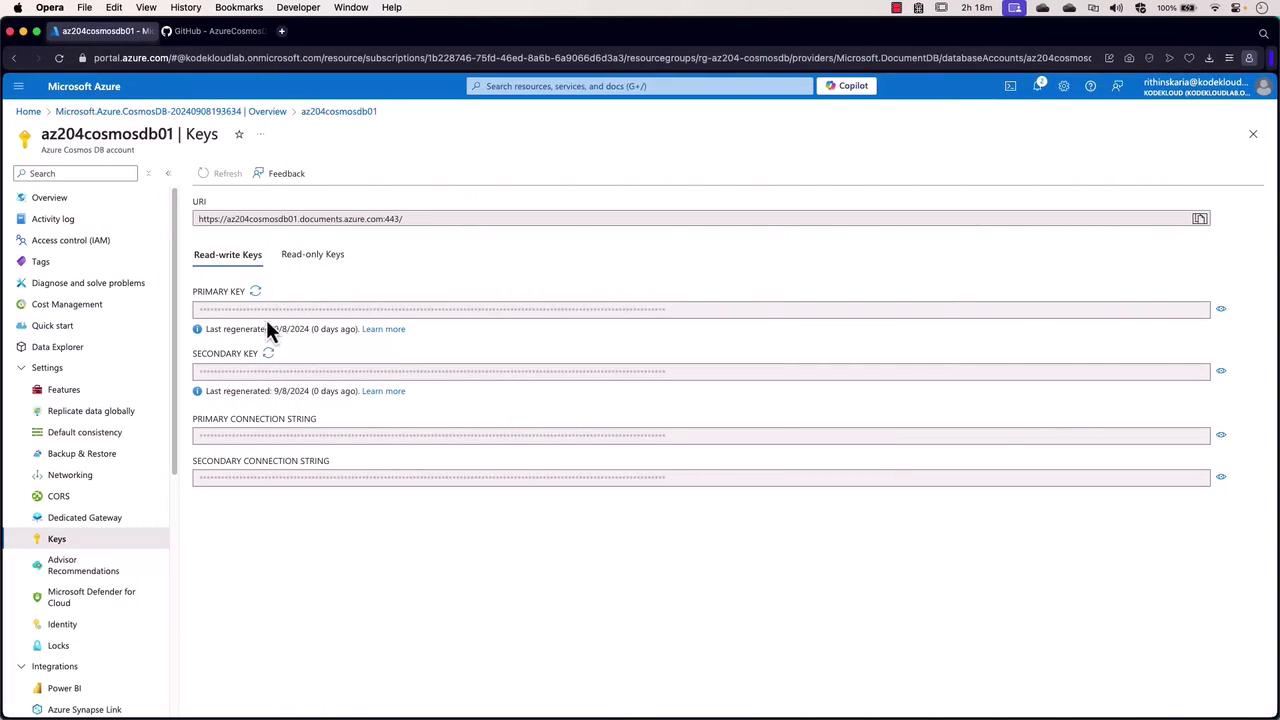
After retrieving the endpoint and key from the Azure portal (under the Keys section), replace the placeholders with your actual account information. Running the application adds the new airport record to your Cosmos DB container. Verify the insertion by querying Data Explorer.
The following example shows how to query for all airports in the United States using a SQL-like statement and how to print the resulting airport names:
Copy
using Microsoft.Azure.Cosmos;using System;using System.Threading.Tasks;class Program{ static async Task Main(string[] args) { string endpoint = "https://az204cosmosdb01.documents.azure.com:443/"; string key = "CQVjdPcMPkByiLu40u646SHoywusm9VUvyJhJcqTpMCTHOxuie5dNdVhLLobQruzAEyfgcJACDbS3CUEg=="; string databaseName = "flightDetails"; string containerName = "airportCodes"; CosmosClient client = new CosmosClient(endpoint, key); Container container = client.GetContainer(databaseName, containerName); FeedIterator<dynamic> iterator = container.GetItemQueryIterator<dynamic>( "SELECT * FROM c WHERE c.country_code = 'United States'" ); while (iterator.HasMoreResults) { FeedResponse<dynamic> batch = await iterator.ReadNextAsync(); foreach (var airport in batch) { Console.WriteLine($"{airport.airport_name}"); } } }}
The code above constructs a query to fetch airports with the country code ‘United States’. It uses a feed iterator to process the results in batches and prints each airport’s name on the console. An example output might be:Burgos Airport
Gregorio Luperon International Airport
Zvartnots International Airport
Caye Caulker Airport
Parry Sound Area Municipal Airport
Pompano Beach Airpark
Akron Canton Regional Airport
Susanville Municipal Airport
Mogilev Airport
Now that you know how to create, read, and query items using the .NET SDK—and how to import bulk data into your Cosmos DB account—the next lesson will focus on creating and managing stored procedures in Azure Cosmos DB to further optimize your data operations.Happy coding!