This lesson teaches how to select and implement Azure Batch solutions for managing compute-intensive tasks efficiently.
In this lesson, you will learn when and how to select an Azure Batch solution. Although Azure Batch is not part of our AZ-104: Microsoft Azure Administrator course, it is included in the AZ-204: Developing Solutions for Microsoft Azure exam because it requires developer skills. With Azure Batch, you can create and manage jobs using Python, .NET, or any other supported language.
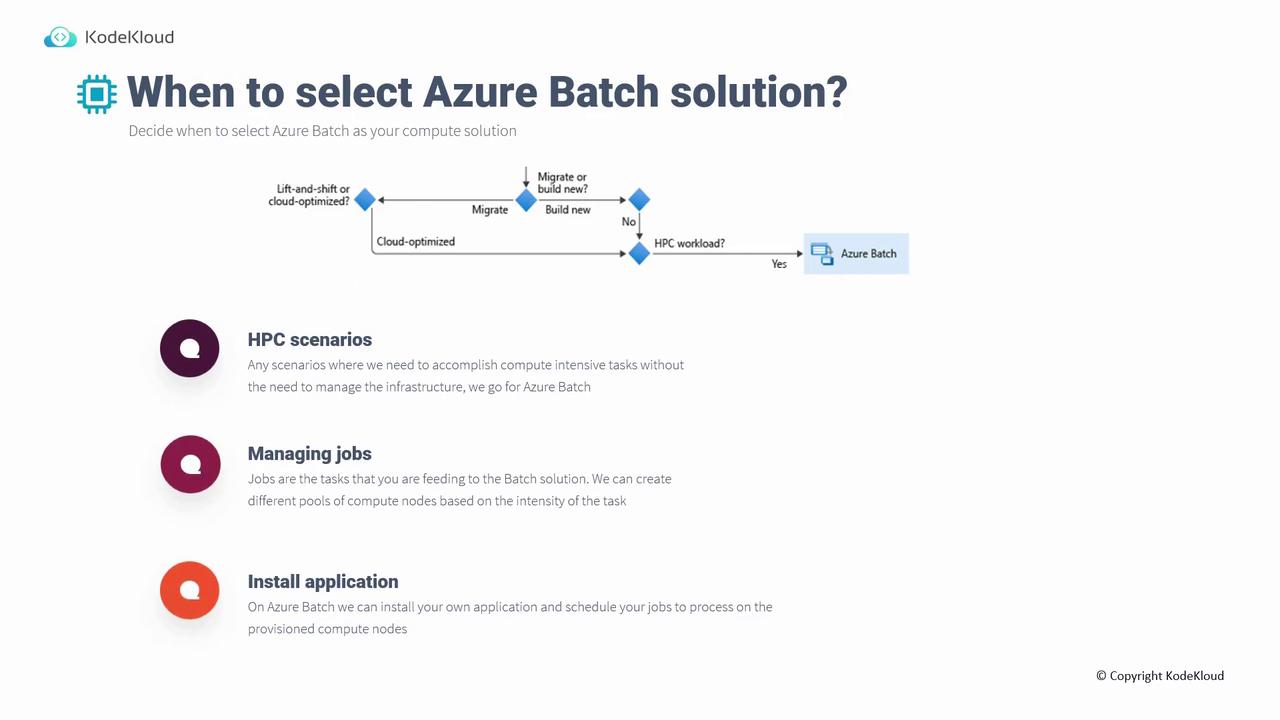
Azure Batch is ideal for High Performance Computing (HPC) workloads. In HPC scenarios, you typically have compute-intensive tasks that do not require deep management of the underlying infrastructure. Azure Batch simplifies job management by automatically scaling compute nodes and scheduling tasks.
Azure Batch is best suited for scenarios where you:
Need to manage a large number of jobs.
Want to scale compute nodes automatically based on task intensity (e.g., running simulations that require multiple nodes).
Prefer to install and run your own application code rather than relying solely on built-in solutions. For example, you might process images stored in a storage account and then output the processed results.
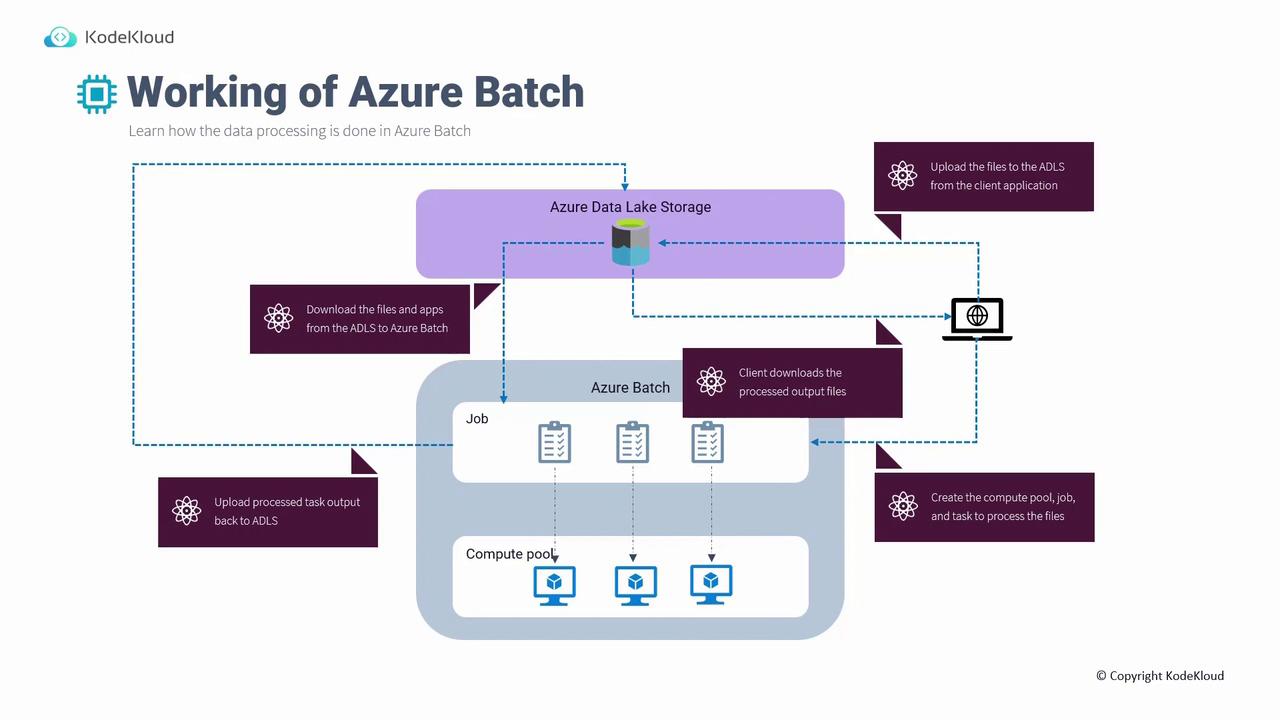
The diagram below illustrates the complete data processing workflow using Azure Batch. Imagine that you have an Azure Data Lake Storage account that holds your data (distinct from regular Azure Storage). A client uploads files—such as images or other data—to Azure Data Lake Storage. In parallel, code provisions the necessary compute resources and jobs. The process pulls data from storage, executes compute-intensive operations (like image processing or simulations), and then pushes the processed data back to storage for your client application to retrieve.
Multiple SDKs, including Python and .NET, are available for Azure Batch, allowing you to choose the one that best fits your development needs.
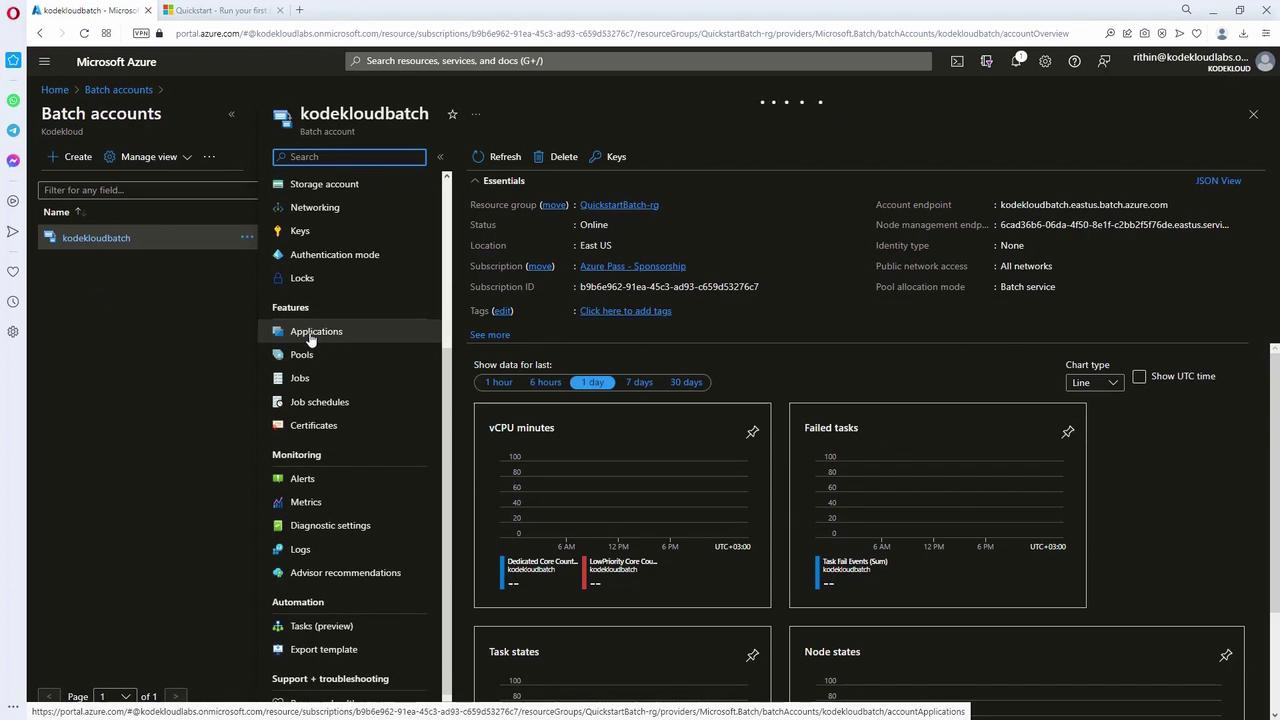
This lesson demonstrates Azure Batch setup using the Azure Portal and Azure CLI commands. Make sure you have the appropriate permissions and Azure CLI installed on your system.
If you encounter policy restrictions allowing deployments only in specific regions (e.g., East US and West US), update the location parameter to match an allowed region.
Create a compute pool to provision the necessary virtual machines. In this example, the pool (named “kpool”) uses a Standard_A1_v2 VM size, employs a canonical Ubuntu 18.04 image, and targets two dedicated nodes:
Copy
az batch pool create --id kpool \
  --vm-size Standard_A1_v2 \
  --target-dedicated-nodes 2 \
  --image canonical:ubuntuserver:18.04-LTS \
  --node-agent-sku-id "batch.node.ubuntu 18.04"
After creating the pool, check its allocation state:
Copy
az batch pool show --pool-id kpool --query "allocationState"
Initially, the allocation state might show “resizing.” Once all nodes are provisioned, the state will change to “steady.” You can also verify the pool status via the Azure Portal.
Once the compute pool is in a “steady” state, create a job that will run on the pool:
Copy
az batch job create --id kjob --pool-id kpool
A job groups tasks that run on the provisioned compute nodes. Next, create tasks within your job—this example uses a loop to create four tasks. Each task prints environment variables (prefixed with AZ_BATCH) and then sleeps for 90 seconds:
Copy
for i in {1..4}do az batch task create --task-id ktask$i --job-id kjob --command-line "/bin/bash -c 'printenv | grep AZ_BATCH; sleep 90s'"done
After task creation, verify the status of a task using:
Copy
az batch task show --task-id ktask1 --job-id kjob
Ensure that the exit code is zero to confirm successful execution. Additional details, such as the compute node on which the task ran, will also be available.To view the task output files (e.g., standard output and standard error), list the files with:
Copy
az batch task file list --task-id ktask1 --job-id kjob -o table
A sample output might include files like the working directory, stderr.txt, and stdout.txt. Download the standard output file to inspect the results:
Finally, review the contents of the downloaded file:
Copy
cat output.txt
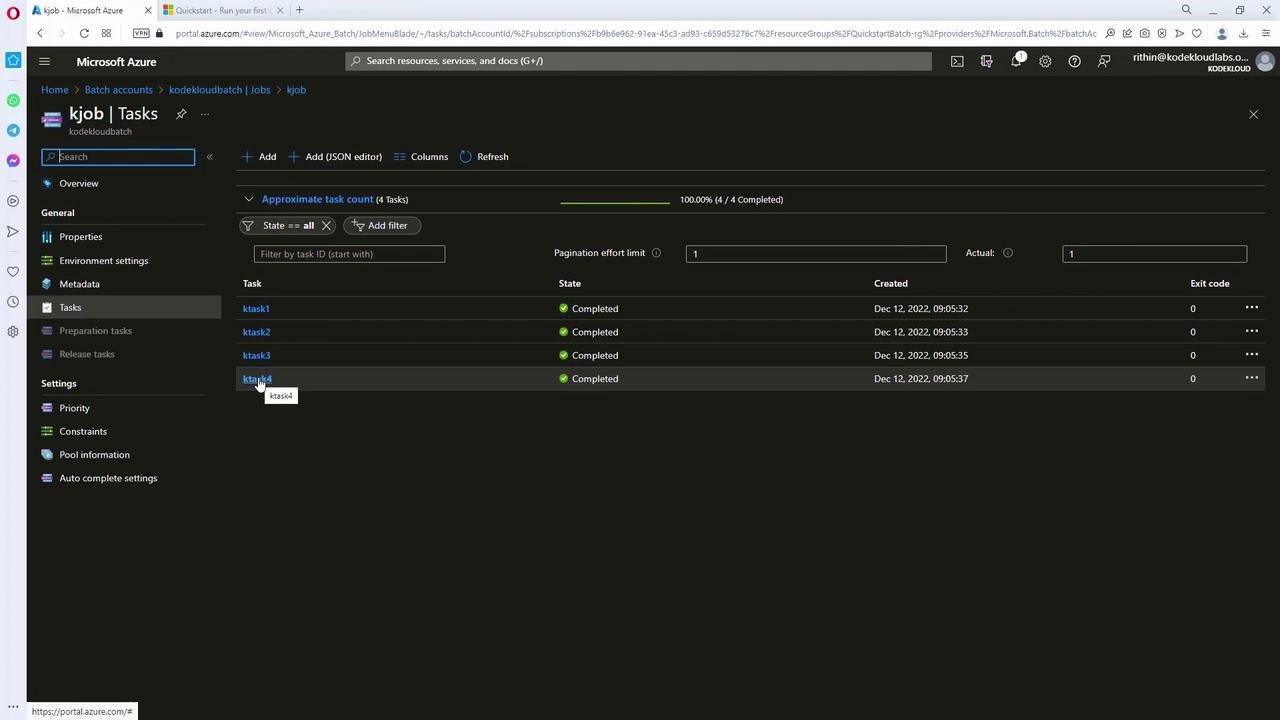
This file should display the environment variables starting with AZ_BATCH, verifying the task executed correctly.Alternatively, you can check task details directly in the Azure Portal. Navigate to your job “kjob” under the “kodekloudbatch” account, then click on a completed task (such as task four) to view its output.
In this lesson, you learned how to create an Azure Batch solution by:
Establishing a resource group and storage account.
Creating and authenticating a batch account.
Provisioning a compute pool.
Setting up jobs and tasks for parallel execution.
This step-by-step example demonstrates basic parallel task execution. You can extend these concepts for more complex workloads by leveraging SDKs like .NET or Python.Happy batching!