Overview of Assessment Tools
Microsoft provides a suite of tools tailored to different workload types. The core tool is the Server Assessment, integrated into Azure Migrate, which combines both assessment and migration functionalities to offer an end-to-end process. By deploying a lightweight appliance on your on-premises environment, Azure Migrate collects detailed workload data (such as memory, CPU, and operating system details from virtual machines) and transfers it to Azure for analysis. Azure then calculates a readiness score that indicates whether a workload is ready for migration, requires changes, or is not supported. Additional assessment tools include:- Database Assessment (DMA Tool): Also known as the Database Migration Assistant, this utility examines your on-premises Microsoft SQL Server databases. It highlights compatibility issues and evaluates migration readiness for Azure SQL Database, Azure SQL Managed Instance, or SQL Server on a VM.
- Web App Assessment: This tool assists in evaluating on-premises web applications in preparation for migration to Azure.
- TCO Calculator: This tool, while not a complete assessment solution, helps you estimate the total cost of ownership and potential savings when adopting cloud services.
- Service Map: By installing an agent on each machine, Service Map creates a comprehensive dependency analysis and visualizes how servers and processes are interconnected. This is particularly beneficial for understanding virtual machine dependencies prior to migration.
Exploring Azure Migrate in the Azure Portal
Within the Azure portal, the Azure Migrate section provides a central location to initiate workload assessments.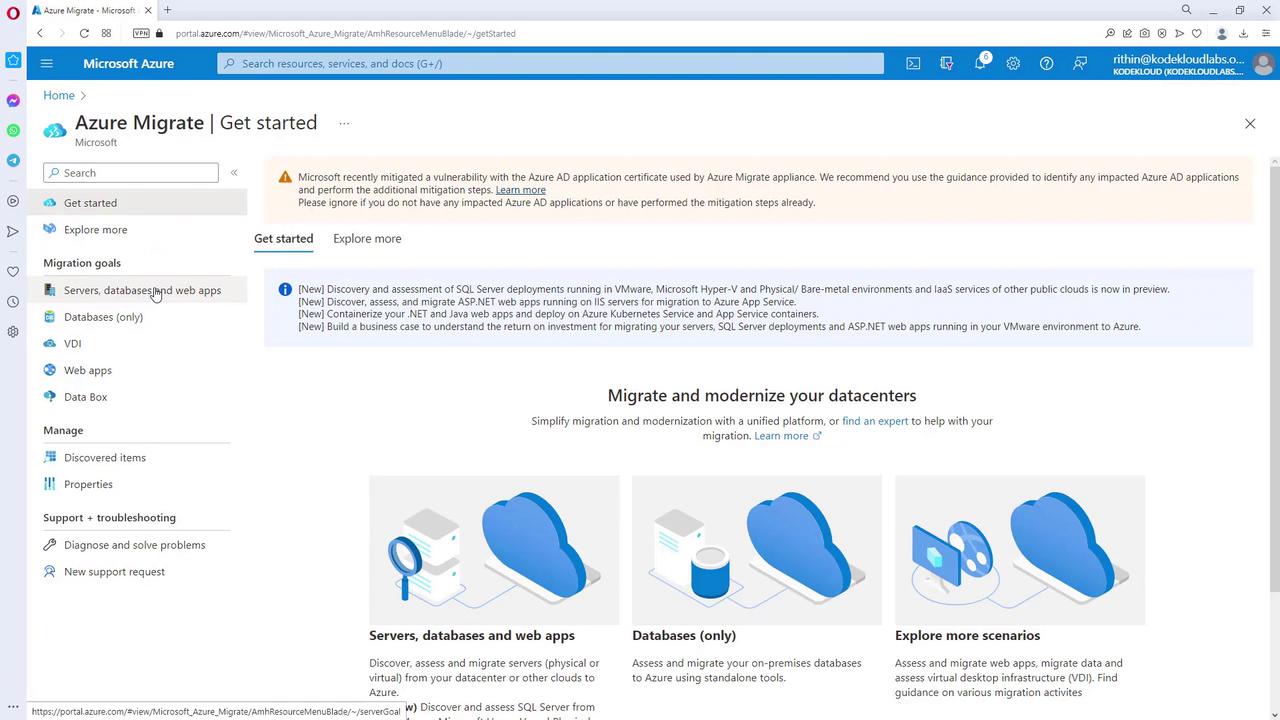
Creating a Migration Project
To get started, create a new migration project by following these steps:-
Define the project parameters, for example:
- Resource Group: Migrate RG
- Project Name: NYC to Azure (assuming a migration for a New York City data center)
- Geography: United States
- Note that historically, Azure Site Recovery handled migrations by replicating workloads to Azure before performing a cutover. Today, Azure Migrate offers a complete picture that integrates both assessment and migration capabilities.
If you experience issues during project creation, such as policies blocking the deployment, consider selecting another region (e.g., Asia Pacific) for project setup.
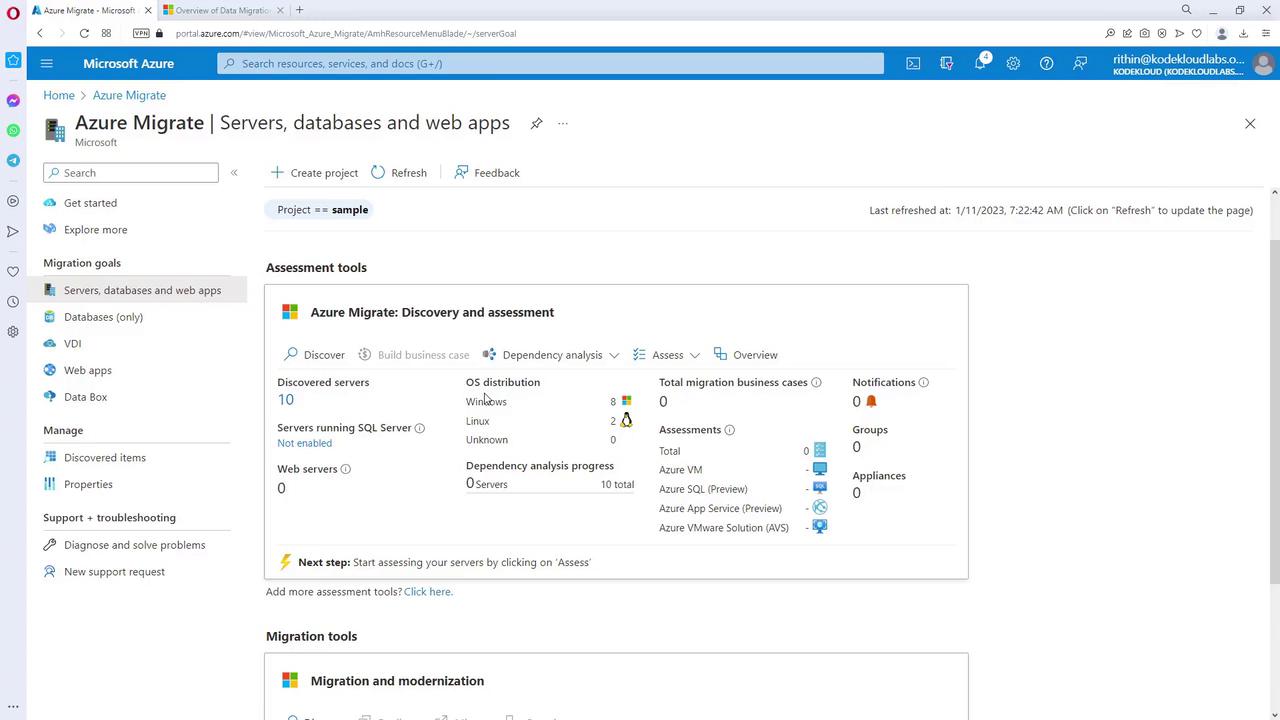
Assessment Phase
Within your Azure Migrate project, the assessment process is divided into two primary sections:- Discovery and Assessment: Gather data from your on-premises environment.
- Migration and Modernization: Utilize tools for migrating and modernizing workloads after the assessment.
Data Collection Methods
Data can be collected in two primary ways: using an on-premises appliance or by importing a CSV file.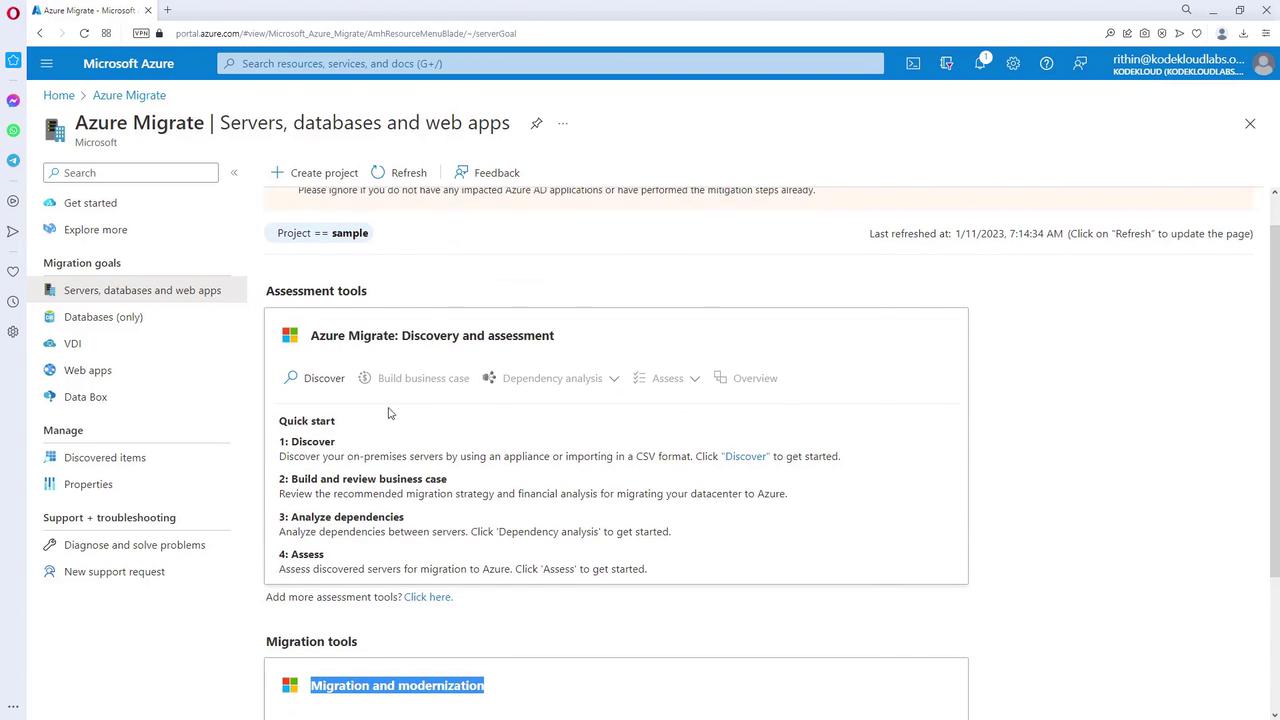
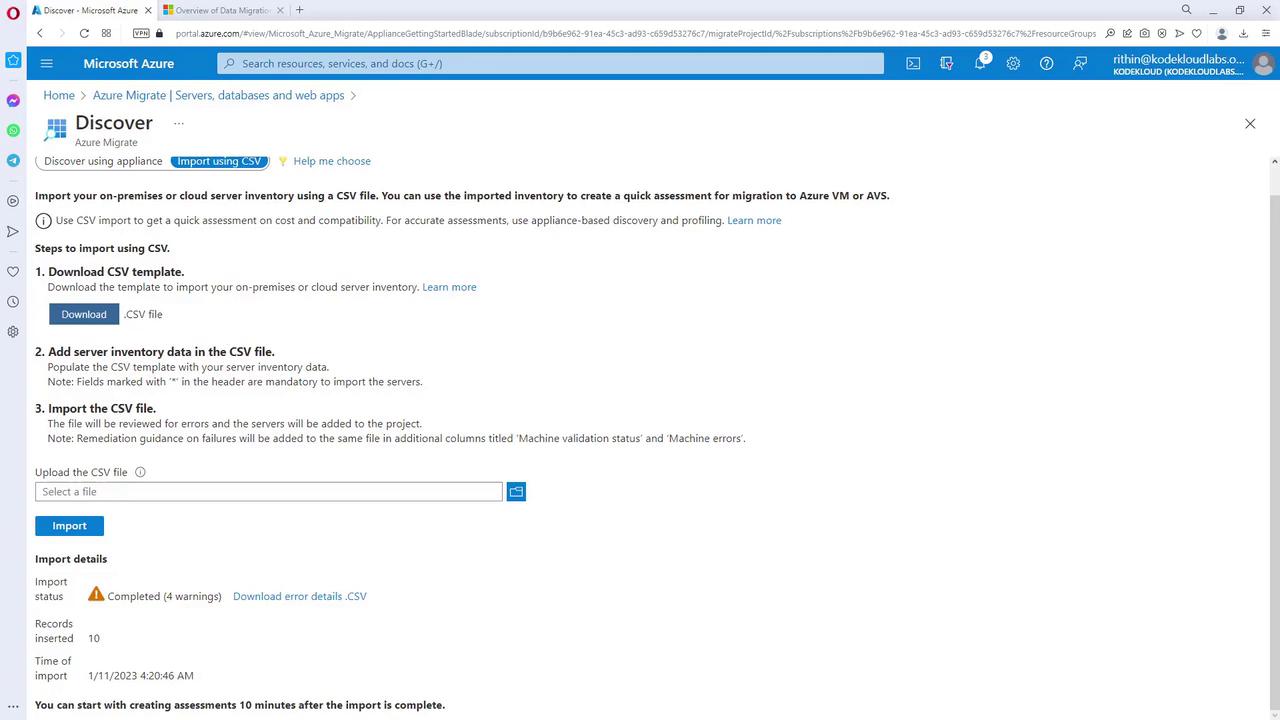
Importing Data via CSV
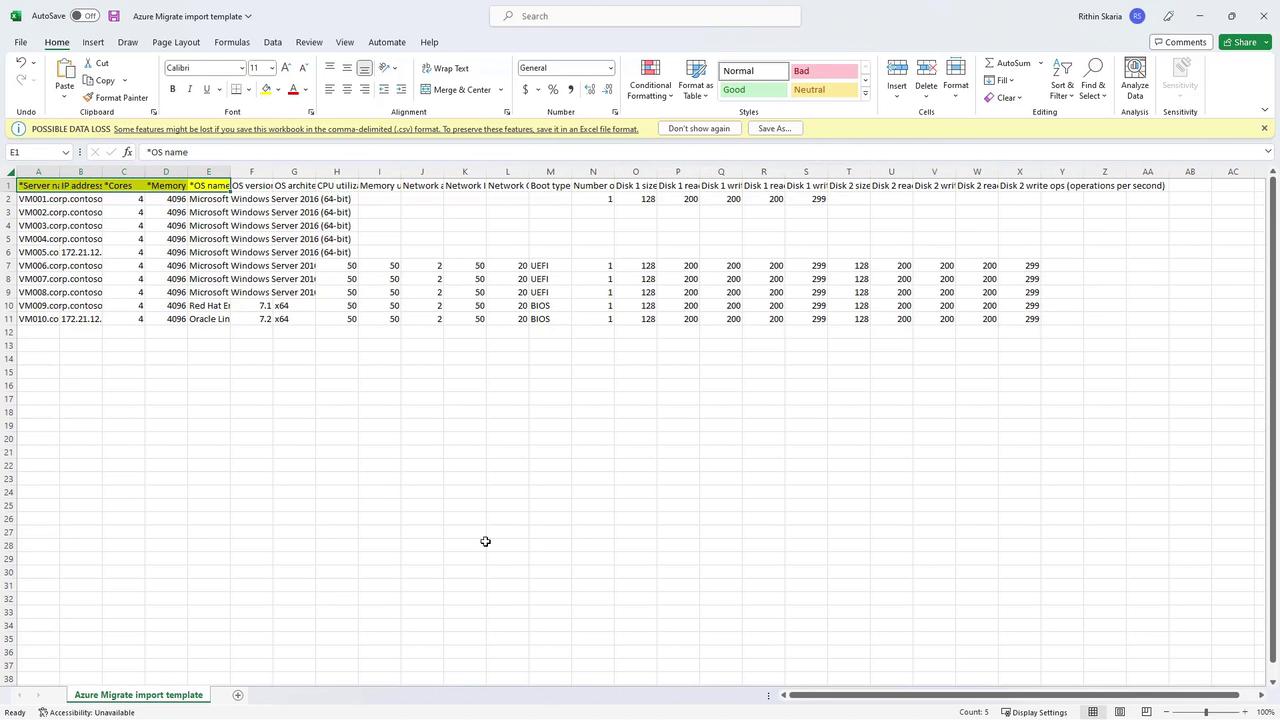
- Download the CSV template provided by Azure.
- Populate the template with the required details such as server name, IP address, core count, memory, and operating system information. Some fields are mandatory while others are optional.
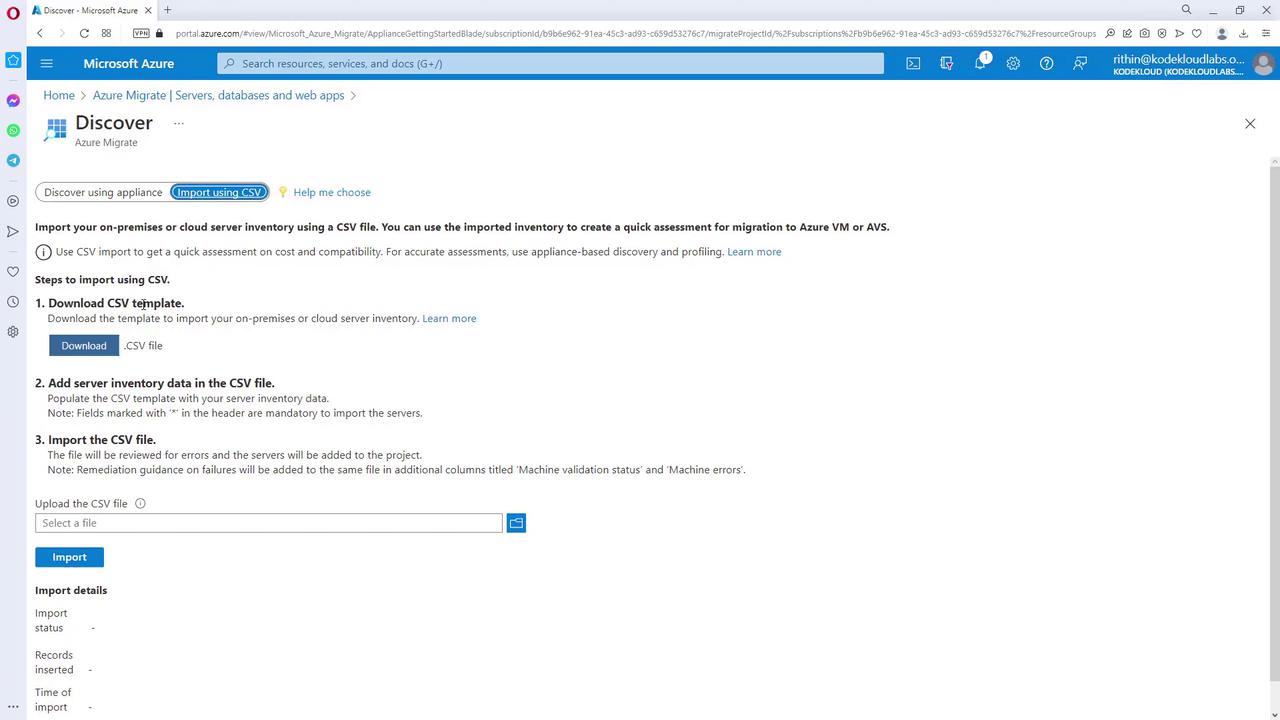
- Upload the completed CSV file back to Azure.
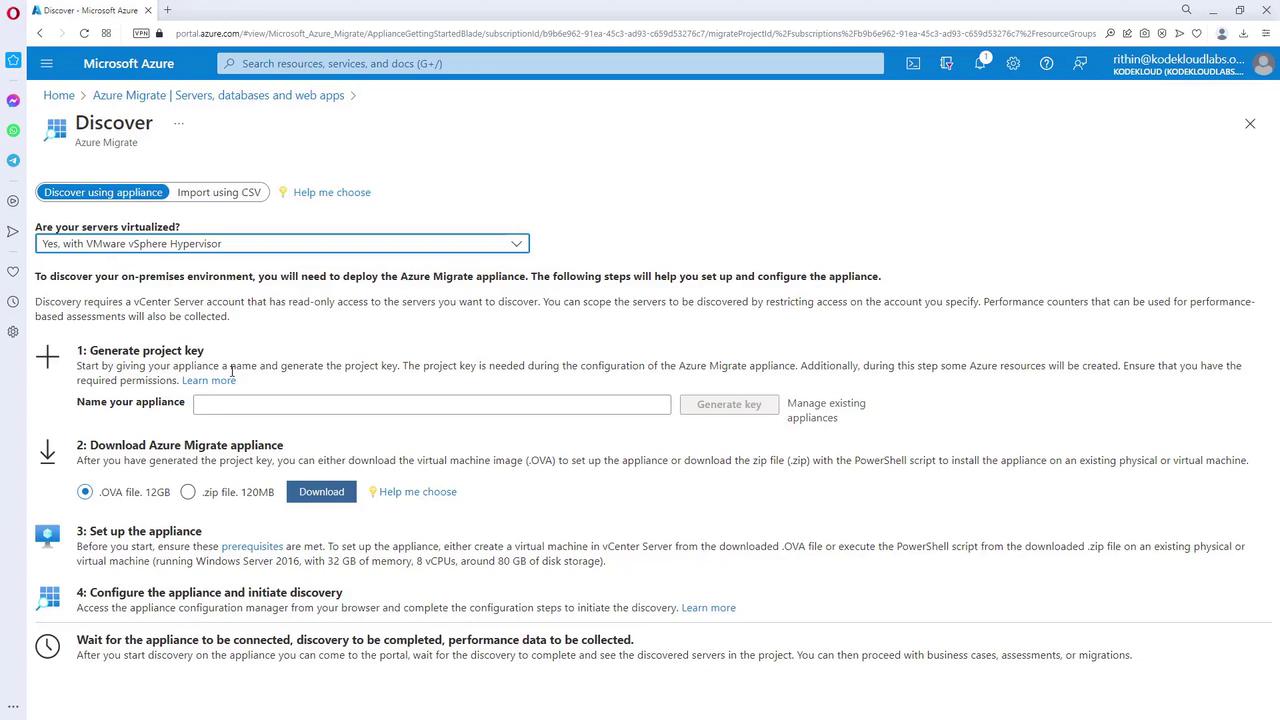
Using an On-Premises Appliance
Deploy an appliance within your environment for automated data collection. Depending on your infrastructure:- For VMware environments: Generate a project key, download the OVA file, deploy the appliance, and configure it.
- For Hyper-V: Utilize the provided VHD file.
- For physical servers or AWS environments: Download a ZIP file and run a PowerShell script on a Windows Server (minimum requirements: Windows Server 2016, 16 GB memory, 8 vCPUs, and 80 GB storage).
Database Assessment with DMA
Install the Database Migration Assistant (DMA) on your on-premises SQL Server to identify compatibility issues and examine migration challenges.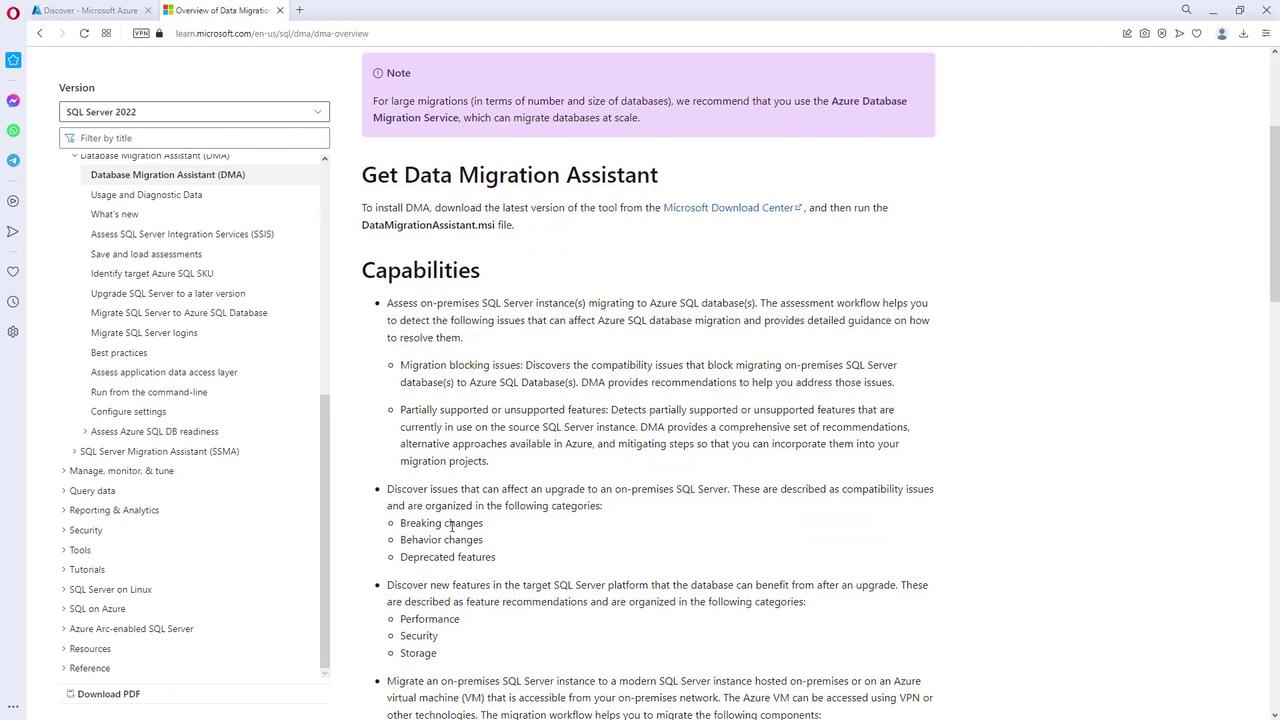
Initiating an Assessment
After gathering your server data, begin the assessment process with these steps:- If using the CSV method, upload your CSV file.
- Wait approximately 10 minutes for the import process to complete.
- Review the assessment results, including any warnings (e.g., disk sizing issues) and the total number of records processed.
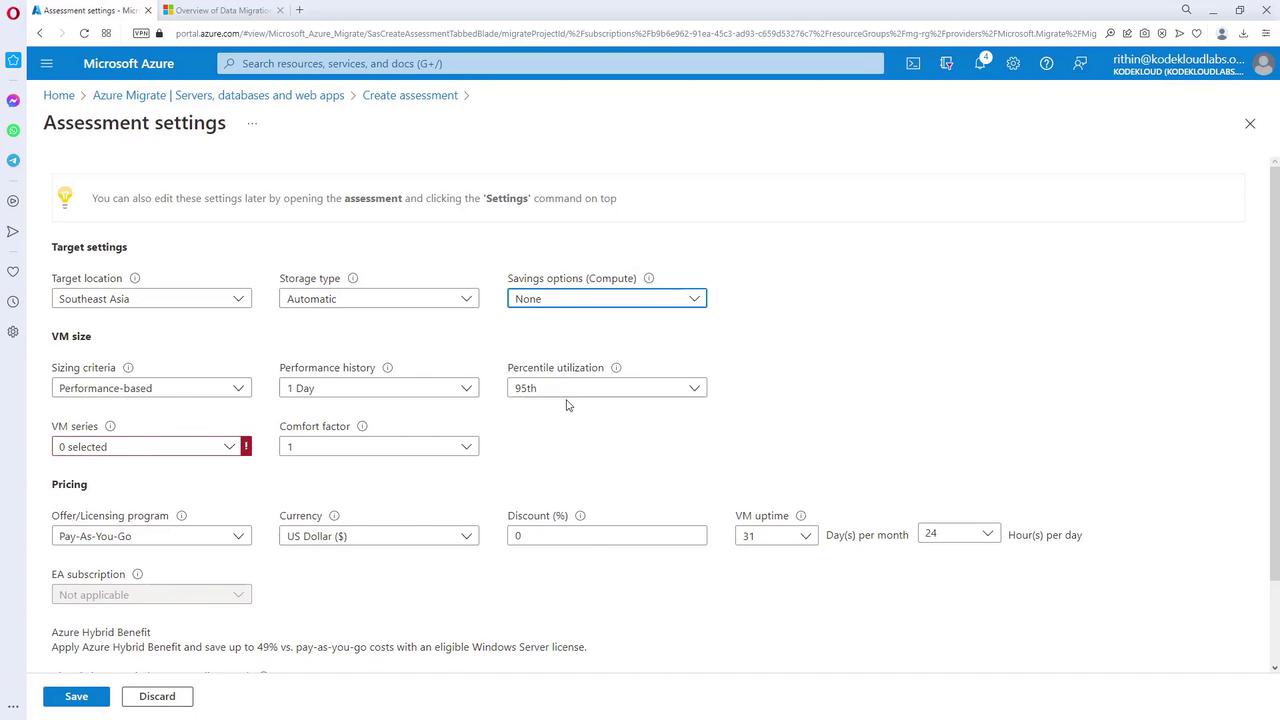
Configuring Assessment Settings
- Select the assessment for Azure VMs.
- Click “Edit” within the assessment settings to adjust parameters such as reservation options and target VM series. For example, choose “None” for reservation and “Select All” for VM series.
- Configure additional licensing options like Azure Hybrid Benefit if applicable.
- The number of machines ready for migration
- Workloads that require modifications or are not supported
- Estimated compute and storage costs
Assessment reports provide critical insights that help present data-driven findings to business stakeholders.