> ## Documentation Index
> Fetch the complete documentation index at: https://notes.kodekloud.com/llms.txt
> Use this file to discover all available pages before exploring further.
# Recovering Data From Source Control Using Azure Repos
> This article explains how to recover lost or deleted data using Azure Repos with Git commands and the Azure Repos UI.
When working with Azure Repos, you can leverage the full power of Git along with a rich web interface to recover lost or deleted data. Whether you prefer command-line operations or a GUI, Azure DevOps provides the tools you need.
Ensure you have a local clone of your Azure Repos repository and the latest Git version installed. You will also need sufficient permissions to push changes back to the remote.
## 1. Recovering with Git commands
All standard Git recovery commands work seamlessly with Azure Repos. Here are common scenarios:
| Recovery Task | Git Command | Description |
| ------------------------ | --------------------------------------------- | ------------------------------------------------------------- |
| Undo a specific commit | `git revert ` | Creates a new commit that reverses the changes in ``. |
| Reset working directory | `git reset --hard HEAD` | Discards all uncommitted changes in your working tree. |
| Recover a deleted branch | `git reflog` → `git branch ` | Locate the commit in reflog and recreate the branch. |
Example: Recover a deleted branch named `feature-x`
```bash theme={null}
# Step 1: Identify the lost branch reference
git reflog
# Step 2: Recreate the branch at the desired commit (e.g., abc1234)
git branch feature-x abc1234
# Step 3: Push the restored branch to Azure Repos
git push origin feature-x
```
Avoid using `git push --force` on shared branches—it can overwrite history and disrupt other collaborators. Use `--force-with-lease` when you need safer history rewrites.
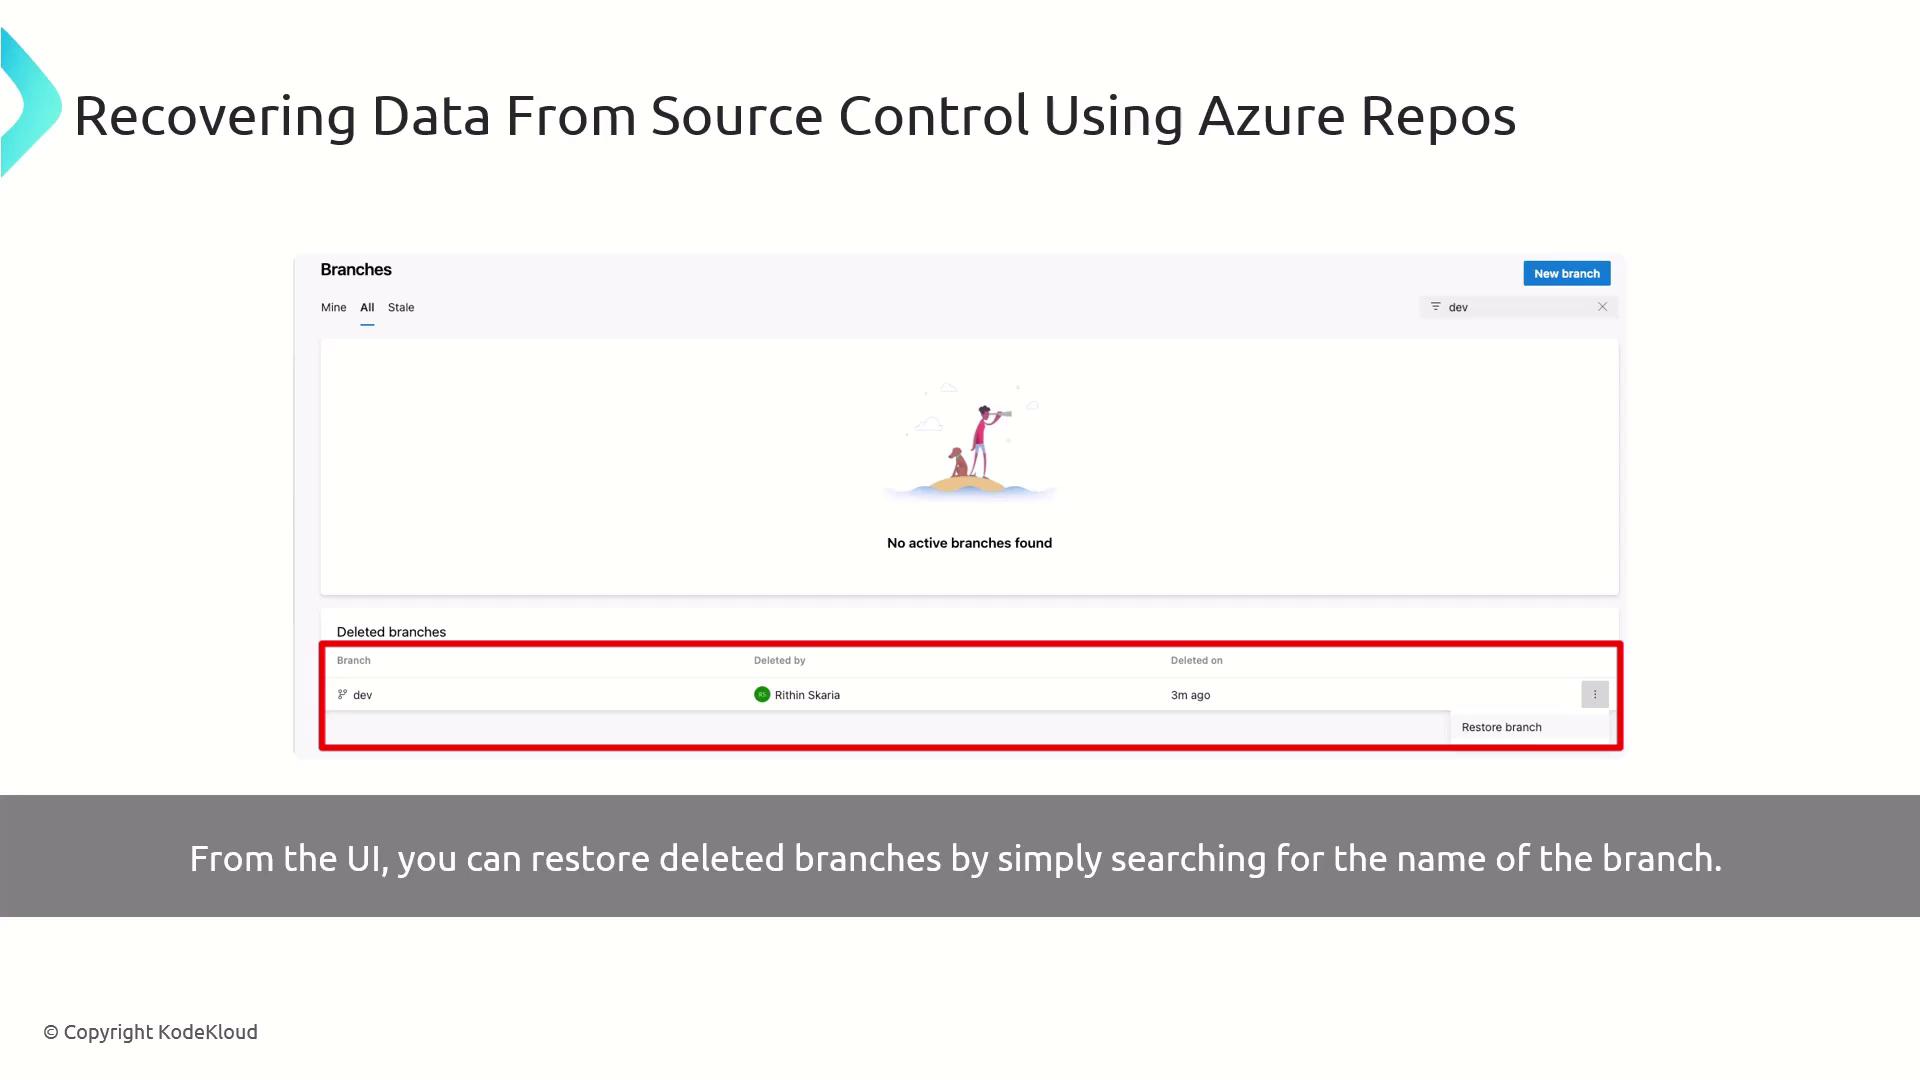
## 2. Restoring deleted branches in the Azure Repos UI
If you prefer a visual approach, Azure Repos provides a point-and-click interface to restore branches:
1. In Azure DevOps, navigate to **Repos** > **Branches**.
2. Toggle **Show deleted branches** in the filter bar.
3. Search for the branch name (e.g., `dev`).
4. Click **Restore** next to the deleted branch.
No matter which method you choose—Git CLI or Azure Repos UI—you can quickly recover commits, branches, and deleted data with confidence.
Next, we’ll explore how to purge sensitive or unwanted data from your source control to meet security and compliance requirements.
## References
* [Azure Repos Documentation](https://docs.microsoft.com/azure/devops/repos/git/)
* [Git Documentation: git-revert](https://git-scm.com/docs/git-revert)
* [Git Documentation: git-reflog](https://git-scm.com/docs/git-reflog)