> ## Documentation Index
> Fetch the complete documentation index at: https://notes.kodekloud.com/llms.txt
> Use this file to discover all available pages before exploring further.

# Configure projects and teams in Azure DevOps

> This article explains how to configure projects and teams in Azure DevOps for effective collaboration and workflow management.

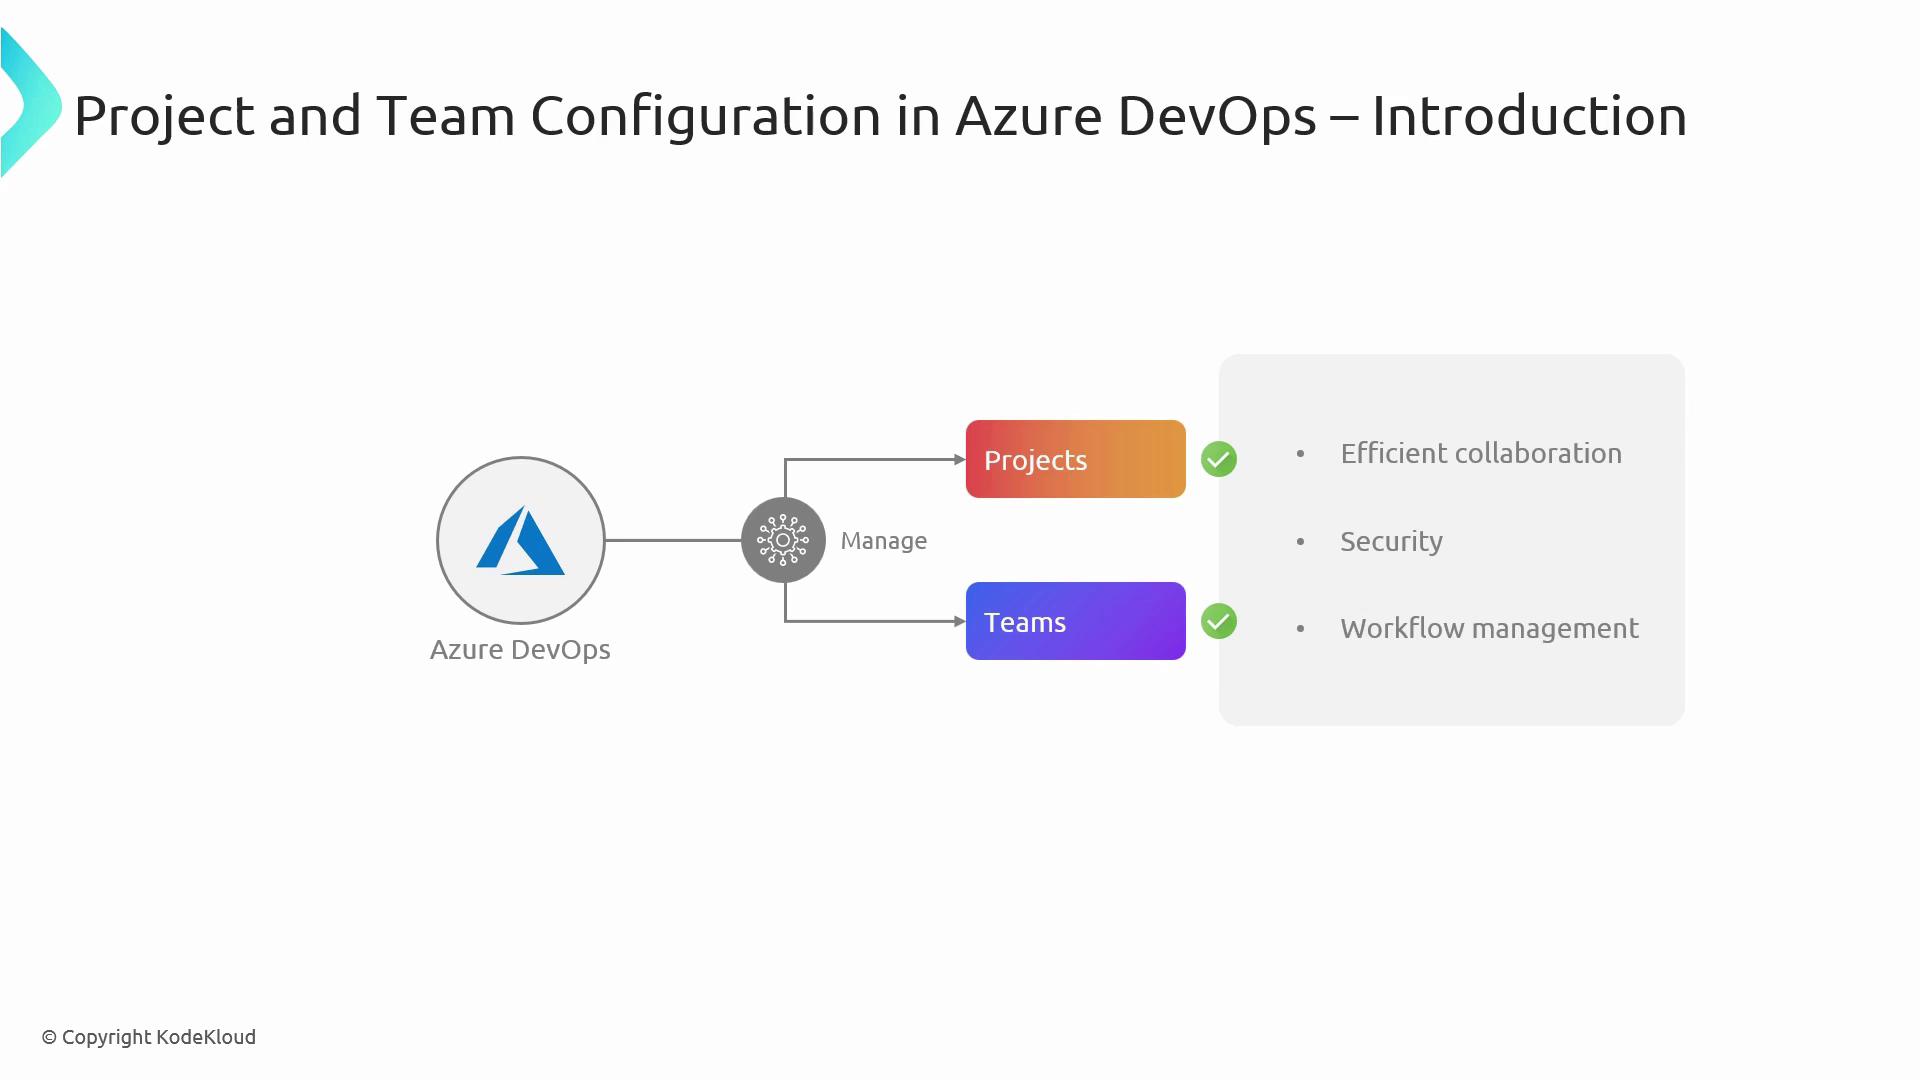
Azure DevOps provides an integrated platform for planning, developing, and delivering software. Properly configuring projects and teams ensures streamlined collaboration, robust security, and efficient workflows.
<Frame>
  ![The image is a diagram illustrating project and team configuration in Azure DevOps, highlighting management of projects and teams for efficient collaboration, security, and workflow management.](https://kodekloud.com/kk-media/image/upload/v1752867544/notes-assets/images/AZ-400-Designing-and-Implementing-Microsoft-DevOps-Solutions-Configure-projects-and-teams-in-Azure-DevOps/azure-devops-project-team-configuration-diagram.jpg)
</Frame>

## 1. Create Your Azure DevOps Project

A project in Azure DevOps centralizes your code repositories, work items, pipelines, and artifacts.

1. Sign in to your [Azure DevOps organization](https://docs.microsoft.com/azure/devops/organizations/).
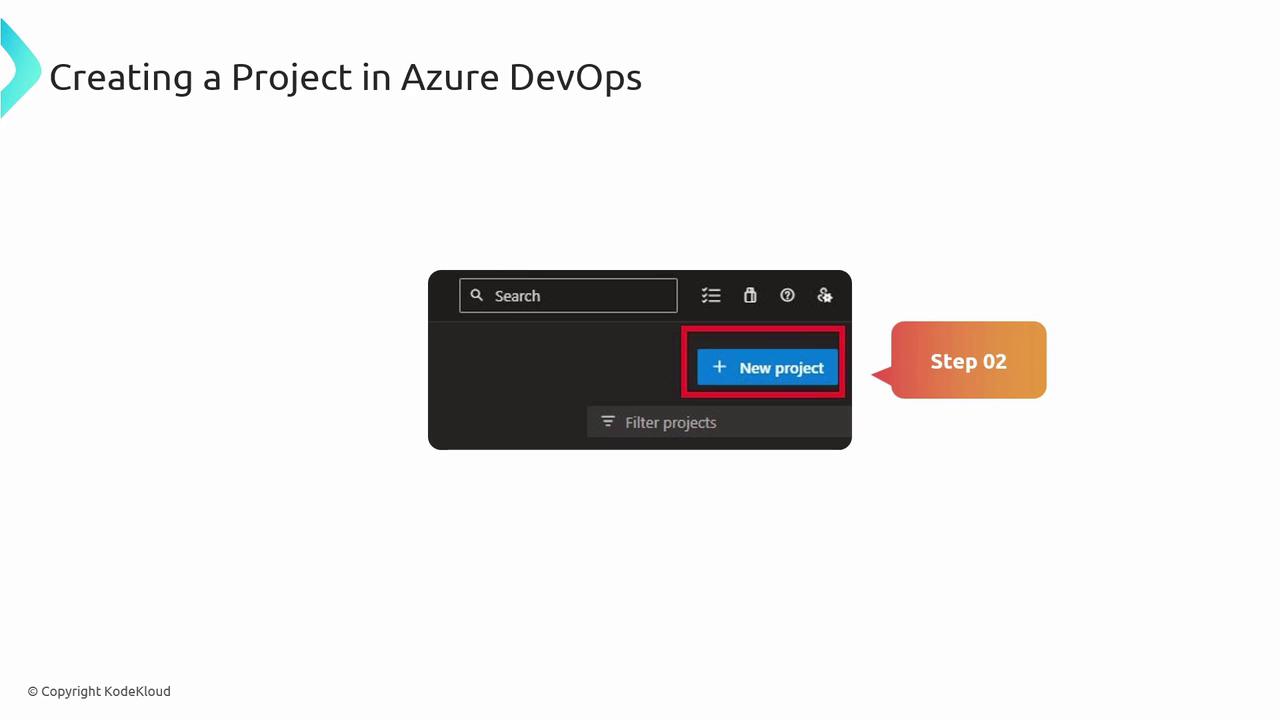
2. Click **New Project**.
<Frame>
  ![The image shows a step in creating a project in Azure DevOps, highlighting the "New project" button. It is labeled as "Step 02."](https://kodekloud.com/kk-media/image/upload/v1752867545/notes-assets/images/AZ-400-Designing-and-Implementing-Microsoft-DevOps-Solutions-Configure-projects-and-teams-in-Azure-DevOps/azure-devops-new-project-step-02.jpg)
</Frame>

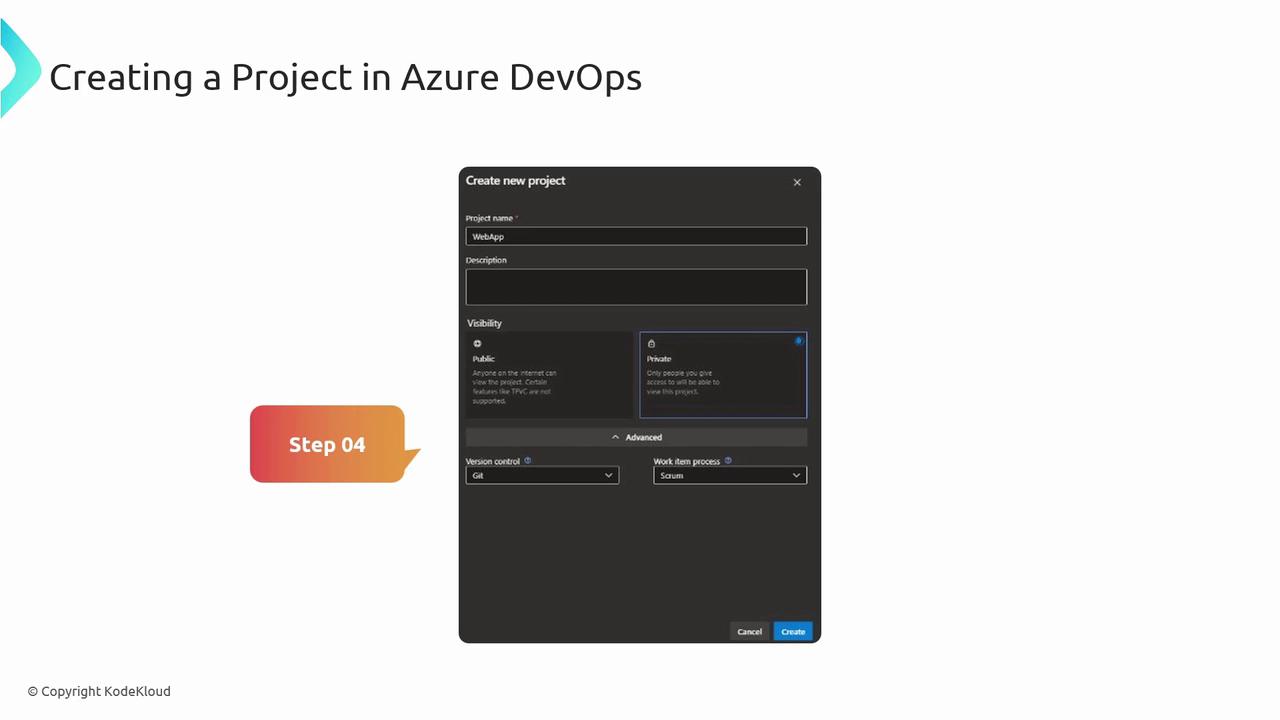
3. Provide a **Project name**, **Description**, and select visibility (Public or Private).
4. Choose a version control system (Git or TFVC) and a work item process (Agile, Scrum, or CMMI).
5. Click **Create** to provision your project.
<Frame>
  ![The image shows a step in creating a project in Azure DevOps, with a form for entering project details like name, visibility, version control, and work item process. It is labeled as "Step 04" and includes options for public or private visibility.](https://kodekloud.com/kk-media/image/upload/v1752867546/notes-assets/images/AZ-400-Designing-and-Implementing-Microsoft-DevOps-Solutions-Configure-projects-and-teams-in-Azure-DevOps/azure-devops-project-creation-step-04.jpg)
</Frame>

Your project is now ready. Next, tailor its settings to match your team’s needs.

## 2. Configure Project Settings

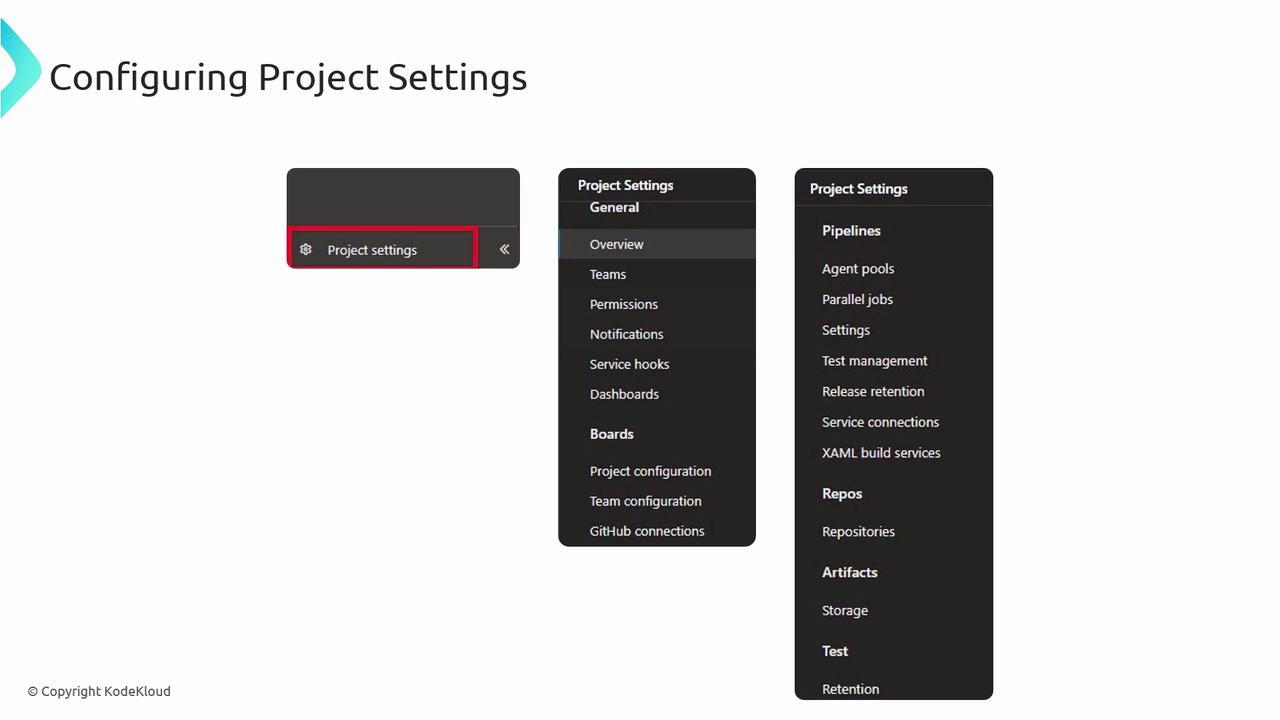
Access **Project Settings** by clicking the gear icon in the lower-left corner of your project dashboard.
<Frame>
  ![The image shows a user interface for configuring project settings, with menus for general settings, boards, pipelines, repos, artifacts, and test options.](https://kodekloud.com/kk-media/image/upload/v1752867547/notes-assets/images/AZ-400-Designing-and-Implementing-Microsoft-DevOps-Solutions-Configure-projects-and-teams-in-Azure-DevOps/project-settings-user-interface-configure.jpg)
</Frame>

### 2.1 Key Configuration Areas

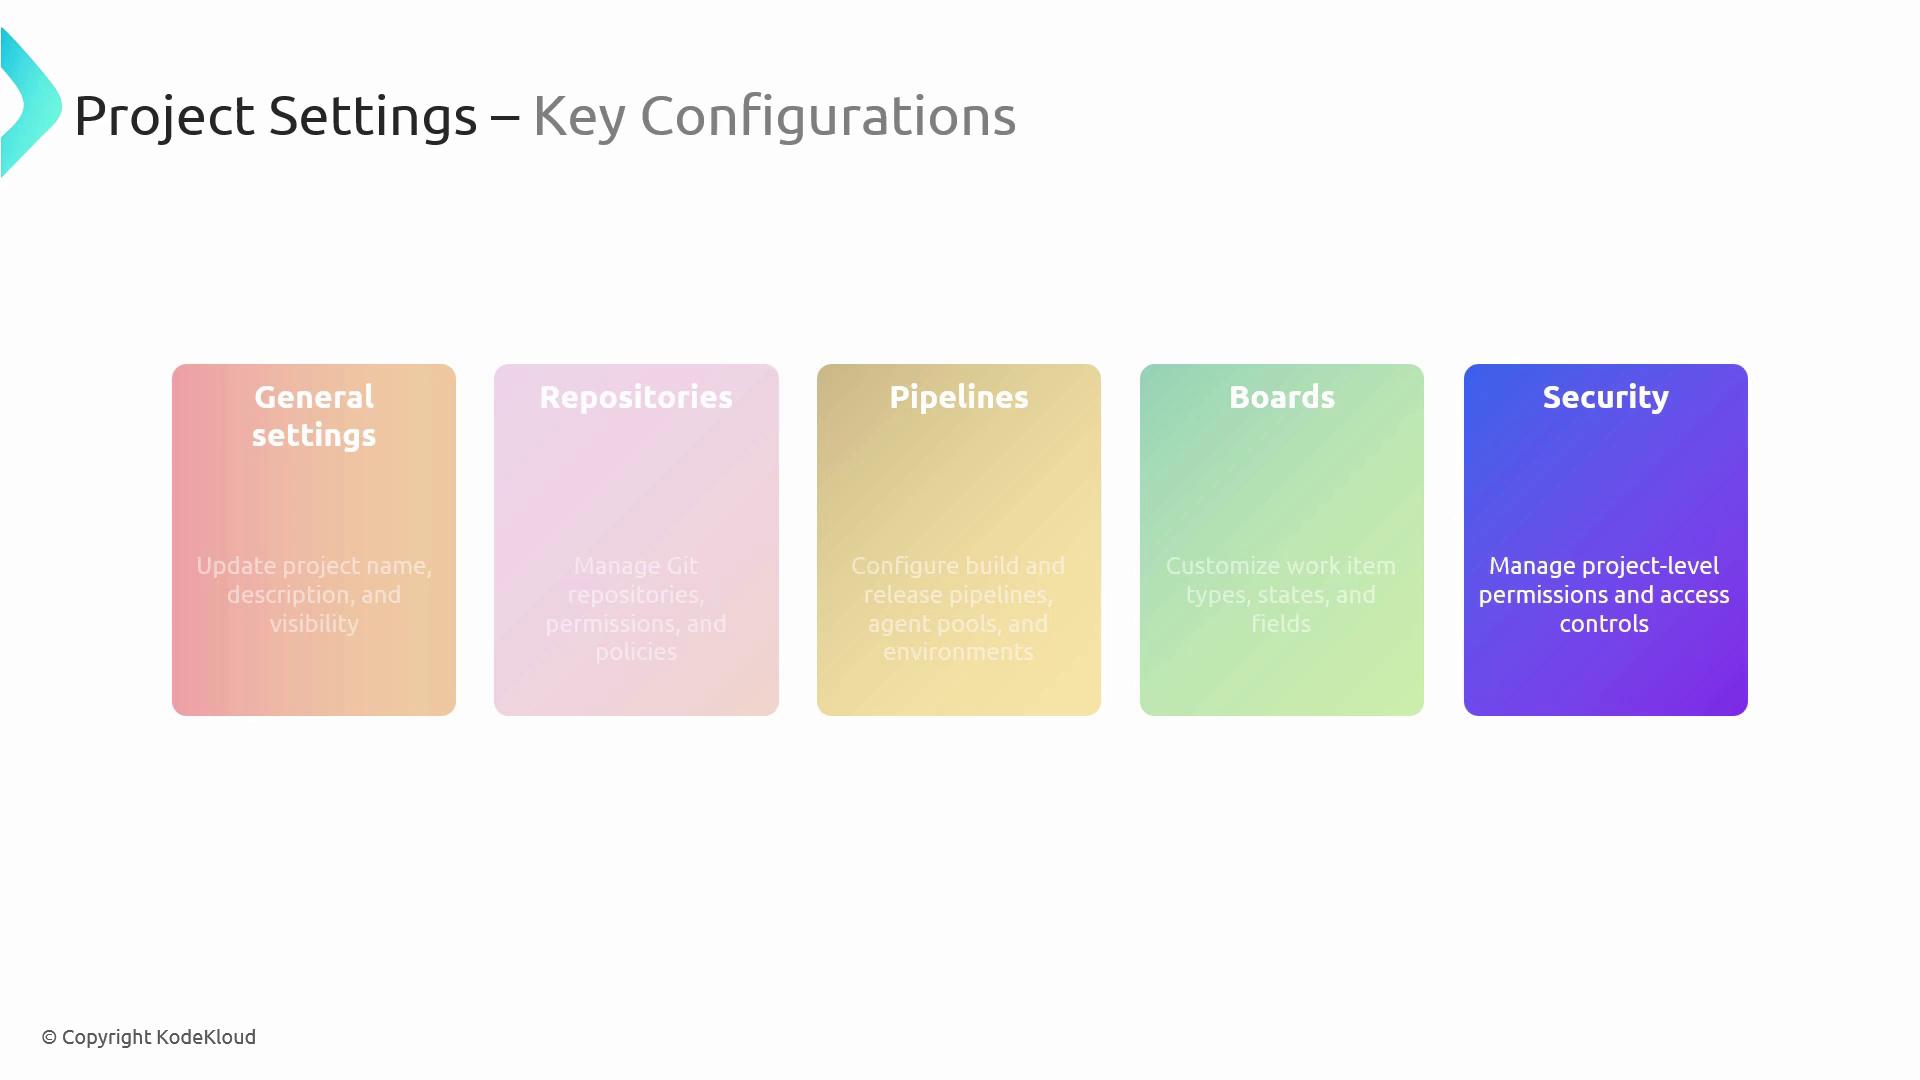
| Setting Category | Purpose                                 | Location                        |
| ---------------- | --------------------------------------- | ------------------------------- |
| General          | Rename project, update visibility       | Project Settings > Overview     |
| Repositories     | Configure Git settings, branch policies | Project Settings > Repositories |
| Pipelines        | Define build and release processes      | Project Settings > Pipelines    |
| Boards           | Customize work items, backlogs          | Project Settings > Boards       |
| Security         | Manage permissions and group access     | Project Settings > Security     |
<Frame>
  ![The image is a diagram titled "Project Settings – Key Configurations," showing five categories: General settings, Repositories, Pipelines, Boards, and Security, each with a brief description of their functions.](https://kodekloud.com/kk-media/image/upload/v1752867548/notes-assets/images/AZ-400-Designing-and-Implementing-Microsoft-DevOps-Solutions-Configure-projects-and-teams-in-Azure-DevOps/project-settings-key-configurations-diagram.jpg)
</Frame>

### 2.2 Best Practices

<Frame>
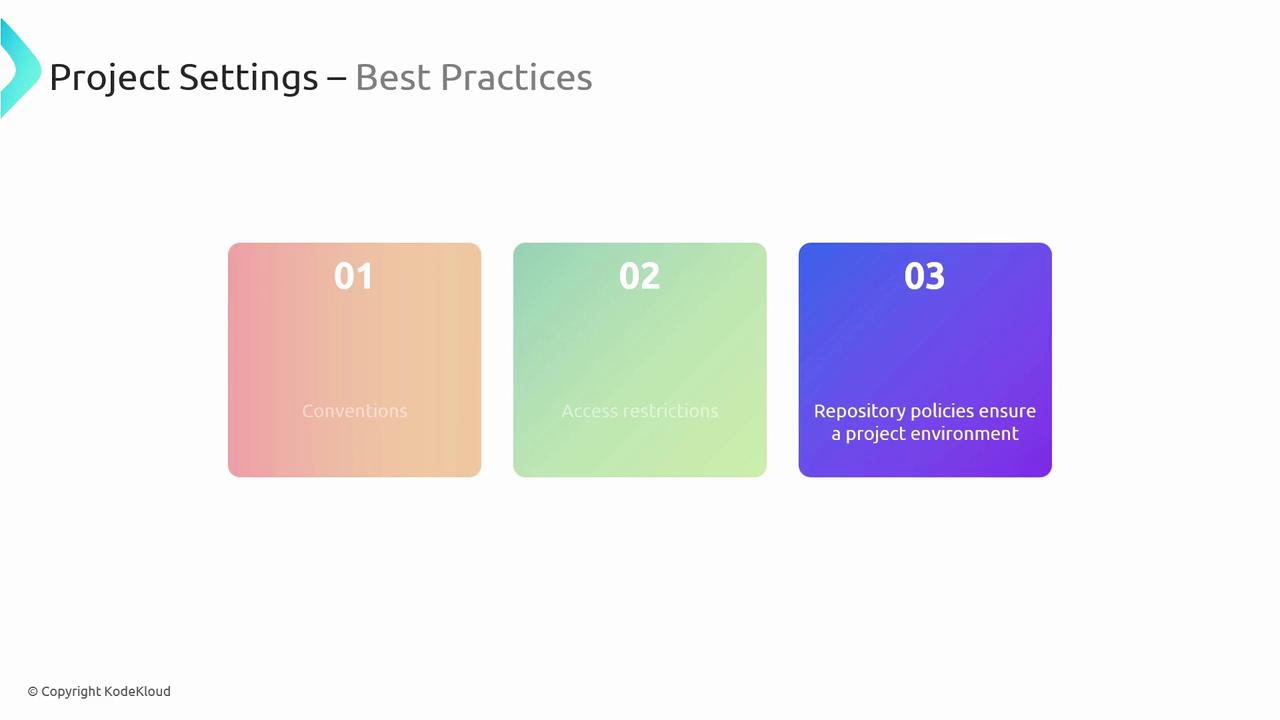
  ![The image is a slide titled "Project Settings – Best Practices" with three colored boxes labeled 01, 02, and 03, detailing conventions, access restrictions, and repository policies.](https://kodekloud.com/kk-media/image/upload/v1752867549/notes-assets/images/AZ-400-Designing-and-Implementing-Microsoft-DevOps-Solutions-Configure-projects-and-teams-in-Azure-DevOps/project-settings-best-practices-slide.jpg)
</Frame>

* Use consistent naming conventions for projects and repositories.
* Enforce branch protection and build validation policies.
* Restrict access to sensitive resources based on roles.

<Callout icon="triangle-alert" color="#FF6B6B">
  Incorrect branch policies can expose your codebase. Always validate pull requests and require successful builds before merging.
</Callout>

## 3. Set Up Teams

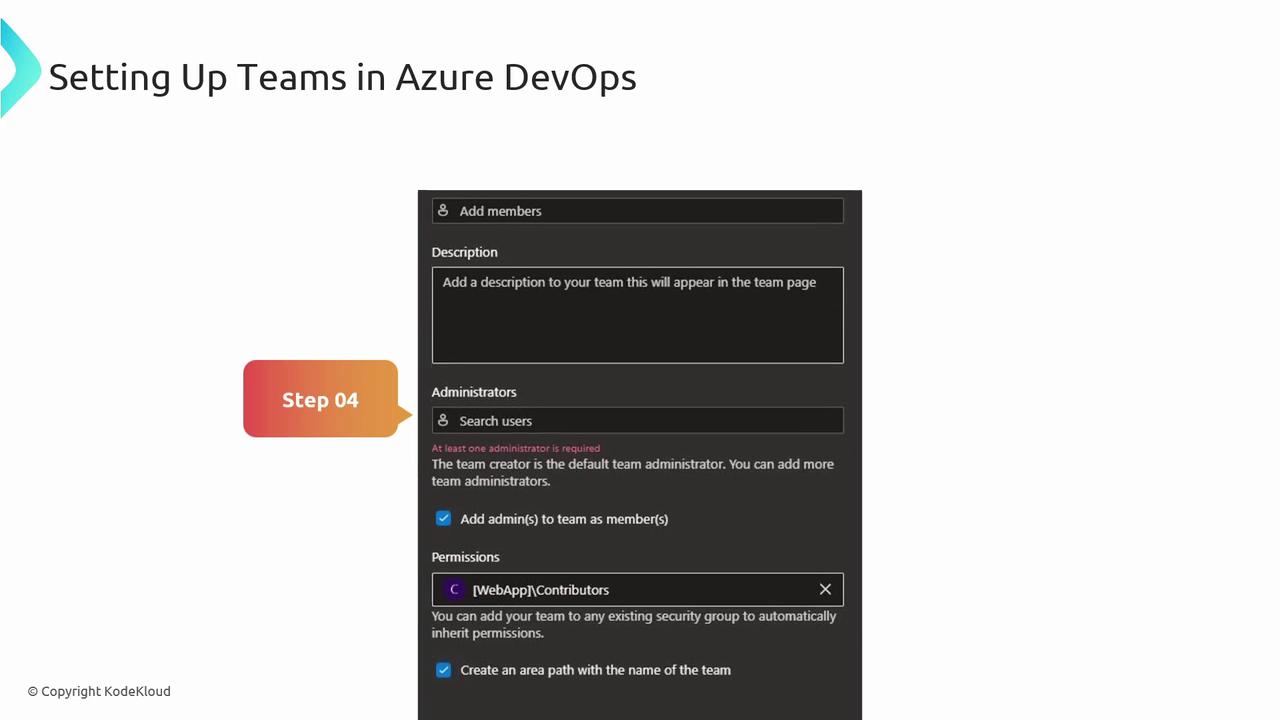
Organize users into teams to manage backlogs, sprints, and dashboards at a granular level.

1. Navigate to **Project Settings** > **Teams**.
2. Click **New Team**.
3. Enter team **Name** and **Description**.
4. Add **Members**, default **Areas**, and **Iterations**.
5. Click **Create**.
<Frame>
  ![The image is a guide for setting up teams in Azure DevOps, showing step 4, which involves adding members, setting administrators, and configuring permissions.](https://kodekloud.com/kk-media/image/upload/v1752867550/notes-assets/images/AZ-400-Designing-and-Implementing-Microsoft-DevOps-Solutions-Configure-projects-and-teams-in-Azure-DevOps/azure-devops-teams-setup-step4.jpg)
</Frame>

### 3.1 Team-Specific Features

* **Boards & Backlogs**: Tailored work item views and filters per team.
* **Dashboards**: Team-level widgets and reports.
* **Iterations**: Configure sprint schedules for each team.

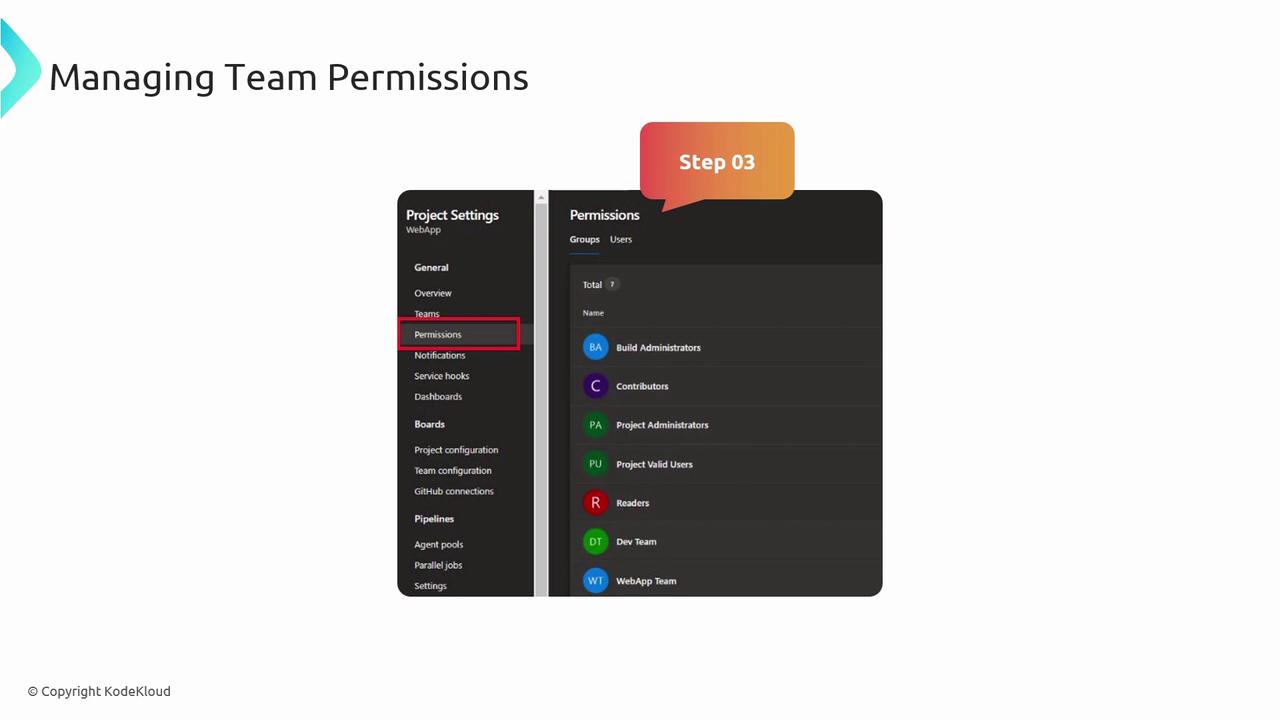
## 4. Manage Permissions

Fine-grained permissions ensure that users have appropriate access without overexposure.

1. Go to **Project Settings** > **Permissions**.
2. Select a **Team** or **User**.
3. Assign a role (Contributor, Reader, Admin).
4. Adjust individual permissions as needed.
<Frame>
  ![The image shows a screenshot of a project settings interface highlighting the "Permissions" section, with a list of user groups and their roles. It is labeled as "Step 03" in a process for managing team permissions.](https://kodekloud.com/kk-media/image/upload/v1752867551/notes-assets/images/AZ-400-Designing-and-Implementing-Microsoft-DevOps-Solutions-Configure-projects-and-teams-in-Azure-DevOps/project-settings-permissions-step-03.jpg)
</Frame>

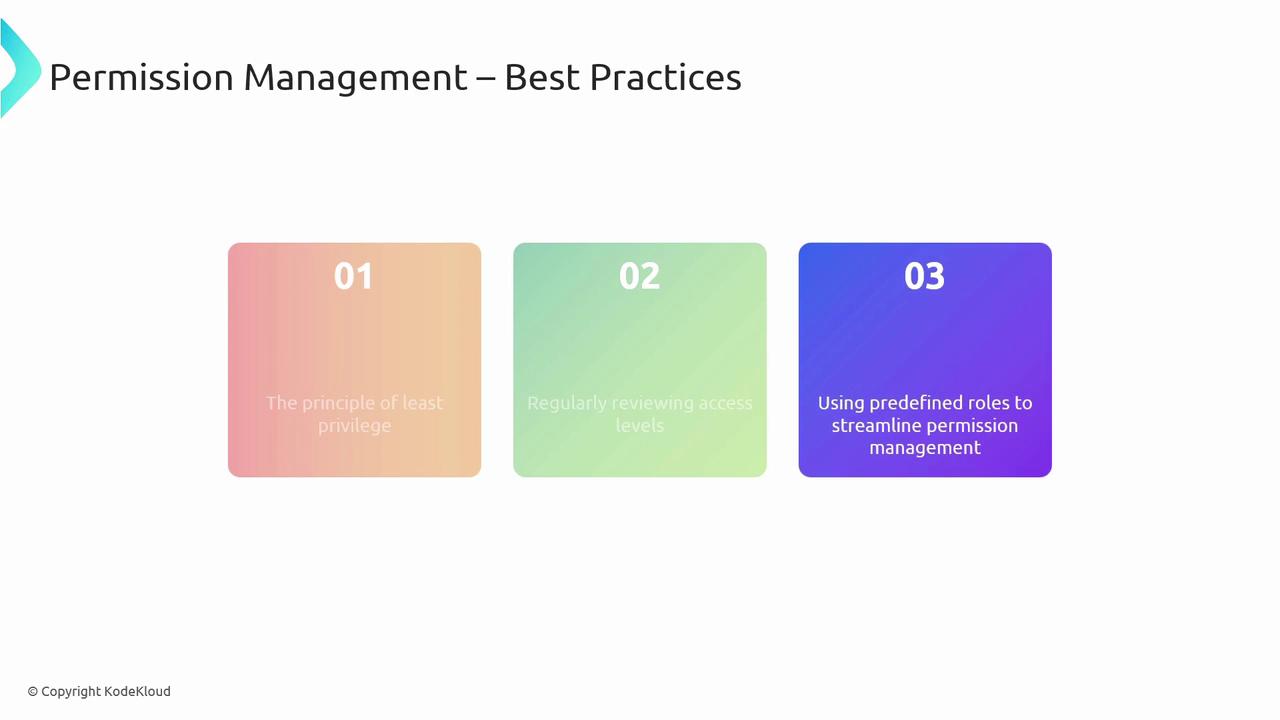
### 4.1 Permission Management Best Practices
<Frame>
  ![The image outlines three best practices for permission management: the principle of least privilege, regularly reviewing access levels, and using predefined roles to streamline permission management.](https://kodekloud.com/kk-media/image/upload/v1752867552/notes-assets/images/AZ-400-Designing-and-Implementing-Microsoft-DevOps-Solutions-Configure-projects-and-teams-in-Azure-DevOps/permission-management-best-practices-outline.jpg)
</Frame>

* Follow the principle of least privilege.
* Review access levels on a regular schedule.
* Use predefined roles to simplify permission assignments.

<Callout icon="lightbulb" color="#1CB2FE">
  Leverage [Azure Active Directory groups](https://docs.microsoft.com/azure/active-directory/) for large teams to streamline permission management.
</Callout>

## 5. Customize Work Items and Boards

Align Azure DevOps with your team’s processes by tailoring work items and board layouts.

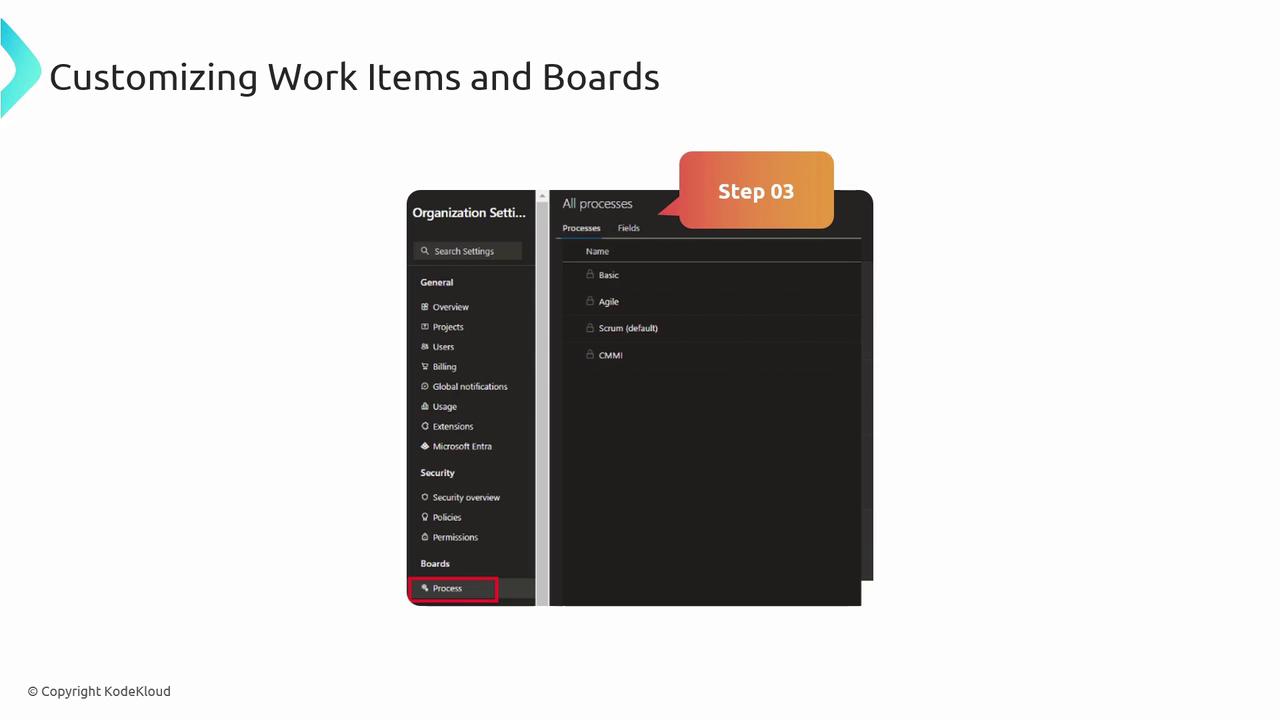
### 5.1 Work Item Customization

1. Go to **Organization Settings** > **Boards** > **Process**.
2. Select a process template (Agile, Scrum, CMMI).
3. Edit work item types, states, fields, and rules.
<Frame>
  ![The image shows a software interface for customizing work items and boards, highlighting the "Process" section in organization settings. It includes a list of processes such as Basic, Agile, Scrum, and CMMI.](https://kodekloud.com/kk-media/image/upload/v1752867553/notes-assets/images/AZ-400-Designing-and-Implementing-Microsoft-DevOps-Solutions-Configure-projects-and-teams-in-Azure-DevOps/customizing-work-items-boards-interface.jpg)
</Frame>

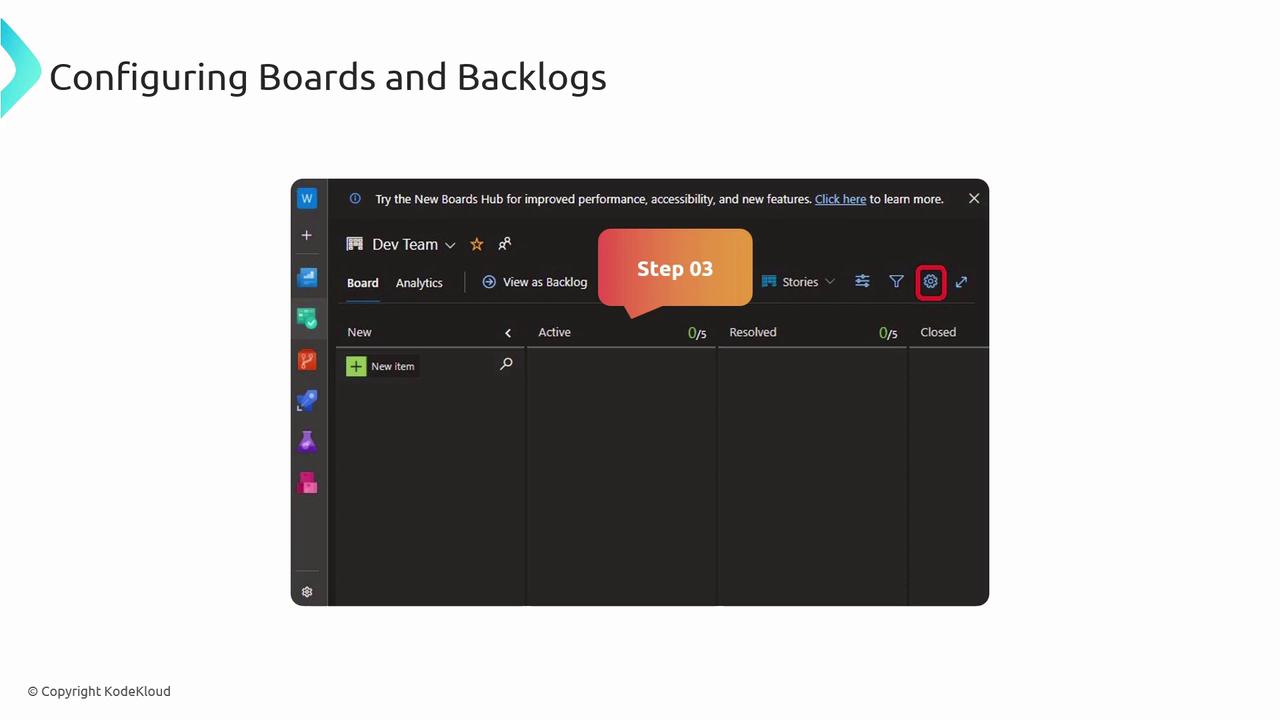
### 5.2 Configure Boards & Backlogs

1. Under **Team Settings**, select **Boards**.
2. Adjust columns, swimlanes, card styles, and colors.
3. Configure backlog levels and view options.
<Frame>
  ![The image shows a screenshot of a project management tool interface labeled "Configuring Boards and Backlogs," highlighting "Step 03" with a focus on a settings icon.](https://kodekloud.com/kk-media/image/upload/v1752867555/notes-assets/images/AZ-400-Designing-and-Implementing-Microsoft-DevOps-Solutions-Configure-projects-and-teams-in-Azure-DevOps/configuring-boards-backlogs-step03-settings.jpg)
</Frame>

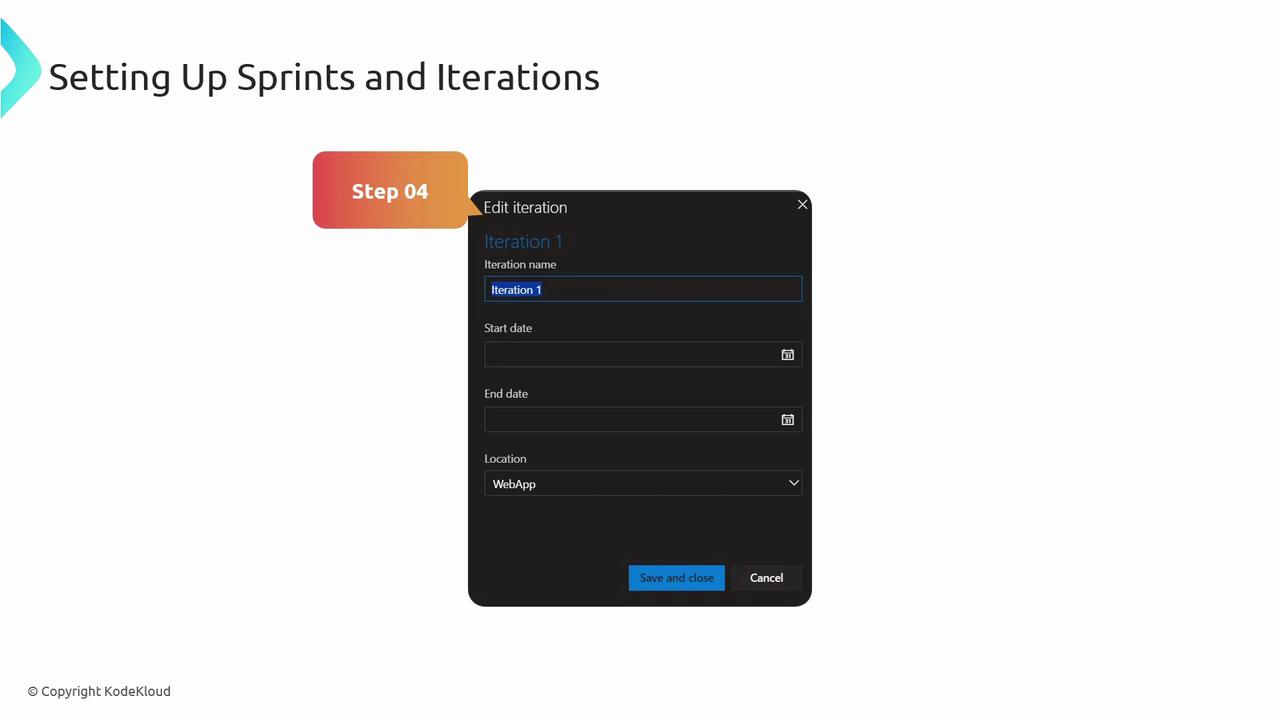
## 6. Configure Sprints and Iterations

Plan work in fixed timeboxes by defining sprints and iterations.

1. Go to **Project Settings** > **Boards** > **Project Configuration**.
2. Under **Iterations**, click **New Child**.
3. Name each sprint, set **Start** and **End** dates.
4. Assign work items to iterations via the backlog.
<Frame>
  ![The image shows a user interface for setting up sprints and iterations, with fields for iteration name, start date, end date, and location. It is labeled as "Step 04" in the process.](https://kodekloud.com/kk-media/image/upload/v1752867556/notes-assets/images/AZ-400-Designing-and-Implementing-Microsoft-DevOps-Solutions-Configure-projects-and-teams-in-Azure-DevOps/sprint-setup-user-interface-step-04.jpg)
</Frame>

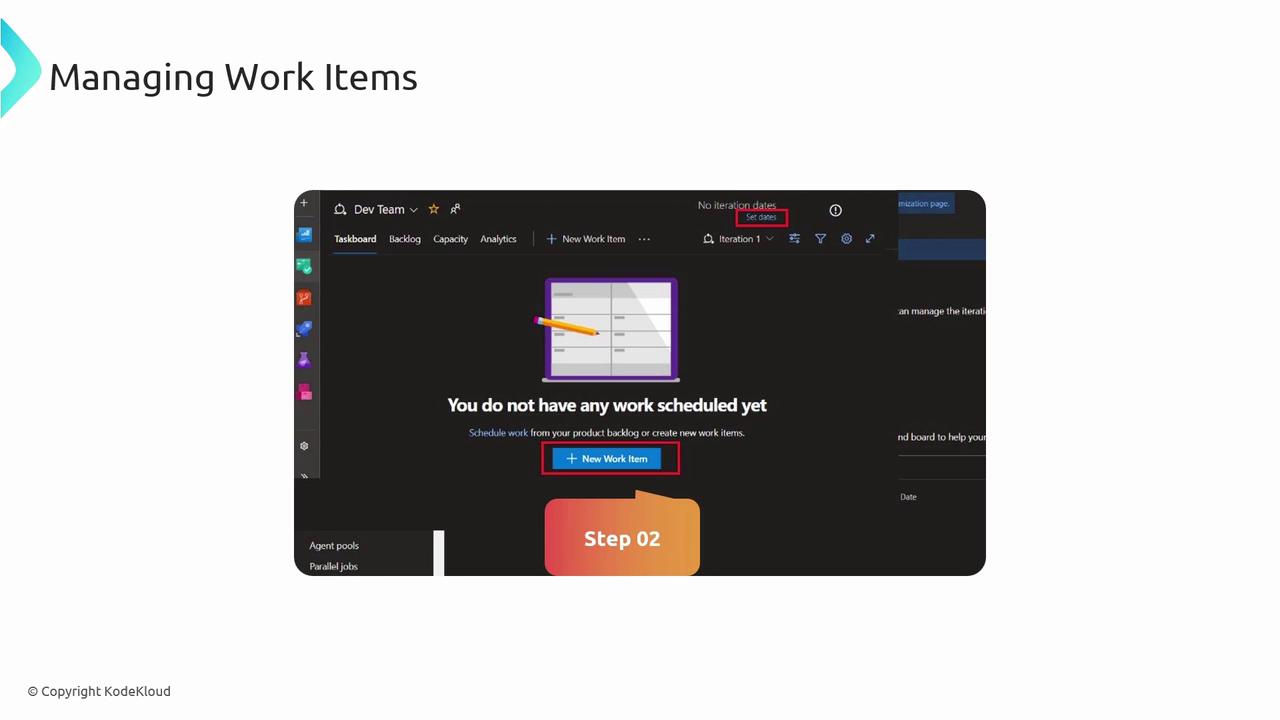
## 7. Manage Work Items

Maintain transparency and ensure traceability by effectively managing work items.

1. Open your project’s **Boards**.
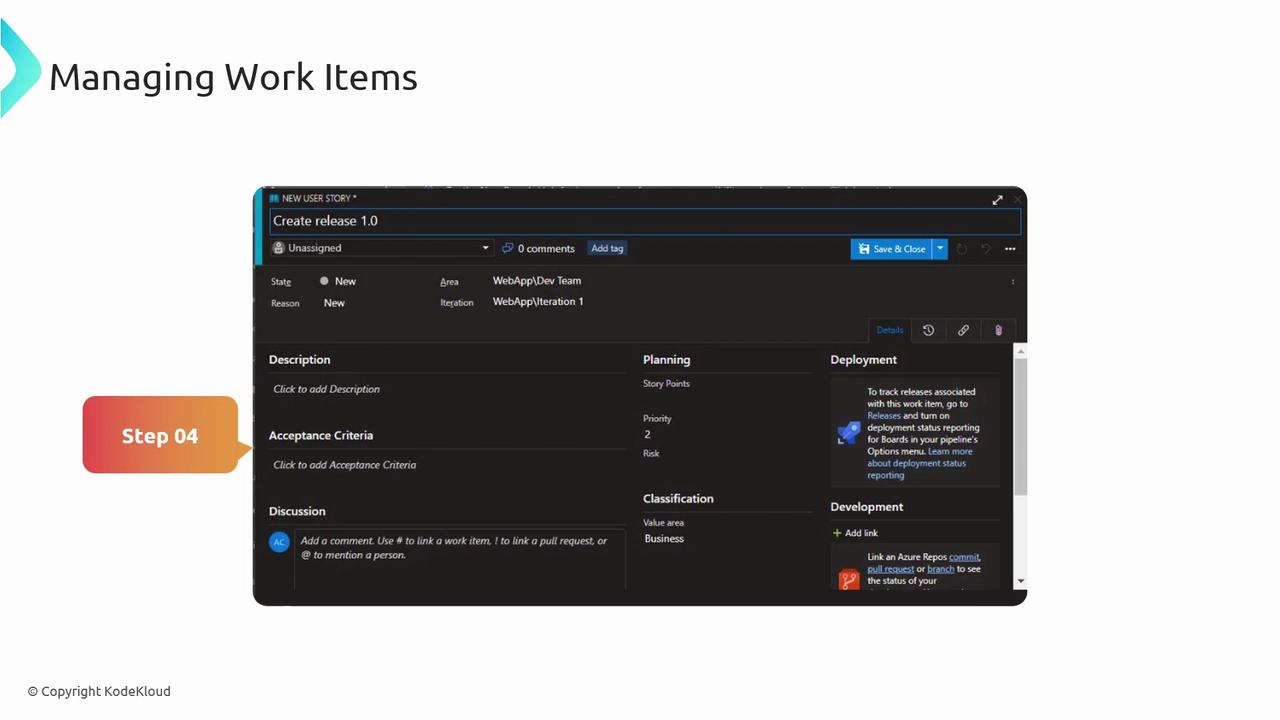
2. Click **New Work Item**, choose a type (Task, Bug, User Story).
3. Complete fields (Title, Description, Tags) and save.
4. Update states or add comments as work progresses.
5. Link related items for end-to-end traceability.
<Frame>
  ![The image shows a software interface for managing work items, indicating no work is scheduled yet, with options to set dates and create a new work item. It is part of a presentation slide titled "Managing Work Items."](https://kodekloud.com/kk-media/image/upload/v1752867557/notes-assets/images/AZ-400-Designing-and-Implementing-Microsoft-DevOps-Solutions-Configure-projects-and-teams-in-Azure-DevOps/managing-work-items-software-interface.jpg)
</Frame>

<Frame>
  ![The image shows a software interface for managing work items, specifically a "Create release 1.0" task with sections for description, acceptance criteria, planning, deployment, and development. It is labeled as "Step 04" in a process.](https://kodekloud.com/kk-media/image/upload/v1752867558/notes-assets/images/AZ-400-Designing-and-Implementing-Microsoft-DevOps-Solutions-Configure-projects-and-teams-in-Azure-DevOps/create-release-1-0-software-interface.jpg)
</Frame>

### 7.1 Work Item Best Practices

<Frame>
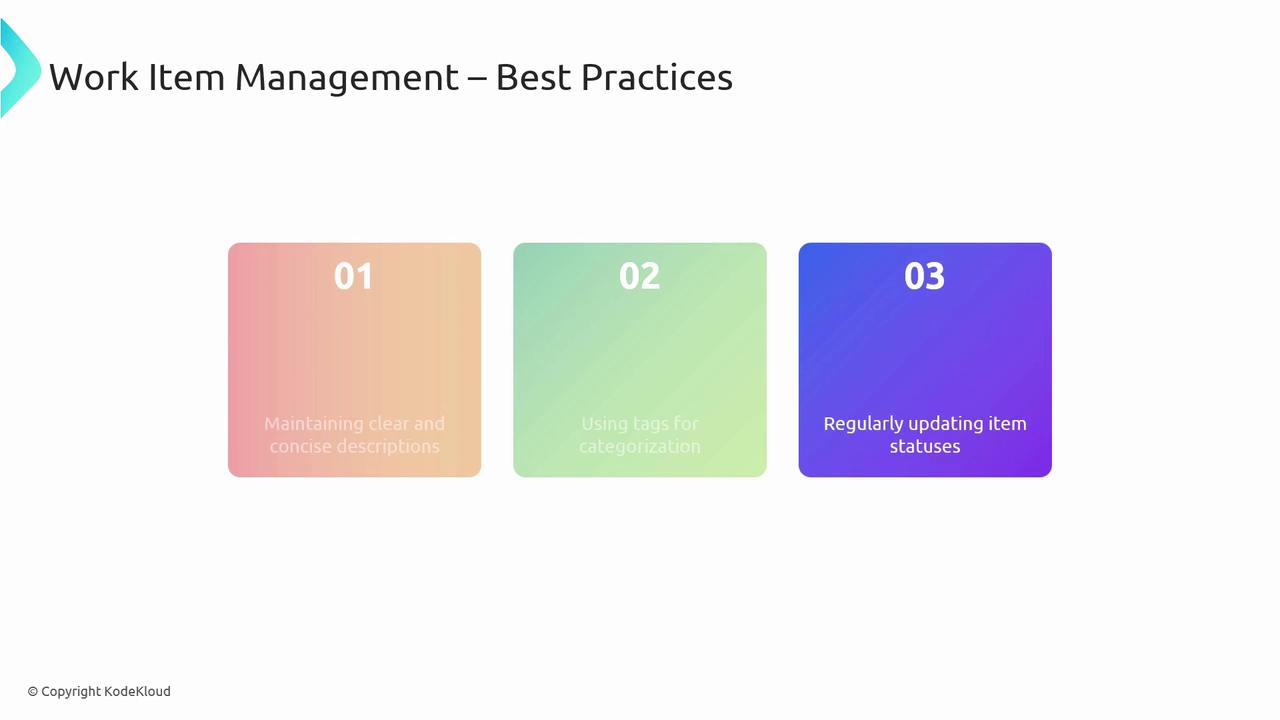
  ![The image outlines best practices for work item management, including maintaining clear descriptions, using tags for categorization, and regularly updating item statuses.](https://kodekloud.com/kk-media/image/upload/v1752867559/notes-assets/images/AZ-400-Designing-and-Implementing-Microsoft-DevOps-Solutions-Configure-projects-and-teams-in-Azure-DevOps/work-item-management-best-practices.jpg)
</Frame>

* Write concise, descriptive titles and acceptance criteria.
* Use tags to filter and categorize work items.
* Update statuses and comments to reflect real-time progress.

***

## Links and References

* [Azure DevOps documentation](https://docs.microsoft.com/azure/devops)
* [Azure DevOps Boards](https://docs.microsoft.com/azure/devops/boards)
* [Azure Repos](https://docs.microsoft.com/azure/devops/repos)
* [Azure Pipelines](https://docs.microsoft.com/azure/devops/pipelines)
* [Azure Active Directory integration](https://docs.microsoft.com/azure/active-directory/)

<CardGroup>
  <Card title="Watch Video" icon="video" cta="Learn more" href="https://learn.kodekloud.com/user/courses/az-400/module/6dcff123-ec53-4c16-b939-97d0b60183e2/lesson/43176056-d983-4e32-ad32-d695591867fe" />
</CardGroup>