> ## Documentation Index
> Fetch the complete documentation index at: https://notes.kodekloud.com/llms.txt
> Use this file to discover all available pages before exploring further.
# Demo Create AMI from AWS Console
> Learn to create a reusable Amazon Machine Image (AMI) from an existing EC2 instance for future launches or backups.
Learn how to create a reusable Amazon Machine Image (AMI) from an existing EC2 instance. An AMI captures a point-in-time snapshot of an instance—including its attached EBS volumes—for future launches or backups.
***
## Step 1: Select Your EC2 Instance
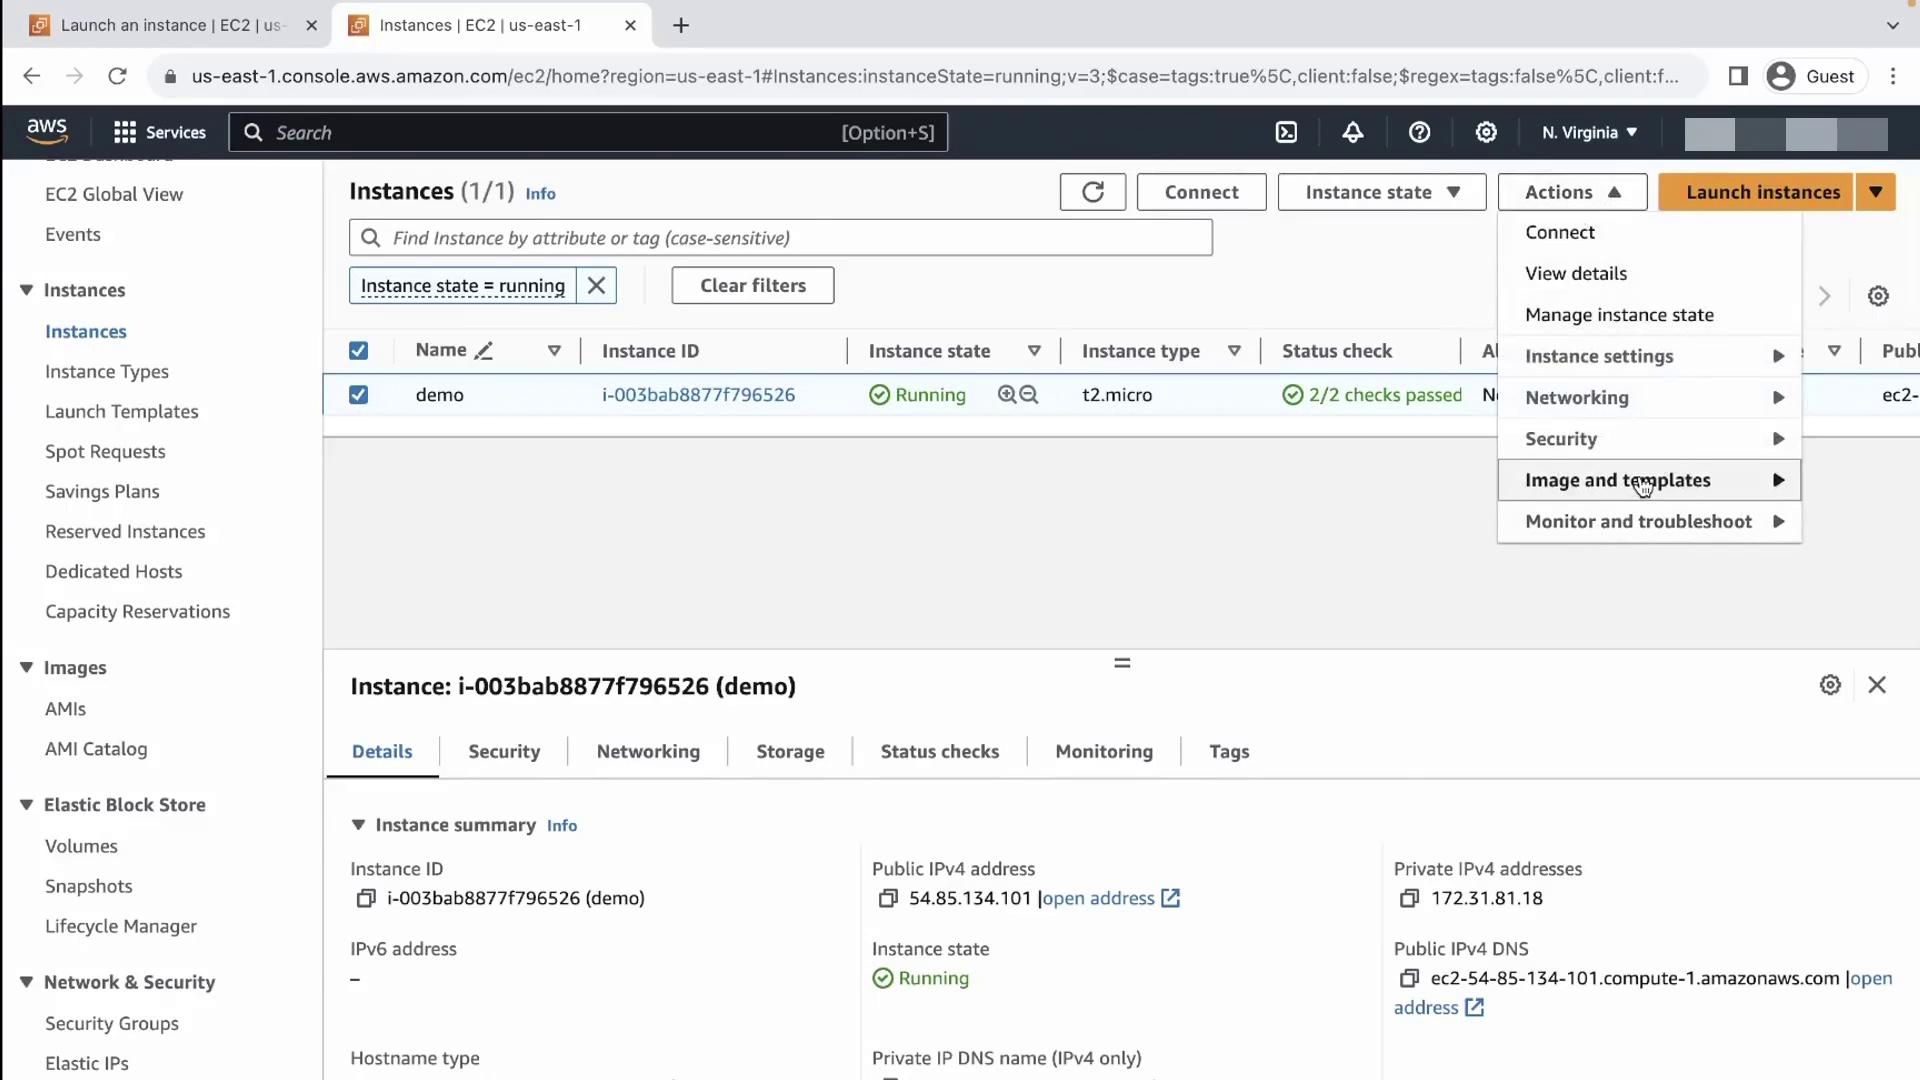
1. Open the EC2 console at [https://console.aws.amazon.com/ec2](https://console.aws.amazon.com/ec2).
2. In the **Instances** pane, choose the target instance.
3. Click **Actions** → **Image and templates** → **Create image**.
***
## Step 2: Configure AMI Settings
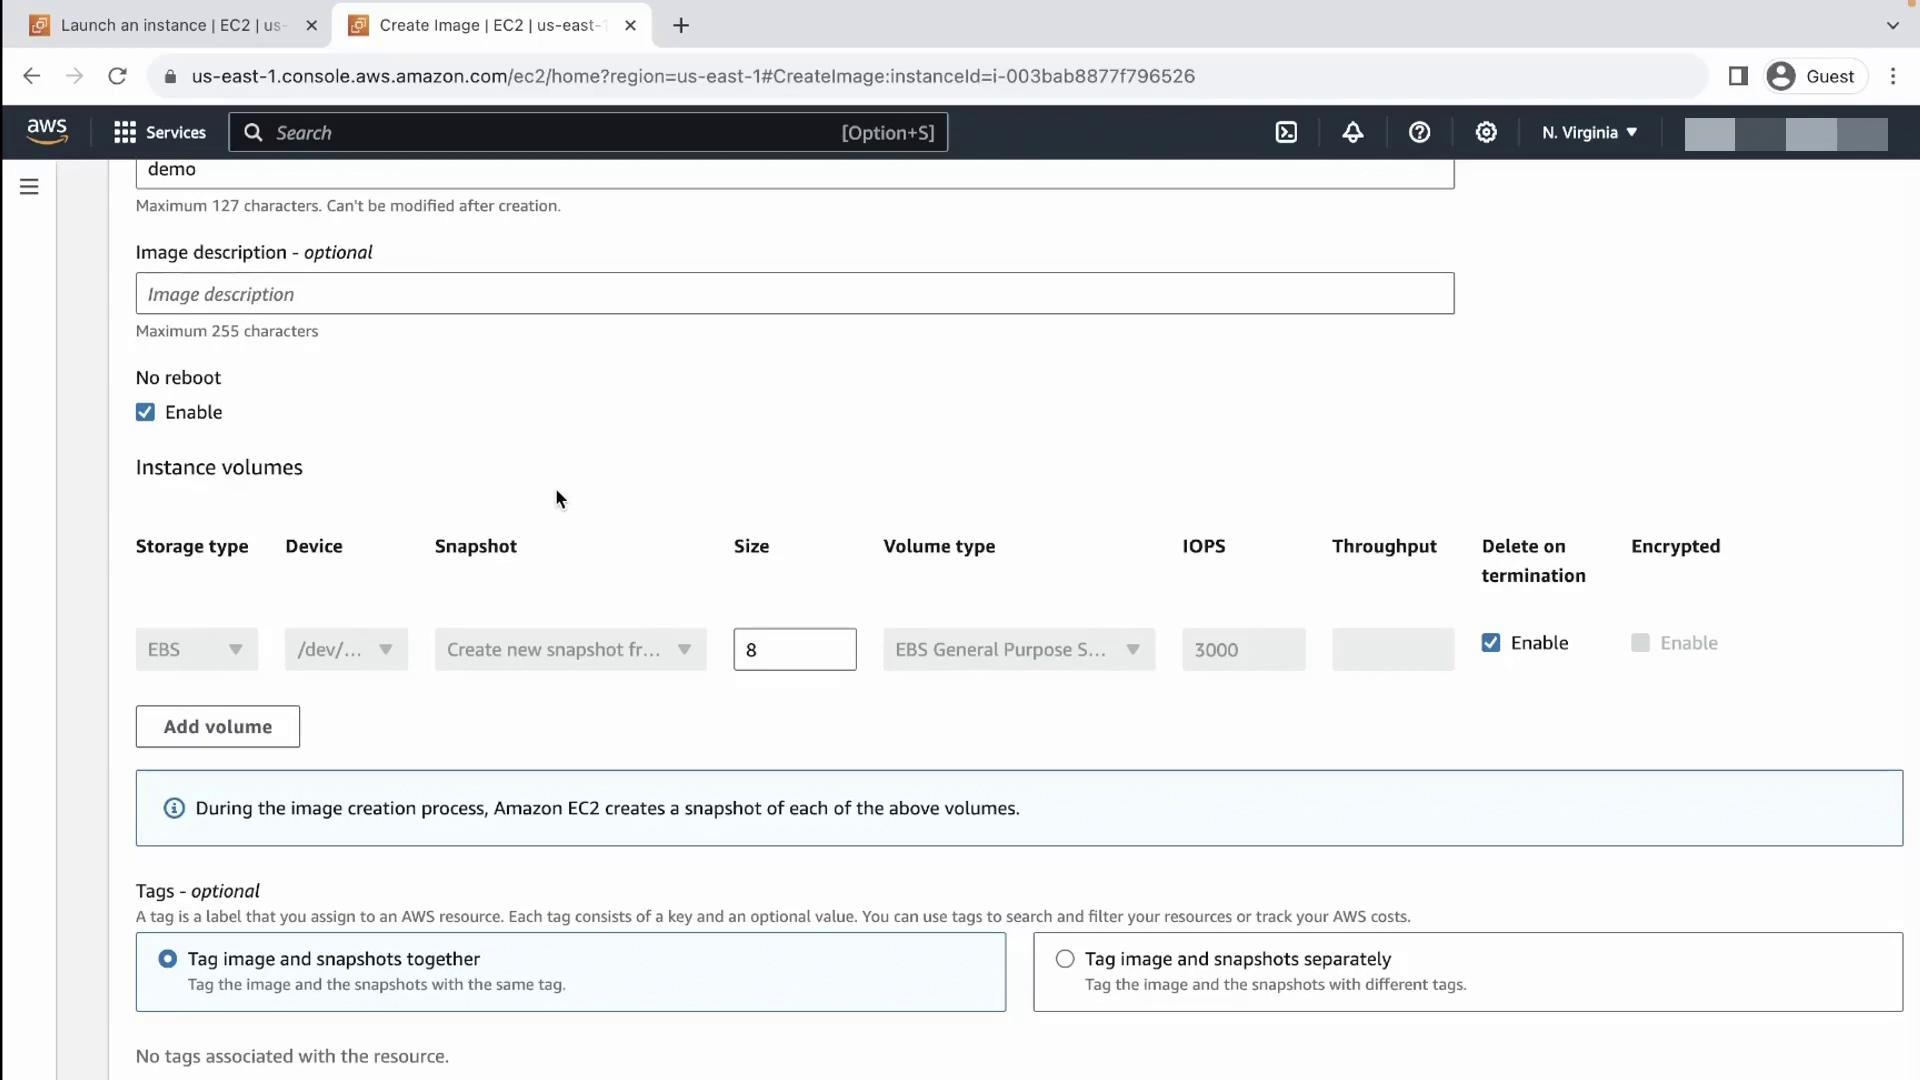
On the **Create Image** dialog:
* **Image name**: Enter a unique, descriptive name (e.g., `prod-webserver-ami-2024-05-01`).
* **No reboot**: Check this to avoid instance reboot during image creation.
* **Volumes**: Confirm which EBS volumes to include. Exclude transient volumes (e.g., log volumes) if you don’t need them.
Skipping the reboot option may lead to file system inconsistencies. Use it only when uptime is critical.
***
## Step 3: Tag Your AMI
Adding tags simplifies automation and cleanup. Include at least these:
| Tag Key | Example Value | Purpose |
| -------------- | ------------- | ---------------------------------- |
| `Name` | `Demo` | Human-readable identifier |
| `InstanceName` | `demo-web-01` | Link back to original EC2 instance |
Once tags are set, click **Create image**. AWS will snapshot each volume, then register the new AMI.
***
## Step 4: Monitor Snapshot Creation
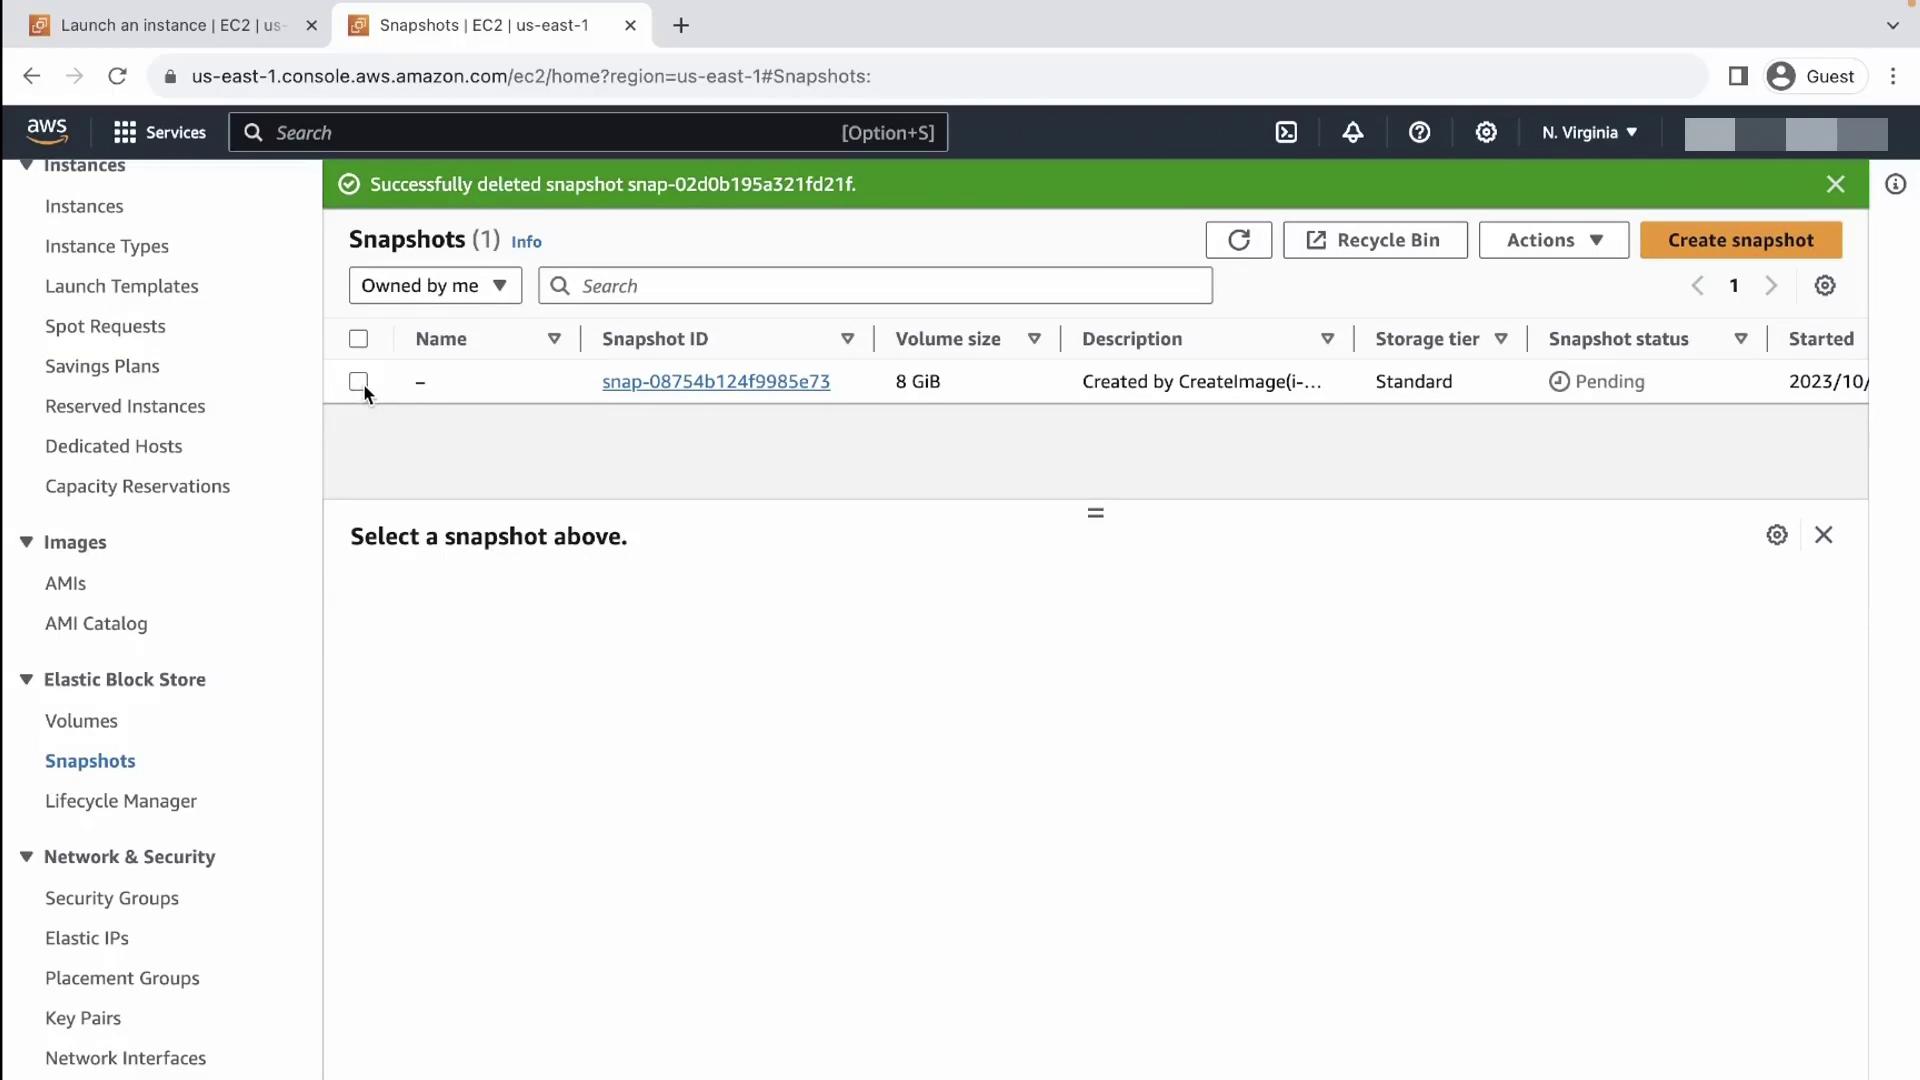
1. In the left menu, select **Snapshots**.
2. Locate the snapshot(s) with **Status: pending**.
***
## Step 5: Monitor AMI Registration
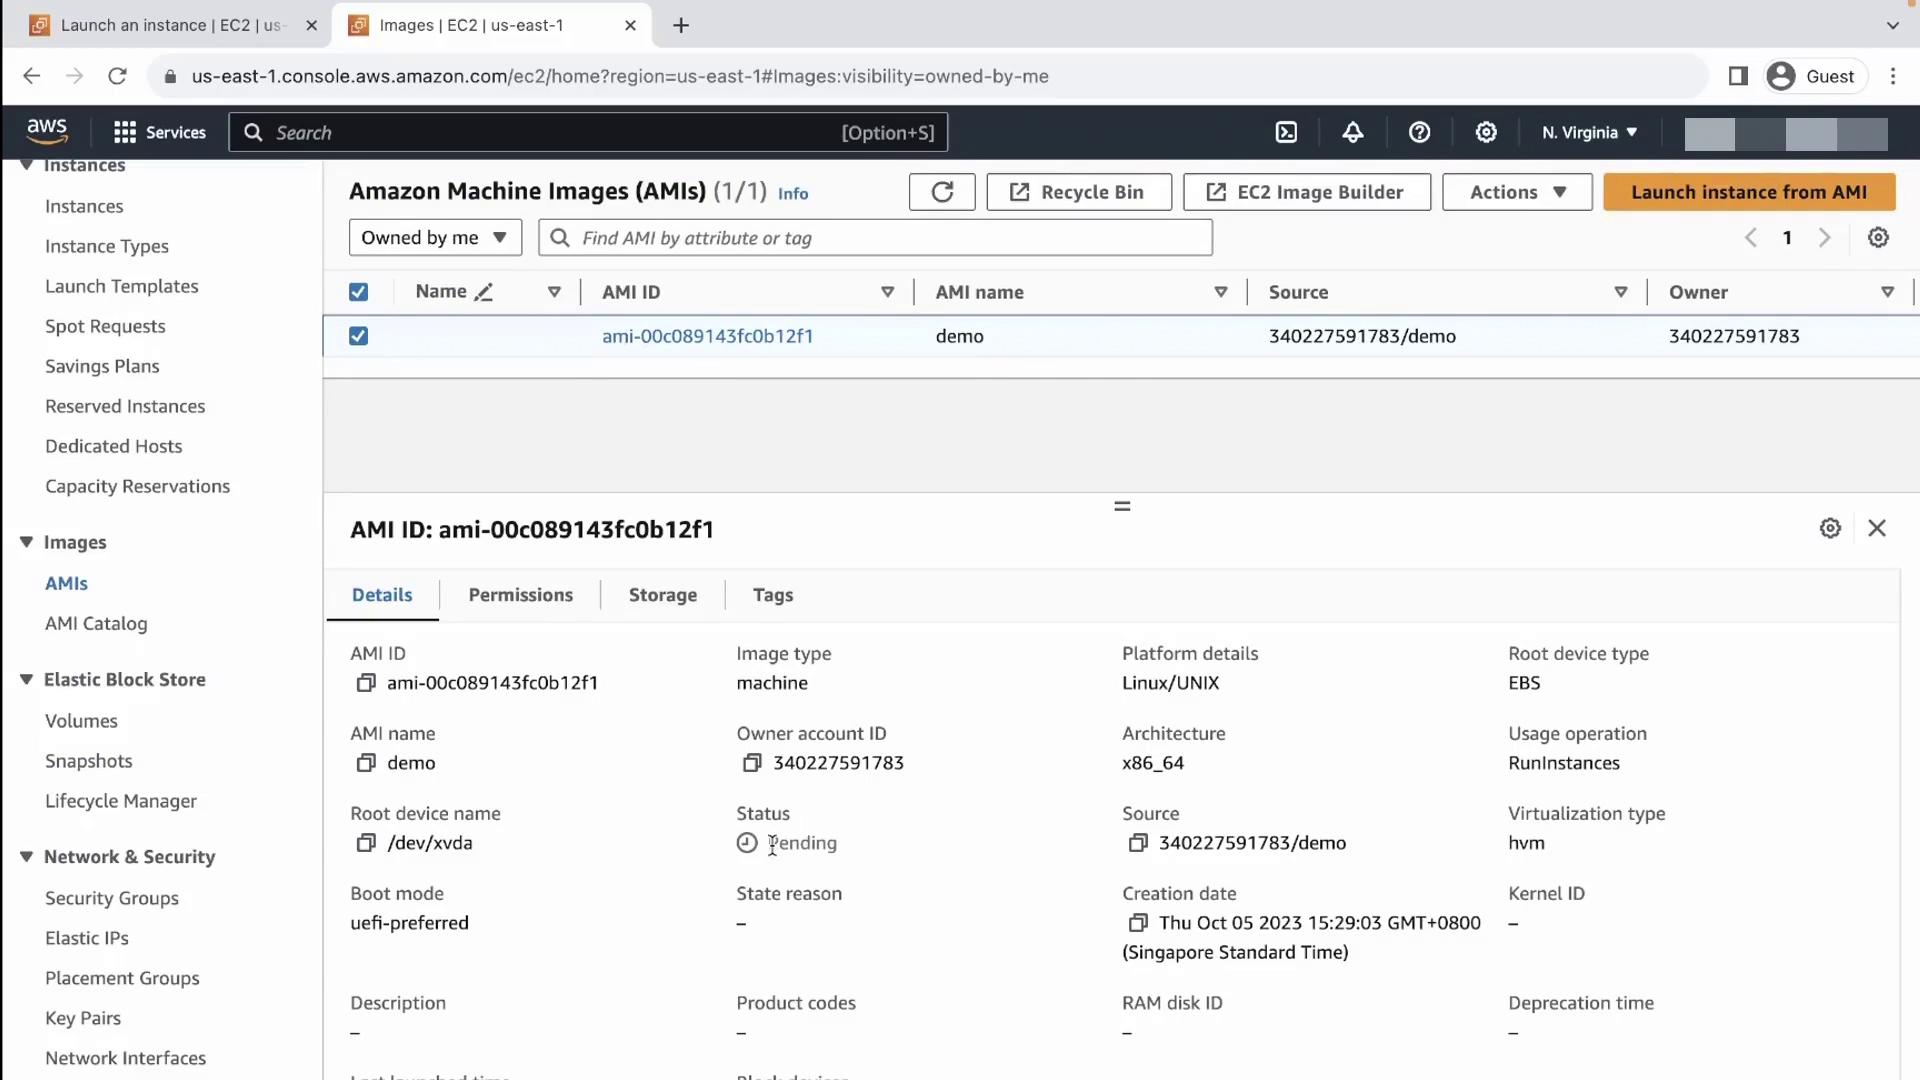
1. Go to **Images** → **AMIs** in the EC2 console.
2. Find your AMI (Status: pending).
After a few minutes, both the snapshot and AMI statuses will switch to **available**.
***
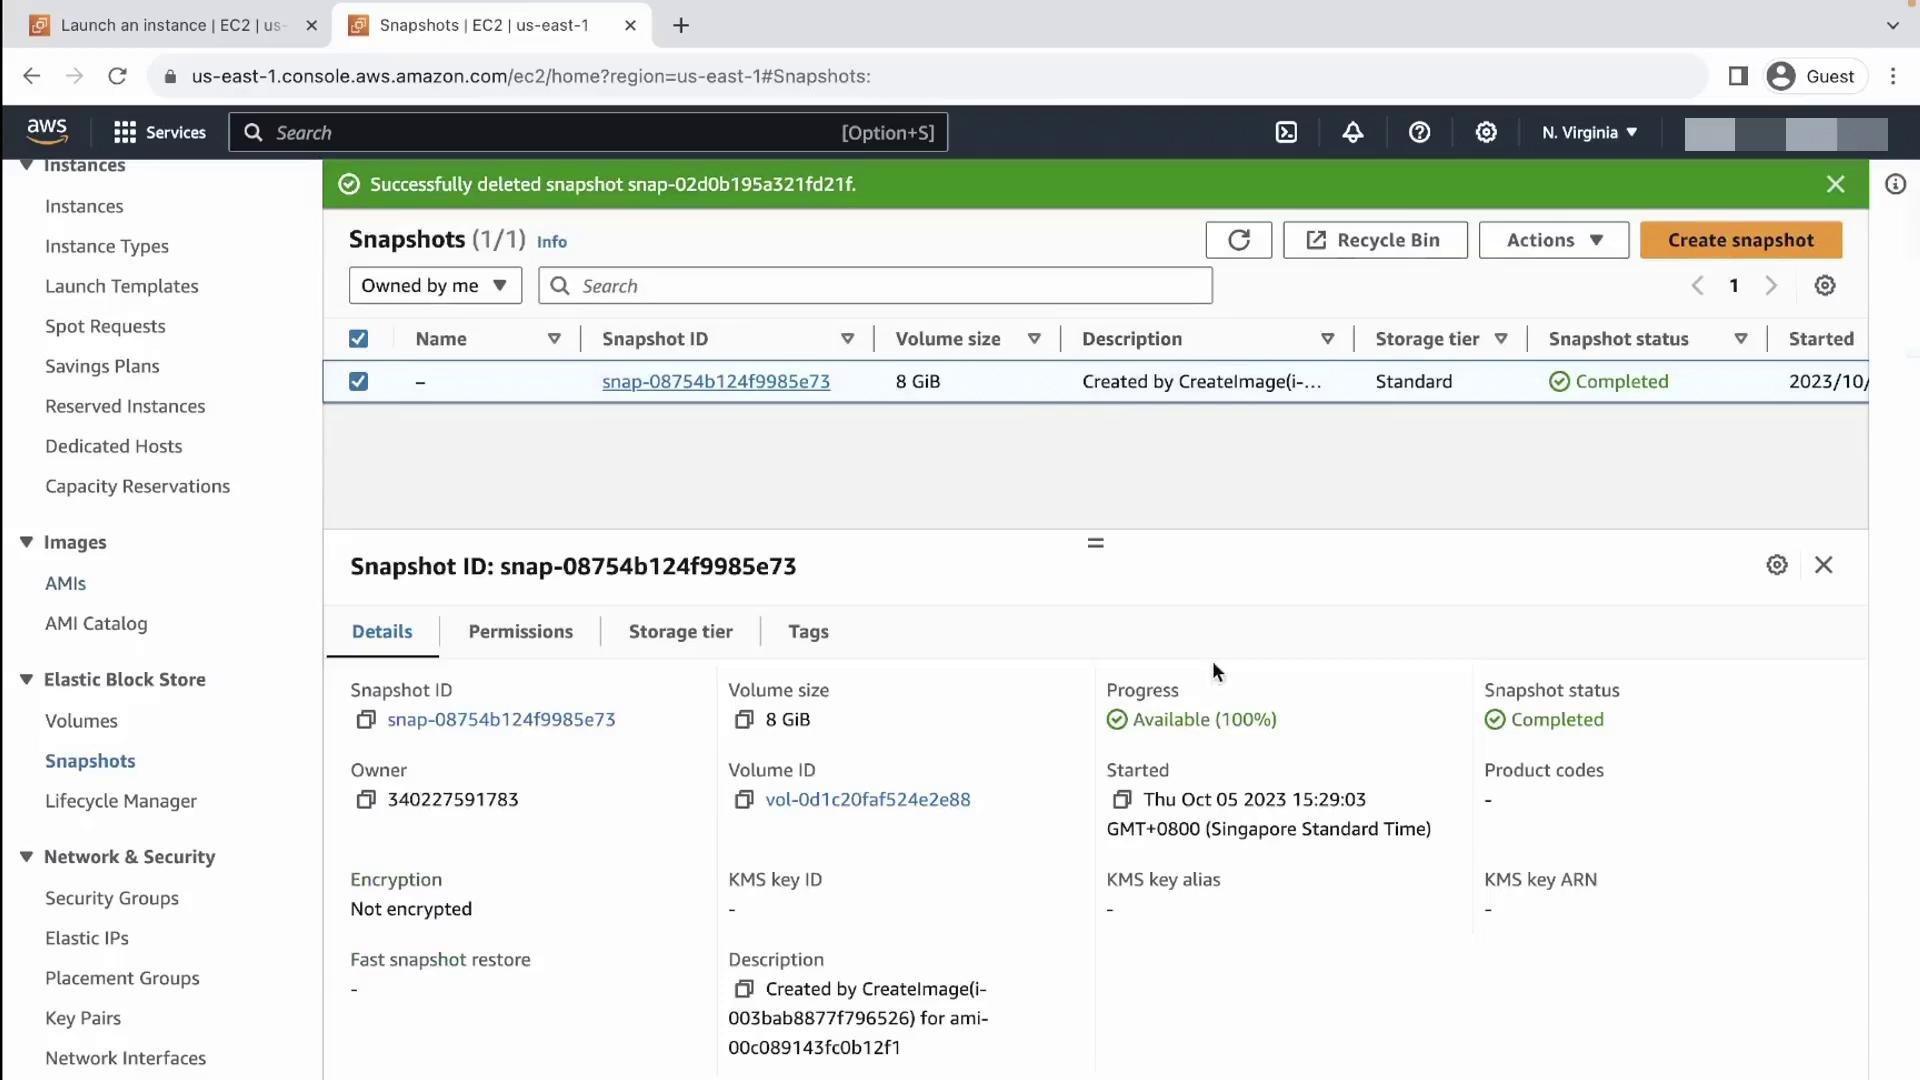
## Step 6: View Snapshot Details
Once complete, click on the snapshot ID to review its metadata, size, and status.
***
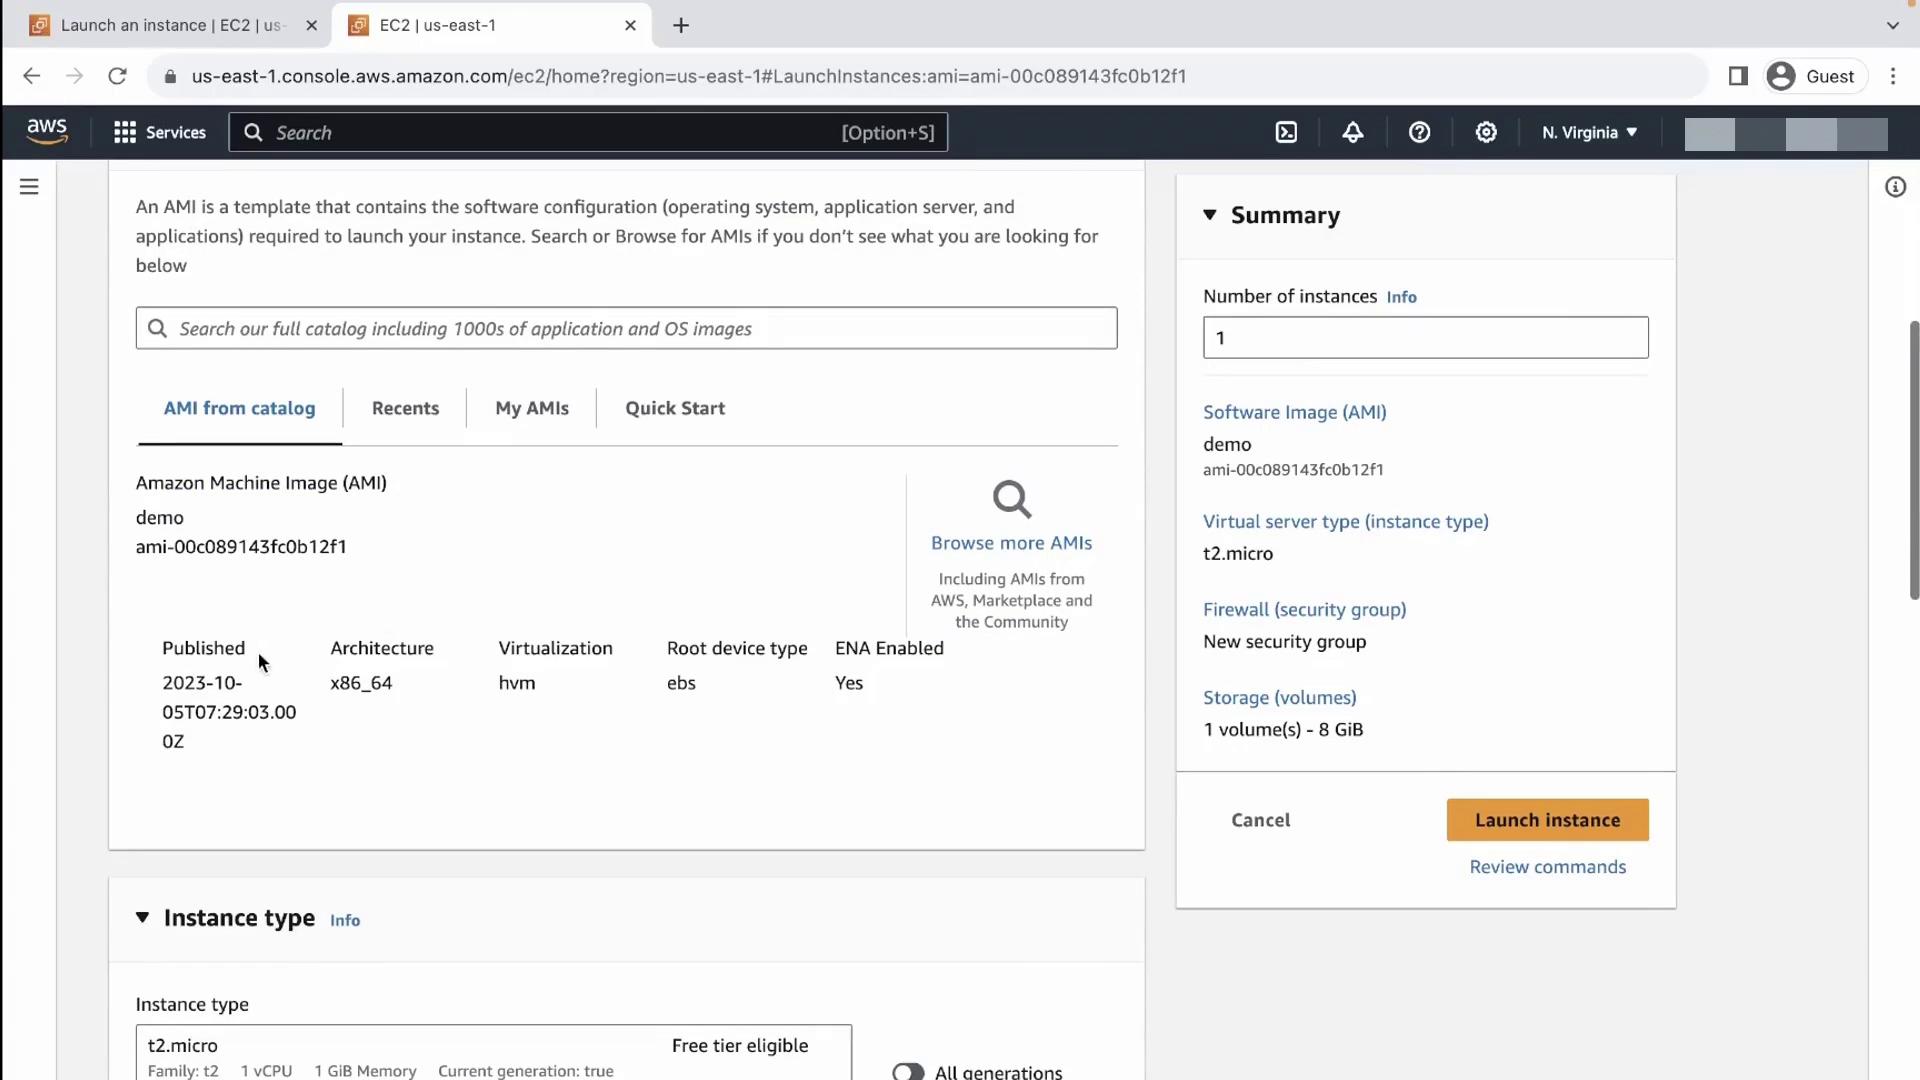
## Step 7: Launch a New Instance from Your AMI
1. In the AMIs list, select your custom AMI.
2. Click **Launch instance**.
3. Under **Application and OS Images (Amazon Machine Image)**, switch to **My AMIs** and pick yours.
4. Continue with the standard launch workflow (instance type, networking, storage, etc.).
***
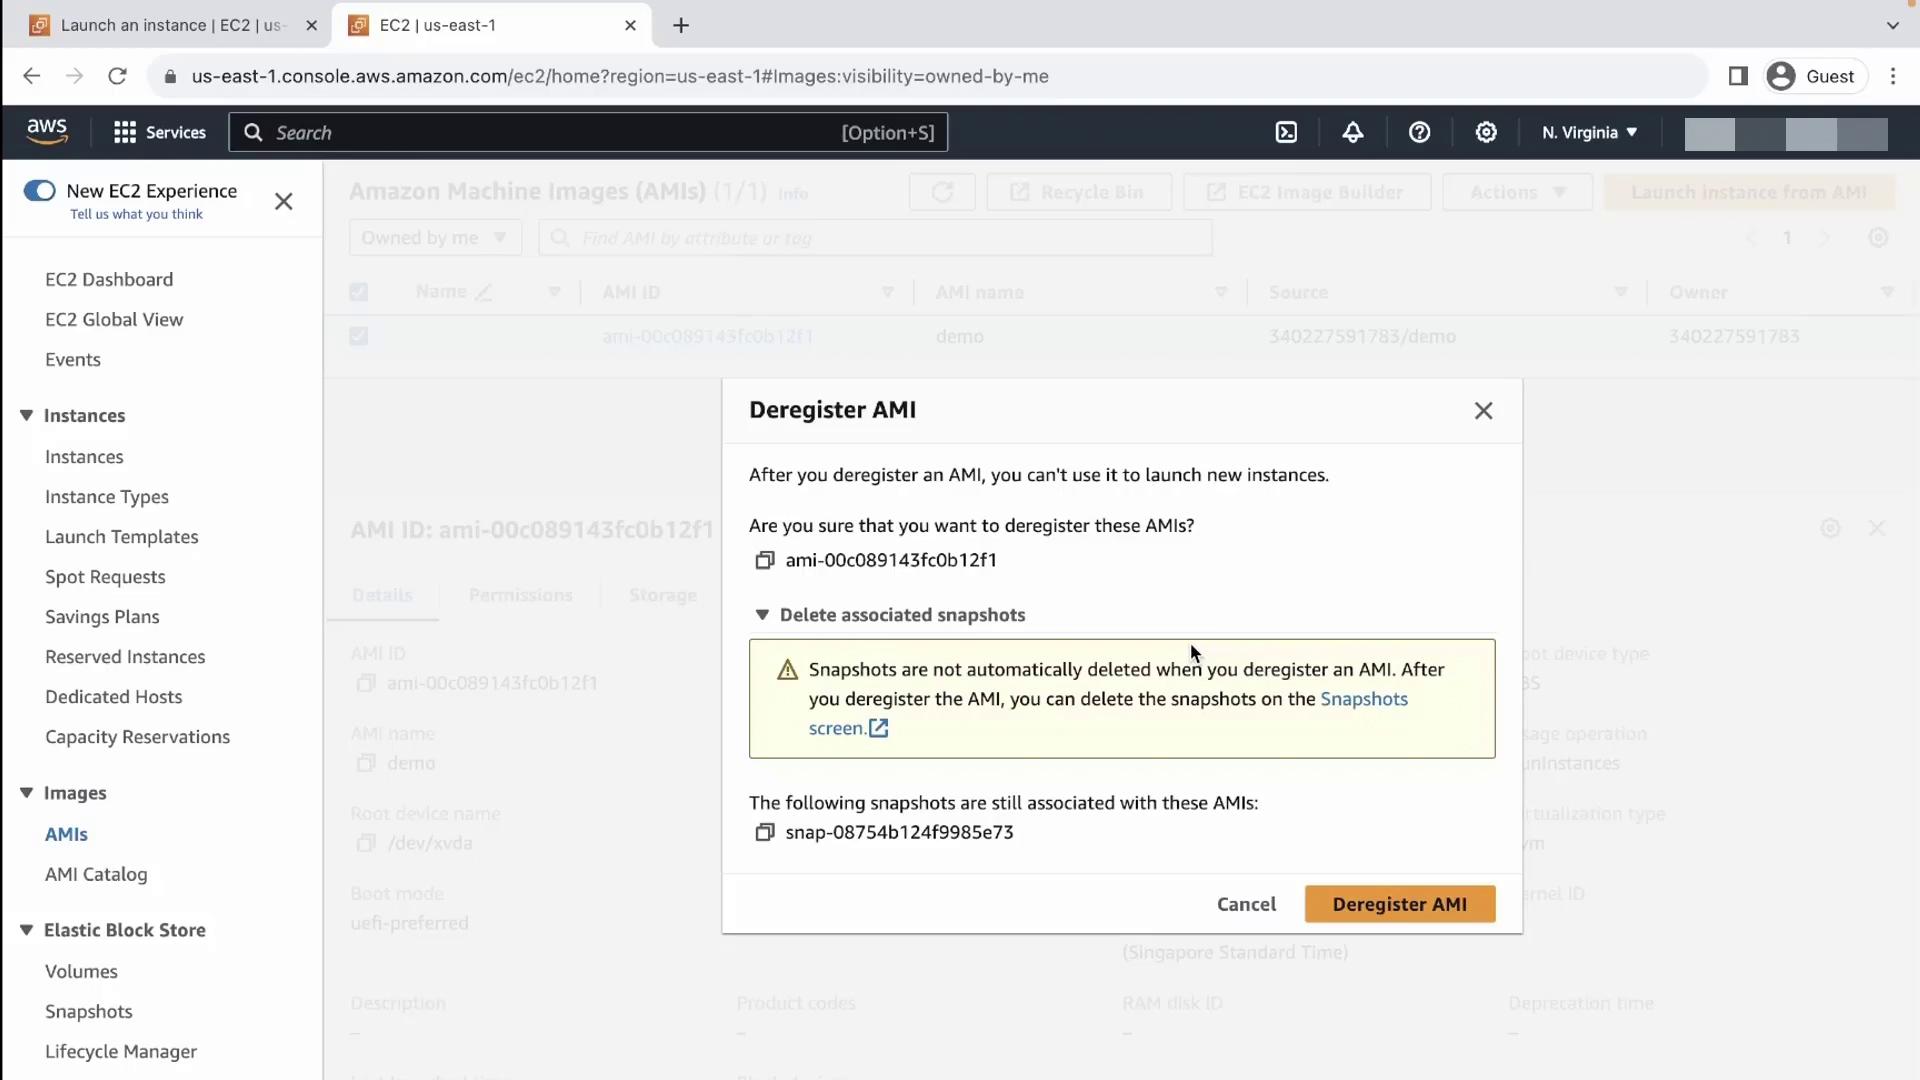
## Step 8: Deregister (Delete) the AMI
To remove an AMI:
1. Go to **Images** → **AMIs**, select the AMI.
2. Choose **Actions** → **Deregister AMI**.
3. Confirm the deregistration.
Deregistering an AMI does *not* delete its associated snapshots. Manually delete any orphaned snapshots to prevent unexpected storage charges.
***
## Cleanup Recommendations
* Implement consistent tagging conventions for automated cleanup via [AWS CLI scripts](https://docs.aws.amazon.com/cli/latest/reference/ec2/index.html#ec2).
* Schedule periodic audits to deregister unused AMIs and delete leftover snapshots.
***
## References
* [Creating an Amazon EBS-backed Linux AMI](https://docs.aws.amazon.com/AWSEC2/latest/UserGuide/creating-an-ami-ebs.html)
* [Amazon EC2 Documentation](https://docs.aws.amazon.com/ec2/)
* [AWS CLI EC2 Commands](https://docs.aws.amazon.com/cli/latest/reference/ec2/index.html)