Amazon Elastic Container Service (AWS ECS)

Deploying a new application from scratch

Demo Creating multi container application

In this guide, we demonstrate how to build and deploy a multi-container application on Amazon ECS using Fargate. We will create a task definition, configure containers for MongoDB and an Express-based web API, mount an Elastic File System (EFS) volume for persistent MongoDB data, and launch a service behind an Application Load Balancer (ALB) for efficient traffic routing.


1. Creating the Task Definition

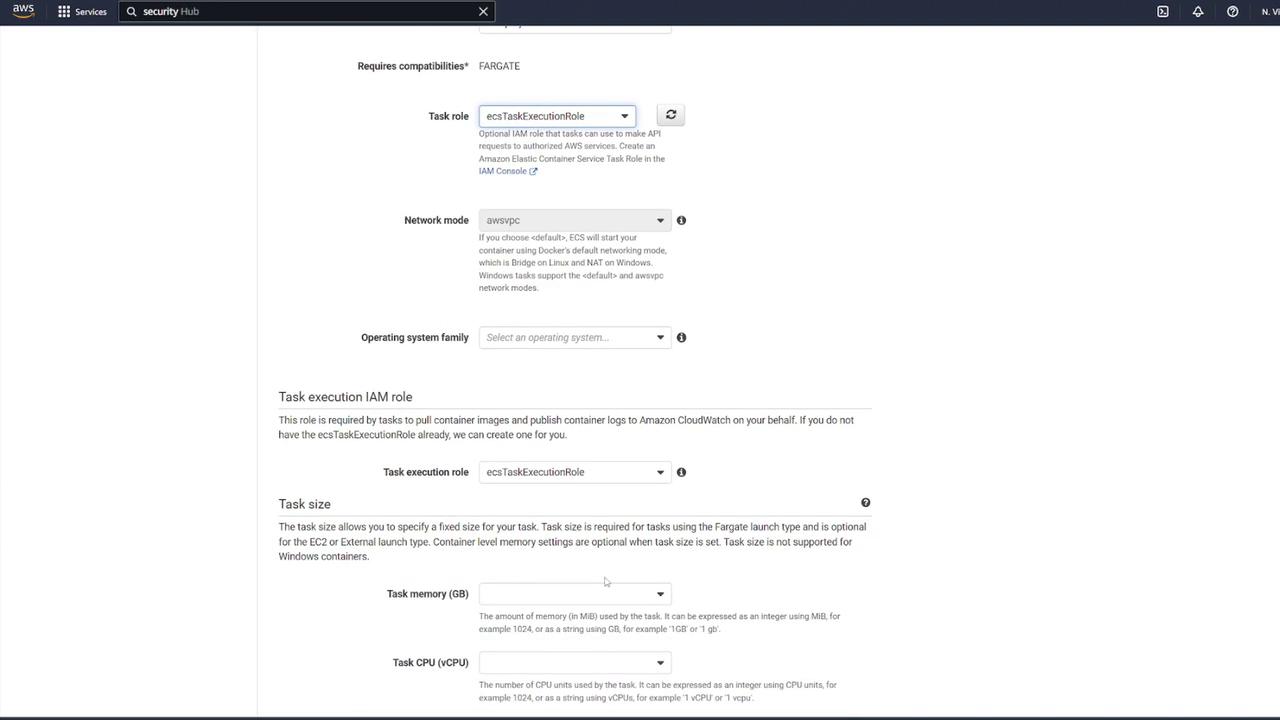
Begin by navigating to your ECS dashboard and selecting Task Definitions. Create a new task definition by choosing Fargate as the launch type. Give it a meaningful name (for example, "ECS-Project1"), assign the ECS task execution role, and select the smallest available memory option. After these steps, proceed to add your containers.

The image shows an AWS interface for creating a new task definition, where users can select launch type compatibility options: Fargate, EC2, or External.

The image shows an AWS management console screen for configuring an ECS task, including settings for task role, network mode, and task size. Options for task execution IAM role and memory/CPU allocation are also visible.


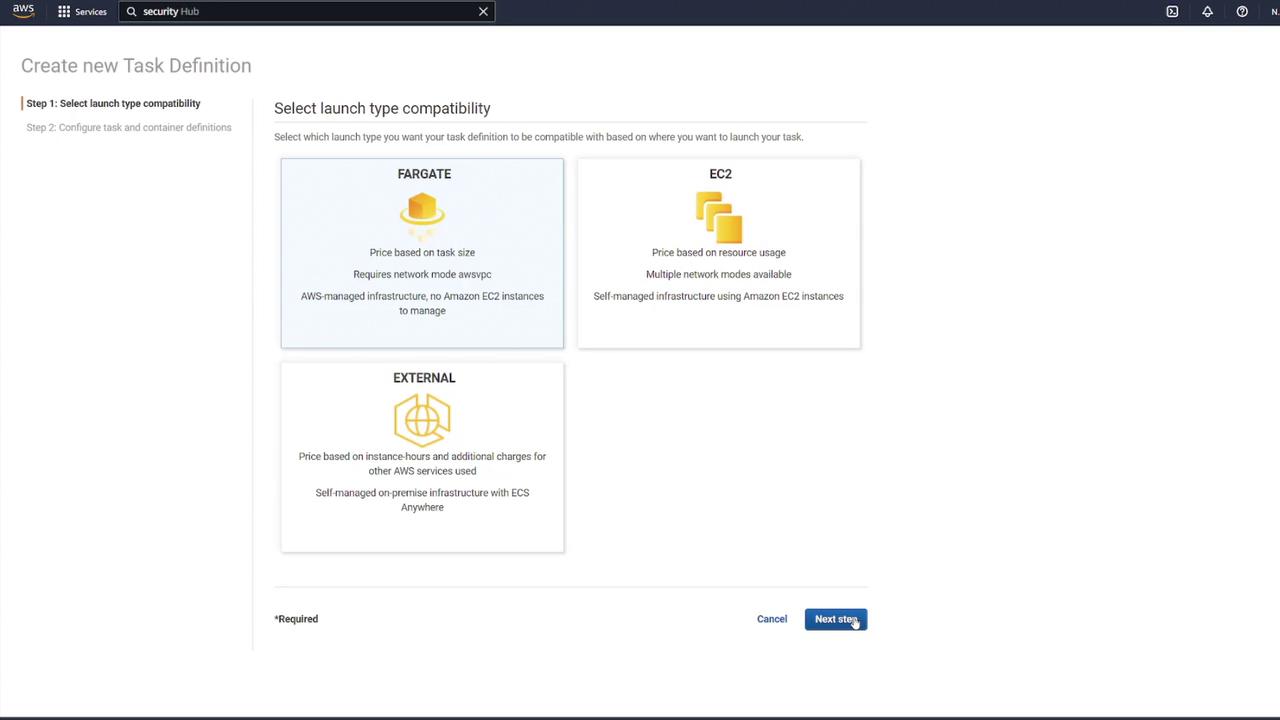
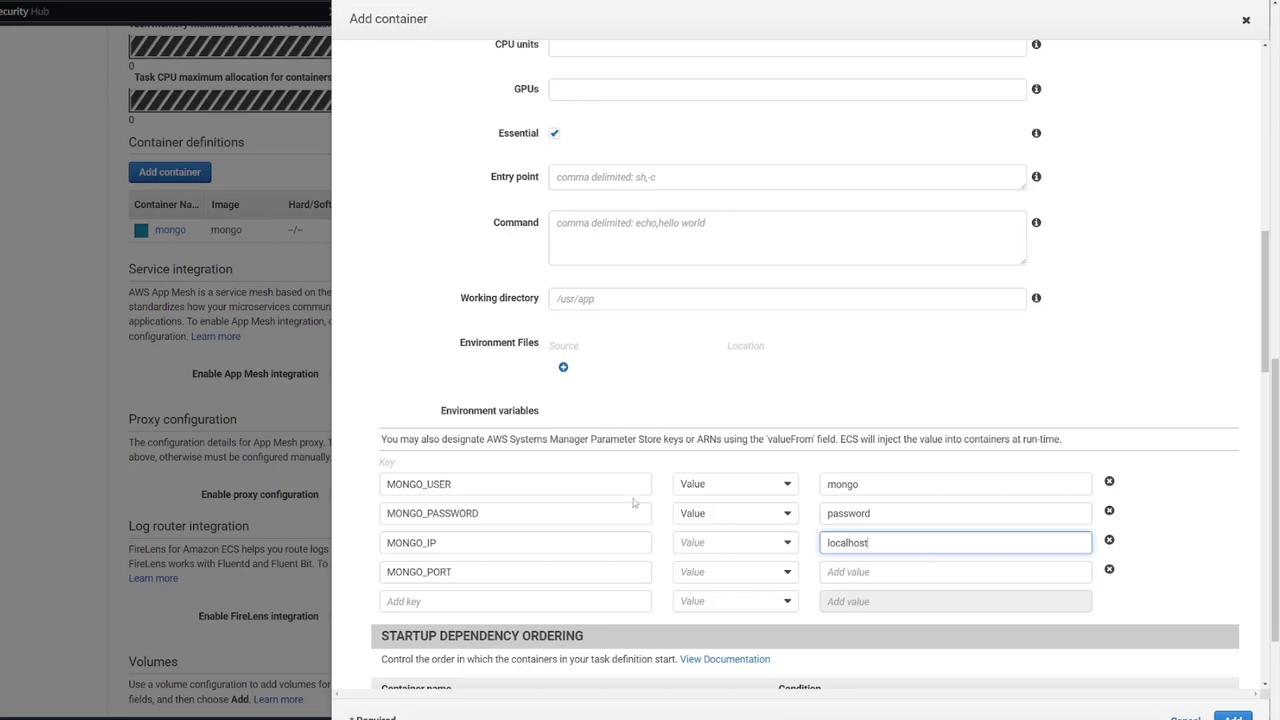
2. Configuring the MongoDB Container

The first container will run the MongoDB database. Configure it with the following steps:

  1. Name the container "Mongo" and select the default Mongo image from Docker Hub.
  2. Set the port mapping to 27017 (MongoDB’s default port).
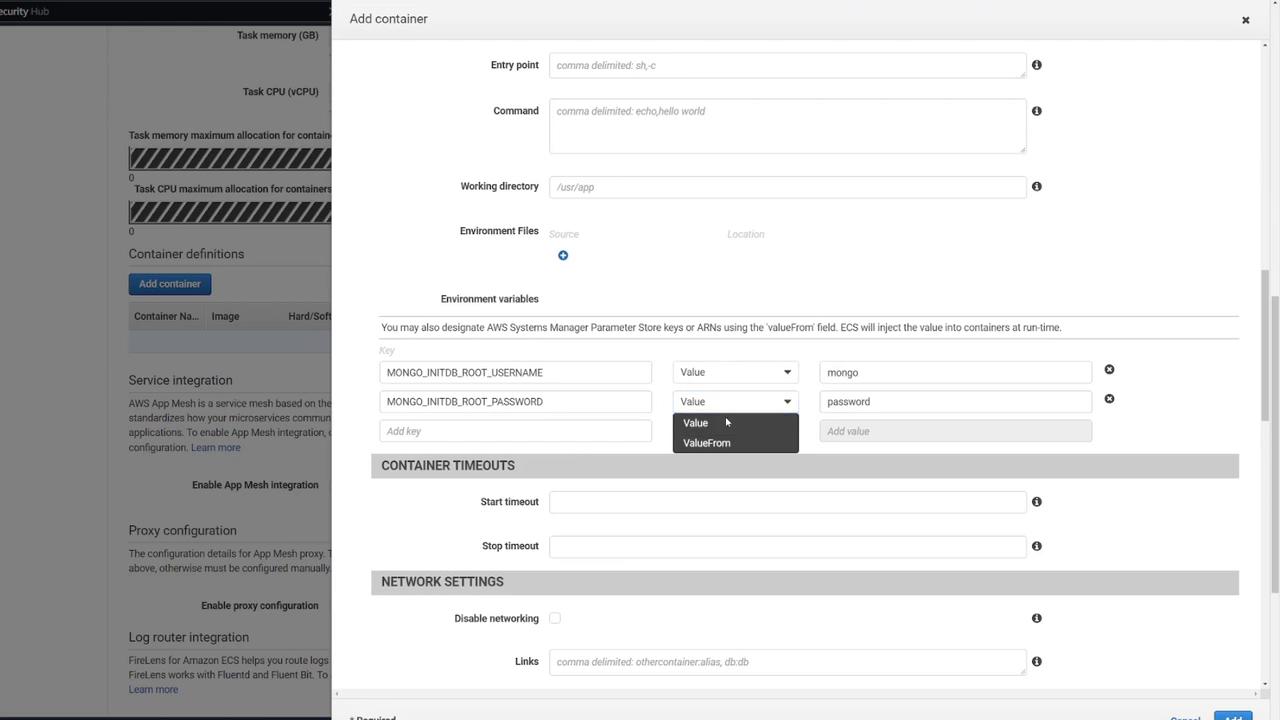
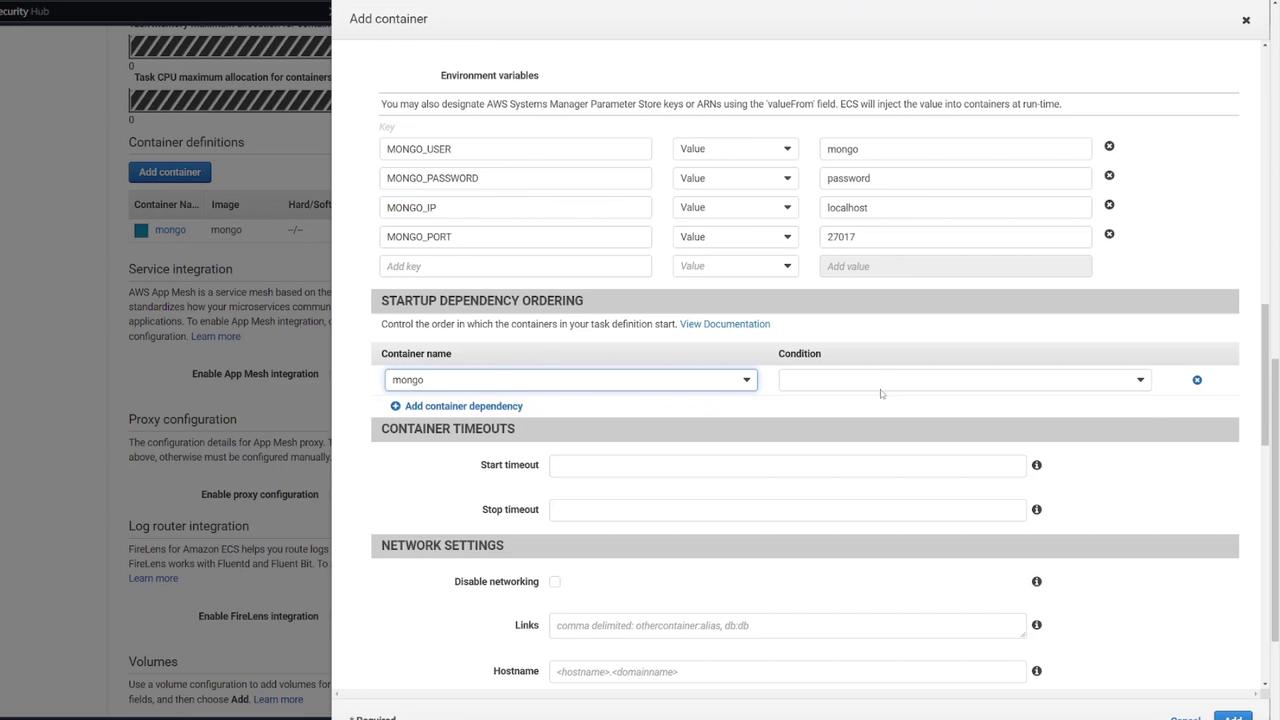
  3. Define the necessary environment variables for MongoDB initialization.

The image shows a configuration screen for adding a container, with fields for container name, image, memory limits, and port mappings. It also includes advanced container configuration options like health checks.

Health Check

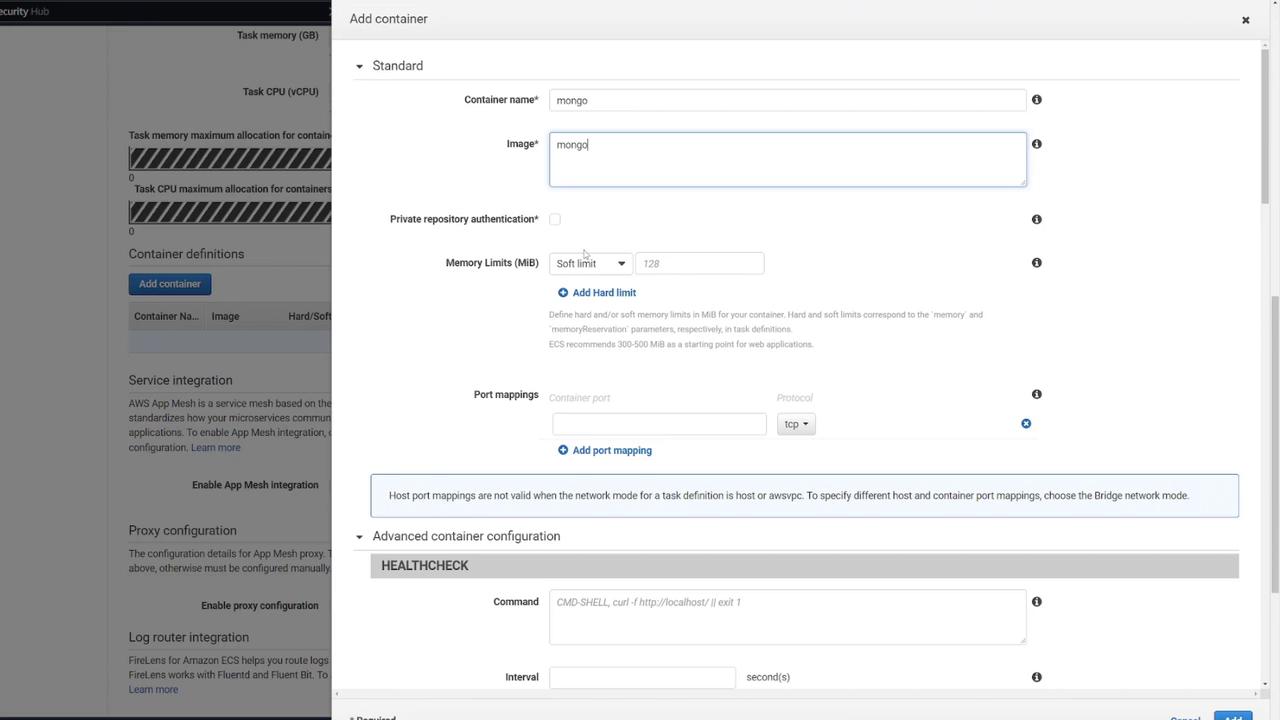
You can add an optional health check for MongoDB. For example:

CMD-SHELL, curl -f http://localhost/ || exit 1

Next, include the following environment variables based on your docker-compose configuration:

environment:
  - MONGO_INITDB_ROOT_USERNAME=mongo
  - MONGO_INITDB_ROOT_PASSWORD=password
  - MONGO_IP=mongo
  - MONGO_PORT=27017
ports:
  - "27017:27017"
mongo:
  image: mongo
  environment:
    - MONGO_INITDB_ROOT_USERNAME=mongo
    - MONGO_INITDB_ROOT_PASSWORD=password
  volumes:
    - mongo-db:/data/db
volumes:
  mongo-db:

Security Notice

Using "password" for MongoDB credentials is not secure and is used here solely for demonstration purposes.

The image shows a user interface for adding a container, with fields for entry point, command, working directory, and environment variables, including MongoDB credentials.

After confirming the settings, close the MongoDB container configuration.


3. Configuring the Web API Container

Next, configure the second container to host your Express-based web API:

  1. Add a new container (for example, named "web API").
  2. Use the image "ECS-Project2" from Docker Hub.
  3. Set the container to listen on port 3000.

Ensure the environment variables match those from the MongoDB container for seamless connectivity:

version: "3"
services:
  api:
    build: .
    image: kodekloud/ecs-project2
    environment:
      - MONGO_USER=mongo
      - MONGO_PASSWORD=password
      - MONGO_IP=mongo
      - MONGO_PORT=27017
    ports:
      - "3000:3000"
  mongo:
    image: mongo
    environment:
      - MONGO_INITDB_ROOT_USERNAME=mongo
      - MONGO_INITDB_ROOT_PASSWORD=password
    volumes:
      - mongo-db:/data/db

Although Docker Compose supports built-in DNS resolution between services, ECS tasks do not. Therefore, ensure the web API leverages the proper host for intra-task communication.

A typical health check command for the web API may look like this:

HEALTHCHECK
  Command: CMD-SHELL, curl -f http://localhost/ || exit 1
  Interval: second(s)

The image shows a configuration screen for adding a container, with fields for CPU units, entry point, command, and environment variables related to a MongoDB setup.

While ECS does offer options to define container dependencies (ensuring MongoDB starts before the web API), this example does not include that configuration.

The image shows a configuration interface for adding a container, with fields for setting environment variables, startup dependency ordering, container timeouts, and network settings. It includes specific entries for a MongoDB container setup.


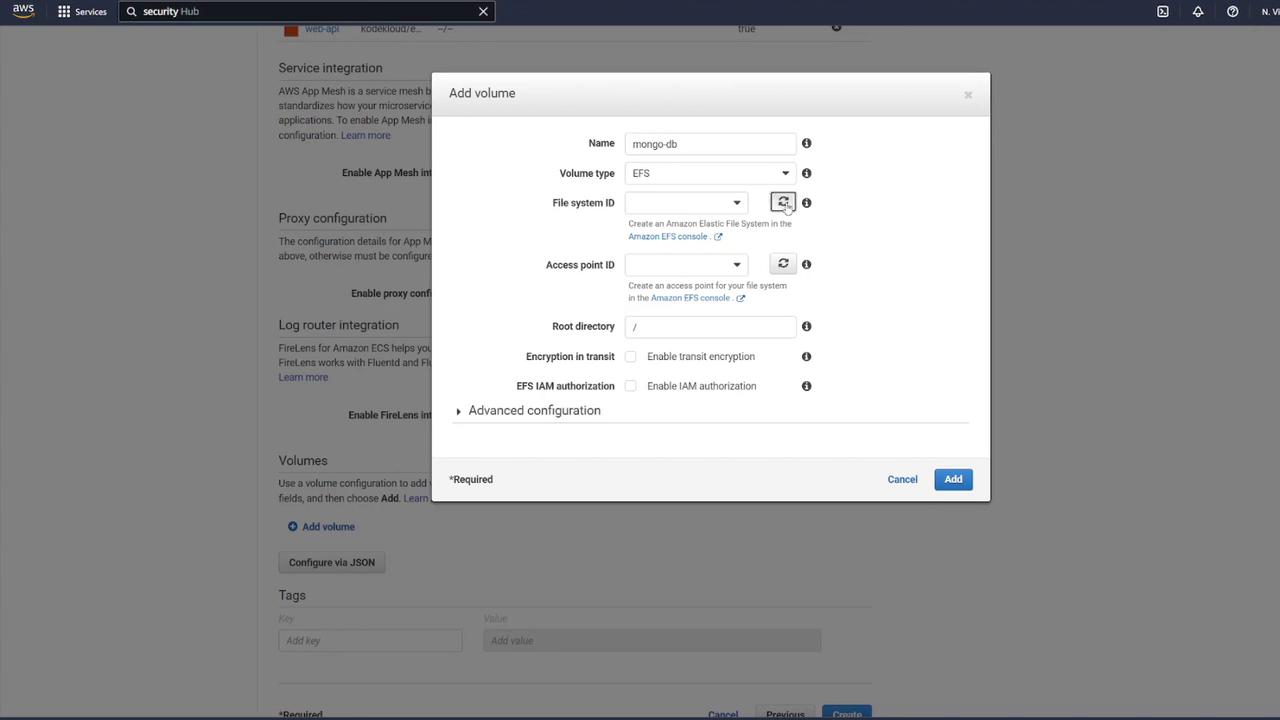
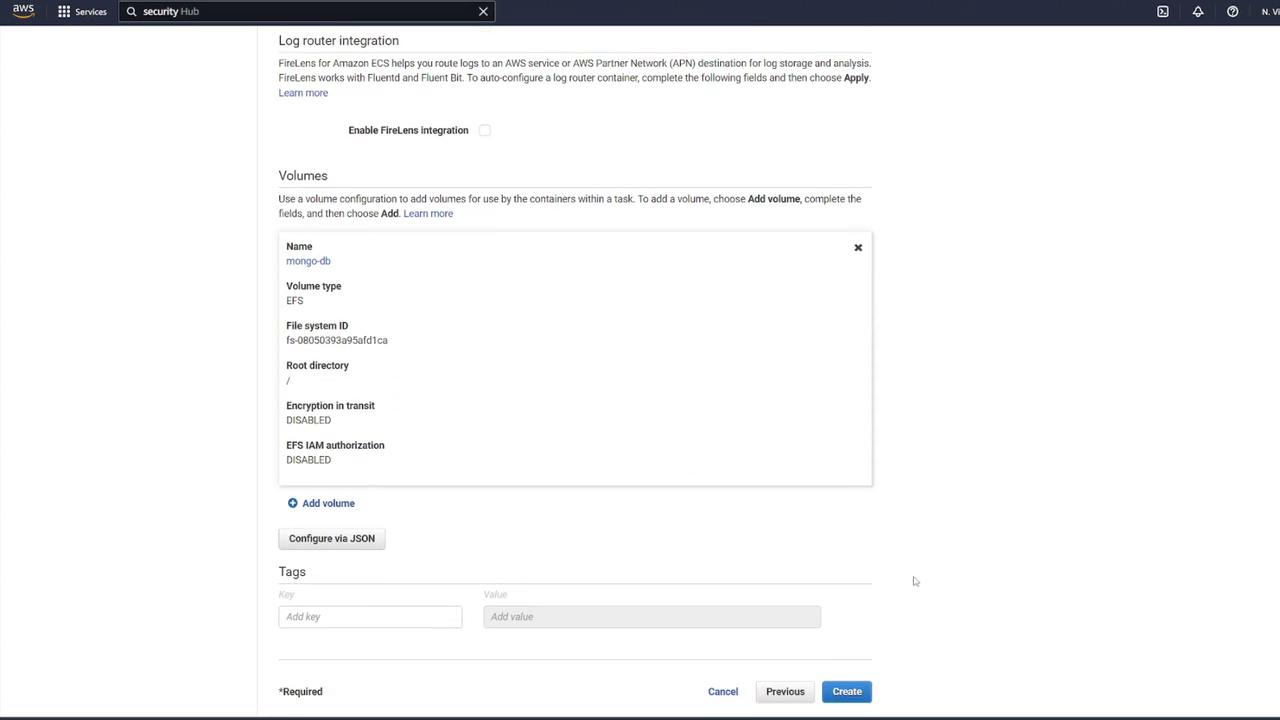
4. Defining a Volume for MongoDB

To ensure data persistence for MongoDB, attach an EFS volume to the MongoDB container:

  1. In the ECS task definition, locate the volume section and add a new volume.
  2. Name the volume "mongo-db" and choose AWS Elastic File System (EFS) as the volume type.
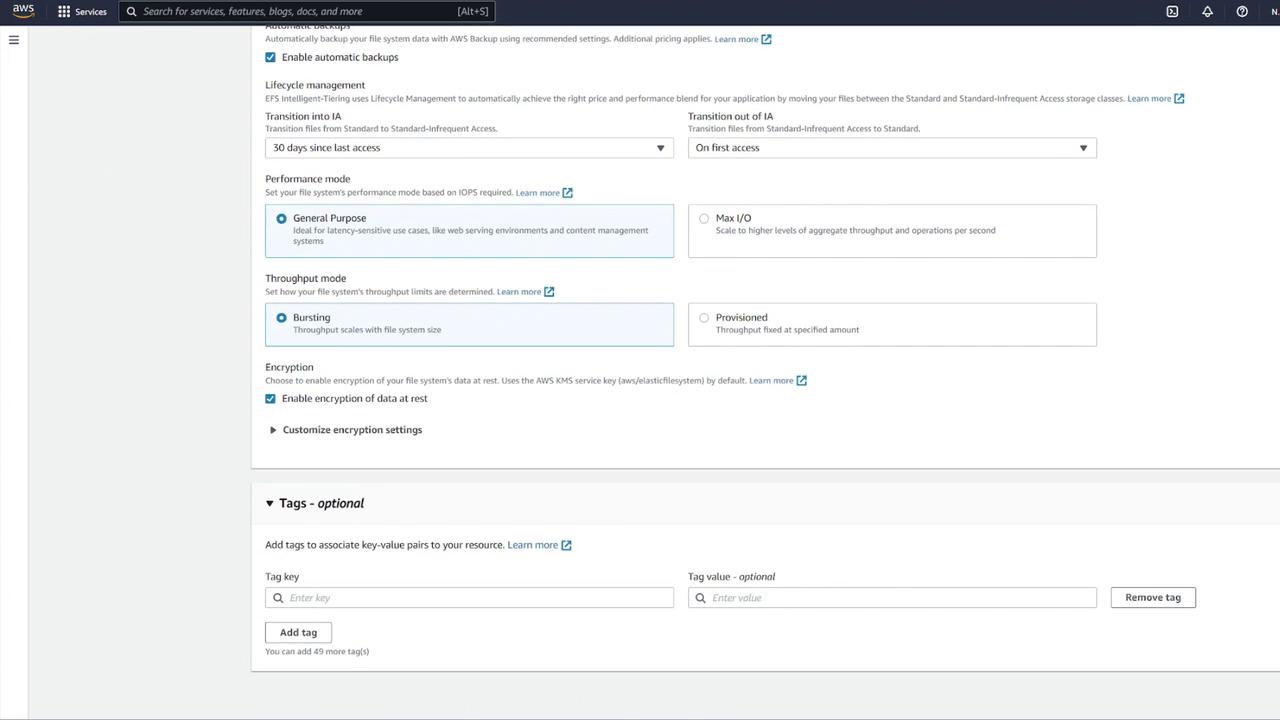
  3. If no EFS is available, click the link to create a new one.
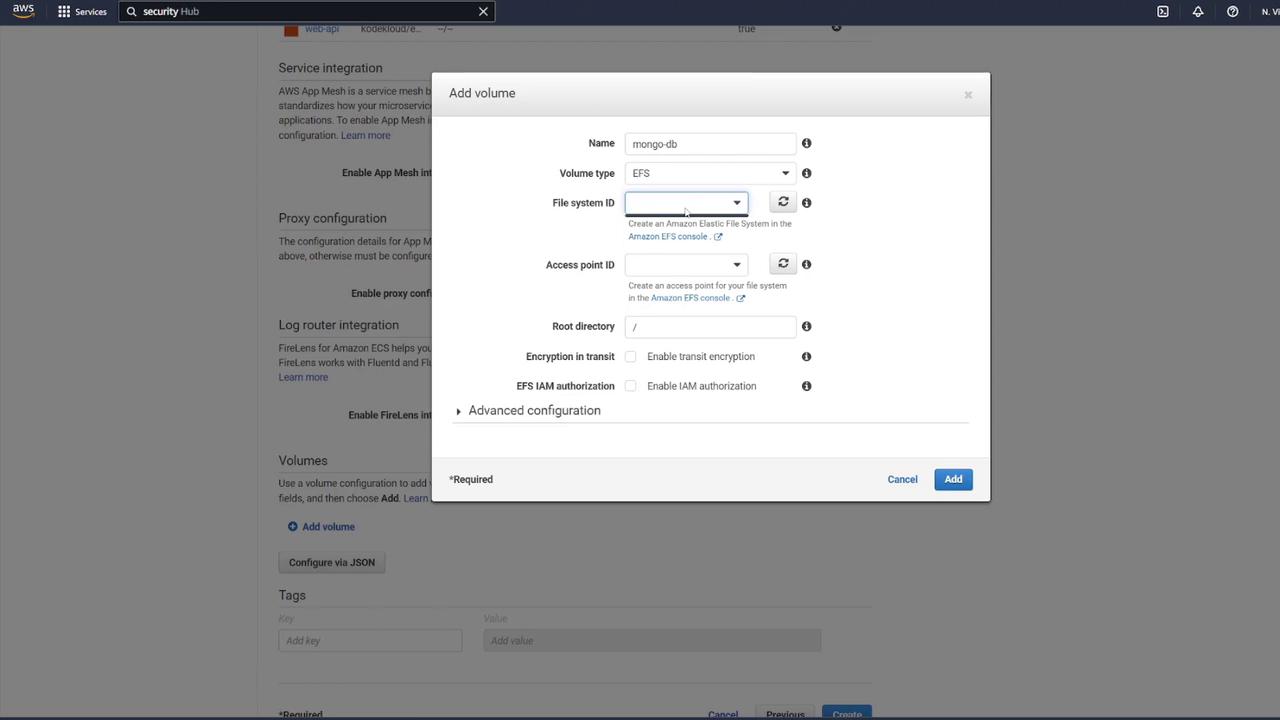
The image shows a dialog box for adding a volume in AWS, with fields for configuring options like volume type, file system ID, and access point ID.

When creating the EFS:

  • Name it "mongo-db".
  • Use the same VPC as your ECS cluster.
  • Select the proper subnets and update the security group to permit ECS container communication.

The image shows an AWS management console screen for configuring file system settings, including options for automatic backups, lifecycle management, performance mode, throughput mode, encryption, and tagging.

Create a dedicated security group for EFS (e.g., "EFS security group") and modify its inbound rules to allow NFS traffic (TCP port 2049) only from your ECS security group.

The image shows an AWS EC2 security group details page, displaying information about inbound rules, including a rule allowing all traffic from any source.

After updating the settings and refreshing the EFS dialog, remove any default security groups and proceed with volume creation.

The image shows a dialog box for adding a volume in an AWS interface, with options for configuring volume type, file system ID, access point ID, and other settings.


5. Mounting the EFS Volume in the MongoDB Container

Associate the EFS volume with your MongoDB container by performing the following:

  1. Edit the MongoDB container’s settings.
  2. In the "Storage and Logging" section, select Mount Points.
  3. Choose the "mongo-db" volume and set the container path to /data/db as recommended by MongoDB.

Example container settings snippet:

Command: echo,hello world
Environment variables:
  MONGO_INITDB_ROOT_PASSWORD: password
  MONGO_INITDB_ROOT_USERNAME: mongo

Click Update and then create your task definition. You may notice the task definition revision incrementing (e.g., revision 4).

The image shows an AWS interface for configuring log router integration and volume settings, including options for FireLens integration and EFS volume details.


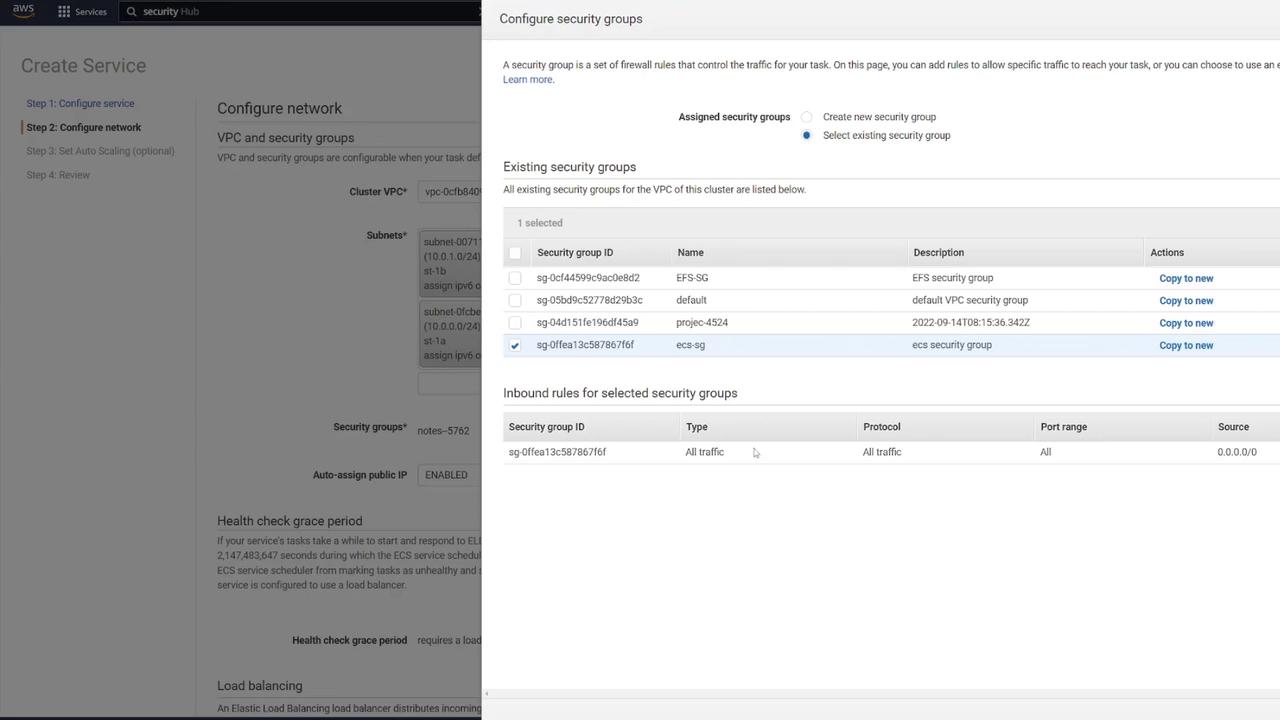
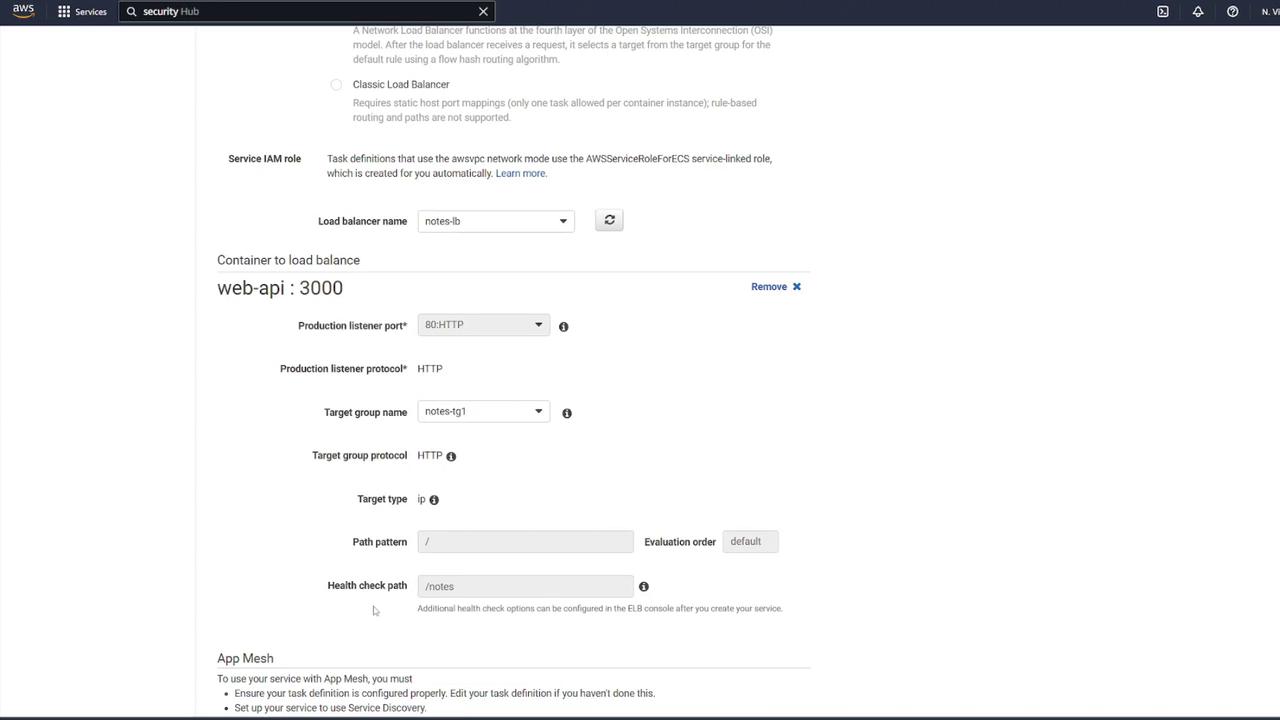
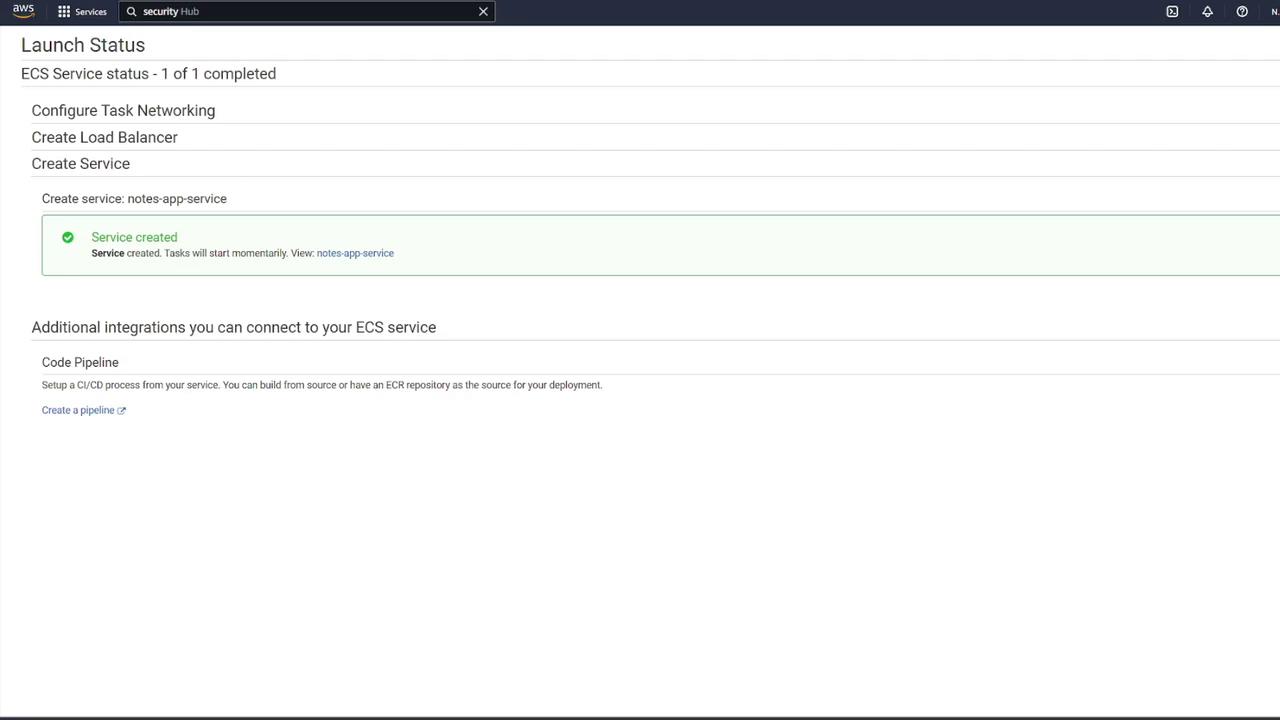
6. Creating the ECS Service and Configuring the Load Balancer

Now that the task definition is complete, create a new ECS service:

  1. Navigate to your ECS cluster (e.g., "cluster one") and create a service.
  2. Select Fargate as the launch type and Linux as the operating system.
  3. Choose the newly created task definition (e.g., "ECS-Project2") and assign a service name (for instance, "notes app service").
  4. Set the number of tasks to 1.
  5. Select the appropriate VPC, subnets, and ECS security group (e.g., "ECS-SG").

The image shows a configuration screen for setting up security groups in AWS, displaying options for selecting existing security groups and their inbound rules.

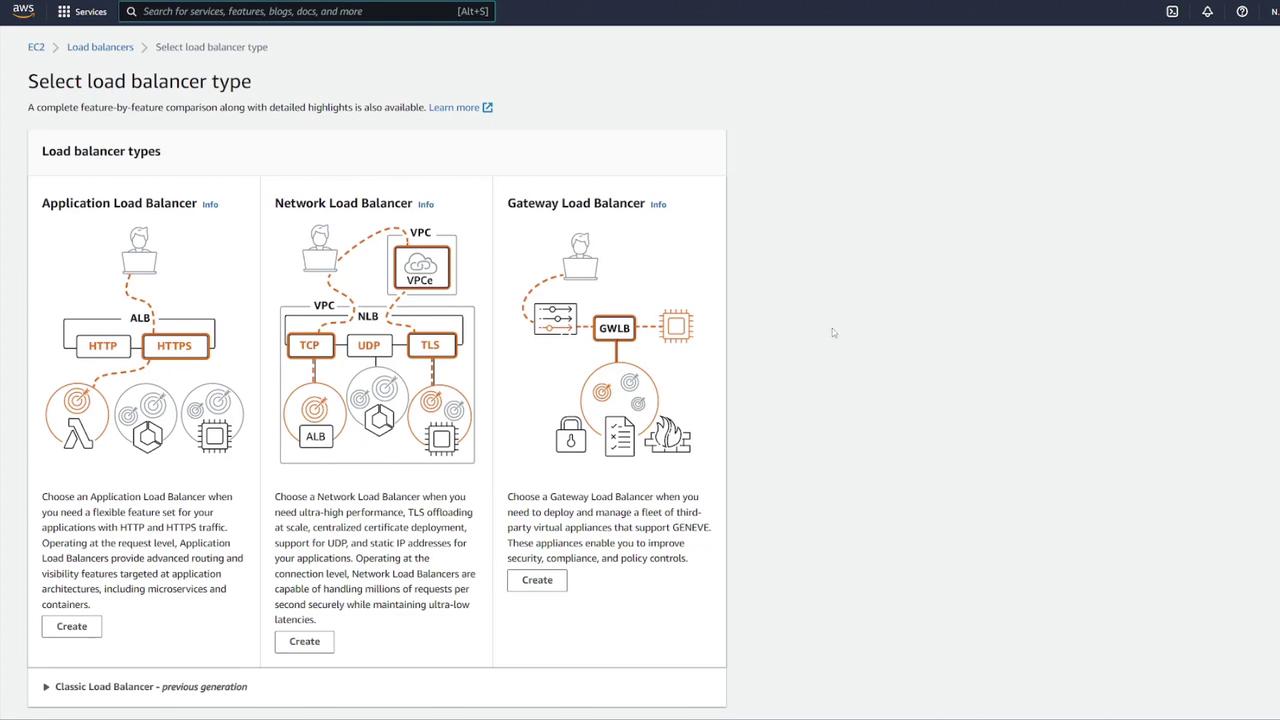
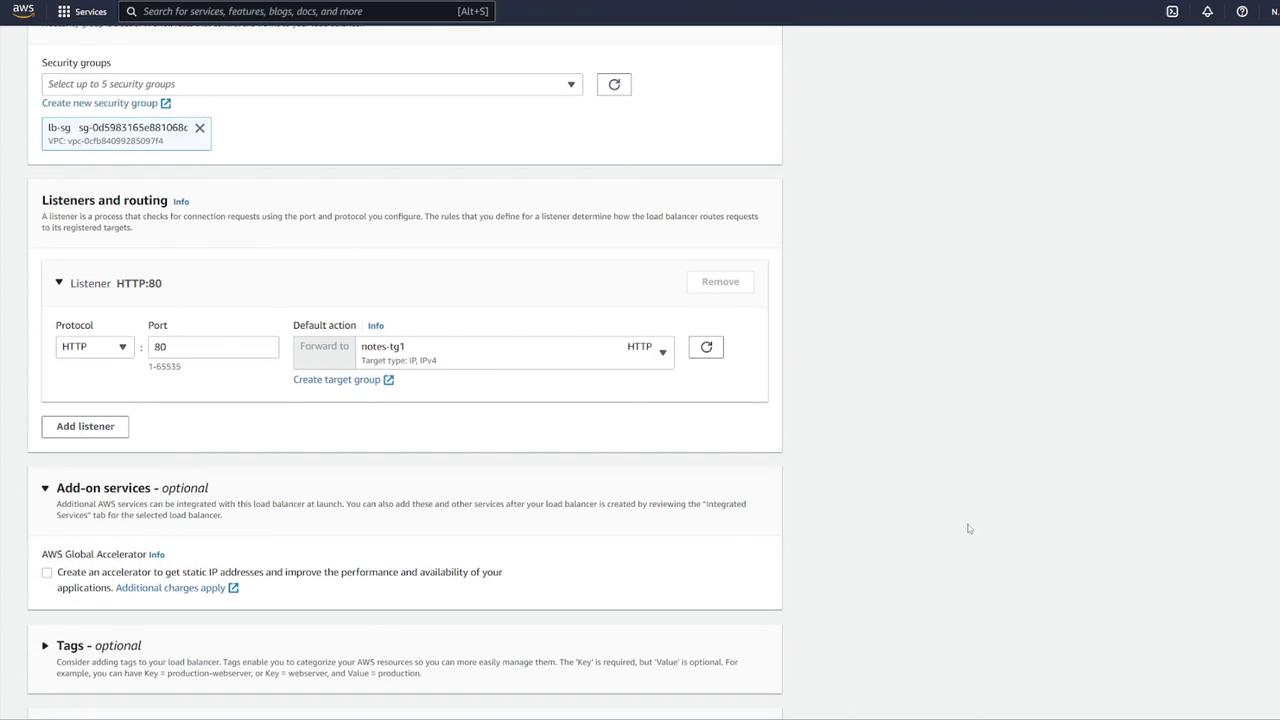
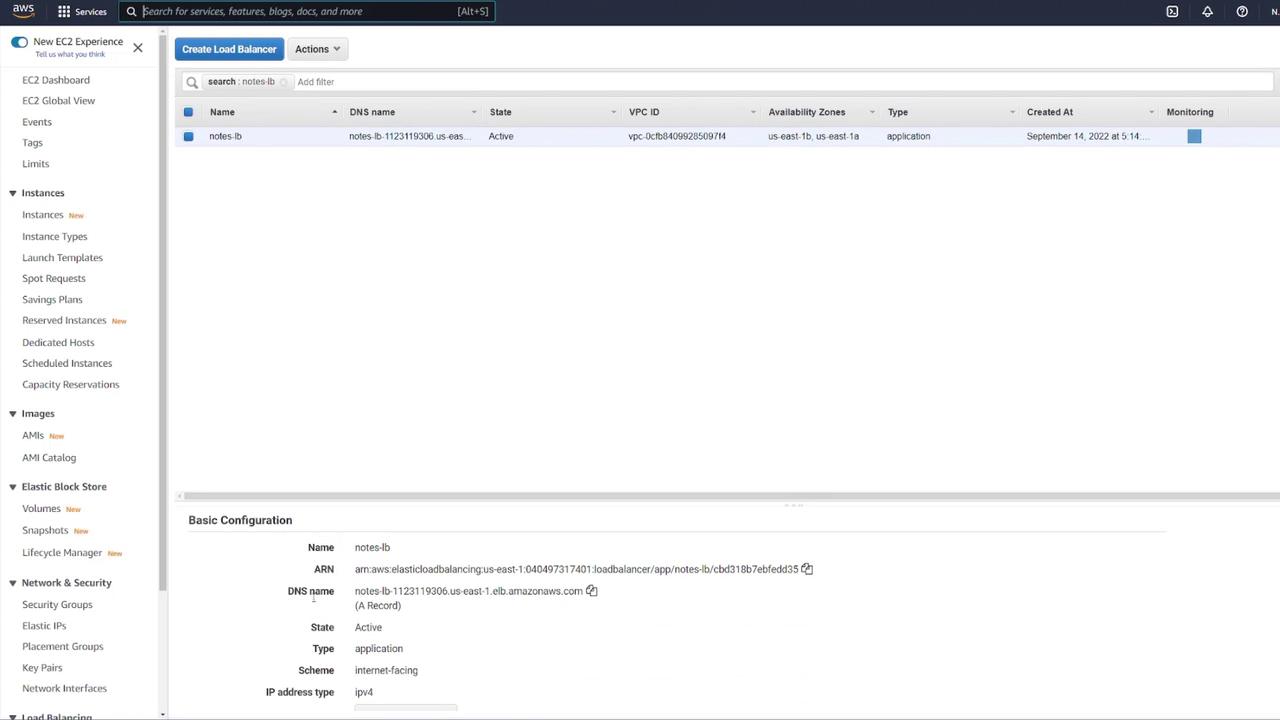
Configuring the Application Load Balancer

To distribute traffic and enhance scalability, set up an ALB:

  1. Click the link to open the ALB configuration in a new tab.
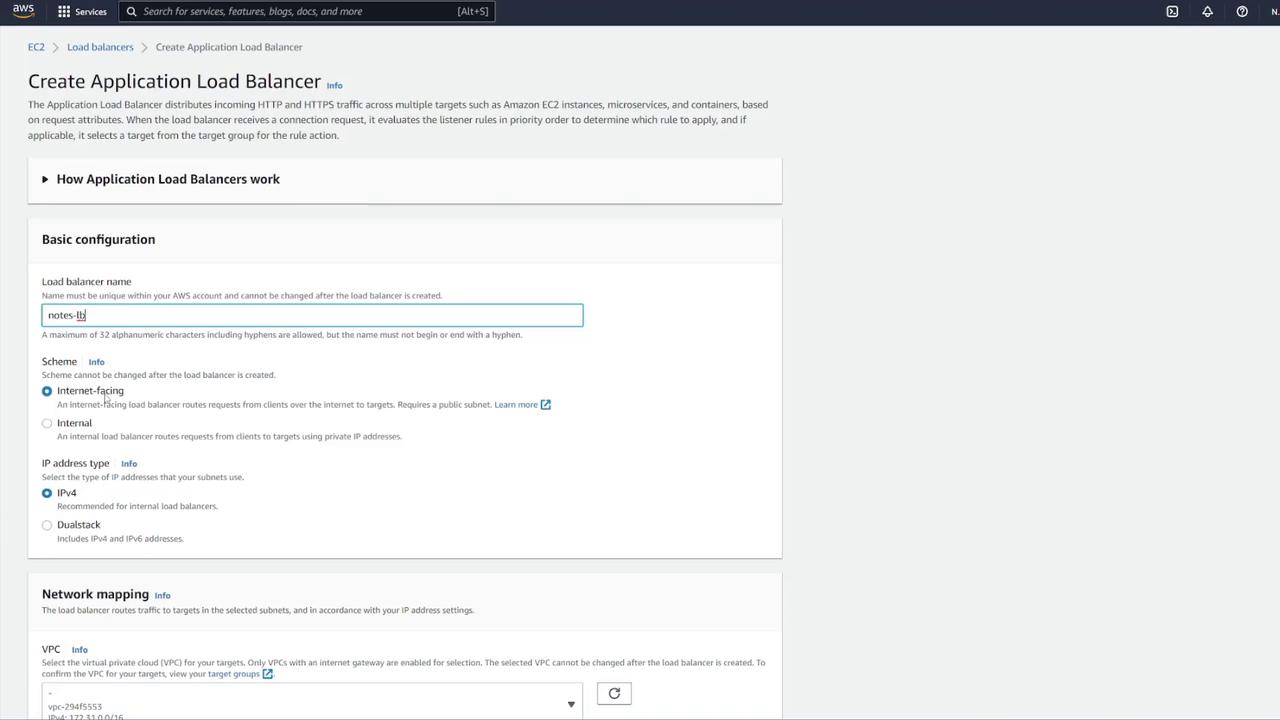
  2. Choose the Application Load Balancer type, set it as internet-facing, and select IPv4.
  3. Map the ALB to the appropriate VPC.
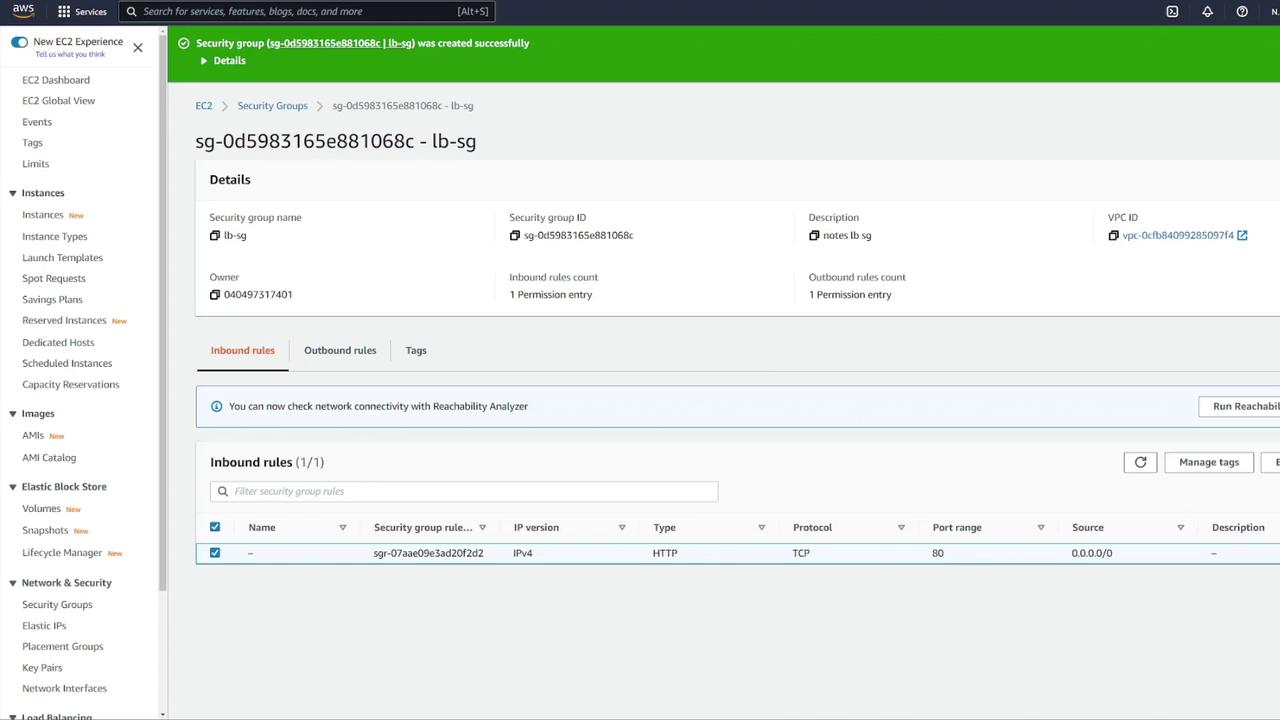
  4. Create a new security group for the ALB (e.g., "LB-SG").

The image shows a webpage from AWS describing three types of load balancers: Application Load Balancer, Network Load Balancer, and Gateway Load Balancer, each with brief descriptions and icons.

Configure the ALB with the following details:

  • Name it appropriately (e.g., "notes LB").
  • Set it as internet facing with IPv4.
  • Configure inbound rules to allow HTTP traffic on port 80. Although the container listens on port 3000, the ALB will forward requests to port 3000 using listener rules.

The image shows a configuration page for creating an Application Load Balancer on AWS, with fields for load balancer name, scheme, IP address type, and network mapping.

If any default security groups cause issues, create a custom ALB security group with the proper rules.

The image shows an AWS EC2 security group details page, displaying information about inbound rules, including an HTTP rule allowing traffic on port 80 from any IP address.

After confirming your ALB settings, create a target group by following these steps:

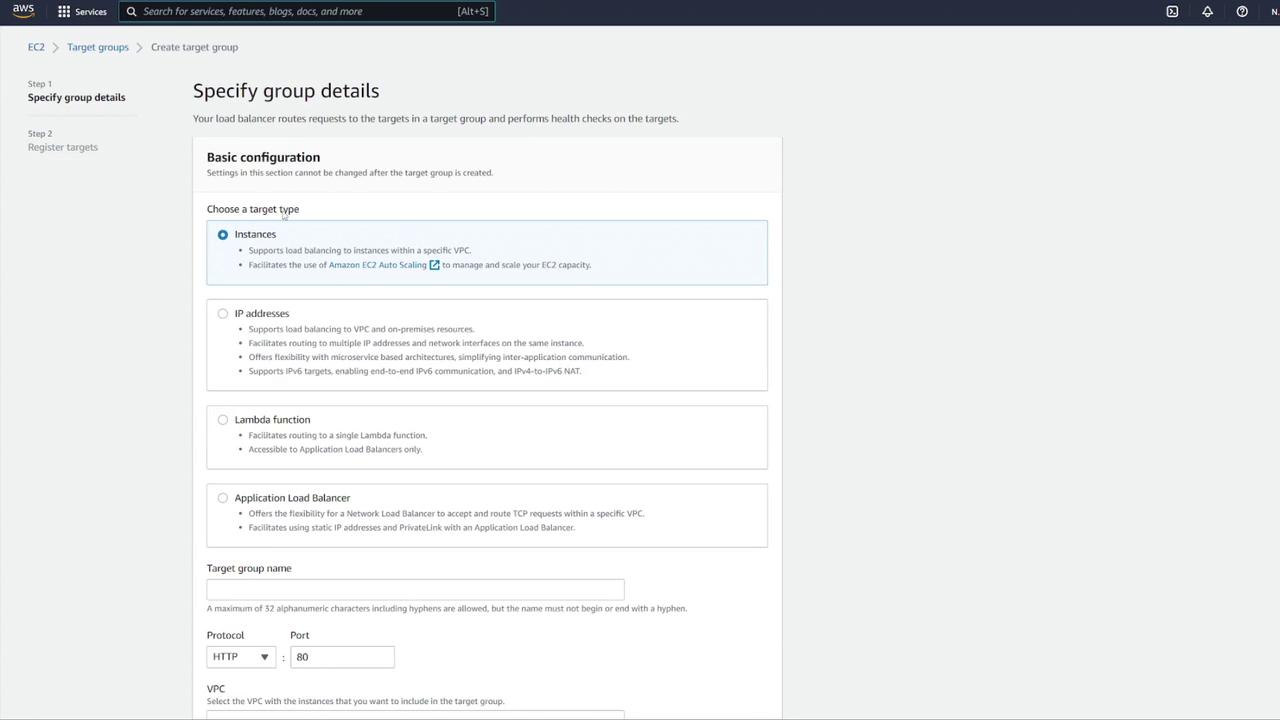
  • Select IP addresses as the target type.
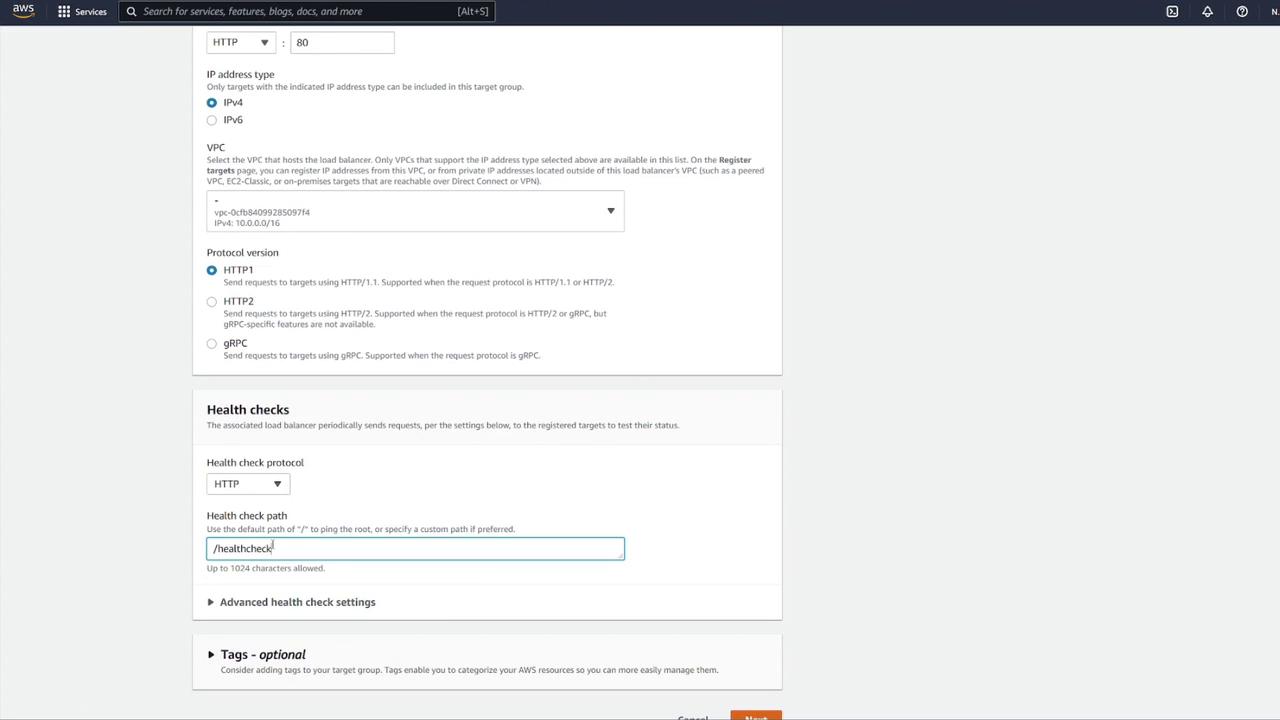
  • Name the target group (e.g., "notes-tg1") and choose the correct VPC.
  • Modify the health check configuration: update the health check path to /notes and override the health check port to 3000 if required.

The image shows an AWS console interface for specifying group details in a target group setup, with options for choosing a target type such as instances, IP addresses, Lambda functions, or an application load balancer.

The image shows an AWS console interface for configuring a target group, including settings for IP address type, VPC, protocol version, and health checks. The health check path is set to "/healthcheck".

Return to the load balancer configuration and associate the new target group (notes-tg1) to the listener on port 80, ensuring traffic is forwarded to port 3000.

The image shows a configuration screen for setting up a listener and routing rules in an AWS service, with options for security groups, protocols, and add-on services.

Review all final settings, disable auto scaling if not necessary, and create the ECS service.

The image shows a configuration screen for setting up a load balancer in AWS, detailing settings like load balancer name, production listener port, and health check path.

After the service is created, verify that at least one task transitions from provisioning to running. You can check the status by clicking the running task and confirming that both the "mongo" and "notes-api" containers operate as expected.

The image shows an AWS ECS service launch status page indicating that a service named "notes-app-service" has been successfully created. It also mentions additional integrations like Code Pipeline for setting up a CI/CD process.

The image shows an Amazon ECS (Elastic Container Service) dashboard displaying details of a running task, including cluster information, network settings, and container statuses. Two containers, "mongo" and "notes-api," are listed as running.


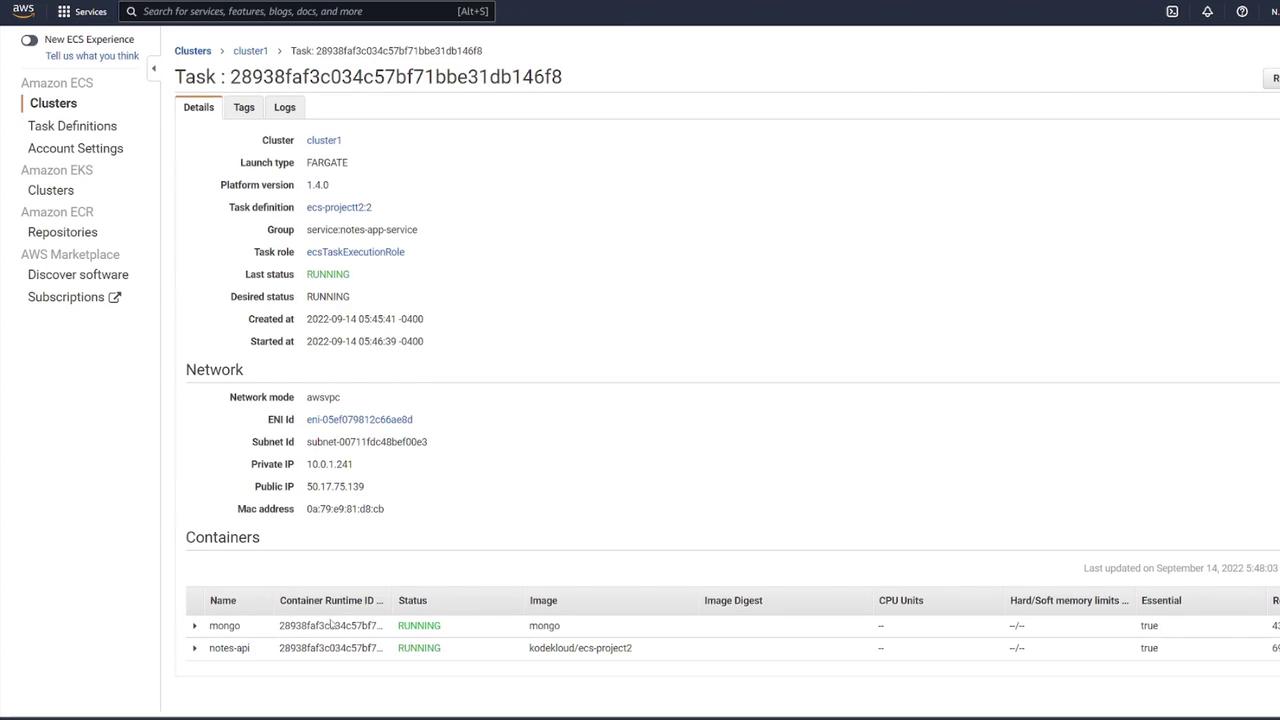
7. Testing the Application

Once your service is running, test your application using tools like Postman:

  1. Send a GET request to the container's IP on port 3000 at the /notes endpoint. The initial response should be:

    {
      "notes": []
    }
    
  2. Send a POST request with JSON data, such as:

    {
      "title": "second_note",
      "body": "remember to do dishes!!!!"
    }
    
  3. A subsequent GET request to /notes should display the newly created note:

    {
      "notes": [
        {
          "_id": "63211a3c034fdd55dec212834",
          "title": "second note",
          "body": "remember to do dishes!!!!",
          "__v": 0
        }
      ]
    }
    

Since you configured a load balancer, test the application using the ALB’s DNS name. For example, navigate to:

The image shows an AWS EC2 dashboard displaying details of a load balancer named "notes-lb," which is active and configured as an internet-facing application.

Ensure you do not include port 3000 in the URL because the ALB listens on port 80 and forwards the requests to port 3000 through the target group. For example:

GET http://notes-lb-1123119306.us-east-1.elb.amazonaws.com/

{
  "notes": []
}

After a POST request adds a note, a subsequent GET should display the updated results.


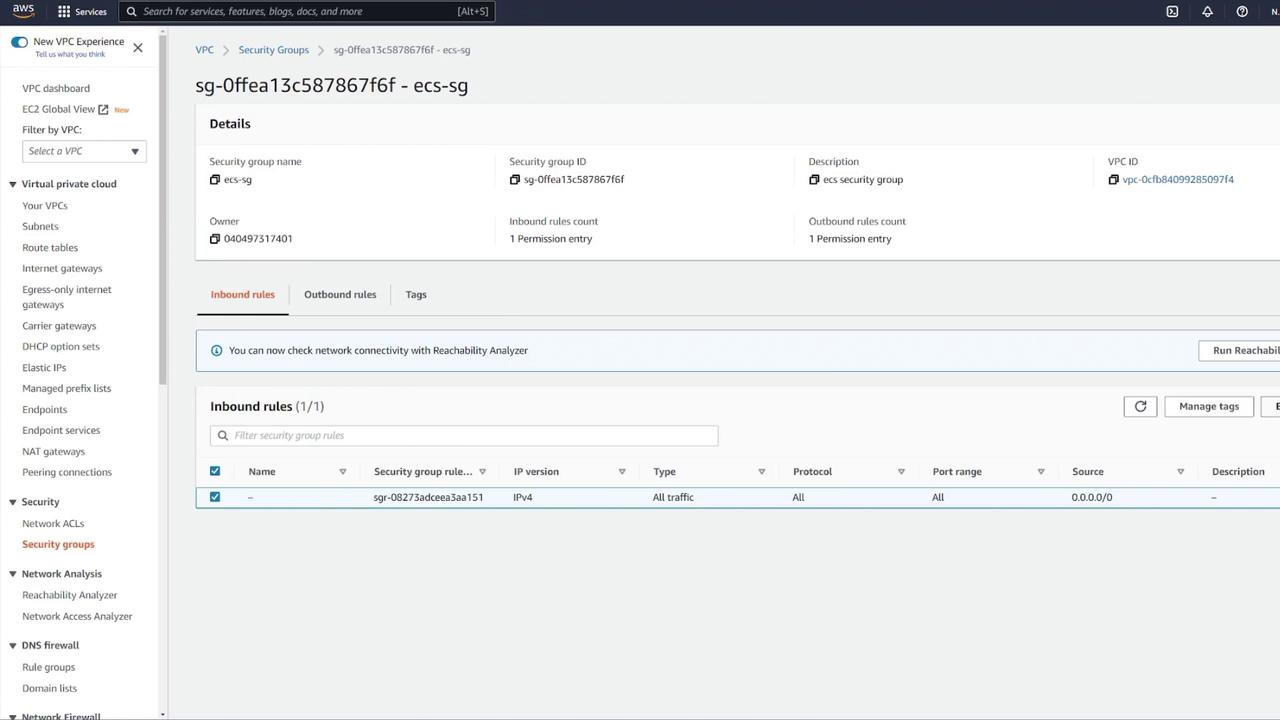
8. Enhancing Security Group Rules

For improved security, update your ECS security group rules:

  1. Instead of allowing all IP addresses on any port, remove the overly permissive rule.
  2. Add a custom TCP rule on port 3000 with the source set to your load balancer's security group. This ensures that only traffic routed through the ALB reaches your ECS containers.

The image shows an AWS Security Group configuration page, detailing inbound rules for a specific security group with all traffic allowed from any source.


In this article, we successfully deployed a multi-container application on Amazon ECS using Fargate. This deployment includes a MongoDB database with persistent EFS storage, an Express-based web API, an Application Load Balancer for efficient traffic distribution, and tightened security through proper security group configurations.

For more detailed information on ECS and related services, please refer to the following resources:

Happy deploying!

Watch Video

Watch video content

Previous
Demo Creating security group