> ## Documentation Index
> Fetch the complete documentation index at: https://notes.kodekloud.com/llms.txt
> Use this file to discover all available pages before exploring further.

# Demo Static Website

> This tutorial teaches how to deploy a static website using Amazon S3, covering configuration, file structure, and testing the site.

In this tutorial, you’ll learn how to deploy a simple static website using Amazon S3. We’ll cover:

* Project file structure
* Configuring S3 for static hosting
* Setting public access and custom error pages
* Testing your site endpoint

This guide is ideal for developers and DevOps engineers looking to serve HTML, CSS, and images directly from S3.

***

## Project Structure

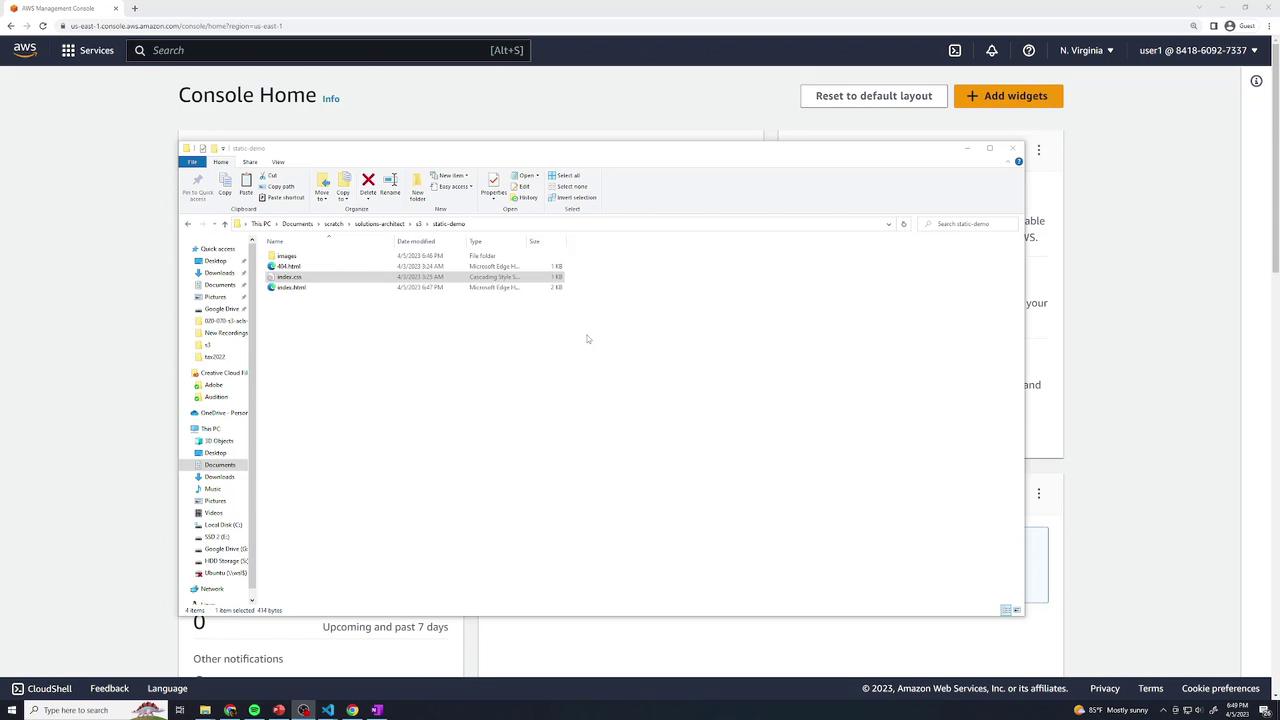
Your local directory (`static-demo/`) contains:

* `index.html` – Main gallery page
* `index.css` – Layout and styling rules
* `404.html` – Custom error page
* `images/` – JPEG photos used in the gallery
<Frame>
  ![The image shows an AWS Management Console with a Windows File Explorer window open, displaying a folder named "static-demo" containing HTML files and an "images" folder.](https://kodekloud.com/kk-media/image/upload/v1752869254/notes-assets/images/Amazon-Simple-Storage-Service-Amazon-S3-Demo-Static-Website/aws-management-console-windows-file-explorer.jpg)
</Frame>

***

## index.html

This HTML file defines the page structure and references your CSS and images:

```html theme={null}
<!DOCTYPE html>
<html lang="en">
<head>
  <meta charset="UTF-8" />
  <meta http-equiv="X-UA-Compatible" content="IE=edge" />
  <meta name="viewport" content="width=device-width, initial-scale=1.0" />
  <link rel="stylesheet" href="index.css" />
  <title>Food Gallery</title>
</head>
<body>
  <div class="container">
    <div class="images">
      <!-- Nine food images displayed in a grid -->
      <div class="image"><img src="images/food1.jpg" alt="Food 1" /></div>
      <div class="image"><img src="images/food2.jpg" alt="Food 2" /></div>
      <div class="image"><img src="images/food3.jpg" alt="Food 3" /></div>
      <div class="image"><img src="images/food4.jpg" alt="Food 4" /></div>
      <div class="image"><img src="images/food5.jpg" alt="Food 5" /></div>
      <div class="image"><img src="images/food6.jpg" alt="Food 6" /></div>
      <div class="image"><img src="images/food7.jpg" alt="Food 7" /></div>
      <div class="image"><img src="images/food8.jpg" alt="Food 8" /></div>
      <div class="image"><img src="images/food9.jpg" alt="Food 9" /></div>
      <div class="image"><img src="images/food10.jpg" alt="Food 10" /></div>
    </div>
  </div>
</body>
</html>
```

Your accompanying `index.css` defines a responsive grid layout, background colors, and typography. Place all JPEGs in the `images/` folder.

***

## 404.html

When users request a missing resource, S3 serves this custom error page:

```html theme={null}
<!DOCTYPE html>
<html lang="en">
<head>
  <meta charset="UTF-8" />
  <meta http-equiv="X-UA-Compatible" content="IE=edge" />
  <meta name="viewport" content="width=device-width, initial-scale=1.0" />
  <link rel="stylesheet" href="index.css" />
  <title>Page Not Found</title>
</head>
<body>
  <div class="container">
    <h1 class="head-404">404</h1>
    <h2 class="text-404">Page not found</h2>
  </div>
</body>
</html>
```

<Callout icon="lightbulb" color="#1CB2FE">
  You can preview both pages locally by opening `index.html` in your browser. The CSS grid will display your food gallery.
</Callout>

***

## 1. Create an S3 Bucket

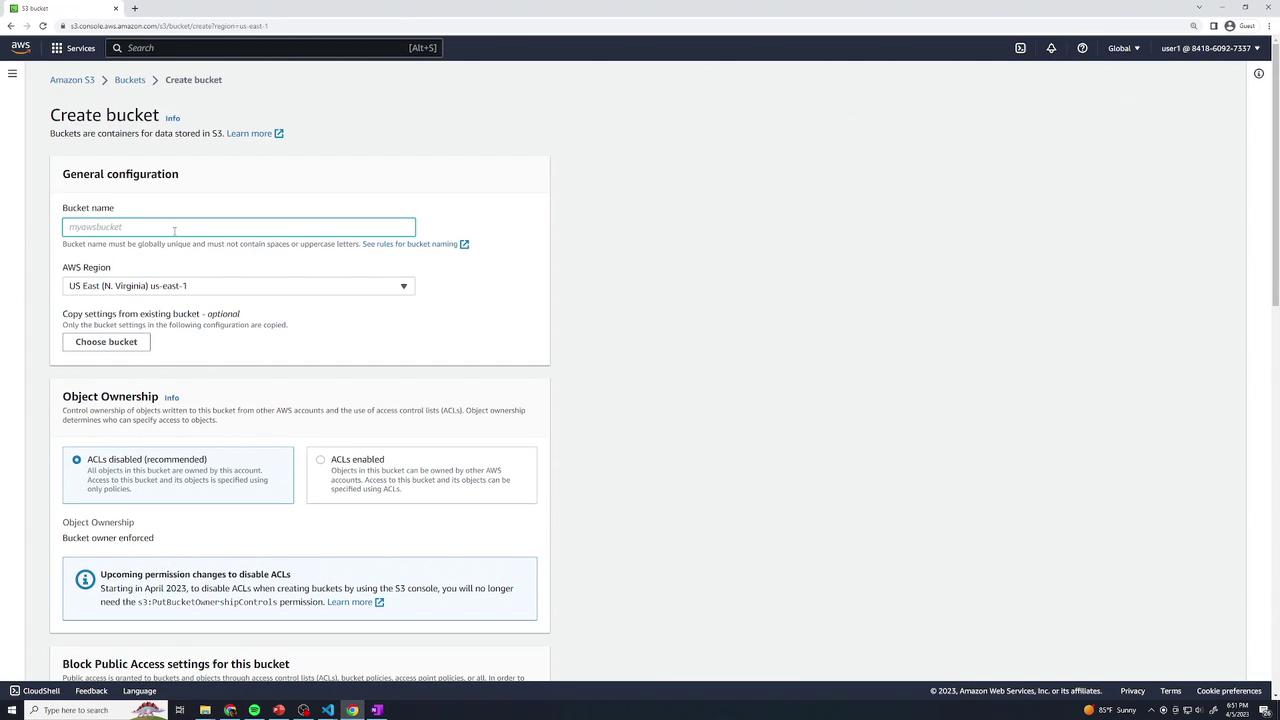
1. Open the [Amazon S3 console](https://console.aws.amazon.com/s3) and click **Create bucket**.
2. Enter a unique bucket name (e.g., `kk-static-demo`) and select your region.
3. Keep default settings and click **Create bucket**.
<Frame>
  ![The image shows the AWS S3 console interface for creating a new bucket, with fields for bucket name, region selection, and object ownership settings.](https://kodekloud.com/kk-media/image/upload/v1752869255/notes-assets/images/Amazon-Simple-Storage-Service-Amazon-S3-Demo-Static-Website/aws-s3-console-create-bucket-interface.jpg)
</Frame>

Once created, locate your bucket in the list:

<Frame>
  ![The image shows the Amazon S3 Management Console with a notification of a successfully created bucket named "kk-static-demo." The console displays the bucket's details, including its creation date.](https://kodekloud.com/kk-media/image/upload/v1752869255/notes-assets/images/Amazon-Simple-Storage-Service-Amazon-S3-Demo-Static-Website/amazon-s3-console-kk-static-demo.jpg)
</Frame>

***

## 2. Upload Website Files

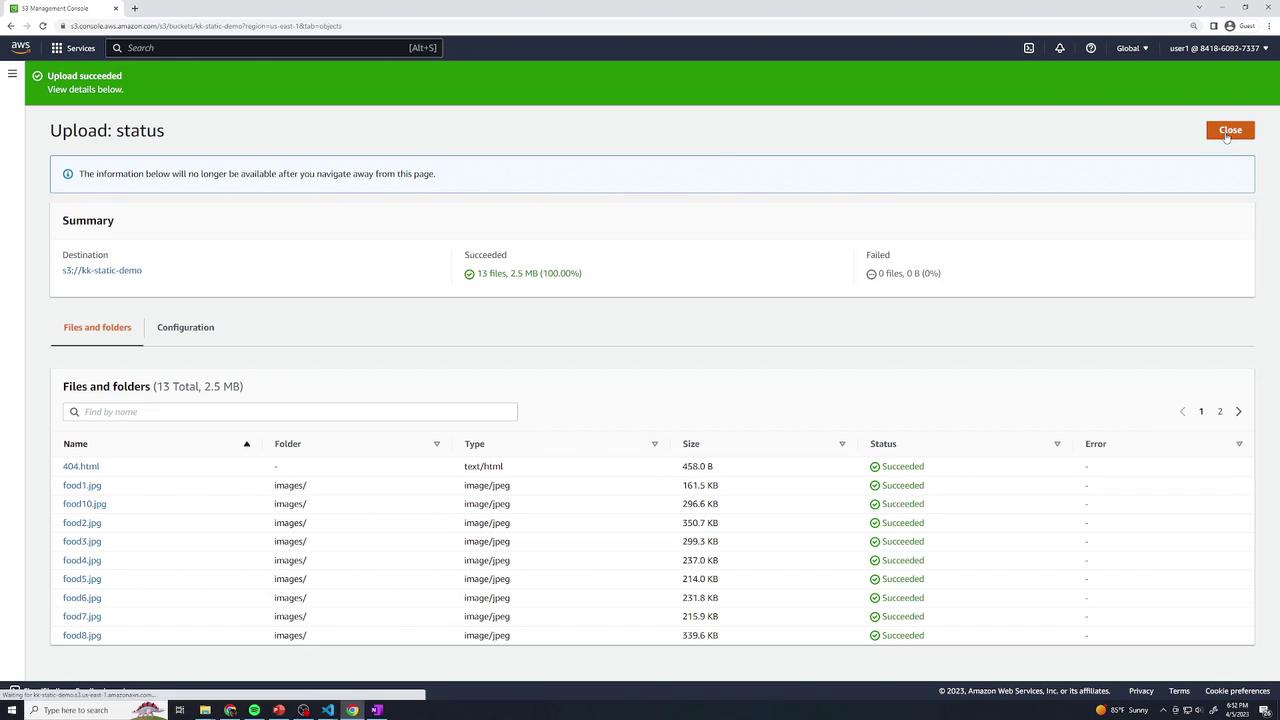
1. Click your bucket name to open it.
2. Drag & drop `index.html`, `index.css`, `404.html`, and the `images/` folder into the console.
3. Choose **Upload** and confirm.
<Frame>
  ![The image shows an AWS S3 Management Console screen with a successful upload status for 13 files totaling 2.5 MB. The files listed include images and an HTML file, all marked as succeeded.](https://kodekloud.com/kk-media/image/upload/v1752869256/notes-assets/images/Amazon-Simple-Storage-Service-Amazon-S3-Demo-Static-Website/aws-s3-management-console-upload-success.jpg)
</Frame>

***

## 3. Enable Static Website Hosting

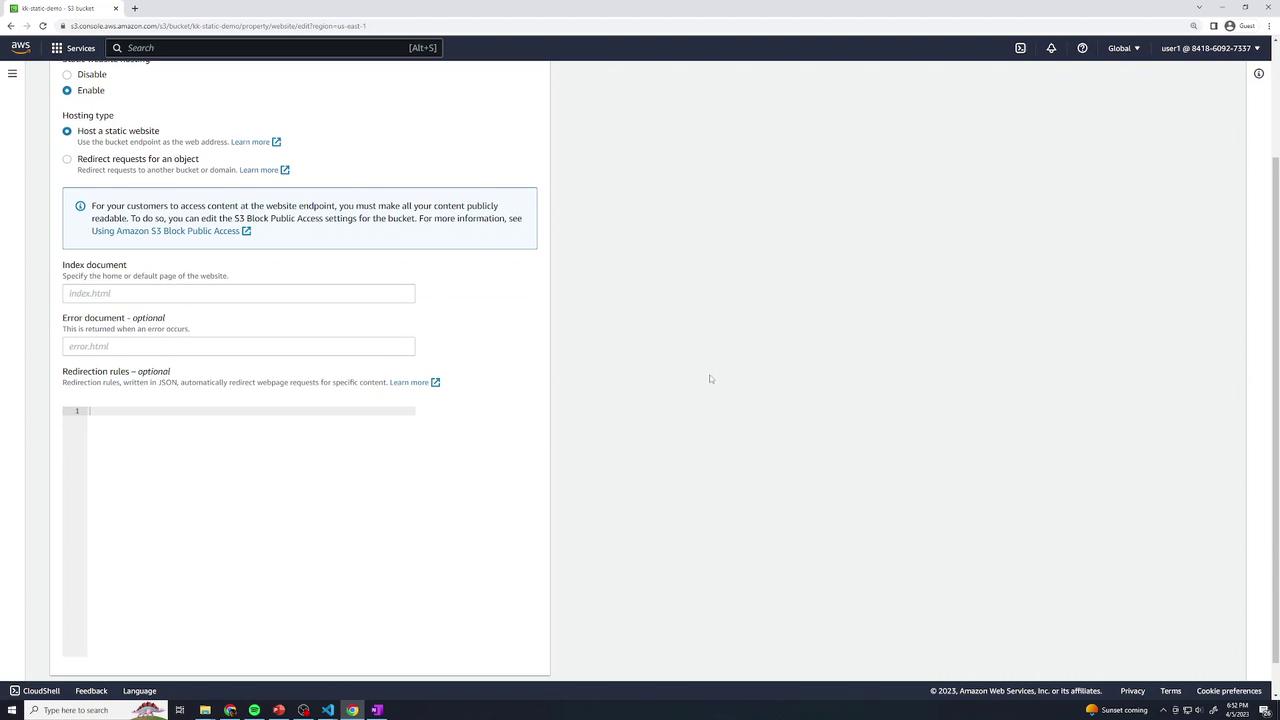
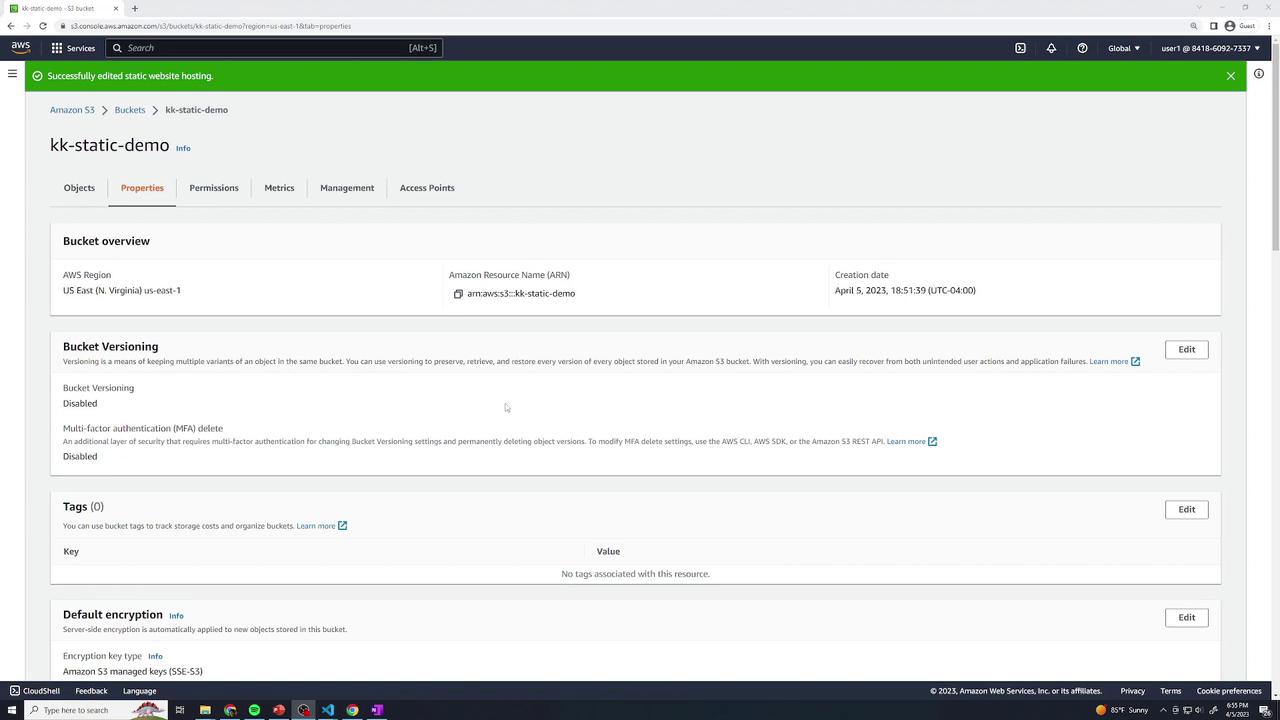
1. In your bucket, navigate to **Properties** → **Static website hosting** → **Edit**.
2. Select **Enable**.
3. For **Index document**, enter `index.html`.
4. For **Error document**, enter `404.html`.
5. Save changes.
<Frame>
  ![The image shows an Amazon Web Services (AWS) S3 bucket configuration page for setting up a static website. It includes options for enabling website hosting, specifying index and error documents, and adding redirection rules.](https://kodekloud.com/kk-media/image/upload/v1752869257/notes-assets/images/Amazon-Simple-Storage-Service-Amazon-S3-Demo-Static-Website/aws-s3-bucket-static-website-setup.jpg)
</Frame>

Review the bucket’s static hosting properties:
<Frame>
  ![The image shows an Amazon S3 bucket properties page for "kk-static-demo," displaying details like bucket versioning, tags, and default encryption settings. The bucket is located in the US East (N. Virginia) region.](https://kodekloud.com/kk-media/image/upload/v1752869258/notes-assets/images/Amazon-Simple-Storage-Service-Amazon-S3-Demo-Static-Website/amazon-s3-bucket-properties-kk-static-demo.jpg)
</Frame>

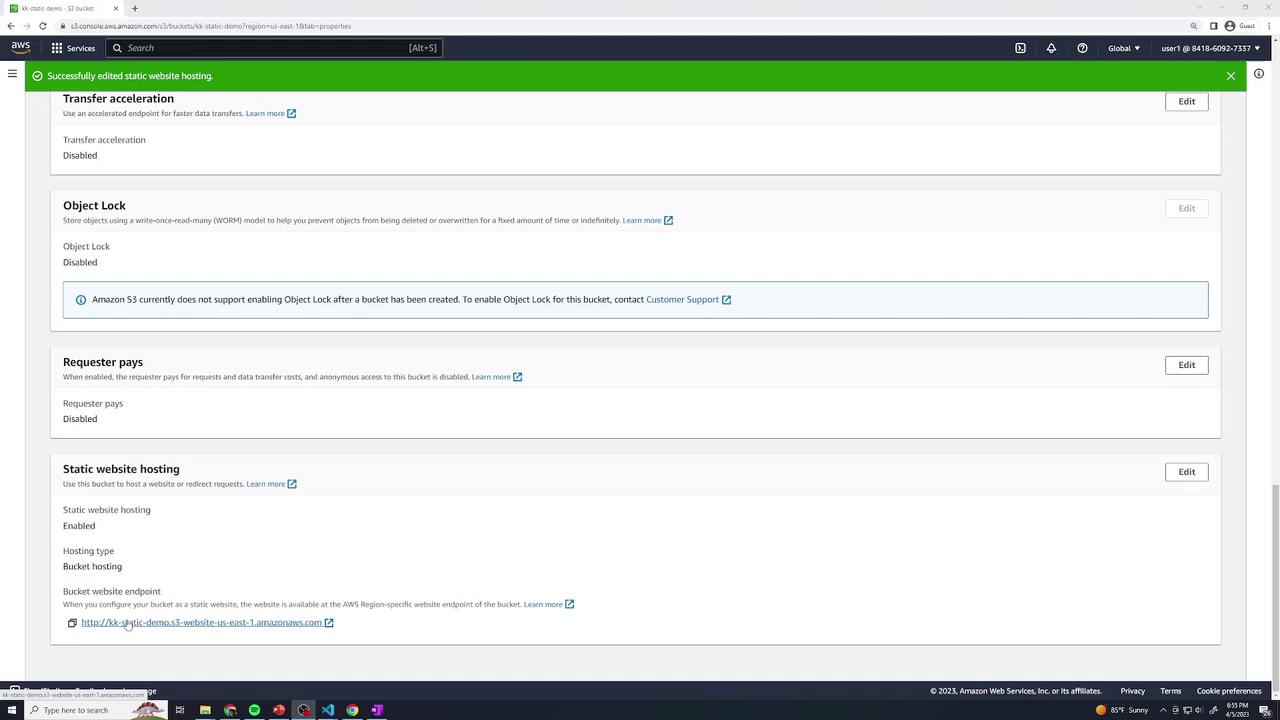
You should see a **Bucket website endpoint** listed:
<Frame>
  ![The image shows an Amazon S3 console page with settings for a bucket, including options for transfer acceleration, object lock, requester pays, and static website hosting. Static website hosting is enabled, and a bucket website endpoint is provided.](https://kodekloud.com/kk-media/image/upload/v1752869259/notes-assets/images/Amazon-Simple-Storage-Service-Amazon-S3-Demo-Static-Website/amazon-s3-bucket-settings-console.jpg)
</Frame>

At this point, clicking the endpoint yields **Access Denied** since the bucket is private.

***

## 4. Configure Public Access

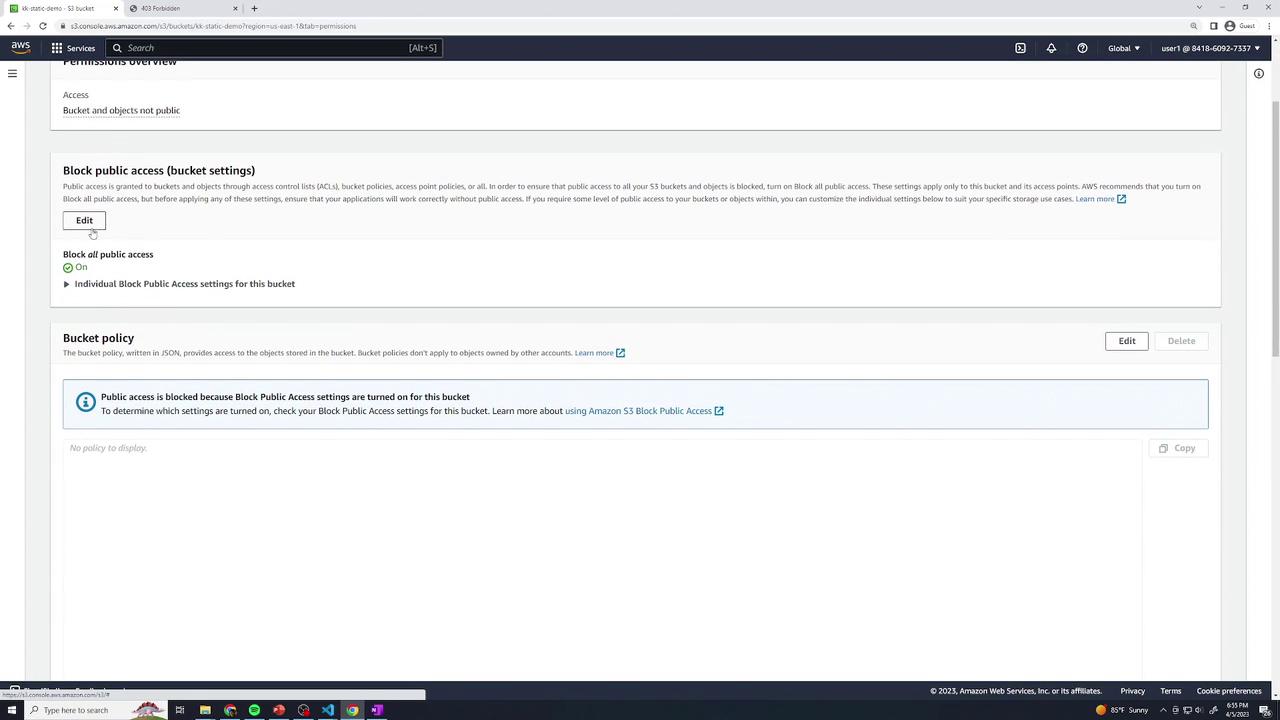
### 4.1 Disable Block Public Access

1. Go to **Permissions** → **Block public access (bucket settings)** → **Edit**.
2. Uncheck **Block all public access** and confirm.
<Frame>
  ![The image shows an AWS S3 bucket permissions settings page, where public access is blocked. The "Block all public access" option is turned on, and there is a note about the bucket policy.](https://kodekloud.com/kk-media/image/upload/v1752869260/notes-assets/images/Amazon-Simple-Storage-Service-Amazon-S3-Demo-Static-Website/aws-s3-bucket-permissions-blocked.jpg)
</Frame>

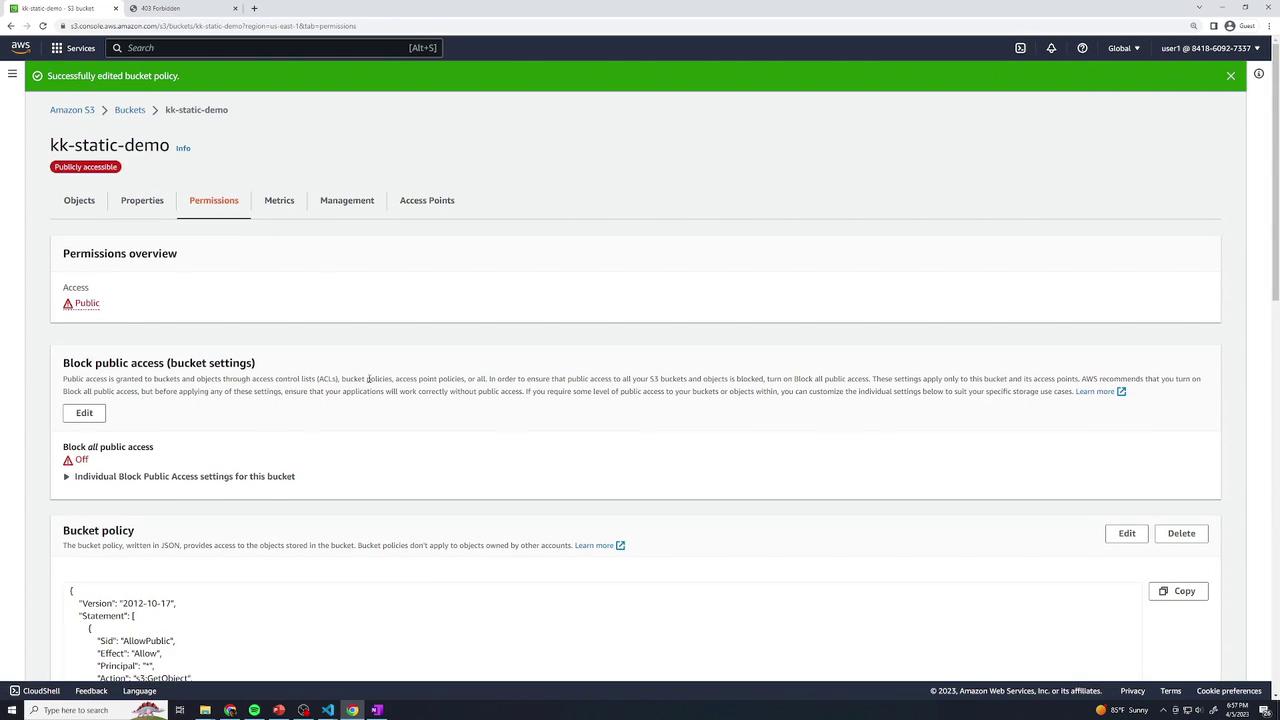
### 4.2 Add a Bucket Policy

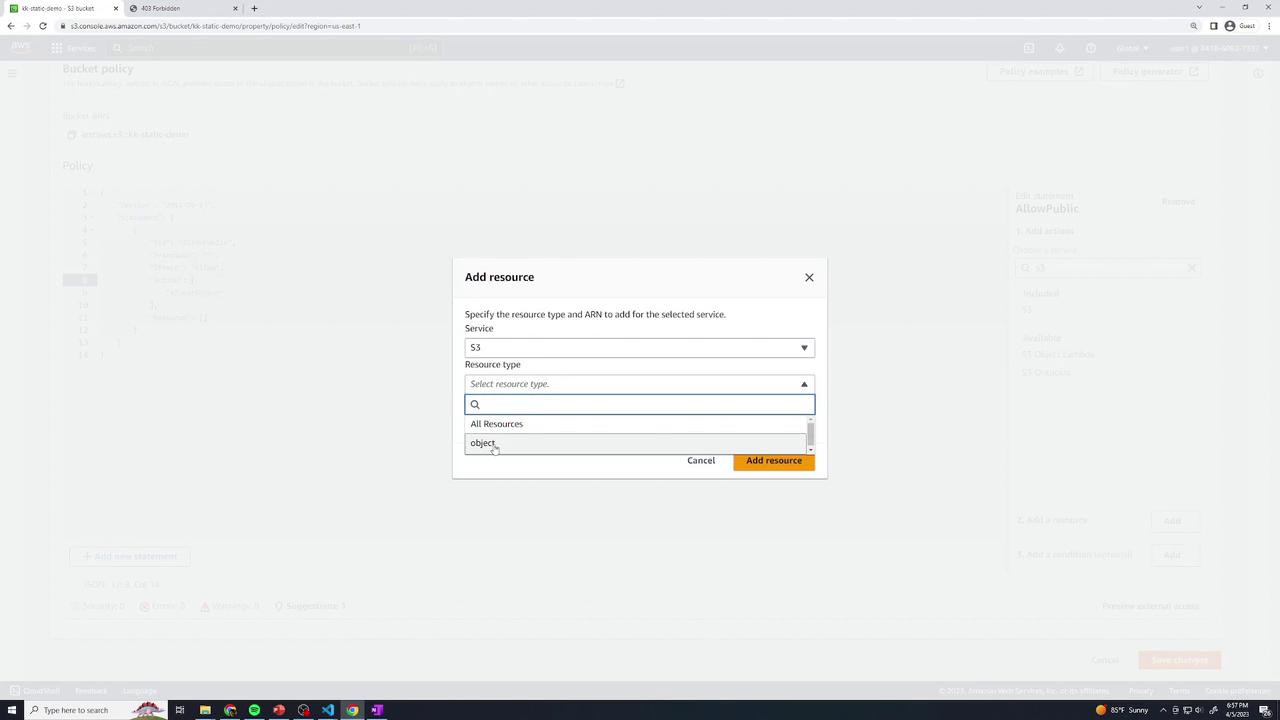
Still under **Permissions**, select **Bucket policy** and paste the following JSON (replace the ARN with your bucket name):

```json theme={null}
{
  "Version": "2012-10-17",
  "Statement": [
    {
      "Sid": "AllowPublic",
      "Principal": "*",
      "Effect": "Allow",
      "Action": ["s3:GetObject"],
      "Resource": ["arn:aws:s3:::kk-static-demo/*"]
    }
  ]
}
```

Save the policy. Alternatively, use the **Add a resource** UI:
<Frame>
  ![The image shows a web interface for adding a resource in AWS, specifically for an S3 service, with a dropdown menu for selecting the resource type.](https://kodekloud.com/kk-media/image/upload/v1752869261/notes-assets/images/Amazon-Simple-Storage-Service-Amazon-S3-Demo-Static-Website/aws-s3-resource-add-interface.jpg)
</Frame>

Your bucket will now appear publicly accessible:
<Frame>
  ![The image shows an Amazon S3 bucket permissions page, indicating that the bucket "kk-static-demo" is publicly accessible, with options to block public access and a section displaying the bucket policy in JSON format.](https://kodekloud.com/kk-media/image/upload/v1752869262/notes-assets/images/Amazon-Simple-Storage-Service-Amazon-S3-Demo-Static-Website/amazon-s3-bucket-permissions-public-access.jpg)
</Frame>

<Callout icon="triangle-alert" color="#FF6B6B">
  Making your bucket public exposes all objects. Ensure only intended files are uploaded.
</Callout>

***

## 5. Test Your Static Website

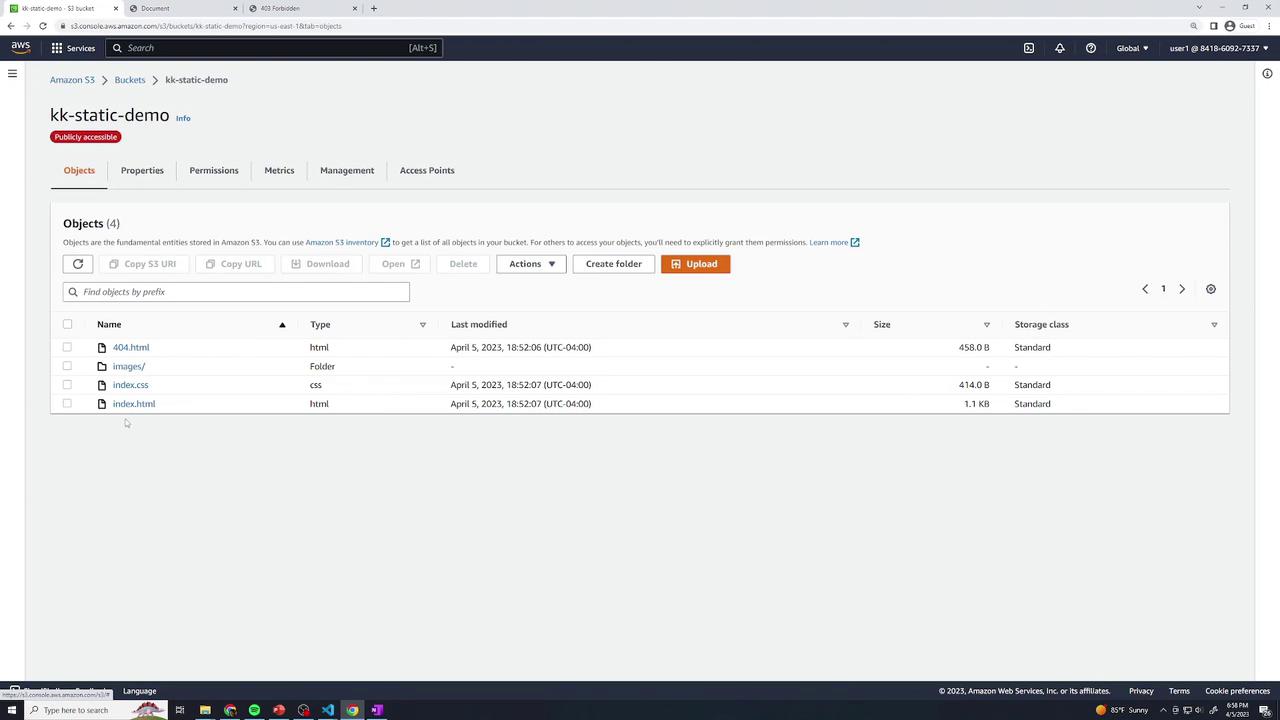
Return to **Properties** → **Static website hosting** and click the endpoint link. You should see the food gallery home page.

You do **not** need to append `/index.html`—the index document is served automatically.
<Frame>
  ![The image shows an Amazon S3 bucket interface with a list of objects, including HTML and CSS files, and a folder named "images." The bucket is labeled as "publicly accessible."](https://kodekloud.com/kk-media/image/upload/v1752869263/notes-assets/images/Amazon-Simple-Storage-Service-Amazon-S3-Demo-Static-Website/amazon-s3-bucket-interface-html-css.jpg)
</Frame>

| Resource                    | URL Pattern                                                                |
| --------------------------- | -------------------------------------------------------------------------- |
| Home page                   | `http://kk-static-demo.s3-website-<region>.amazonaws.com/`                 |
| Explicit index              | `http://kk-static-demo.s3-website-<region>.amazonaws.com/index.html`       |
| Specific image              | `http://kk-static-demo.s3-website-<region>.amazonaws.com/images/food1.jpg` |
| Missing resource (404 page) | `http://kk-static-demo.s3-website-<region>.amazonaws.com/does-not-exist`   |

***

## References

* [Amazon S3 Static Website Hosting](https://docs.aws.amazon.com/AmazonS3/latest/userguide/WebsiteHosting.html)
* [AWS S3 Bucket Policies](https://docs.aws.amazon.com/AmazonS3/latest/userguide/example-bucket-policies.html)
* [AWS CLI S3 Commands](https://docs.aws.amazon.com/cli/latest/reference/s3/index.html)

<CardGroup>
  <Card title="Watch Video" icon="video" cta="Learn more" href="https://learn.kodekloud.com/user/courses/amazon-simple-storage-service-amazon-s3/module/64c3572f-57b6-4263-8818-9809392a98a1/lesson/04a11917-5bf1-4abc-91e9-c416fe96505e" />

  <Card title="Practice Lab" icon="installation" cta="Learn more" href="https://learn.kodekloud.com/user/courses/amazon-simple-storage-service-amazon-s3/module/64c3572f-57b6-4263-8818-9809392a98a1/lesson/c7d7b0f0-871a-4cbd-ad2d-61df73b783e4" />
</CardGroup>
