> ## Documentation Index
> Fetch the complete documentation index at: https://notes.kodekloud.com/llms.txt
> Use this file to discover all available pages before exploring further.
# Scaling the Nodes using Azure CLI
> This article explains how to scale Azure Kubernetes Service nodes using Azure CLI and discusses autoscaling components.
Our Azure Kubernetes Service (AKS) cluster is configured to support up to 30 pods, but only 16 are currently running. Before we scale the nodes manually, let’s review how AKS autoscaling works and when you might need to intervene.
## AKS Autoscaling Components
AKS provides two core autoscaler types to ensure your workloads have the right resources:
| Autoscaler | Purpose | Scope |
| ------------------------------- | ---------------------------------------------------------------------- | --------------------------- |
| Cluster Autoscaler | Adds or removes nodes based on unschedulable pods and node utilization | Node pool level |
| Horizontal Pod Autoscaler (HPA) | Adjusts pod replica count based on real-time CPU/memory metrics | Deployment/ReplicaSet level |
### Cluster Autoscaler
The Cluster Autoscaler watches for pending pods that cannot be scheduled due to insufficient node capacity. When required, it scales out the node pool by adding new VMs. Conversely, when nodes are underutilized, it can remove nodes after cordoning and draining them.
If you set both the minimum and maximum node count to the same value, the Cluster Autoscaler cannot expand or shrink your node pool.
### Horizontal Pod Autoscaler (HPA)
The HPA relies on the Kubernetes Metrics Server to monitor pod resource usage (CPU, memory, custom metrics, etc.). When usage crosses user-defined thresholds, HPA automatically increases or decreases the number of pod replicas.
#### How HPA Works
1. Polls metrics every 60 seconds by default.
2. Retrieves current resource usage from the Metrics Server.
3. Compares usage against your target thresholds.
4. Adjusts the replica count via the deployment controller.
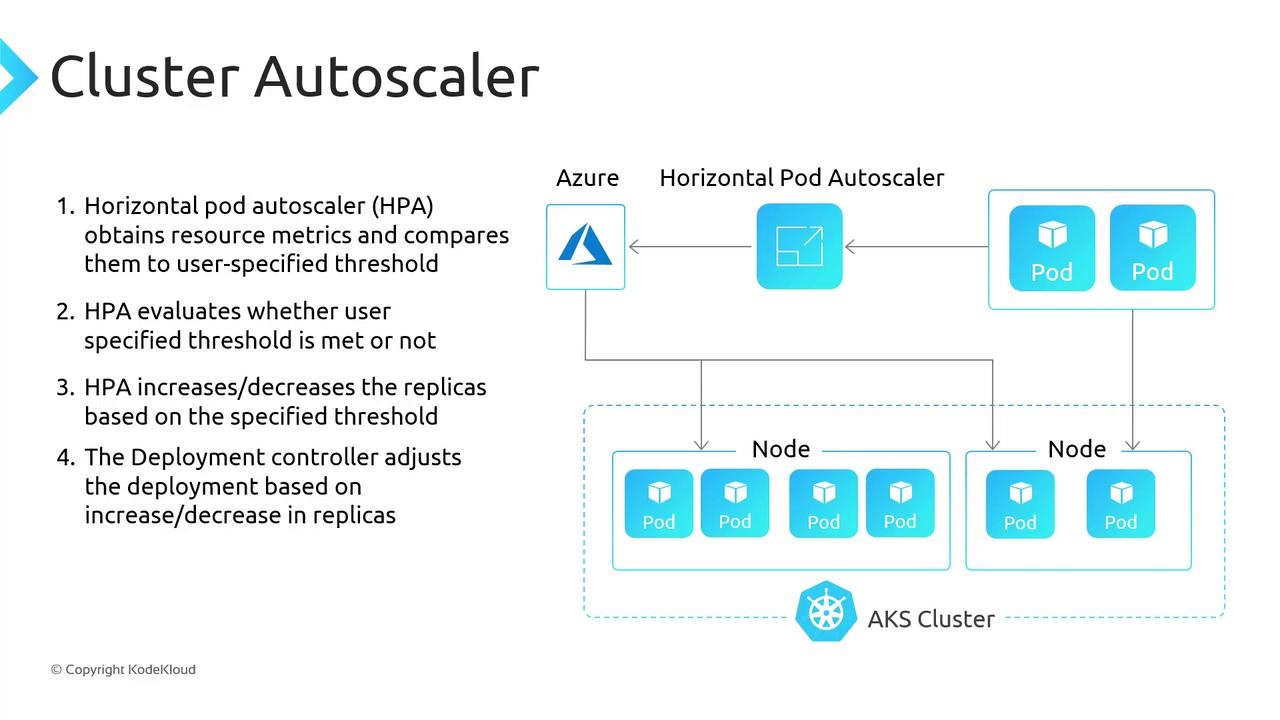
You can customize the HPA polling interval and thresholds in your `HorizontalPodAutoscaler` manifest.
## Manually Scaling the AKS Node Pool
Since our Cluster Autoscaler is locked to a fixed node count (1–1), we’ll use Azure CLI to increase the pool to two nodes.
### 1. Verify System Pods
Run the following commands to confirm that system components are healthy:
```bash theme={null}
kubectl get pods --namespace kube-node-lease
kubectl get pods --namespace kube-public
kubectl get pods --namespace kube-system
```
Example output:
```bash theme={null}
NAME READY STATUS RESTARTS AGE
coredns-596bbf8b84-lwt4c 1/1 Running 0 131m
metrics-server-7d7ad478s-wfdd 2/2 Running 0 130m
kube-proxy-dx4s4 1/1 Running 0 131m
...
```
### 2. Scale the Node Pool
Use `az aks scale` to adjust the node count:
```bash theme={null}
az aks scale \
--resource-group RG1-KodeKloud-AKS \
--name AKS1-KodeKloudApp \
--node-count 2
```
This command will provision a second VM in your AKS node pool. Provisioning may take a few minutes.
### 3. Confirm Two Ready Nodes
After scaling, verify the node count:
```bash theme={null}
kubectl get nodes
```
You should see two nodes, both in the `Ready` state.
### 4. Verify Pod Scheduling
Finally, ensure all pods are scheduled across the nodes:
```bash theme={null}
kubectl get pods --all-namespaces
```
Pending pods should now be distributed on the new node.
## Scaling Down
When you reduce your workload (for example, scaling your deployment replicas down to two), you may want to shrink the node pool back to one. Since our Cluster Autoscaler remains disabled, we need to scale down manually:
```bash theme={null}
az aks scale \
--resource-group RG1-KodeKloud-AKS \
--name AKS1-KodeKloudApp \
--node-count 1
```
This command will cordon and drain the extra node, then remove it from the pool.
## Links and References
* [AKS Cluster Autoscaler Documentation](https://docs.microsoft.com/azure/aks/cluster-autoscaler)
* [Horizontal Pod Autoscaler (HPA)](https://kubernetes.io/docs/tasks/run-application/horizontal-pod-autoscale/)
* [Azure CLI `az aks scale`](https://docs.microsoft.com/cli/azure/aks#az_aks_scale)
* [Kubernetes Metrics Server](https://github.com/kubernetes-sigs/metrics-server)