CKA Certification Course - Certified Kubernetes Administrator
Helm Components
In this lesson, you will explore the essential components of Helm and learn how they interact with a Kubernetes cluster. We’ll dive into the Helm CLI, charts, releases, and metadata management, providing a detailed look at each aspect.
Helm CLI and Overall Structure
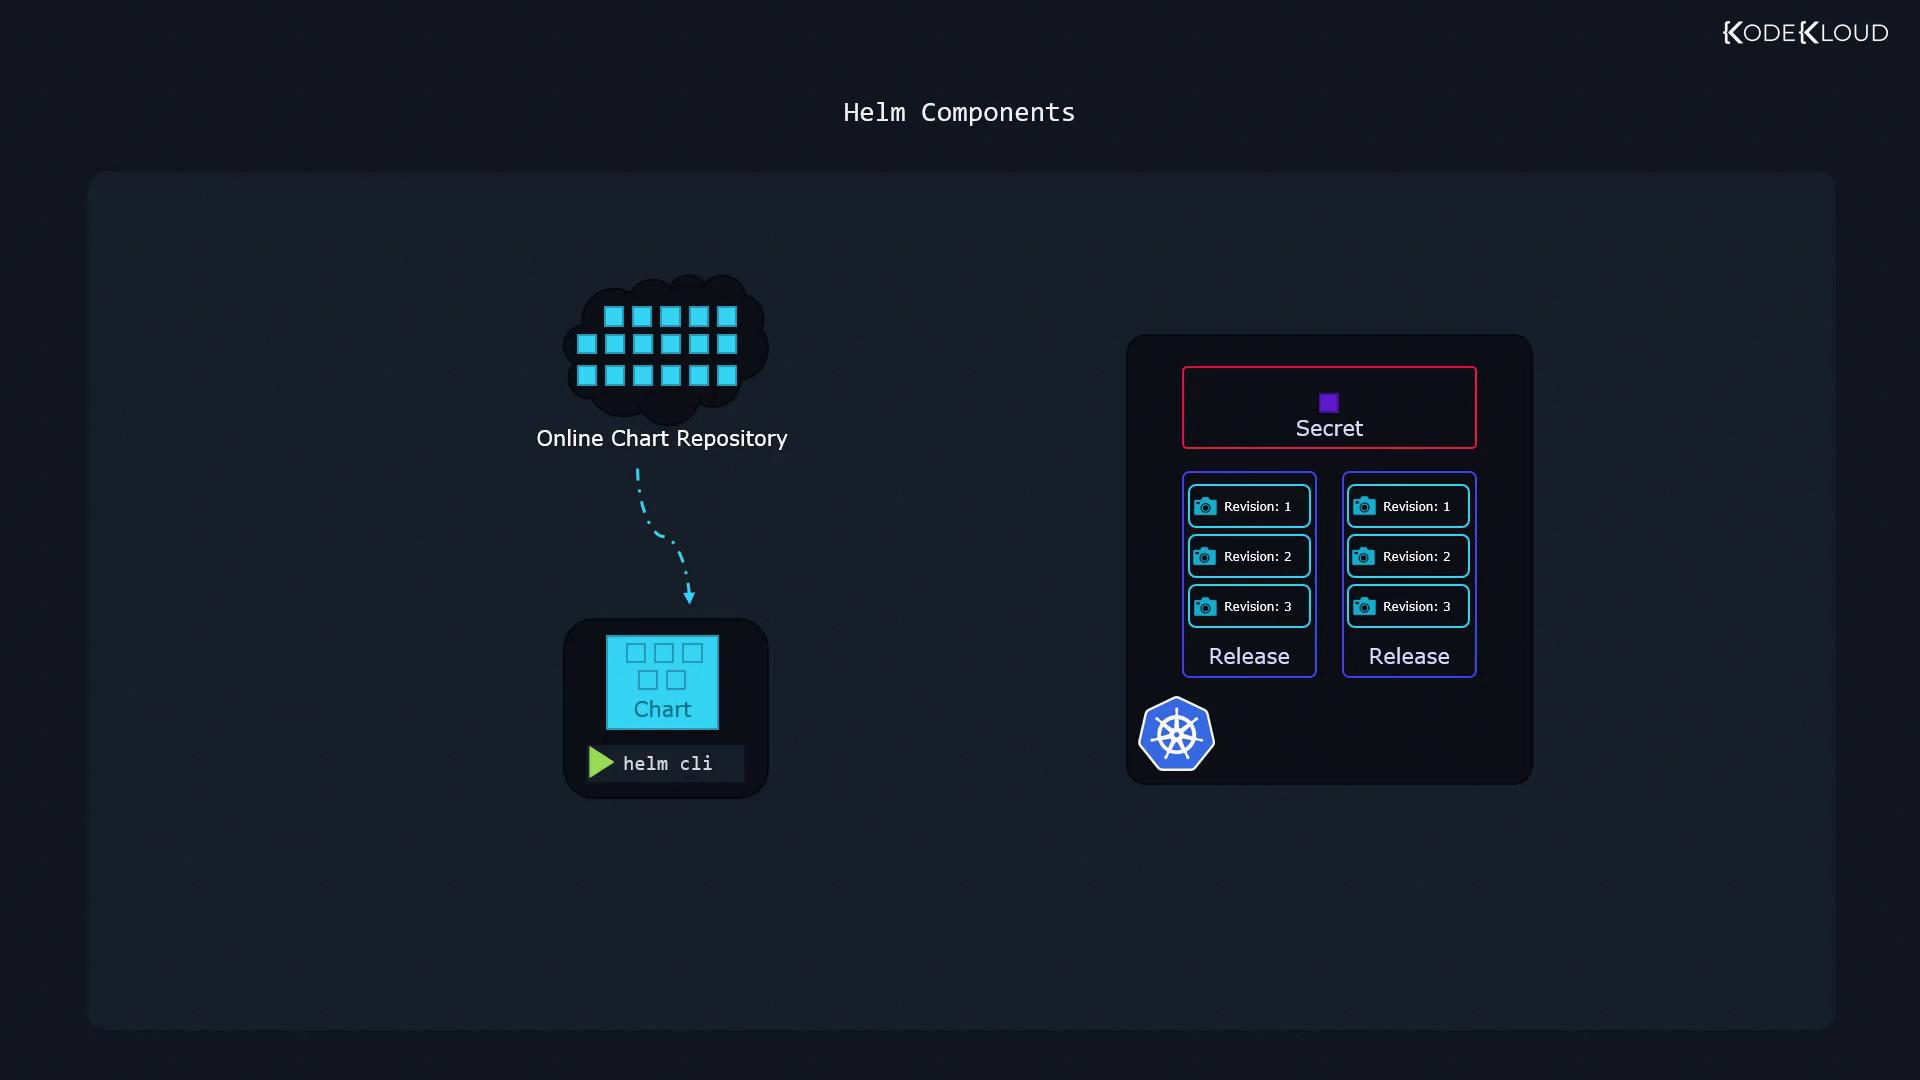
The Helm CLI is the command-line tool installed on your local machine. It enables you to perform actions such as installing, upgrading, and rolling back applications. A Helm chart is a collection of files that contains all the instructions needed to create the Kubernetes objects required by your application. When you deploy a chart, Helm creates a release. Each installation becomes a release, and updating the application (by modifying configurations like image versions or replica counts) results in a new revision of that release.
Helm stores metadata not on your local system but within your Kubernetes cluster as Kubernetes secrets. This ensures that metadata stays accessible to anyone working with the cluster and persists through cluster restarts.
Charts and Templating
Helm charts are packages that include several resource definition files, such as templates for Deployments, Services, and more. The templating mechanism allows you to separate configuration values (for example, those provided in a values.yaml file) from the resource definitions.
Consider the following basic example for a simple HelloWorld application deploying an Nginx-based web server:
# service.yaml
apiVersion: v1
kind: Service
metadata:
  name: hello-world
spec:
  type: NodePort
  ports:
    - port: 80
      targetPort: http
      protocol: TCP
      name: http
  selector:
    app: hello-world
# deployment.yaml
apiVersion: apps/v1
kind: Deployment
metadata:
  name: hello-world
spec:
  replicas: {{ .Values.replicaCount }}
  selector:
    matchLabels:
      app: hello-world
  template:
    metadata:
      labels:
        app: hello-world
    spec:
      containers:
        - name: nginx
          image: "{{ .Values.image.repository }}"
          ports:
            - name: http
              containerPort: 80
              protocol: TCP
# values.yaml
replicaCount: 1
image:
  repository: nginx
In this example, templating substitutes values from the values.yaml file into the resource definitions. This strategy makes it simple to customize your application without modifying the underlying templates.
Tip
Many public repositories offer Helm charts, but you might need to adjust the values.yaml file to tailor the installation to your specific requirements. In this lesson, we use two applications to illustrate these concepts: a simple HelloWorld application and a more complex WordPress site.
Below is an example of an advanced templating approach in a Helm chart:
# deployment-advanced.yaml
apiVersion: {{ include "common.capabilities.deployment.apiVersion" . }}
kind: Deployment
metadata:
  name: {{ include "common.names.fullname" . }}
  namespace: {{ .Release.Namespace | quote }}
  labels:
    {{- include "common.labels.standard" . | nindent 4 }}
    {{- if .Values.commonLabels }}
    {{- include "common.tplvalues.render" (dict "value" .Values.commonLabels "context" $) | nindent 4 }}
    {{- end }}
    {{- if .Values.commonAnnotations }}
    annotations: {{- include "common.tplvalues.render" (dict "value" .Values.commonAnnotations "context" $) | nindent 6 }}
    {{- end }}
spec:
  selector:
    matchLabels: {{- include "common.labels.matchLabels" . | nindent 6 }}
  {{- if .Values.updateStrategy }}
  strategy: {{- toYaml .Values.updateStrategy | nindent 4 }}
  {{- end }}
  {{- if not .Values.autoscaling.enabled }}
  replicas: {{ .Values.replicaCount }}
  {{- end }}
This snippet demonstrates how to leverage helper templates and conditional logic for dynamically rendering deployment configurations based on provided values.
Releases and Versioning
Every deployment of a Helm chart results in a new release. Releases allow you to run multiple instances of the same chart concurrently, with each release maintaining its own revision history. This functionality is especially useful when you need separate releases for production and development environments, even though they may be based on the same chart.
For instance, you can deploy multiple instances of a WordPress website using distinct release names:
# helm install [release-name] [chart-name]
$ helm install my-site bitnami/wordpress
$ helm install my-second-site bitnami/wordpress
Each release is tracked independently, allowing you to manage, upgrade, or roll back installations individually.
Helm Repositories and Artifact Hub
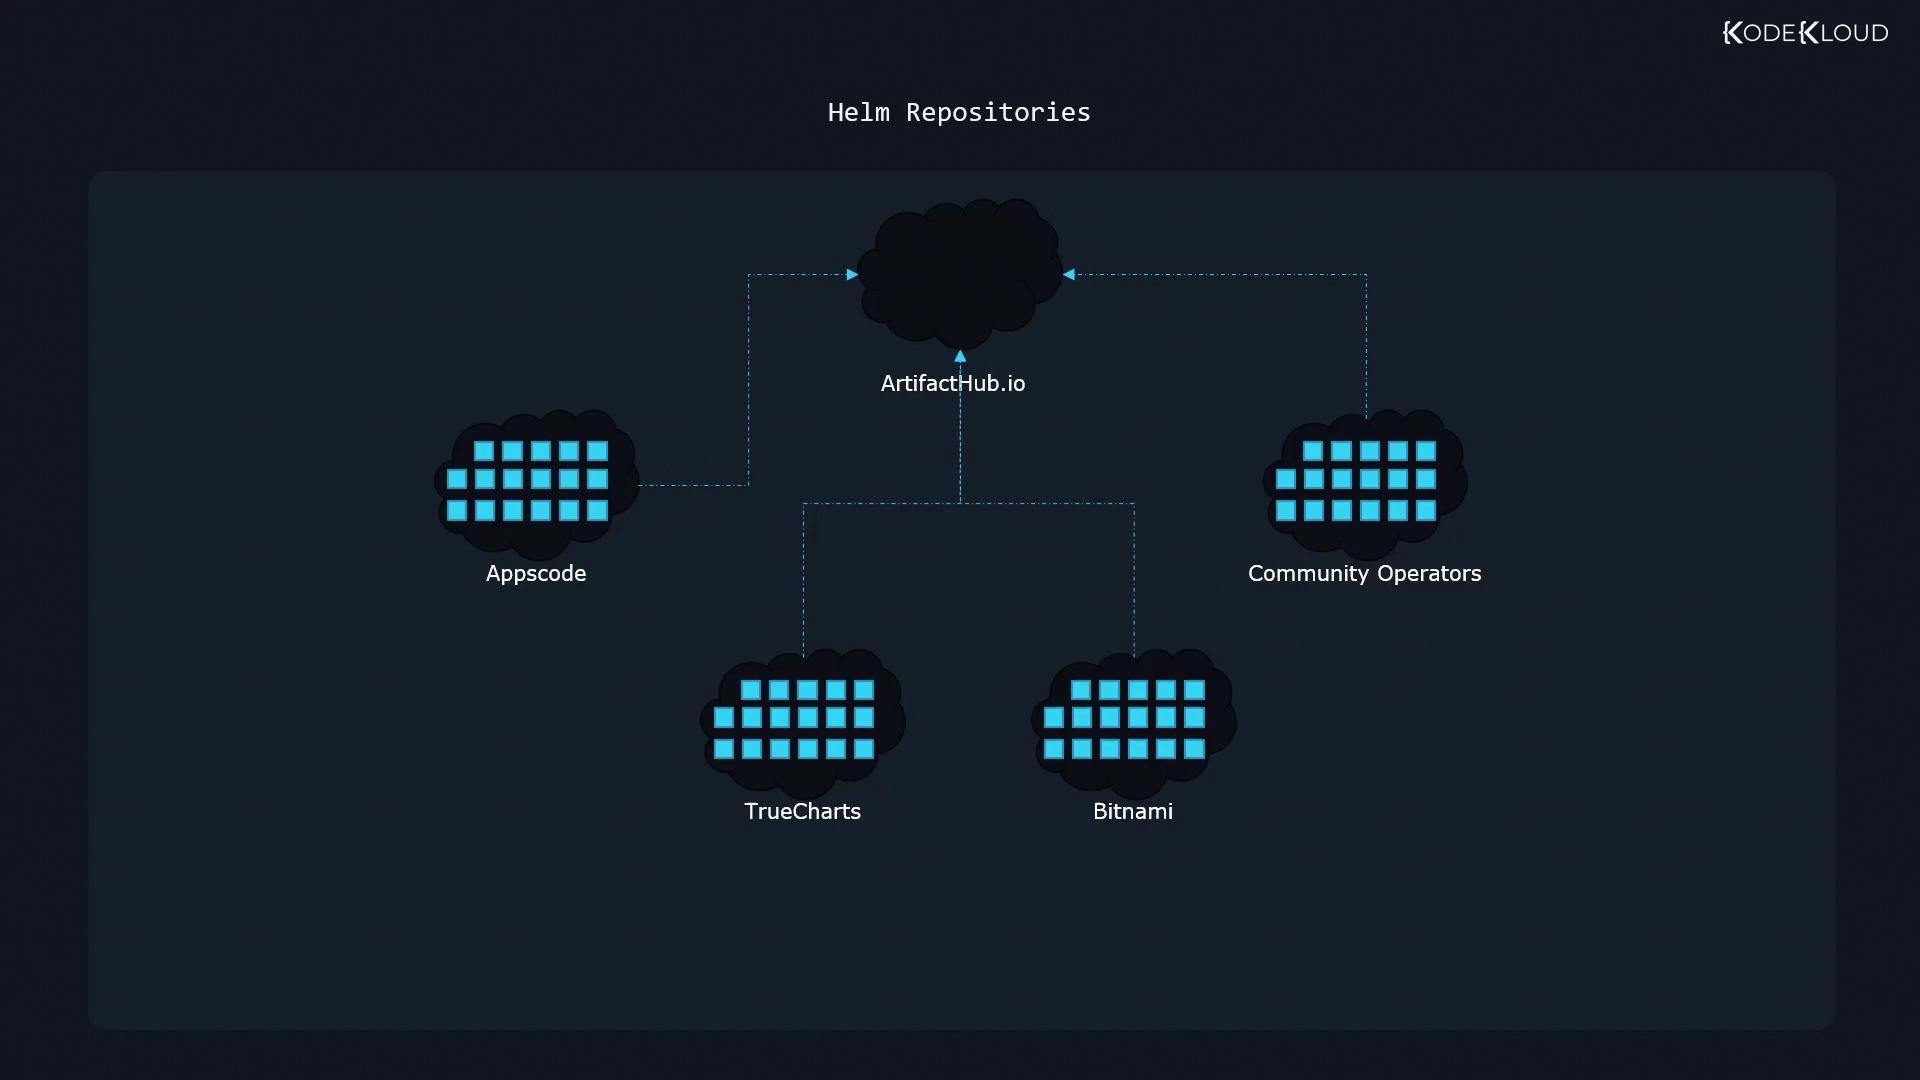
Helm charts are available across numerous public repositories managed by providers such as Appscode, Community Operators, TrueCharts, and Bitnami. Instead of searching through each repository separately, Artifact Hub aggregates these resources in one convenient location.
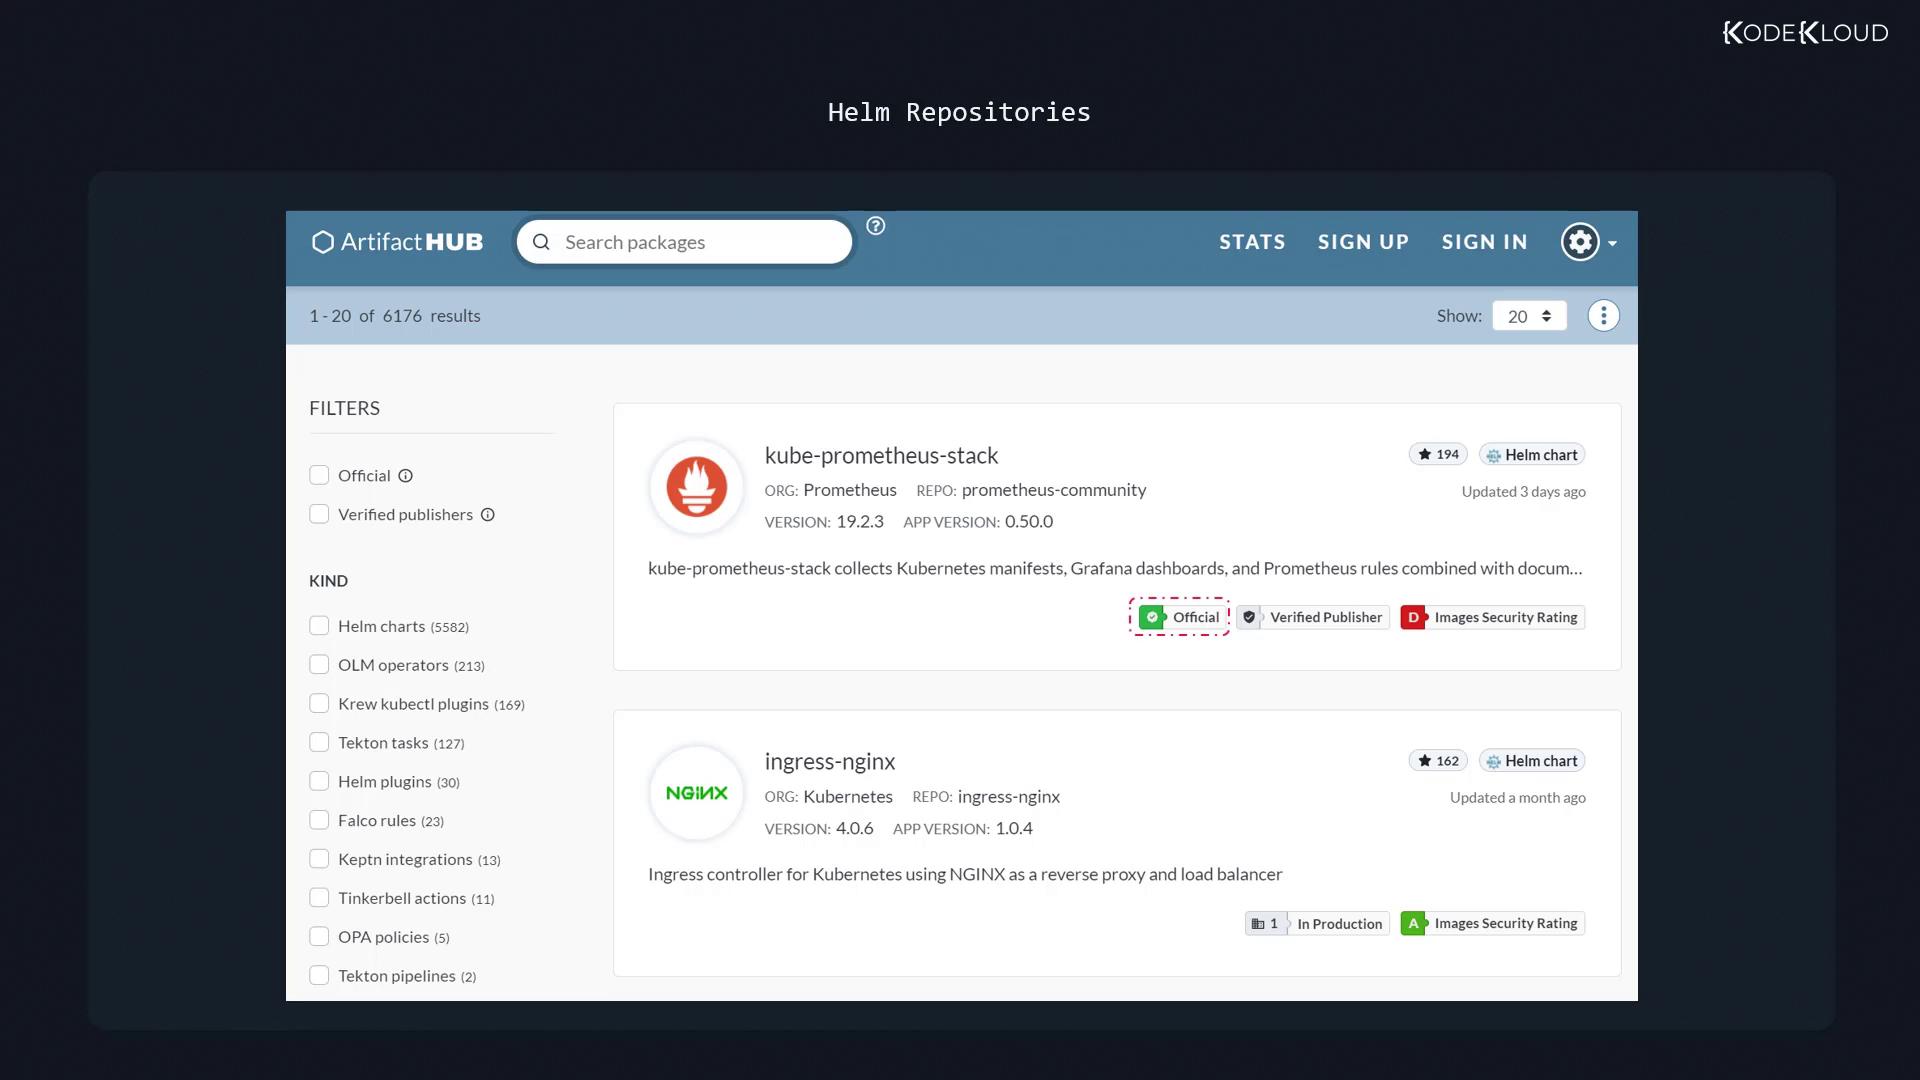
Artifact Hub currently hosts over 6,300 packages, making it easy to search for and browse available charts. Official or verified publisher badges help identify reputable charts, so it is generally recommended to use these trusted options.
Conclusion
This lesson has provided a comprehensive overview of Helm’s core components: the CLI, charts with templating, releases, and metadata management within your Kubernetes cluster. Mastering these fundamentals sets the foundation for more advanced topics, including chart customization and package installation from various Helm repositories in future lessons.
Thank you for reading, and see you in the next lesson.
Watch Video
Watch video content