CKA Certification Course - Certified Kubernetes Administrator
Application Lifecycle Management
Vertical Pod Autoscaling VPA 2025 Updates
In this article, we explore how to optimize Kubernetes workloads by scaling them vertically using the Vertical Pod Autoscaler (VPA). As a Kubernetes administrator, your goal is to ensure that applications always receive optimal resource allocations, such as CPU and memory. Let’s start by examining a typical deployment configuration for a pod that specifies a CPU request of 250 millicores and a limit of 500 millicores:
apiVersion: apps/v1
kind: Deployment
metadata:
  name: my-app
spec:
  replicas: 1
  selector:
    matchLabels:
      app: my-app
  template:
    metadata:
      labels:
        app: my-app
    spec:
      containers:
        - name: my-app
          image: nginx
          resources:
            requests:
              cpu: "250m"
            limits:
              cpu: "500m"
In this setup, the pod cannot use more than 500 millicores of CPU. To monitor its resource consumption, execute the following command (ensure that the metrics server is installed in your cluster):
$ kubectl top pod my-app-pod
NAME        CPU(cores)   MEMORY(bytes)
my-app-pod  450m         350Mi
If the pod's CPU consumption reaches a predefined threshold, you might need to update its resource specifications manually. For example, you can increase the CPU request to "1" while keeping the limit unchanged:
apiVersion: apps/v1
kind: Deployment
metadata:
  name: my-app
spec:
  replicas: 1
  selector:
    matchLabels:
      app: my-app
  template:
    metadata:
      labels:
        app: my-app
    spec:
      containers:
      - name: my-app
        image: nginx
        resources:
          requests:
            cpu: "1"
          limits:
            cpu: "500m"
To apply this change, run:
$ kubectl edit deployment my-app
After saving, Kubernetes will terminate the current pod and create a new one with the updated resource configuration.
Note
Manually updating pods can be time-consuming and error-prone. Kubernetes provides the Vertical Pod Autoscaler (VPA) to automate this process.
Kubernetes distinguishes between scaling methods. While the Horizontal Pod Autoscaler (HPA) adds or removes pods based on demand, the VPA continuously monitors metrics and automatically adjusts the CPU and memory allocation of each pod. Since VPA is not enabled by default, you must install it manually. Start by applying the VPA definition file from the autoscaler GitHub repository:
$ kubectl apply -f https://github.com/kubernetes/autoscaler/releases/latest/download/vertical-pod-autoscaler.yaml
Verify that the VPA components are running in the kube-system namespace:
$ kubectl get pods -n kube-system | grep vpa
vpa-admission-controller-xxxx   Running
vpa-recommender-xxxx            Running
vpa-updater-xxxx                Running
The VPA deployment includes three key components:
- VPA Recommender: Continuously monitors resource usage via the Kubernetes metrics API, analyzes historical and live data, and provides optimized recommendations for CPU and memory.
- VPA Updater: Compares current pod resource settings against recommendations and evicts pods running with suboptimal resources. This eviction triggers the creation of new pods with updated configurations.
- VPA Admission Controller: Intercepts pod creation requests and mutates the pod specification based on the recommender's suggestions, ensuring that new pods start with the ideal resource configuration.
Next, create a VPA resource with a YAML definition. Unlike HPA, the VPA isn’t set up through imperative commands. The example below shows a configuration that monitors the "my-app" deployment, enforces minimum and maximum CPU limits, and uses the "Auto" update mode:
apiVersion: autoscaling.k8s.io/v1
kind: VerticalPodAutoscaler
metadata:
  name: my-app-vpa
spec:
  targetRef:
    apiVersion: apps/v1
    kind: Deployment
    name: my-app
  updatePolicy:
    updateMode: "Auto"
  resourcePolicy:
    containerPolicies:
      - containerName: "my-app"
        minAllowed:
          cpu: "250m"
        maxAllowed:
          cpu: "2"
        controlledResources: ["cpu"]
In "Auto" mode, the VPA updater behaves similarly to a "recreate" strategy by terminating pods that run with non-optimal resources, allowing new pods to be created with the recommended values. In the future, when Kubernetes supports in-place updates, VPA will update pods’ resources without needing a full restart.
To inspect the resource recommendations provided by VPA for your deployment, run:
$ kubectl describe vpa my-app-vpa
You might see an output similar to this, which indicates a recommended CPU value of 1.5:
Recommendations:
  Target:
    Cpu: 1.5
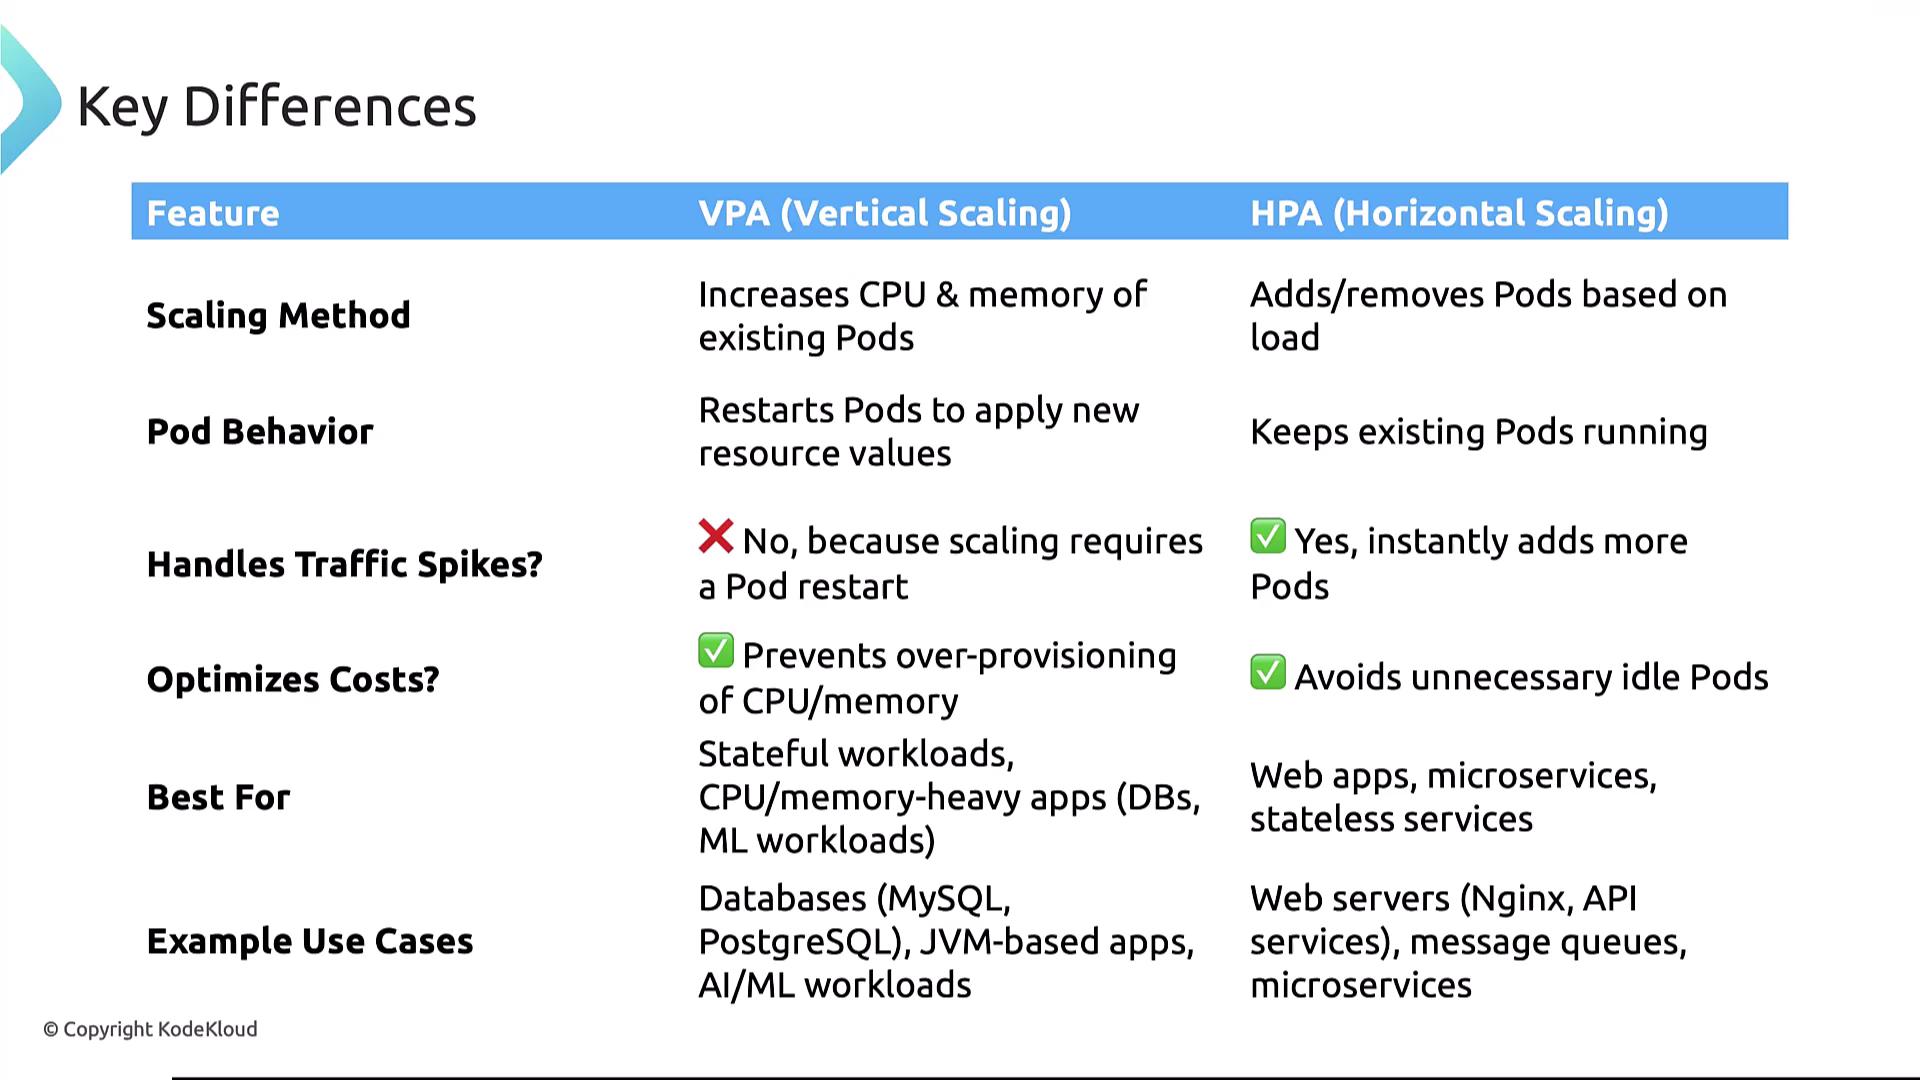
Comparing Vertical and Horizontal Pod Autoscaling
Understanding when to use VPA versus HPA is crucial for efficient resource management:
| Feature | Vertical Pod Autoscaling (VPA) | Horizontal Pod Autoscaling (HPA) |
|---|---|---|
| Scaling Method | Adjusts CPU and memory settings of individual pods (may restart pods for changes). | Increases or decreases the number of pods to distribute load. |
| Pod Behavior | May cause temporary downtime during pod restarts. | Scales pods seamlessly without interrupting existing ones. |
| Traffic Handling | Less effective for sudden spikes due to restart delays. | Ideal for handling rapid traffic spikes by adding more pods instantly. |
| Cost Optimization | Prevents over-provisioning by matching resource allocation with actual usage. | Reduces operational costs by avoiding underutilized pods. |
| Use Cases | Stateful workloads, databases, JVM-based applications, and AI workloads requiring precise tuning. | Stateless applications, web services, and microservices requiring rapid scaling. |

Key Takeaway
VPA focuses on optimizing resource allocation for individual pods, while HPA scales the number of pods to meet demand. The choice depends on your application’s workload characteristics and scaling requirements.
In summary, the Vertical Pod Autoscaler (VPA) enhances Kubernetes resource management by dynamically adjusting CPU and memory allocations based on real-time metrics. By applying these VPA techniques, you can ensure that your applications run efficiently without manual intervention.
Now, try deploying VPA in your Kubernetes environment to experience improved resource optimization and operational efficiency.
Watch Video
Watch video content
Practice Lab
Practice lab