This article provides a lab walkthrough on managing namespaces, pods, and services in Kubernetes.
This article provides a comprehensive lab walkthrough on namespaces in Kubernetes, addressing questions related to namespaces, pods, and services. Follow the steps below to learn how to manage namespaces effectively.
To determine the number of namespaces in your cluster, you can run either of the following commands:
Copy
kubectl get namespaces
or its shorthand:
Copy
kubectl get ns
The sample output below shows a list of namespaces:
Copy
controlplane ~ ✗ kubectl get namespacesNAME STATUS AGEdefault Active 6m50skube-system Active 6m49skube-public Active 6m49skube-node-lease Active 6m49sfinance Active 27smarketing Active 27sdev Active 27sprod Active 27smanufacturing Active 27sresearch Active 27s
And using the shorthand command:
Copy
controlplane ~ ✗ kubectl get nsNAME STATUS AGEdefault Active 6m55skube-system Active 6m54skube-public Active 6m54skube-node-lease Active 6m54sfinance Active 32smarketing Active 32sdev Active 32sprod Active 32smanufacturing Active 32sresearch Active 32s
In this example, there are a total of 10 namespaces.
Before creating a pod in the finance namespace, ensure that the namespace exists by running:
Copy
kubectl get namespaces
You should see output similar to:
Copy
controlplane ~ ❯ kubectl get namespacesNAME STATUS AGEdefault Active 6m50skube-system Active 6m49skube-public Active 6m49skube-node-lease Active 6m49sfinance Active 32smarketing Active 32sdev Active 32sprod Active 32smanufacturing Active 32sresearch Active 32s
Next, create a Redis pod named “redis” in the finance namespace with the following command:
Copy
kubectl run redis --image=redis -n finance
After successfully executing this command, you will see a confirmation message:
Copy
pod/redis created
You can verify the pod creation by listing the pods in the finance namespace:
Copy
kubectl get pods -n finance
Sample output:
Copy
NAME READY STATUS RESTARTS AGEpayroll 1/1 Running 0 2m20sredis 0/1 ContainerCreating 0 8s
Accessing the Database Service from the Blue Application
The blue application, a simple web application for connectivity tests, interacts with a database service. Depending on where the DB service is running, the access method varies.
Accessing the DB Service in the Same Namespace (Marketing)
In the marketing namespace, the blue application and its associated DB service coexist. To check the pods in this namespace, run:
Copy
kubectl get pods -n marketing
Expected output:
Copy
NAME READY STATUS RESTARTS AGEredis-db 1/1 Running 0 4m14sblue 1/1 Running 0 4m14s
Next, list the services in the marketing namespace:
Copy
kubectl get svc -n marketing
This yields an output similar to:
Copy
NAME TYPE CLUSTER-IP EXTERNAL-IP PORT(S) AGEblue-service NodePort 10.43.82.162 <none> 8080:30082/TCP 4m27sdb-service NodePort 10.43.134.33 <none> 6379:30758/TCP 4m27s
Since both the blue application and the DB service are in the same namespace, the application can reach the DB service simply by using its DNS name, which is: db-serviceand connecting via port 6379.
Another DB service is running in the dev namespace. To view it, execute:
Copy
kubectl get svc -n dev
The output might be as follows:
Copy
NAME TYPE CLUSTER-IP EXTERNAL-IP PORT(S) AGEdb-service ClusterIP 10.43.252.9 <none> 6379/TCP 5m22s
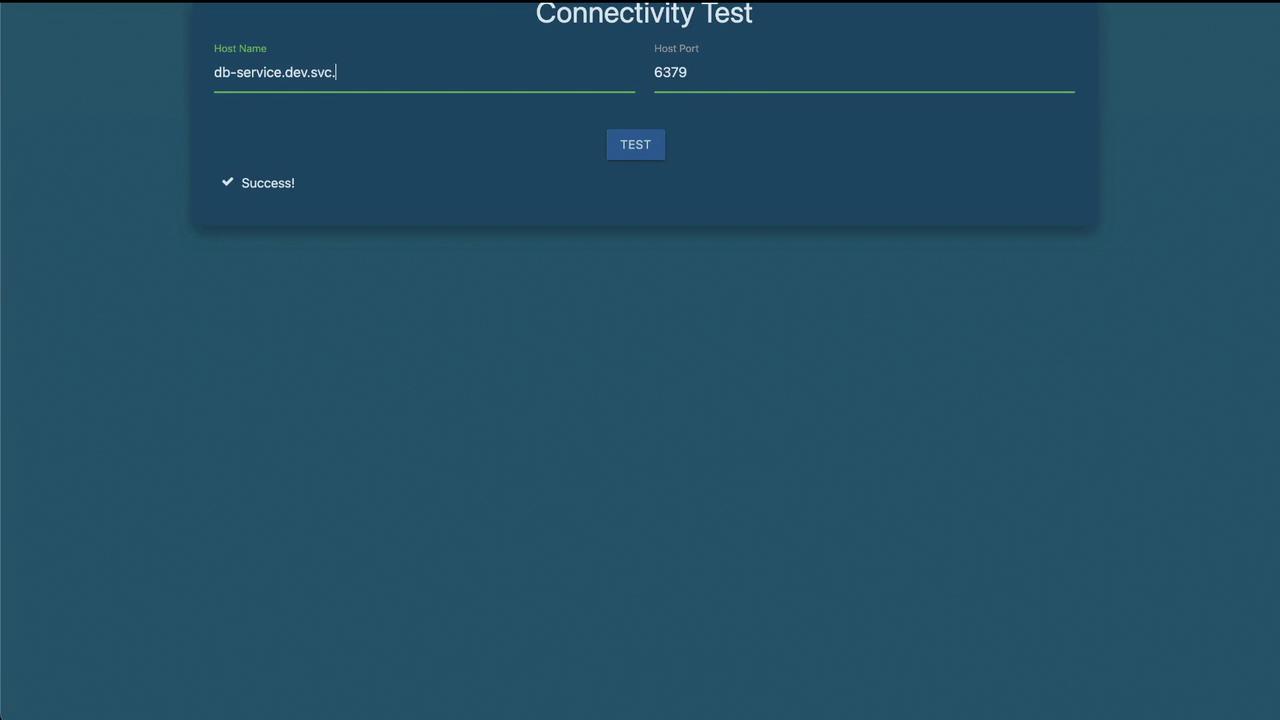
To access the DB service in the dev namespace from the blue application located in the marketing namespace, you must use the fully qualified DNS name. The DNS naming convention is: <service-name>.<namespace>.svc.cluster.localIn this case, the DNS name is: db-service.dev.svc.cluster.localUsing this fully qualified domain name ensures traffic is correctly directed to the DB service in the dev namespace on port 6379.
When performing connectivity tests from the blue application, the console output should verify that the connection to the DB service is successfully established.
This concludes the lab solution for namespaces. Each step demonstrates how to manage and interact with namespaces, pods, and services in a Kubernetes cluster.For more details on Kubernetes concepts, visit the Kubernetes Documentation.