CKA Certification Course - Certified Kubernetes Administrator

Kustomize Basics 2025 Updates

Kustomize Problem Statement idealogy

Before diving into what Kustomize is and how to use it, let's review the problem it addresses and the motivation behind its creation.

The Challenge with Multiple Environments

Consider a simple example using an nginx deployment YAML file that deploys a single nginx pod:

apiVersion: apps/v1
kind: Deployment
metadata:
  name: nginx-deployment
spec:
  replicas: 1
  selector:
    matchLabels:
      component: nginx
  template:
    metadata:
      labels:
        component: nginx
    spec:
      containers:
      - name: nginx
        image: nginx

Imagine you have multiple environments—a development environment on your local machine, a staging environment, and a production environment. You need your deployment to behave differently in each, with varying numbers of replicas. For example:

  • 1 replica in development,
  • 2–3 replicas in staging, and
  • 5–10 replicas in production.

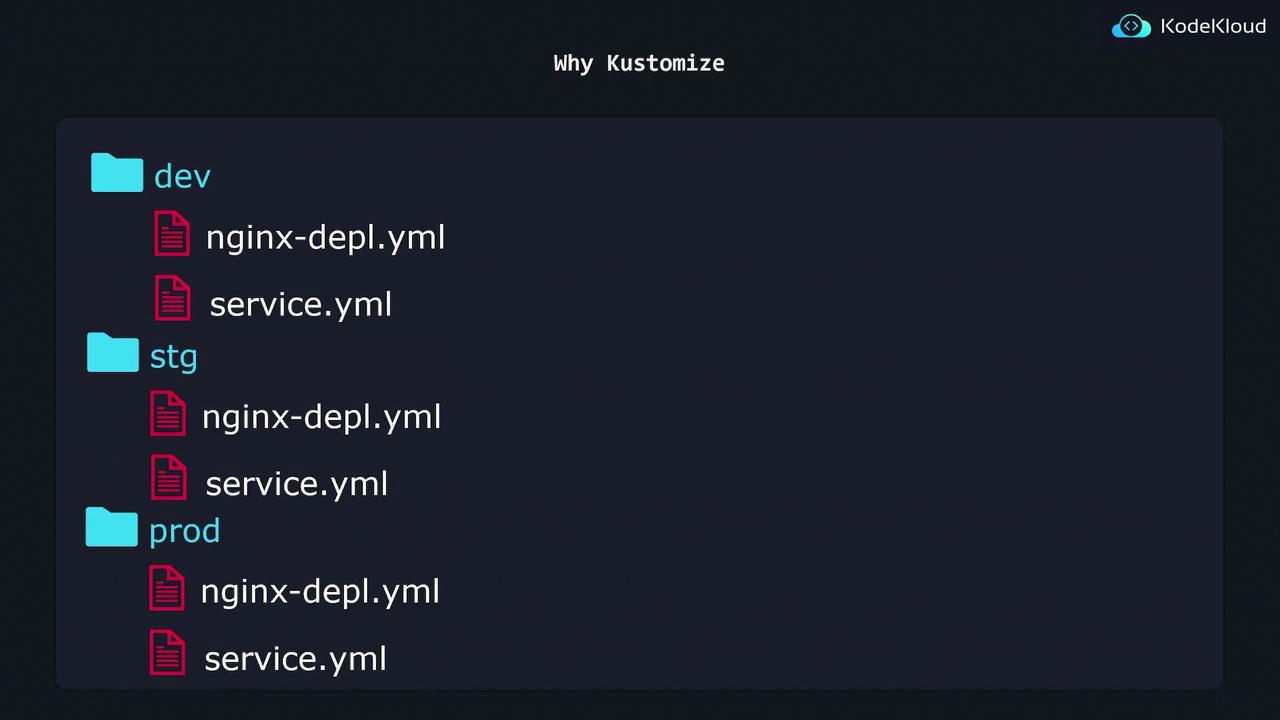
If you use a single nginx deployment YAML file, each environment would deploy only one replica. A common workaround is to create separate directories (dev, stg, prod) and duplicate your configuration file while modifying only the replica count.

Example Directory Structure

Your directory might be organized as follows:

  • dev: The deployment file sets replicas to 1.
  • stg: The same configuration is used but with replicas set to 2.
  • prod: The replica count is set to 5.

For instance:

# dev/nginx.yml
apiVersion: apps/v1
kind: Deployment
metadata:
  name: nginx-deployment
spec:
  replicas: 1
  selector:
    matchLabels:
      component: nginx
  template:
    metadata:
      labels:
        component: nginx
    spec:
      containers:
      - name: nginx
        image: nginx
# stg/nginx.yml
apiVersion: apps/v1
kind: Deployment
metadata:
  name: nginx-deployment
spec:
  replicas: 2
  selector:
    matchLabels:
      component: nginx
  template:
    metadata:
      labels:
        component: nginx
    spec:
      containers:
      - name: nginx
        image: nginx
# prod/nginx.yml
apiVersion: apps/v1
kind: Deployment
metadata:
  name: nginx-deployment
spec:
  replicas: 5
  selector:
    matchLabels:
      component: nginx
  template:
    metadata:
      labels:
        component: nginx
    spec:
      containers:
      - name: nginx
        image: nginx

To deploy the configuration, you would run a command for each environment, for example:

$ kubectl apply -f dev/
deployment.apps/nginx-deployment created

For the staging environment:

$ kubectl apply -f stg/
deployment.apps/nginx-deployment created

This command creates two nginx pods for staging.

Note

This approach works for small deployments. However, as you add more resources (e.g., a separate service.yaml file), you must copy every new file to each environment directory, increasing both maintenance overhead and the risk of inconsistencies.

The directory structure might end up looking like this:

dev
  ├── nginx-depl.yml
  └── service.yml
stg
  ├── nginx-depl.yml
  └── service.yml
prod
  ├── nginx-depl.yml
  └── service.yml

Enter Kustomize

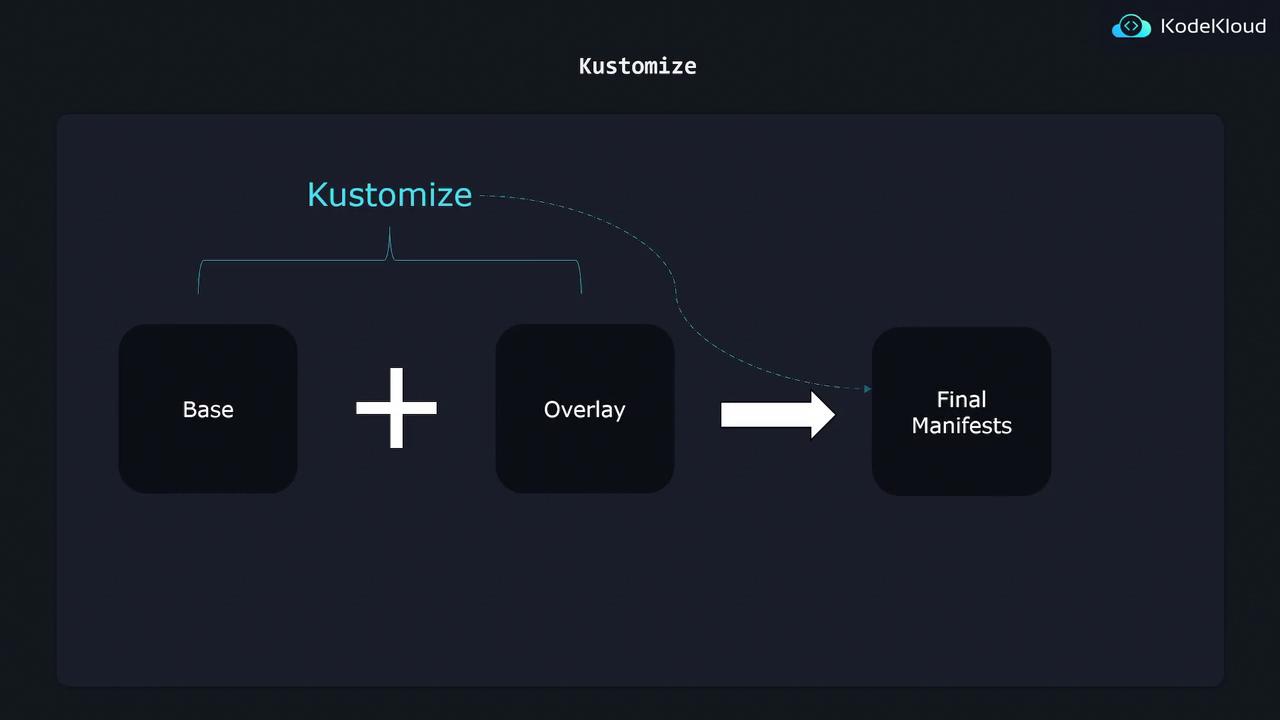
Kustomize provides a scalable solution to avoid excessive duplication. Instead of maintaining separate configurations for each environment, you can create a single Base configuration and apply environment-specific Overlays for adjustments.

Base and Overlays Explained

  • Base: Contains settings common to all environments. For example, the Base for the nginx deployment might look like this:

    apiVersion: apps/v1
    kind: Deployment
    metadata:
      name: nginx-deployment
    spec:
      replicas: 1
      selector:
        matchLabels:
          component: nginx
      template:
        metadata:
          labels:
            component: nginx
        spec:
          containers:
          - name: nginx
            image: nginx
    
  • Overlays: Allow you to override or add environment-specific configurations. For example, you can change the replica count to 2 for staging and 5 for production.

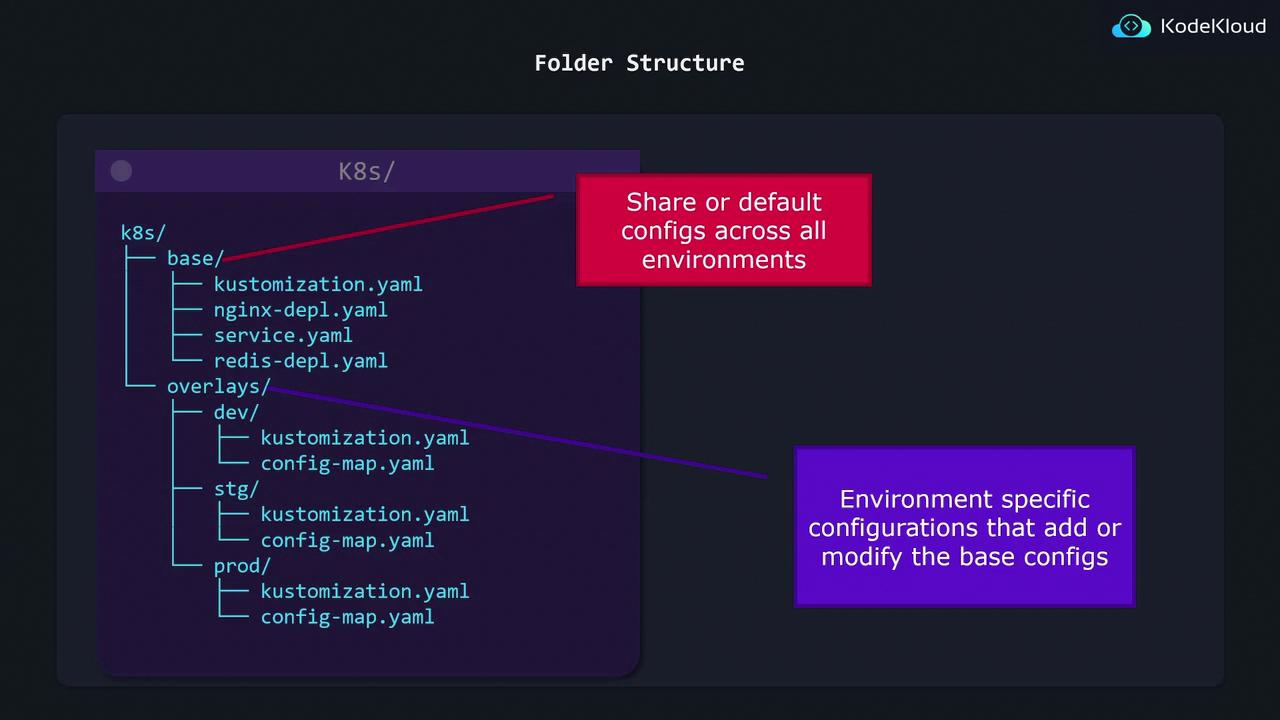
A typical folder structure when using Kustomize might include:

  1. A base directory containing all the shared Kubernetes configurations.
  2. An overlays directory with subdirectories for each environment (dev, stg, and prod). Each subdirectory includes patches or additional resources that override the Base configuration.

This organization ensures that common configurations remain in the base folder, while environment-specific modifications are managed separately, preventing configuration drift and reducing the effort required for updates.

The image shows a directory structure with folders for "dev," "stg," and "prod," each containing "nginx-depl.yml" and "service.yml" files. The title "Why Kustomize" is displayed at the top.

Configuration as Code

This approach adheres to the principle of treating configuration as code, minimizing repetition while ensuring consistency across your Kubernetes deployments.

The Merging Process

When you run Kustomize, it merges the Base configuration with your selected environment overlay, producing a complete set of manifests ready for deployment.
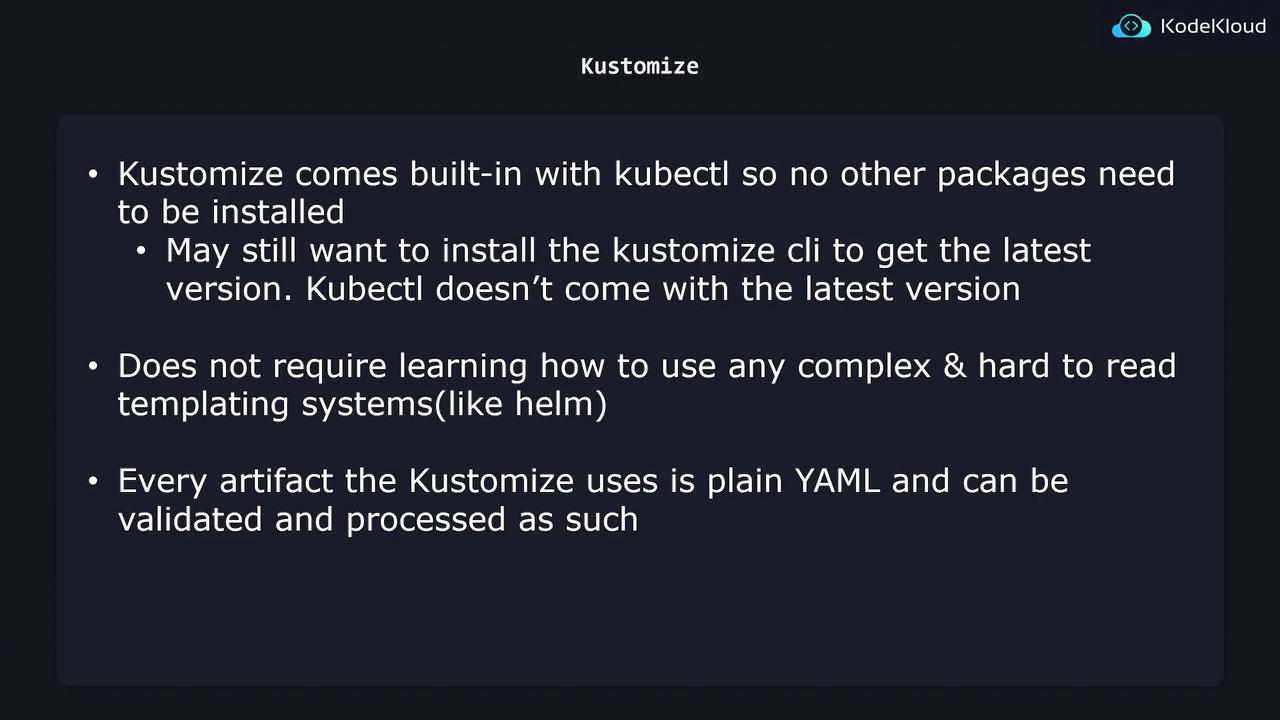
The image shows a folder structure for Kubernetes configurations, with a base directory for shared configs and overlay directories for environment-specific configurations.

The image illustrates the Kustomize process, showing how a "Base" and "Overlay" combine to create "Final Manifests."

One of Kustomize's best features is its seamless integration with kubectl. Since it is built into kubectl, no additional installation is required (although you might update it later if necessary). Unlike Helm, Kustomize avoids complex templating, relying instead on plain YAML files which are easy to read, validate, and maintain.

The image is a slide about Kustomize, highlighting that it is built into kubectl, doesn't require complex templating systems, and uses plain YAML for artifacts.

Summary

Kustomize effectively addresses the challenges of managing configurations across multiple environments by allowing you to maintain a single Base configuration and apply minimal, environment-specific Overlays. This strategy ensures consistency, reduces maintenance overhead, and scales well as your Kubernetes deployments grow.

Happy customizing!

Watch Video

Watch video content

Previous
Lifecycle management with Helm