CKA Certification Course - Certified Kubernetes Administrator
Scheduling
Validating and Mutating Admission Controllers 2025 Updates
In this lesson, we take an in-depth look at Admission Controllers in Kubernetes—covering both validating and mutating functions—and learn how to configure custom Admission Controllers. Understanding these controllers is essential for ensuring that Kubernetes objects are created and modified correctly.
Admission Controllers Overview
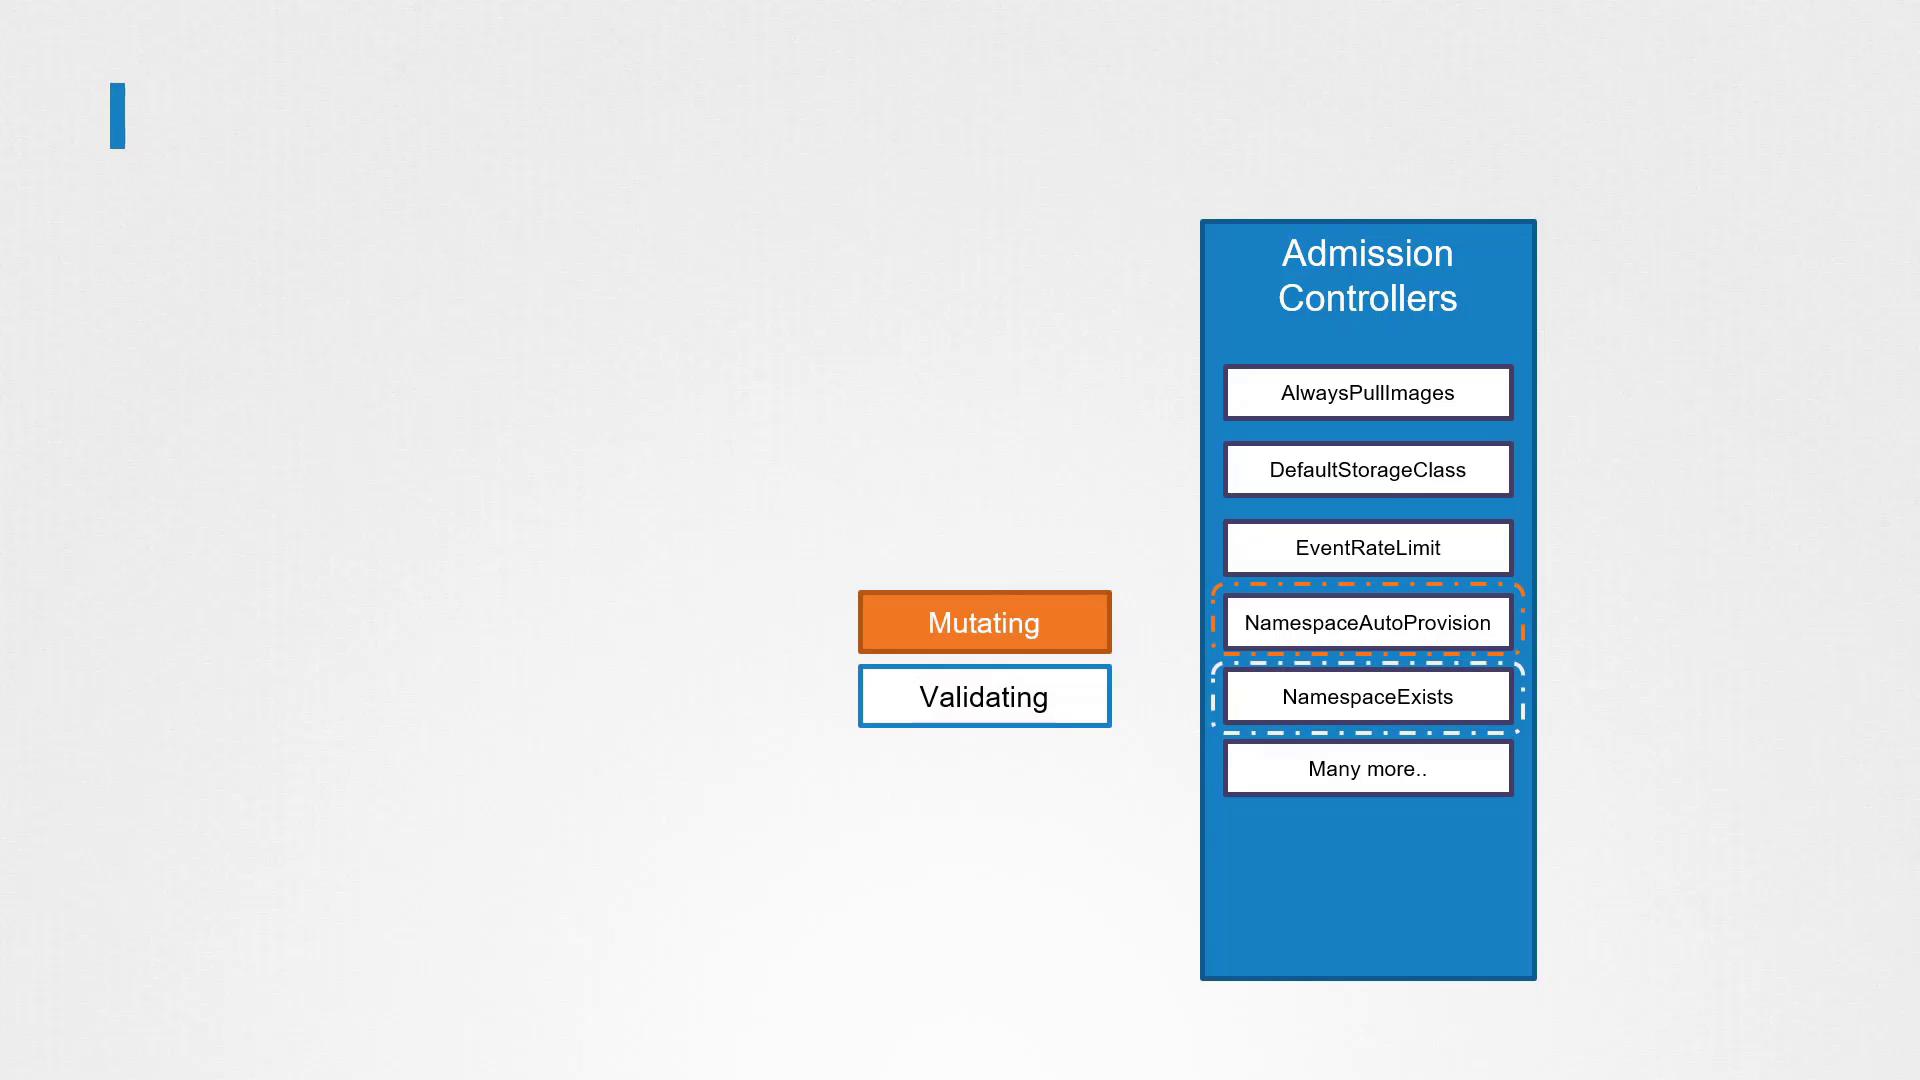
Admission Controllers perform crucial tasks during the API request lifecycle:
- Mutating Admission Controllers: Modify the object (mutate the request) before it is created.
- Validating Admission Controllers: Inspect a request to decide whether it should be allowed or rejected.
- Dual-Purpose Controllers: Some controllers support both mutating and validating functions.
Typically, mutating controllers are invoked before validating controllers. This order ensures that any changes made during mutation are considered during validation. For example, if the namespace auto-provisioning admission controller (mutating) runs before the namespace existence admission controller (validating), the missing namespace is created, preventing potential validation failures.
Tip
If any admission controller rejects the request, an error message is returned and the request is not processed further.
Namespace and Storage Class Admission Controllers
Namespace Existence
The namespace existence (or namespace lifecycle) admission controller verifies if a namespace already exists. If it does not, the request is rejected.
Default Storage Class Plugin
The default storage class admission controller is enabled by default. When you create a PersistentVolumeClaim (PVC) without specifying a storage class, the request is authenticated, authorized, and then passed through the admission controller. This controller mutates the request by adding the default storage class if none is provided.
For example, consider the following PVC creation request:
apiVersion: v1
kind: PersistentVolumeClaim
metadata:
  name: myclaim
spec:
  accessModes:
    - ReadWriteOnce
  resources:
    requests:
      storage: 500Mi
After the request passes through the admission controller, it is mutated to include the default storage class:
apiVersion: v1
kind: PersistentVolumeClaim
metadata:
  name: myclaim
spec:
  accessModes:
    - ReadWriteOnce
  resources:
    requests:
      storage: 500Mi
  storageClassName: default
Inspecting Mutated Objects
When you inspect a PVC that has been modified by an admission controller, you can use the kubectl describe command:
kubectl describe pvc myclaim
The resulting output will include the added storage class:
Name:           myclaim
Namespace:      default
StorageClass:   default
Status:         Pending
Volume:         <none>
Labels:         <none>
Annotations:    <none>
And the specification appears as:
accessModes:
  - ReadWriteOnce
resources:
  requests:
    storage: 500Mi
storageClassName: default
External Admission Webhooks
While built-in admission controllers are compiled with Kubernetes, you can implement custom logic using external admission webhooks. Two specific controllers support webhooks:
- Mutating Admission Webhook
- Validating Admission Webhook
How Admission Webhooks Work
- Webhook Configuration: After passing through all built-in admission controllers, requests are forwarded to the webhook server.
- Admission Review Request: The API server sends a JSON-formatted admission review object containing request details.
- Webhook Response: The webhook processes the request and sends back an AdmissionReview response.
An example admission review object is as follows:
{
  "apiVersion": "admission.k8s.io/v1",
  "kind": "AdmissionReview",
  "request": {
    "uid": "705ab4f5-6393-11e8-b7cc-42010aa80002",
    "kind": {"group": "autoscaling", "version": "v1", "kind": "Scale"},
    "resource": {"group": "apps", "version": "v1", "resource": "deployments"},
    "subResource": "scale",
    "requestKind": {"group": "autoscaling", "version": "v1", "kind": "Scale"},
    "requestResource": {"group": "apps", "version": "v1", "resource": "deployments"}
  }
}
A successful (allowed) response from the webhook might look like:
{
  "apiVersion": "admission.k8s.io/v1",
  "kind": "AdmissionReview",
  "response": {
    "uid": "<value_from request.uid>",
    "allowed": true
  }
}
If the "allowed" field is false, the request is rejected.
Deploying an Admission Webhook Server
To start using webhooks, deploy your custom webhook server. This server handles your custom logic for mutating and/or validating requests. You can implement the server in any language that supports processing JSON admission review objects.
Example: Go Webhook Server
Below is a sample snippet in Go that demonstrates setting up a webhook server:
package main

import (
	"encoding/json"
	"flag"
	"fmt"
	"io/ioutil"
	"net/http"

	admissionv1beta1 "k8s.io/api/admission/v1beta1"
	metav1 "k8s.io/apimachinery/pkg/apis/meta/v1"
	"k8s.io/klog"
)

// toAdmissionResponse creates an AdmissionResponse containing an error message.
func toAdmissionResponse(err error) *admissionv1beta1.AdmissionResponse {
	return &admissionv1beta1.AdmissionResponse{
		Result: &metav1.Status{
			Message: err.Error(),
		},
	}
}

// admitFunc defines the function type for validators and mutators.
type admitFunc func(*admissionv1beta1.AdmissionReview) *admissionv1beta1.AdmissionResponse

// serve handles the HTTP requests and passes them to the admit function.
func serve(w http.ResponseWriter, r *http.Request, admit admitFunc) {
	var body []byte
	if r.Body != nil {
		data, err := ioutil.ReadAll(r.Body)
		if err == nil {
			body = data
		}
	}
	// Further processing of the admission review object would occur here.
}
Example: Python Webhook Server
Below is pseudocode for a simple webhook server using Python and Flask. This example includes both a validating and a mutating webhook endpoint.
from flask import Flask, request, jsonify
import base64

app = Flask(__name__)

@app.route("/validate", methods=["POST"])
def validate():
    object_name = request.json["object"]["metadata"]["name"]
    user_name = request.json["request"]["userInfo"]["name"]
    status = True
    message = ""
    if object_name == user_name:
        message = "You can't create objects with your own name"
        status = False
    return jsonify({
        "response": {
            "allowed": status,
            "uid": request.json["request"]["uid"],
            "status": {"message": message},
        }
    })

@app.route("/mutate", methods=["POST"])
def mutate():
    user_name = request.json["request"]["userInfo"]["name"]
    patch = [{"op": "add", "path": "/metadata/labels/users", "value": user_name}]
    encoded_patch = base64.b64encode(bytes(str(patch), 'utf-8')).decode('utf-8')
    return jsonify({
        "response": {
            "allowed": True,
            "uid": request.json["request"]["uid"],
            "patch": encoded_patch,
            "patchType": "JSONPatch",
        }
    })

if __name__ == '__main__':
    app.run(host='0.0.0.0', port=443, ssl_context=('path/to/tls.crt', 'path/to/tls.key'))
Key Takeaway
The critical aspect of setting up webhooks is ensuring that your server processes the admission review objects and responds with a valid JSON object following the mutate and validate APIs.
Configuring the Webhook in Kubernetes
Once your webhook server is deployed, configure Kubernetes to route requests to your service by creating a webhook configuration object. For instance, the following example shows a [ValidatingWebhookConfiguration] that validates pod creation:
apiVersion: admissionregistration.k8s.io/v1
kind: ValidatingWebhookConfiguration
metadata:
  name: "pod-policy.example.com"
webhooks:
  - name: "pod-policy.example.com"
    clientConfig:
      service:
        namespace: "webhook-namespace"
        name: "webhook-service"
      caBundle: "CiOtLS0tQk......tLS0K"
    rules:
      - apiGroups: [""]
        apiVersions: ["v1"]
        operations: ["CREATE"]
        resources: ["pods"]
        scope: "Namespaced"
In this configuration:
- API Server Invocation: The API server calls the webhook service when a pod is created.
- Security: TLS is enforced by providing a valid certificate bundle.
- Rules: The
rulessection precisely specifies which operations (in this case, pod creation) trigger the webhook.
Final Thoughts
Admission controllers are a powerful mechanism for enforcing policies and modifying Kubernetes objects during their lifecycle. By integrating custom admission webhooks, you can extend Kubernetes functionality to meet your specific needs.
For further practice, consider configuring and testing these webhooks in your environment to better understand their impact on Kubernetes operations.
Watch Video
Watch video content
Practice Lab
Practice lab