This article explains how to create and manage Persistent Volume Claims in Kubernetes, including binding, deletion, and reclaim policies.
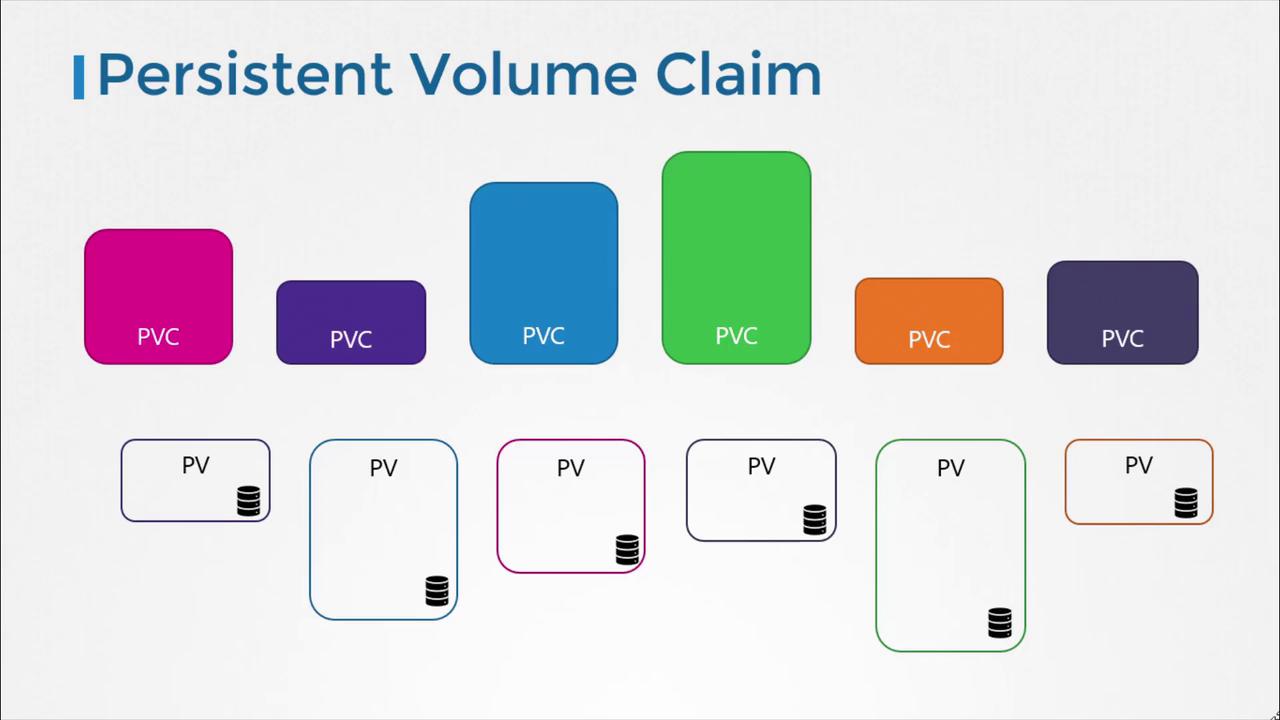
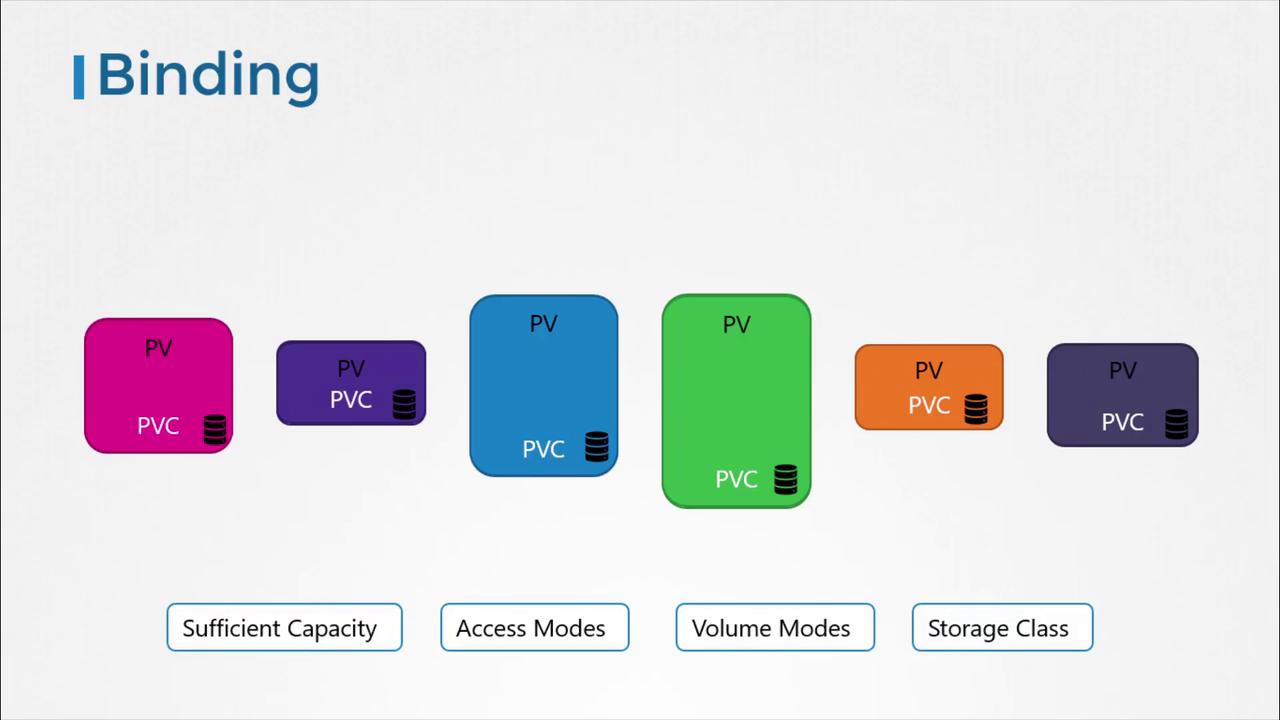
Welcome to this article on Persistent Volume Claims (PVCs) in Kubernetes. In our previous lesson, we created a Persistent Volume (PV). Now, we will explore how to create a Persistent Volume Claim (PVC) to expose that storage to a node.Persistent volumes and persistent volume claims are two distinct objects in Kubernetes. An administrator is responsible for creating PVs, while users create PVCs to request storage resources. When a PVC is created, Kubernetes automatically binds it to a PV that meets the requested capacity, access modes, volume modes, and storage class.
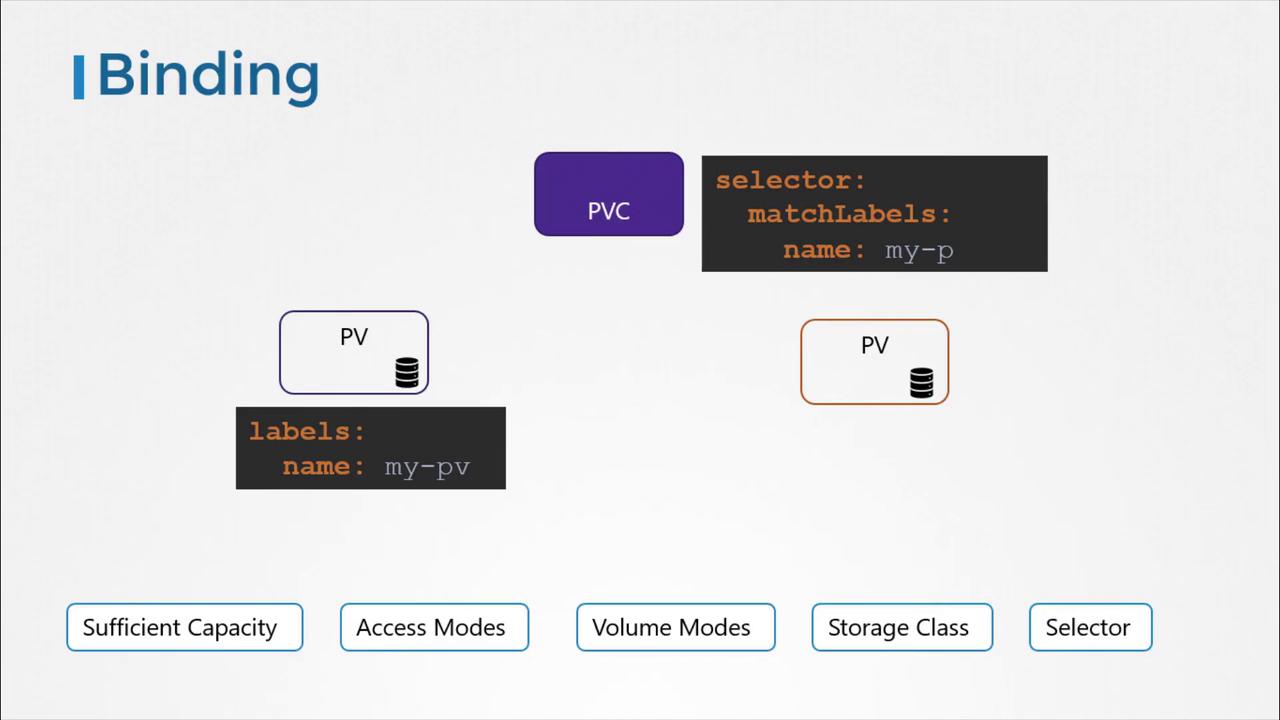
Kubernetes evaluates several factors when binding a PVC to a PV. If multiple PVs can satisfy a claim, you can use labels and selectors to bind the claim to a specific volume.
It is important to note that if a smaller PVC is matched with a larger PV that meets all criteria, the unrequested capacity remains unused by any other PVC. If no PV satisfies the claim’s requirements, the PVC will remain in a pending state until a new, suitable PV becomes available.
Below is an example YAML template for creating a PVC. In this configuration, we set the API version to v1 with kind PersistentVolumeClaim, and name it “myclaim”. Under the specification section, the access mode is set to ReadWriteOnce, and 500 MiB of storage is requested.
Save the above YAML to a file, for example, pvc-definition.yaml.
Run the command below in your terminal:
kubectl create -f pvc-definition.yaml
You can verify the created PVC by executing:
kubectl get persistentvolumeclaimNAME STATUS VOLUME CAPACITY ACCESS MODESmyclaim Pending
Kubernetes will inspect the available PV. Suppose, in our example, a PV is configured with 1GiB storage and compatible access modes — if it meets the PVC’s criteria, it will automatically bind to the PVC. Here is an example of such a PV definition:
After the binding process, running the kubectl get persistentvolumeclaim command will show that the PVC has been successfully bound to the matching PV.
Deleting a PVC and Persistent Volume Reclaim Policies
To delete a PVC, use the following command:
kubectl delete persistentvolumeclaim myclaim
When a PVC is deleted, what happens next depends on the underlying persistent volume’s reclaim policy. The reclaim policy determines the fate of the PV and can be configured as follows:
Reclaim Policy
Description
Retain
The PV remains in the cluster after the PVC is deleted. An administrator must manually reclaim it.
Delete
The PV is automatically deleted along with the PVC, releasing the storage on the physical device.
Recycle
The PV data is scrubbed before reuse by new claims.
The “Recycle” reclaim policy is deprecated in recent Kubernetes versions and might not be available in your cluster.
For example, to set the reclaim policy to Retain, you would include:
persistentVolumeReclaimPolicy: Retain
Choose the reclaim policy that best fits your storage management strategy.That concludes our guide on Persistent Volume Claims. We encourage you to practice configuring, binding, and troubleshooting PVs and PVCs in your Kubernetes environment. For further reading, check out the Kubernetes Documentation and other related resources.