> ## Documentation Index
> Fetch the complete documentation index at: https://notes.kodekloud.com/llms.txt
> Use this file to discover all available pages before exploring further.
# Demo Utilize newContainerPerStage
> This guide explores using the newContainerPerStage option in Jenkins Declarative Pipeline for isolated container environments.
In this guide, we’ll explore how to leverage the `newContainerPerStage()` option to control container lifecycle in a Jenkins Declarative Pipeline. By default, a top-level `dockerfile` agent builds one container and reuses it across all stages. With `newContainerPerStage()`, each stage runs in its own fresh container—ensuring clean, isolated environments.
## Pipeline Strategies Overview
| Approach | Description | Pros | Cons |
| ------------------------------- | ---------------------------------------------- | --------------------------------- | ----------------------------------- |
| Stage-Specific Agents | Define an agent for each stage | Fine-grained control | Verbose configuration |
| Single Global Dockerfile Agent | One container built from a Dockerfile | Fast setup, shared workspace | Stateful builds, no isolation |
| Shared Workspace Across Stages | Persist files and workspace in one container | Easy data sharing | Hard to clean up between stages |
| `newContainerPerStage()` Option | Fresh container per stage from same Dockerfile | Clean slate each stage, better QA | No shared files, longer total build |
***
## 1. Pipeline with Stage-Specific Agents
Assigning agents at the stage level offers maximum flexibility but can become verbose:
```groovy theme={null}
pipeline {
agent any
stages {
stage('S1-Any Agent') {
agent any
steps {
echo "Running on any available agent"
}
}
stage('S2-Ubuntu Agent') {
agent { label 'ubuntu' }
steps {
echo "Running on Ubuntu node"
}
}
stage('S3-Node Image Agent') {
agent { docker { image 'node:18-alpine' } }
steps {
sh 'node -v'
}
}
stage('S4-Dockerfile Agent') {
agent {
dockerfile {
filename 'Dockerfile.cowsay'
label 'ubuntu-docker-jdk17-node20'
}
}
steps {
sh 'node -v'
}
}
}
}
```
***
## 2. Single Global Dockerfile Agent
Simplify the pipeline by declaring one global Dockerfile agent. All stages execute in the same container built from `Dockerfile.cowsay`:
```groovy theme={null}
pipeline {
agent {
dockerfile {
filename 'Dockerfile.cowsay'
label 'ubuntu-docker-jdk17-node20'
}
}
stages {
stage('Stage-1') {
steps {
sh 'cat /etc/os-release'
sh 'node -v'
sh 'npm -v'
}
}
stage('Stage-2') {
steps {
sh 'cat /etc/os-release'
sh 'node -v'
sh 'npm -v'
}
}
stage('Stage-3') {
steps {
echo "Custom build steps..."
}
}
stage('Stage-4') {
steps {
sh 'node -v'
sh 'npm -v'
sh 'cowsay -f dragon "This is running on Docker Container"'
}
}
}
}
```
Jenkins will:
1. Build the Docker image:
```bash theme={null}
#1 FROM docker.io/library/node:18-alpine
#5 RUN apk update && apk add --no-cache git perl && \
cd /tmp && git clone https://github.com/jasonm23/cowsay.git && cd cowsay ;
```
2. Launch a single container.
3. Run each `sh` step inside that container.
4. Tear down the container after pipeline completion.
***
## 3. Sharing State Across Stages
Because the container and workspace persist, you can create files in one stage and consume them later:
```groovy theme={null}
pipeline {
agent {
dockerfile { filename 'Dockerfile.cowsay' }
}
stages {
stage('Stage-1') {
steps {
echo "Generating a random file"
sh 'echo $((RANDOM)) > /tmp/imp-file-$BUILD_ID'
sh 'ls -l /tmp/imp-file-$BUILD_ID'
sh 'cat /tmp/imp-file-$BUILD_ID'
}
}
stage('Stage-2') {
steps {
echo "Reading the same file in Stage-2"
sh 'ls -l /tmp/imp-file-$BUILD_ID'
sh 'cat /tmp/imp-file-$BUILD_ID'
}
}
stage('Stage-3') {
steps {
echo "Verifying file in Stage-3"
sh 'cat /tmp/imp-file-$BUILD_ID'
}
}
stage('Stage-4') {
steps {
echo "Inspecting before exit"
sh 'ls -l /tmp/imp-file-$BUILD_ID'
sh 'cat /tmp/imp-file-$BUILD_ID'
echo "Sleeping to keep container alive"
sh 'sleep 120s'
}
}
}
}
```
With a single container, workspace contents persist across stages—ideal for sharing build artifacts or test reports.
***
## 4. Isolating Stages with `newContainerPerStage()`
To enforce a clean container per stage (and thus no shared workspace), enable the `newContainerPerStage()` pipeline option:
```groovy theme={null}
pipeline {
agent {
dockerfile { filename 'Dockerfile.cowsay' }
}
options {
newContainerPerStage()
}
stages {
stage('Stage-1') {
steps {
echo "Stage-1: create file"
sh 'echo $((RANDOM)) > /tmp/imp-file-$BUILD_ID'
sh 'ls -l /tmp/imp-file-$BUILD_ID'
sh 'cat /tmp/imp-file-$BUILD_ID'
}
}
stage('Stage-2') {
steps {
echo "Stage-2: cannot access file from Stage-1"
sh 'ls -l /tmp/imp-file-$BUILD_ID'
sh 'cat /tmp/imp-file-$BUILD_ID'
}
}
}
}
```
With `newContainerPerStage()`, each stage builds its own image and launches a separate container. Files created in one stage will **not** be available in subsequent stages.
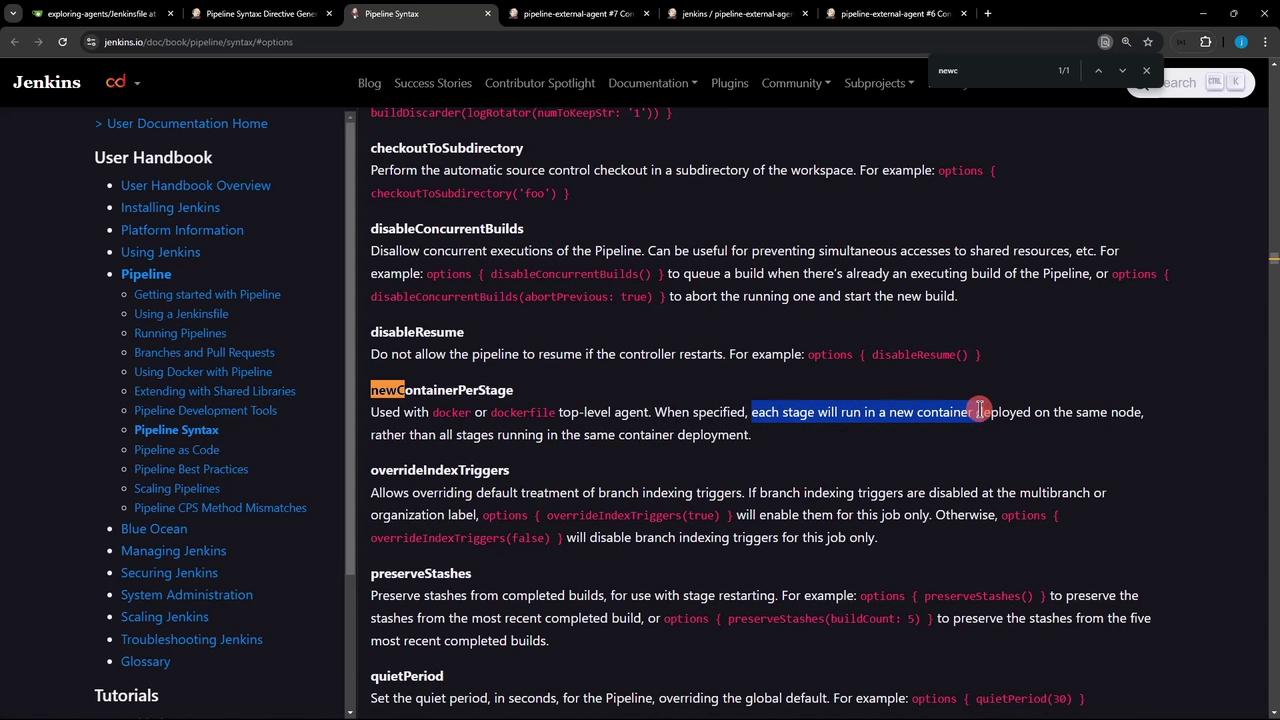
For detailed syntax, refer to the Jenkins Pipeline [options section](https://www.jenkins.io/doc/book/pipeline/syntax/#options).
***
## Links and References
* [Jenkins Pipeline Syntax](https://www.jenkins.io/doc/book/pipeline/syntax/)
* [Declarative Pipeline Documentation](https://www.jenkins.io/doc/book/pipeline/development/)
* [Dockerfile Agent](https://www.jenkins.io/doc/book/pipeline/docker/)