> ## Documentation Index
> Fetch the complete documentation index at: https://notes.kodekloud.com/llms.txt
> Use this file to discover all available pages before exploring further.

# Demo Markup Formatters

> Learn to use the Jenkins Markup Formatter for formatted text in various Jenkins components while ensuring protection against XSS attacks.

In this guide, you’ll learn how to use the Jenkins Markup Formatter to add formatted text—including HTML tags—into Views, Jobs, Builds, and System Messages, while maintaining protection against cross-site scripting (XSS) attacks.

## Default Formatter Behavior

By default, Jenkins uses the **Plain Text** formatter. It escapes all HTML tags and displays exactly what you type.

<Callout icon="lightbulb" color="#1CB2FE">
  The Plain Text formatter is safe but does not render any HTML. Switch to Safe HTML if you need styled markup.
</Callout>

## Editing the System Message

1. In Jenkins, navigate to **Manage Jenkins** > **Configure System**.
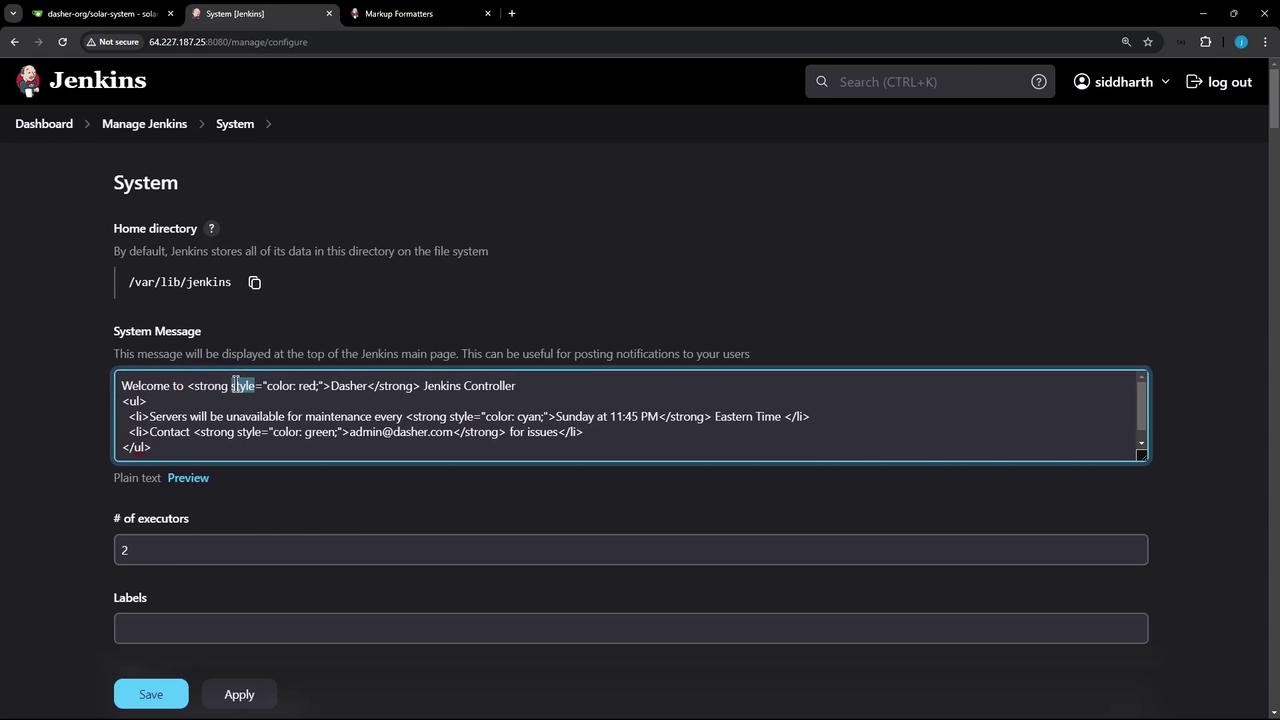
2. Scroll down to **System Message** and enter your HTML. For example:

```html theme={null}
<strong style="color:red">Server maintenance scheduled at 10 PM UTC.</strong>
<ol>
  <li>Service A</li>
  <li>Service B</li>
</ol>
```

<Frame>
  ![The image shows a Jenkins system configuration page with a system message editor open, displaying HTML-formatted text for a notification about server maintenance.](https://kodekloud.com/kk-media/image/upload/v1752870641/notes-assets/images/Certified-Jenkins-Engineer-Demo-Markup-Formatters/jenkins-system-configuration-notification.jpg)
</Frame>

If you click **Save** or **Apply** now, the message still appears as plain text because the formatter is unchanged.

## Changing the Markup Formatter

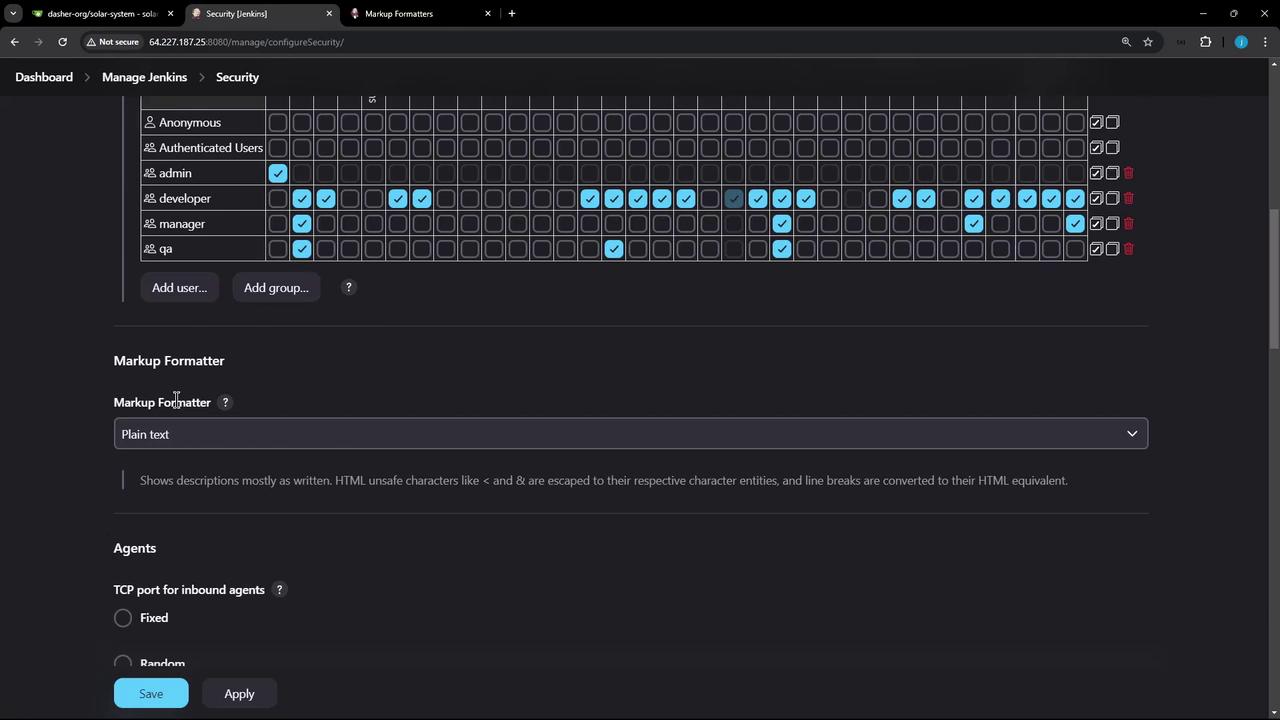
1. Go to **Manage Jenkins** > **Configure Global Security**.
2. Locate the **Markup Formatter** section.
3. Change **Plain Text** to **Safe HTML**.
<Frame>
  ![The image shows a Jenkins security configuration page with user roles and permissions, and options for markup formatting and agent settings.](https://kodekloud.com/kk-media/image/upload/v1752870643/notes-assets/images/Certified-Jenkins-Engineer-Demo-Markup-Formatters/jenkins-security-configuration-user-roles.jpg)
</Frame>

4. Click **Save** to apply.

| Formatter  | Description                                           | Common Allowed Tags                        |
| ---------- | ----------------------------------------------------- | ------------------------------------------ |
| Plain Text | Escapes all HTML; displays raw input.                 | —                                          |
| Safe HTML  | Sanitizes a predefined subset of tags to prevent XSS. | `<strong>`, `<em>`, `<ul>`, `<ol>`, `<li>` |

<Callout icon="triangle-alert" color="#FF6B6B">
  Safe HTML strips any disallowed tags or attributes. Avoid embedding `<script>` or inline event handlers.
</Callout>

<Frame>
  ![The image shows a Jenkins security configuration screen with user permissions and settings for markup formatting and agent TCP ports. Various user roles have different permissions indicated by checkboxes.](https://kodekloud.com/kk-media/image/upload/v1752870644/notes-assets/images/Certified-Jenkins-Engineer-Demo-Markup-Formatters/jenkins-security-configuration-permissions.jpg)
</Frame>

## Viewing the Rendered Message

Return to the Jenkins Dashboard. Your system message now displays with bold text, colors, and lists as defined by your HTML.

You can apply the same approach to:

* Job descriptions
* Build overviews
* View headings

## Further Reading & References

* [Jenkins Markup Formatter Plugin](https://plugins.jenkins.io/markup-formatter/)
* [Jenkins System Configuration](https://www.jenkins.io/doc/book/managing/system-configuration/)
* [Cross-Site Scripting (XSS) Prevention](https://owasp.org/www-community/attacks/xss/)

<CardGroup>
  <Card title="Watch Video" icon="video" cta="Learn more" href="https://learn.kodekloud.com/user/courses/certified-jenkins-engineer/module/bf3ddc28-a03d-4738-9f98-2779d81482f5/lesson/b3243ae4-9efd-4672-a8fc-4441c372b298" />
</CardGroup>