> ## Documentation Index
> Fetch the complete documentation index at: https://notes.kodekloud.com/llms.txt
> Use this file to discover all available pages before exploring further.

# Demo Slack Notification Setup

> Learn to configure Slack notifications in Jenkins for automated build alerts by installing the Slack Notification plugin and integrating it with secure credentials.

Learn how to configure Slack notifications in Jenkins by installing the Slack Notification plugin, creating a Slack channel and app, and integrating them with secure credentials. By the end, you’ll have automated build alerts in your Slack workspace.

## Installing the Slack Notification Plugin

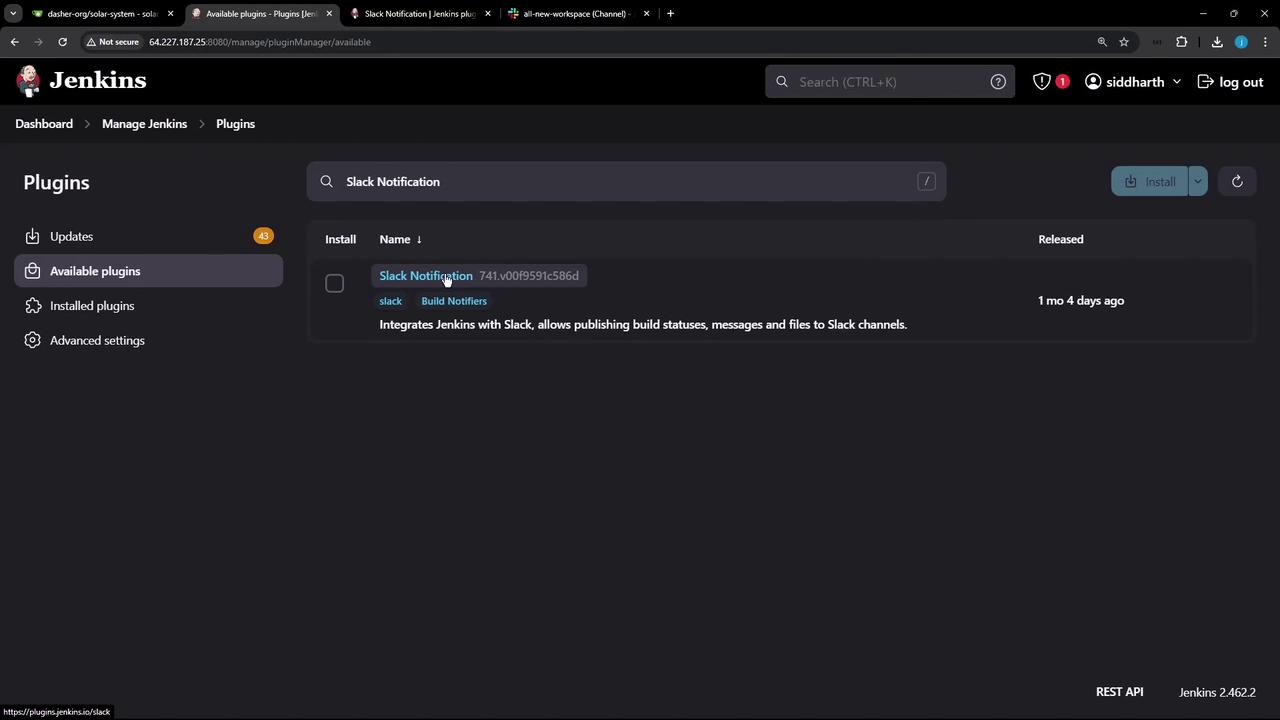
Jenkins offers a dedicated Slack Notification plugin to send build statuses, messages, and files directly to Slack channels.

1. In Jenkins, navigate to **Manage Jenkins > Manage Plugins**.
2. Open the **Available** tab, search for **Slack Notification**, select it, and click **Install without restart**.
<Frame>
  ![The image shows the Jenkins plugin management interface, specifically displaying the "Slack Notification" plugin available for installation. It integrates Jenkins with Slack to publish build statuses, messages, and files to Slack channels.](https://kodekloud.com/kk-media/image/upload/v1752870658/notes-assets/images/Certified-Jenkins-Engineer-Demo-Slack-Notification-Setup/jenkins-slack-notification-plugin.jpg)
</Frame>

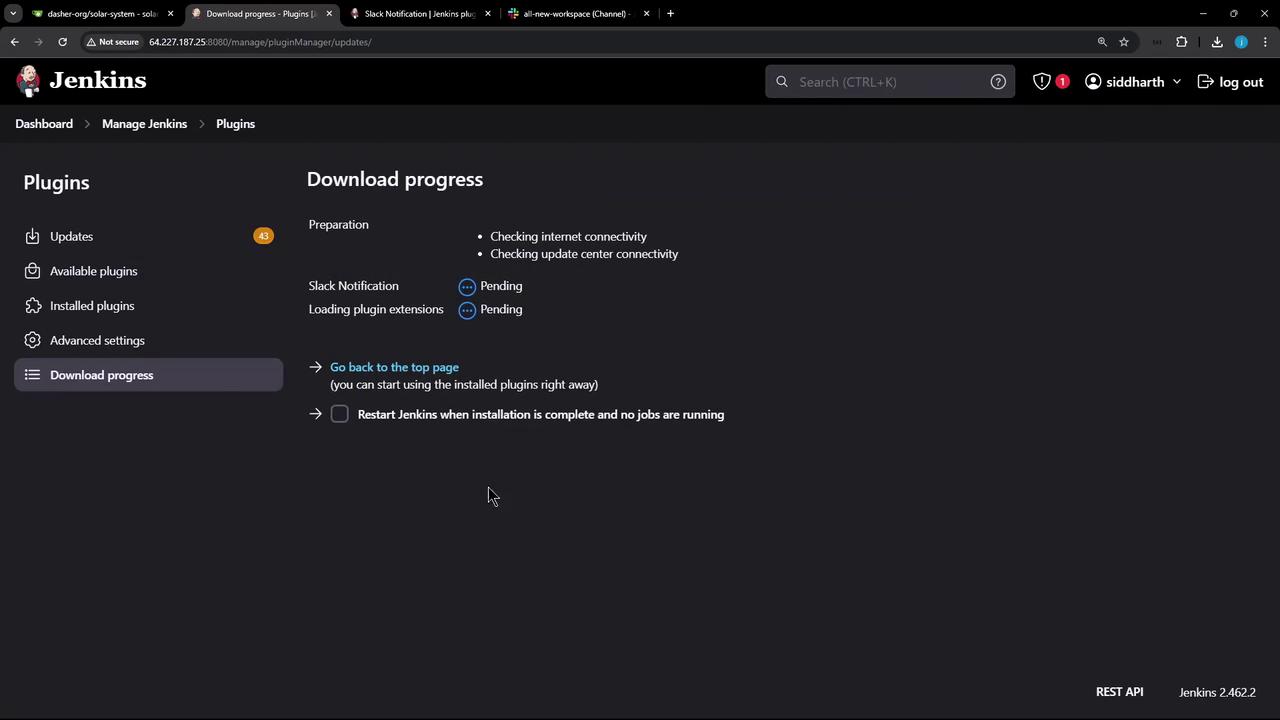
3. Monitor the download progress under **Plugin Manager**. You’ll see statuses like "Pending," "Downloading," and "Installed."
<Frame>
  ![The image shows a Jenkins interface displaying the download progress of plugins, with various statuses like "Pending" and options for managing plugins.](https://kodekloud.com/kk-media/image/upload/v1752870659/notes-assets/images/Certified-Jenkins-Engineer-Demo-Slack-Notification-Setup/jenkins-plugin-download-progress.jpg)
</Frame>

4. Once installation completes, restart Jenkins to activate the plugin.

<Callout icon="lightbulb" color="#1CB2FE">
  Restarting Jenkins ensures the Slack plugin is loaded and all dependencies are ready.
</Callout>

## Reviewing the Plugin Documentation

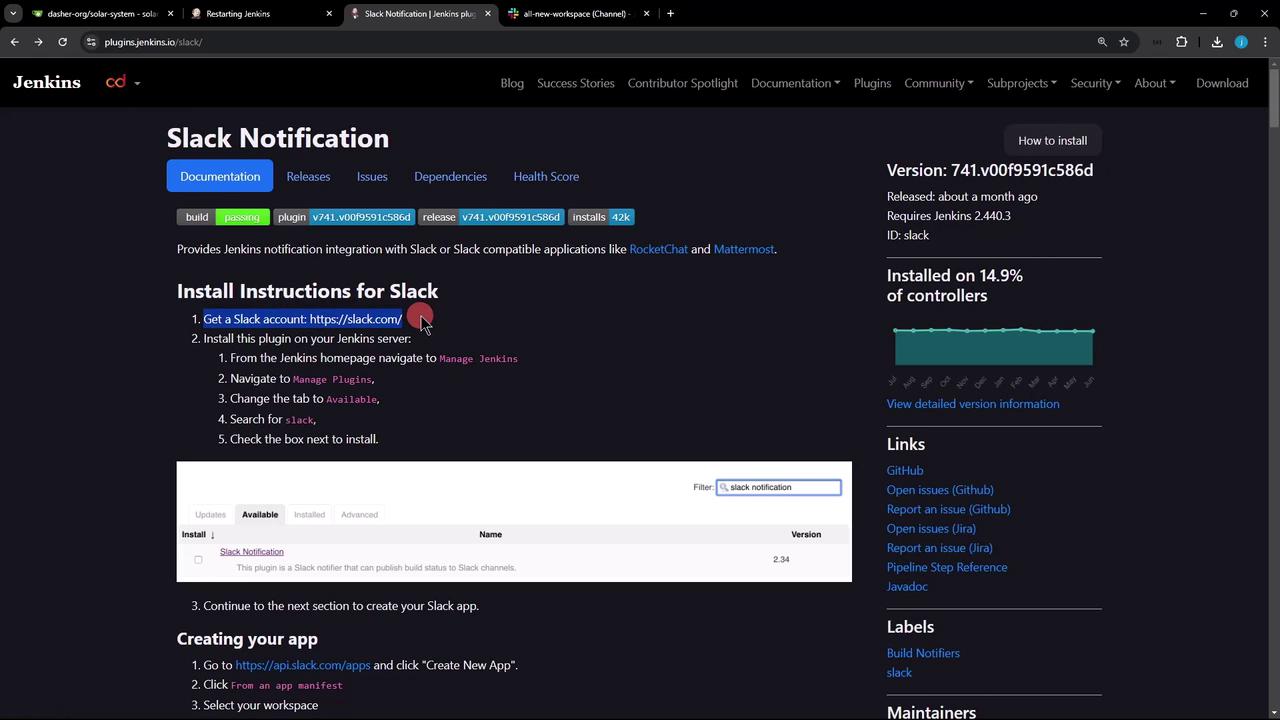
While Jenkins restarts, review the official plugin documentation to explore advanced features and configuration options:

* [Slack Notification Plugin for Jenkins](https://plugins.jenkins.io/slack/)
<Frame>
  ![The image shows a webpage with instructions for installing the Slack Notification plugin for Jenkins, including steps to create a Slack account and manage plugins. It also displays version information and links related to the plugin.](https://kodekloud.com/kk-media/image/upload/v1752870660/notes-assets/images/Certified-Jenkins-Engineer-Demo-Slack-Notification-Setup/slack-notification-jenkins-installation.jpg)
</Frame>

## Creating a Slack Channel

Define a Slack channel to receive Jenkins build notifications:

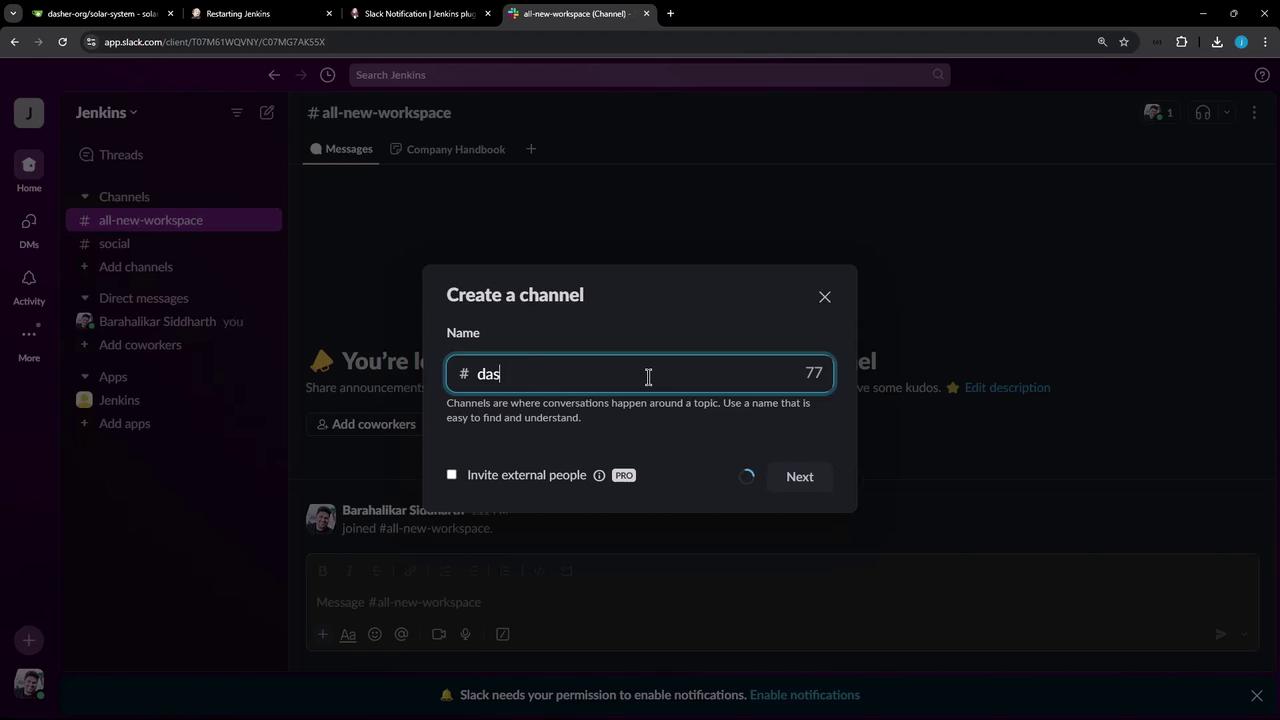
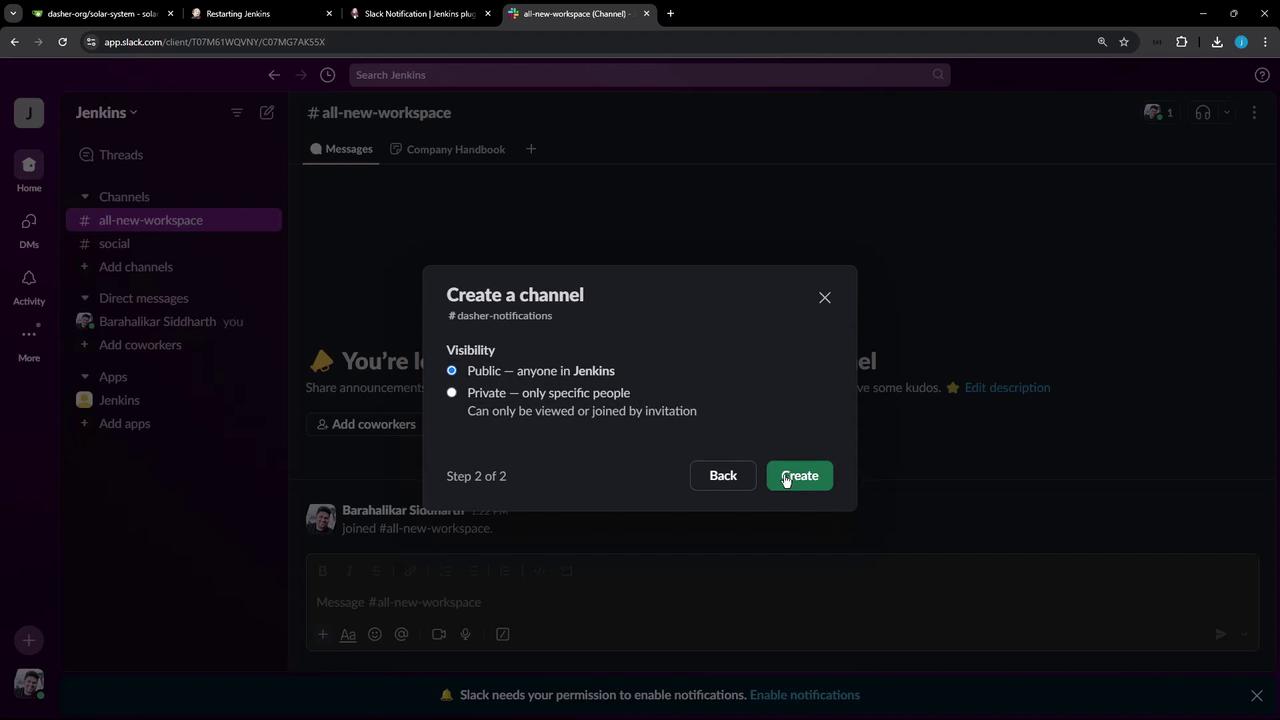
1. In Slack, click **Add channels > Create a channel**.
2. Name it `dasher-notifications` (or your preferred identifier).
3. Choose **Public** or **Private**, then click **Create**.
<Frame>
  ![The image shows a Slack interface where a user is in the process of creating a new channel named "das" within a workspace. The "Create a channel" dialog box is open, and the user is typing the channel name.](https://kodekloud.com/kk-media/image/upload/v1752870661/notes-assets/images/Certified-Jenkins-Engineer-Demo-Slack-Notification-Setup/slack-create-channel-dialog.jpg)
</Frame>

<Frame>
  ![The image shows a Slack interface where a user is creating a new channel named "#dasher-notifications" with visibility options for public or private access.](https://kodekloud.com/kk-media/image/upload/v1752870663/notes-assets/images/Certified-Jenkins-Engineer-Demo-Slack-Notification-Setup/slack-new-channel-dasher-notifications.jpg)
</Frame>

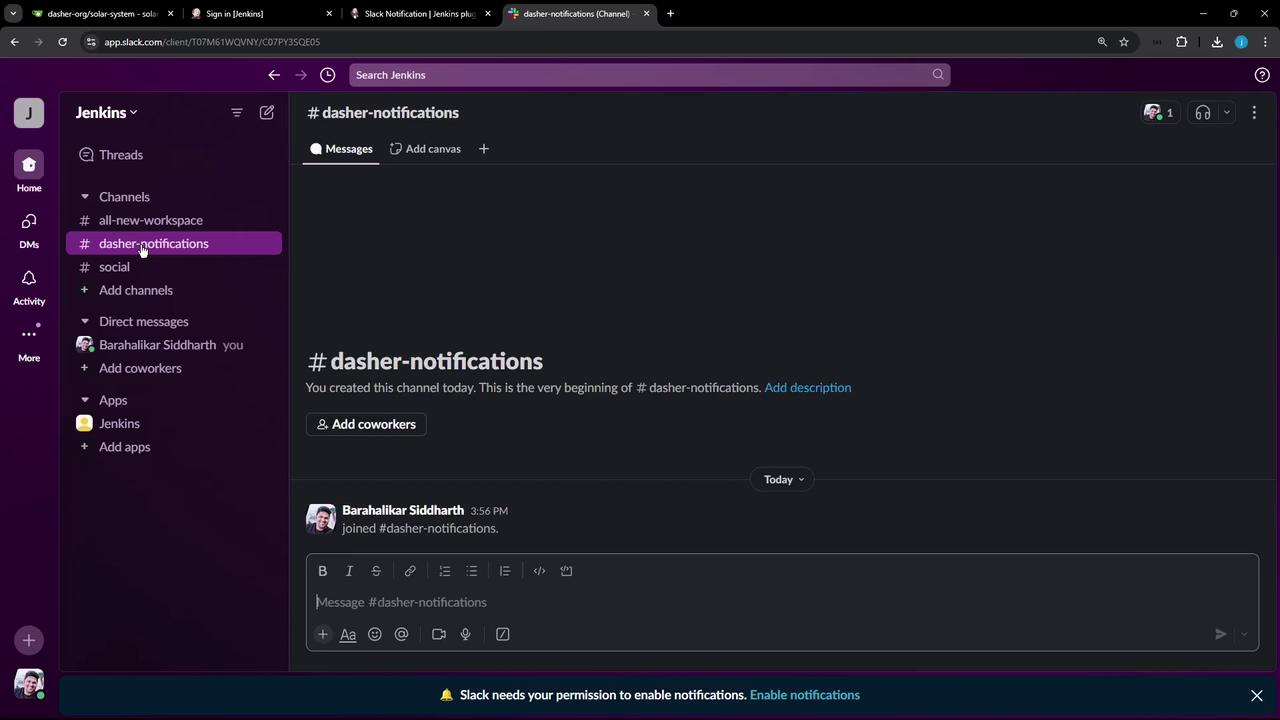
When the channel opens, you’ll see a welcome prompt and an option to enable notifications.
<Frame>
  ![The image shows a Slack workspace interface with a channel named "#dasher-notifications" open. The channel appears to be newly created, with a message from a user and a prompt to enable notifications.](https://kodekloud.com/kk-media/image/upload/v1752870664/notes-assets/images/Certified-Jenkins-Engineer-Demo-Slack-Notification-Setup/slack-workspace-dasher-notifications.jpg)
</Frame>

## Creating a Slack App via Manifest

Grant Jenkins permission to post messages by creating a Slack App with a bot user.

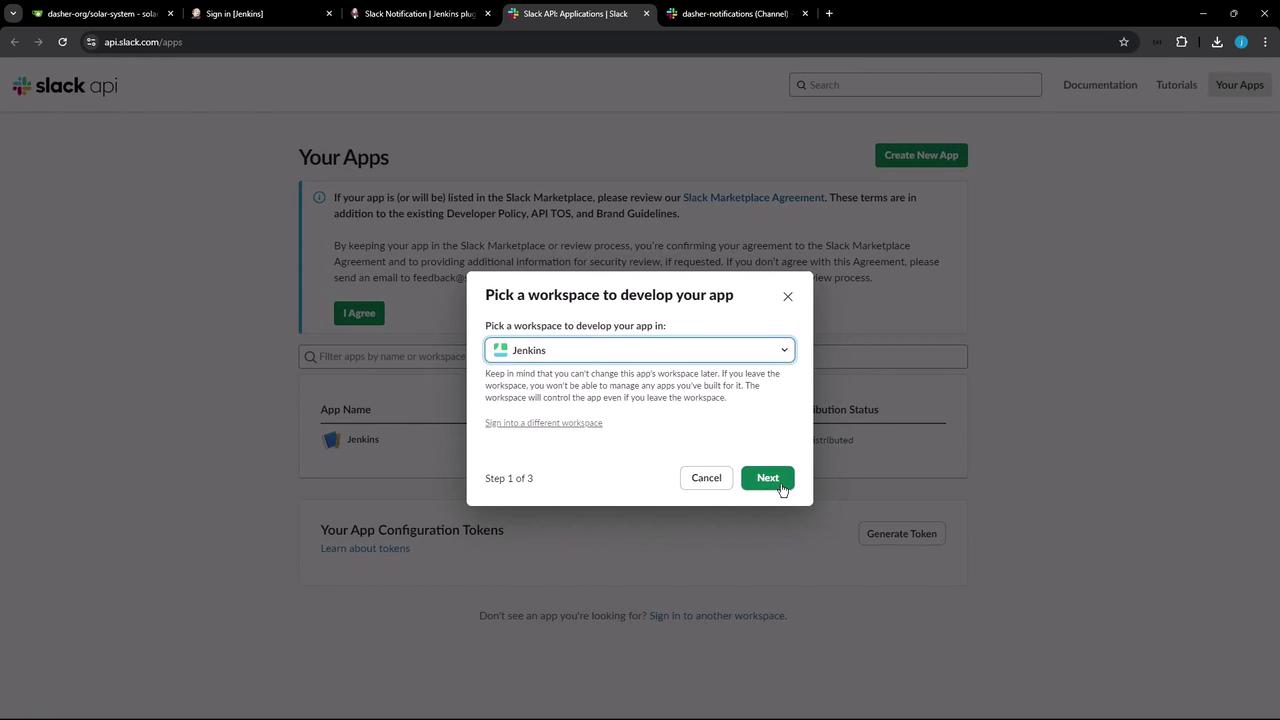
1. In Slack, go to **Apps > Build**, choose **From an app manifest**, and select your workspace.
<Frame>
  ![The image shows a Slack API webpage where a user is selecting a workspace to develop an app, with a pop-up window displaying options and a "Next" button.](https://kodekloud.com/kk-media/image/upload/v1752870664/notes-assets/images/Certified-Jenkins-Engineer-Demo-Slack-Notification-Setup/slack-api-workspace-selection-popup.jpg)
</Frame>

2. Paste the YAML manifest below to define the bot and its scopes:

```yaml theme={null}
display_information:
  name: Jenkins
features:
  bot_user:
    display_name: Jenkins
    always_online: true
oauth_config:
  scopes:
    bot:
      - channels:read
      - chat:write
      - chat:write.customize
      - files:write
      - reactions:write
      - users:read
      - users:read.email
      - groups:read
settings:
  org_deploy_enabled: false
  socket_mode_enabled: false
  token_rotation_enabled: false
```

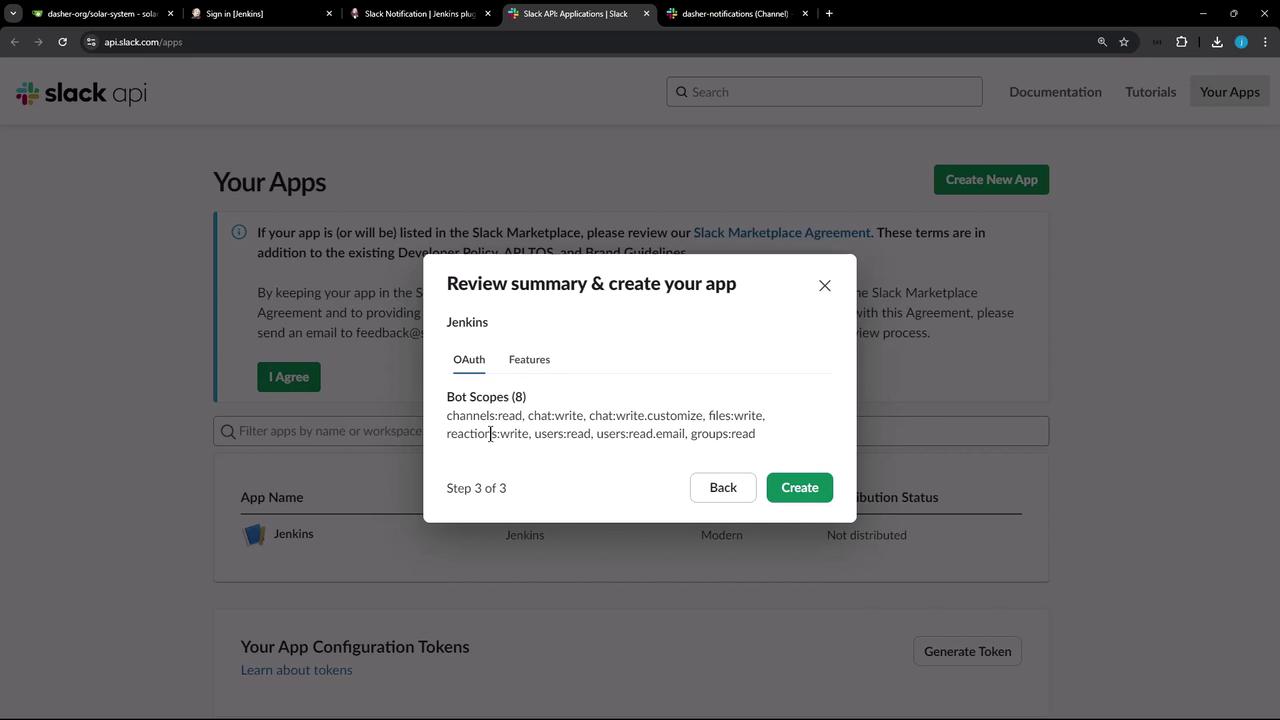
3. Click **Next**, review permissions, then **Create App**.
<Frame>
  ![The image shows a Slack API interface where a user is reviewing the summary to create an app named "Jenkins," with various bot scopes listed. A pop-up window displays options to go back or create the app.](https://kodekloud.com/kk-media/image/upload/v1752870665/notes-assets/images/Certified-Jenkins-Engineer-Demo-Slack-Notification-Setup/slack-api-jenkins-app-summary.jpg)
</Frame>

4. Under **OAuth & Permissions**, click **Install to Workspace** and authorize the app.
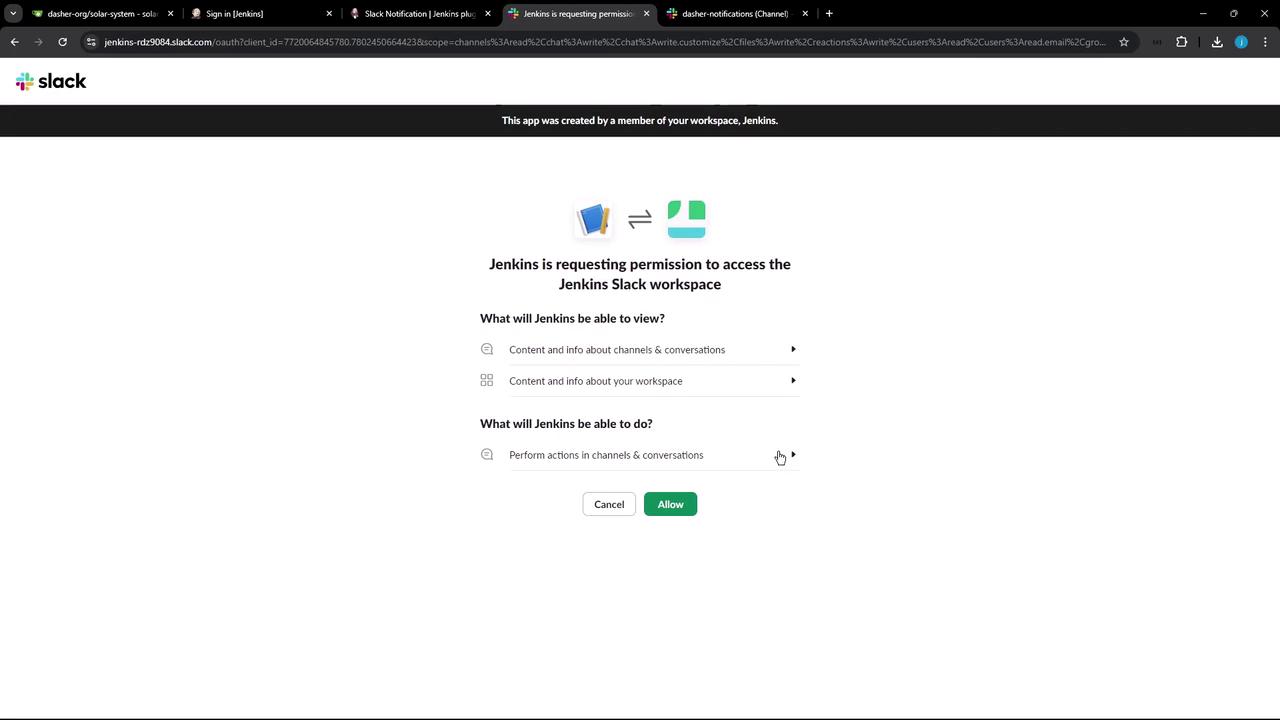
<Frame>
  ![The image shows a Slack authorization page where Jenkins is requesting permission to access a Slack workspace. It lists what Jenkins will be able to view and do, with options to cancel or allow.](https://kodekloud.com/kk-media/image/upload/v1752870666/notes-assets/images/Certified-Jenkins-Engineer-Demo-Slack-Notification-Setup/slack-authorization-jenkins-access.jpg)
</Frame>

5. Copy the **Bot User OAuth Access Token** from **Installed App Settings**. You’ll use this as a Jenkins credential.
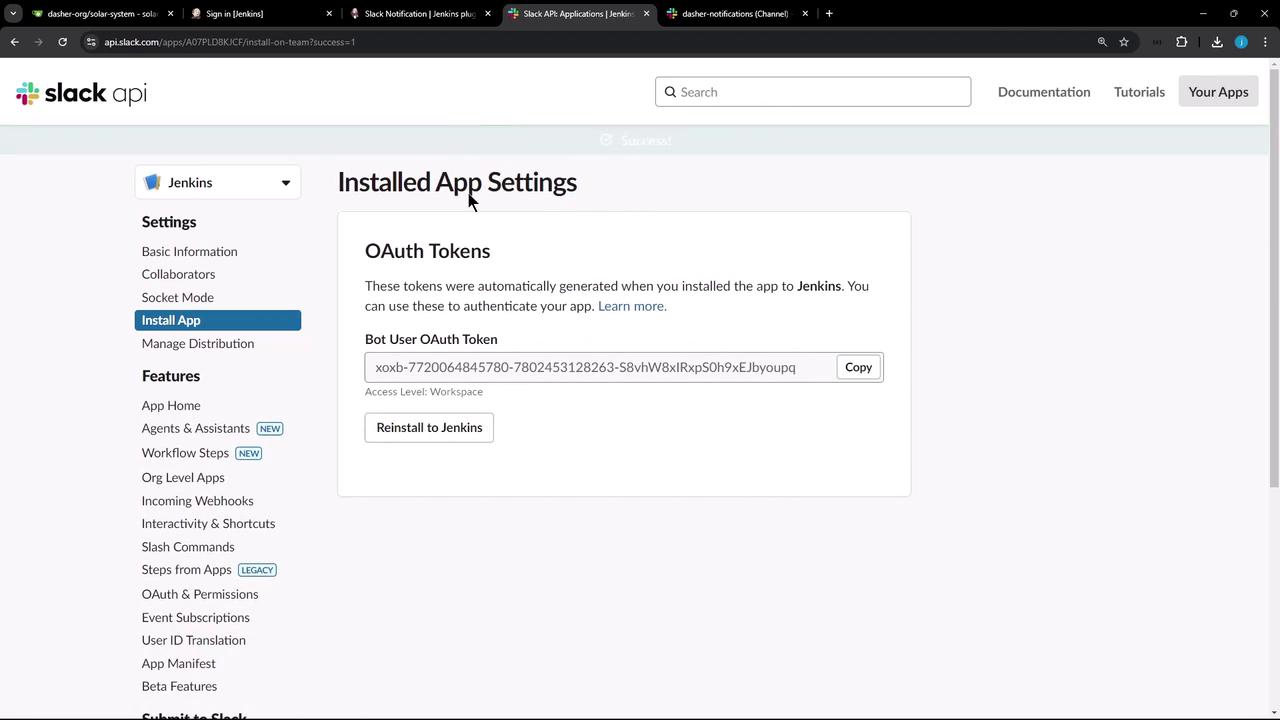
<Frame>
  ![The image shows the "Installed App Settings" page of the Slack API, displaying an OAuth token for a bot user and options related to app installation in Jenkins.](https://kodekloud.com/kk-media/image/upload/v1752870667/notes-assets/images/Certified-Jenkins-Engineer-Demo-Slack-Notification-Setup/slack-api-installed-app-settings.jpg)
</Frame>

### Slack Bot Scopes Reference

| Scope                | Purpose                      |
| -------------------- | ---------------------------- |
| channels:read        | Read public channel info     |
| chat:write           | Post messages in channels    |
| chat:write.customize | Customize message appearance |
| files:write          | Upload files                 |
| reactions:write      | Add reactions to messages    |
| users:read           | Read user profiles           |
| users:read.email     | Access user email addresses  |
| groups:read          | Read private channel info    |

## Configuring Jenkins with Slack Credentials

1. After Jenkins restarts, go to **Manage Jenkins > Configure System**.
2. Scroll to the **Slack** section.
3. For **Workspace**, enter `Jenkins`.
4. Under **Credentials**, click **Add > Jenkins > Secret text**.
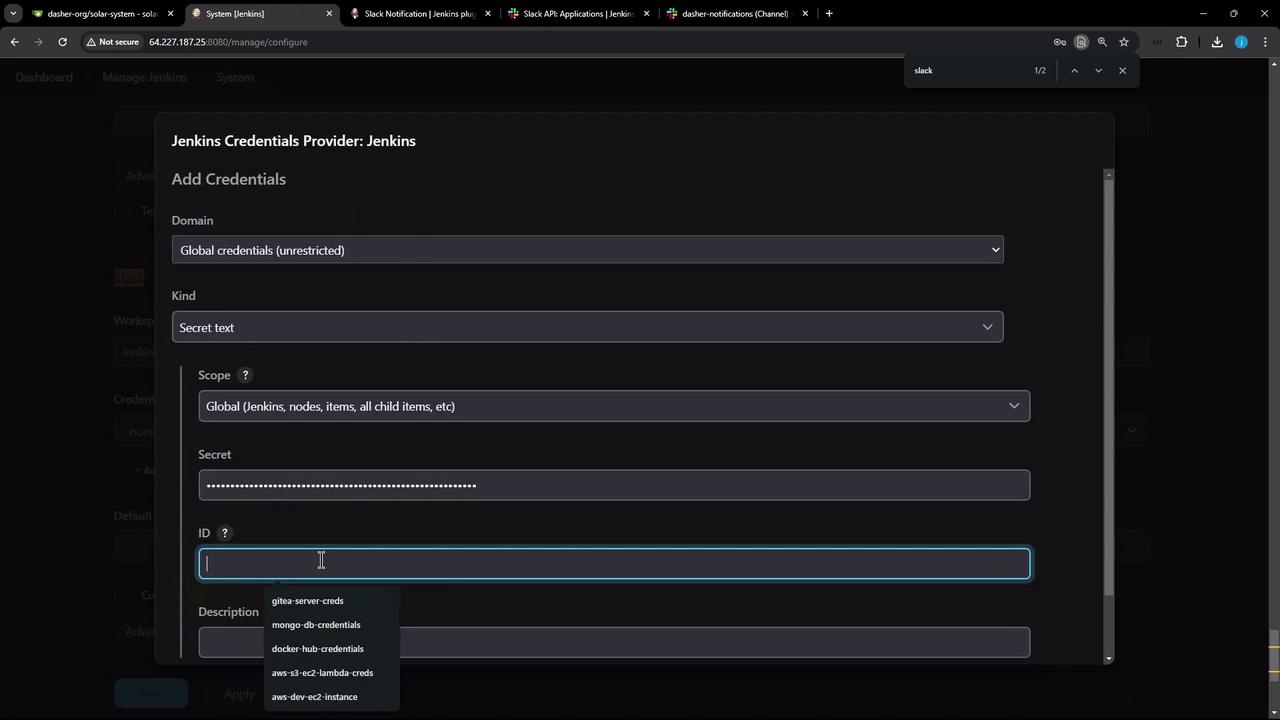
<Frame>
  ![The image shows a Jenkins interface for adding credentials, with fields for domain, kind, scope, secret, ID, and description. The interface is set to add a "Secret text" credential under "Global credentials (unrestricted)."](https://kodekloud.com/kk-media/image/upload/v1752870669/notes-assets/images/Certified-Jenkins-Engineer-Demo-Slack-Notification-Setup/jenkins-add-credentials-interface.jpg)
</Frame>

5. In the dialog:
   * **Kind**: Secret text
   * **Secret**: Bot User OAuth token
   * **ID**: `slack-bot-token`
   * Click **Add**.
6. Back in the Slack section, select **Credentials** → `slack-bot-token`.
7. Set **Default Channel / Member ID** to `#dasher-notifications`.
8. Click **Test Connection**, then **Save**.
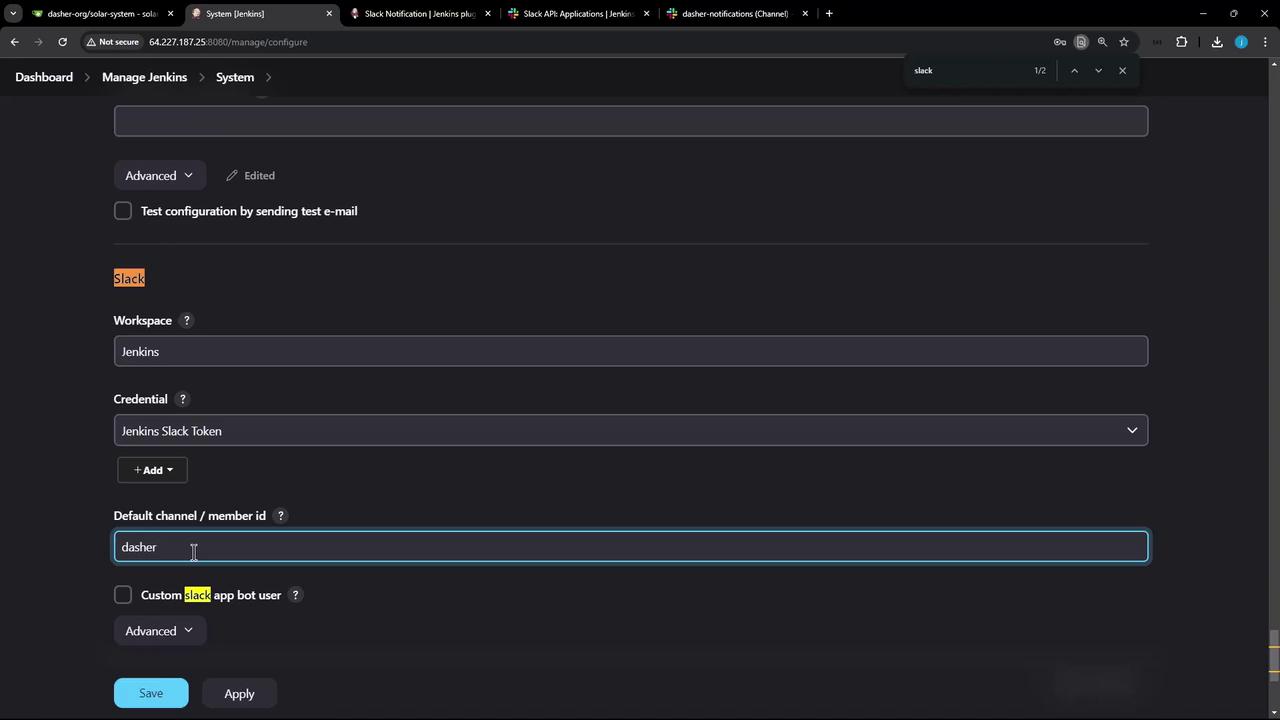
<Frame>
  ![The image shows a Jenkins system configuration page for Slack integration, with fields for workspace, credentials, and default channel/member ID. There are options to save or apply the settings.](https://kodekloud.com/kk-media/image/upload/v1752870669/notes-assets/images/Certified-Jenkins-Engineer-Demo-Slack-Notification-Setup/jenkins-slack-integration-config.jpg)
</Frame>

<Callout icon="triangle-alert" color="#FF6B6B">
  If Jenkins reports that the bot isn’t in the channel, invite it before retesting:

  ```text theme={null}
  /invite @Jenkins
  ```
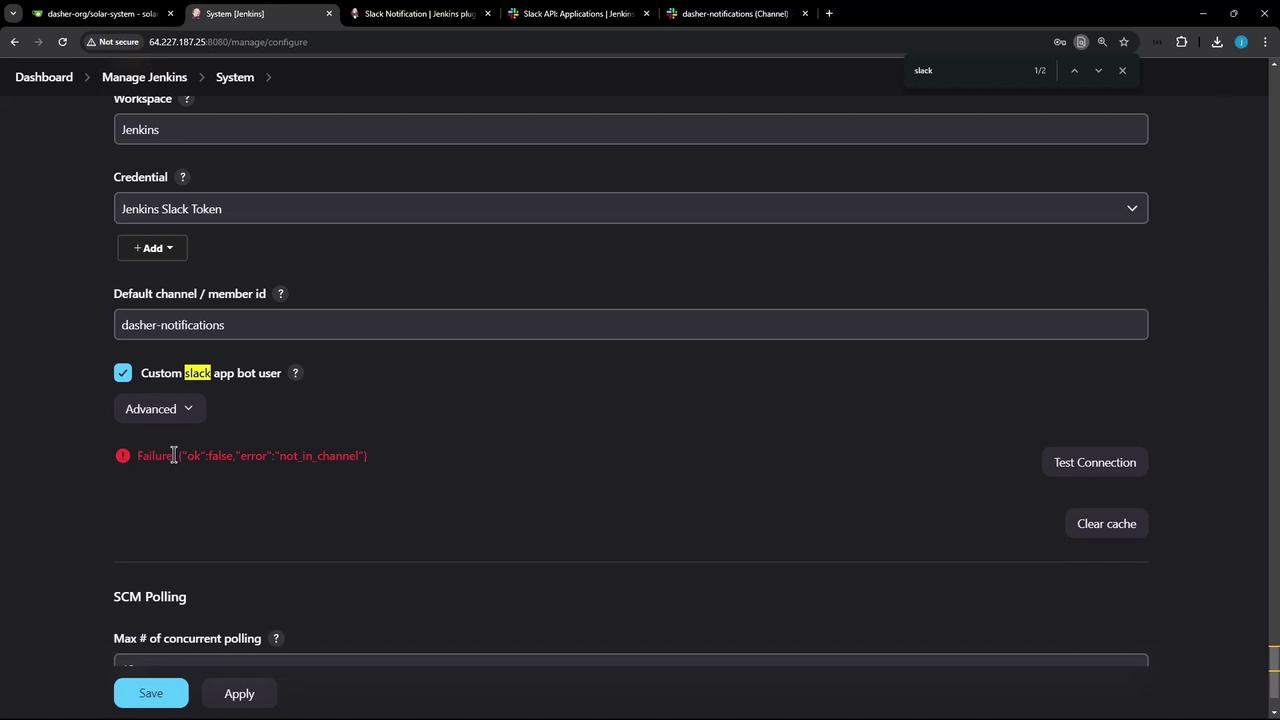
</Callout>

<Frame>
  ![The image shows a Jenkins system configuration page for Slack integration, with an error message indicating a connection failure due to the bot not being in the channel.](https://kodekloud.com/kk-media/image/upload/v1752870671/notes-assets/images/Certified-Jenkins-Engineer-Demo-Slack-Notification-Setup/jenkins-slack-integration-error.jpg)
</Frame>

## Verifying the Integration

Once the connection succeeds, the Jenkins app will join the channel and post a confirmation message.
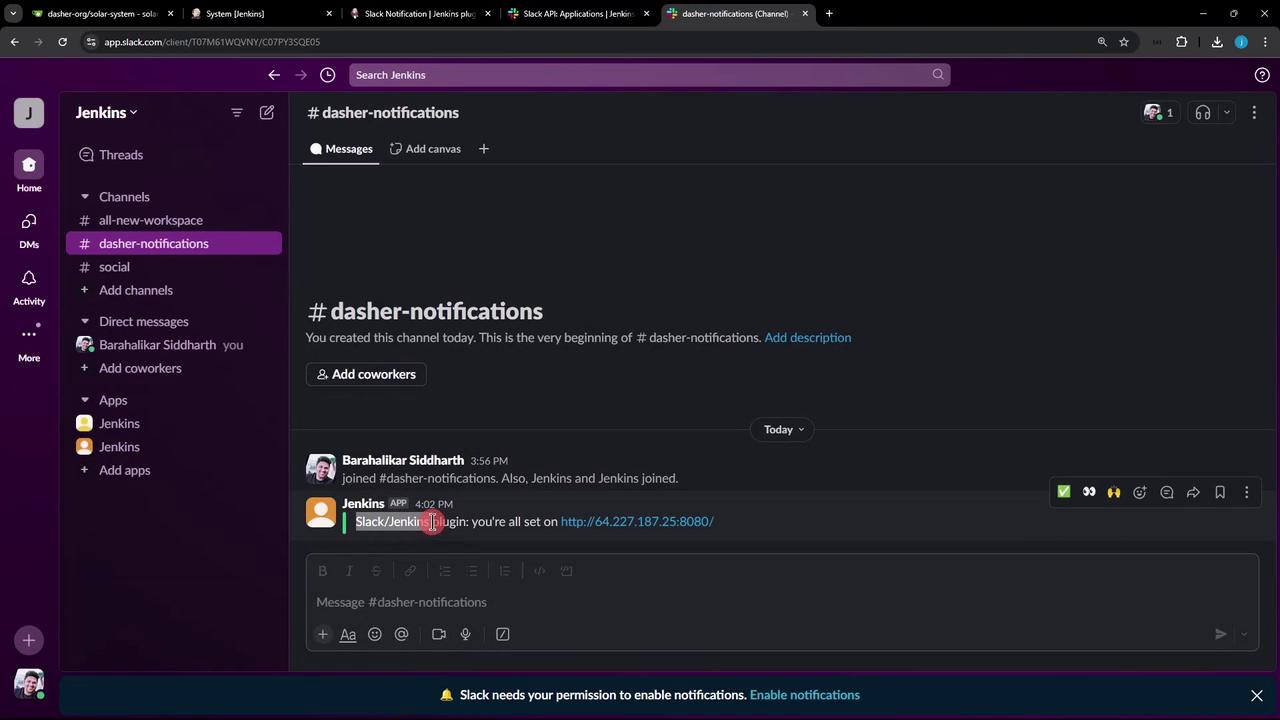
<Frame>
  ![The image shows a Slack workspace with a channel named "#dasher-notifications" open. A message indicates that a user and the Jenkins app have joined the channel.](https://kodekloud.com/kk-media/image/upload/v1752870672/notes-assets/images/Certified-Jenkins-Engineer-Demo-Slack-Notification-Setup/slack-workspace-dasher-notifications-2.jpg)
</Frame>

You’ve successfully set up Slack notifications for Jenkins. Next, configure your pipelines to send alerts on build successes, failures, and more!

## Links and References

* [Slack Notification Plugin for Jenkins](https://plugins.jenkins.io/slack/)
* [Jenkins Documentation](https://www.jenkins.io/doc/)
* [Slack API Documentation](https://api.slack.com/)

<CardGroup>
  <Card title="Watch Video" icon="video" cta="Learn more" href="https://learn.kodekloud.com/user/courses/certified-jenkins-engineer/module/bf3ddc28-a03d-4738-9f98-2779d81482f5/lesson/2ffb02a4-03ce-45cb-96f8-8fb7aea82391" />
</CardGroup>
