> ## Documentation Index
> Fetch the complete documentation index at: https://notes.kodekloud.com/llms.txt
> Use this file to discover all available pages before exploring further.

# Demo Create Pipeline using Blue Ocean Graphical Editor

> This guide explains how to use the Blue Ocean plugin in Jenkins to create and manage a multibranch pipeline visually.

In this guide, you’ll learn how to install the Blue Ocean plugin in Jenkins, create and configure a multibranch pipeline with its graphical editor, archive build artifacts, publish JUnit reports, and view results both in Blue Ocean and the classic UI. Each step includes screenshots to illustrate the workflow.

***

## 1. Install the Blue Ocean Plugin

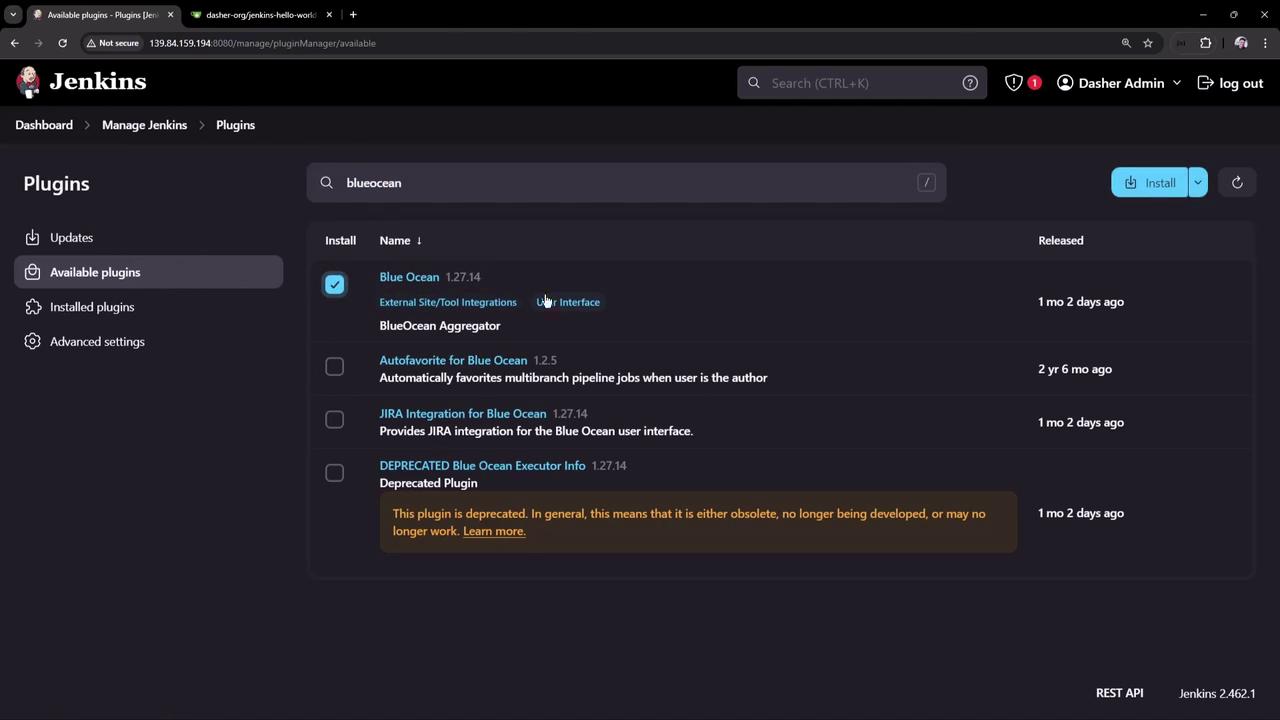
1. Navigate to **Manage Jenkins → Plugin Manager → Available**.
2. Search for **blueocean**, select the plugin bundle, and click **Install without restart**.

<Callout icon="lightbulb" color="#1CB2FE">
  Blue Ocean requires Jenkins 2.x and the Pipeline plugin. Ensure your instance meets these prerequisites before installation.
</Callout>

<Frame>
  ![The image shows a Jenkins plugin management interface with a search for "blueocean," displaying several plugins related to Blue Ocean, including one marked as deprecated.](https://kodekloud.com/kk-media/image/upload/v1752870755/notes-assets/images/Certified-Jenkins-Engineer-Demo-Create-Pipeline-using-Blue-Ocean-Graphical-Editor/jenkins-plugin-management-blueocean.jpg)
</Frame>

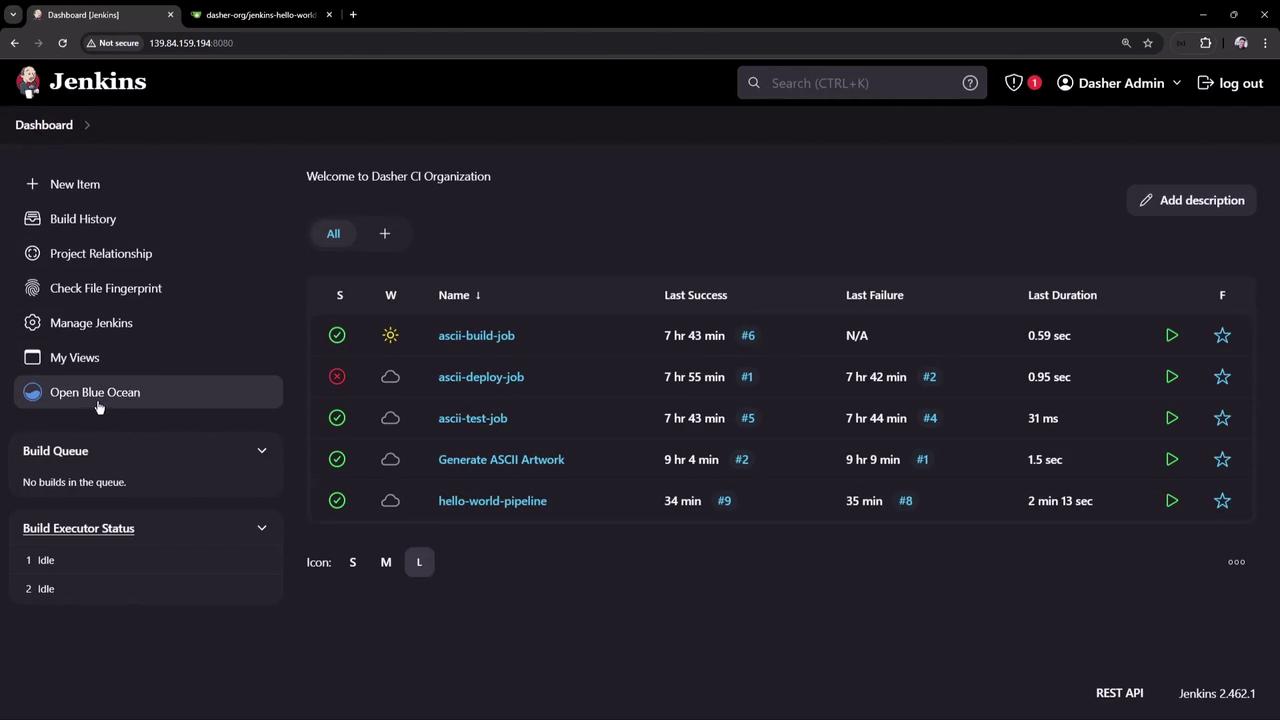
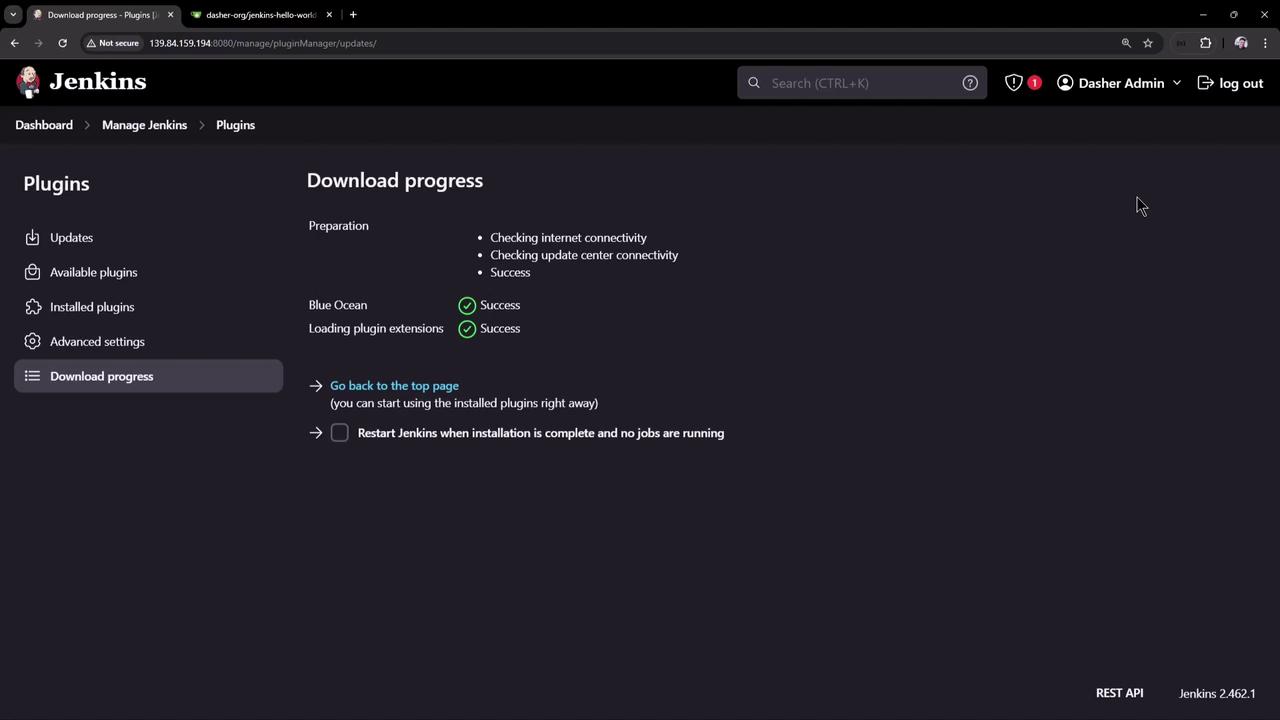
After installation, return to the dashboard. You should see **Open Blue Ocean** in the sidebar.
<Frame>
  ![The image shows a Jenkins dashboard displaying the download progress of plugins, with successful connectivity checks and plugin installations.](https://kodekloud.com/kk-media/image/upload/v1752870756/notes-assets/images/Certified-Jenkins-Engineer-Demo-Create-Pipeline-using-Blue-Ocean-Graphical-Editor/jenkins-dashboard-plugin-downloads.jpg)
</Frame>

<Frame>
  ![The image shows a Jenkins dashboard displaying a list of jobs with their status, last success, last failure, and duration. The sidebar includes options like "Build History" and "Open Blue Ocean."](https://kodekloud.com/kk-media/image/upload/v1752870757/notes-assets/images/Certified-Jenkins-Engineer-Demo-Create-Pipeline-using-Blue-Ocean-Graphical-Editor/jenkins-dashboard-job-status.jpg)
</Frame>

***

## 2. Launch Blue Ocean and Create a New Pipeline

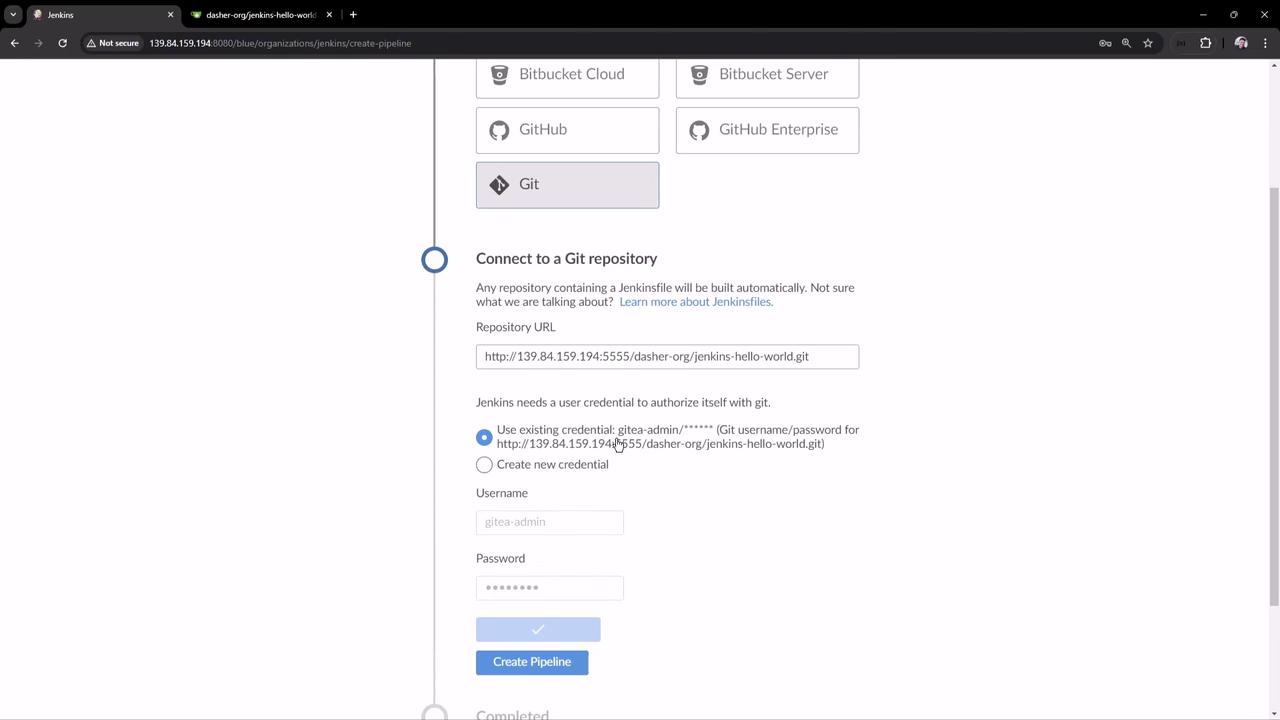
1. Click **Open Blue Ocean → New Pipeline**.
2. Select **Git**, enter your repository URL, and add credentials if needed.
3. Blue Ocean will scan branches for a `Jenkinsfile` and automatically trigger the pipeline if found.
<Frame>
  ![The image shows a Jenkins interface for creating a pipeline, where a user is connecting to a Git repository by entering a repository URL and selecting user credentials.](https://kodekloud.com/kk-media/image/upload/v1752870758/notes-assets/images/Certified-Jenkins-Engineer-Demo-Create-Pipeline-using-Blue-Ocean-Graphical-Editor/jenkins-pipeline-git-connection.jpg)
</Frame>

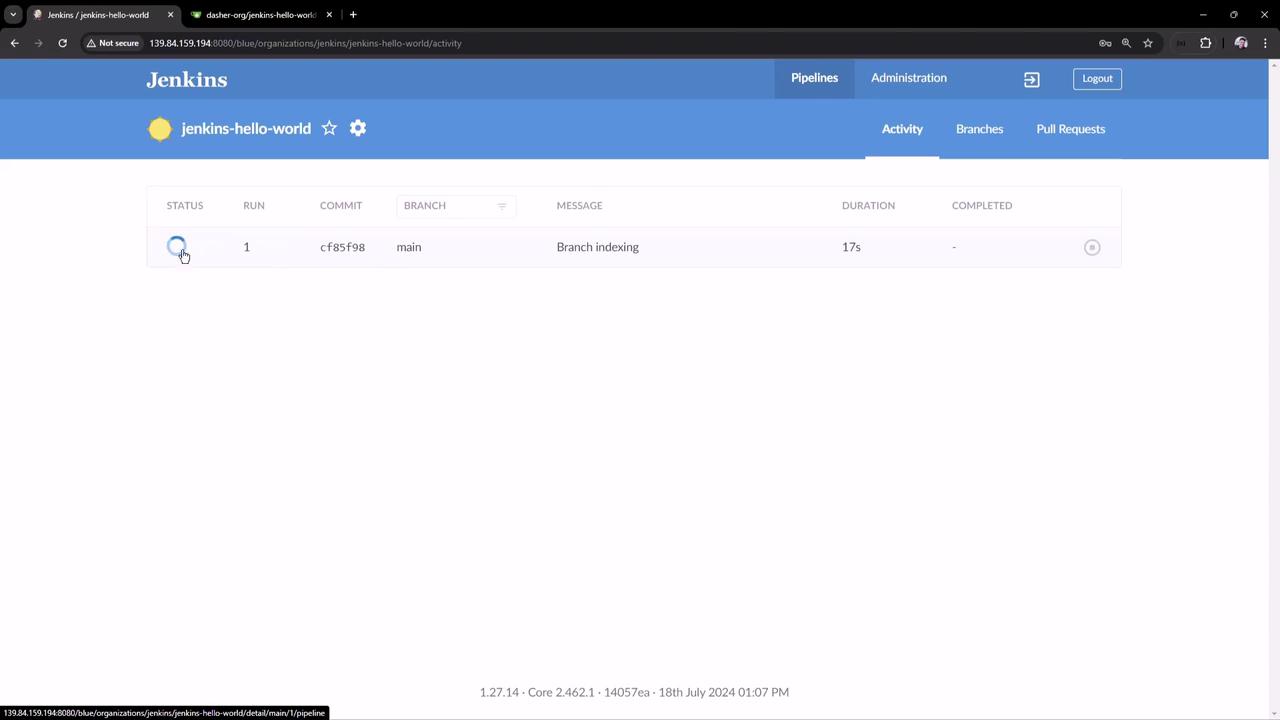
Once branches are indexed and a run starts, you’ll see the activity feed:
<Frame>
  ![The image shows a Jenkins dashboard displaying a pipeline activity for a project named "jenkins-hello-world." It includes details such as the status, run number, commit ID, branch, message, and duration of the activity.](https://kodekloud.com/kk-media/image/upload/v1752870759/notes-assets/images/Certified-Jenkins-Engineer-Demo-Create-Pipeline-using-Blue-Ocean-Graphical-Editor/jenkins-dashboard-pipeline-activity.jpg)
</Frame>

***

## 3. Example `Jenkinsfile` and Stage Overview

Below is the sample `Jenkinsfile` stored in your repository. It defines three key stages:

```groovy theme={null}
pipeline {
  agent any
  tools { maven 'M398' }
  stages {
    stage('Echo Version') {
      steps {
        sh 'echo Print Maven Version'
        sh 'mvn -version'
      }
    }
    stage('Build') {
      steps {
        sh 'mvn clean package -DskipTests=true'
      }
    }
    stage('Unit Test') {
      steps {
        script {
          for (int i = 0; i < 60; i++) {
            echo "${i + 1}"
            sleep 1
          }
        }
        sh 'mvn test'
      }
    }
  }
}
```

| Stage Name   | Purpose                           | Commands                              |
| ------------ | --------------------------------- | ------------------------------------- |
| Echo Version | Display Maven environment details | `mvn -version`                        |
| Build        | Compile and package the app       | `mvn clean package -DskipTests=true`  |
| Unit Test    | Execute unit tests                | `mvn test` (with optional sleep loop) |

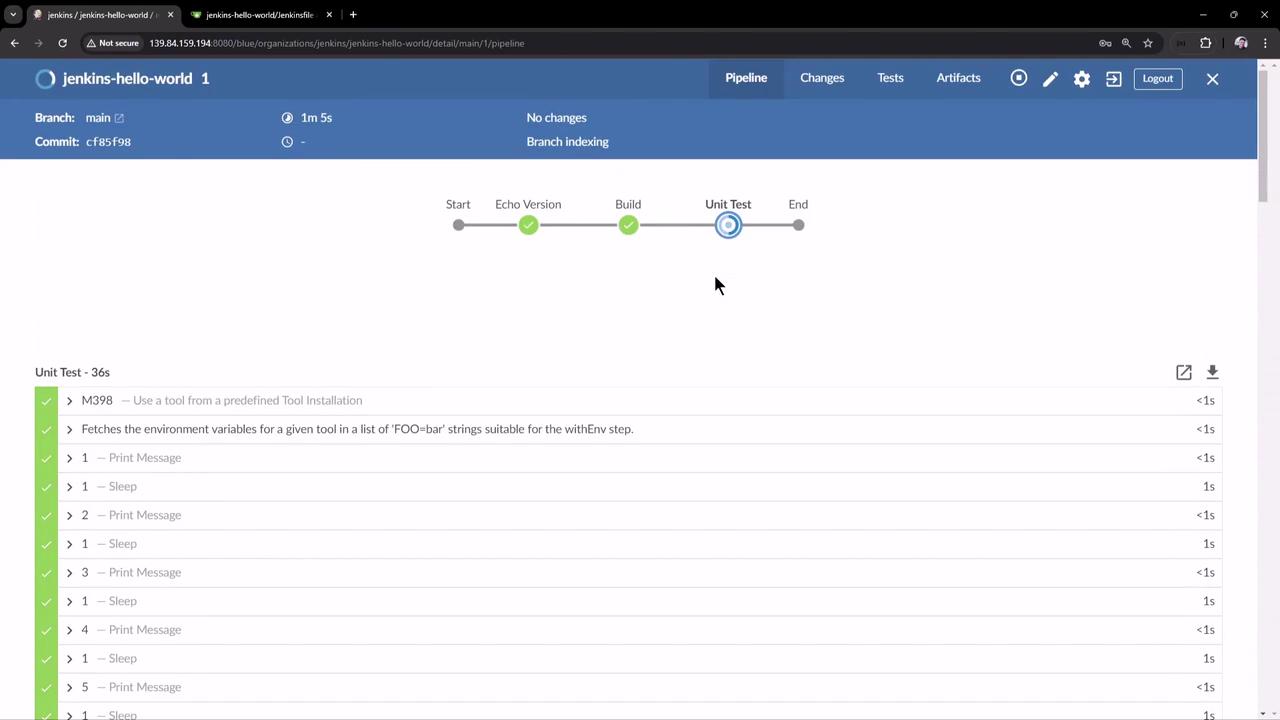
After triggering the pipeline, you can monitor each stage in real time:
<Frame>
  ![The image shows a Jenkins pipeline interface with a progress bar indicating stages from "Start" to "End," currently at the "Unit Test" stage. Below, there are details of unit test steps, all marked as successful.](https://kodekloud.com/kk-media/image/upload/v1752870760/notes-assets/images/Certified-Jenkins-Engineer-Demo-Create-Pipeline-using-Blue-Ocean-Graphical-Editor/jenkins-pipeline-unit-test-success.jpg)
</Frame>

***

### Viewing Console Logs

**Echo Version** stage output:

```bash theme={null}
mvn -version
Apache Maven 3.9.8 (3645f66c…)
Maven home: /var/lib/jenkins/tools/hudson.tasks.Maven.MavenInstallation/M398
Java version: 17.0.7, vendor: Ubuntu
OS name: "linux", version: "6.8.0-39-generic"
```

**Build** stage output:

```bash theme={null}
mvn clean package -DskipTests=true
[INFO] Scanning for projects…
[INFO] Building hello-demo 0.0.1-SNAPSHOT
[INFO] --- maven-clean-plugin:3.3.2:clean (default-clean) @ hello-demo ---
…
```
<Frame>
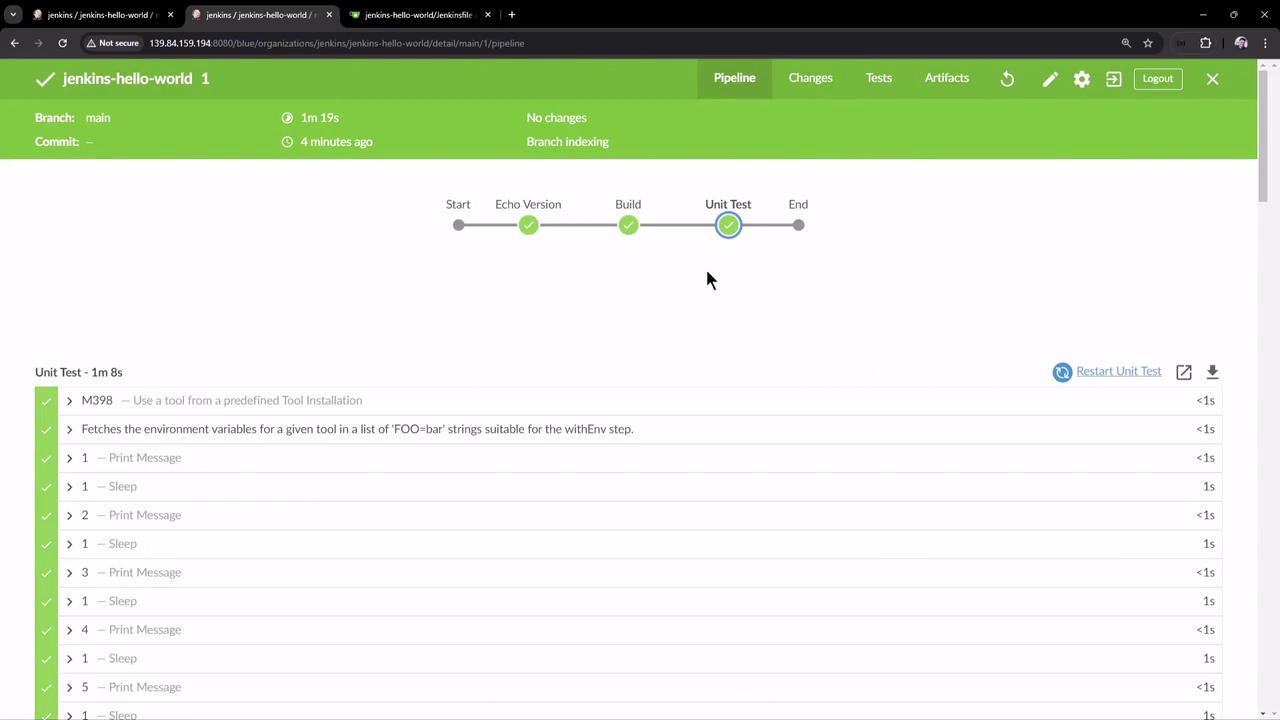
  ![The image shows a Jenkins pipeline interface with a completed unit test stage, displaying a series of steps and their execution times. The pipeline stages are visually represented with checkmarks indicating successful completion.](https://kodekloud.com/kk-media/image/upload/v1752870761/notes-assets/images/Certified-Jenkins-Engineer-Demo-Create-Pipeline-using-Blue-Ocean-Graphical-Editor/jenkins-pipeline-unit-test-completed.jpg)
</Frame>

***

## 4. Inspect the Multibranch Pipeline Configuration

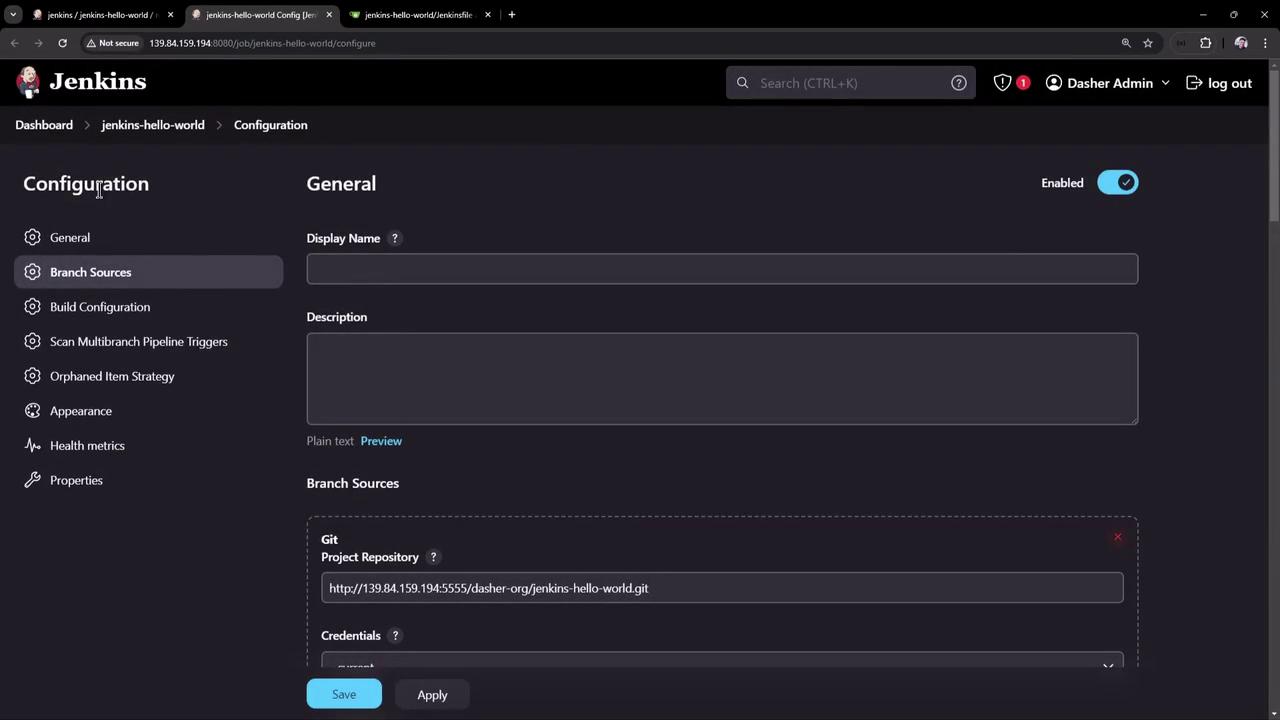
Blue Ocean automatically creates a **Multibranch Pipeline** job in the classic UI:
<Frame>
  ![The image shows a Jenkins configuration page for a project named "jenkins-hello-world," with options for setting branch sources and other configurations. The interface includes fields for display name, description, and Git project repository URL.](https://kodekloud.com/kk-media/image/upload/v1752870762/notes-assets/images/Certified-Jenkins-Engineer-Demo-Create-Pipeline-using-Blue-Ocean-Graphical-Editor/jenkins-hello-world-configuration-page.jpg)
</Frame>

When Jenkins scans your repository, it runs:

```bash theme={null}
> git ls-remote -h -- http://…/jenkins-hello-world.git
Checking branch main
'Jenkinsfile' found
Met criteria
Scheduled build for branch: main
Processed 1 branches
Finished: SUCCESS
```

***

## 5. Edit the Pipeline in Blue Ocean

Back in Blue Ocean:

1. Select your branch and click the **pencil** icon to open the visual editor.
2. Remove the sleep loop in **Unit Test** to simplify:

```groovy theme={null}
stage('Unit Test') {
  steps {
    sh 'mvn test'
  }
}
```

Press **Ctrl+S** (or **Command+S** on Mac) to save and commit the changes to your `Jenkinsfile`.

***

## 6. Archive Build Artifacts

1. In the **Build** stage, click **+ Add Step → Archive Artifacts**.
2. Enter the file pattern: `target/hello-demo-*.jar`.

Verify on the Jenkins controller:

```bash theme={null}
cd /var/lib/jenkins/workspace/jenkins-hello-world_main/target
ls
hello-demo-0.0.1-SNAPSHOT.jar
```

Your updated **Build** stage:

```groovy theme={null}
stage('Build') {
  steps {
    sh 'mvn clean package -DskipTests=true'
    archiveArtifacts 'target/hello-demo-*.jar'
  }
}
```

***

## 7. Publish JUnit Test Results

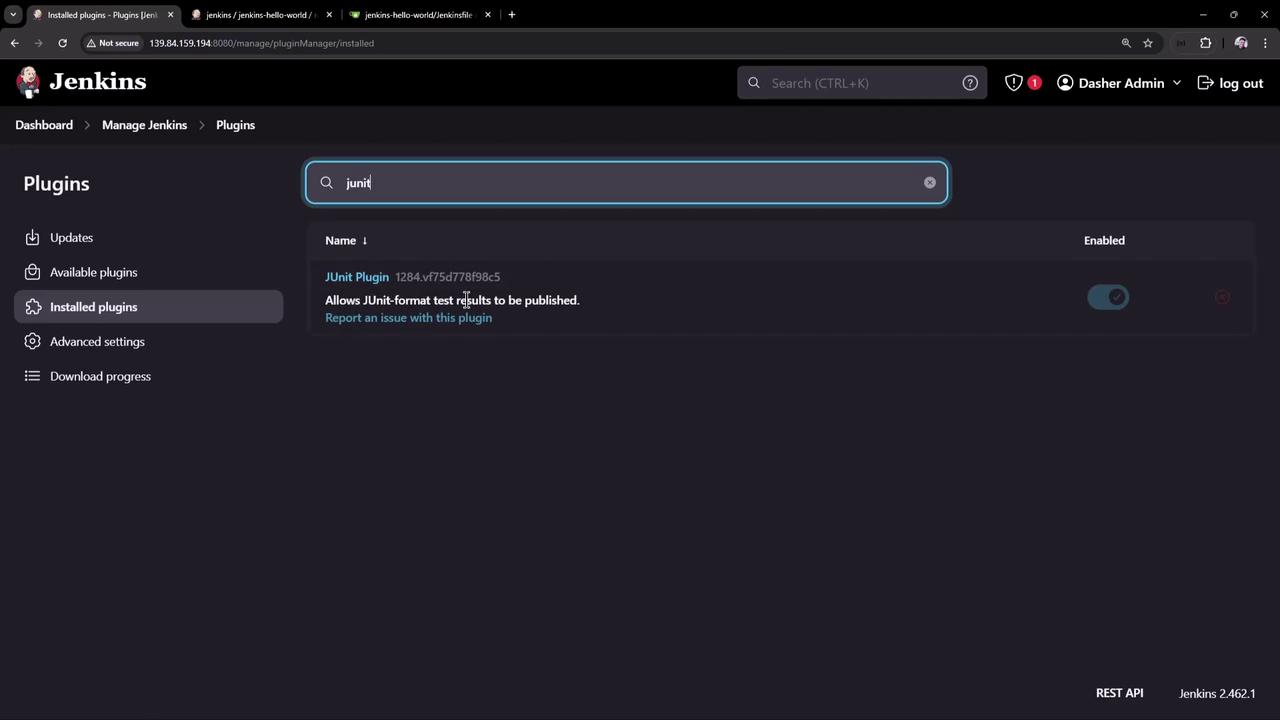
The JUnit plugin is pre-installed, as shown here:
<Frame>
  ![The image shows a Jenkins interface with the "Installed plugins" section open, displaying the JUnit Plugin, which allows JUnit-format test results to be published.](https://kodekloud.com/kk-media/image/upload/v1752870763/notes-assets/images/Certified-Jenkins-Engineer-Demo-Create-Pipeline-using-Blue-Ocean-Graphical-Editor/jenkins-installed-plugins-junit.jpg)
</Frame>

To add JUnit reporting:

1. Edit the **Unit Test** stage → **+ Add Step → Archive JUnit-formatted test results**.
2. Enter `target/surefire-reports/TEST-*.xml` and select **Keep properties** and **Keep test names**.

Final **Unit Test** stage snippet:

```groovy theme={null}
stage('Unit Test') {
  steps {
    sh 'mvn test'
    junit testResults: 'target/surefire-reports/TEST-*.xml', keepProperties: true, keepTestNames: true
  }
}
```

***

## 8. Commit and Validate Changes

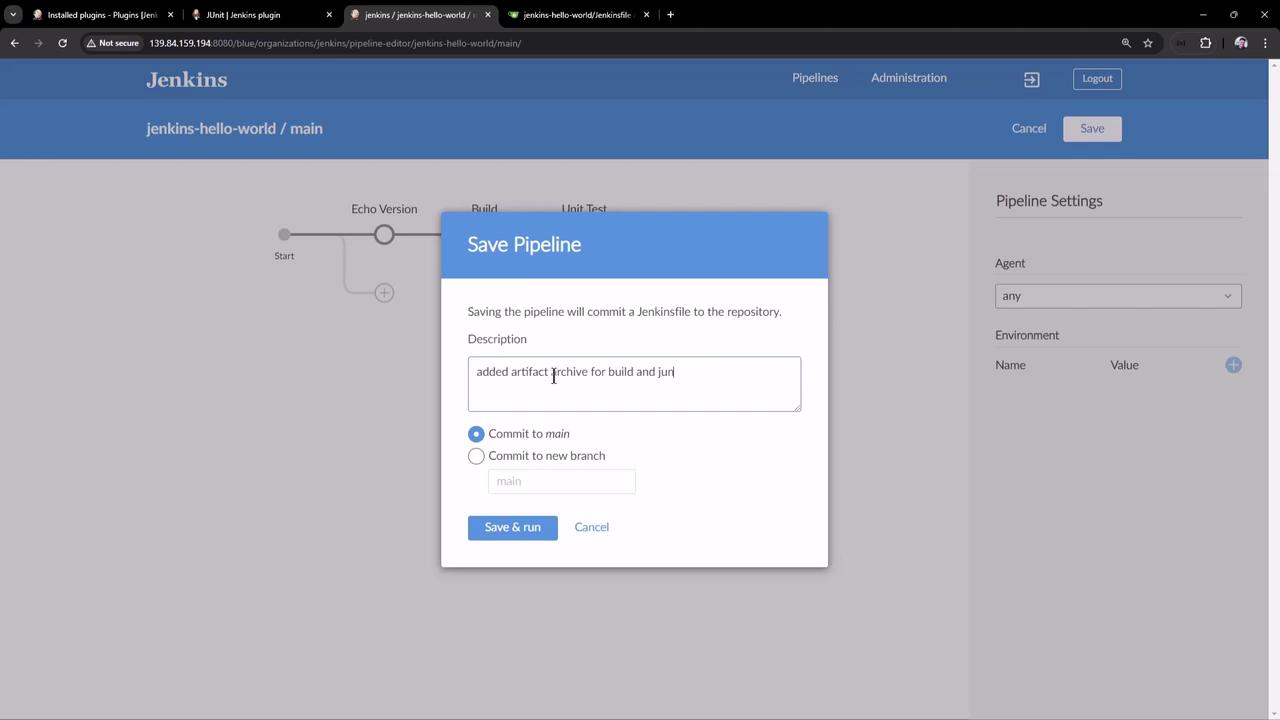
Click **Save**, add a commit message (e.g., “Archive artifacts and publish JUnit reports”), and push to the `main` branch:
<Frame>
  ![The image shows a Jenkins interface with a "Save Pipeline" dialog box open, allowing the user to commit changes to a Jenkinsfile in a repository. The dialog includes options to commit to the main branch or a new branch, with a description field filled in.](https://kodekloud.com/kk-media/image/upload/v1752870764/notes-assets/images/Certified-Jenkins-Engineer-Demo-Create-Pipeline-using-Blue-Ocean-Graphical-Editor/jenkins-save-pipeline-dialog.jpg)
</Frame>

<Callout icon="triangle-alert" color="#FF6B6B">
  If you mistype the artifact pattern (for example, `hello-world-*.jar`), the build will fail:

  ```bash theme={null}
  > archiveArtifacts 'target/hello-world-*.jar'
  No artifacts found that match the file pattern 'target/hello-world-*.jar'
  ```

  Double-check your paths before committing.
</Callout>

***

## 9. View Pipeline Results

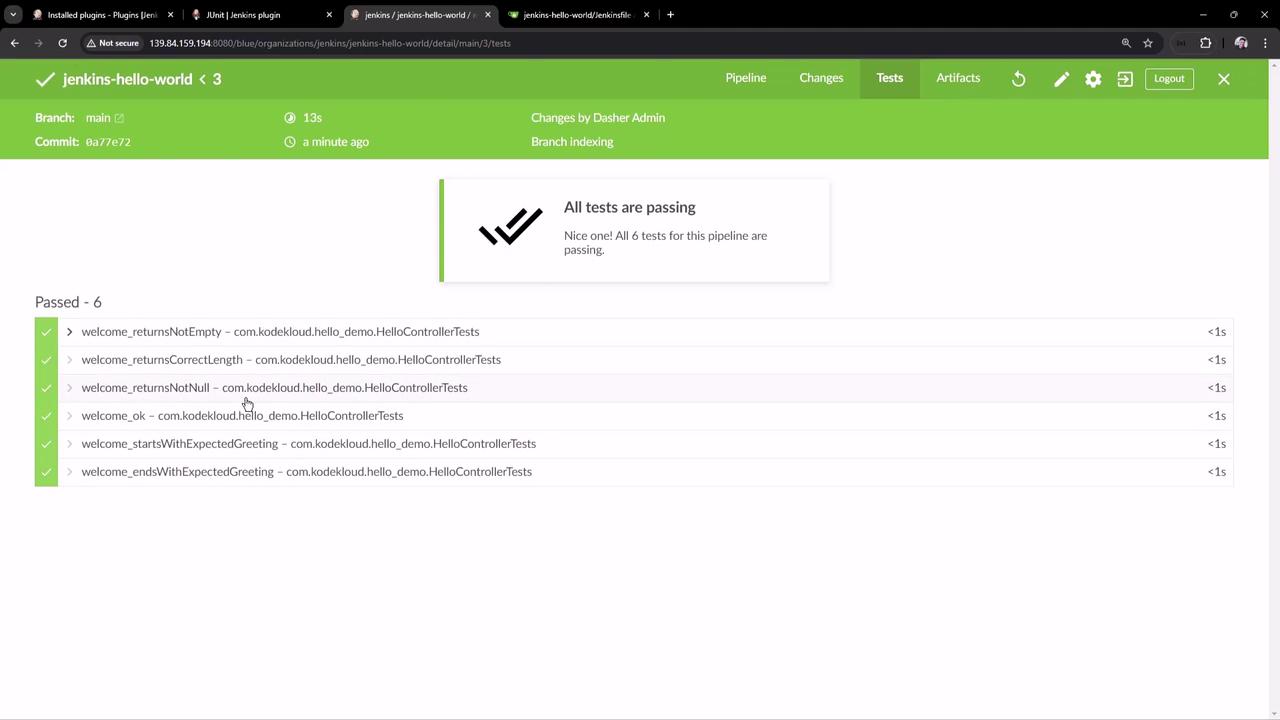
Once the pipeline completes successfully, Blue Ocean displays:

* **Build** stage with archived artifacts
* **Unit Test** stage with pass/fail details
* A summary showing all tests passed
<Frame>
  ![The image shows a Jenkins interface with a test summary indicating that all six tests have passed successfully.](https://kodekloud.com/kk-media/image/upload/v1752870765/notes-assets/images/Certified-Jenkins-Engineer-Demo-Create-Pipeline-using-Blue-Ocean-Graphical-Editor/jenkins-test-summary-all-passed.jpg)
</Frame>

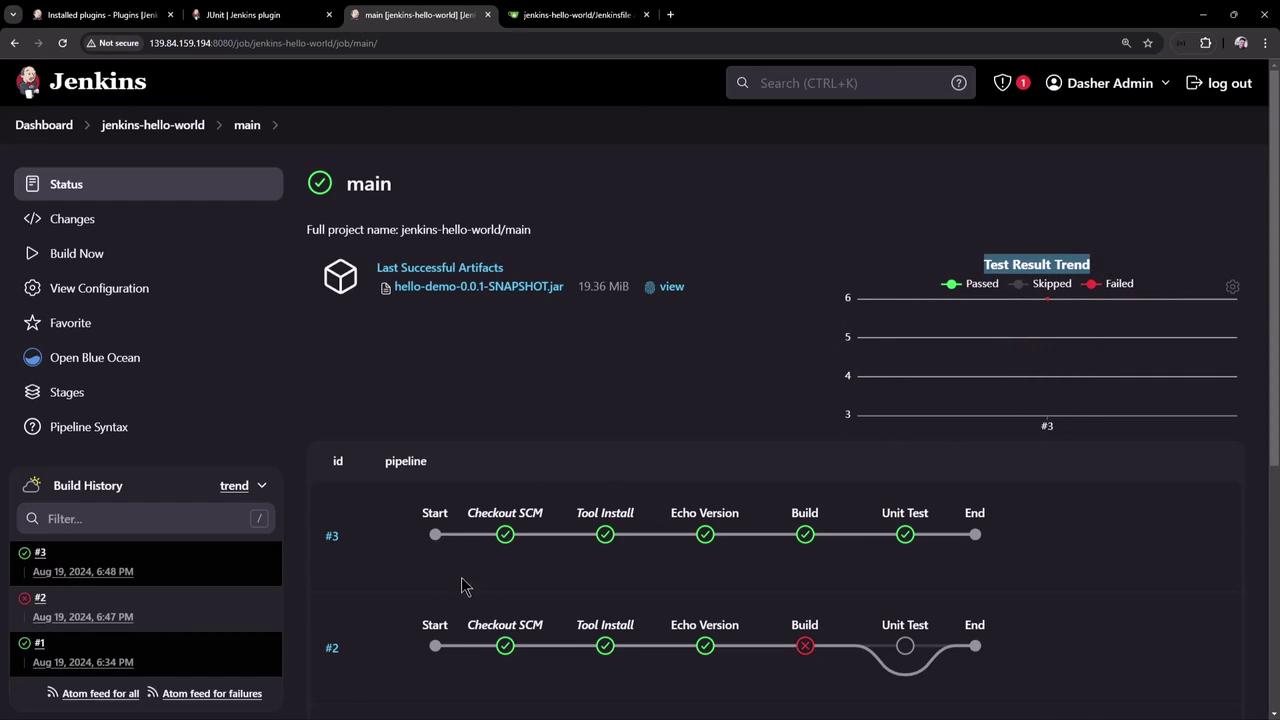
In the classic UI, you can also review build history, visualize test trends, and download artifacts:
<Frame>
  ![The image shows a Jenkins dashboard displaying the status of a project pipeline, including build history and test result trends. It highlights successful and failed stages in the pipeline process.](https://kodekloud.com/kk-media/image/upload/v1752870767/notes-assets/images/Certified-Jenkins-Engineer-Demo-Create-Pipeline-using-Blue-Ocean-Graphical-Editor/jenkins-dashboard-project-pipeline-status.jpg)
</Frame>

***

## Additional Resources

* [Blue Ocean Documentation](https://www.jenkins.io/doc/book/blueocean/)
* [Jenkins Pipeline Syntax](https://www.jenkins.io/doc/book/pipeline/syntax/)
* [Jenkins Plugin Manager](https://www.jenkins.io/doc/book/managing/plugins/)

<CardGroup>
  <Card title="Watch Video" icon="video" cta="Learn more" href="https://learn.kodekloud.com/user/courses/certified-jenkins-engineer/module/054c2c42-f54a-42a4-ab39-4b432a36aaa1/lesson/e734bfbe-7589-4a8e-b90e-f5ed01d02517" />
</CardGroup>