> ## Documentation Index
> Fetch the complete documentation index at: https://notes.kodekloud.com/llms.txt
> Use this file to discover all available pages before exploring further.
# Demo Create Pipeline with Parameters
> This tutorial teaches how to create a parameterized Jenkins pipeline for flexible CI/CD workflows without duplicating the Jenkinsfile.
In this tutorial, you’ll learn how to build a single, parameterized Jenkins pipeline that can switch between branches, customize ports, and adjust timeouts—all without duplicating your Jenkinsfile. Parameterized pipelines make your CI/CD workflows more flexible and maintainable.
## What Is a Parameterized Pipeline?
A parameterized build in Jenkins lets you define input variables that users can set at build time. This approach helps you:
* Reuse the same pipeline for multiple branches or environments
* Pass dynamic values such as branch names, ports, or timeouts
* Reduce Jenkinsfile duplication and improve maintainability
## Example Repository
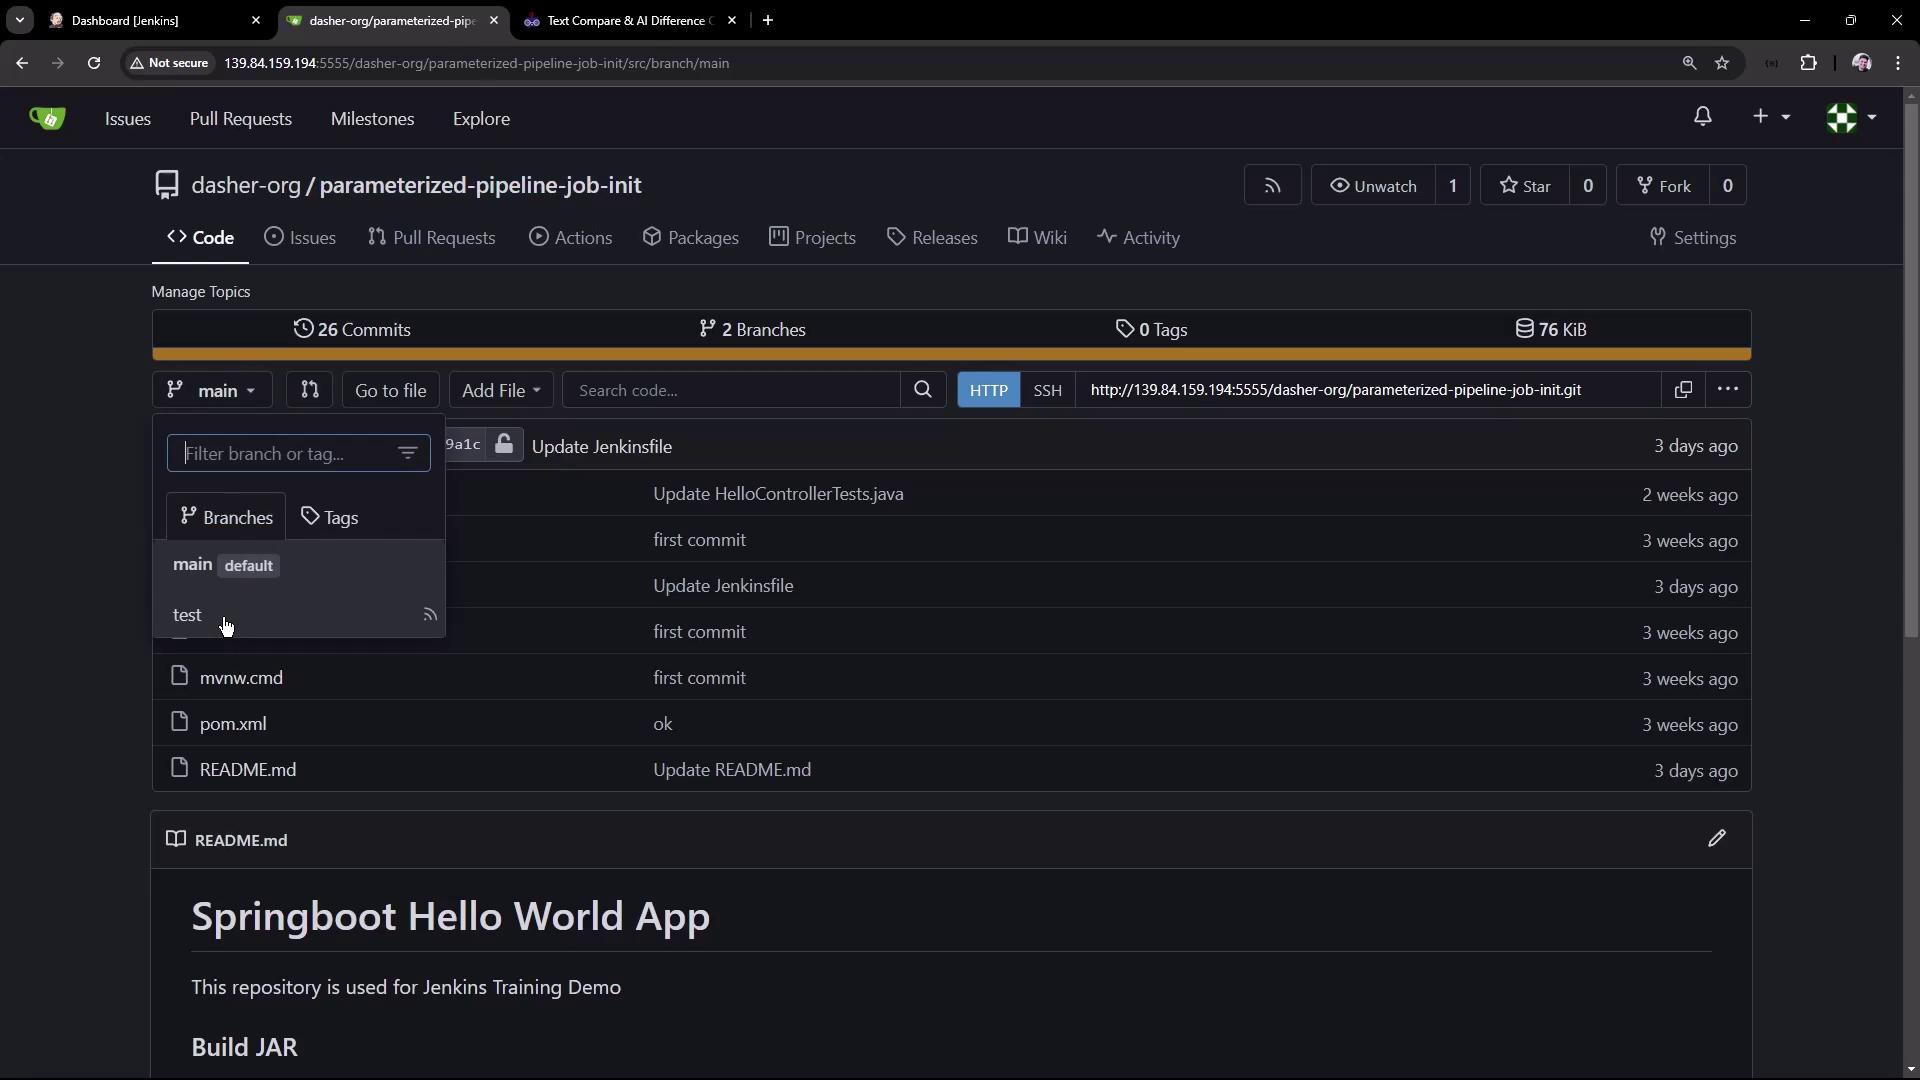
We’ll use the **parameterized-pipeline-job-init** GitHub repository, which contains a simple Spring Boot “Hello World” application. There are two branches:
* **main**: Production pipeline with containerization and Kubernetes deployment
* **test**: Basic pipeline that builds, tests, and deploys locally
### Pipeline Definition: `test` Branch
```groovy theme={null}
pipeline {
agent any
tools { maven 'M398' }
stages {
stage('Maven Version') {
steps {
sh 'echo Print Maven Version'
sh 'mvn -version'
}
}
stage('Build') {
steps {
sh 'mvn clean package -DskipTests=true'
archiveArtifacts 'target/hello-demo-*.jar'
}
}
stage('Test') {
steps {
sh 'mvn test'
junit(testResults: 'target/surefire-reports/TEST-*.xml',
keepProperties: true,
keepTestNames: true)
}
}
stage('Local Deployment') {
steps {
sh 'java -jar target/hello-demo-*.jar > /dev/null &'
}
}
stage('Integration Testing') {
steps {
sh 'sleep 10s'
sh 'echo Testing using cURL commands......'
}
}
}
}
```
### Pipeline Definition: `main` Branch
```groovy theme={null}
pipeline {
agent any
tools { maven 'M398' }
stages {
stage('Build') {
steps {
sh 'mvn clean package -DskipTests=true'
archiveArtifacts 'target/hello-demo-*.jar'
}
}
stage('Test') {
steps {
sh 'mvn test'
junit(testResults: 'target/surefire-reports/TEST-*.xml',
keepProperties: true,
keepTestNames: true)
}
}
stage('Containerization') {
steps {
sh 'echo Docker Build Image..'
sh 'echo Docker Tag Image....'
sh 'echo Docker Push Image......'
}
}
stage('Kubernetes Deployment') {
steps {
sh 'echo Deploy to Kubernetes using ArgoCD'
}
}
stage('Integration Testing') {
steps {
sh 'sleep 10s'
sh 'echo Testing using cURL commands......'
}
}
}
}
```
## Goal: One Job for Both Branches
Instead of creating separate Jenkins jobs, we’ll parameterize a single pipeline so it can target either branch at build time.
## 1. Create the Parameterized Job
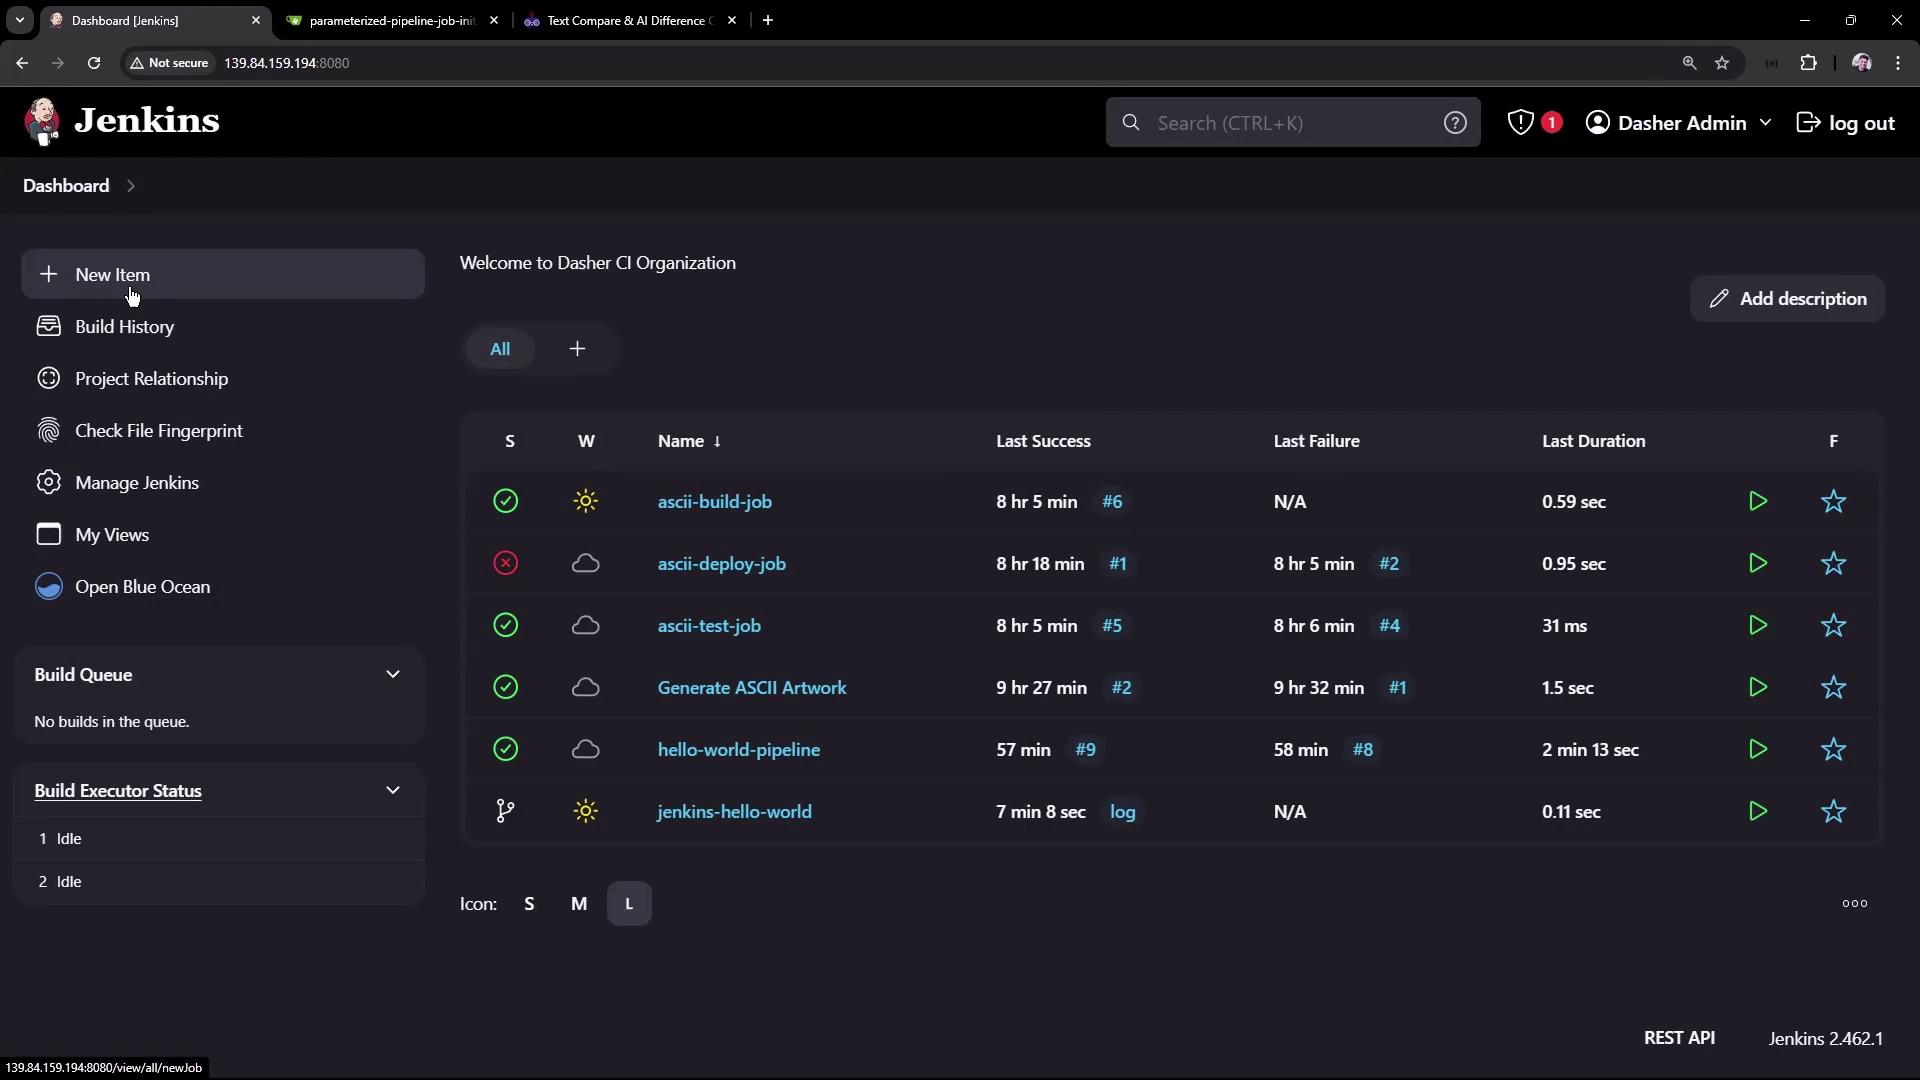
1. In Jenkins Classic UI, click **New Item**.
2. Enter **Parameterized Pipeline Job**, select **Pipeline**, then click **OK**.
3. Under **Pipeline**, choose **Pipeline script from SCM**.
4. Point **SCM** to your Git repo and set **Branch Specifier** to `test` for now.
5. Keep **Script Path** as `Jenkinsfile`.
## 2. Verify the `test` Branch
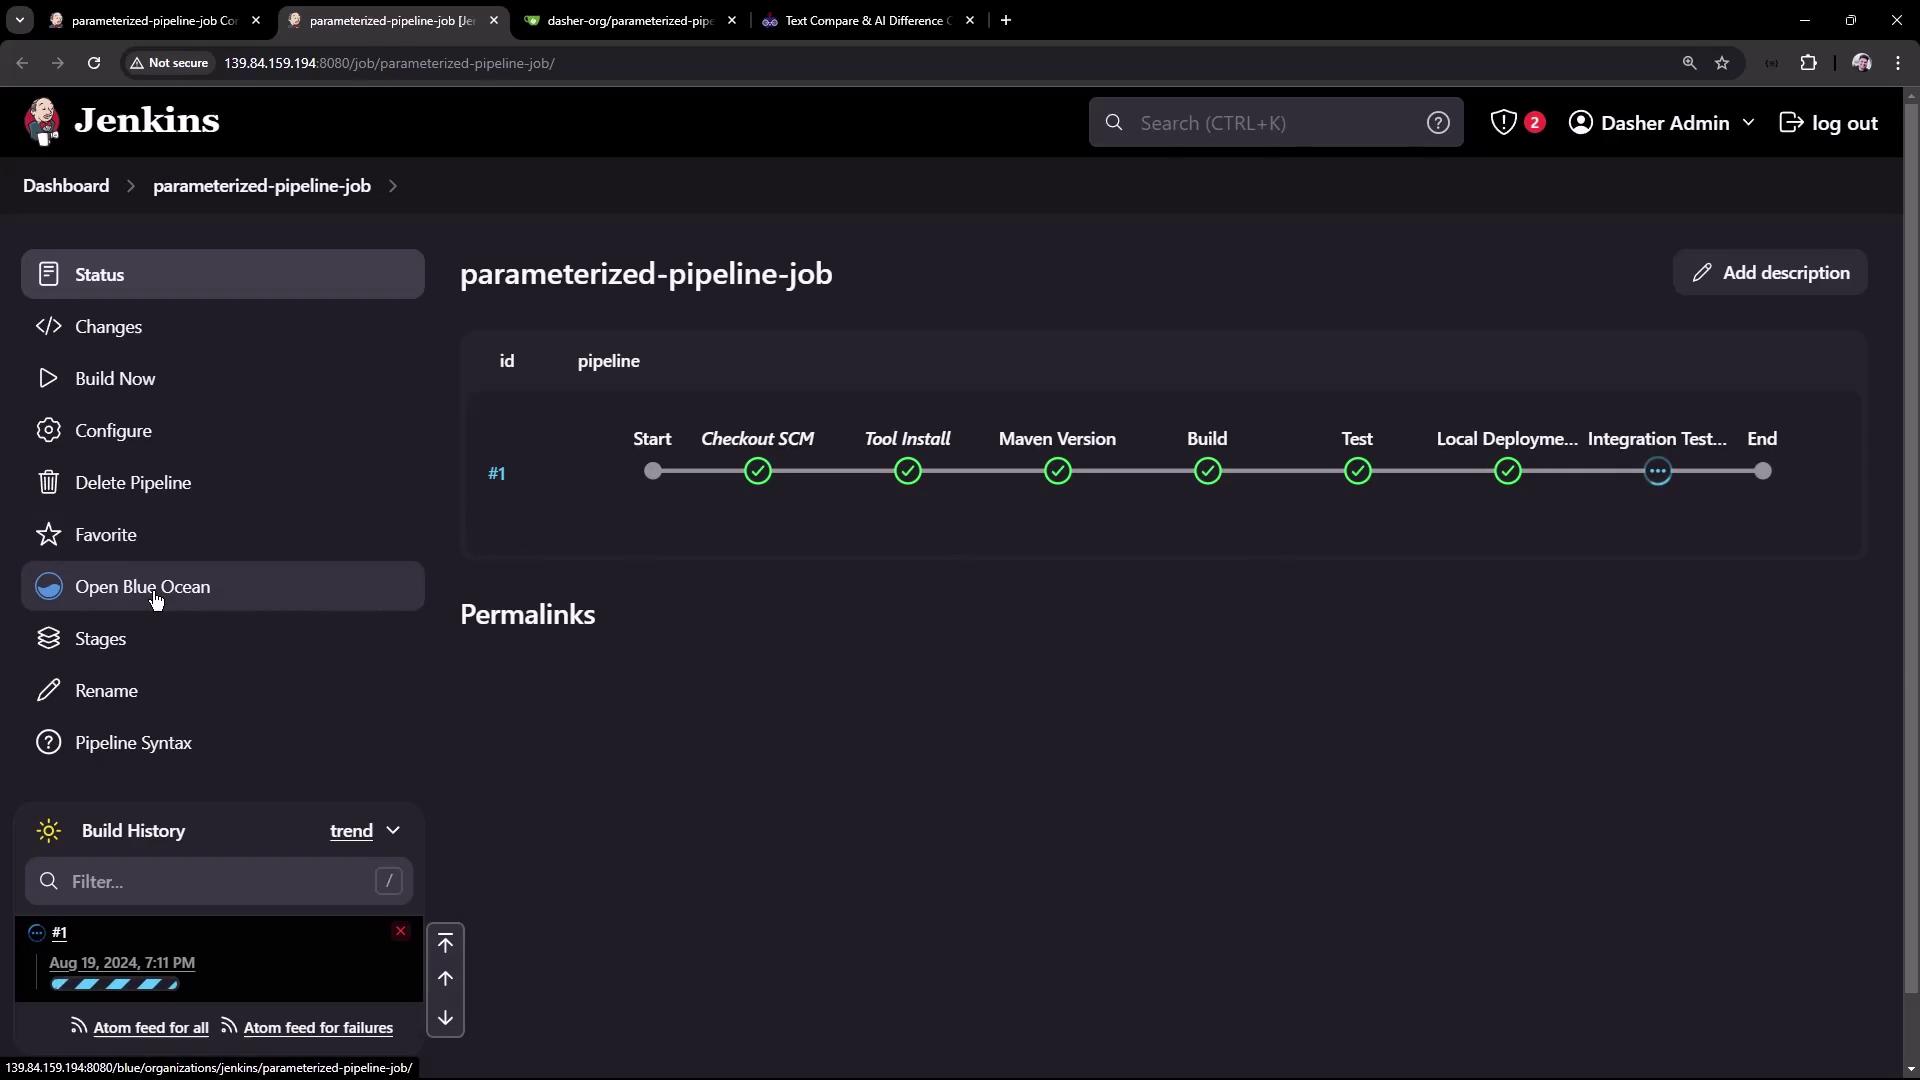
Run the job once to ensure the `test` pipeline works as expected. In Blue Ocean, you should see all stages complete successfully:
## 3. Define Build Parameters
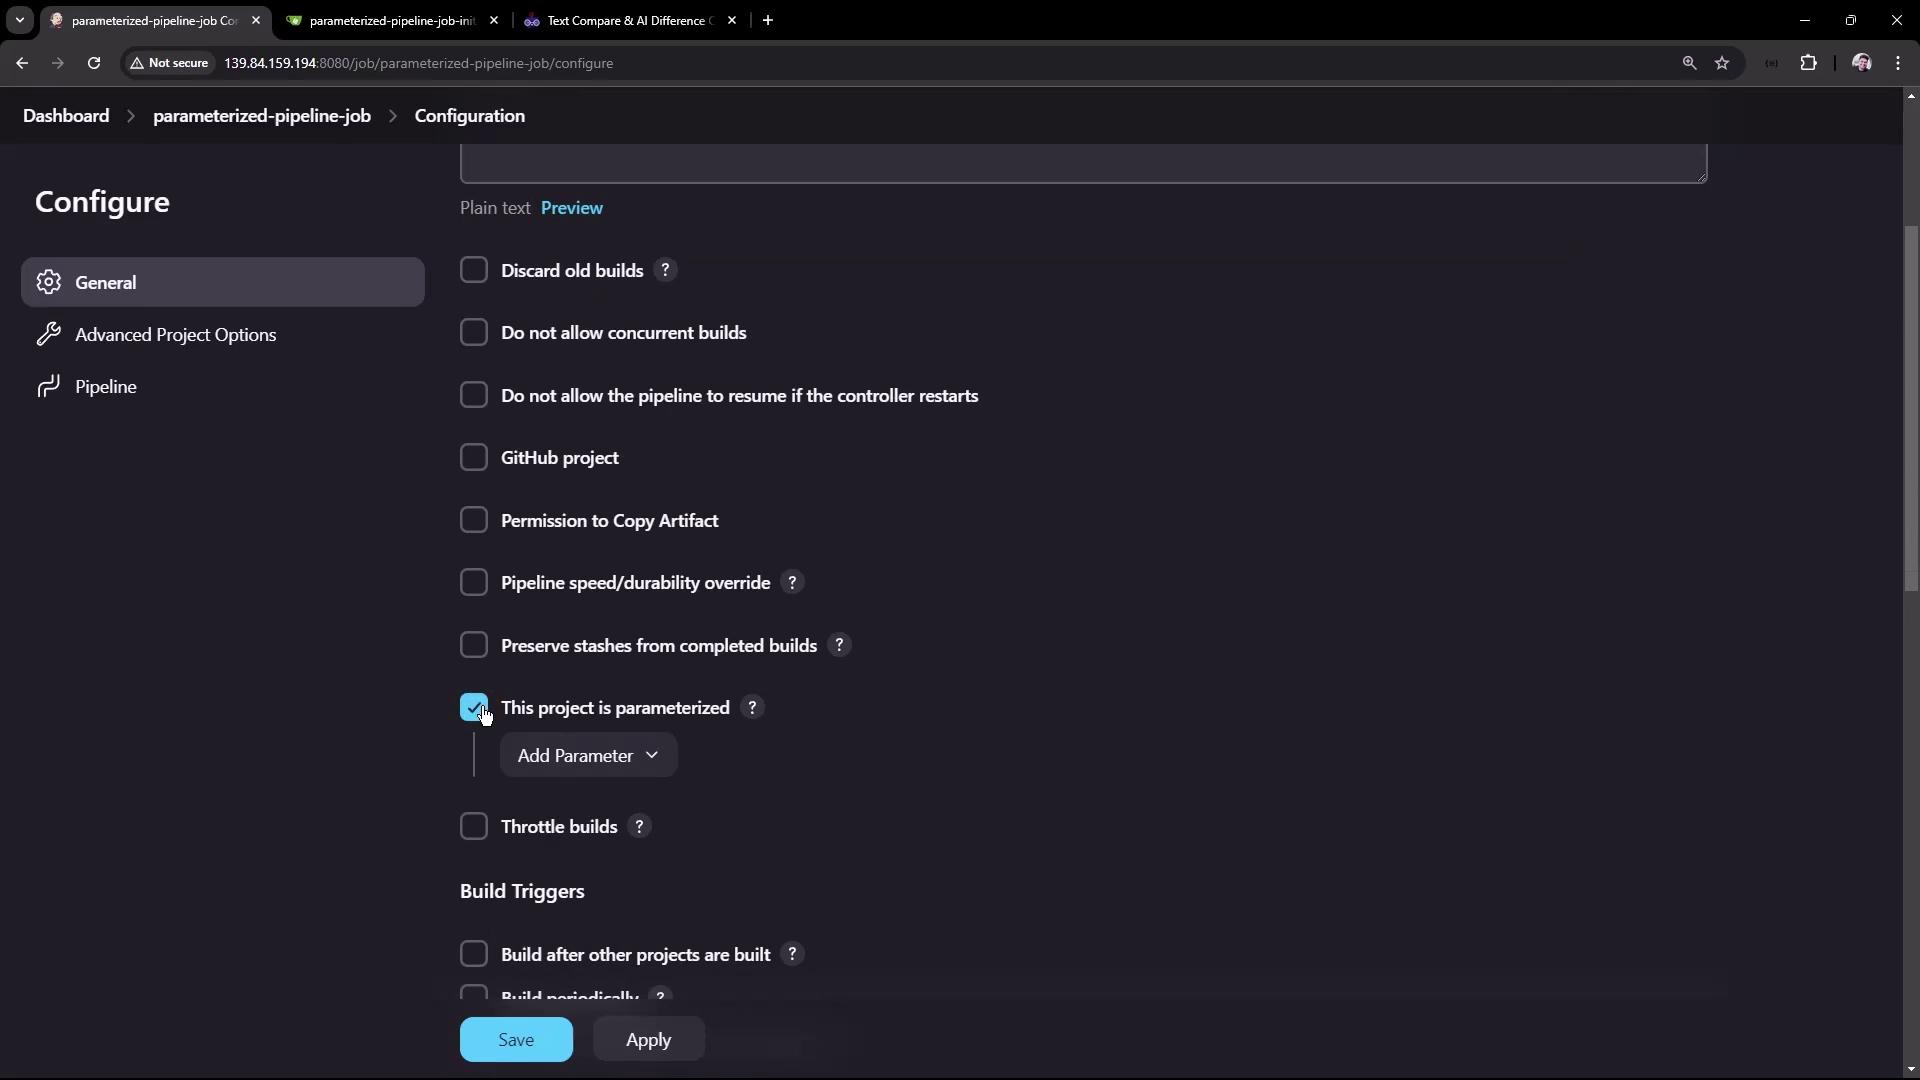
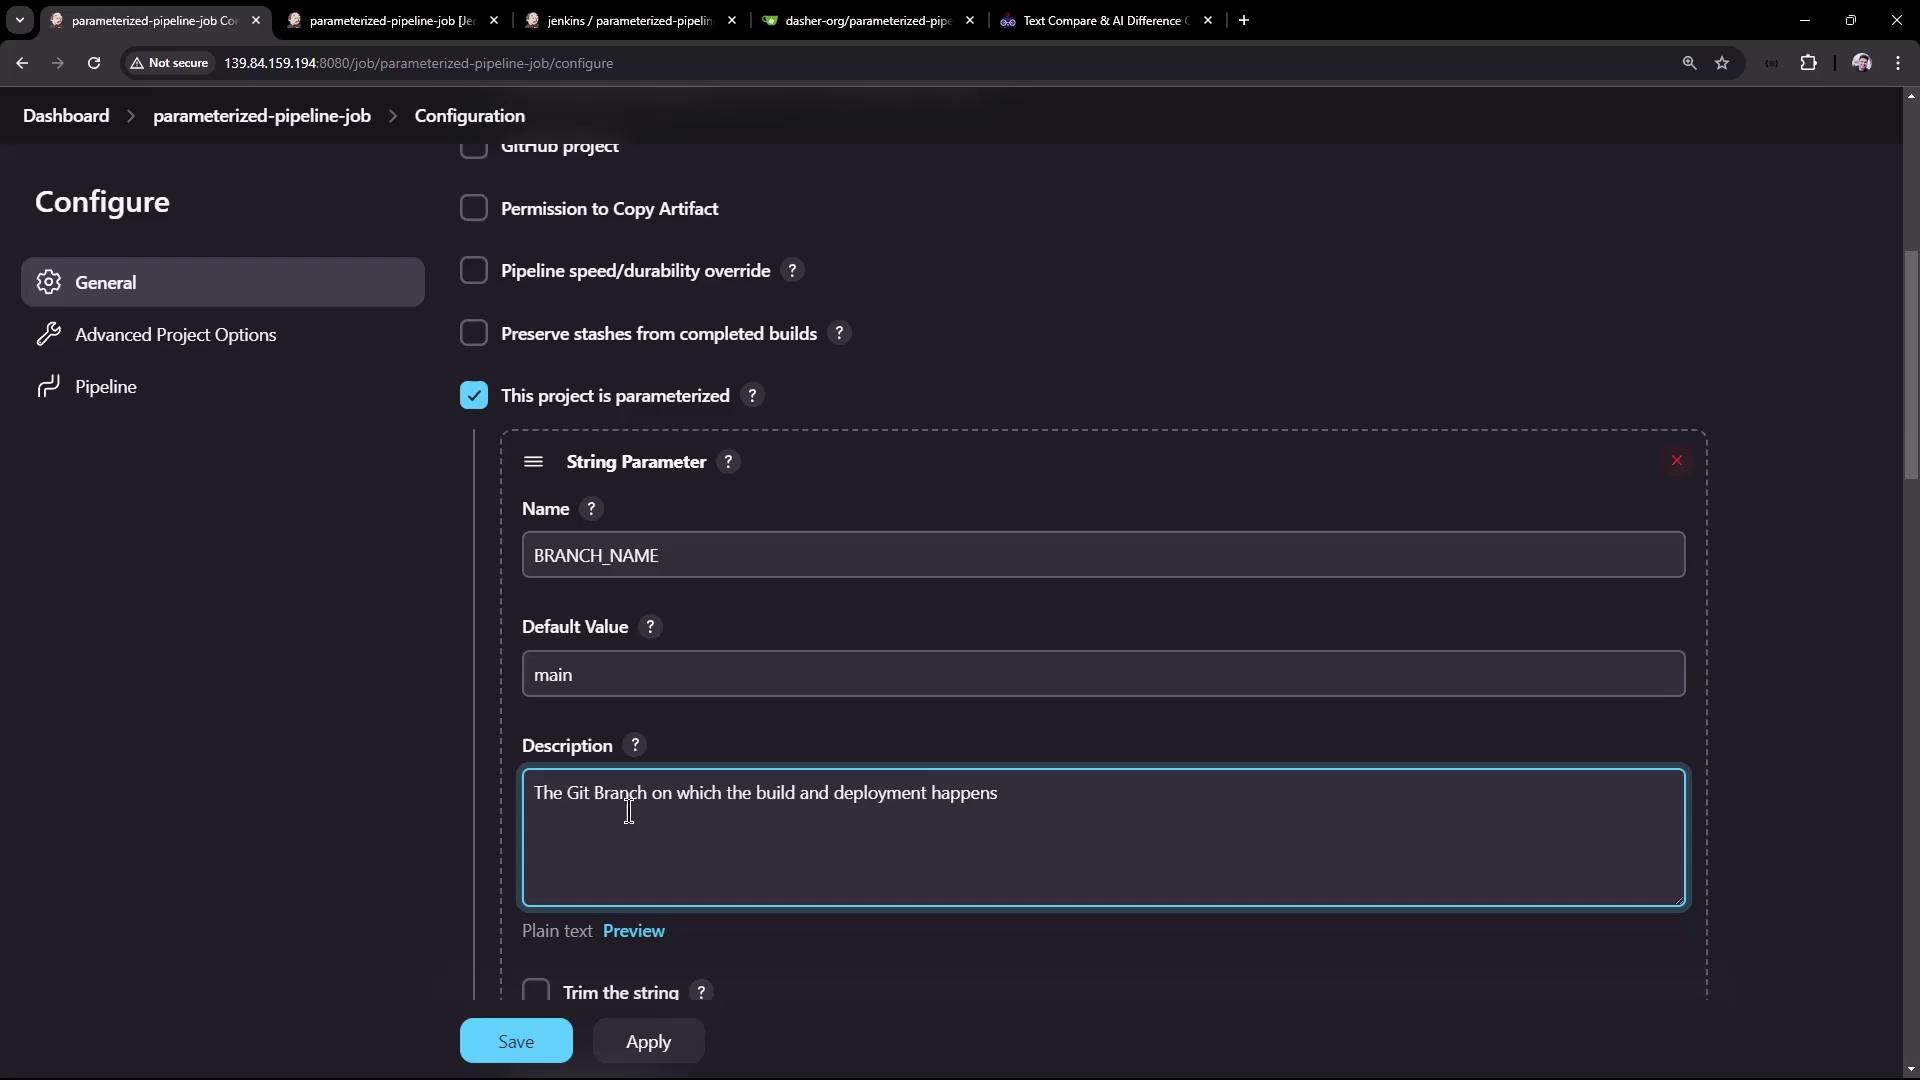
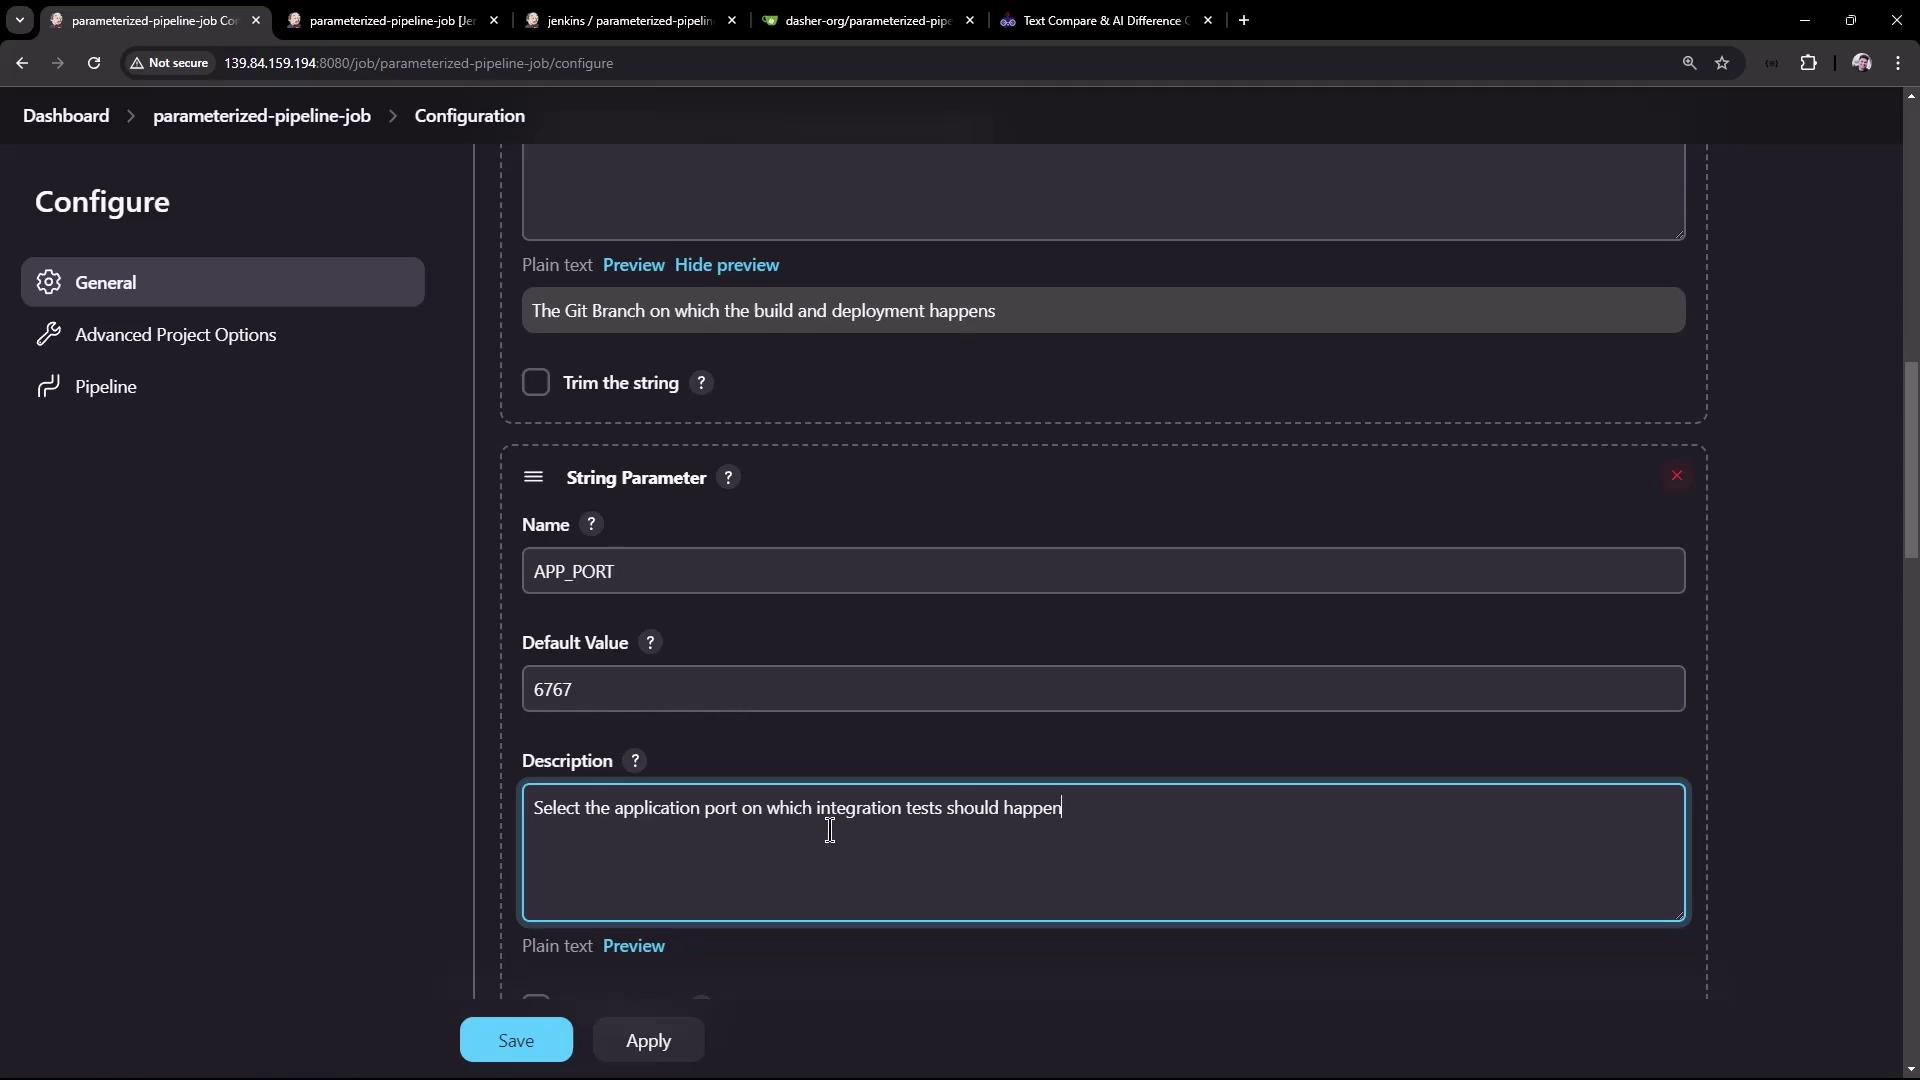
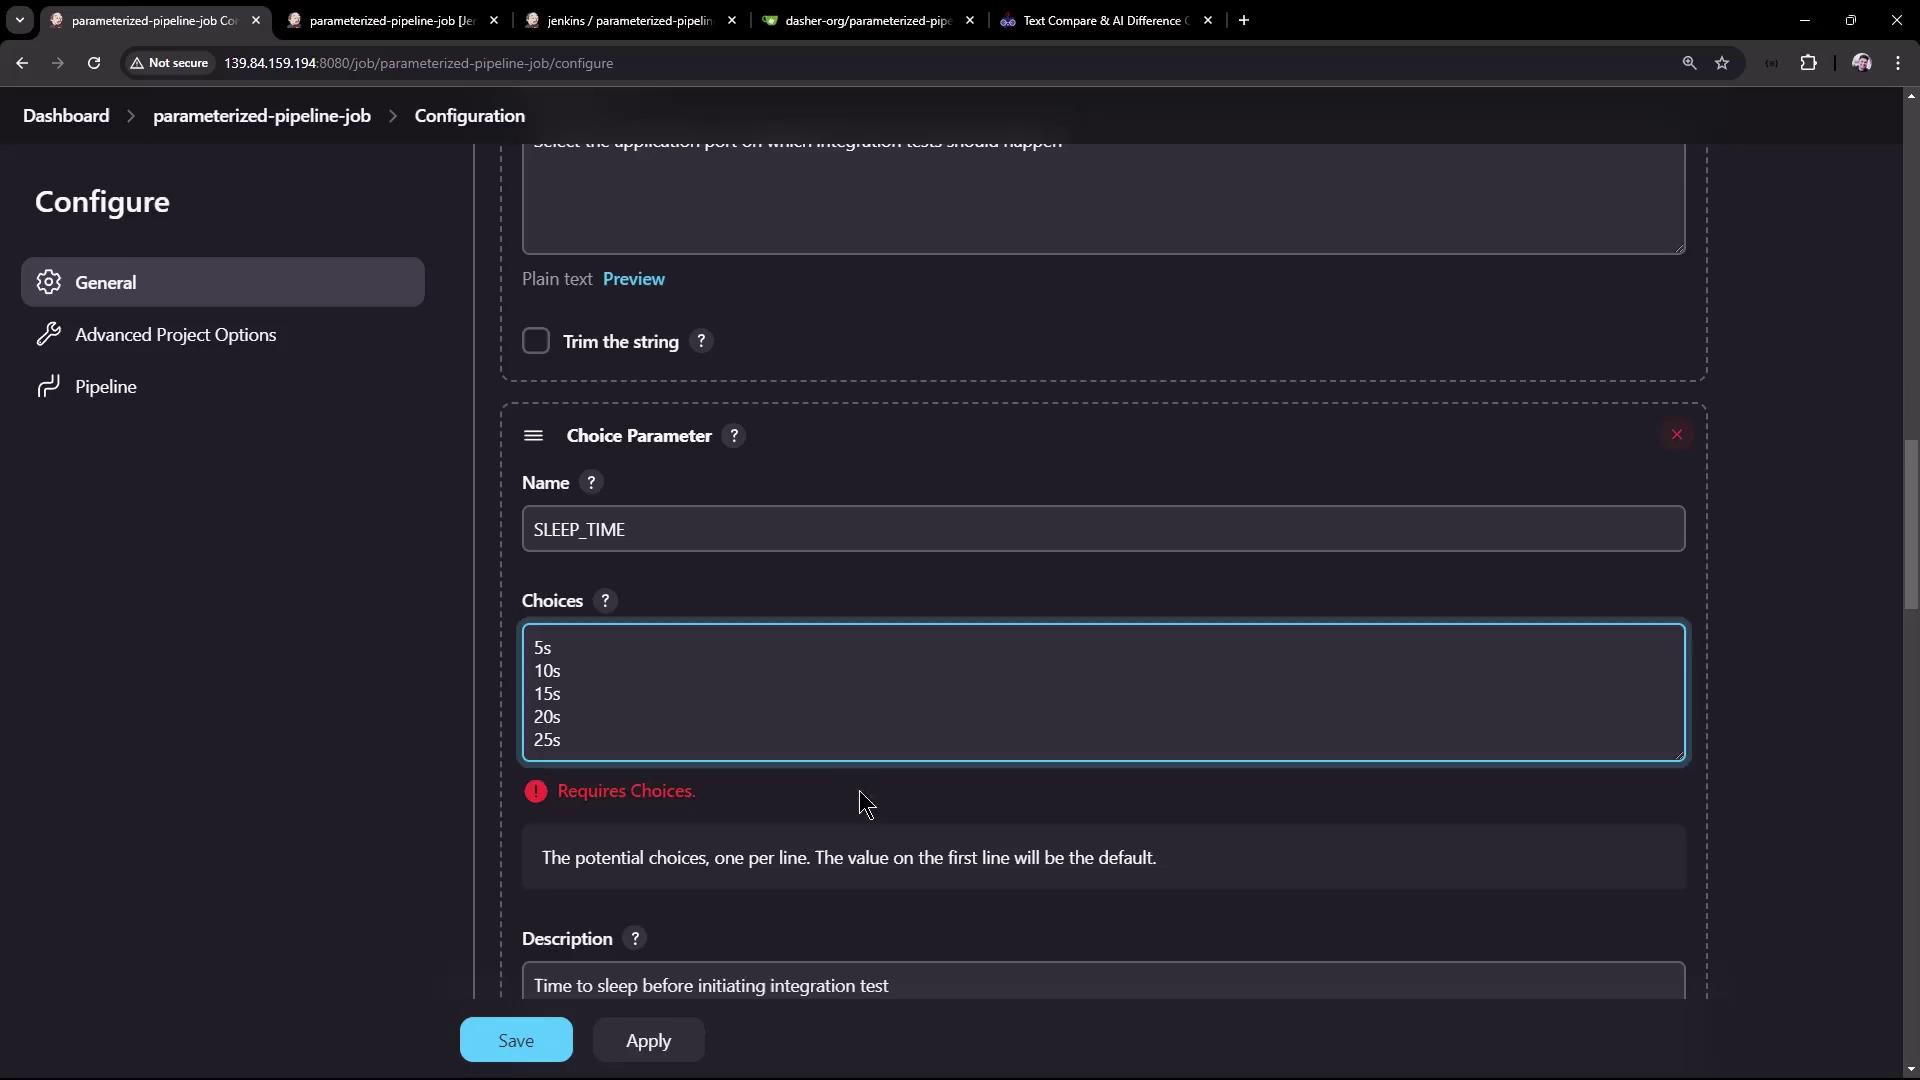
Go back to **Configure** and enable **This project is parameterized**. Add the following parameters:
| Parameter | Type | Default | Description |
| ------------ | ------ | ------- | ---------------------------------- |
| BRANCH\_NAME | String | main | Git branch to build |
| APP\_PORT | String | 6767 | Port for local or integration test |
| SLEEP\_TIME | Choice | 10s | Delay before running tests |
You can add more parameters (e.g., `TIMEOUT`, `ENVIRONMENT`) to adapt this pipeline for different use cases.
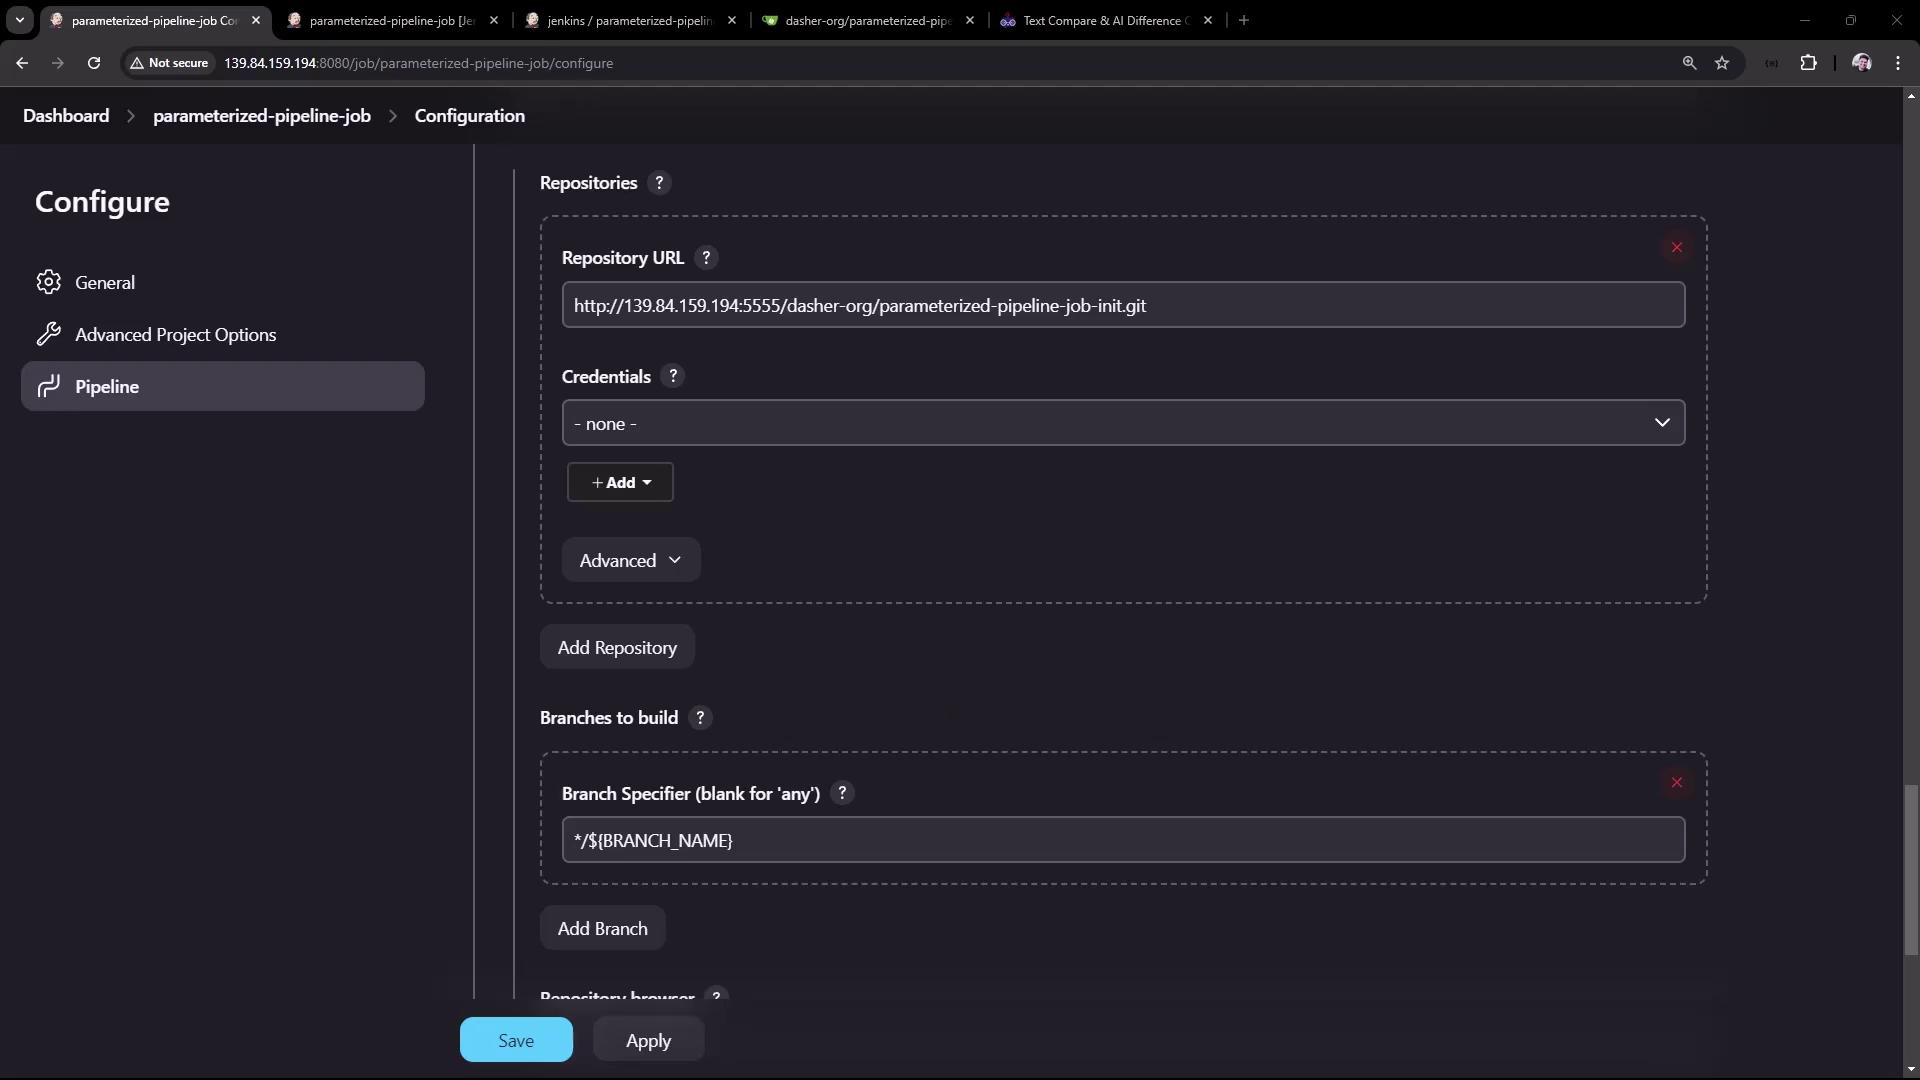
Next, update **Branch Specifier** under **Source Code Management** to:
```text theme={null}
*/${BRANCH_NAME}
```
Make sure to commit these parameterized Jenkinsfile changes to each branch; otherwise, `${params.*}` will not be available.
## 4. Update the `test` Branch Jenkinsfile
Switch to the `test` branch and edit **Jenkinsfile** to leverage the new parameters:
```groovy theme={null}
pipeline {
agent any
stages {
stage('Maven Version') {
steps {
sh "echo Print Maven Version"
sh "mvn -version"
sh "echo Sleep-Time - ${params.SLEEP_TIME}, Port - ${params.APP_PORT}, Branch - ${params.BRANCH_NAME}"
}
}
stage('Build') {
steps {
sh 'mvn clean package -DskipTests=true'
archiveArtifacts 'target/hello-demo-*.jar'
}
}
stage('Test') {
steps {
sh 'mvn test'
junit(testResults: 'target/surefire-reports/TEST-*.xml',
keepProperties: true,
keepTestNames: true)
}
}
stage('Local Deployment') {
steps {
sh "java -jar target/hello-demo-*.jar > /dev/null &"
}
}
stage('Integration Testing') {
steps {
sh "sleep ${params.SLEEP_TIME}"
sh "curl -s http://localhost:${params.APP_PORT}/hello"
}
}
}
}
```
Commit and push these updates. Then in Jenkins, select **Build with Parameters**, choose:
* **BRANCH\_NAME**: test
* **APP\_PORT**: 6767
* **SLEEP\_TIME**: 5s
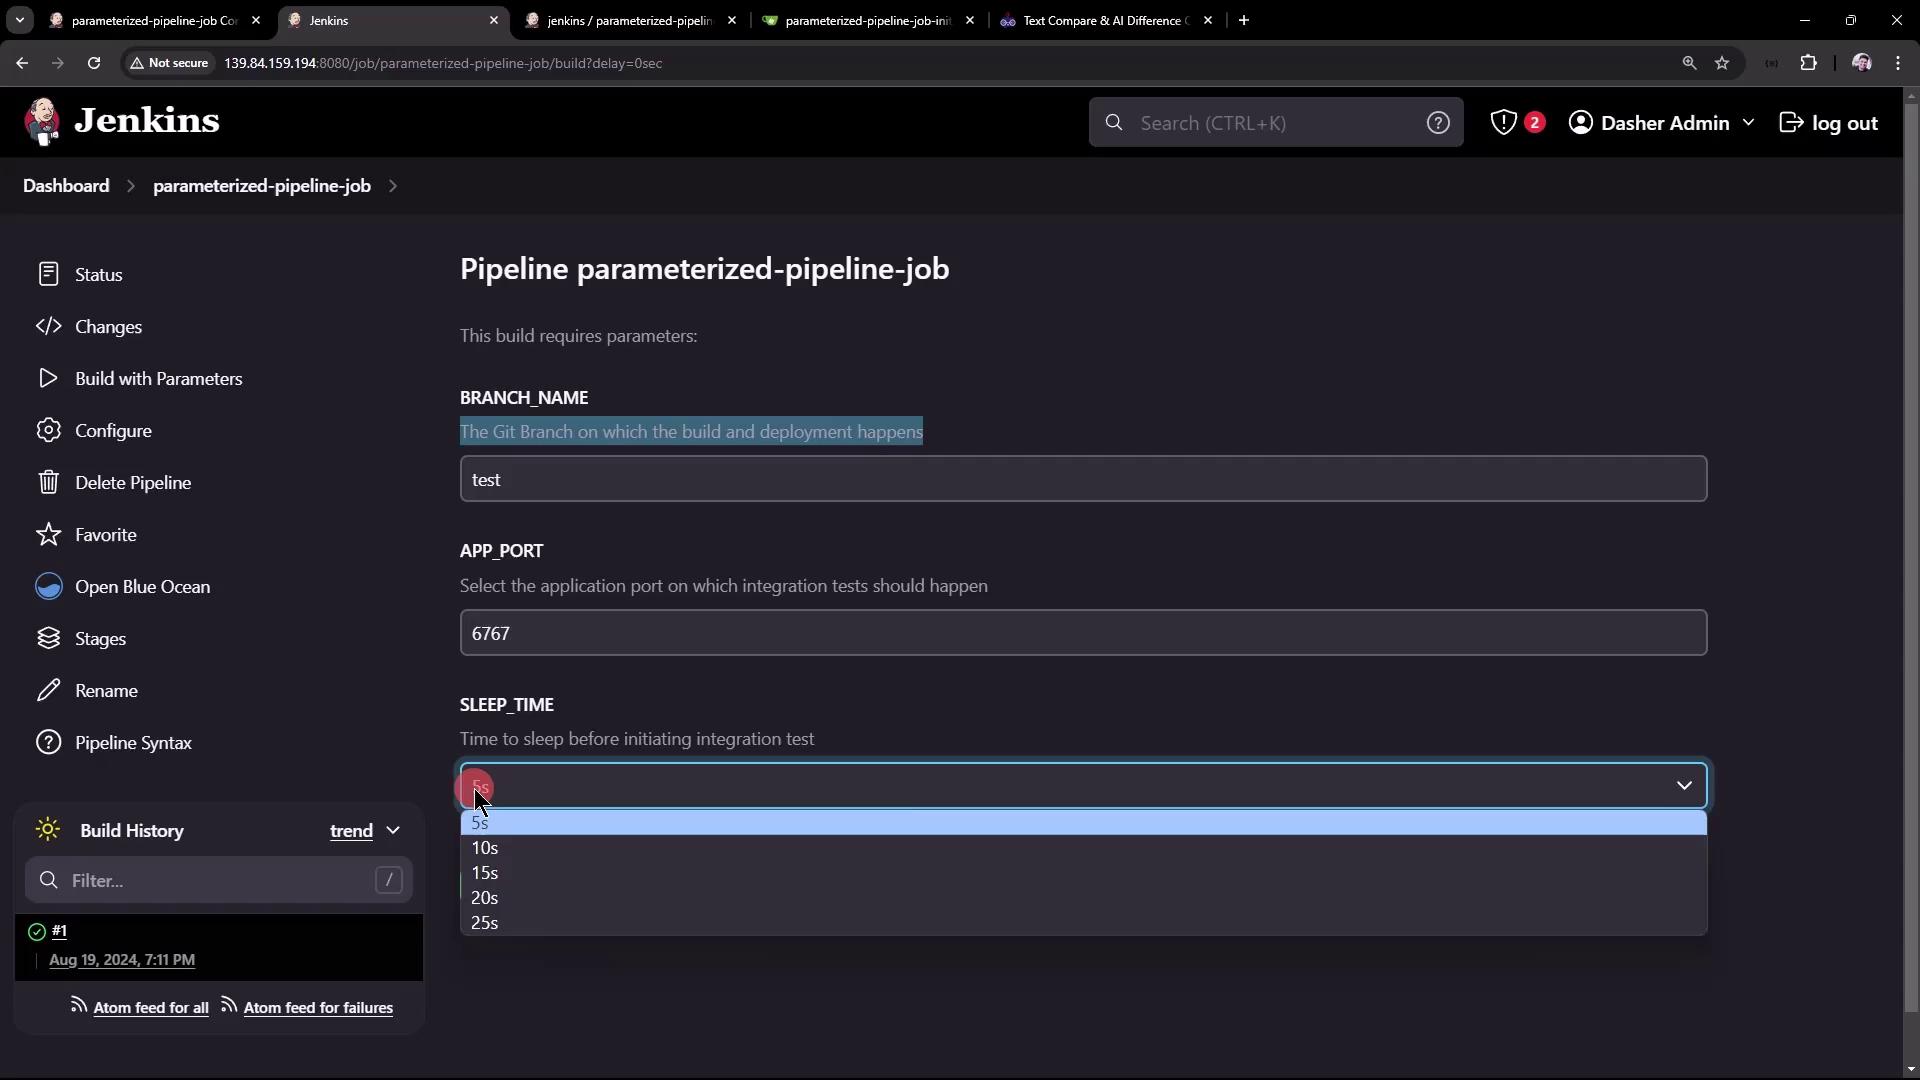
In the logs, you’ll see the parameter values substituted correctly:
```bash theme={null}
echo Sleep-Time - 5s, Port - 6767, Branch - test
Sleep-Time - 5s, Port - 6767, Branch - test
+ sleep 5s
+ curl -s http://localhost:6767/hello
Hello, KodeKloud community!
```
## 5. Update the `main` Branch Jenkinsfile
Repeat a similar update in the `main` branch to reference `${params.SLEEP_TIME}`:
```groovy theme={null}
pipeline {
agent any
stages {
stage('Build') {
steps {
sh 'mvn clean package -DskipTests=true'
archiveArtifacts 'target/hello-demo-*.jar'
}
}
stage('Test') {
steps {
sh 'mvn test'
junit(testResults: 'target/surefire-reports/TEST-*.xml',
keepProperties: true,
keepTestNames: true)
}
}
stage('Containerization') {
steps {
sh 'echo Docker Build Image..'
sh 'echo Docker Tag Image....'
sh 'echo Docker Push Image......'
}
}
stage('Kubernetes Deployment') {
steps {
sh 'echo Deploy to Kubernetes using ArgoCD'
}
}
stage('Integration Testing') {
steps {
sh "sleep ${params.SLEEP_TIME}"
sh 'echo Testing using cURL commands......'
}
}
}
}
```
Commit, push, then run **Build with Parameters**:
* **BRANCH\_NAME**: main
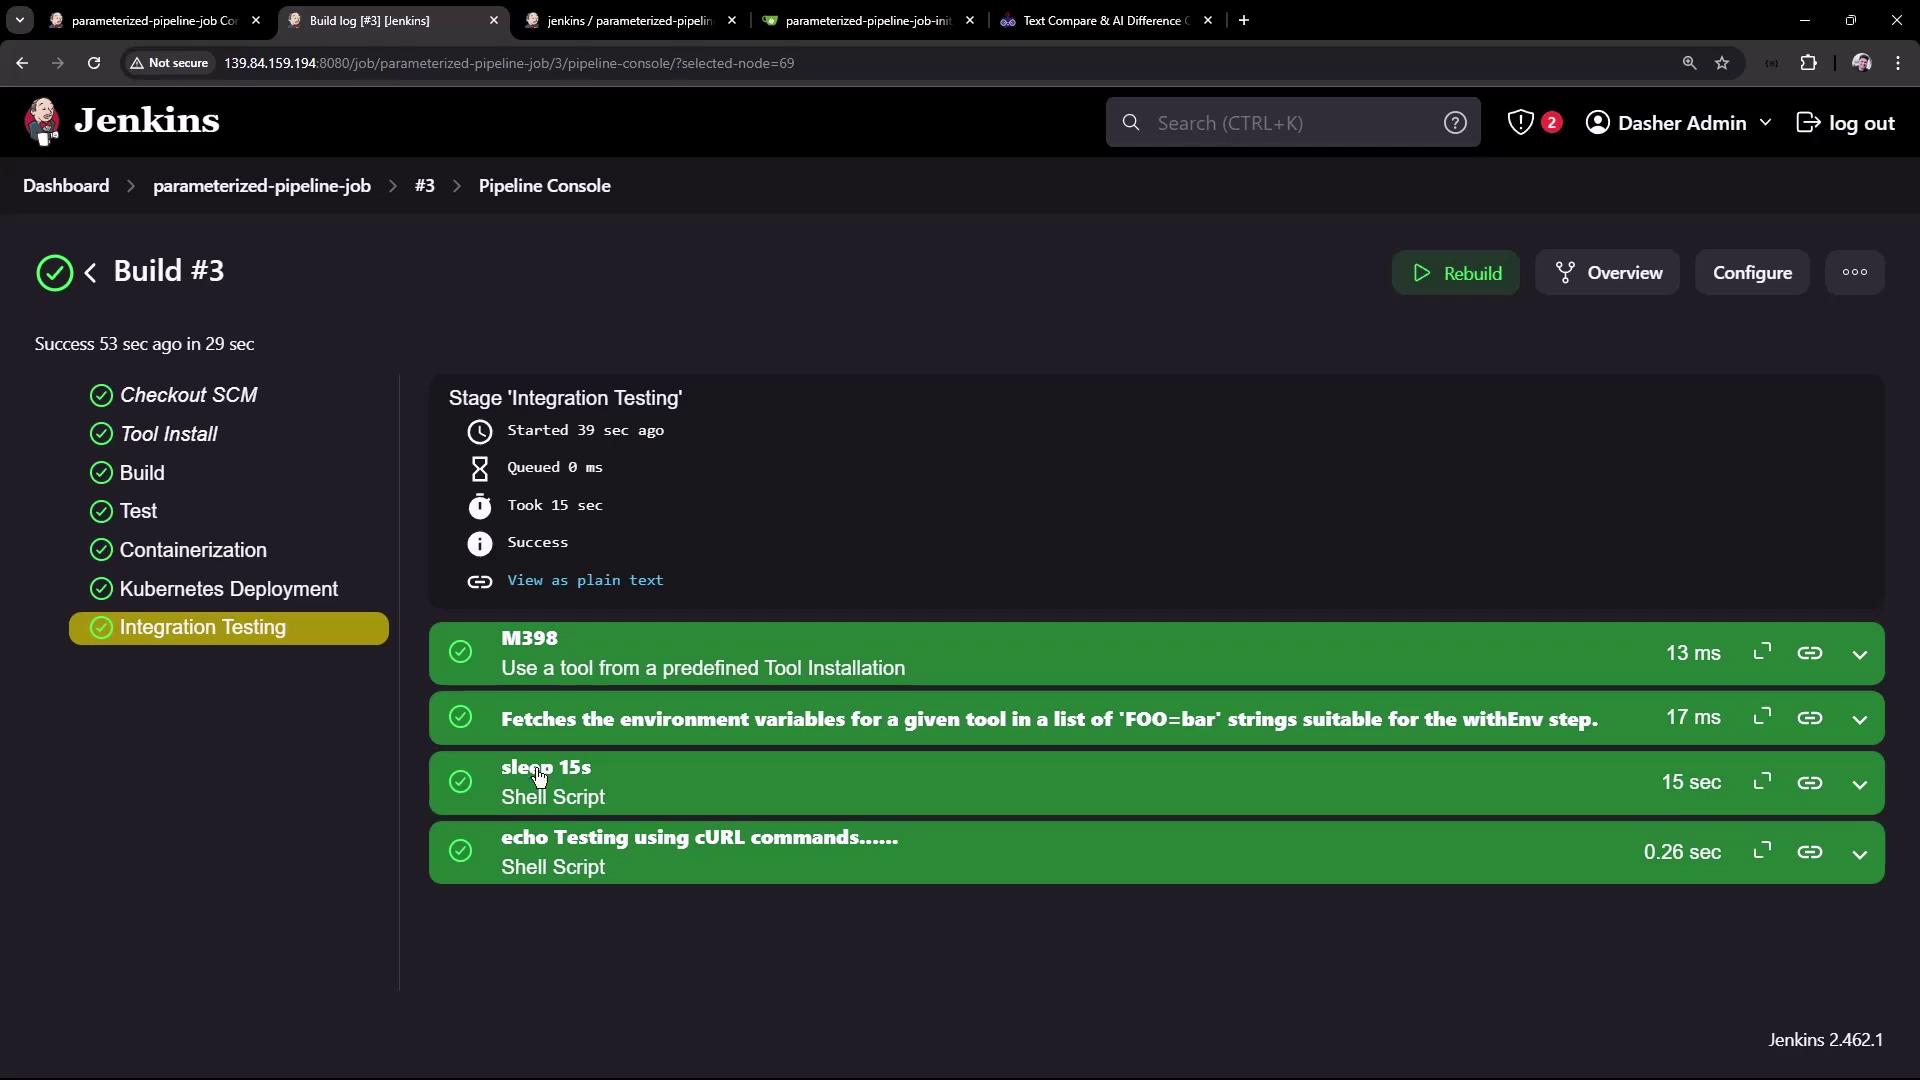
* **SLEEP\_TIME**: 15s
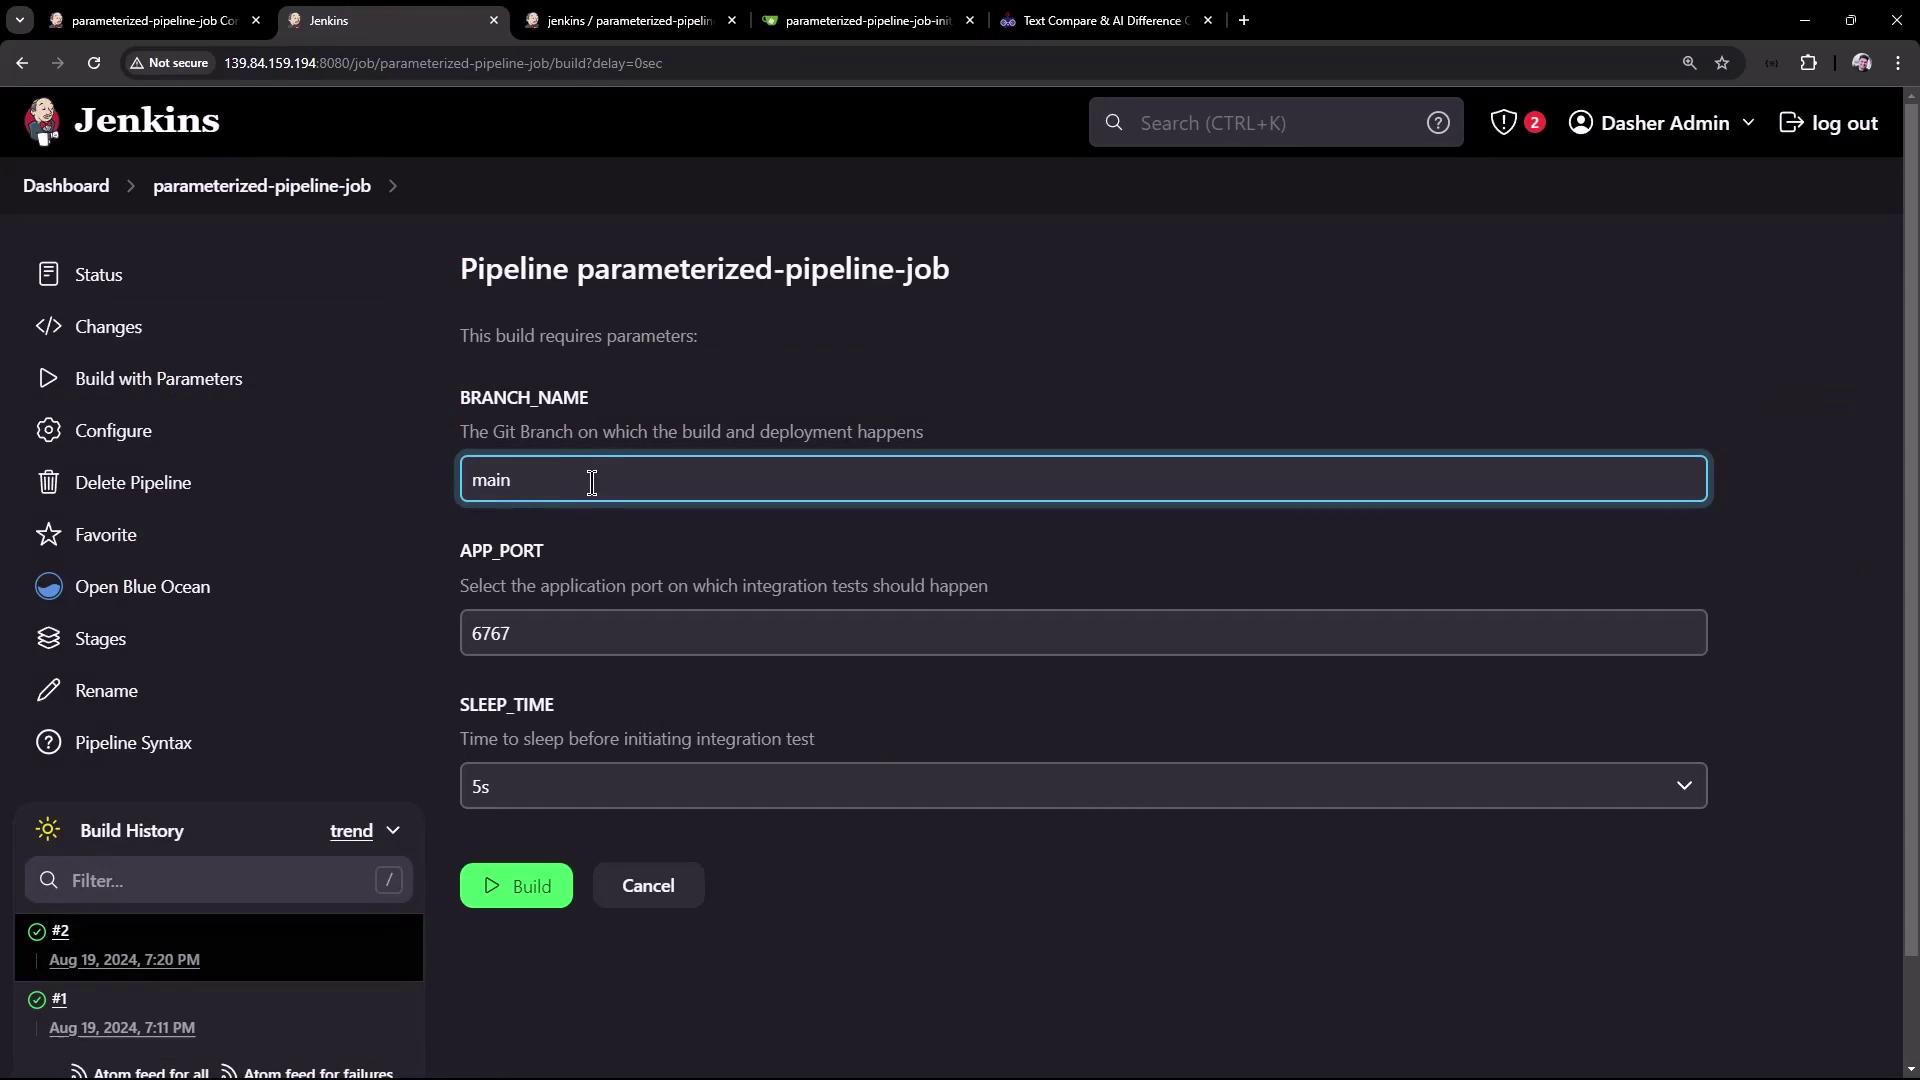
You should see the `main` branch pipeline honor the parameters:
## Conclusion
By defining job-level parameters and referencing them in your Jenkinsfile, you can maintain a single pipeline that adapts to multiple branches and environments. This strategy:
* Reduces duplication across branches
* Simplifies CI/CD maintenance
* Enables dynamic, user-driven builds
For more on Jenkins pipelines and job parameters, check out:
* [Jenkins Pipeline Documentation](https://www.jenkins.io/doc/book/pipeline/)
* [Jenkins Parameterized Builds](https://www.jenkins.io/doc/book/pipeline/syntax/#parameters)
Happy building!