> ## Documentation Index
> Fetch the complete documentation index at: https://notes.kodekloud.com/llms.txt
> Use this file to discover all available pages before exploring further.
# Demo Scripted Pipeline Static Agent
> This tutorial explains how to run a Jenkins scripted pipeline on a dedicated static agent for consistent build environments.
In this tutorial, you’ll learn how to run every stage of a Jenkins **scripted pipeline** on a dedicated static agent instead of the controller node. By specifying the agent label at the `node` level, you ensure consistent build environments for your projects.
## 1. Confirm Your Static Agent
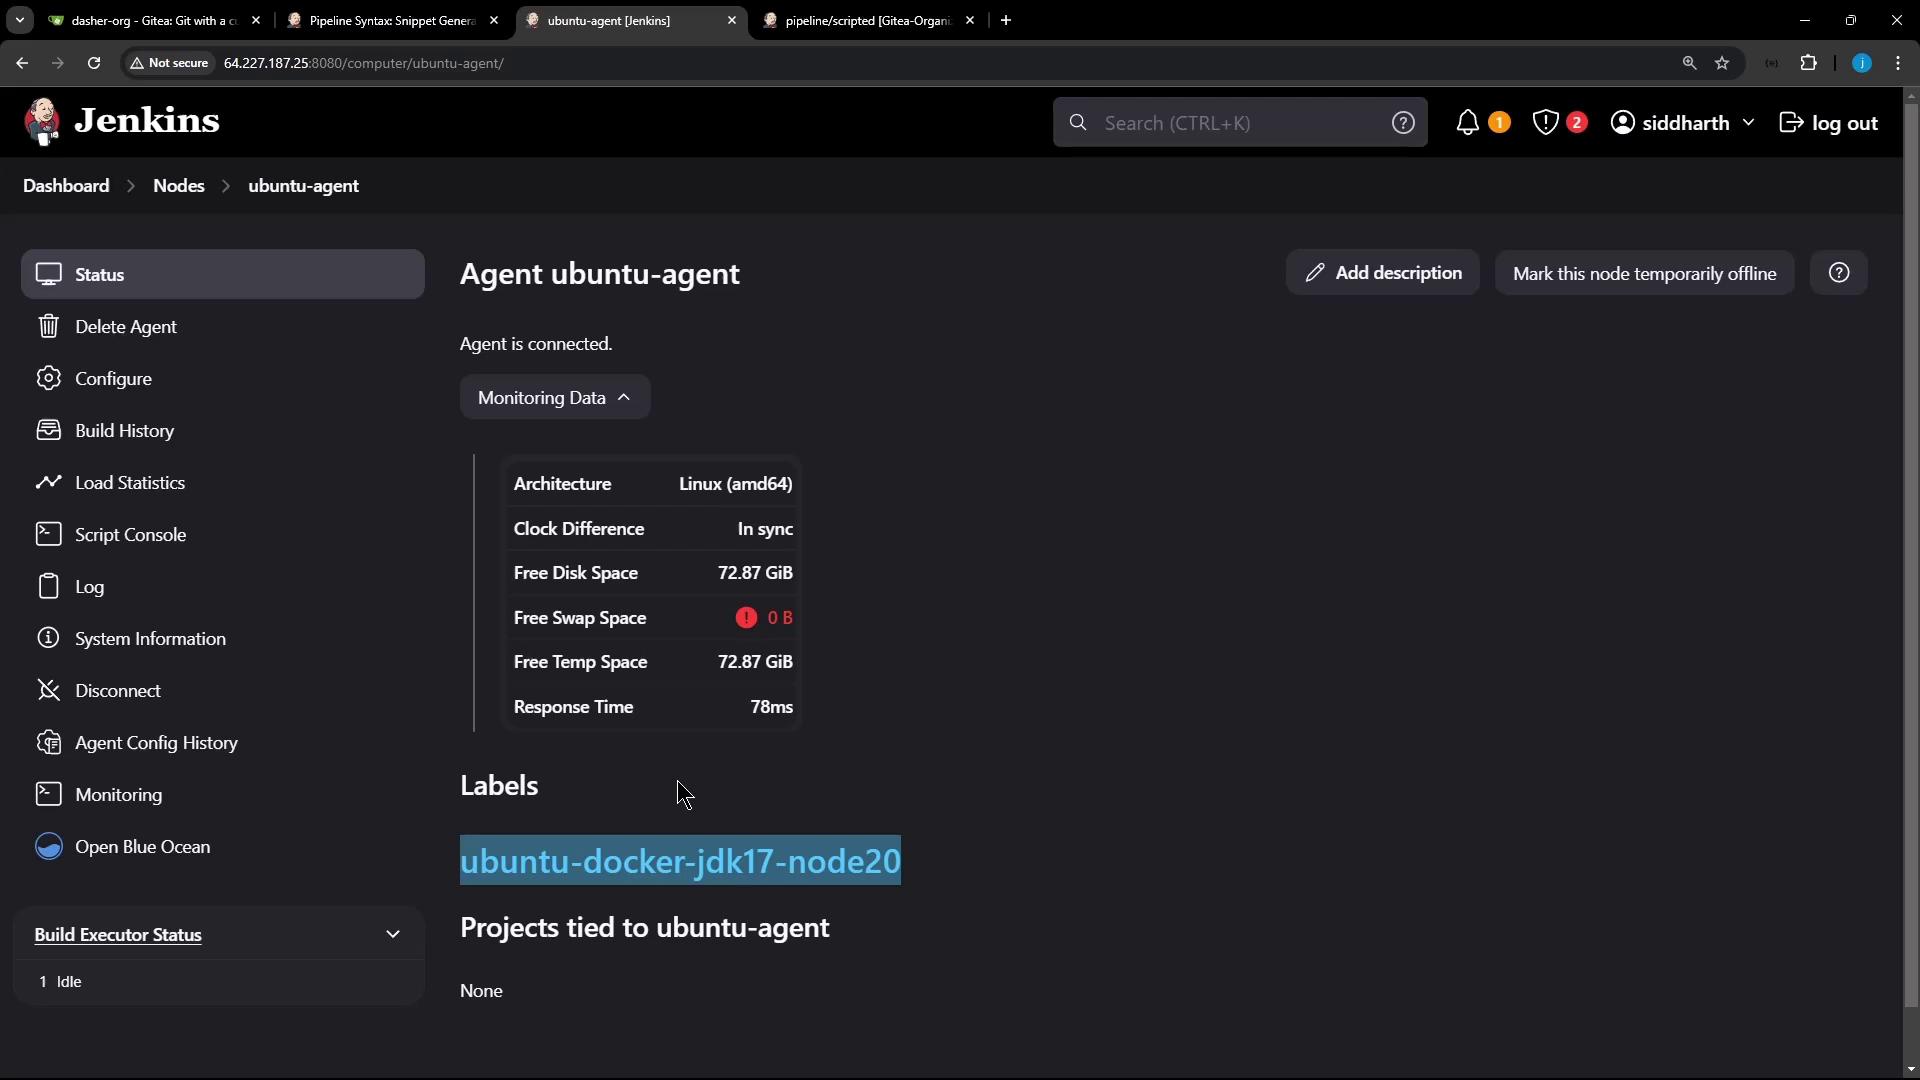
We’ve provisioned a static agent labeled `Ubuntu-Docker-JDK-17-node20`. Verify its status in the Jenkins dashboard:
## 2. Wrap All Stages in a `node` Block
Open your `Jenkinsfile` and nest every stage inside a `node` block that targets the static agent:
```groovy theme={null}
node('Ubuntu-Docker-JDK-17-node20') {
stage('Checkout') {
git url: 'http://.git', branch: 'pipeline/scripted'
}
stage('Installing Dependencies') {
sh 'npm install --no-audit'
}
stage('Unit Testing') {
// Define the MongoDB URI
env.MONGO_URI = 'mongodb+srv://supercluster.d83j'
// Inject MongoDB credentials securely
withCredentials([usernamePassword(
credentialsId: 'mongo-db-creds',
usernameVariable: 'MONGO_USERNAME',
passwordVariable: 'MONGO_PASSWORD'
)]) {
sh 'node -v'
sh 'npm test'
}
}
}
```
Scripted pipelines don’t support declarative `environment` blocks. Use `withCredentials` to inject secrets at runtime without exposing them in your repository.
## 3. Generate the `withCredentials` Snippet
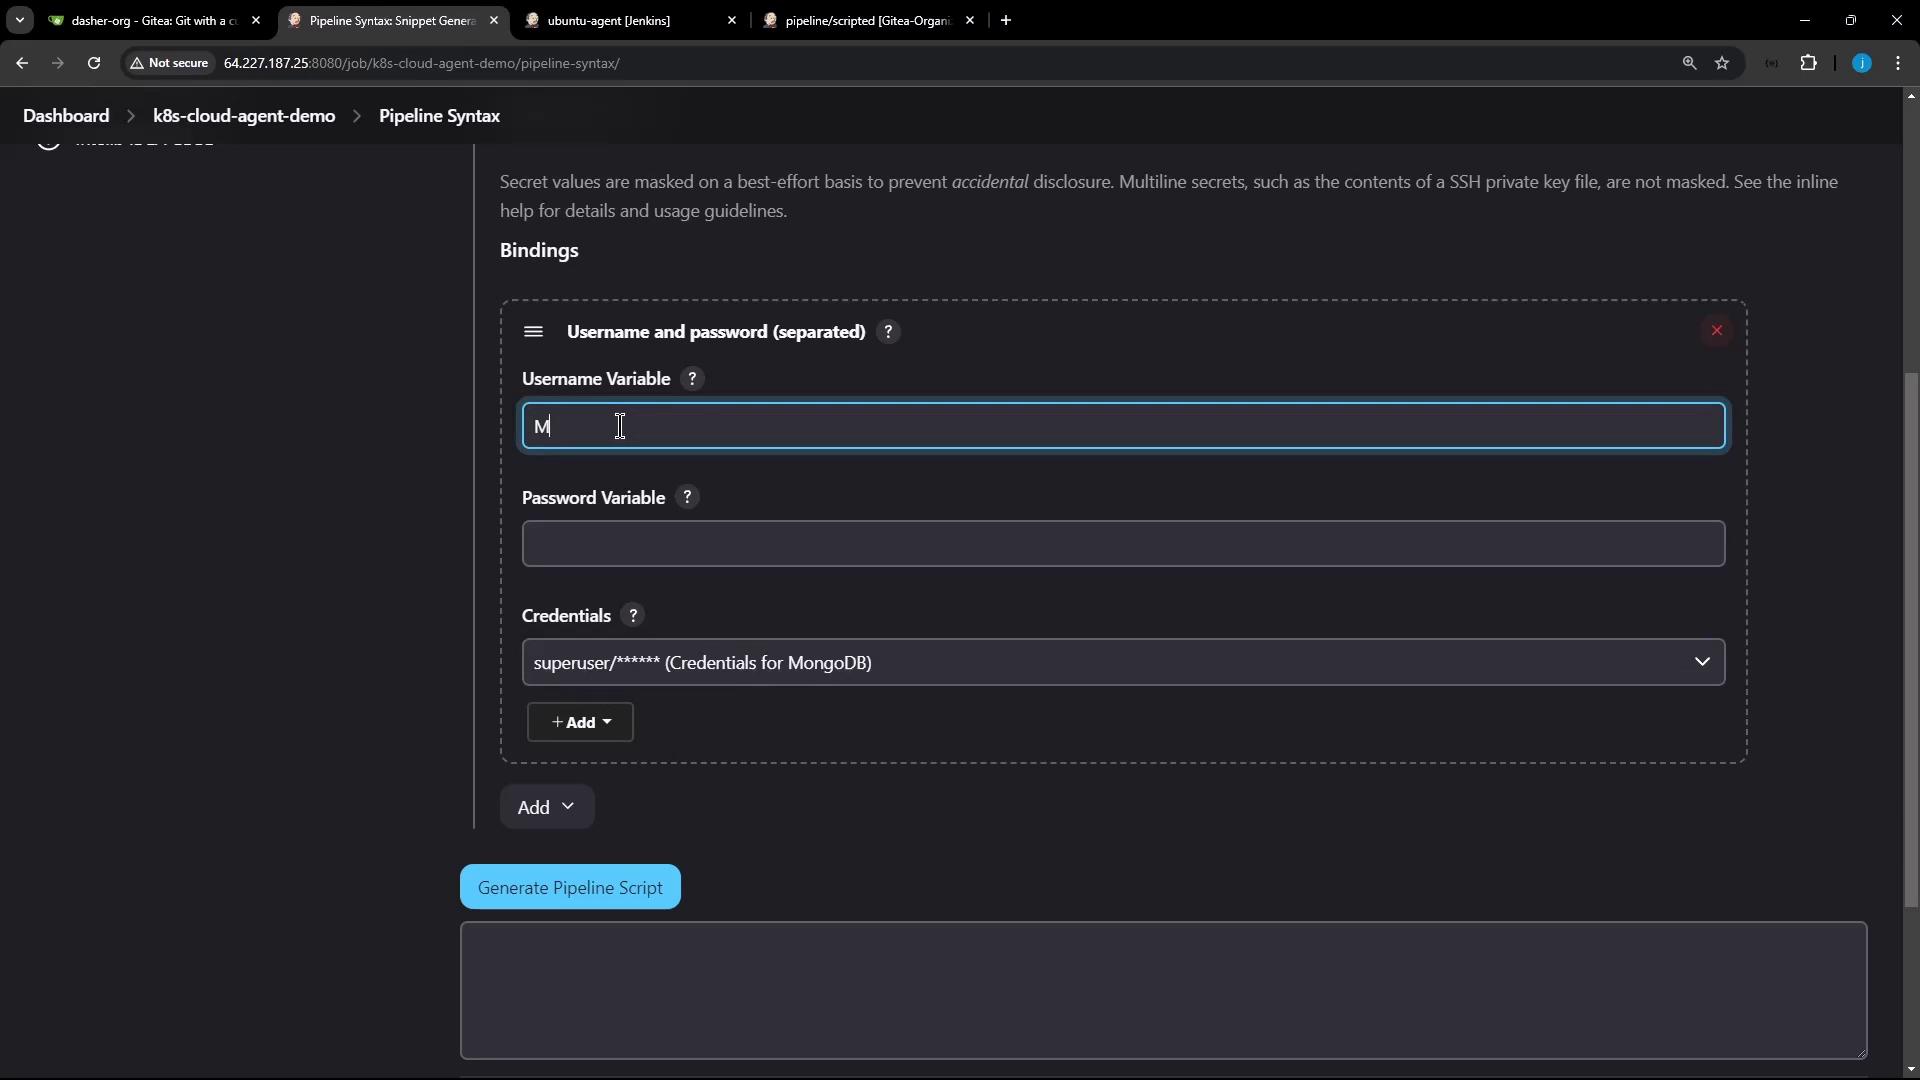
To obtain the exact snippet for your setup, use the Jenkins **Pipeline Syntax** generator:
1. Navigate to **Dashboard → [Pipeline Syntax](https://www.jenkins.io/doc/book/pipeline/syntax/)**
2. Select **withCredentials: Username and password (separated)**
3. Choose the `mongo-db-creds` credential
4. Set **Username Variable** to `MONGO_USERNAME` and **Password Variable** to `MONGO_PASSWORD`
5. Click **Generate Pipeline Script**
## 4. Stage Overview
| Stage | Purpose | Commands / Steps |
| ----------------------- | ---------------------------------- | ------------------------------ |
| Checkout | Clone the Git repository | `git url: ...`, `branch: ...` |
| Installing Dependencies | Install project dependencies | `npm install --no-audit` |
| Unit Testing | Run tests with MongoDB credentials | `withCredentials` + `npm test` |
## 5. Commit and Push
Once your `Jenkinsfile` is updated:
```bash theme={null}
git add Jenkinsfile
git commit -m "Use static agent and add unit tests with MongoDB credentials"
git push origin pipeline/scripted
```
This push triggers a build on the `pipeline/scripted` branch.
## 6. Monitor the Build
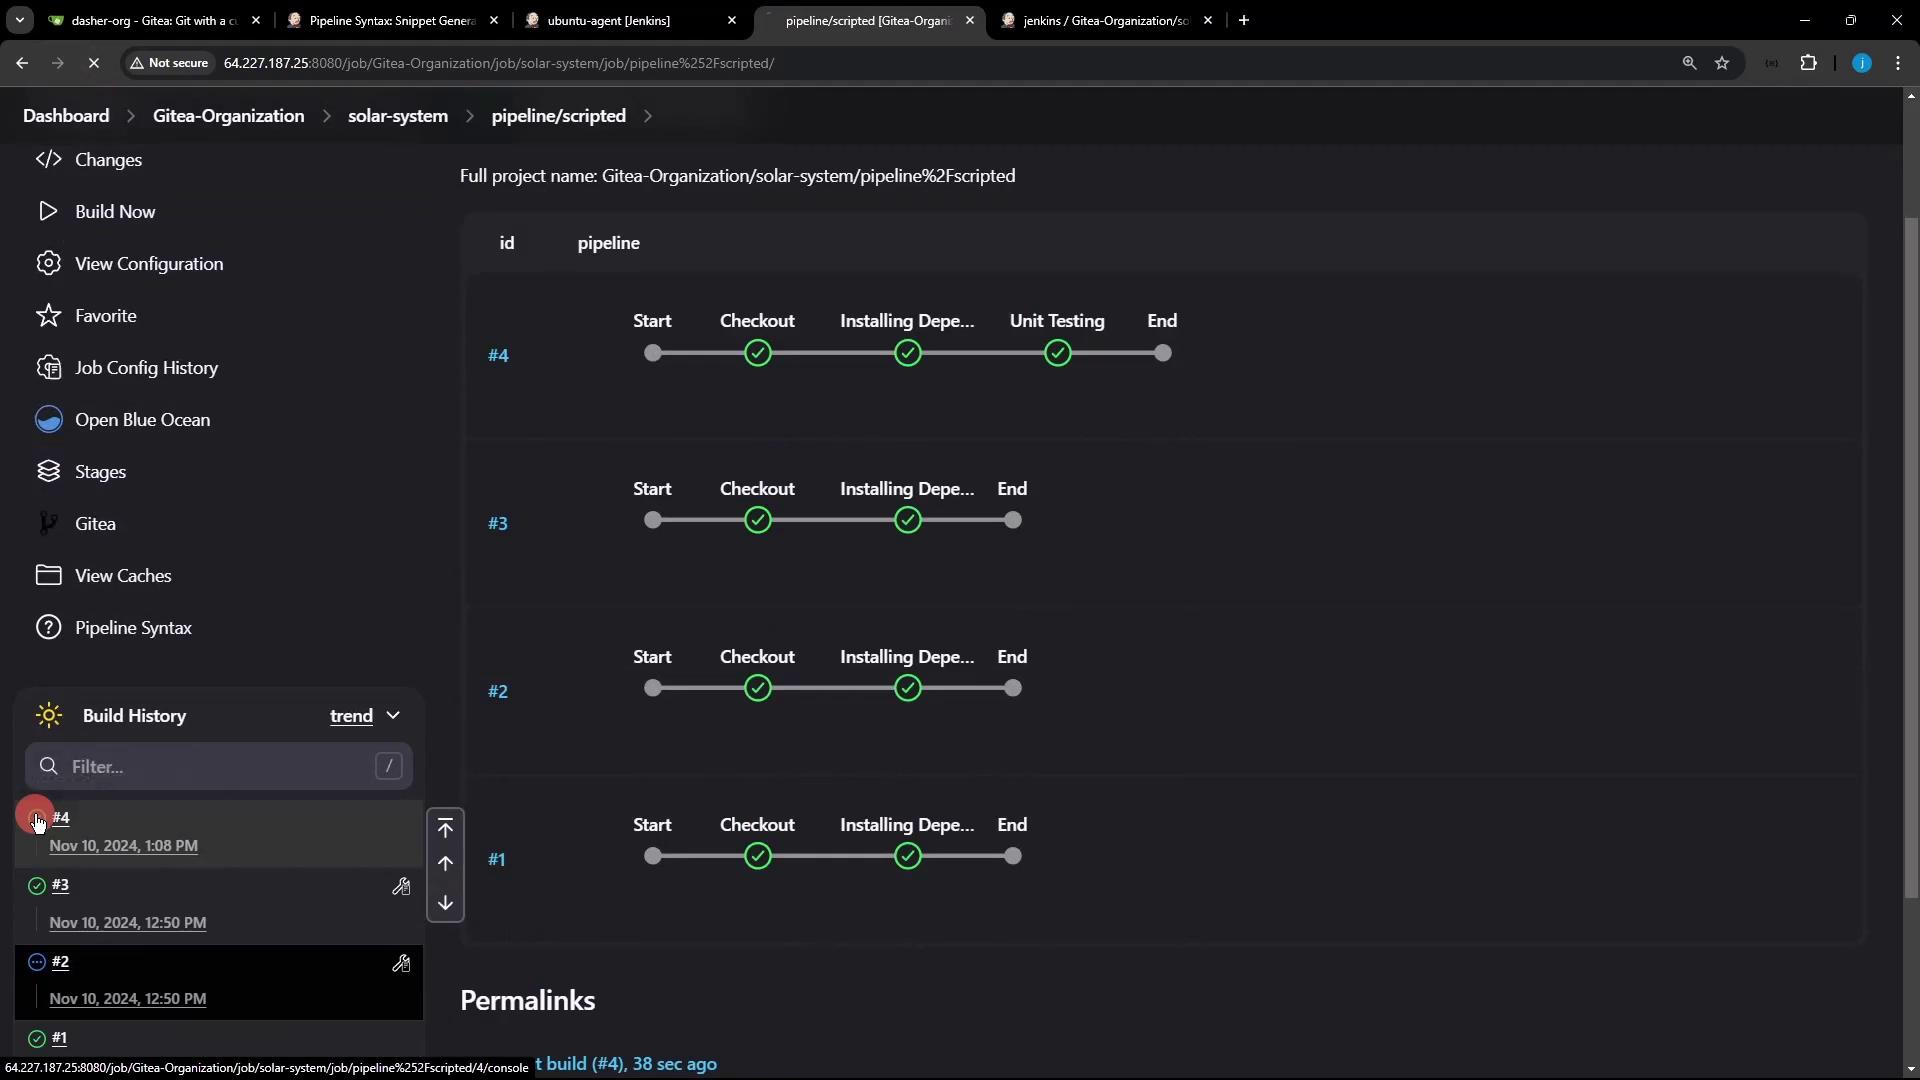
Open **[Blue Ocean](https://www.jenkins.io/projects/blueocean/)** or the **[Classic UI](https://www.jenkins.io/doc/book/managing/ui/)** to watch your pipeline execute all stages on the static agent:
### Sample Console Output
```shell theme={null}
> git init /home/jenkins-agent/workspace/n_solar-system_pipeline_scripted
> git remote add origin http://64.227.187.25:8080/dasher-org/solar-system.git
+ node -v
v22.6.0
+ npm test
> Solar System@6.7.6 test
> mocha app-test.js --timeout 10000 --reporter mocha-junit-reporter --exit
Server successfully running on port - 3000
```
You should see all stages executed on `Ubuntu-Docker-JDK-17-node20`, with `MONGO_URI`, `MONGO_USERNAME`, and `MONGO_PASSWORD` injected for your tests.
***
## Links and References
* [Jenkins Pipeline Syntax](https://www.jenkins.io/doc/book/pipeline/syntax/)
* [Jenkins Blue Ocean](https://www.jenkins.io/projects/blueocean/)
* [Jenkins Classic UI](https://www.jenkins.io/doc/book/managing/ui/)