> ## Documentation Index
> Fetch the complete documentation index at: https://notes.kodekloud.com/llms.txt
> Use this file to discover all available pages before exploring further.
# Solution CKA Mock Exam 3 Optional
> This article provides solutions and tasks for a Kubernetes mock exam, covering service accounts, pods, network policies, and kubeconfig adjustments.
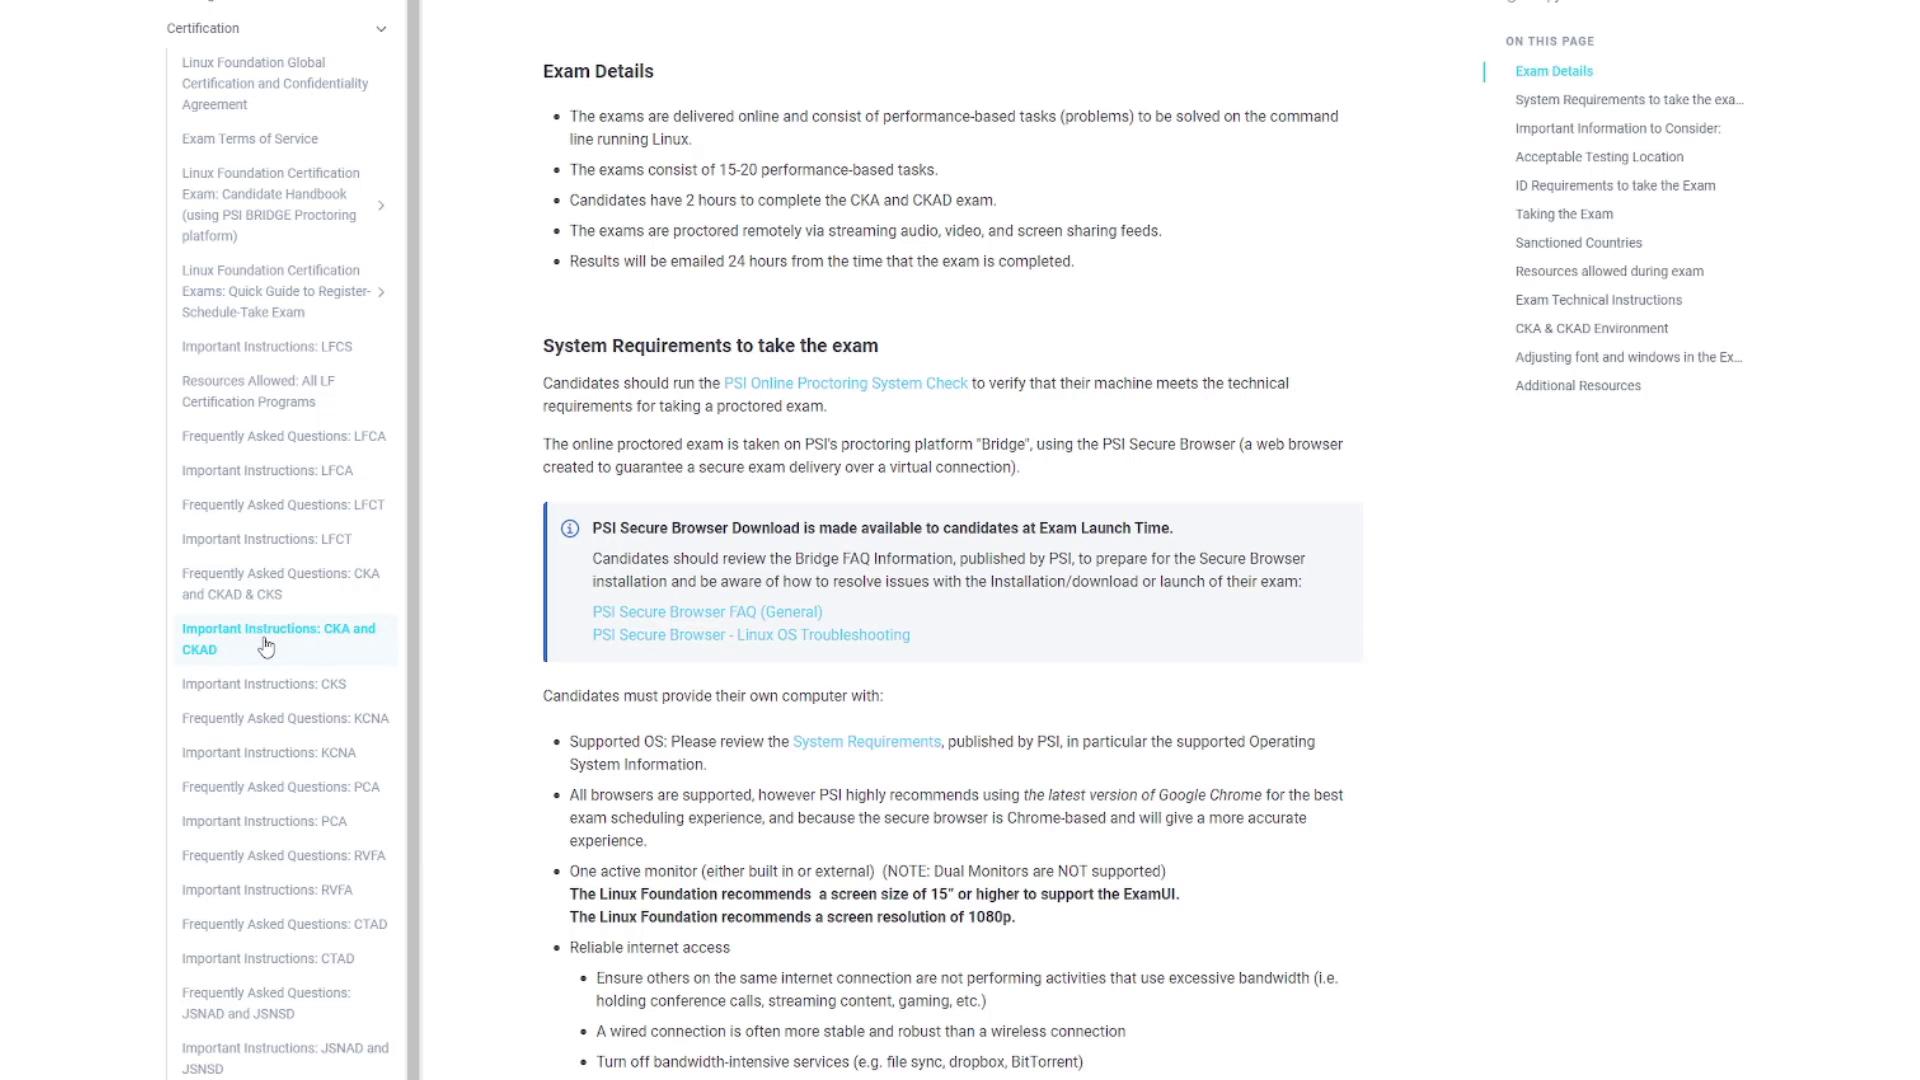
Before diving into the solutions for Mock Exam Three, it’s important to understand the exam environment. The Linux Foundation exam page under “Important Instructions for CKA and CKAD” outlines that the exam environment is preconfigured with several useful tools. These include an alias for kubectl (`k`) paired with bash auto-completion, along with preinstalled utilities such as JQ, TMUX, curl, wget, and man. These settings are designed to streamline your exam experience.
***
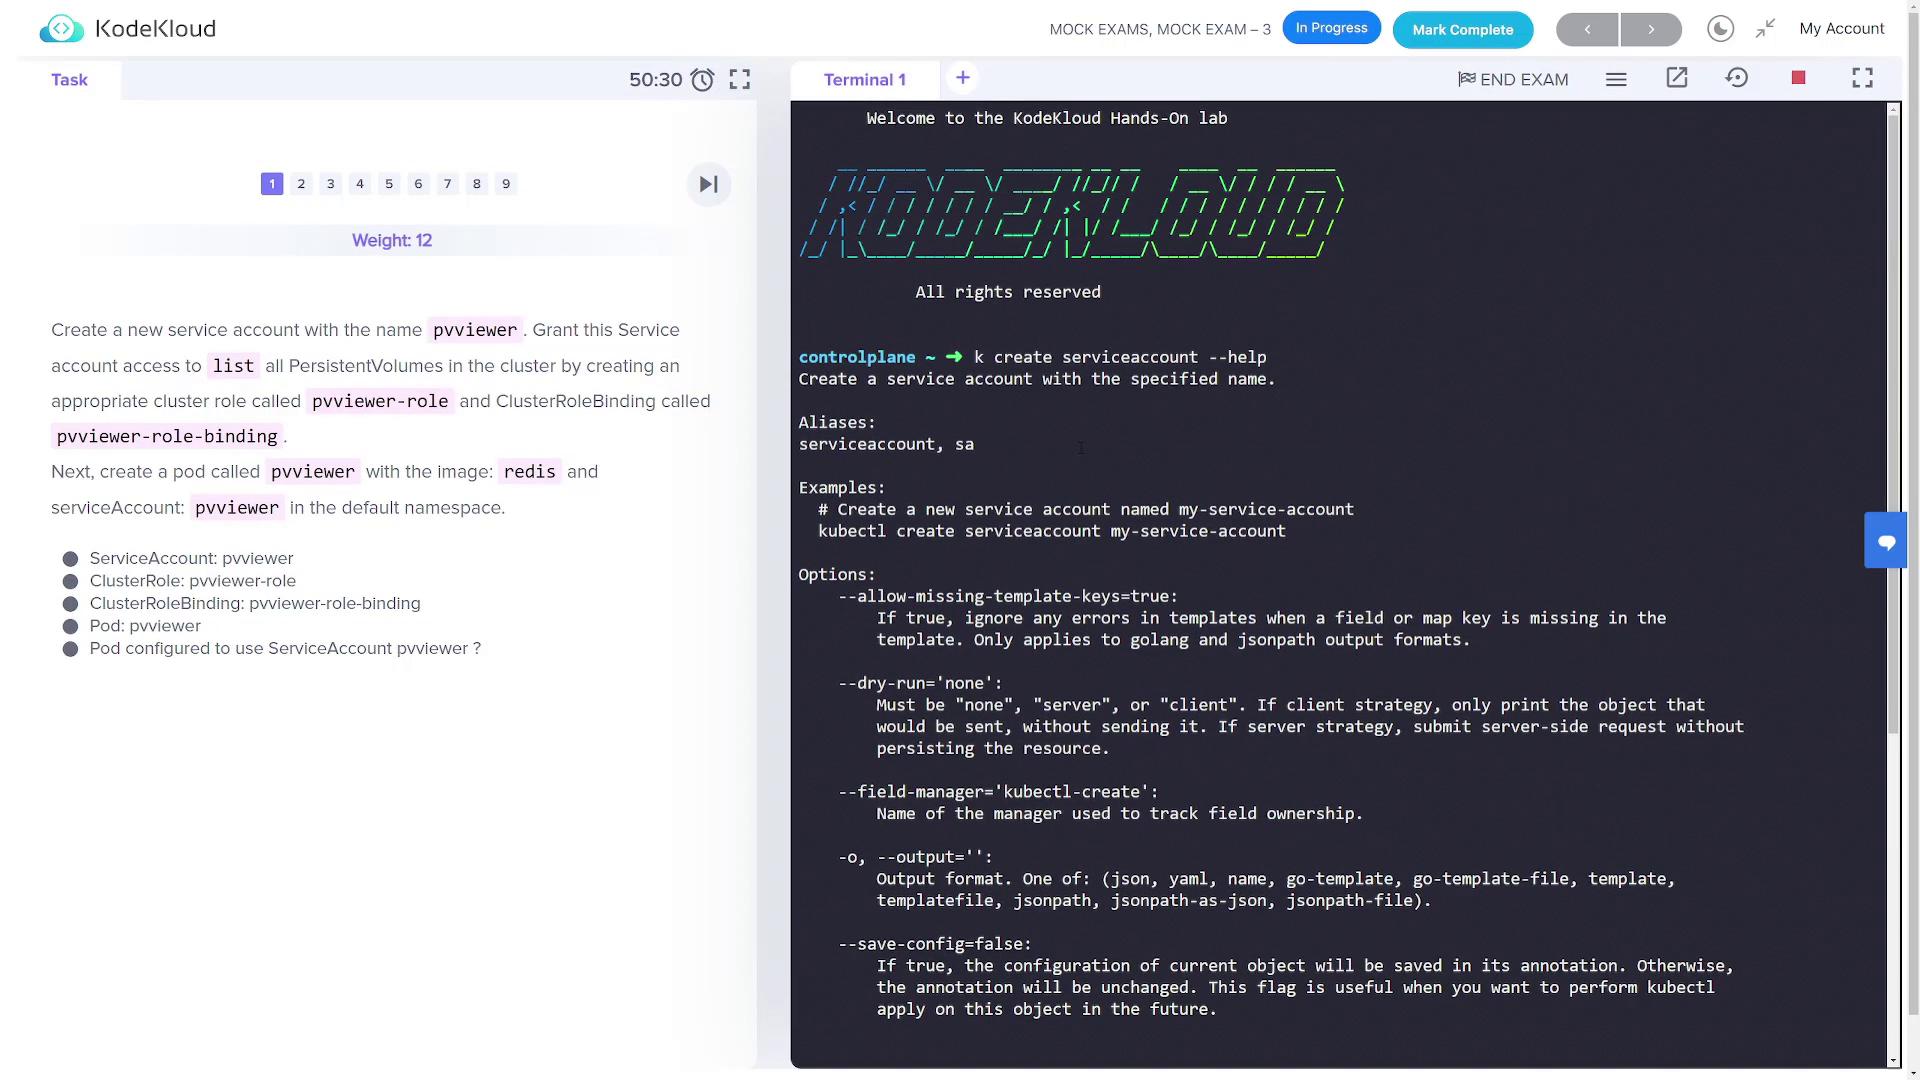
## Task 1: Create a Service Account, Cluster Role, and Pod
In this task, you will create a service account, a cluster role (with permissions to list persistent volumes), a cluster role binding, and finally, deploy a pod using the Redis image with the created service account.
### Step 1.1: Create the Service Account
Create a service account named `pvviewer` and verify its creation:
```bash theme={null}
kubectl create serviceaccount pvviewer
kubectl get serviceaccounts
```
The output should list the `pvviewer` service account, confirming its successful creation.
### Step 1.2: Create the Cluster Role
Check the available options for creating a cluster role:
```bash theme={null}
kubectl create clusterrole --help
```
Then, generate the cluster role `pvviewer-role` to allow listing persistent volumes:
```bash theme={null}
kubectl create clusterrole pvviewer-role --verb=list --resource=persistentvolumes
```
### Step 1.3: Bind the Role to the Service Account
Bind the newly created role to the `pvviewer` service account in the default namespace:
```bash theme={null}
kubectl create clusterrolebinding pvviewer-role-binding --clusterrole=pvviewer-role --serviceaccount=default:pvviewer
kubectl describe clusterrolebinding pvviewer-role-binding
```
Ensure the binding output confirms that the `pvviewer` service account is correctly associated with the `pvviewer-role`.
### Step 1.4: Create the Pod
Since the `kubectl run` command might not support the service account flag in all versions, start by generating a YAML manifest, update it to specify the service account, and then deploy the pod.
Generate the YAML file:
```bash theme={null}
kubectl run pvviewer --image=redis --dry-run=client -o yaml > pvviewer.yaml
```
Edit `pvviewer.yaml` to include the `serviceAccountName` field. The file should resemble:
```yaml theme={null}
apiVersion: v1
kind: Pod
metadata:
name: pvviewer
labels:
run: pvviewer
spec:
serviceAccountName: pvviewer
containers:
- name: pvviewer
image: redis
dnsPolicy: ClusterFirst
restartPolicy: Always
```
Apply the configuration:
```bash theme={null}
kubectl apply -f pvviewer.yaml
kubectl describe pod pvviewer
```
Verify that the pod is running with the correct service account.
***
## Task 2: List Internal IPs of All Nodes
Your objective is to list the internal IP addresses of every node and save the output to `/root/CKA/node_ips` in the format shown below:
```text theme={null}
InternalIP of controlplane
InternalIP of node1
```
### Step 2.1: Verify Node Details
List nodes with extended information:
```bash theme={null}
kubectl get nodes -o wide
```
### Step 2.2: Extract the Internal IP Addresses
Use JSONPath to extract the `InternalIP` addresses and write them to the file:
```bash theme={null}
kubectl get nodes -o jsonpath='{range .items[*]}{.status.addresses[?(@.type=="InternalIP")].address}{"\n"}{end}' > /root/CKA/node_ips
```
Verify the output by displaying the file content:
```bash theme={null}
cat /root/CKA/node_ips
```
***
## Task 3: Create a Multi-Container Pod
You will deploy a pod named `multi-pod` containing two containers. The first container, "alpha", will use the NGINX image, and the second container, "beta", will use the busybox image to run the command `sleep 4800`. Both containers will have environment variables assigned.
### Step 3.1: Generate and Edit the Pod Manifest
Generate the initial YAML manifest:
```bash theme={null}
kubectl run multi-pod --image=nginx --dry-run=client -o yaml > multipod.yaml
```
Edit `multipod.yaml` to include a second container and the required environment variables:
```yaml theme={null}
apiVersion: v1
kind: Pod
metadata:
name: multi-pod
labels:
run: multi-pod
spec:
containers:
- name: alpha
image: nginx
env:
- name: name
value: "alpha"
- name: beta
image: busybox
command:
- sleep
- "4800"
env:
- name: name
value: "beta"
dnsPolicy: ClusterFirst
restartPolicy: Always
```
Deploy the pod:
```bash theme={null}
kubectl apply -f multipod.yaml
kubectl describe pod multi-pod
```
Ensure that both containers are correctly configured with their respective commands and environment variables.
***
## Task 4: Create a Non-root Pod
Deploy a pod named `non-root-pod` using the `redis:alpine` image. This pod must run as a non-root user (user ID 1000) with the file system group set to 2000.
### Step 4.1: Generate and Edit the YAML Manifest
Generate the YAML manifest:
```bash theme={null}
kubectl run non-root-pod --image=redis:alpine --dry-run=client -o yaml > non-root-pod.yaml
```
Edit the manifest to add a security context at the pod level:
```yaml theme={null}
apiVersion: v1
kind: Pod
metadata:
name: non-root-pod
labels:
run: non-root-pod
spec:
securityContext:
runAsUser: 1000
fsGroup: 2000
containers:
- name: non-root-pod
image: redis:alpine
dnsPolicy: ClusterFirst
restartPolicy: Always
```
Apply the configuration and verify the security context:
```bash theme={null}
kubectl apply -f non-root-pod.yaml
kubectl get pod non-root-pod -o yaml | grep -i securityContext -A 5
```
***
## Task 5: Create a Network Policy for Service Ingress
A predeployed pod (`np-test-1`) and a service (`np-test-service`) are experiencing connection issues on port 80. To resolve this, you need to create a network policy named `ingress-to-nptest` that permits ingress traffic on TCP port 80.
### Step 5.1: Verify Existing Resources
Confirm that the pod and service exist:
```bash theme={null}
kubectl get pods
kubectl get service np-test-service
```
### Step 5.2: Test Connectivity
Launch a temporary pod with curl to test connectivity:
```bash theme={null}
kubectl run curl-test --rm -it --image=alpine -- sh
# Inside the container, install curl and test:
apk add --no-cache curl && curl np-test-service
```
### Step 5.3: Create the Network Policy
Create a file named `network-policy.yaml` with the following content. Ensure the pod selector label matches that of `np-test-1`:
```yaml theme={null}
apiVersion: networking.k8s.io/v1
kind: NetworkPolicy
metadata:
name: ingress-to-nptest
namespace: default
spec:
podSelector:
matchLabels:
run: np-test-1
policyTypes:
- Ingress
ingress:
- ports:
- protocol: TCP
port: 80
```
Apply the network policy:
```bash theme={null}
kubectl apply -f network-policy.yaml
kubectl get networkpolicy
```
Test connectivity again using the curl test pod.
***
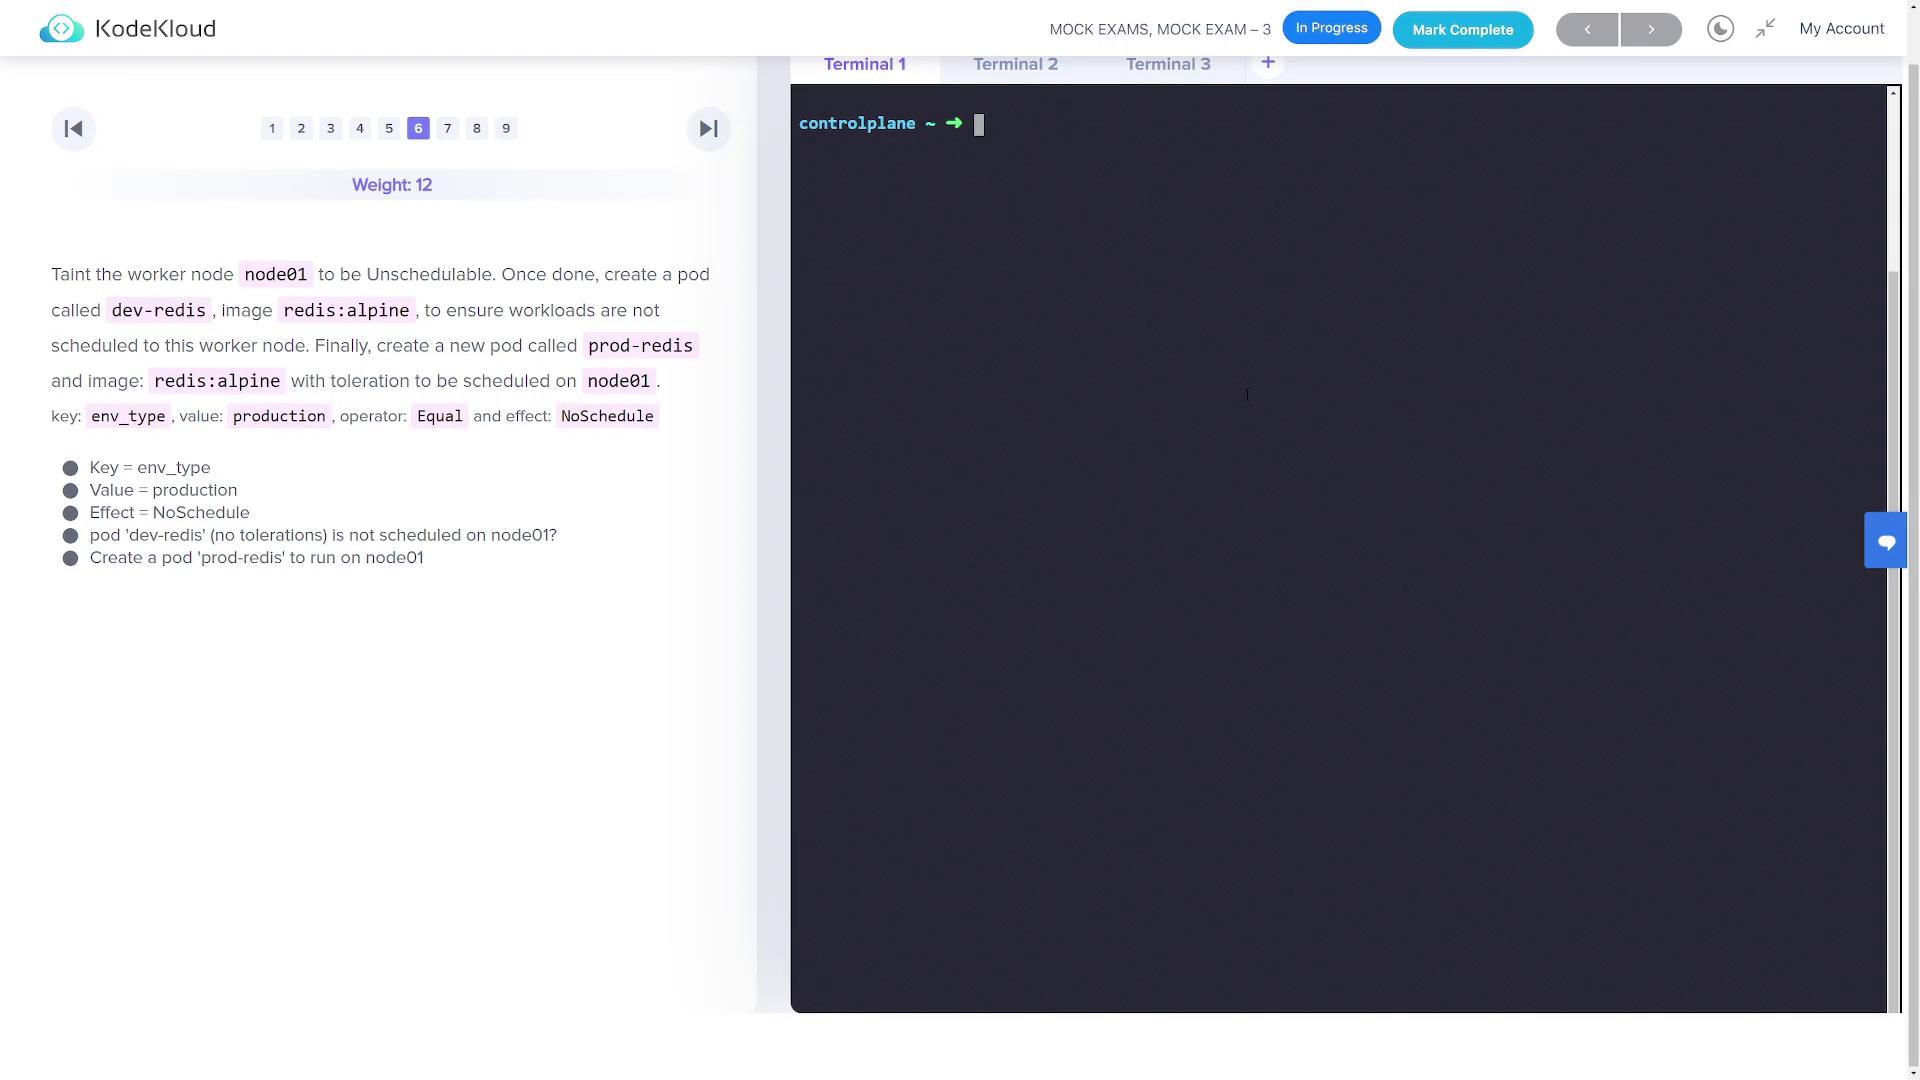
## Task 6: Use Taints and Tolerations for Pod Scheduling
### Part 6.1: Taint a Node and Create a Dev Pod
Firstly, taint the worker node (`node01`) with the key `env_type`, value `production`, and effect `NoSchedule` so that workloads without the appropriate toleration cannot be scheduled on it:
```bash theme={null}
kubectl taint nodes node01 env_type=production:NoSchedule
kubectl describe node node01 | grep Taints
```
Next, create a pod named `dev-redis` using the Redis Alpine image without specifying any toleration:
```bash theme={null}
kubectl run dev-redis --image=redis:alpine
kubectl get pods -o wide
```
Verify that the `dev-redis` pod is not scheduled on `node01` due to the applied taint.
### Part 6.2: Create a Production Pod with a Toleration
Now create a pod named `prod-redis` that tolerates the taint and can be scheduled on `node01`.
Generate the manifest:
```bash theme={null}
kubectl run prod-redis --image=redis:alpine --dry-run=client -o yaml > prod-redis.yaml
```
Edit `prod-redis.yaml` to add the toleration:
```yaml theme={null}
apiVersion: v1
kind: Pod
metadata:
name: prod-redis
labels:
run: prod-redis
spec:
tolerations:
- key: "env_type"
operator: "Equal"
value: "production"
effect: "NoSchedule"
containers:
- name: prod-redis
image: redis:alpine
dnsPolicy: ClusterFirst
restartPolicy: Always
```
Apply the configuration:
```bash theme={null}
kubectl apply -f prod-redis.yaml
kubectl get pods -o wide
```
The `prod-redis` pod should now be scheduled on `node01` since it tolerates the taint.
***
## Task 7: Create a Pod in the HR Namespace with Specific Labels
Deploy a pod named `hr-pod` in a new namespace `hr` using the Redis Alpine image. The pod should include the labels `environment=production` and `tier=front-end`.
### Step 7.1: Create the Namespace
Create the `hr` namespace:
```bash theme={null}
kubectl create namespace hr
```
### Step 7.2: Deploy the Pod with Labels
Deploy the pod in the `hr` namespace with the required labels:
```bash theme={null}
kubectl run hr-pod -n hr --image=redis:alpine --labels="environment=production,tier=front-end"
```
Verify the pod and its labels:
```bash theme={null}
kubectl get pods -n hr --show-labels
```
***
## Task 8: Fix the Kubeconfig File (super.kubeconfig)
A misconfigured kubeconfig file named `super.kubeconfig` is located in `/root/CKA/`. When using it via the command below, you may encounter connection errors:
```bash theme={null}
kubectl get nodes --kubeconfig /root/CKA/super.kubeconfig
```
The error might look similar to:
```text theme={null}
The connection to the server controlplane:9999 was refused - did you specify the right host or port?
```
### Step 8.1: Edit the Kubeconfig File
Open the file for editing:
```bash theme={null}
vi /root/CKA/super.kubeconfig
```
Locate the `server:` field. It may appear as:
```text theme={null}
server: https://controlplane:9999
```
Update it to use the correct port (typically 6443):
```text theme={null}
server: https://controlplane:6443
```
Save the file and re-test the connection:
```bash theme={null}
kubectl get nodes --kubeconfig /root/CKA/super.kubeconfig
```
This change should resolve the connection errors by directing `kubectl` to the correct API server port.
***
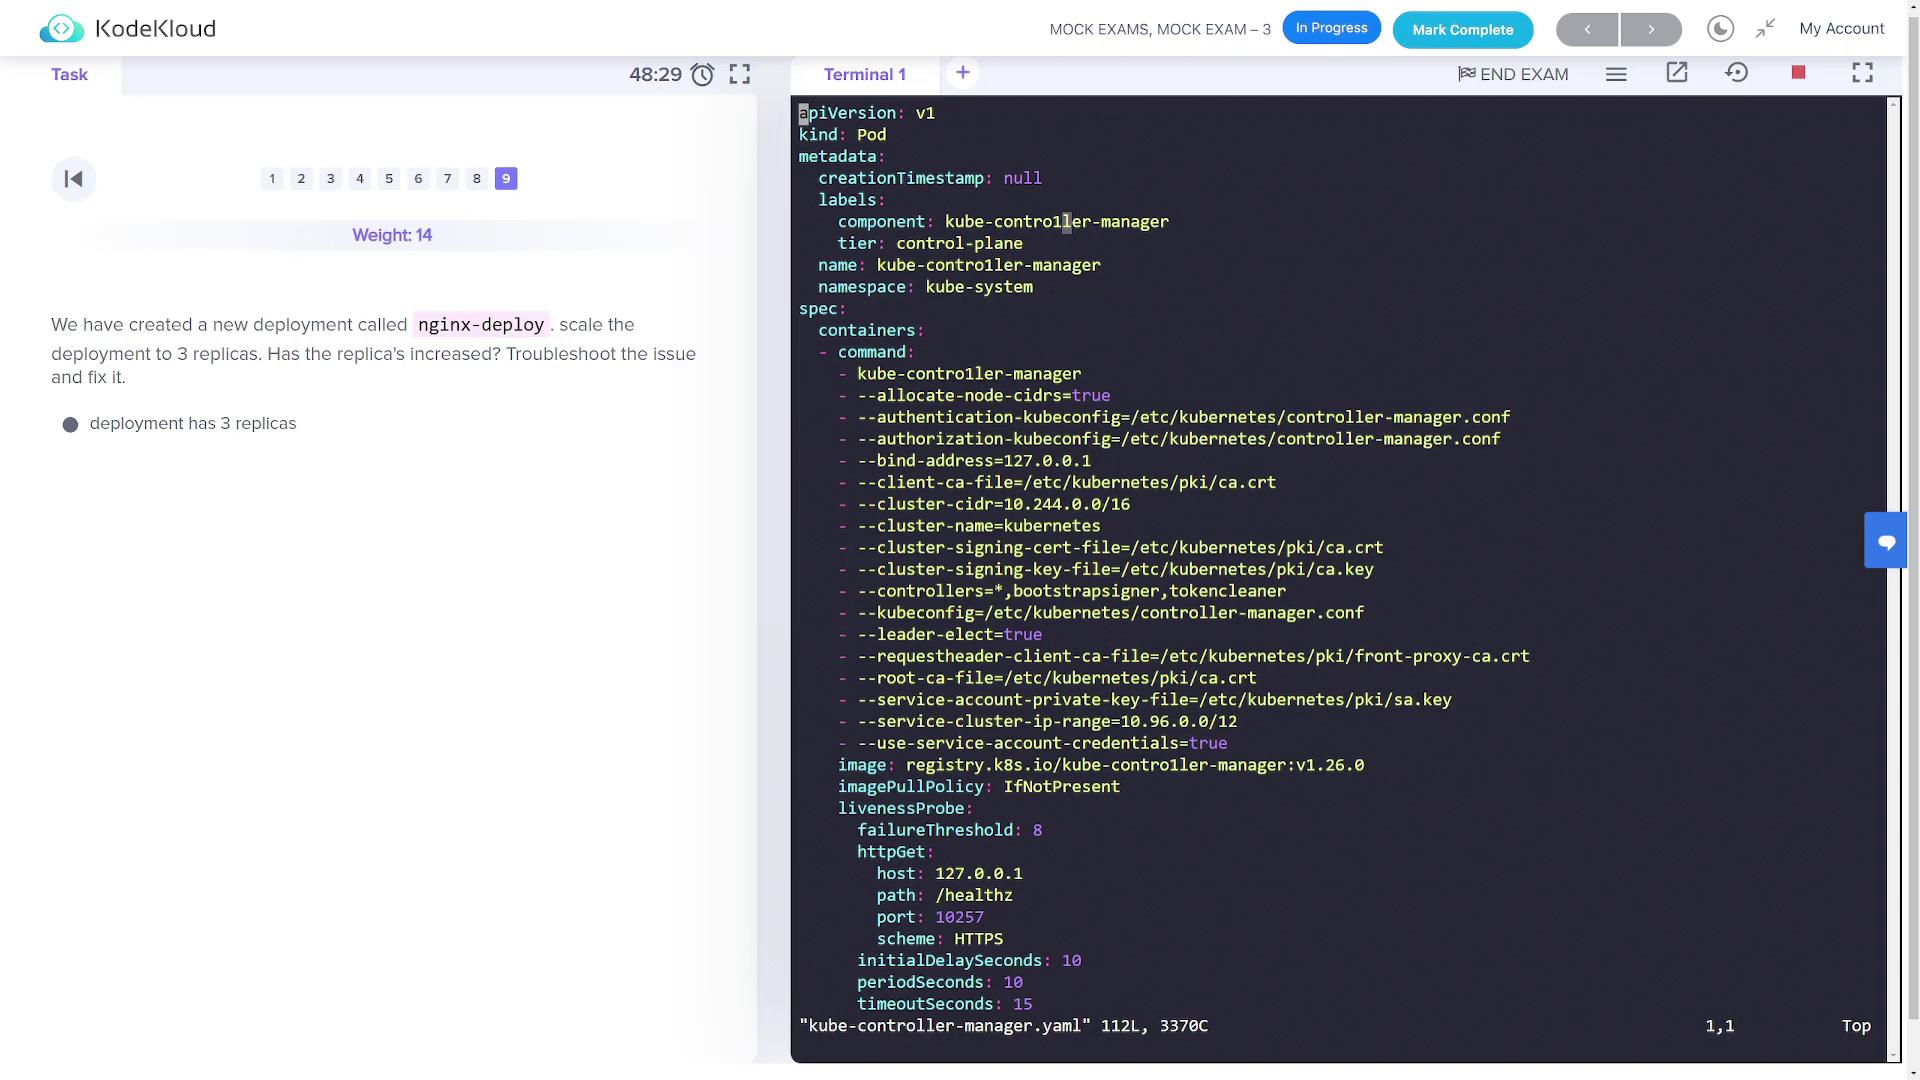
## Task 9: Scale an NGINX Deployment and Fix the Kube-Controller-Manager
A deployment named `nginx-deploy` was created with a single replica. Your goal is to scale it to three replicas.
### Step 9.1: Scale the Deployment
Scale the deployment using the following commands:
```bash theme={null}
kubectl get deployments
kubectl scale deployment nginx-deploy --replicas=3
kubectl get deployments
```
If the deployment does not scale as expected, it might be due to issues with the kube-controller-manager (for example, an `ImagePullBackOff` state).
### Step 9.2: Troubleshoot the Controller Manager
First, inspect the status of critical components:
```bash theme={null}
kubectl get pods -n kube-system
```
If the `kube-controller-manager` pod is in an `ImagePullBackOff` state, review its static pod manifest:
```bash theme={null}
vi /etc/kubernetes/manifests/kube-controller-manager.yaml
```
Look for any typographical errors (for example, confusing the digit "1" with the letter "l" in command parameters or image names). Fix any discovered mistakes. After saving, the kube-controller-manager should restart and function normally.
Verify that all deployment replicas are now correctly scaled once the control plane stabilizes.
***
This concludes the lesson on the solutions for Mock Exam Three.