> ## Documentation Index
> Fetch the complete documentation index at: https://notes.kodekloud.com/llms.txt
> Use this file to discover all available pages before exploring further.
# Solution Service Accounts
> This guide explores using service accounts for a Kubernetes Dashboard application, including listing accounts, inspecting tokens, and creating a new account with RBAC permissions.
In this guide, we'll explore the usage of service accounts for a Kubernetes Dashboard application. We will walk through listing service accounts, inspecting tokens and deployments, and finally creating a new service account with proper RBAC permissions for secure access.
***
## Step 1: Listing Service Accounts
Begin by checking how many service accounts exist in the default namespace. The shortened command below leverages "sa" as an abbreviation for service accounts:
```bash theme={null}
kubectl get sa
```
The output will look similar to:
```bash theme={null}
NAME SECRETS AGE
default 0 20m
dev 0 35s
```
This indicates that two service accounts are available in the default namespace: one called **default** and another called **dev**.
***
## Step 2: Inspecting the Default Service Account Token
Next, verify the secret token associated with the default service account by running:
```bash theme={null}
kubectl describe sa default
```
Examine the "Tokens" section in the output. If you notice that it displays "none", it means no token has been assigned to the default service account.
The default service account may lack the permissions needed for certain operations. This is why a custom service account is often required.
***
## Step 3: Inspecting the Web Dashboard Deployment
After deploying the Kubernetes Dashboard, inspect its deployment to understand the configuration:
1. List the current deployments with:
```bash theme={null}
kubectl get deployments
```
2. Describe the specific **web-dashboard** deployment:
```bash theme={null}
kubectl describe deployment web-dashboard
```
Within the output, locate the **Pod Template** section. Under **Containers**, details such as the container image are provided, and the deployment process waits for the new pod to be ready. At times, you might see an error like:
```bash theme={null}
pods is forbidden: User "system:serviceaccount:default:default" cannot list resource "pods" in API group "" in the namespace "default"
```
This error confirms that the **default** service account does not have the necessary permissions. We will address this later.
***
## Step 4: Checking the Dashboard Pod Status
To ensure that the dashboard pod is running correctly, first verify the deployment status:
```bash theme={null}
kubectl get deployment
```
The expected output should show something similar to:
```bash theme={null}
NAME READY UP-TO-DATE AVAILABLE AGE
web-dashboard 1/1 1 1 20s
```
Next, review the deployment in detail:
```bash theme={null}
kubectl describe deployment web-dashboard
```
This command outputs crucial details including container image, environment variables, and events. Even if error messages (such as forbidden access to pods) appear, they are expected since the default service account is in use.
***
## Step 5: Identifying the Service Account Used by the Dashboard
Review the logs where you encounter the error message:
```bash theme={null}
pods is forbidden: User "system:serviceaccount:default:default" cannot list resource "pods" in API group "" in the namespace "default"
```
This message confirms that the Dashboard application is currently using the **default** service account to query the Kubernetes API. This is insufficient for the required permissions.
***
## Step 6: Verifying the Service Account Mounted on the Pod
To check which service account is mounted on the dashboard pod:
1. List your pods:
```bash theme={null}
kubectl get pod
```
2. Describe the target pod (replace `` with the actual pod name):
```bash theme={null}
kubectl describe pod
```
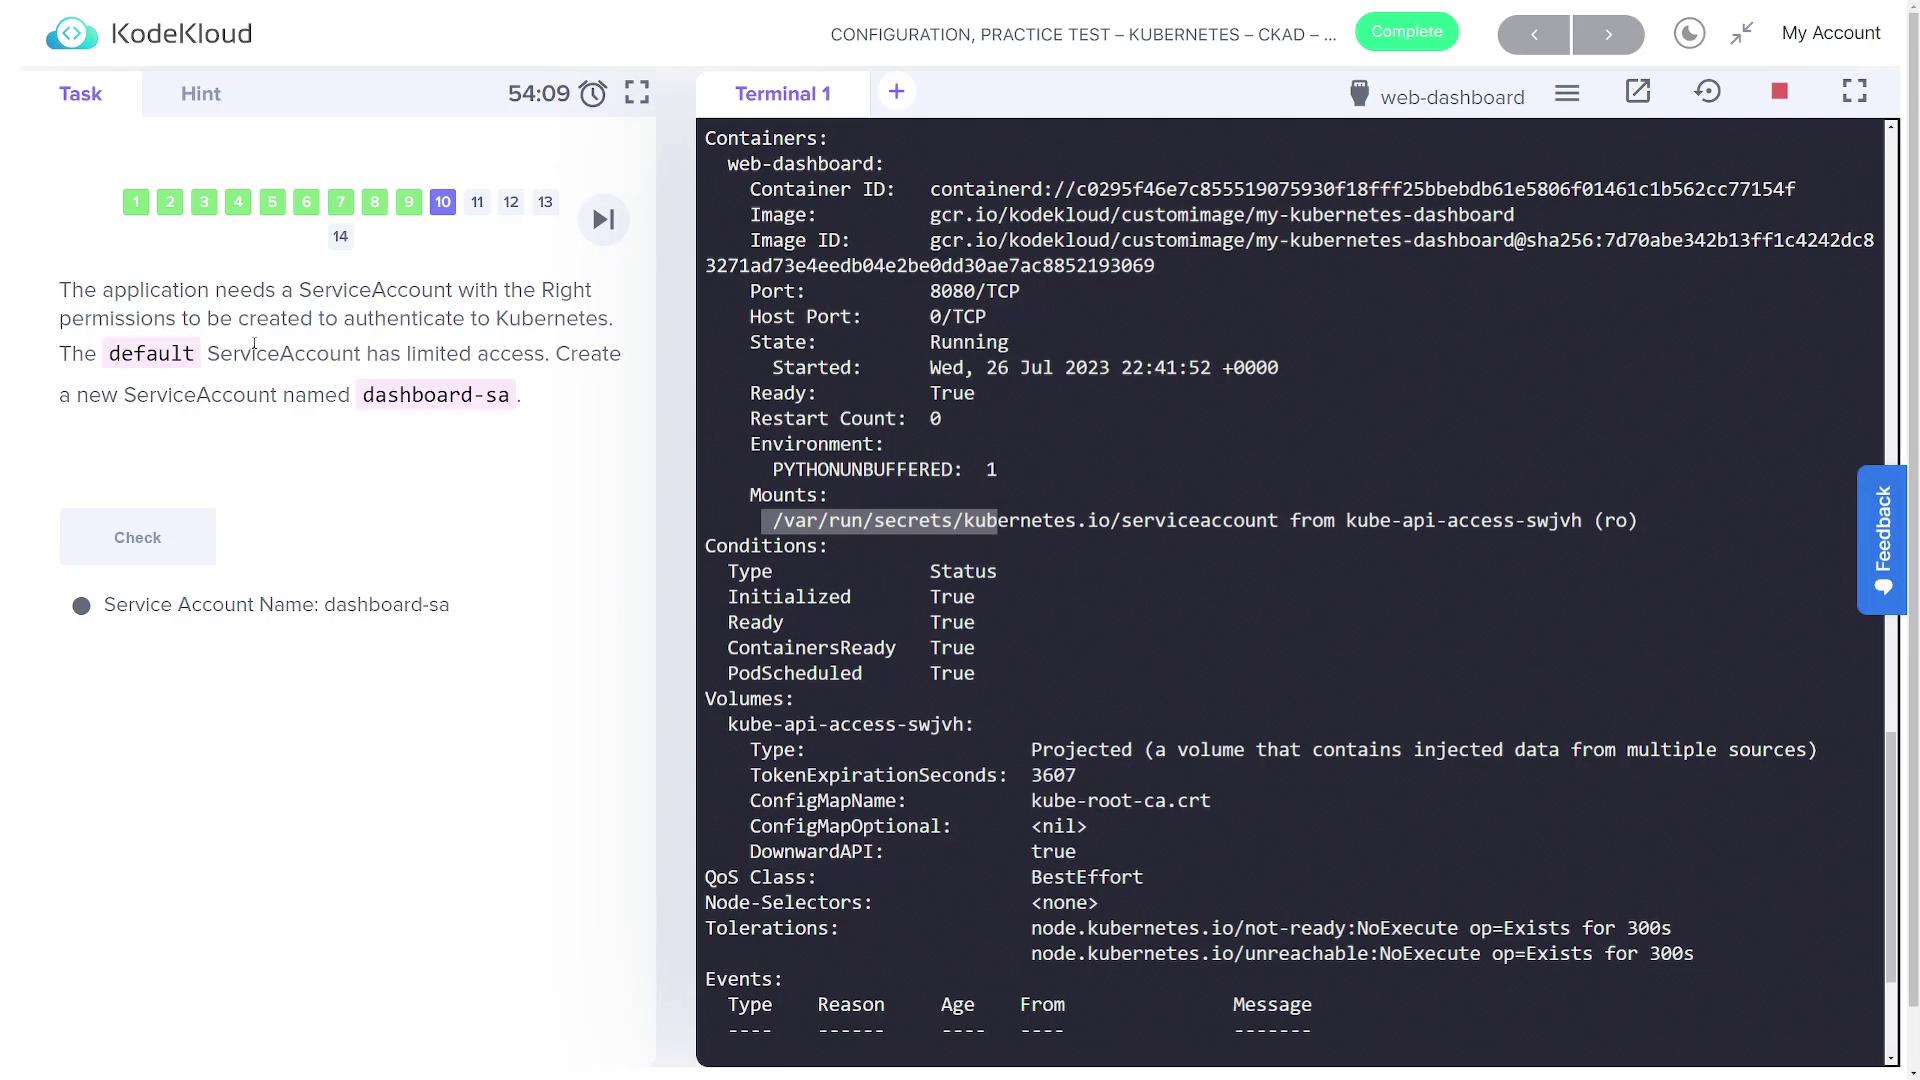
Within the output, you will notice a section in the container details similar to:
```bash theme={null}
Containers:
web-dashboard:
Container ID: docker://c0295f46e7c855919075930f18fff25bbebdb61e5806f01461c1b562cc77154f
Image: gcr.io/kodekloud/customimage/my-kubernetes-dashboard
Port: 8080/TCP
State: Running
Ready: True
Environment:
PYTHONUNBUFFERED: 1
Mounts:
/var/run/secrets/kubernetes.io/serviceaccount from kube-api-access-swjvh (ro)
```
This shows that the service account credentials are automatically mounted at **/var/run/secrets/kubernetes.io/serviceaccount**.
***
## Step 7: Creating a New Service Account with Correct Permissions
Since the default service account has limited access, create a new service account called **dashboard-sa** with the proper permissions:
```bash theme={null}
kubectl create serviceaccount dashboard-sa
```
After creating the service account, verify the RBAC configuration from the RBAC directory. Navigate to the `/var/rbac` directory:
```bash theme={null}
cd /var/rbac/
ls
```
You should see files like:
```bash theme={null}
dashboard-sa-role-binding.yaml pod-reader-role.yaml
```
Further RBAC details can be found in our additional materials. Ensure that the role binding is correctly configured to grant the required permissions.
***
## Step 8: Generating a Token for the New Service Account
Generate a token for **dashboard-sa** for automated authentication with the Kubernetes API:
```bash theme={null}
kubectl create token dashboard-sa
```
This command will output a token string. Copy the token and use it to authenticate via the Dashboard application UI. With this token, the application gains the required permissions to successfully list all pods running in the cluster.
***
## Step 9: Updating the Deployment to Use the New Service Account
Instead of manually entering a token, update the Dashboard deployment to automatically use the new **dashboard-sa** service account.
1. Export the current deployment configuration to a YAML file:
```bash theme={null}
kubectl get deployment web-dashboard -o yaml > dashboard.yaml
```
2. Edit the `dashboard.yaml` file. Locate the pod specification (under the pod template, not the Deployment spec) and add or update the field as follows:
```yaml theme={null}
spec:
serviceAccountName: dashboard-sa
```
3. Save the file and apply the updated configuration:
```bash theme={null}
kubectl apply -f dashboard.yaml
```
After the changes, validate by listing the deployments again:
```bash theme={null}
kubectl get deployments
```
Finally, refresh the Dashboard application in your browser (e.g., Ctrl+R). The new service account should automatically mount its token, eliminating the need for manual token entry.
***
## Final Remarks
This guide demonstrated how to inspect and modify service accounts and their associated RBAC permissions for a Kubernetes Dashboard application. By creating a new **dashboard-sa** service account, generating a token, and updating deployment configurations, you can secure access and ensure that your Dashboard can communicate effectively with the Kubernetes API.